Olympus Stylus 720 SW Design
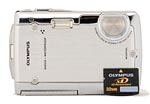 Trim, compact, and very sleek, the silvery-smooth Olympus Stylus 720 SW features an attractive case design that's fashion-forward yet practical. The "SW" in the name refers to Shock and Waterproof, making the 720 SW very attractive to the adventure traveler, as it can survive a five-foot drop without internal damage. The 720 SW can also shoot underwater as deep as 10 feet, though Olympus offers an optional accessory marine housing for deeper ventures. Measuring 3.5 x 2.3 x 0.7 inches (91 x 59 x 20 millimeters) and weighing 5.8 ounces (164 grams) without battery or card, the 720 SW is perfect for pockets. The camera's lens doesn't telescope out from the camera body, keeping the front panel free of protrusions at all times. (This also shortens the camera's startup time, making it quick on the draw.) Because of the 720 SW's small size, I highly recommend keeping the wrist strap securely in place while shooting in precarious situations; though it is a comfort to know that a short fall or a splash of water won't hurt anything, you can still damage the exterior finish. And though the camera is pocket friendly, a small, soft case will help protect that large LCD monitor from incidental scratches.
The Stylus 720 SW features a nice, flat front panel with few elements. The camera's lens dominates the top right corner (as viewed from the rear), and features an automatic sliding lens cover for protection. Also on the front panel are the flash, microphone, and a tiny LED lamp that blinks as the self-timer counts down.
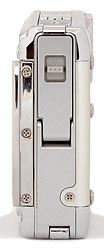
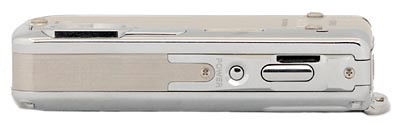
The right side of the camera (as viewed from the rear) holds the multi-use USB/DC In/AV Out connector compartment, protected by a rubber-sealed door. A sliding lock releases the door, which opens downward to reveal the jack. Also on this side of the camera is a protruding eyelet for the wrist strap.
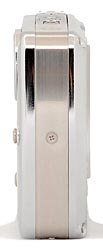
The left side is featureless and slightly curved.
The camera's top panel is also fairly sparse control-wise, featuring only the Power and Shutter buttons.
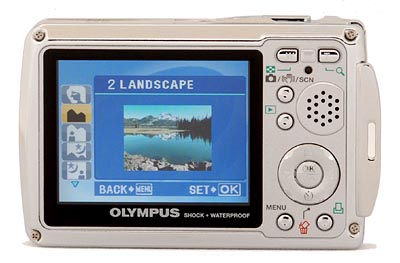
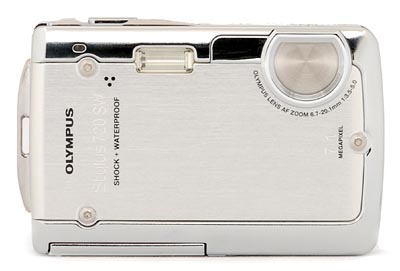
The 720 SW's remaining controls are on the rear panel, lined up on the right side of the impressive 2.5-inch color LCD monitor for previewing and playing back images. The camera's Zoom control buttons crown the upper right corner, and the Record Mode and Playback buttons line up below them next to the camera's large speaker. Between the two zoom buttons is a small LED lamp, which lights whenever the camera is accessing the memory. Below these is a Five-way Arrow pad, with small arrows pointing in four directions (Up, Down, Left, and Right) and an OK/Func. button in the middle. Each serves multiple functions, navigating onscreen menus scrolling between captured images in playback mode, or activating different camera functions (Exposure Compensation, Flash, Self-Timer, and Macro). Below the Arrow pad are the Menu and Print buttons. Pressing and holding the Menu button while the camera is off brings up the date and time for a few seconds.
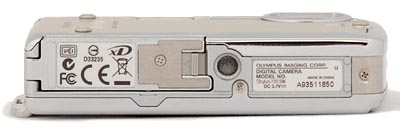
Finally, the 720 SW's flat bottom holds the threaded, metal tripod screw mount, and the shared xD-Picture Card / battery compartment. While most users of the 720 SW probably won't care, it is impossible to change the batteries while the camera is mounted on a tripod.
Olympus Stylus 720 SW External Controls

Power Button: Located on the top panel, this well-recessed button turns the camera on and off.
![]()
Shutter Button: Elongated and adjacent to the Power button, this button sets focus and exposure when halfway pressed, and fires the shutter when fully pressed.
![]()
Zoom Control Buttons: Positioned in the top right corner of the rear panel, these two buttons (marked with a W and a T) control optical zoom and digital zoom.
In Playback mode, the W button repeatedly cycles through the 4, 9, 16, and 25-image index display modes. The T button returns to the normal image display, and also enlarges the current display for closer viewing of fine details. (Pressing the W button again during playback enlargement returns to the normal display.)
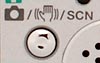
Record Mode Button: Beneath the W button on the rear panel, this button controls the camera's exposure mode when pressed repeatedly. The first press enables Program/Auto mode (selected through the Function menu), while a second press calls up Image Stabilization mode. A third press displays the Scene menu, which offers 25 preset shooting modes.

Playback Button: Directly below the Record Mode button, this button puts the camera into Playback mode.
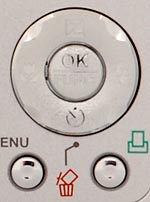
Five-Way Arrow Pad: Located toward the lower right corner of the rear panel, this four-way rocker button features four arrow buttons, each pointing in a different direction (up, down, left, and right), with an OK/Func. button in the middle. In all settings menus, these arrow keys navigate through menu options. Pressing the center button confirms selections.
In any record mode, the Up button displays the Exposure Compensation adjustment, from -2 to +2 EV in 1/3 EV increments. The right button controls the Flash mode, cycling through Auto, Forced, Red-Eye Reduction, and Suppressed modes. The Left arrow turns the Macro (close-up) and Super Macro modes on and off, and Down arrow accesses the Self-Timer mode.
Also in most record modes, the OK/Func. button pulls up the Function menu, with the following options. Not all options are available in all modes:
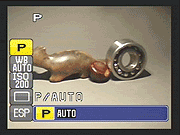 P/Auto: Selects between Program and Auto exposure modes.
 - White Balance: Sets white balance to Auto, Daylight, Cloudy, Incandescent, Fluorescent 1, Fluorescent 2, or Fluorescent 3 modes.
- ISO: Sets the ISO to Auto or anywhere from 64 to 1,600 equivalents.
- Drive: Accesses the Continuous and Hi Speed Continuous shooting modes, as well as Single Shot.
- Metering: Sets the metering mode to Digital ESP or Spot.
In Playback mode, the Right and Left arrows scroll through captured images. When Playback zoom is enabled, all four arrows scroll around within the enlarged view. The Down arrow calls up the camera's Erase menu, letting you erase the currently displayed image.

Menu Button: Adjacent to the lower right corner of the LCD monitor, this button activates the settings menu in any camera mode. The Menu button also turns off the menu display.

Print Button: Right of the Menu button, this button pulls enables direct printing to a compatible printer.
 Fujifilm GFX 50S Review
 Fujifilm X-T3 Review
 Olympus E-M5 III Review

Follow Imaging Resource