The Imaging Resource
Quick Review
Pentax Optio 230 Digital Camera
 |
Camera QuickLook | |
|
Review Date
|
|
|
|
User Level
|
|
|
|
Product Uses
|
|
|
|
Digicam Design
|
|
|
|
Picture Quality
|
Good, 2.0-megapixel CCD | |
|
Print Sizes
|
4x6, 5x7 inches | |
|
Availability
|
|
|
|
Suggested Retail Price
|
|
|
|
||||||||||
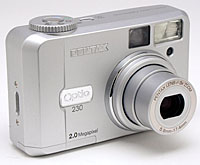
Pentax is a camera maker with a long tradition in the film-based world, but a relative newcomer to the digital arena. They co-developed several cameras with Hewlett Packard, but have now stepped out on their own, with digicams entirely of their own design. Last year, they came out with the Optio 330 and 430, three and four-megapixel models respectively. Now, they've developed the Optio 230, a two megapixel model clearly aimed at a more entry-level price point. - The 230's features and operating scheme are very similar to the two earlier models, but cost saving methods are apparent in its all-plastic case design, rather than the exceptional metal cases of its predecessors. Despite the obvious cost paring, the 230 is a very worthy little camera, a nice, compact choice for users interested in the two megapixel category.
Camera Overview
Compact and lightweight, the new Pentax Optio 230 has a body design similar to many film-based point-and-shoot cameras. The silver-tone body has few protrusions when the camera is powered off and the LCD monitor stowed, and so should slip into larger pockets with no trouble. Actual dimensions of the Optio 230 are 4.0 x 2.5 x 1.6 inches (103.5 x 63.5 x 42 millimeters), with the lens fully withdrawn and the LCD monitor in place. An all-plastic body keeps the Optio 230 light and portable, at just 8.11 ounces (230 grams) with batteries and memory card. The included wrist strap secures the camera to your wrist, but I'd still recommend getting a soft case to protect the camera when traveling. Camera operation is fairly straightforward, with the Optio 230's combination of external controls and the sensible LCD menu system. The 2.0-megapixel CCD delivers good quality images with accurate color, with an image resolution high enough for printing good quality images as large as 5x7 inches.
Built into the Optio 230 is a 3x, 5.8-17.4mm optical zoom lens, the equivalent of a 38-114mm zoom on a 35mm camera. (This is a fairly typical range, from a modest wide angle to a moderate telephoto.) Made up of six elements in five groups, with one aspherical element, the Optio 230's lens offers a maximum aperture ranging from f/2.6 to f/5 (depending on the zoom position). Aperture remains under automatic control, though the selected value appears in the LCD monitor. Focus ranges from 1.31 feet (0.4 meters) to infinity in normal AF mode, and from 0.33 to 1.64 feet (0.1 to 0.5 meters) in Macro mode, with the full zoom range available in both. A Landscape Infinity focus mode (accessed through the Focus Mode button) locks focus for distant subjects. You can also manually adjust focus, from 0.33 feet (0.1 meters) to infinity, and a distance display appears in the LCD monitor to let you know the current manual focus setting. An AF Area selection option offers Wide and Spot AF area choices. Both AF focus options base focus on the central portion of the image, but Wide responds to objects a bit to either side of center, rather than just in the center alone. Spot AF will only focus on subjects in the very center of the frame. In addition to the 3x optical zoom, the Optio 230 also features a maximum 2.5x digital telephoto option, but remember that digital zoom decreases the overall image quality because it just "stretches" the center pixels of the CCD image, rather than enlarging the image that the CCD sees.
For composing shots, the Optio 230 offers a real-image optical viewfinder and a 1.6-inch color LCD monitor with backlight and brightness adjustment. For more flexible framing, the LCD monitor swings out from the back panel, and turns around to face forward–useful when framing yourself in the shot. The LCD monitor's information display includes detailed exposure information, including shutter speed and aperture settings (when the Shutter button is halfway pressed), so you have an idea of what the exposure will be. Additionally, the LCD monitor reports the date, time, number of available images, special camera modes, and battery power.
Exposure remains under automatic control at all times, though the LCD menu offers a range of camera settings that you can adjust. Available shutter speeds range from 1/1,500 to four seconds, with the slower end of the range available in Night Scene mode only. The Mode dial on top of the camera features Auto, "Full Selectable," Night Scene, and Movie capture modes. Auto mode places the camera in charge of all settings, with the exception of flash, image size, and image quality settings. Full Selectable mode expands user control to include Exposure Compensation, Metering, White Balance, ISO, Color, Saturation, Contrast, and Sharpness adjustments. Exposure Compensation increases or decreases the overall exposure, from -2 to +2 exposure equivalents (EV) in one-third-step increments. Metering options include Multi-Segment, Center-Weighted, and Spot. White Balance adjusts overall color balance to match a variety of light sources, with settings for Auto, Daylight, Shade, Tungsten, and Fluorescent. A Manual white balance setting offers more direct control. The camera's ISO setting offers 100 and 200 ISO equivalents, as well as an Auto setting. The Color adjustment has a default Full Color mode, but you can set it to Black and White or Sepia for more dramatic effects. Contrast, Sharpness, and Saturation settings increase your creative options as well. The camera's built-in flash operates in Auto, On, Auto with Red-Eye Reduction, and On with Red-Eye Reduction modes.
For night or twilight exposures, the Optio 230's Night Scene mode enables longer shutter times to allow more ambient light into the exposure (which will generally require using a tripod to prevent blurring from camera movement). A unique feature on the Optio 230 is the 3D recording mode, which produces three-dimensional images similar to old-fashioned stereographs. The camera guides you to capture two images of the same subject (one just slightly off-center from the other) and combines them as a "stereo pair" in a single frame of image memory. A transparent display of the first image captured remains on the LCD monitor, so that you can keep everything aligned as you move the camera over slightly and capture the second image. A 3D viewer comes with the Optio 230, and works whether viewing 3D images in the Parallel or Cross formats. This is a fun exposure feature, and the first time I've seen it on a digicam. (I predict we'll be seeing this on more digicams in the near future. - It should be an easy feature for the camera manufacturers to add, and it's a lot of fun to play with.)
A Continuous Shooting mode works like a motor drive on a 35mm camera, capturing a sequence of images for as long as the Shutter button is held down. The actual shot-to-shot cycle time and number of images will vary depending on exposure settings and the amount of memory card space available, but ranges from a second and a half to three seconds. (This isn't nearly as fast as the equivalent function on many higher-end models.) When you're not sure about an exposure, the Auto Exposure Bracketing mode captures three images at different exposure settings. One is captured at the normal metered setting, one underexposed, and one overexposed. An option in the Applied Function menu lets you change the bracketing series to alter white balance, saturation, sharpness, or contrast instead of the exposure. The Optio 230 also features a Self-Timer mode, which delays the shutter for about 10 seconds after the Shutter button is pressed. A small light on the front of the camera lights solid for the first seven seconds, then blinks for the remaining three before the shutter opens. Combined with the rotating LCD monitor, the Optio 230's Self-Timer mode is an accurate tool for self-portraits. Finally, a Movie mode captures moving images (without sound) for as long as 30 seconds per movie. The amount of recording time appears in the LCD monitor, and recording stops and starts with a full press of the Shutter button. Movies are recorded at 320 x 240-pixel resolution.
The Optio 230 stores images on CompactFlash memory cards, and a 16 MB card is included in the box with the camera. CompactFlash cards are currently available in sizes as large as 640MB. That's way more than you're likely to need with the 230, but I highly recommend purchasing a larger card along with the camera. Memory is cheap enough these days that even a 64 MB card is quite affordable, and the extra space will help insure that you don't miss any precious memories.
The camera utilizes either two AA-sized batteries or one CRV3 battery for power, or the optional AC adapter. A single CRV3 battery pack comes with the camera, but I strongly advise picking up a good charger and a couple of sets of high-capacity NiMH rechargeable AA cells Always keep an extra set of batteries fully charged and on hand, as a hedge against the infallible rule that the best shot always comes along just after your batteries have run out. The Optio 230 comes with a USB cable for high-speed connection to a computer, transferring data at about 340 KBytes/second, on the slow side of average, but fast enough that you can easily get by without an external card reader. Also nice is that the camera acts as a "storage class" USB device, which means that you don't need to install any software on Windows ME, 2000, XP, or Mac OS 8.6 or newer operating systems - Just plug the camera in , and it appears on your desktop. The included CD-ROM features ACDSee imaging software and USB drivers, compatible with Windows 98/ME/2000/XP and Macintosh OS 8.6 and higher. For connecting to a television set, the Optio 230 has a Video Out jack and comes with a video cable. The Optio 230 is DPOF (Digital Print Order Format) compatible, with a range of print settings available through the Playback menu.
Basic Features
- 2.0-megapixel CCD.
- 1.6-inch color LCD monitor with 180-degree swing function.
- Real-image optical viewfinder.
- Glass, 3x 38-114mm zoom lens.
- Automatic and Manual focus options, with Landscape Infinity fixed focus mode.
- Maximum 2.5x digital zoom.
- Automatic exposure control.
- Maximum aperture of f/2.8 to f/5.0, depending on lens zoom position.
- Shutter speed range from 1/1,500 to four seconds.
- Built-in flash with five operating modes.
- CompactFlash memory storage.
- Power supplied by two AA batteries, one CRV3 battery, or optional AC adapter.
Special Features
- Continuous Shooting, Auto Exposure Bracketing, and 10-second Self-Timer modes.
- 3D image mode.
- Night Scene mode.
- Movie recording mode (without sound).
- Sharpness, Saturation, Contrast, and Color adjustments. (Unusual in entry-level cameras.)
- White balance (color) adjustment with six modes, including a manual adjustment.
- ISO adjustment with ISO equivalents of 100 and 200, as well as an Auto setting.
- Multi-Pattern, Center-Weighted, and Spot metering options.
- DPOF (Digital Print Order Format) compatibility.
- World Time setting with 62 cities (28 time zones).
- USB cable for connection to a computer (driver software included).
- NTSC video cable for connecting to a television set (PAL for European models).
- Software CD-ROM loaded with USB drivers and ACDSee imaging application, for Windows and Macintosh.
Recommendation
While the Optio 230's automatic exposure control keeps things simple, a number of creative shooting options makes the camera flexible in a wide range of shooting situations. The ability to adjust ISO, color saturation, contrast, sharpness, exposure compensation, and white balance expands the Optio 230 beyond the typical point-and-shoot realm. Additionally, the 3D image mode is fun and unique. The 2.0-megapixel CCD captures good-resolution images, suitable for printing as large as 8x10 inches. Small, and fairly compact, the Optio 230 is game for travel, as the camera fits into most standard coat pockets and purses. A straightforward user interface and automatic exposure control will make novice users comfortable, while more experienced amateurs will enjoy the extended exposure options. A great little all-around camera for family trips and special events, with creative tools for turning ordinary snapshots into unique photographs.
Design
The all-plastic, silver body of the Optio 230 is light and compact, perfect for carrying along on a hike or family outing. Though the camera doesn't have much of a handgrip (just a slight bulge on the back to catch your thumb), it does come with a wrist strap for a more secure hold, and fits the pretty hand well. Measuring 4.0 x 2.5 x 1.6 inches (103.5 x 63.5 x 42 millimeters), the Optio 230 should have no trouble slipping into an average coat pocket, as well as purses and small bags. The camera weighs a mere 8.11 ounces (230 grams) with batteries and memory card, quite light by digicam standards. One-handed operation is possible, though you'll need two hands for a secure grip when changing settings. That said, you could easily control zoom and flash mode one-handed.
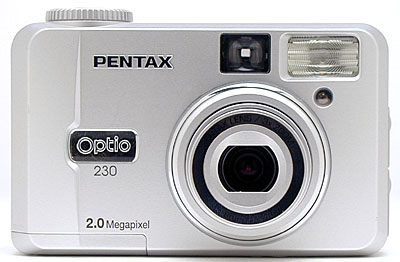
Apart from the lens barrel, the Optio 230 has a smooth front panel. With the lens stowed, the lens barrel only protrudes a quarter-inch or so. Once extended, the telescoping lens protrudes an additional 3/4 of an inch from the camera body. A protective shutter protects the lens when not in use, automatically opening whenever the camera is powered on with the Mode dial is set to a capture position. Also on the front panel are the flash, optical viewfinder window, and self-timer lamp. A very slight lip serves as a small finger grip down the right side (as viewed from the back).
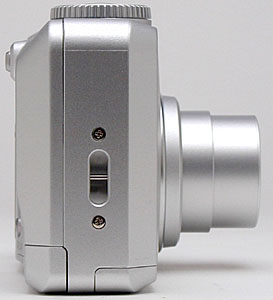
The wrist strap eyelet is the sole feature on the camera's right side.
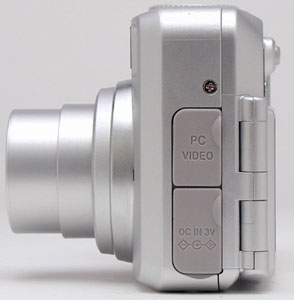
On the opposite side of the camera are two connector compartments, both covered by soft, rubbery flaps that bend out of the way to reveal the connectors. The top compartment holds the dual-purpose PC/Video jack, while the bottom flap reveals the DC In power connector.
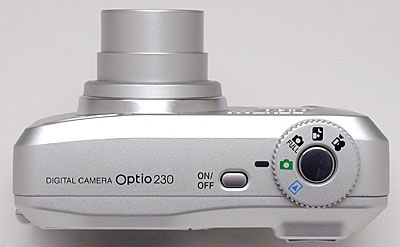
A large, ribbed Mode dial dominates the right side of the Optio 230's top panel, offering Playback, Auto, Full Selectable, Night Scene, and Movie modes. In the center of the Mode dial is the shiny, silver Shutter button. The only other control on the top panel is the Power button.

The remaining camera controls dot the back panel, along with the optical viewfinder eyepiece and LCD monitor. The viewfinder eyepiece has two LED lamps on its right side, which light or blink to indicate camera status (such as when focus is set or the flash is charging). Though it doesn't offer a diopter adjustment, the eyepiece has a reasonably high eyepoint. I could see the full view with my glasses on, even with the eyepiece a slight distance from my lenses. Most eyeglass thicknesses thus shouldn't pose a problem, although the corners of the viewfinder will be slightly obscured with thicker eyeglass lenses. Hinged on the left side of the back panel, the LCD monitor swings out a full 180 degrees to face frontward (but doesn't swivel up and down to face more angles). This lets you see yourself in the viewfinder so you can snap a self-portrait, but doesn't convey the advantages of over-the-head or ground-level shooting offered by full tilt/swivel LCD screens. Spread across the back panel are the Flash/Erase, Focus Mode/Protect, Zoom, Menu, Four-Way Arrow pad, Display, and Reverse buttons. (This last button flips the LCD view left for right, so it has the proper orientation when the LCD monitor is facing forward.)
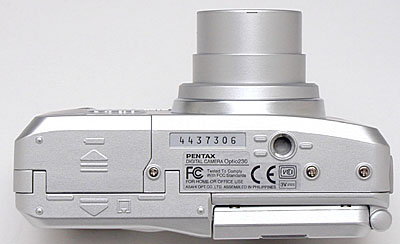
The Optio 230's bottom panel is reasonably flat, though the area directly beneath the LCD monitor is indented somewhat. The battery compartment and CompactFlash slot both open from the bottom, a setup I'm not too fond of for studio shooting. (This means you have to dismount the camera from the tripod whenever you want to change memory cards or batteries.) Given the Optio 230's point-and-shoot design and compact size though, I doubt this will be an issue for many users. A plastic threaded tripod mount is slightly off-center from the lens, but provides a fairly stable tripod connection.
Camera Operation
With just a handful of control buttons and a straightforward menu system, the Optio 230's user interface won't take long to master. The Mode dial on top of the camera controls the main operating mode, and you can change flash mode, focus mode, exposure compensation, and optical zoom externally. Though the remaining exposure features require the LCD menu system, the menus are uncomplicated and simple to navigate. The camera's Setup menu is available in all modes, making it quick to change the main camera settings. With the instruction manual in-hand, it should take less than an hour to get comfortable with the controls. (If you even need the instruction manual at all.)
External Controls
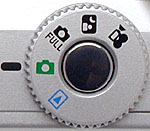
Mode Dial: The dominant control on the camera's top panel, this ribbed dial controls the camera's operating mode. Available choices are Playback, Auto, Full Selectable, Night Scene, and Movie.
Shutter Button: In the center of the Mode dial, the silver Shutter button sets exposure and focus when pressed halfway, and fires the shutter when pressed all the way.
![]()
Power Button: Adjacent to the Mode dial on the left, this button turns the camera on or off.

Flash / Erase Button: On the right side of the viewfinder eyepiece on the camera's back panel, this button cycles through the available flash modes in Auto, Full Selectable, and Night Scene modes. Choices are:
- Auto: Fires the flash in low lighting or when subjects are backlit.
- Flash Off: Completely disables the flash.
- Flash On: Fires the flash with every shot, regardless of light level.
- Auto Red-Eye Reduction: Just like Auto mode, only fires the flash in low lighting or backlit conditions. However, this mode also fires a small preflash before the full flash, to reduce the occurrence of the Red-Eye Effect in people.
- Flash On Red-Eye Reduction: Fires the flash with every exposure, using the Red-Eye Reduction preflash as well.
In Playback mode, this button cycles through the Delete options. The first press lets you delete the current image, while a second press lets you delete all images from the memory card (except for protected ones). A third press returns to the normal Playback display.
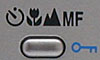
Self-Timer / Focus Mode / Protect Button: Directly to the right of the Flash / Erase button, this button cycles through Self-Timer, Macro, Landscape Infinity, and Manual Focus modes in any record mode.
In Playback mode, this button lets you write-protect the current image or all images on the memory card. If the displayed image already has write-protection, this button lets you cancel the setting.
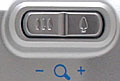
Zoom Rocker Button: Located in the top right corner of the back panel, this two-way rocker button controls optical and digital zoom while in record mode.
In Playback mode, this control governs the digital enlargement of a captured image.

Menu Button: Adjacent to the top right corner of the LCD monitor, this button calls up the LCD menu in any camera mode. A second press cancels the display.
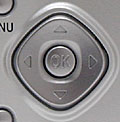
Four Way Arrow Pad and OK Button: This diamond-shaped rocker button is just to the right of center on the back panel. Arrows point up, down, left, and right, with an OK button in the center. In any settings menu, the arrow keys navigate through settings, while the OK button confirms any changes.
In any record mode, the right and left arrows adjust the exposure compensation from -2 to +2 EV in one-third-step increments.
In Playback mode, the OK button activates the nine-image index display mode, while the left and right arrow keys scroll through captured images on the memory card.

Display Button: Adjacent to the lower right corner of the LCD monitor, this button controls the LCD monitor display mode. In any record mode, pressing the button sequentially cycles through the display options of image with information display, image only, and no display at all (LCD off).
In Playback mode, this button simply turns the information display on and off.
![]()
Reverse Button: Tucked below the LCD monitor, this button reverses the image view from right to left, so that it shows the correct orientation when the LCD monitor is facing forward.
Camera Modes and Menus
![]()
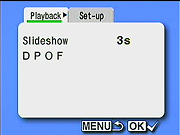
Playback Mode: This mode lets you review captured images and movies on the memory card, as well as erase them, protect them, or set them up for printing. Pressing the Menu button displays the following options:
- Slide Show: Activates an automated playback of all images on the card, with a selection of interval times from three to 30 seconds.
- DPOF: Displays the DPOF settings menu, which lets you set the number of copies to be printed and whether or not the date is imprinted on each image.
![]()
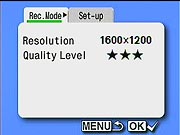 Auto Mode: Designated on the Mode dial by a small, green camera symbol, this mode sets up the camera for capturing still images. All exposure options are automatically controlled, with the exception of flash mode, focus mode, and image size and quality. The Record menu offers the following settings:
- Resolution: Changes the image resolution to 1,600 x 1,200, 1,024 x 768, or 640 x 480 pixels.
- Quality Level: Sets the compression level to TIFF, Fine, Normal, or Basic settings.
![]()
Full Selectable Mode: Also designated by a small camera icon (though with the word "Full"), this mode extends the available exposure options. Aperture and shutter speed remain under automatic control, but the Record menu offers the following selections:
 Record Menu
- Resolution: Changes the image resolution to 1,600 x 1,200, 1,024 x 768, or 640 x 480 pixels.
- Quality Level: Sets the image quality/compression level to TIFF (uncompressed), Fine, Normal, or Basic.
- White Balance: Adjusts the overall color balance. Choices are Auto, Daylight, Shade, Tungsten, Fluorescent, and Manual.
- Focusing Area: Specifies the size of the focusing area, with choices of Wide and Spot.
- Digital Zoom: Turns the 2.5x digital zoom option on or off.
- AE Metering: Selects Multi-Segment, Center-Weighted, or Spot exposure metering.
- ISO Speed: Adjusts the camera's sensitivity to light. Choices are Auto, or 100 and 200 ISO equivalents.
- Color: Offers Full color mode, as well as Black and White and Sepia modes.
- Instant Review: Turns the Instant Review function on or off, and specifies the period of review time (from 0.5 to five seconds).
- Memory: Displays a list of camera settings that can be saved when the camera is shut off, so that they are instantly recalled when powered back on.
- Exposure Compensation Memory: Determines whether or not the exposure compensation setting is held in memory when the camera is powered off.
- Continuous Shooting: Turns Continuous Shooting on or off.
- Sharpness: Adjusts the in-camera sharpening to Low, Normal, or High.
- Saturation: Controls the overall color saturation(color intensity), with three adjustment levels.
- Contrast: Increases or decreases overall image contrast, in three settings.
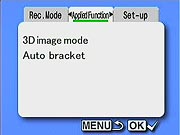 Applied Function Menu
- 3D Image Mode: Turns on the 3D image mode, with viewing mode options of Parallel or Cross. (Cross means you need to cross your eyes slightly to see the 3D effect. Parallel means you need to look straight ahead. - Actually slightly "wall-eyed." Most people find the crossed-eye method easier.)
- Auto Bracket: Displays the Auto Bracketing sub-menu:
- Applied Photo Mode: Designates which image parameter will be adjusted between shots in the auto bracketing series: Exposure, White Balance, Saturation, Sharpness, or Contrast.
- Bracketing Amount: Adjusts the variation between bracketed images. Options are 0.3, 0.5, and 1.0 EV steps for an exposure series, and +1 through +5 arbitrary units for White Balance. (Contrast, Sharpness, and Saturation series only bracket across the three adjustment levels available.)
![]()
Night Scene Mode: Marked on the Mode dial with a night symbol (a person in front of the moon), this mode optimizes the camera for exposures in low lighting. The Record menu offers the same options as in Full Selectable mode.
![]()
Movie Mode: The final position on the Mode dial, this mode captures moving images without sound. The Record menu is identical to that of the Full Selectable mode, though the Applied Function menu isn't present. (Personally, I it rather confusing to have all the still-capture options included here. It's obvious that you can't record movies with a resolution of 1600x1200 pixels, and that the TIFF option doesn't apply to movie mode, but both options are present on this mode's menu screens. I'd much prefer that only those menu items which apply to a given camera mode be shown on that mode's menus.)
 Setup Menu: The following menu is available in every camera mode, and displays as a subject tab behind the main mode menu.
- Format: Formats the CompactFlash card, erasing all files (even protected ones).
- Date Style: Selects the format of the date and time display.
- Date Adjust: Sets the camera's internal clock and calendar.
- World Time: Enables the camera's World Time setting, which displays the date and time for one of 62 cities (28 time zones). The top half of the screen displays the time and date in another city, while the bottom half is for the home city. You can adjust either of the time and date settings with the Four Way Arrow pad.
- Beep: Turns the camera's beep sounds on and off.
- Language: Switches the menu language to English, French, German, Spanish, Italian, or Japanese.
- Video Out: Sets the video signal to NTSC or PAL timing.
- Sleep Timeout: Designates the period of inactivity before the camera shuts itself off. Choices are 30 seconds, or one or two minutes. You can also turn the sleep function off.
- Brightness Level: Adjusts the LCD brightness level.
- Reset: Resets all the camera settings to their defaults.
Sample Pictures
See our sample pictures and detailed analysis here. The thumbnails below show a subset of our test images. Click on a thumbnail to see the full-size photo.
 |
 |
 |
|
|
|
|
|
|
|
 |
|
|
|
|
|
|
|
|
|
|
|
|


Specifications
See the specifications sheet here.
Picky Details
Information on shooting speed, battery life, etc. can be found here.
- Color: Very good color overall, a little difficulty with household incandescent lighting, but still better than average.
The Optio 230 produced good color throughout my testing, both outdoors and under the studio lighting. In the studio, I typically chose the Manual white balance setting as the most accurate, though it sometimes produced a slight greenish tint. Outdoors, the Auto setting produced the best color, though the always-difficult blue flowers were dark and purplish. Both the Manual and Auto white balance settings had a difficult time with the incandescent lighting of the Indoor Portrait (without flash), producing strong orange casts. Though the Incandescent setting still produced a slight warm cast, overall color looked closer to natural. The Optio 230 did a good job with the large color blocks of the Davebox target, with nearly accurate saturation.
- Exposure: Accurate exposure, but slightly high contrast. Indoor shots required more positive exposure compensation than most cameras.
Despite its all-automatic exposure control, the Optio 230 accurately exposed most shots. It did a good job with the harsh lighting of the Outdoor Portrait and outdoor house shots, but the slightly high default contrast setting resulted in an overly-bright image when the midtones were properly exposed. That said, shadow detail was pretty good. The Optio 230 picked up the subtle tonal variations of the Davebox nicely, which is a difficult area for many digicams.
- Sharpness & Distortion: Good sharpness (about average for a two megapixel digicam). Slightly higher than average geometric distortion but virtually no chromatic aberration in the lens.
Overall image sharpness was good in most cases, as the Optio 230's 2.0-megapixel CCD and lens produced good detail and definition. Some details were just a hint soft, but remained well-defined. Optical distortion was higher than average, showing 1.06 percent barrel distortion at wide angle and 0.39 percent at telephoto. Chromatic aberration was virtually nonexistent though, with only one or two pixels of extremely light coloration on either side of the test target lines.
- Closeups: Very good macro performance, with a minimum capture area of 1.64 x 1.23 inches.
The Optio 230 performed very well here, capturing a tiny minimum area of just 1.64 x 1.23 inches (41.7 x 31.3 millimeters). Resolution was high, with strong detail on the coins, brooch, and dollar bill. Color and exposure were both good, though the Auto white balance setting resulted in a warm cast. The flash had no trouble throttling down for the macro area, with good intensity throughout the frame and just a small hot spot at the top.
- Night Shots: OK for average city night scenes, but not much darker.
With a maximum shutter time of four seconds, the Optio 230 is slightly limited in its low-light shooting abilities. The camera captured bright, clear images at light levels as low as one foot-candle (11 lux), at both 100 and 200 ISO settings. Image noise remained moderately low at both settings. At 1/2 foot-candle (5.5 lux), the image was nearly usable, though somewhat dim. Typical street lighting on a city street equates to about one foot-candle, so anything darker will require the built-in flash. The Auto white balance setting resulted in a warm color balance.
- Battery Life: About average battery life - 88 minutes in worst-case record mode, 124 minutes in playback mode.
Given that it's powered by only two AA cells, the Optio 230 does pretty well on battery life, producing average run times of 88 minutes in record mode with the LCD on, 146 minutes with the LCD off, and 124 minutes in playback mode. These times are longer than most subcompact cameras, but shorter than many full-sized models that run on sets of four AA batteries or higher-power LiIon battery packs.
In the Box
The Optio 230 ships with the following complement of accessories and software:
- Wrist strap.
- CRV3 lithium battery.
- 16MB CompactFlash memory card.
- USB cable.
- NTSC video cable (US models).
- 3D Image Viewer.
- Software CD.
- Instruction manual, software guide, and registration kit.
Recommended Accessories
- Larger CompactFlash card. (64 MB recommended)
- Two sets of rechargeable batteries and charger.
- AC adapter.
- Soft case.
Conclusion
Although it offers only fully automatic exposure control, the Pentax Optio 230's other exposure options extend its ability well beyond the typical boundaries of the point and shoot category. A unique 3D image capture mode is fun and creative, and the ability to adjust color, saturation, sharpness, and contrast give you a lot of creative control. The 2.0-megapixel CCD captures good quality images, with good color and detail. Image contrast is a little high by default, but that's one of the parameters you can adjust through the camera's menu system. While novices will enjoy the fully automatic operation, more experienced users will appreciate the extended exposure capabilities. With all it has to offer, the Optio 230 looks like a great little digicam at a great price.

Follow Imaging Resource: