Back
to Full Casio EXILIM PRO EX-P600 Review
Back
to Full Casio EXILIM PRO EX-P600 ReviewGo to Casio EXILIM PRO EX-P600 Data Sheet
Go to Casio EXILIM PRO EX-P600 Pictures Page
Up to Imaging Resource Cameras Page
Use your browser's "Back" button to return to the previous page, or the links at the top and bottom of this page to navigate to related information. If you have difficulty fitting the text on this page onto your printer output, simply resize your browser window to a narrower width and print again.
Remember us when it's time to buy!
Dave here: Have our reviews been helpful to you? (Is this article you're reading right now useful?) Preparing this level of information on as many products as we do is incredibly hard work, not to mention expensive. Things on the Internet may look like they're free, but they're not. (As a lot of big dot.com companies are finding out these days.) Somewhere, somebody has to pay to produce worthwhile content. YOU can help us though, by remembering us when it comes time to make your purchase. Would you consider coming back to our site and clicking-through to one of our advertisers to make your purchase? Every dollar you spend with one of our advertisers helps us directly (in affiliate fees) or indirectly (the advertiser will keep renewing their ad contract with us). To make it easy for you to support us, here's a URL you can visit, to see all our current advertisers, with links to click on that will register your visit to them as having come from our site. It's up to you where you buy, but Mike, Mike, Kim, Yazmin, Marti and I would be really grateful if you'd help us out by choosing one of our advertisers to purchase from.
Thank you for your support!
Dave Etchells, Founder & Publisher
Visit our "Buy Now" Page:
https://www.imaging-resource.com/buynow.htm
Back
to Full Casio EXILIM PRO EX-P600 Review
Go to Casio EXILIM PRO EX-P600
Data Sheet
Go to Casio EXILIM PRO EX-P600
Pictures Page
Up to Imaging Resource Cameras
Page
Casio EXILIM PRO EX-P6006.0 megapixels, a Canon 4x zoom lens, and a host of features. Review First Posted: 07/30/2004 |
|
 |
|
6.0-megapixel resolution for 2,816 x 2,112-pixel images. |
| |
Canon 4x zoom lens (33-132mm 35mm equivalent). | |
| |
Full manual exposure control and 25 preset Scene modes. | |
| |
SD/MMC memory storage. | |
| |
Hybrid AF system using both contrast detection and phase differential methods. |
Manufacturer Overview
The Casio EX-P600 digital camera marks a significant turning point for Casio, a return to the "Enthusiast" market that they left after their very successful QV-3000 model had run its course. The QV-3000 was introduced in early 2000, so it's been a while since we've seen a full-featured "enthusiast" model from Casio. In contrast to the feature-rich consumer-oriented cameras they've focused on in the last few years, the Exilim EX-P600 offers a combination of features, capabilities, and image quality that is very clearly aimed at the serious photographer, rather than the casual snapshooter. How successful has Casio been in their goals for the P600? Read on for all the details, but the short answer is "very" - The EX-P600 is a very capable, flexible, and high-performing photographic tool.
High Points
Executive Overview
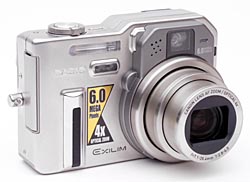
Trim, compact, and sporting a stylish new user interface, the Casio Exilim EX-P600 is one of the smallest digicams I've seen that offers so much manual control. The EX-P600 offers a generous six-megapixel CCD, which, combined with the high-quality Canon 4x zoom lens, captures high-resolution images with loads of fine detail. Also packed into the EX-P600's tiny body is full manual exposure control, an excellent range of bracketing and shooting modes, a full range of image adjustment tools, and a unique Free AF autofocus area selector that gives you complete control over where in the frame the autofocus system takes its cues from. The EX-P600's BESTSHOT mode is better suited to novices, offering no less than 25 (!) preset scene modes, but a wide array of features and the option for partial or full manual exposure control makes the EX-P600 well suited to a range of experience levels.
Neat and trim in its small body, the EX-P600 is perfect for travelers, and may also suit more experienced pros who want something smaller than their bulkier digital SLRs for vacations and casual outings. Though the lens protrudes a fair amount from the camera when shooting, it retracts just enough to make the EX-P600 reasonably pocket friendly. The camera measures 3.8 x 2.7 x 1.8 inches (97.5 x 67.5 x 45.1 millimeters) with the lens retracted, and is about seven-eights of an inch thicker with the lens fully extended. Its mixture of plastic and light metal body panels weighs just 9.2 ounces (260 grams) with the battery and memory card loaded, light enough to fit into a purse or coat pocket.
The EX-P600 features a real-image optical viewfinder, as well as a 2.0-inch, TFT color, high-definition LCD monitor. The optical viewfinder doesn't offer a diopter adjustment, but has an unusually high eyepoint, making it very comfortable for eyeglass wearers. The LCD provides a detailed information display and an optional, stylish interface design that's fun to use, once you get used to it. The Canon-built 7.1-28.4mm, 4x zoom lens is equivalent to a 33-132mm lens on a 35mm camera, with a maximum aperture of f/2.8-f/4.0 (wide angle to telephoto). Canon is well known for the quality of their optics, and the lens on the P600 seems to be no exception, delivering better sharpness in the corners than most digicam lenses I see. A hybrid autofocus system delivers amazingly fast shutter response, with the shutter firing less than 0.3 seconds after you press the shutter release, including autofocus time. In addition to the 4x optical zoom, images can be enlarged up to an additional 4x with the digital zoom option, effectively increasing the camera's zoom capabilities to 16x. (Keep in mind though, that digital zoom directly trades off image quality for magnification, because it simply crops out and enlarges the central pixels of the CCD.) The EX-P600's maximum image size is 2,816 x 2,112 pixels, but lower resolutions of 2,816 x 1,872 (a 3:2 ratio), 2,048 x 1,536; 1,600 x 1,200; 1,280 x 960; and 640 x 480 pixels are also available. Image quality options include three JPEG compression ratios, plus an uncompressed mode that produces full-resolution TIFF images.
The EX-P600 offers the full range of exposure modes, including Program, Aperture Priority, Shutter Speed Priority, and Manual settings. In Program mode (also referred to as Snapshot), the camera controls both aperture and shutter speed, while Aperture and Shutter Priority modes give you control over aperture or shutter speed, and the camera chooses the best value for the other exposure variable. Manual exposure mode provides total user control over both aperture and shutter speed. Shutter speeds range from 1/2,000 to 60 seconds, with a Bulb setting. The Bulb option still has the maximum 60-second shutter time, but lets you determine the length of the exposure without being confined to preset times. In addition to the main exposure mode, a BESTSHOT mode lets you choose between 25 preset shooting modes. You can also create your own BESTSHOT setup, based on the settings used to shoot a previously captured image.
The EX-P600 has five ISO settings (Auto, 50, 100, 200, and 400), automatic exposure bracketing, three metering modes (Center-Weighted, Spot, and Multi-Pattern), plus exposure compensation from +2 to -2 exposure value units (EV) in one-third-step increments. The auto exposure bracketing system also brackets white balance and focus settings. White balance options include Auto, Daylight, Cloudy, Shade, Incandescent, Daylight Fluorescent, White Fluorescent, Flash, or Manual to accommodate a variety of lighting conditions. Image contrast, saturation, and sharpness adjustments are available through the LCD menu, as well as a Filter option that alters the tint of an image (Black and White, Sepia, Red, Green, Blue, Yellow, Pink, and Purple options). A Multi-Bracketing mode brackets images for contrast, sharpness, filter, and portrait settings, providing even more exposure flexibility. An adjustable Automatic Exposure Lock (AEL) function locks an exposure reading, eliminating the need to hold down the Shutter button halfway to maintain the exposure setting while you reframe the image. There's also a self-timer option for self-portraits (two or 10 seconds), and an optional remote control.
The EX-P600's Movie mode records QuickTime movies with sound at 320 x 240 pixels. Actual recording times vary with the amount of memory card space, and are limited solely by memory space. (That is, there's no arbitrary limit set by buffer memory capacity.) An Audio Snap mode records 30-second sound clips to accompany captured images, while a Voice Recording mode records up to 40 minutes of audio. Two Continuous Shutter modes capture multiple images in rapid succession, at High or Normal speeds. In Normal Continuous Shutter mode, the camera captures images for as long as the Shutter button is held down, at a rate ranging from 0.6 to 1.1 frames/second, depending on the image size selected. High Speed Continuous Shutter mode is limited to a series of six images, at a rate of approximately three frames per second. (2.3-2.4 frames/second, according to my measurements.) There's also a Multi Continuous Shutter mode, which captures 25 stop-action shots at high speed, and stores them in a single image (25 thumbnails in a 5x5 array). A Coupling mode combines two images shot side-by-side into one (so you and a friend can shoot two pictures, yet get both of you into the final image), while a Pre-Shot mode lets you record a second image on top of a previous one, like a double-exposure (both of these modes are accessed via BESTSHOT mode). The camera's internal flash unit offers four operating modes (Auto, Red-Eye Reduction, On, and Off), and an external flash sync terminal on the side of the camera accommodates a more powerful flash unit.
The EX-P600 has 9.2 megabytes of built-in memory, and accepts SD/MMC memory cards as well. Though the internal memory ensures you can snap images with the camera straight out of the box, I highly recommend purchasing a large-capacity memory card along with the camera, ideally at least a 128MB one, given the large files the P600's six-megapixel sensor produces. You can connect the camera directly to your computer via a high-speed USB interface to download images, and if you want a slightly larger viewfinder (or image playback) display, Casio also includes a video output cable for connection to a television set. Software shipped with the unit includes Casio's utility package, a capable all-in-one image management program that provides basic organization and editing tools, including an album feature. Apple QuickTime and USB drivers for Mac and Windows are also supplied.
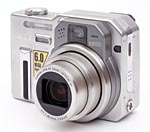
Design
 The
EX-P600 is quite compact, with an attractive silver body and low-profile controls.
Despite its small size, the EX-P600 packs a lot of features into its small body,
providing a six-megapixel CCD, 4x optical zoom lens, and a generous offering
of exposure controls and image adjustment tools. The EX-P600 measures 3.8 x
2.7 x 1.8 inches (97.5 x 67.5 x 45.1 millimeters), excluding any protrusions.
The mixture of plastic and thin metal body panels keeps
the EX-P600 very light at 9.2 ounces (260 grams) with the battery and memory
card loaded. The camera is just small enough to be quickly stashed into an average
shirt pocket, with a fairly thin body to prevent it from hanging up on pockets.
(While it will fit in a shirt pocket though, you'll likely be more comfortable
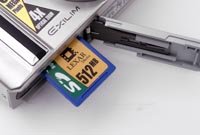
carrying it in a pants pocket or purse.) The shot above right shows the camera
posed with an SD memory card in front of it, so you can get an idea of its relative
size. The accompanying wrist strap is useful and secure, but I highly recommend
picking up a soft camera case to protect the EX-P600 when traveling.
The
EX-P600 is quite compact, with an attractive silver body and low-profile controls.
Despite its small size, the EX-P600 packs a lot of features into its small body,
providing a six-megapixel CCD, 4x optical zoom lens, and a generous offering
of exposure controls and image adjustment tools. The EX-P600 measures 3.8 x
2.7 x 1.8 inches (97.5 x 67.5 x 45.1 millimeters), excluding any protrusions.
The mixture of plastic and thin metal body panels keeps
the EX-P600 very light at 9.2 ounces (260 grams) with the battery and memory
card loaded. The camera is just small enough to be quickly stashed into an average
shirt pocket, with a fairly thin body to prevent it from hanging up on pockets.
(While it will fit in a shirt pocket though, you'll likely be more comfortable
carrying it in a pants pocket or purse.) The shot above right shows the camera
posed with an SD memory card in front of it, so you can get an idea of its relative
size. The accompanying wrist strap is useful and secure, but I highly recommend
picking up a soft camera case to protect the EX-P600 when traveling.
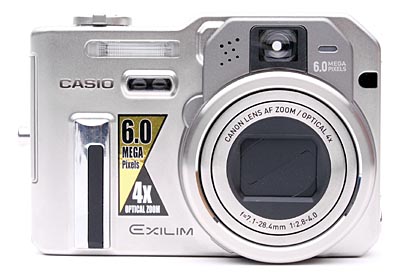
The front of the EX-P600 features the lens, flash, phase-differential AF sensor (just below the flash), microphone, self-timer LED, and IR remote sensor. When fully extended, the lens barrel projects just under an inch from the outside lip of the lens barrel. When not in use, the lens is protected by a shutter-like, retractable cover that automatically slides in and out of place when the camera is turned on or off. A small finger grip on the front panel is balanced by a smaller thumb pad on the rear panel for a secure hold, and a rubbery texture on the front grip provides added friction for your fingers, but I'd still recommend using the wrist strap.
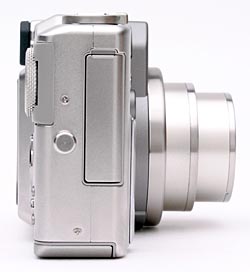
The right side of the camera has an eyelet for the wrist strap, as well as the connector compartment. Beneath the compartment's plastic door (tethered to the camera at the bottom of the compartment) are the DC In and USB / AV Out jacks. From this view, you can also see the textured edge of the Mode dial.

On the opposite side of the camera are the secondary IR remote sensor, speaker, and an external flash sync terminal.

The EX-P600's top panel has just a few controls on it, including the Shutter button (surrounded by the Zoom lever) and the Power button.

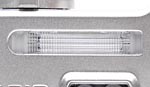
All of the remaining camera controls are on the rear panel, along with the optical viewfinder and two-inch LCD monitor. Less commonly used controls (Bracket, AE Lock, and the EX/Delete buttons) line the far left side of the LCD monitor, while the Macro and Flash/Calendar buttons are just above it. The large Mode dial dominates the top right corner, with a Four-Way Arrow pad below it. Surrounding the arrow pad are the Menu, Display, Self-Timer/Remote, and Preview buttons. The optical viewfinder has two LEDs adjacent to it, which blink or light steady to report camera status (such as when the flash is charging, focus is set, etc.)

The bottom of the camera holds the battery and memory card compartment, as well as a metal screw-mount tripod socket. The spring-loaded compartment door slides forward before opening out, and accommodates the lithium-ion battery and an SD/MMC memory card side-by-side. A small pressure latch keeps the battery in place, and pops it out when released.
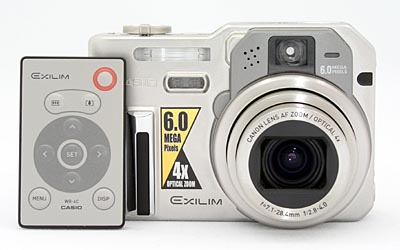
The P-600 also comes with a very handy little infrared remote control. The remote can not only fire the shutter and zoom the lens, but can navigate the menu system as well. This would be very handy for studio or event-photography applications, in which you might want to mount the camera remotely and use a video display as the viewfinder. - You can control virtually all aspects of the camera's operation that involve the zoom lever, four-way controller, or Menu or Display buttons.
Viewfinder
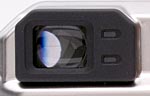 The
EX-P600 offers both a real-image optical viewfinder and a rear panel, 2.0-inch,
TFT color LCD screen. Though it does not offer a diopter correction adjustment,
the EX-P600's optical viewfinder has a very high eyepoint, with plenty of room
for most eyeglass thicknesses to fit. In common with those of many digicams,
the EX-P600's optical viewfinder isn't too accurate, showing between 81 and
85 percent of the final image area, depending on the lens zoom position. The
LCD does much better, showing almost exactly 100% of the final frame, regardless
of lens setting. Two small LEDs on the right side of the optical viewfinder
blink or light continuously to report camera status, such as when the AF system
is fixed or having trouble, or if the flash is ready or charging.
The
EX-P600 offers both a real-image optical viewfinder and a rear panel, 2.0-inch,
TFT color LCD screen. Though it does not offer a diopter correction adjustment,
the EX-P600's optical viewfinder has a very high eyepoint, with plenty of room
for most eyeglass thicknesses to fit. In common with those of many digicams,
the EX-P600's optical viewfinder isn't too accurate, showing between 81 and
85 percent of the final image area, depending on the lens zoom position. The
LCD does much better, showing almost exactly 100% of the final frame, regardless
of lens setting. Two small LEDs on the right side of the optical viewfinder
blink or light continuously to report camera status, such as when the AF system
is fixed or having trouble, or if the flash is ready or charging.
 The
EX-P600's 2.0-inch, color, high-definition LCD monitor has a 115,200-pixel display
and a very unique information overlay. The Display button next to the lower
right corner of the LCD monitor controls the display mode, cycling between a
standard information overlay, an advanced graphic display, a basic display with
only the focus brackets, and the disabled setting. The standard information
display reports the basic camera settings, including aperture and shutter speed
(when the Shutter button is halfway pressed), remaining battery power, date
and time, and the number of images that can be stored in memory at the current
image size/quality setting. The display also indicates where the images are
being stored, either on the internal memory or SD card. The EX-P600's more advanced
graphic display is much more interesting, and almost has a "flight simulator"
quality to it. A large cross-hair in the center of the frame, surrounded by
a circle, shows the focus area and the current focus setting. The ISO and flash
settings are reported in the top two corners, while a live-action histogram
in the lower left corner reports the tonal distribution for the overall image,
as well as for the individual R, G, and B channels. (This last is a very slick
feature, one that I've only previously seen on the Sigma SD-9 and SD-10 digital
SLRs.) On the right side are graphs representing the exposure compensation,
shutter speed, and aperture settings. Just above these, a color option cycles
through the available color display choices. Though it may be a little overkill,
the interface is actually quite fun to play around with, even though it does
cover up most of the image area, making it a little hard to see the subject.
In both the standard and graphic information display modes, you can use the
Four-Way Arrow pad to make a handful of exposure adjustments directly, depending
on the exposure mode selected. A Grid option is available through the Record
menu, which divides the image area into thirds, horizontally and vertically,
to help you line up shots with strong horizontal or vertical components. (Great
for making sure that your horizon is level, or for lining up architectural shots.)
The
EX-P600's 2.0-inch, color, high-definition LCD monitor has a 115,200-pixel display
and a very unique information overlay. The Display button next to the lower
right corner of the LCD monitor controls the display mode, cycling between a
standard information overlay, an advanced graphic display, a basic display with
only the focus brackets, and the disabled setting. The standard information
display reports the basic camera settings, including aperture and shutter speed
(when the Shutter button is halfway pressed), remaining battery power, date
and time, and the number of images that can be stored in memory at the current
image size/quality setting. The display also indicates where the images are
being stored, either on the internal memory or SD card. The EX-P600's more advanced
graphic display is much more interesting, and almost has a "flight simulator"
quality to it. A large cross-hair in the center of the frame, surrounded by
a circle, shows the focus area and the current focus setting. The ISO and flash
settings are reported in the top two corners, while a live-action histogram
in the lower left corner reports the tonal distribution for the overall image,
as well as for the individual R, G, and B channels. (This last is a very slick
feature, one that I've only previously seen on the Sigma SD-9 and SD-10 digital
SLRs.) On the right side are graphs representing the exposure compensation,
shutter speed, and aperture settings. Just above these, a color option cycles
through the available color display choices. Though it may be a little overkill,
the interface is actually quite fun to play around with, even though it does
cover up most of the image area, making it a little hard to see the subject.
In both the standard and graphic information display modes, you can use the
Four-Way Arrow pad to make a handful of exposure adjustments directly, depending
on the exposure mode selected. A Grid option is available through the Record
menu, which divides the image area into thirds, horizontally and vertically,
to help you line up shots with strong horizontal or vertical components. (Great
for making sure that your horizon is level, or for lining up architectural shots.)
 When
using the LCD monitor to review captured images, you can zoom in up to 8x on
displayed images and then scroll around the enlarged image using the arrow buttons.
This is extremely handy for checking focus, small details, or precise framing.
There's also an Index display option which shows 16 images at a time. The Display
button again controls the amount of information presented onscreen, showing
the image only, the image with limited shot information (image size, file number,
date and time, and battery level), and the image with more detailed exposure
information and a histogram. The EX-P600 also offers the ability to resize or
crop your images post-exposure. You can also rotate images, or record a short
sound clip to accompany an image as an "audio caption."
When
using the LCD monitor to review captured images, you can zoom in up to 8x on
displayed images and then scroll around the enlarged image using the arrow buttons.
This is extremely handy for checking focus, small details, or precise framing.
There's also an Index display option which shows 16 images at a time. The Display
button again controls the amount of information presented onscreen, showing
the image only, the image with limited shot information (image size, file number,
date and time, and battery level), and the image with more detailed exposure
information and a histogram. The EX-P600 also offers the ability to resize or
crop your images post-exposure. You can also rotate images, or record a short
sound clip to accompany an image as an "audio caption."
Optics
Learn how to use lens aperture to control depth of field - Visit our free Photo Lessons area!
Free Photo Lessons
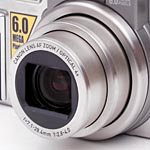 Much
to their credit, Casio went to Canon for the lens on the EX-P600, with the result
that the camera shows good optical characteristics. The all-glass Canon lens
on the EX-P600 is made up of eight elements in seven groups, and shows relatively
little chromatic aberration as well as little of the softening in the corners
of the frame that I've almost come to expect in digicam lenses. The 4x, 7.1-28.4mm
lens provides a focal length range equivalent to a 33-132mm zoom on a 35mm film
SLR, amounting to a pretty wide angle to a decent telephoto. Apertures range
from f/2.8 to f/8, with the maximum aperture setting dependent on the lens zoom
position, ranging up to f/4 at the maximum telephoto position. The EX-P600's
normal focusing distance extends from 1.3 feet (40 centimeters) to infinity,
and a macro setting permits focusing from 3.9 to 19.7 inches (10 to 50 centimeters).
Much
to their credit, Casio went to Canon for the lens on the EX-P600, with the result
that the camera shows good optical characteristics. The all-glass Canon lens
on the EX-P600 is made up of eight elements in seven groups, and shows relatively
little chromatic aberration as well as little of the softening in the corners
of the frame that I've almost come to expect in digicam lenses. The 4x, 7.1-28.4mm
lens provides a focal length range equivalent to a 33-132mm zoom on a 35mm film
SLR, amounting to a pretty wide angle to a decent telephoto. Apertures range
from f/2.8 to f/8, with the maximum aperture setting dependent on the lens zoom
position, ranging up to f/4 at the maximum telephoto position. The EX-P600's
normal focusing distance extends from 1.3 feet (40 centimeters) to infinity,
and a macro setting permits focusing from 3.9 to 19.7 inches (10 to 50 centimeters).
The EX-P600's hybrid autofocus system employs both contrast-detection and phase difference methods to determine focus, though you can designate contrast-detection only through the exposure menu. The phase difference system accounts for its unusually fast autofocus speed, and also helps it focus under very low-light conditions. (Its shutter lag is right around 0.28 seconds in full autofocus mode, making it one of the fastest cameras on the market. It can also focus at light levels as low as 1/16 foot-candle, corresponding to an exposure of 15 seconds at f/2.8 at ISO 100, although I did encounter occasional focus errors at the darkest light levels I tested at.) A set of focus brackets in the LCD display outlines the main autofocus and exposure area, and you can choose between Spot, Multi, and Free AF area modes. Spot mode looks at only the very center of the frame, the area within the small white AF target marks on the viewfinder display. A wider set of AF marks indicates the Center AF area, which is a slightly larger central region. The Free setting is one of the most flexible AF area selectors I've seen on a digicam of this class, as you can literally select any point on the viewfinder display for the camera to judge focus from. In this mode, two lines appear on the LCD display, one vertical and one horizontal. The AF area is the point where the two come together (the corresponding area is actually displayed on the LCD screen like a coordinate). You simply use the arrow keys to move the crosshairs to any point on the screen, very handy for still subjects.
As I mentioned earlier, the EX-P600's AF system uses a hybrid focus mode by default, which combines standard contrast-detection AF with phase difference AF, depending on the location and type of subject. When in Hybrid AF mode, the camera uses one or the other AF methods to determine the best focus. An optional Continuous AF mode continuously checks focus and refocuses as conditions change, better for moving subjects, but actually slightly increasing the shutter delay for stationary ones. Finally, the EX-P600 features a fixed, Infinity focus setting, as well as a manual focus option. Pressing the Macro button three times activates manual focus mode. The center of the display is magnified, and a distance scale appears on the screen (though the distance scale doesn't report all of the focusing distances). You then use the right and left arrow keys to adjust the focus.
The EX-P600's lens provides up to 4x optical zoom, and the camera's 4x digital zoom increases that magnification to a maximum of 16x, although the digital zoom brings with it the usual reduction in resolution. Digital zoom is enabled through the Record menu and controlled by the Zoom Lever on top of the camera. Since digital zoom just crops out and enlarges the central pixels from the CCD's image, it directly trades resolution for magnification. This will result in very soft images if you're working at the camera's maximum file size, but can be useful if you're only need 640 x 480 pixels for web or email use.
Exposure
Learn about white balance and simple lighting techniques for dramatic shots in out free Photo Lessons area!
The EX-P600 offers an impressive amount of exposure control, including
Program (called "Snapshot" by Casio), Aperture Priority, Shutter Priority,
and Manual exposure modes, as well as a BESTSHOT mode with 25 preset scene modes.
All capture modes are set by rotating the Mode dial on camera's rear panel,
which also accesses the Movie, Audio, and Playback modes.
Free Photo Lessons
In Program (Snapshot) mode, the camera has control over the aperture and shutter speed, while you can adjust other exposure parameters. (You can leave all of the additional parameters at their default settings for full automatic exposure control.) In Program mode, you also have access to the exposure compensation adjustment, which lets you adjust the camera's automatically determined exposure setting up or down by up to two exposure equivalent (EV) units, in steps of 0.3 EV. (Each EV unit corresponds to a doubling or halving of the total exposure.) One limitation of Program mode that I disagree somewhat with is that the maximum shutter time is limited to only 1/8 second, significantly limiting the camera's low-light capability in this mode. (You can get exposure times as long as 2 seconds in Night Landscape mode, but for really dark conditions, your only options are Shutter Priority or full Manual mode.) Aperture Priority lets you set the aperture from f/2.8-f/4.0 to f/8 (the bottom end of which depends on the lens zoom position, with a maximum aperture of f/2.8 at full wide-angle, and f/4.0 at full telephoto) leaving the camera to automatically determine the appropriate shutter speed, once again down to a maximum of only 1/8 second. In Shutter Priority, you can select shutter speeds from 1/2,000 to 60 seconds, with the camera selecting the corresponding aperture setting. A Bulb shutter mode is also available for manually controlled exposures of varying lengths up to 60 seconds. The Manual exposure option lets you control both aperture and shutter speed yourself, with the same shutter range.
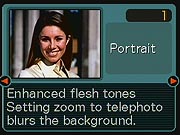
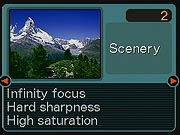
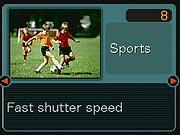
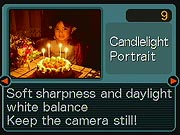
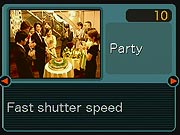
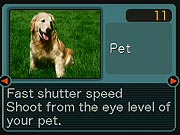
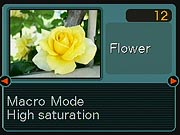
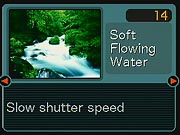
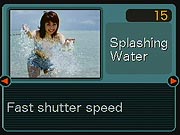
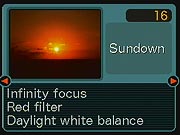
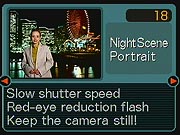
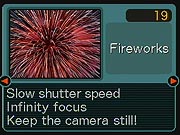
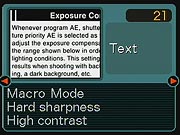
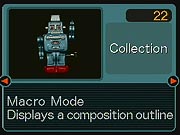
The 25 scene settings of BESTSHOT mode include: Portrait, Scenery, Portrait with Scenery, Coupling, Pre-Shot, Soft Focus, Children, Sports, Candlelight Portrait, Party, Pet, Flower, Natural Green, Soft Flowing Water, Splashing Water, Sundown, Night Scene, Night Scene Portrait, Fireworks, Food, Text, Collection, Monochrome, Retro, Twilight, or Custom. Each of these modes is fairly self-explanatory, thanks to fairly explicit descriptions in the menu system itself, although the Coupling and Pre-Shot modes perhaps deserve a little further explanation here. Coupling mode combines two separate exposures into one split image, with the two smaller images displayed side-by-side. This is great if you want to get yourself and a companion into the same shot, when there's nobody around to snap the shutter while you both pose. Pre-Shot mode is a sort of double-exposure mode, in that you can record one image on top of another. In both modes, framing guidelines appear on the LCD display to help you line up shots. Limited menu options are available in the scene modes, as their purpose is to simplify camera setup for novices. (A multitude of menu choices would only add complication to what are intended to be easy-to-use camera settings.) The Custom option lets you save a series of exposure parameters, based on a previously captured image, useful if you shoot under specific conditions frequently. (See the Camera Modes and Menus section of this review for a more detailed description of the operation of the various BESTSHOT modes.)
The EX-P600 features a variable ISO option, which lets you explicitly set the camera's light sensitivity to 50, 100, 200, or 400 ISO equivalents, or to an Auto mode in which the camera selects an ISO appropriate to the subject's brightness. Three metering options are available on the EX-P600: Spot, Center-Weighted, and Multi. Under the default Multi setting, the camera takes an exposure reading from the center of the image as well as the surrounding area and chooses the best exposure based on both brightness and contrast across the entire scene. Center-Weighted mode reads the exposure from a fairly large area in the center of the frame, while Spot metering simply reads the exposure from the very center of the image, so you can pinpoint the specific area of the photograph you want properly exposed. (Spot metering is very handy when you have a subject that's backlit, or that has a very different brightness, either lighter or darker, than the background.)
An AE Lock button locks the current exposure settings whenever pressed, so you can lock exposure and focus independently of each other. (AE Lock is useful when you want to base your exposure on an off-center subject. Point the camera at the subject, lock the exposure, then recompose your shot however you like. Your subject will be correctly exposed, regardless of what might be in the center of the frame when you finally snap the shutter, but the focus will be determined by whatever was in the currently-selected focus area when you finally pressed the shutter button.) If you're not sure of the best exposure for a given shot, you can use the Auto Exposure Bracketing (AEB) function to automatically bracket the exposure as much as +/- 2 EV in either three or five steps of 0.3, 0.6, or 1.0 EV units each. The auto bracketing will center its efforts around whatever exposure you've chosen as the starting point, including any exposure compensation adjustments you've made. AEB is really handy for those times when you want to make sure you get just the right exposure for a critical subject.
White balance options include Auto, Daylight, Cloudy, Shade, Incandescent, Daylight Fluorescent, White Fluorescent, Flash, and Manual, to accommodate a variety of lighting situations. You can also use the Auto Bracketing option to bracket the white balance.
The EX-P600 also offers a ten- or two-second Self-Timer for self-portraits or for those occasions when you don't want to risk camera shake on a long exposure by using the Shutter button to trip the shutter. (For the latter case, just set the Self-Timer for a two-second delay, and any vibrations from pressing the shutter button most likely will have died away by the time the shutter opens.) Additionally, the EX-P600's Triple Self-Timer mode takes three images consecutively, with the self-timer countdown before each, handy for taking multiple group shots to insure getting at least one exposure with nobody blinking or not smiling. A Remote Control mode works with the included remote control accessory, with a two-second self-timer.
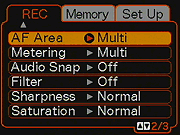
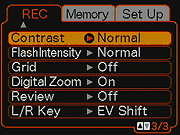
There are also options on the Record menu to set the in-camera image sharpening, contrast, and saturation, and a Filter option for adjusting the overall tint of the image. The camera's Multi-Bracketing feature lets you bracket any of these adjustments. The sharpening, contrast, and saturation adjustments work pretty well, but I have to confess that I don't see any use for the Filter option as implemented on the P600.
Flash
 The
EX-P600 offers a built-in flash with four operating modes: Auto, Suppressed,
Flash On, and Red-Eye Reduction modes. Auto mode lets the camera decide when
to fire the flash, while the Flash On mode fires the flash with every shot.
The Red-Eye Reduction mode fires a brief low-power flash pulse before firing
the flash at full power, making the pupils of your subject's eyes contract,
reducing the occurrence of the Red-Eye Effect. Through the Record menu, you
can set flash intensity to Normal, Strong, or Weak. The EX-P600 also features
a PC sync socket, for connecting a more powerful external flash unit. Both internal
and external flashes synchronize properly at any shutter speed up to the maximum
1/2,000 second, surprisingly fast, and very helpful for situations in which
you need to minimize the impact of ambient lighting on your flash exposures.
Note too, that the action of the internal and external flash appear to be completely
independent of each other. The "flash" button on the camera's rear
panel controls the internal flash, but the external flash sync socket appears
to always be "live," regardless of the setting of the internal flash.
This means that you can choose to combine internal and external flash units
or not, as dictated by the subject you're shooting.
The
EX-P600 offers a built-in flash with four operating modes: Auto, Suppressed,
Flash On, and Red-Eye Reduction modes. Auto mode lets the camera decide when
to fire the flash, while the Flash On mode fires the flash with every shot.
The Red-Eye Reduction mode fires a brief low-power flash pulse before firing
the flash at full power, making the pupils of your subject's eyes contract,
reducing the occurrence of the Red-Eye Effect. Through the Record menu, you
can set flash intensity to Normal, Strong, or Weak. The EX-P600 also features
a PC sync socket, for connecting a more powerful external flash unit. Both internal
and external flashes synchronize properly at any shutter speed up to the maximum
1/2,000 second, surprisingly fast, and very helpful for situations in which
you need to minimize the impact of ambient lighting on your flash exposures.
Note too, that the action of the internal and external flash appear to be completely
independent of each other. The "flash" button on the camera's rear
panel controls the internal flash, but the external flash sync socket appears
to always be "live," regardless of the setting of the internal flash.
This means that you can choose to combine internal and external flash units
or not, as dictated by the subject you're shooting.
Special Exposure Modes
Movie and Sound Recording Modes
The EX-P600's Movie mode is accessible via the Mode dial on the rear panel
(the movie position indicated by a small camcorder symbol). Once in Movie mode,
you can record QuickTime movies with sound, for as long as the memory card has
available space. (There doesn't appear to be any limit on the length of individual
movie clips, you can record continuously until the card is full.) Movies are
recorded at 320 x 240 pixels. Numbers indicating the minutes and seconds of
movie storage remaining on the memory card appears on the LCD monitor.
As is the case with most digicams that record sound with their movies, you can't adjust the P600's zoom lens while recording is in process, although you're free to set the zoom to any position prior to the beginning of recording. (This is to prevent the noise of the zoom motor from affecting the audio track.)
An Audio recording mode (indicated by a microphone symbol on the Mode dial) records audio only, for as long as the memory card has available space. (The built-in memory can accommodate about 40 minutes of sound.) You can also record a short sound clip to accompany still images, via the Audio Snap option of the Record menu. Audio captions can be a maximum of 30 seconds in length.
Continuous Shutter Mode
The EX-P600 also offers three Continuous Shutter modes that mimic the motor
drive on a film camera, recording images in rapid sequence when you hold down
the Shutter button. The Normal Speed Continuous Shutter
mode captures shots for as long as the memory card has available space, at frame
rates ranging from 0.6 to 1.1 frames/second, depending on the size of the images
being recorded. High Speed Continuous Shutter mode captures a maximum of only
six shots, but at 2.3 to 2.4 frames per second. (Casio's specs say three frames
per second for high speed continuous mode, but my own measurements showed slightly
slower frame rates.) Finally, the 25-Shot Stop Action Images mode captures 25
small frames at high speed, and then displays them as a single image in a five-by-five
array.
Shutter Lag/Cycle Times
When you press the shutter release on a camera, there's generally a delay or lag time before the shutter actually fires. This time is to allow the autofocus and autoexposure mechanisms time to do their work, and can amount to a fairly long delay in some situations. Since this number is rarely reported (and even more rarely reported accurately), and can significantly affect the picture taking experience, I routinely measure it with a custom test system I constructed for the purpose. (With crystal-controlled timing, accurate to 0.01% and with a timing resolution of one millisecond.) Here are the figures I obtained in my testing of the EX-P600:
| |
||
| |
(secs) |
|
| Power On -> First shot | |
LCD turns
on and lens extends forward. About average |
| Shutdown | |
First time is time to retract
lens, second time is worst-case buffer-clearing time. A little slow on
both counts. The 20-second worst-case buffer-clearing time though, is
after a string of 20 or more large/fine images in normal speed continuous
mode, so actually isn't too bad, considering. |
| Play to Record, first shot | |
Time until
first shot is captured. Very fast. |
| Record to play | |
First time is that required
to display a large/fine file immediately after capture; second time is
that needed to display a large/fine file that has already been processed
and stored on the memory card. Very fast. |
| Shutter lag, full autofocus | |
First time is at full wide-angle, second is full telephoto. Extremely fast. (One of the fastest prosumer cameras I've tested to date!) (July, 2004) |
| Shutter lag, prefocus | |
Time to capture, after half-pressing
shutter button. Extremely fast. |
| Cycle Time, max resolution TIFF | 43 |
Captures 17.5 MB TIFF and 2.9MB JPEG file for each shot. Continuous mode is not available with TIFF mode. Very slow, but then these are awfully big files. (No buffering for TIFF-mode files.) |
| Cycle Time, max/min resolution | 2.44 / |
First number is for large/fine files, second number is time for 640x480 images. Times are averages. Buffer takes up to 14 seconds to clear after a long series (20 or more) large/fine files, clears almost immediately with 640x480 files. |
| Cycle Time, continuous High mode, max/min resolution | 0.41 / 0.43 (2.42/2.33 fps) |
First number is for large/fine files, second number is time for 640x480 images. Times are averages. Shoots 6 frames at any resolution, then pauses to empty buffer. Buffer clears in 15 seconds for large/fine images, 3 seconds for lowest resolution. |
| Cycle Time, continuous Low mode, max/min resolution | 1.73 / 0.91 (0.58 / 1.1 fps) |
First number is for large/fine files, second number is time for small/basic images. Times are averages. There doesn't appear to be a buffer-imposed limit, but the camera stops writing to the memory card 20 seconds after a series of ~20 large/fine shots, and almost immediately after a series of 640x480 shots. |
| Cycle Time, Continuous Multi mode | 0.07 (14.3 fps) |
Camera captures 25 images of 320 x 240 pixels, stores them in 5x5 arrays inside normal 1600x1200 files. Takes 3 seconds to process and save the file and clear the buffer, then can shoot another 25. |
The EX-P600 is a surprisingly fast camera, particularly considering its 6-megapixel CCD. Its full-autofocus shutter lag time of only 0.27-0.28 seconds makes it one of (if not the) fastest non-SLR cameras currently on the market. Its prefocus shutter lag of only 16 milliseconds (0.016 second) makes it one of the fastest cameras out there, regardless of price. Cycle times are good, but not quite as spectacular as the shutter lag numbers, although the P600 can maintain its large/fine cycle time of 2.4 seconds more or less indefinitely, as its buffer fills very slowly. (I found no increase in cycle time, even after 20 large/fine shots in rapid succession. Continuous-mode performance is a very good 2.4 frames/second for up to 6 frames in high-speed mode, and Continuous Multi grabs 25 small images (320x240) at just over 14 frames/second, saving them in a single full-resolution file. All in all, the P600 is a remarkably responsive camera, a great choice for shooting sports and other fast-paced action. And nicely responsive the rest of the time. - We're finally starting to see full-featured digital cameras with shutter response approaching that of their film-based ancestors!
Operation and User Interface
The EX-P600's user interface is one of the most unique I've seen, with an optional graphic display on the LCD monitor that reports the camera's focus and exposure information. The graphic display is sporty, conjuring up images of video racing games and flight simulators, but perhaps a bit more than what the average photographer needs. (Although I really liked the unique 3-channel histogram display, and found myself wishing I could have the histogram without all the "cockpit" silliness along with it.) The standard LCD display is also quite useful, reporting a host of camera settings as well as the exposure information. In either display mode, you can use the multi-functional Four-Way Arrow pad to make many of the basic exposure settings without delving into the LCD menus. When you do need the LCD menu system, it's actually quite straightforward, organized as a series of menu tabs. This layout lets you quickly skip to the options you need without sifting through pages of menu options. Once you get the hang of things, the control layout is fairly intuitive. The graphic display is fun and creative, but not very efficient for normal operation.
Control Enumeration

Zoom Lever: On top of the camera, surrounding the shutter release, the Zoom
Lever controls the optical and digital zoom in all exposure modes.
In Playback mode, the zoom lever switches between Index view, normal image display, and playback zoom, and controls the amount of playback zoom applied.
Shutter Button: Located in the center of the Zoom control, the Shutter button sets focus and exposure settings when pressed halfway and triggers the shutter when fully pressed.

Power Button: To the left of the Shutter button and Zoom control, the
Power button turns the camera on and off.
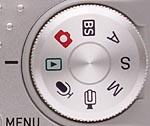
Mode Dial: In the top right corner of the camera's rear panel is the Mode
Dial, which controls the camera's main operating mode. Choices are Playback,
Snapshot, BESTSHOT, Aperture Priority, Shutter Priority, Manual, Movie, and
Audio modes.

Focus Button: To the right of the optical viewfinder, this button cycles
between Macro, Infinity, Manual, and Normal AF modes.

Flash / Calendar Button: To the right of the Focus button, this button controls
the Flash mode in all still capture modes. Pressing it cycles through Auto,
Suppressed, Flash On, and Red-Eye Reduction modes.
In Playback mode, this button displays captured images on a graphic calendar, letting you easily see which were captured on which date.

Continuous Shutter / Auto Bracketing Button: The top button in a series
lining the left side of the LCD monitor, this button accesses the available
Continuous Shutter modes, as well as the camera's Auto Bracketing modes.

AE Lock Button: Just below the Continuous Shutter / Auto Bracketing button,
this button locks the exposure setting in any record mode.

EX / Erase Button: Directly below the AE Lock button, this button short
cuts to a limited exposure menu in Record mode, with the following options:
In Playback mode, this button displays the Erase menu, which lets you delete a single image or all files.
![]()
Menu Button: On the right side of the LCD monitor, this button displays
the settings menu (and dismisses it) for any camera mode.

Four-Way Arrow Pad and Set Button: This multi-directional toggle button
surrounds a single "Set" button, and controls many of the camera's
operations. In all capture modes except Manual, the left and right arrow buttons
increase or decrease the exposure compensation setting. (You can change the
function of the left and right keys through the Setup menu, though.) In Aperture
or Shutter Priority exposure modes, the up and down arrow buttons select either
the exposure compensation or the selected exposure variable for adjustment,
while the right and left buttons change the settings. In Manual mode, the up
and down arrows move the selection between the aperture and shutter speed settings,
and the right and left buttons again change the settings. In BESTSHOT mode,
the Set button enables you to select one of the 25 available scene modes, selectable
via the right and left arrows.
In Playback mode, the left and right arrows move forward or backward through the pictures stored on the card. All four are used to scroll around the zoomed image in Zoom Playback mode.
In the LCD menu system, the arrow buttons navigate through menu screens and select settings. The Set button in the center of the pad confirms menu selections.
![]()
Display Button: Just off the lower right corner of the LCD monitor, this
button cycles through the available LCD display modes, including the graphic
interface in capture mode.

Self-Timer / Remote Control Button: Located in the lower right corner
of the rear panel, this button accesses the two and 10-second Self-Timer modes,
Triple Self-Timer mode, as well as the Remote Control mode.

Preview Button: Calls up the previously-captured image on the screen and
enables most Playback-mode functions.
Camera Modes and Menus
Movie Mode: Accessed by turning the Mode dial to the movie camera symbol, Movie mode lets you capture movies (with sound) for as long as the memory card has available space. Shutter speed is set automatically, depending on light levels and the camera's ISO setting. Most other menu options are available, including ISO and white balance.
Audio Mode: Records audio only, for as long as the memory card, or internal memory, has available space. (A maximum of 40 minutes on the internal memory.)
Playback Mode: This mode lets you view previously captured images using the Four-Way Arrow Pad to scroll through frames stored in memory. The Zoom Lever switches the image display to Index mode when moved in the wide angle direction, and when moved in the telephoto direction, enlarges a single image. While zoomed in on an image, the arrow buttons can move the enlarged view around the full image area, allowing you to inspect all parts of it.
Snapshot Mode: Puts the camera in control of both aperture and shutter speed settings, while you control all other exposure variables, such as white balance, exposure compensation, etc. Shutter speed in this mode is limited to a maximum of 1/8 second.
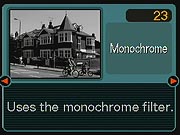
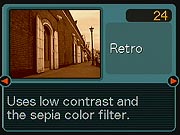
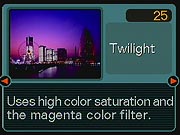
BESTSHOT Mode: Lets you select from 25 preset scene shooting modes, or enable a custom preset mode. The 25 modes include Portrait, Scenery, Portrait with Scenery, Coupling, Pre-Shot, Soft Focus, Children, Sports, Candlelight Portrait, Party, Pet, Flower, Natural Green, Soft Flowing Water, Splashing Water, Sundown, Night Scene, Night Scene Portrait, Fireworks, Food, Text, Collection, Monochrome, Retro, and Twilight.
Aperture Priority Mode: Allows the user to control the lens aperture setting, from f/2.8 to f/8.0, while the camera adjusts the shutter speed as needed. Shutter speed is again limited to a maximum of 1/8 second.
Shutter Priority Mode: The user can adjust the shutter speed, from 1/2,000 to 60 seconds, while the camera selects the most appropriate aperture setting. A Bulb setting is available for exposures as long as 60 seconds.
Manual Mode: In this mode, the user has full control over the exposure, with the same shutter range as in Shutter Priority mode.
Still Picture Shooting Menu: In capture mode, pressing the Menu button displays the following menu options:
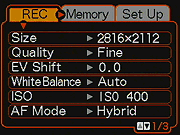 Size:
Sets the resolution to 2,826 x 2,112, 2,816 x 1,872 (3:2 aspect), 2,048
x 1,536, 1,600 x 1,200, 1,280 x 960, or 640 x 480 pixels.
Size:
Sets the resolution to 2,826 x 2,112, 2,816 x 1,872 (3:2 aspect), 2,048
x 1,536, 1,600 x 1,200, 1,280 x 960, or 640 x 480 pixels.
 AF
Area: Selects Spot, Multi, or Free AF area modes.
AF
Area: Selects Spot, Multi, or Free AF area modes.
 Contrast:
Sets image contrast to High, Normal, or Low.
Contrast:
Sets image contrast to High, Normal, or Low.
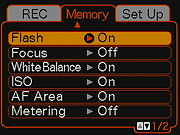 Memory:
Designates whether the following settings are remembered whenever the
camera is powered off: Flash, Focus, White Balance, ISO, AF Area, Metering,
Continuous Shooting/Bracketing mode, Flash Intensity, Digital Zoom, MF Position,
and Zoom Position. (All options are simple yes/no choices, so I only showed
the first one in the screenshot at right.)
Memory:
Designates whether the following settings are remembered whenever the
camera is powered off: Flash, Focus, White Balance, ISO, AF Area, Metering,
Continuous Shooting/Bracketing mode, Flash Intensity, Digital Zoom, MF Position,
and Zoom Position. (All options are simple yes/no choices, so I only showed
the first one in the screenshot at right.) 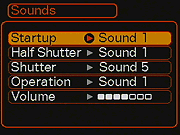 Sounds:
Controls the following camera sounds: (secondary
screens)
Sounds:
Controls the following camera sounds: (secondary
screens)
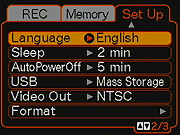 Language:
Sets the menu language to one of 10 choices. (secondary
screen)
Language:
Sets the menu language to one of 10 choices. (secondary
screen)
Playback Menu: Play menu options
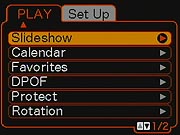 Slideshow:
Controls an automated slide show of captured images. A submenu lets you
start the show, designate which images to play, show length, the interval
between images, or you can cancel the show. (secondary
screens)
Slideshow:
Controls an automated slide show of captured images. A submenu lets you
start the show, designate which images to play, show length, the interval
between images, or you can cancel the show. (secondary
screens)
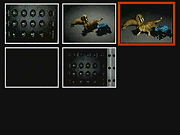
BestShot Modes
The BestShot mode options are really pretty self-explanatory, thanks to
clear explanations on the selection screens. You select the desired BestShot
mode by pressing the Set button, and then scrolling with the right or left arrow
keys through the available options. The table below shows the screens describing
each option.
BestShot
Mode Options |
|
 |
 |
 |
 |
 |
 |
 |
 |
 |
 |
 |
 |
 |
 |
 |
 |
 |
 |
 |
 |
 |
 |
 |
 |
 |
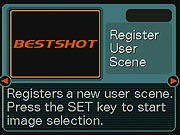 |
Image Storage and Interface
 The
EX-P600 stores images either in its 9.2 megabytes of internal memory, or on
an SD/MMC type memory card. Because the camera has its own built-in memory,
it does not come with a "starter" memory card. Thus, I'd advise picking
up a large memory card right away, given the EX-P600's maximum 2,816 x 2,112-pixel
resolution. (64 MB would be an absolute minimum, 128 MB comfortable, and 256
MB preferable.) Through the camera's Playback menu, you can copy images from
the internal memory to a memory card, and vice versa.
A Protect option in the Playback menu lets you mark all images or individual
images for write-protection, which does not protect against formatting. The
Playback menu also offers a wide range of image management tools, including
an album and favorites option, and cropping and resizing tools.
The
EX-P600 stores images either in its 9.2 megabytes of internal memory, or on
an SD/MMC type memory card. Because the camera has its own built-in memory,
it does not come with a "starter" memory card. Thus, I'd advise picking
up a large memory card right away, given the EX-P600's maximum 2,816 x 2,112-pixel
resolution. (64 MB would be an absolute minimum, 128 MB comfortable, and 256
MB preferable.) Through the camera's Playback menu, you can copy images from
the internal memory to a memory card, and vice versa.
A Protect option in the Playback menu lets you mark all images or individual
images for write-protection, which does not protect against formatting. The
Playback menu also offers a wide range of image management tools, including
an album and favorites option, and cropping and resizing tools.
The EX-P600 can store images in both uncompressed TIFF and compressed JPEG
file formats. JPEG compression levels include Fine, Normal, and Economy. Resolutions
include 2,816 x 2,112; 2,816 x 1,872 (3:2 aspect ratio); 2,048 x 1,536; 1,600
x 1,200; 1,280 x 960; and 640 x 480 pixels.
The table below shows the approximate size and compression ratio of each of
the EX-P600's size/quality setting combinations, along with how many of each
image size can fit on a 128MB memory card.
| Resolution/Quality 128 MB Card |
TIFF | Fine | Normal | |
|
| 2,816 x 2,112 | Images (Avg size) |
6 17.8 MB |
40 3.2 MB |
49 2.6 MB |
73 1.8 MB |
| Approx. Compression |
1:1 | 6:1 | 7:1 | 10:1 | |
| 2,048 x 1,536 | Images (Avg size) |
11 9.4 MB |
69 1.9 MB |
92 1.3 MB |
178 719 KB |
| Approx. Compression |
1:1 | 5:1 | 7:1 | 13:1 | |
| 1,200 x 1600 | Images (Avg size) |
18 5.8 MB |
107 1.2 MB |
159 803 KB |
311 411 KB |
| Approx. Compression |
1:1 | 5:1 | 7:1 | 14:1 |
|
| |
Images (Avg size) |
28 3.7 MB |
166 771 KB |
254 503 KB |
286 KB |
| Approx. Compression |
1:1 | 5:1 | 7:1 | |
|
| 640
x 480 |
Images (Avg size) |
112 921 KB |
594 215 KB |
779 164 KB |
103 KB |
| Approx. Compression |
1:1 | 4:1 | 6:1 | |
|
The EX-P600 comes with interface software and cables for both Mac and Windows computers. It employs a USB interface for high-speed computer connection, and implements a "storage-class" connection (which lets you connect the camera directly to a Windows Me, 2000, or XP computer, or a Mac running OS version 8.6 or later, without the need for driver software). An option for PTP (PictBridge) USB is available through the Setup menu, for direct printing to PictBridge and USB Direct Print printers.
Downloading files to my Sony desktop running Windows XP (Pentium IV, 2.4 GHz),
I clocked it at 769 KBytes/second. This is a bit faster than USB v1.1 interfaces
can manage, but at the low end of the range for cameras having high-speed USB
v2.0 connections. In any case though, it's fast enough that you won't likely
need an external card reader. (Cameras with slow USB interfaces run as low as
300 KB/s, cameras with fast v1.1 interfaces run as high as 600 KB/s. Cameras
with USB v2.0 interfaces run as fast as several megabytes/second.)
Video Out
 The
EX-P600 has an A/V Out port for reviewing previously captured images and movies,
or running slide shows from the camera. It also shows all of the LCD menu screens,
as well as the preview display from the LCD viewfinder. (This last means that
you could use a TV monitor as a "remote viewfinder" if you wanted
to.) Through the Setup menu, you can set the Video Out signal to NTSC or PAL.
The
EX-P600 has an A/V Out port for reviewing previously captured images and movies,
or running slide shows from the camera. It also shows all of the LCD menu screens,
as well as the preview display from the LCD viewfinder. (This last means that
you could use a TV monitor as a "remote viewfinder" if you wanted
to.) Through the Setup menu, you can set the Video Out signal to NTSC or PAL.
Power
 The
EX-P600 is powered by a rechargeable NP-40 battery pack or an optional AC adapter
that can significantly extend battery life if you're doing a lot of downloads
on the computer or working in a studio environment. An additional CR-2025 lithium
battery powers the camera's internal clock and memory settings, ensuring information
isn't lost when the main battery loses charge. The table below shows the power
drain I measured in various operating modes for the EX-P600.
The
EX-P600 is powered by a rechargeable NP-40 battery pack or an optional AC adapter
that can significantly extend battery life if you're doing a lot of downloads
on the computer or working in a studio environment. An additional CR-2025 lithium
battery powers the camera's internal clock and memory settings, ensuring information
isn't lost when the main battery loses charge. The table below shows the power
drain I measured in various operating modes for the EX-P600.
| |
(@4 volts on the external power terminal) |
|
| Capture Mode, w/LCD | |
|
| Capture Mode, no LCD | |
|
| Half-pressed shutter w/LCD | |
|
| Half-pressed w/o LCD | |
|
| Memory Write (transient) | |
|
| Flash Recharge (transient) | |
|
| Image Playback | |
|
With a worst-case run time of 2.3 hours in capture mode with the LCD on, and over 3.3 hours with the LCD off, the P600 shows better than average battery life, particularly in light of its compact size and high resolution sensor. I still recommend purchasing a second battery right along with the camera, to keep on hand as a spare, but the P600 had better run times than I expected it to.
Included Software
The EX-P600 comes with a CD-ROM loaded with Casio's complement of interface software, as well as a full copy of the instruction manual. (Yes, the P600 is one of those benighted cameras that come with only a "quick guide" in printed form, the full manual only being available as a PDF file.) PhotoLoader (Windows and Macintosh compliant) lets you download and manage images, organizing them into albums. Photohands, which is a Windows-only application, provides minor image editing and retouching tools. DirectX, for Windows 98 and 2000, is a tool for reviewing movie files. The CD also includes a copy of Adobe Acrobat Reader, for viewing the camera and software manuals.
In the Box
In the US, the EX-P600 ships with the following items in the box::
Test Images and "Photo Gallery"
These days, I'm trying to provide more pictorial "Gallery" photos,
in addition to my standardized test shot images, as a way of giving more of
an idea of how the cameras I test perform with more "natural" looking
subjects. Accordingly, you can find my standard test shots from the EX-P600
on the standard Pictures Page, or a collection
of more pictorial subjects (this collection shot by assistants Chris Etchells
and Luke Smith) on the EX-P600's
Gallery page.
Test Results
| Free Photo Lessons | |
|
As with all Imaging Resource product tests, I encourage you to let your own eyes be the judge of how well the camera performed. Explore the images on the pictures page, to see how EX-P600's images compare to other cameras you may be considering.
Not sure which camera to buy? Let your eyes be the ultimate judge! Visit our Comparometer(tm) to compare images from the EX-P600 with those from other cameras you may be considering. The proof is in the pictures, so let your own eyes decide which you like best!
Conclusion
In recent years, Casio has concentrated more on the "consumer" market than on the needs of "enthusiast" shooters. With the EX-P600, Casio has decided to again focus on the needs of more advanced users, while still maintaining excellent ease of use with their extensive "BestShot" modes. Based on my use and testing of the P600, it appears that they've been thoroughly successful in that goal. Besides having good image quality and pretty much every control and adjustment a serious photographer could desire, the EX-P600 is one of the fastest digicams on the market, with blazing shutter lag numbers and very good continuous-mode cycle times as well. The P600's viability as a true enthusiast camera is also aided by the excellent Canon-built 4x zoom lens, which shows excellent resolving power and low chromatic aberration. With its combination of compact size, rich feature set, good image quality, fast shooting, and attractive, rugged case design, the Exilim EX-P600 very much brings Casio back into the "enthusiast" market. If you're looking for an excellent high-resolution camera with all the bells and whistles, you definitely need to add the P600 to your "short list" of serious candidates. Highly recommended, and a strong contender as a "Dave's Pick."
<<EX-P600 Sample Images | Additional Resources and Other Links>>
Reader Comments!
Questions, comments or controversy on this product? Click
this link to see what other Imaging Resource readers have had to say about
the Casio EXILIM PRO EX-P600, or add comments of your own!