Back
to Full Casio QV-2300UX Plus Review
Back
to Full Casio QV-2300UX Plus ReviewGo to Casio QV-2300UX Plus Data Sheet
Go to Casio QV-2300UX Plus Pictures Page
Up to Imaging Resource Cameras Page
Use your browser's "Back" button to return to the previous page, or the links at the top and bottom of this page to navigate to related information. If you have difficulty fitting the text on this page onto your printer output, simply resize your browser window to a narrower width and print again.
Remember us when it's time to buy!
Dave here: Have our reviews been helpful to you? (Is this article you're reading right now useful?) Preparing this level of information on as many products as we do is incredibly hard work, not to mention expensive. Things on the Internet may look like they're free, but they're not. (As a lot of big dot.com companies are finding out these days.) Somewhere, somebody has to pay to produce worthwhile content. YOU can help us though, by remembering us when it comes time to make your purchase. Would you consider coming back to our site and clicking-through to one of our advertisers to make your purchase? Every dollar you spend with one of our advertisers helps us directly (in affiliate fees) or indirectly (the advertiser will keep renewing their ad contract with us). To make it easy for you to support us, here's a URL you can visit, to see all our current advertisers, with links to click on that will register your visit to them as having come from our site. It's up to you where you buy, but Mike, Mike, Kim, Yazmin, Marti and I would be really grateful if you'd help us out by choosing one of our advertisers to purchase from.
Thank you for your support!
Dave Etchells, Founder & Publisher
Visit our "Buy Now" Page:
https://www.imaging-resource.com/buynow.htm
Back
to Full Casio QV-2300UX Plus Review
Go to Casio QV-2300UX Plus
Data Sheet
Go to Casio QV-2300UX Plus
Pictures Page
Up to Imaging Resource Cameras
Page
Casio QV-2300UX PlusA 2 megapixel swivel-lens design with lots of creative options and a 340-megabyte Microdrive included (US only) Review First Posted: 1/29/2001 |
|
 |
|
2.1 megapixel CCD delivers 1,600 x 1,200 pixel images |
|
|
3x optical zoom lens plus 2x/4x digital zoom | |
|
|
"Plus" units include 340MB Microdrive storage card (US only) | |
|
|
Huge range of "scene presets" for easy creative photography |
Executive Overview
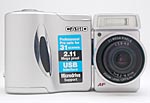
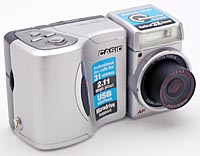
Don't let its compact size fool you, the Casio QV-2300UX Plus is packed with features — far more than most digicams of comparable size and cost. Measuring only 4.6 x 2.6 x 2.1 inches (118 x 67 x 54mm), the QV-2300UX Plus should fit easily into a purse or large coat pocket. It weighs only 8.6 ounces (245 grams) and comes with a soft case and wrist strap to make toting it around a cinch. Like many previous Casio digicams, the QV-2300UX Plus features a swiveling lens housing that rotates approximately 270 degrees up and down, allowing you to direct the camera lens forward, up, and back, as well as any angle in between. The lens is protected by a plastic lens cap, complete with an attachable cord, so you don't have to worry about leaving it behind. The main body of the camera has only a modest collection of control buttons, all of which are pretty easy to reach with the right thumb and forefinger.
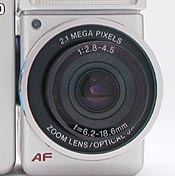
The 3x, 6.2-18.6mm zoom lens (equivalent to a 41-123mm zoom on a 35mm camera) is built into a rotating lens housing, which turns on a smoothly-operating swivel mechanism. The inner lip of the lens has filter threads for attaching filters, adapters, and lens conversion kits, via an (optional) adapter ring. Focus is controlled automatically or manually, with two fixed-focus modes for Macro and Infinity. In addition to the 3x Optical Zoom, the QV-2300UX Plus has a 4x Digital Zoom function, which effectively increases the camera's zoom range to 12x. The Digital Zoom menu has two enlargement factors, 2x and 4x, which are engaged by zooming past the maximum Optical Zoom setting or by accessing the Digital Zoom menu in the Record > Function mode, as described below. (Imaging Resource warns readers that digital zoom is a software function, that enlarges the central portion of the CCD only. As a result, it reduces overall image resolution, decreases quality, and raises noise levels. Digital zoom is not a substitute for optical zoom.)
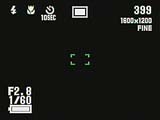
Due to its small size and rotating lens housing, the QV-2300UX Plus has no room for an optical viewfinder. Thus, the 1.8-inch LCD monitor remains active at all times, displaying a variety of camera specifications on-screen, including battery power, remaining image count, and exposure information. Additional information is displayed as different functions are activated.
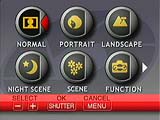
The QV-2300UX Plus offers nine Recording modes: Normal, Portrait, Landscape, Night Scene, Scene (Preset), Movie (Normal), Movie (Past), Panorama, and Interval. Portrait and Landscape modes adjust the aperture setting to achieve the best depth of field for each subject, while Night Scene uses slower shutter speeds to record darker surroundings. The Scene mode offers 31 presets (three of which are user-defined) for capturing specific subjects, such as fireworks, streams, still lifes, night scenes, and fast action. The two Movie modes allow you to record up to 16 seconds of moving images without sound. The Normal Movie mode begins recording images as soon as you press the shutter button; the Past Movie mode records the action to a memory buffer when initially activated, but records only the last 16 seconds of the movie as a permanent file when you press the shutter button. Panorama mode lets you take up to 10 sequential (side-by-side) images that can be stitched together as a full panorama on the computer, and Interval mode captures a series of images at set time intervals, much like time-lapse photography.
You can access the Recording mode menu by pressing the Menu button on top of the camera while in Record mode. This brings up a series of 10 icons, spread out over two screens. By pressing the Plus and Minus (+/-) buttons on top of the camera, you can scroll through the mode selections until you highlight the one you want. Press the shutter button (which doubles as an "OK" button) to engage the mode, and the camera automatically engages the appropriate camera settings for that particular shooting situation. Some selections, like the Scene mode, will bring up additional menus or options that must be considered before they return you to a shooting mode.
The Function mode is the tenth icon in the Recording menu. It provides access to an extensive selection of exposure adjustments, special effects, and basic camera settings, such as the Exposure mode (see below). You can scroll through these options, just like you did the first set of icons, using the +/- buttons on top of the camera. Once you highlight the function you want to change, press the Shutter button again, and it will bring up the menu for that function. In Exposure mode, those options include Program AE, Aperture Priority, Shutter Speed Priority, and Manual. Each option provides various levels of user control over shutter speed and aperture. For example, Program AE places the camera in charge of both shutter speed and aperture, while the Aperture Priority and Shutter Speed Priority modes allow the user to choose either the aperture or shutter speed (respectively), and the camera determines the appropriate corresponding settings. Manual exposure places the user in complete control of both shutter speed and aperture settings. Shutter speeds range from 1/2,000 to 60 seconds (Bulb mode), and aperture settings are f/2.8 and f/5.6.
Though it's a long process, the Casio's extensive on-screen Function menu seems to be the simplest answer to accessing the many features this camera has to offer. In some cases, you can bypass the Function menu and make some simple mode changes using the buttons on the camera. For example, Exposure modes, Metering, and White Balance can all be accessed using the Shortcut keys below the LCD monitor: Hold down the Shift/Info button on the far left and scroll through settings with the next three buttons. Their icons will appear at the bottom of the LCD to help you determine what function each button controls. You scroll through their menu options by continuing to press the button until you reach the options you want. Exposure mode options are the same as those listed above for the Function menu. Metering modes include Multi, Center, and Spot. White Balance options include Auto, Daylight, Shade, Tungsten, Fluorescent, and Manual settings. (The Manual setting allows the user to determine the white balance value by taking a reading from a white card held in front of the lens.)
The same three buttons have dedicated functions if you don't hold down the Shift/Info button. The second from the left is the Flash button. It has four operating modes: Automatic, Off (forced), On (suppressed), and Red-Eye Reduction. (Flash intensity can be adjusted through the Function menu, with options of High, Normal, or Weak flash intensities.) The Focus button has three options: Macro, Infinity, and Manual. The last button, the Self-Timer, can be set to a two- or 10-second countdown. It's activated by fully depressing the Shutter button. Exposure compensation is another function controlled externally. Settings are adjusted with the +/- buttons on top of the camera. Options range from -2 to +2 exposure equivalents (EV) in one-third EV increments.
Among the Function menu items, there are several special effects that can be used to enhance your images. The Filter option works similar to conventional lens filters, allowing you to add Red, Green, Blue, Yellow, Pink, or Purple tones to your images, or you can change them to B&W (black-and-white) or Sepia. Specific colors can be emphasized through the Enhance feature, which boosts the saturation of Reds, Greens, Blues, or Flesh Tones. In addition, overall Color Saturation can be set to High, Normal, or Low, as can image Contrast and Sharpness.
The QV-2300UX Plus stores images on Type I or II CompactFlash cards, and (in the "Plus" package only) comes complete with a 340MB IBM Microdrive (a definite perk!). Two image resolutions are available: 1,600 x 1,200 and 800 x 600 pixels; with three JPEG compression levels: Fine, Normal, and Economy. Through the Playback menu, files and folders can be Protected, Deleted, and set up for printing on DPOF (Digital Print Order Format) devices. There's also an automated Slide Show playback, a Playback Zoom and a nine-image index display, accessed by the Macro/Infinity/MF button in Playback mode. The QV-2300UX Plus can be set up to create an HTML file with each image, with four Card Browser options available. A function of the Playback Set-Up menu, HTML files (if selected) are automatically written to the memory card whenever you turn off the camera. Two of the Card Browser options use high-level Javascript compatible with Microsoft Internet Explorer 4.01 or later and Netscape Communicator 4.5 or later.
The camera features serial and USB output jacks for connecting to a computer, and a USB cable is provided. The software CD includes a USB driver, software manuals, Photo Loader, Panorama Editor, Internet Explorer, QuickTime, PhotoGenetics (trial version), Acrobat Reader, ActiveShare, MediaCenter, and Zing. (Only Photo Loader, Internet Explorer, QuickTime, and PhotoGenetics are compatible with both Windows and Macintosh formats, the remaining applications are Windows-only). The included software provides downloading utilities, as well as minor image correction and editing tools, a panorama "stitching" solution, and web utilities for ordering prints and creating online photo albums.
An NTSC video cable is provided for connection to television sets in the U.S. and Japan, while European models ship with a PAL video cable. The video out setting is adjustable through the camera's Set Up menu. Once the camera is connected to a television, images can be composed and reviewed through the larger television screen -- the perfect venue for a spur-of-the-moment family slide show. For power, the QV-2300UX Plus uses four AA alkaline, lithium, or NiMH batteries, with a set of alkaline batteries accompanying the camera. An AC adapter and a battery charger are available as optional accessories, which we highly recommend purchasing.
The QV-2300UX Plus provides an excellent level of exposure control, with full manual exposure and extensive color adjustments. We also enjoyed the rotating lens and bountiful Recording mode options. This camera has enough manual controls to interest more advanced users, with automatic settings and a wide range of preset Scene modes that should set most novices at ease. It's lightweight and portable, and the inclusion of an IBM Microdrive can't be beat.
Design
The design of the Casio QV-2300UX Plus is similar to earlier models - QV-8000SX and QV-7000SX (now discontinued) - with its swiveling lens and compact body style. The lens portion of the camera actually rotates up and down about 270 degrees, with the limits set at the straight down and straight back positions (the latter is useful for self- or family portraits taken with the self-timer). Reasonably lightweight, the QV-2300UX Plus is only 8.6 ounces (245g) and measures 4.6 x 2.6 x 2.1 inches (118 x 67 x 54mm). While it should fit easily into large shirt or coat pockets, it also comes equipped with a wrist strap and soft case for easy toting.

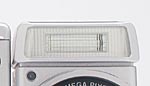
The front of the camera includes the lens, flash, and metering sensors. As mentioned earlier, the lens housing rotates approximately 270 degrees, allowing you to photograph from just about any angle. The flash is just above the lens, so it also rotates along with the lens. A plastic lens cap is provided for protection, and is accompanied by an attachable cord to prevent it from being lost. A large hand grip surrounds the battery chamber, which makes up much of the right portion of the camera body. A silver and black rubber finger grip curves along the front edge of the grip -- providing not only a firm hold, but it also serving as an attractive design element.


The right side of the camera also includes an eyelet for attaching the wrist strap, and a memory card slot covered by a hinged plastic door. Pressing the small button inside the compartment door releases the Type I or II CompactFlash card from the slot.

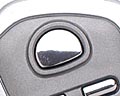
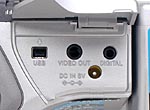
The camera's top panel layout is somewhat different from conventional digicams. The far right side accommodates the Shutter button, scroll buttons (marked + and -), and the Menu button. In the center is the Input/Output compartment, which is covered by a hinged, plastic cover. We're accustomed to seeing a small status display panel on top of most digicams, and the input/output compartment located elsewhere. However, given the relatively small amount of real estate available on the QV-2300UX Plus, and the lack of an optical viewfinder (which would create the need for a status display panel), the compartment's placement makes sense, as it provides easy access to the USB, Video Out, Digital, and DC-In jacks. Once the hinged, plastic cover is in its opened position, the door locks into place, staying out of the way of incoming cables.

On the back panel are the camera's remaining exposure controls, as well as the power switch, Record/Play switch, Zoom Slider, status LED, and LCD monitor. Because the QV-2300UX Plus does not feature an optical viewfinder, the LCD monitor remains active at all times. This is bad for power consumption, but necessary, because the swiveling lens barrel leaves no room for logical placement of an optical viewfinder. A range of control buttons along the bottom of the LCD monitor controls various camera and exposure settings.

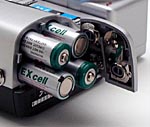
A plastic tripod mount and battery compartment door are located on the camera's bottom panel. The tight space forces the two very close together, making quick battery changes impossible while shooting with a tripod. The battery compartment door is a little tricky to operate at times. You have to push and hold down a very small button before you can slide the door out and open. This operation requires two hands and a strong fingernail (or thin coin) to work. While it isn't a serious problem, it can be a little awkward, especially when trying to change out battery sets in a hurry.
 Viewfinder/Monitor
The QV-2300UX Plus features a 1.8-inch, low-glare, color LCD monitor, with approximately 122,100 pixels. As previously noted, the swiveling lens and compact body size leave no room for an optical viewfinder, so Casio chose to eliminate it altogether. The LCD monitor is activated as soon as the camera is switched on, displaying various icons on-screen to report camera settings, as well as autofocus/autoexposure target brackets to aid in image composition. The information display reports the number of available images, resolution size, quality setting, battery capacity, and recording mode. Other exposure variables, such as flash, digital zoom, and self-timer also appear on the information display, once the settings have been enabled.
When the camera is first turned on, the date and time are displayed for a few seconds in the lower right corner of the LCD monitor. Pressing the Shift/Info button, turns off the normal information display and brings up a Shortcut menu, allowing you to change the exposure, metering, or white balance, using the three control buttons to the right of the Shift/Info button. (Shortcut menu options can be reassigned to control other exposure variables as well.) When the Shutter button is depressed halfway, the current shutter speed and aperture settings are displayed in the lower left corner of the LCD monitor, disappearing once the shutter is fully triggered. An on-screen grid, activated through the Record > Function menu, divides the image into thirds horizontally and vertically, to help in composing shots.
In Playback mode, the LCD monitor also displays pertinent information, including the size and quality of the image file, the remaining battery power, the image number, and the current date and time. By pressing the Shift/Info button, the monitor displays exposure information for the currently selected image, including record mode, exposure, metering, white balance, and flash modes, plus aperture, and shutter speed. A Playback Zoom function (controlled by the Zoom slider) enlarges captured images to 2x or 4x size for closer inspection, and once enlarged, you can scroll around to different parts of the image using the +/- buttons (for left and right), and the Flash and Focus buttons (up and down). A nine-image Index mode allows you to quickly scan through all of the captured images on the card, using the same buttons you use to scroll through the images.
 Optics
The built-in, 3x, 6.2-18.6mm zoom lens is equivalent to a 41-123mm lens on a 35mm camera. Much like the preceding QV-7000SX and QV-8000SX models, the QV-2300UX Plus' lens housing features a swivel design that rotates the lens approximately 270 degrees up and down. This greatly simplifies self-portraits, as the lens can turn completely around to face the back panel. It can also be pointed straight up or down, or at any angle within its rotating range. A small, plastic lens cap protects the lens, and a small, attachable lens cord prevents it from being separated from the camera. Focus ranges from 3.9 inches (10cm) to infinity in Infinity mode, and from 0.4 to 19.7 inches (1.0 to 50cm) in Macro mode. The aperture can be adjusted manually or automatically, with available settings of f/2.8 and f/5.6. A series of filter threads on the inside lip of the lens hood accommodate optional Casio lens conversion kits, which increase the camera's wide angle and telephoto capabilities. (Note that an optional adapter ring is needed to attach auxiliary lenses to the QV-2300, due to its telescoping lens design that extends out beyond the body threads.)
Four focus modes are available -- Auto, Macro, Infinity, and Manual -- all accessible by pressing the Macro/Infinity/Manual Focus button on the bottom of the back panel. The QV-2300UX Plus' Auto focus mode uses a contrast-detection method to determine focus, basing its readings on the very center of the image (which is marked on the LCD display by central focus brackets). When shooting in Auto focus mode, the small LED on the back panel lights green as soon as the subject is in focus. If the LED turns red, the camera cannot judge the focus distance of the subject. (Casio notes in the instruction manual that when the camera cannot judge focus on a subject, it automatically sets the focus to approximately 4.9 feet [1.5m] in well-lit situations, and to about 6.6 feet [2.0m] when the flash is enabled.) Macro Focus mode simply switches the focus range to the Macro setting, disabling the Optical Zoom. Infinity Focus mode sets the focus distance to infinity, which is a quick and easy way to photograph scenery and distant subjects. The Manual Focus mode allows you to adjust the focus by pressing the +/- buttons on top of the camera.
We would have preferred to see a distance scale in the Manual Focus mode, as it can be a little difficult to judge when a subject is in focus. However, we had the greatest success by zooming out to the furthest telephoto setting, setting the focus, then zooming back in to the desired focal length. (It is important to note that you can only adjust the focus when the "MF" is flashing in the LCD monitor. After the "MF" stops flashing, the +/- buttons reset to adjust exposure compensation. To reactivate the flashing "MF," press the Focus button once and it will come back on.) You can lock the focus on a subject by framing it within the autofocus brackets in the center of the LCD, pressing the shutter button halfway, then repositioning the camera to the original composition while keeping the shutter button halfway depressed. When you depress the shutter button completely, focus and exposure will be locked on the original object.
The Digital Zoom function is set through the Record > Functions menu. It has four options: Off, Auto, 2x, or 4x zoom. Once enabled, the digital zoom picks up after the optical zoom reaches the end of its telephoto range. At 4x zoom, a frame appears on the LCD display to show what part of the image will actually be recorded. As a general rule, digital zoom results in degraded image quality, because it works by enlarging the center portion of the CCD image, rather than increasing the magnification of the lens. The end result is increased noise levels and reduced resolution (images recorded at 4x zoom are 800 x 600 pixel resolution). Digital Zoom is completely disabled when the camera is set to Scene mode, and only 2x digital zoom is available in Panorama and Movie modes.
Exposure
The QV-2300UX Plus offers a variety of Recording modes, including a wide range of preset "Scene" modes for shooting in special situations. A switch on the camera's back panel controls whether the camera is in Record or Playback mode, while depressing the Menu button on top of the camera brings up a selection of nine icons on the camera's LCD that represent difference Record modes. These include Portrait, Landscape, Night Scene, and Scene modes, plus two Movie modes, a Panorama mode, and Interval (or time-lapse) recording. Portrait mode uses a larger lens aperture to decrease the depth of field and blur the background. Landscape mode uses a smaller lens aperture to keep both the background and foreground in sharp focus. Night Scene mode uses a longer exposure to allow more ambient light into the camera. (Because of the slower shutter speed, a tripod is recommended to prevent any blur from camera movement.) Night Scene can be used in combination with the camera's flash to produce a slow-synch effect with nighttime portraits.
The Scene mode offers 31 presets for shooting in specific situations. A library of 28 scenes are available in menu form, allowing you to choose a preset for any type of subject you want to photograph. Some of the choices include: Landscapes with People, Floral Close Up, Bright Beach, Fireworks, Flowing Water, Stopped Action, Food, and Text. Scenes 29 through 31 are available for you to register your own preset exposure parameters. In other words, you can select your own picture as a Scene preset, and record all of the available parameters for that particular photo: Focus, aperture, shutter speed, exposure compensation, ISO, filter, exposure mode, metering mode, white balance, enhancement, flash intensity, sharpness, saturation, and contrast. To register a new preset, you must select the Scene mode, scroll through the options until you reach one of the three User Setup Scenes, and press the Self-Timer/Trash button below the LCD monitor. The camera will pull up a menu of images you've already recorded on the memory card. Scroll through the images until you've highlighted the image you want to register as a User Setup. The camera will store all of the exposure information from that image and register it as a preset Scene. (Note: the image you choose as a template for the User Setup will not be imported into the Scene menu, so you will have to write down or remember the photographic information for that particular Scene.) Once a new user-defined Scene has been recorded, it cannot be deleted. It has to be overwritten by repeating the registration process.
The QV-2300UX Plus offers four Exposure modes, each accessed through the Record menu (Record > Function > Exposure Mode). Choices include: Program AE, Aperture Priority, Shutter Speed Priority, and Manual modes. In Program AE, the camera controls both the shutter speed and aperture settings, while you control the remaining exposure variables. Aperture Priority allows you to set the lens aperture to f/2.8 or f/5.6, while the camera determines the best shutter speed. Shutter Speed Priority lets you set the shutter speed from 1/2,000 to 60 seconds, while the camera chooses the best aperture setting. (While the Bulb setting keeps the shutter open as long as you hold down the shutter button, the maximum exposure time is still limited to 60 seconds). In both Aperture Priority and Shutter Speed Priority exposure modes, the designated variable is set by holding down the Shift/Info button and using the +/- buttons to scroll through the settings displayed in the lower left corner of the LCD monitor. Manual mode places you in control of both the shutter speed and aperture settings. In Manual mode, you use only the +/- buttons set the shutter speed, and the Shift/Info button, plus the +/- buttons, to set the aperture.
Exposure Compensation is available in Program AE, Shutter Speed Priority, and Aperture Priority modes. It is adjustable from -2 to +2 exposure equivalents (EV), in one-third increments, by pressing the +/- buttons. The Self-Timer mode is activated by pressing the Self-Timer/Erase button on the camera's back panel -- one time for a 10-second countdown and twice for a two-second count. Once the Self-Timer is activated, fully depressing the shutter button triggers the countdown, and the remaining seconds flash on the LCD monitor until the shutter is released. The QV-2300UX Plus also features three Metering options: Multi, Center, and Spot. These can be set using the Record menu (Record > Function > Metering) or by holding down the Shift/Info button, and scrolling through the choices with the Macro/Infinity/Manual Focus button. Multi metering divides the image area into five segments, then reads the light level in each segment, averages the readings, and determines the overall exposure. The Center mode takes its readings from a large area in the center of the scene, while the Spot meter determines the exposure by reading a very small area at the center of the image. Spot metering is good for photographing high-contrast or backlit subjects, where the camera may misjudge the exposure if it averages light readings from the entire scene. It allows you to select the portion of the image that you want metered, by centering it in the LCD monitor. ISO sensitivity is also adjustable through the Function menu, with equivalent settings of 80, 160, and 320 ISO. The ISO setting automatically reverts to 80 when shooting with the flash and in Shutter Priority mode.
White Balance (WB) is available in six operating modes -- Auto, Daylight, Shade, Tungsten, Fluorescent, and Manual -- to match a variety of light sources. It can be adjusted through the Record menu (Record > Function > White Balance), or by using one of the camera's three Shortcut Features: Hold down the Shift/Info button and scroll through WB options using the Self-Timer/Erase button. When you select the Manual option, an "Adjust Shutter" prompt comes up on the LCD screen. Make your manual adjustment by placing a white card in front of the lens, holding down the Shift/Info button, and depressing the shutter button to record the white value. The camera retains the last manual white balance adjustment in its memory and recalls it the next time the Manual white balance mode is selected. The Casio instruction manual recommends shooting with Daylight or Manual white balance when working in Night Scene mode, for more accurate color balance.
A Filter function (also accessible through the Record > Function menu), allows you to choose among eight special effects filters: B&W, Sepia, Red, Green, Blue, Yellow, Pink, and Purple. The B&W filter records images in black and white. The Sepia filter records images in a monochrome sepia color that resembles old-time photographs. The color filters produce an effect similar to placing a piece of colored cellophane in front of the lens. If you'd rather emphasize a specific color in the image, the Enhance function allows you to boost Red, Green, Blue, or Flesh Tone. Color Saturation and Contrast functions are adjustable by selecting either High, Normal, or Low options, while the Sharpness function offers High, Normal, and Soft options.
 Flash
Flash
The QV-2300UX Plus built-in flash offers four operating modes (controlled by the Flash button on the back panel): Auto Flash, Flash Off, Flash On, and Red-Eye Reduction. Auto Flash lets the camera judge when to fire the flash, based on existing light levels and exposure conditions. The Flash Off setting disables the flash no matter what the surrounding conditions, Flash On sets the flash to fire with every exposure, and Red-Eye Reduction fires a small pre-flash before firing the full flash, to constrict the subject's pupils and prevent the dreaded Red-Eye Effect. Red-Eye Reduction mode is also automatic, meaning that the flash will not fire if the subject is well lit.
The small LED lamp on the camera's back panel blinks amber when the flash unit is charging, and lights green when it's ready to shoot. The instruction manual notes that the flash could take up to 10 seconds to charge, depending on the type of batteries being used and the operating temperature. If the LED is flashing red, then the camera cannot charge the flash unit, either due to low battery power or a malfunction. While there is no Slow Synchro flash setting, you can get the same effect by choosing the Flash On option in the Night Scene mode. Three Flash Intensity levels are available through the Function menu: Strong, Normal, or Weak. Casio estimates the QV-2300UX Plus' flash power to cover from 6.6 to 16 feet (0.5 to 2m).
Casio rates the QV-2300's flash as being effective at a range of 1.6 to 6.5 feet (0.5 to 2.0m). This agreed with our own testing of the camera, but represents a more limited range than we're accustomed to seeing on cameras competing in this price/capability range. The built-in flash will be useful for taking fairly close shots of individuals or couples indoors, but forget about larger groups. (We really can't understand why Casio chose such an underpowered flash unit for such an otherwise capable camera.)
Movie Mode
The QV-2300UX Plus also provides two Movie recording modes, both without sound. Images are saved as AVI files, with a fixed 320 x 240 pixel resolution, and a maximum movie length of 16 seconds. Normal mode begins recording as soon as you press the shutter button. Recording stops when the shutter button is pressed a second time. Movie (Past) mode begins recording images to a memory buffer as soon as you enter the mode. Once the shutter button is pressed, the camera records the last 16 seconds of whatever is in the buffer to the memory card. All exposure modes and settings are available in Movie mode, with the exception of Flash. Digital Zoom is only available at the 2x setting.
Panorama Mode
Also accessible through the Record menu, Panorama mode records up to 10 consecutive images to be "stitched" together later as single panoramic image. After the first image is recorded, a small portion of the image remains on the left side of the LCD screen, helping you line up the next shot. Exposure compensation and white balance are set with the first shot and maintained throughout the series. Panorama Editor software is supplied for stitching together the images on a computer. All exposure modes and camera settings are available in Panorama mode, except flash. Digital Zoom is only available at the 2x setting.
Interval Mode
The Interval shooting mode allows you to record a series of images at specified time intervals. Accessed through the Record menu, Interval mode provides three types of Interval shooting: Interval, Timer, and Interval + Timer. Standard Interval records multiple exposures at fixed intervals, starting as soon as the shutter button is fully pressed. When selected, the Interval menu brings up three option fields: The Shots field allows you to set the number of interval shots to be taken, from two to "Max Shots," which records images until the memory card is full. The Interval field specifies the time between shots, from one to 60 minutes, adjustable in one-minute increments. Start Time allows you to choose the time (within 24 hours) when you want the shooting to begin. All exposure modes and settings are available in Interval mode, except for Bulb. Additionally, if the shutter speed is set to 20 seconds or slower, and the time interval is set to one minute, the camera may not be able to record at true one-minute intervals because of the processing time required.
Shutter Lag/Cycle Times
When you press the shutter release on a digital camera, there's usually a lag time before the shutter actually fires. This time allows the autofocus and autoexposure mechanisms time to do their work, and can amount to a fairly long delay in some situations. Since this number is almost never reported on by the manufacturer or other reviewers, and can significantly affect the picture taking experience, Imaging Resource now routinely measures it using a proprietary testing system.
|
|
||
|
|
|
|
| Power On -> First shot |
|
A bit slow, due to the telescoping lens.
|
| Shutdown |
|
Not too bad, given the telescoping lens. The longer time is that required for the Microdrive to spin down before you can remove it.
|
| Play to Record, first shot |
|
A little slow.
|
| Record to play (max/min res) |
|
Pretty fast
|
| Shutter lag, full autofocus |
|
A bit slower than average. |
| Shutter lag, manual focus |
|
Faster than average. |
| Shutter lag, prefocus |
|
A bit faster than average. (Lag time with shutter half-pressed and held prior to the exposure.) |
| Cycle Time, autofocus (max/min res) |
|
A bit faster than average. (Second set of numbers is after buffer fill, about 2 shots.) |
| Cycle Time, manual focus (max/min res) |
|
A bit faster than average. (Second set of numbers is after buffer fill, about 2 shots.)
|
In our testing, the QV-2300 started up and shut down a bit slower than average, due to the need to extend and retract its telescoping lens assembly. Shot to shot though, it was a bit faster than average, especially for the first two shots in a series. Shutter lag is a bit slower than average for full autofocus, at 1.0 seconds, but quite a bit faster than average in manual focus and prefocus operation.
Operation and User Interface
The Casio QV-2300UX Plus interface takes some getting used to, as the controls are arranged very differently than other digicams we've tested. For example, the Menu button is located on top of the camera, and instead of four-way arrow buttons on the back panel, the Casio has +/- buttons that are used for scrolling. The camera lacks an optical viewfinder, so it relies heavily on its LCD monitor. The majority of the camera settings are chosen through the LCD menu system, though there are a few external controls and shortcuts that allow you to make basic exposure adjustments without going through the on-screen menu. We would have liked to have seen a mode dial of some sort on the camera, since the QV-2300UX Plus offers such a large variety of recording and exposure modes. Instead, a small switch on the back panel controls the camera's operating mode, placing it in either Record or Playback. Additional Recording modes must be changed through the Record menu, while exposure settings and other controls are handled by the Function menu. Once we were accustomed to the unique control layout though, we had relatively little trouble working with the camera. The LCD menus are similar to other Casio designs and feature a friendly user interface that's uncomplicated and easy to navigate. The camera's button controls are arranged in such a way as to allow one-handed operation, although many of the camera settings require two hands to adjust. Overall, we found the QV-2300UX Plus user interface to be relatively straightforward.
Control Enumeration
Shutter Button: Located on top of the camera, this large, silver button sets focus and exposure (in Program AE mode) when halfway pressed, and fires the shutter when fully pressed. If the Self-Timer mode is enabled, a full press of the shutter button triggers the timer countdown. Likewise, if Interval or Movie mode are enabled, a full press of the shutter button begins recording. When adjusting menu settings, the shutter button acts as the "OK" button to confirm menu selections.
![]()
+/- (Scroll) Buttons: Just behind the shutter button are the + and - buttons, which control a variety of settings.

Menu Button: Also located on the top panel, the Menu button pulls up the settings menus in both Record and Playback modes. It also cancels the menu display.
![]()
Power Switch: On top of the back panel, this sliding switch turns the camera on and off.
![]()
Zoom Slider Switch: To the right of the power switch, the Zoom Slider switch controls Optical and Digital Zoom (when enabled) in Record mode. In Playback mode, it zooms in and out of captured images.

Mode Switch: Positioned below the Zoom Slider switch, the Mode switch places the camera in Record or Playback modes. The Record mode enables the camera to capture images with a variety of Recording, Exposure, and Function options available. Playback mode allows the user to scroll through the captured images on the memory card, as well as delete, protect, and set up images for printing.

Shift/Info Button: The first button from the left, under the LCD monitor, this button serves multiple functions.

Flash/Folder Button: To the right of the Shift/Info button, this button controls the Flash (in Record mode), cycling between Automatic, Off, On, and Red-Eye Reduction settings. When pressed with the Shift/Info button, it changes the Exposure mode setting (unless the Shortcut is reassigned through the Record menu). In Playback mode, it selects the image folder to be played back.

Focus/Index Display Button: Directly to the right of the Flash/Folder button, this button controls the camera's Focus function in Record mode. Pressing it cycles through Auto, Macro, Infinity, and Manual focus modes. If pressed while holding down the Shift/Info button, it acts as a Shortcut button, enabling you to select the camera's Metering mode -- Multi, Center, and Spot -- without going through the Function menu (unless the shortcut is reassigned through the Record menu). In Playback mode, this button brings up the nine-image index display.

Self-Timer/Erase Button: The far right button under the LCD monitor, this control activates the Self-Timer when the camera is in Record mode. Pressing the button once activates the 10-second timer, twice activates the two-second timer, and a third time turns the timer off. If you hold down the Shift/Info button while using it, this button also serves as a Shortcut to adjust White Balance settings (unless the shortcut is reassigned through the Record menu). The button cycles through Auto, Daylight, Shade, Tungsten, Fluorescent, or Manual WB modes.
In Playback mode, pressing this button allows you to delete the currently displayed image. The Delete function can also be accessed through the Playback menu. When selected, the Delete function offers three options: Select (one image), Folder (a group of images), and All. Once the images or folders have been selected, the Self-Timer/Erase button initiates the deletion process (an option to cancel immediately follows).

Battery Compartment Release Button: Located on the battery compartment door on the bottom of the camera, this button unlocks the door so that it can slide out and open to access the compartment.
Memory Card Release Button: Hidden inside the memory card compartment, next to the card slot, this button releases the memory card so you can pull it out.
Camera Modes and Menus
Record Mode: Accessed by sliding the Mode Switch to the Record position, this mode allows you to capture images with the QV-2300UX. Recording modes are as follows:
 Normal: Sets up the camera for recording single, still images.
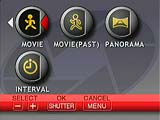 Movie (Normal): Records moving images (without sound) as soon as the shutter button is pressed, for up to 16 seconds. A second press of the shutter button ends the recording any time before the 16-second shut-off.
Function Menu: In addition to the Recording modes listed above, there is a full range of camera settings controlled through the Function menu. You can access these settings by selecting the Function icon in the Record mode.
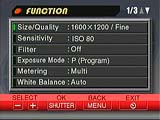 Size/Quality: Sets the image resolution and compression level. Resolution options are 1,600 x 1,200 and 800 x 600 pixels, with Fine, Normal, and Economy compression settings.
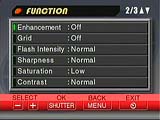 Enhancement: Activates the color enhancement feature, which emphasizes a particular color in the image. Options include Off, Red, Green, Blue, and Flesh Tones.
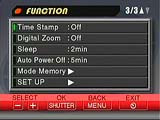 Time Stamp: Turns the Time Stamp function on or off. Time Stamp records the date, time, or both over the lower right corner of the image.
Playback Mode: Allows the user to review captured images on the memory card. Images can be protected, erased, enlarged for viewing, set up for printing on DPOF devices, or viewed in a slide show. Pressing the menu button pulls up the Playback menu. The following controls are provided:.
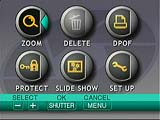 Zoom: Activates the playback zoom function, which enlarges images up to 4x for close inspection of details.
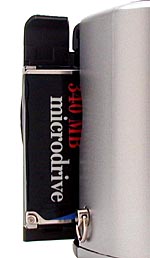 Image Storage and Interface
The QV-2300UX Plus uses CompactFlash for image storage, accepting both Type
I and Type II card formats. We were extremely pleased that Casio provided an
IBM 340MB Microdrive with the camera, which gives you a huge amount of storage
capacity right out of the box. Standard CompactFlash memory cards are sold separately
in sizes up to 192MB. An LED on the camera's back panel flashes green when an
image is being recorded to the card. A flashing red light indicates that there
is a problem with the card, and a solid red light indicates that the memory
card is full. (Note: a memory card should never be removed from the camera while
in use.)
The 2.1-megapixel digicam can be programmed to create HTML files along with
the JPEG files -- providing four card browser options from which to choose (compatible
with Microsoft Internet Explorer 4.01 or later and Netscape Communicator 4.5
or later). QuickTime player, which is included on the accompanying software
CD, is required to play back movie images. The four different browser formats
allow you to choose how much information is recorded with each image (a detailed
chart explaining all of the settings is provided in the instruction manual).
Perfect for detail-oriented consumers, the card browser is a great way to check
exposure settings for each picture.
The QV-2300UX Plus organizes images into storage folders, labeled by number
and date, creating up to 100 folders on a memory card. Each folder can hold
up to 250 images, which are numbered from 0001 to 9900. The camera manual includes
a detailed layout of the folder and file structure, showing exactly how information
is encoded on the CompactFlash card.
You can protect individual images on the memory card by selecting the Protect
mode in the camera's Playback menu. Write-b images prevents accidental deletion
of images (except from card formatting). If you want to erase images, the Delete
mode gives you the option of deleting individual images, a folder, or all images
that aren't protected. You can also press the Self-Timer/Trash button on the
camera's back panel to delete individual images as you bring them up on the
LCD monitor.
Images recorded with the QV-2300UX Plus are captured at either 1,600 x 1,200-
or 800 x 600-pixel resolution. JPEG compression levels are Fine, Normal, and
Economy. Movies are saved in the AVI format. A USB cable comes with the camera,
for quick connection to a PC or Mac, but the QV-2300UX Plus also features a
standard serial output jack for RS-232 connection to a PC. A software CD is
also included, containing a range of image downloading and editing software.
A computer problem prevented us from testing the QV-2300's download speed, but
the USB connection should be pretty fast. (Given the huge capacity of the Microdrive
though, users may well want to buy an external card reader anyway: Card readers
are almost always faster than even USB-equipped cameras, and when you're transferring
many tens of megabytes of data, the speed difference can be noticeable.)
The following tables show card capacities and approximate JPEG compression ratios
for the IBM 340MB Microdrive provided with the camera, as well as a standard,
8MB CompactFlash card.
|
Resolution/Quality (340 MB Microdrive) |
|
|
|
|
| High Resolution | Images | 401 | 562 | 943 |
| Approx. Compression |
7:1 | 10:1 | 16:1 | |
| Standard Resolution | Images | 1587 | 2054 | 2494 |
| Approx. Compression |
4:1 | 9:1 | 11:1 | |
|
Resolution/Quality (8 MB CompactFlash card) |
|
|
|
|
| High Resolution | Images | 8 | 11 | 19 |
| Approx. Compression |
6:1 | 8:1 | 14:1 | |
| Standard Resolution | Images | 33 | 43 | 53 |
| Approx. Compression |
6:1 | 8:1 | 10:1 | |
 Video Out
US and Japanese models of the Casio QV-2300UX Plus come equipped with an NTSC cable for viewing images on a television set. European models are equipped for PAL timing. You can select NTSC or PAL video signal compatibility through the Setup mode in the camera's Playback menu. Once connected to a television, the camera uses the television screen as an enlarged LCD monitor, allowing you to compose and review movies and images.
 Power
Power
The QV-2300UX Plus is powered by four AA batteries. A set of alkaline batteries comes with the camera, but we recommend purchasing a couple sets of rechargeable lithium ion or NiMH batteries and a battery charger. Casio estimates that four alkaline batteries will provide up to 80 minutes of recording time, while lithium batteries should provide approximately 200 minutes (and you don't throw them out when you're done!). Casio sells an optional Sunpak PicturePlus battery charger with four AA NiMH batteries for $25. A combination AC Adapter and Rapid Charger with batteries sells for about $60. AC adapters come in handy for tasks like reviewing or downloading images, and shooting in the Interval photography mode.
The QV-2300UX Plus is quite reliant on its LCD display (due to the lack of an optical viewfinder), but it does offer two power-saving options. A Sleep mode shuts off the LCD display after 30 seconds, one minute, or two minutes of inactivity. An Auto Power Off feature turns the camera of completely after two or five minutes of inactivity. (Shutoff times for Sleep and Auto Power Off are controlled through the Function menu.) The current battery capacity is displayed on the LCD monitor as a battery symbol, with shading to indicate the amount of power left.
|
|
|
| Capture Mode, w/LCD |
|
| Half-pressed shutter w/LCD |
|
| Memory Write (transient) |
|
| Flash Recharge (transient) |
(Same as Memory Write) |
| Image Playback |
|
Although the QV-2300 lacks an optical viewfinder, we found it's power consumption surprisingly low. With capture-mode current drain measured at 480 mA, a high-capacity set of NiMH AA cells should be able to power the camera for as much as two hours of continuous operation. (As always, we strongly recommend buying high-quality NiMH rechargeable batteries (at least two sets) and a good charger. Don't even think about alkaline AA cells!)
Included Software/Hardware
The software CD provided with the camera offers a full range of imaging software, as well as a USB driver and printable software manuals. Programs include Photo Loader, Panorama Editor, Internet Explorer, QuickTime, PhotoGenetics (trial version), Acrobat Reader, ActiveShare, MediaCenter, and Zing. Only Photo Loader, Internet Explorer, QuickTime, and PhotoGenetics are accessible to both Windows and Macintosh operating systems (Windows Version 2000/98/NT4.0 and Mac OS 8.5 or higher). The remaining applications are for Windows only. Photo Loader is the utility for downloading images from the camera to a computer. Panorama Editor allows you to "stitch" together panorama images taken with the camera, and provides a playback utility for viewing completed panoramas.
Internet Explorer is provided to facilitate reading the optional HTML files created with images and storing images in a Library. A copy of QuickTime enables movie playback, but also plays panorama and still images. Acrobat Reader is provided to view the software manuals, while ActiveShare creates digital photo albums, which are set up for easy Web sharing. MediaCenter and Zing both provide Web image-sharing utilities. Zing also connects to Casio's Zing website, so you can order custom prints of your digital images. Finally, the 30-day trial version of PhotoGenetics provides a well-rounded offering of image editing and correction tools, as well as creative filters and templates. We noticed that when we inserted the CD into the PC, that a trial copy of PictureWorks Web Publisher was also included, which enables you to create photo-based Web pages.
Also packaged with the QV-2300UX Plus are four alkaline batteries, a video cable, a lens cap with strap, camera and software manuals, an accessories catalog, one IBM 340MB Microdrive, soft carrying case, software CD-ROM, USB cable, wrist strap, and Zing card (redeemable for printing discounts).
Test Results
In keeping with our standard policy, our comments here are rather condensed,
summarizing our key findings. For a full commentary on each of the test images,
see the Casio QV-2300UX Plus' "pictures" page.
As with all Imaging Resource camera tests, we encourage you to let your own eyes
be the judge of how well the devices performed. Explore the images on the pictures
page, to see how well the Casio QV-2300UX Plus performed, and how its images
compare to other cameras you may be considering buying.
The QV-2300UX Plus did a very nice job with color balance, handling even our difficult indoor portrait's incandescent lighting with ease. We used the manual white balance setting the majority of the time, as it did the most accurate job. The QV-2300UX Plus was tricked slightly by the overwhelming blue in our Musicians portrait, but still managed to get a good color balance in the other shots. The QV-2300UX Plus reproduced the large color blocks in the Davebox target very well, though some colors appeared just slightly undersaturated. Tonal handling was also good, as the tonal variations of the Q60 target were visible up to the "B" range. The QV-2300UX Plus' saturation adjustments did a nice job of controlling color intensity, which we found useful with the Davebox shot. Overall, the QV-2300UX Plus color handling is excellent.
In our resolution test, the QV-2300 shows visible detail out to about 700 lines per picture height in both horizontal and vertical directions, but some aliasing begnis at around 550 lines in both directions. Accordingly, we'd "call" the overall resolution at 600 lines per picture height, both vertically and horizontally. Sharpness is a bit below average among competing models we've tested. Overall a middle of the road performance in the resolution department.
With full manual and automatic exposure control, as well as a variety of special Scene modes, the QV-2300UX is very flexible with exposure. In addition to the standard exposure variables, the user can adjust white balance, exposure compensation, ISO, sharpness, contrast, saturation, and flash mode. All this control gives the QV-2300UX Plus great low light capabilities, as we were able to capture reasonably bright, useable images at light levels as low as 1/16 of a foot candle (0.67 lux), at all three ISO settings. (That's really dark!) Color balance was rather warm at the lower light levels, but gradually cooled to a normal level as the light level increased. Noise levels stayed relatively low at the ISO 80 and 160 settings, but increased at the 320 setting. Despite being more prevalent, the noise level at ISO 320 is still not the worst we've seen. (We direct readers to Mike Chaney's excellent Qimage Pro program, for a tool with an amazing ability to remove image noise without significantly affecting detail.) To put the QV-2300UX Plus' low light performance into perspective, an average city night scene under modern street lighting corresponds to a light level of about one foot candle, meaning the camera can handle even darker situations relatively well.
We found the QV-2300UX Plus' LCD monitor to be quite tight, showing about 87 percent accuracy at wide angle, and about 86 percent at the telephoto setting (for both image sizes). We generally like to see LCD monitors as close to 100 percent accuracy as possible, so the QV-2300UX Plus came up a little short in this area.
The QV-2300 turned in about an average performance in our macro test, capturing a minimum area of 3.65 x 2.74 inches (92.8 x 69.6 mm). Focus was a little soft, and some barrel distortion was visible, but overall the results were good. The flash shot came out a little dark, due to the camera being fooled by glare from the brooch. This actually bodes well for flash use in macro pictures, as it says the flash has no trouble throttling down enough for close-in work.
Overall, we were very pleased with the performance of the QV-2300UX Plus. Its white balance system can handle most light sources, even difficult ones, and color balance is pretty accurate as well. Combined with the wide variety of exposure modes, the camera's low light capabilities extend its shooting range to include even the darkest situations. We also found the sharpness, contrast, and saturation adjustments very handy and useful.
Conclusion
Overall, shooting with the Casio QV-2300UX Plus was a real pleasure. It provides excellent exposure control and a bounty of special features that are not typically found in other digicams. The preset Scene modes are perfect for novices who want to take great pictures of sometimes difficult subjects, and the extensive color adjustments offer a host of creative options that will tempt even the busiest editor to play! ;-) If the extremely flexible exposure options don't excite you, then the 340MB IBM Microdrive certainly will. The camera is small, portable, and packs a substantial 2.1-megapixel CCD. Given its generous exposure and creative controls, reasonable price, and excellent image quality, we expect the QV-2300UX Plus to appeal to a broad range of digital camera buffs.
<<QV-2300UX Sample Images | Additional Resources and Other Links>>
Reader Comments!
Questions, comments or controversy on this product? Click
this link to see what other Imaging Resource readers have had to say about
the Casio QV-2300UX Plus, or add comments of your own!