Quick Review
Pentax Optio S4i Digital Camera
 |
Camera QuickLook | |
| Review Date | 7/6/2004 | |
|
User Level
|
|
|
|
Product Uses
|
|
|
|
Digicam Design
|
|
|
|
Picture Quality
|
High, 4.-megapixel CCD | |
|
Print Sizes
|
4x6, 5x7, 8x10, 11x14 | |
|
Availability
|
|
|
|
Suggested Retail Price
(At time of introduction) |
|
|
Introduction
|
||||||||||
The Pentax Optio S4i is the latest in a series of ultra-compact digital cameras that arguably offer more features per cubic inch than any other digicam line on the planet. The Pentax Optio S4i is the latest stylish, compact, feature-packed digital camera from them, an update from last year's Optio S4. Sporting a 4.0 megapixel CCD, the Optio S4i literally fits inside an empty Altoids tin, giving Pentax a competitive edge in the portable digicam market. Pentax has also given the Optio S4i a Full Auto mode, a bigger LCD display and included a dock/battery charger. Read on for more details, this cool little design just got even better!
With an amazingly tiny size (it actually fits inside an Altoids mint tin), the Optio S4i is an exciting example of miniaturization in the digicam marketplace. Measuring a Lilliputian 3.3 x 2.0 x 0.81 inches (84 x 52 x 20.5 millimeters) and weighing just 4.2 ounces (120 grams) with the battery and SD memory card, the Optio S4i will fit into even the smallest shirt pocket. There's no question this camera is meant to go places, and the retractable lens keeps the camera front flat, making it quick on the draw. A built-in shutter-like lens cover conveniently opens whenever the camera is powered on, and the lens telescopes outward in a matter of seconds. The 4.0-megapixel CCD (4.23 total megapixels) produces high resolution, print quality images, as well as lower resolution images better suited for email. The camera offers a host of creative features and functions, as well as manual control over focus and white balance (if desired), proof that small size doesn't have to cramp your style.
The Optio S4i has a 3x zoom, 5.8-17.4mm lens, the equivalent of a 35-105mm lens on a 35mm camera, just like its predecessor, the Optio S4. The lens is where Pentax made a real innovation with the Optio S-series, in that its internal elements actually "unstack" as the lens retracts, arranging themselves side by side within the camera body. When the lens telescopes back out again, the optical elements shuffle back into normal alignment. I have to admit that I expected to see some pretty horrific optical trade-offs resulting from such a shoehorned lens design, but the Optio S-family lens is of surprisingly high quality. It loses some sharpness at closer shooting distances and the corners of its images are a little soft, but overall there seem to have been fewer trade-offs made than in many subcompact models I've seen in the past.
The lens' maximum aperture ranges from f/2.6 to f/4.8, depending on the zoom position, and focus ranges from 1.31 feet (0.4 meters) to infinity in normal shooting mode, with a Macro range extending from 7.08 inches to 1.64 feet (0.18 to 0.5 meters). A Super Macro mode gets even closer, focusing from 2.36 to 7.87 inches (0.06 to 0.2 meters) at the middle-zoom lens position. In addition to manual and automatic focus control, the Optio S4i also offers Spot and Multiple AF area modes. Plus, an Adjustable AF mode lets you select the AF area manually from 49 points using the Multi-Controller. The camera's autofocus system uses a TTL contrast-detection method to determine focus, based on a seven-point area in the center of the frame. A maximum of 4x digital zoom is available in addition to the optical zoom, but keep in mind that digital zoom generally decreases the overall image quality because it simply enlarges the center pixels of the CCD image. To frame shots, the Optio S4i features a very tiny, real-image optical viewfinder as well as a 1.8-inch, color TFT LCD monitor. The optical viewfinder is unfortunately very "tight," showing only 72-77% of the final image area, forcing you to use the LCD for even mildly accurate framing. Fortunately, the LCD viewfinder is spot-on 100% accurate. The LCD monitor reports limited camera information, including camera mode, the number of available images, focus mode, date and time, and battery power, among various other mode information. An expanded histogram information display not only puts a small histogram on-screen for checking exposure, but also reports more exposure details, such as white balance, quality and resolution, ISO, and metering mode.
 Exposure remains
under automatic control, although the Optio S4i does provide a lot of options.
Shutter speeds range from 1/2000 to four seconds, but note that longer shutter
speeds are only available in the "night" shooting mode. (Shutter speed
is otherwise limited to 1/8 second, or 1/60 second if the flash is turned on.
Note too, that the longest exposure times are only available at ISO 50 and 100.
At ISO 200, the maximum shutter time is reduced to two seconds, and at ISO 400,
the longest exposure time is held to one second.) An On/Off button on top of
the camera powers the camera on, and the down arrow of the Multi-Controller
accesses the camera's Mode menu. The Mode menu appears as an array of icons,
from which the 5-way nav disk can select in any direction. Available modes are
Full Auto (Green Mode), Program AE, Night Scene, Movie, Panorama Assist, 3D
Image, Landscape, Flower, Portrait, Self-portrait, Surf and Snow, Autumn colors,
Sunset, Museum, Text, Food, Soft, Posterization, Digital Filter, User, and Marine.
Exposure remains
under automatic control, although the Optio S4i does provide a lot of options.
Shutter speeds range from 1/2000 to four seconds, but note that longer shutter
speeds are only available in the "night" shooting mode. (Shutter speed
is otherwise limited to 1/8 second, or 1/60 second if the flash is turned on.
Note too, that the longest exposure times are only available at ISO 50 and 100.
At ISO 200, the maximum shutter time is reduced to two seconds, and at ISO 400,
the longest exposure time is held to one second.) An On/Off button on top of
the camera powers the camera on, and the down arrow of the Multi-Controller
accesses the camera's Mode menu. The Mode menu appears as an array of icons,
from which the 5-way nav disk can select in any direction. Available modes are
Full Auto (Green Mode), Program AE, Night Scene, Movie, Panorama Assist, 3D
Image, Landscape, Flower, Portrait, Self-portrait, Surf and Snow, Autumn colors,
Sunset, Museum, Text, Food, Soft, Posterization, Digital Filter, User, and Marine.
Program mode is the default operating mode, providing access to all of the camera's exposure options, such as Exposure Compensation, White Balance, metering, etc. You can also press the green Quick button on the back to enter Full Auto mode, in which the camera takes control of everything, including flash. The user only controls the zoom and shutter release in Green mode. By default, the Optio S4i uses a Multi-Segmented metering mode, which reads the entire image area to determine exposure. Through the Record menu, Center-Weighted and Spot options are also available. Exposure Compensation is adjustable from -2 to +2 exposure equivalents (EV) in one-third-step increments. An ISO adjustment offers an Auto setting, as well as 50, 100, 200, and 400 equivalent settings. White Balance options include Auto, Daylight, Shade, Tungsten, Fluorescent, and Manual settings. The Optio S4i also features sharpness, saturation, and contrast adjustments, unusual features to find on a subcompact digicam model.
The remaining modes on the list are intended for special shooting situations. The camera's separate Night Scene mode allows you to capture bright images in relatively dark settings; noise reduction is activated, where the camera records a "dark frame" to subtract electronic noise from the image sensor, resulting in apparently longer exposure times.
Movie mode captures as much video with sound as your card will hold, at 320 x 240 pixels, 15 frames per second. Through the Record menu, a Fast Forward Movie option slows down the frame rate during recording, so when movies are played back, the action appears sped up (like time-lapse photography). Speed-up ratios of anywhere from 2x to 100x are available in Fast Forward Movie mode.
In Panorama Assist mode, the Optio S4i captures a series of images to be joined together as a single panoramic image on a computer. When this mode is highlighted on the virtual dial, pressing the down arrow lets you select which direction the panoramic series will go in (up, down, left, or right). A semi-transparent display of the previous image in the panoramic series helps you align each subsequent one.
3D Image mode produces three-dimensional images similar to old-fashioned stereographs. The camera captures two images of the same subject (one just slightly off-center from the other) and combines them to achieve a 3D effect. A transparent display of the first image captured remains on the LCD monitor, so that you can align the second image to it. A 3D viewer comes with the Optio S4i, and works when viewing 3D images in either Parallel or Cross formats.
Landscape mode enhances some colors for better foliage and sky rendition, while Flower mode improves color for photos of flowers. Portrait mode biases aperture toward wide open to blur the background. Self portrait mode sets the camera for best results when pointing the camera at yourself. Surf and Snow adjusts exposure to compensate for bright backgrounds. Autumn colors increases saturation appropriately for dramatic pictures of Autumn leaves. Sunset likewise adjusts color to preserve the drama in sunsets. Museum mode adjusts the camera for capture of art in museums. Text makes it easier to capture text on a page.
Perhaps the most unique feature is Food mode, which "lets you take appetizing pictures of prepared food." Soft focus mode gives pictures a soft effect. Posterization brings the old darkroom effect to your digital camera. In Digital Filter mode, the camera offers Color and Slim filter settings. Pressing the down arrow when the Digital Filter icon is highlighted on the virtual dial accesses the available filters. Color filters include black and white, sepia, red, pink, violet, blue, green, and yellow filter effects. The Slim filter lets you "squeeze" your subject in eight steps vertically or horizontally. The User setting lets you customize a set of camera functions, such as flash mode, white balance, etc., which can be instantly recalled. Finally, Marine mode is set when the camera is placed in the optional waterproof housing for better exposures underwater.
The Optio S4i also features a Self-Timer mode that provides a 10-second delay between the time the Shutter button is pressed and when the camera actually takes the picture, allowing you to get into your own shots. A remote control is available as an accessory. For shooting fast action subjects, the camera's Continuous Shooting mode captures a rapid series of images for as long as you hold down the Shutter button, much like a motor drive on a traditional 35mm camera. The amount of available memory space determines the maximum number of images the camera will capture in the series, and details like image size and shutter speed determine the shooting interval.
The camera's flash operates in either Auto, Off, On, Auto with Red-Eye Reduction, or On with Red-Eye Reduction modes, and is effective from 7.87 inches to 11.48 feet (0.2 to 3.5 meters) at wide angle with a sensitivity of ISO 200. In telephoto mode it's effective from 7.87 inches to 6.56 feet (0.2 to 2.0 meters).
If you press the Power switch more than two seconds, the Optio S4i turns into a voice recorder. The lens retracts and the LCD shows remaining recordable time and elapsed recording time. Press the Shutter button to toggle recording through the built-in microphone on the front of the camera. Alternately you can hold the Shutter button down for the duration of the recording. Pressing the Menu button while recording adds an index to the sound file. Sounds are saved as monaural WAV files.
The Optio S4i stores images on SD / MMC memory cards or in its 11 megabytes of internal memory. My evaluation sample came with a 16MB SD card, but the box contents don't list a memory card as part of the standard offering. You should thus plan on purchasing a good-sized card along with the camera. The camera utilizes a D-LI8 rechargeable lithium-ion battery pack for power, which is included along with the necessary battery charger. Since the Optio S4i does not accommodate AA batteries in any form, I highly recommend picking up an additional battery pack and keeping it freshly charged. This is easier to do with the S4i, because the battery charger can be used in two ways. You can remove the battery and place it in the charger, or leave it in and simply place the camera in the slot designed to hold it upright, while the charging is done through the three gold contacts on the bottom of the camera. The optional AC adapter might also useful for preserving battery power when reviewing and downloading images, but it isn't really necessary for normal usage. A USB cable accompanies the camera for quick connection to a computer, as well as a software CD containing ACDSee software for both Mac and PC platforms.
Basic Features
- 4.0-megapixel CCD.
- Real-image optical viewfinder.
- 1.8-inch color TFT LCD monitor.
- Glass, 3x, 5.8-17.4mm lens, equivalent to a 35-105mm lens on a 35mm camera.
- 4x digital zoom.
- Two automatic exposure controls, plus a range of preset Scene modes.
- Shutter speeds from 1/2000 to four seconds.
- Maximum aperture of f/2.6 to f/4.8, depending on lens zoom position.
- Built-in flash with five modes.
- SD/MMC memory card storage, although no card is included in the box.
- 11 megabytes of internal memory. (So you don't absolutely have to have a card.)
- Power supplied by one D-LI8 rechargeable lithium-ion battery pack or optional AC adapter.
- ACDSee software and USB drivers included for both Windows and Mac platforms.
Special Features
- Green "Quick" capture mode.
- Movie with sound mode.
- Voice Recorder mode.
- Continuous Shooting mode.
- 3D Image and Panorama Assist modes.
- Night Scene photography mode, plus eleven preset Scene modes.
- Posterization mode.
- Marine mode for use in waterproof housing.
- 10-second Self-Timer for delayed shutter release.
- Remote-Control mode for use with optional remote-control.
- Adjustable color mode eight color filters and a Slim filter setting.
- Macro and Super Macro (close-up) lens settings.
- White balance (color) adjustment with six modes, including a manual adjustment.
- Image Contrast, Sharpness, and Saturation adjustments.
- Multi-Segment, Center-Weighted, and Spot metering modes.
- Sensitivity setting with three ISO equivalents and an Auto setting.
- Adjustable autofocus area and available manual focus control.
- DPOF (Digital Print Order Format) compatibility.
- USB cable for connection to a computer (driver software included).
Recommendation
With its tiny size and multitude of features, the Optio S4i is a good camera for people on the go. Although it operates mainly as a point-and-shoot style digicam, it offers an abundance of color and exposure controls for creative shooting, so it should be interesting to advanced users as well. The 4.0-megapixel CCD delivers pretty good resolution, but like most subcompact digicams, the sharpness and resolution (particularly in the corners of the frame) aren't going to be as good as you'd find on the best full-sized 4-megapixel models. The camera also has somewhat higher than average image noise. - This won't be an issue for daylight shooting, but could be something to consider if you plan to do a lot of shooting in dim indoor settings, or after dark. The ultra-compact design makes the Optio S4i an excellent candidate for travel, fitting easily into a shirt pocket or small purse. It's also great for novices who want to have fun with their digital picture-taking, but get good quality images as well, and have a few features to grow into. If you want a camera that's ultra-compact, has good color, and that can be shared by both novice and enthusiast users, and don't need to do a lot of shooting after dark, the S4i would make an excellent choice.
 The
Optio S4i is easily one of the most feature-packed, subcompact cameras on the
market. Its sleek, smooth styling is free from any notable protrusions except
for the lens, which telescopes outward about an inch when powered on. The camera
is so small, it actually fits inside an empty Altoids tin (making for a very
inexpensive, minty-fresh camera case!). Measuring 3.3 x 2.0 x 0.81 inches (84
x 52 x 20.5 millimeters), it's well-suited for shirt pockets, hip pockets, and
small evening bags. Despite its attractive metal body, the Optio S4i weighs
just 4.2 ounces (120 grams) including the battery and SD card. The small size
and smooth case design could make it a little difficult for larger hands to
hold onto, but the included wrist strap will provide some security if it slips
through your fingers. The camera also has textured body panels that help provide
some traction for fingers, and a small raised thumb ridge on the back panel.
The photo inset above right shows the camera posed with an SD memory card in
front of it, so you can get an idea of just how small it actually is.
The
Optio S4i is easily one of the most feature-packed, subcompact cameras on the
market. Its sleek, smooth styling is free from any notable protrusions except
for the lens, which telescopes outward about an inch when powered on. The camera
is so small, it actually fits inside an empty Altoids tin (making for a very
inexpensive, minty-fresh camera case!). Measuring 3.3 x 2.0 x 0.81 inches (84
x 52 x 20.5 millimeters), it's well-suited for shirt pockets, hip pockets, and
small evening bags. Despite its attractive metal body, the Optio S4i weighs
just 4.2 ounces (120 grams) including the battery and SD card. The small size
and smooth case design could make it a little difficult for larger hands to
hold onto, but the included wrist strap will provide some security if it slips
through your fingers. The camera also has textured body panels that help provide
some traction for fingers, and a small raised thumb ridge on the back panel.
The photo inset above right shows the camera posed with an SD memory card in
front of it, so you can get an idea of just how small it actually is.
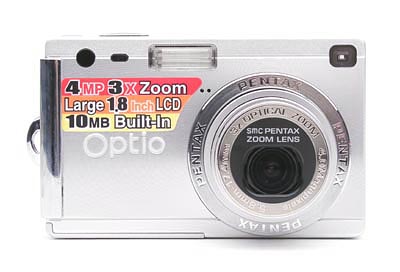
The front of the camera features the lens, flash, optical viewfinder window, flash sensor, self-timer lamp, and remote control sensor. There's also a tiny microphone, upper right of the lens barrel. A shutter-like, retractable lens cover protects the lens whenever the camera is powered off, sliding quickly out of the way when the camera is turned on. The lens then telescopes out from the camera body about an inch. The front of the Optio S4i is flat without any finger grips, so keep the wrist strap securely around your wrist when holding the camera.

On the right side of the camera (when viewed from the back) are the DC In and dual-purpose PC/AV connector jacks, each protected by a flexible, rubbery flap that remains tethered to the camera. The metal eyelet for attaching the wrist strap is also on this side of the camera.

The opposite side of the Optio S4i is nearly featureless, except for the nine small holes of the speaker grille.

The camera's top panel is flat with only slight protrusions from the Shutter and Power buttons. An illuminated ring surrounds the Power button, lighting green in Camera mode and Red in Voice Recorder mode. Some reviewers have commented negatively about the position of the power switch on the top panel, feeling that it would be too easy to confuse it with the shutter button. In practice though, I didn't find this to be an issue at all. The power switch is slightly recessed, and takes a deliberate effort to actuate, while the shutter button is raised slightly above the surface of the case. In shooting hundreds of shots, none of us at IR ever had any trouble confusing the power switch with the shutter button.

Only a handful of external controls dot the camera's rear panel, along with the optical viewfinder eyepiece and 1.8-inch color LCD monitor. Two LEDs next to the optical viewfinder report the camera's status, such as when focus is set, when the flash is charged, etc. A small 5-way navigation controller is placed central between the LCD and right side of the camera, eliminating most of the thumb rest space. With it, the user navigates through settings menus, and accesses the camera's Mode menu via the down arrow. The up arrow accesses the Remote Control, Self-Timer, and DPOF functions. While shooting, the left and right arrows adjust EV compensation. Just below the 5-way are the Menu and Display buttons. Menu brings up and cancels the menu, while Display toggles through Default, Histogram, plain screen, and LCD off. Above left of the 5-way is the Playback button. When in Playback mode, another press here or on the shutter button takes you very quickly back to Record mode. Just right of the optical viewfinder is the Green mode button. In this mode, the camera controls everything but the zoom. To the right of this are the Flash/Erase and Macro/Super Macro/Landscape/Manual Focus/AutoFocus Point/AF/Protect buttons (talk about your multi-function buttons). The Zoom lever is in the top right corner, controlling both Record and Playback mode zoom.

On the bottom panel of the Optio S4i are the tripod mount, charging pads, and memory card / battery compartment. The plastic, threaded tripod mount is off-center from the lens because of the camera's small size, but provides a stable mount, centered along the panel. The memory card / battery compartment features a plastic sliding-release door, hinged with metal but too close to the tripod mount to allow quick battery changes while working from a tripod. However, I doubt that this will be of much concern to most users, as the Optio S4i is clearly designed for on-the-go shooting rather than tripod work.
The S4i's user interface is very straightforward, with only a few external controls and an easily navigable LCD menu system. For standard point-and-shoot operation, the most basic features (such as flash, focus mode, and zoom) all feature external controls. The Mode setting allows you to quickly set the camera's operating mode, using the Multi-Controller. When it is necessary to enter the LCD menu system, you'll find it simple to navigate. Three menus are available, delineated by subject tabs at the top of the screen, with the Playback and Setup menus available in any mode. The arrow keys of the Multi-Controller scroll through each selection, and the OK button in the center of the pad confirms any changes. It shouldn't take much more then half an hour to an hour to become familiar with the basic camera setup, as it's fairly intuitive.
 Record-Mode Display
In Record mode, the LCD monitor optionally displays just the subject, the subject plus a partial information overlay, the subject plus a full information overlay that includes a histogram, or nothing at all (that is, the LCD is turned off).
Playback-Mode Display
 In playback mode, the LCD display options mirror those in Record mode, but expand to include thumbnail or zoomed views. The LCD can show the captured images alone, with a limited information overlay, or with a full overlay that includes a histogram. Pressing the wide-angle side of the zoom control takes you to a nine-image thumbnail view of images on the card, letting you quickly scan through them. Pressing the telephoto end of the zoom control zooms in on the captured image, up to a maximum enlargement of 4x. When zoomed in, you can use the Multi-Controller to scroll around the enlarged display.

Power Button: Placed unobtrusively on the camera's top panel, this button
powers the camera on and off. If you press the Play button while powering the
camera on, the lens does not extend, and the camera comes up in Playback mode.
If you hold the Power button down for two seconds at startup, the lens does
not extend, and you enter Voice Recorder mode.

Shutter Button: To the left of the Power button on top of the camera, this
button sets focus and exposure when halfway pressed, and fires the shutter when
fully pressed.

Zoom Toggle: Located in the top right corner of the back panel, this toggle
controls the optical and digital zoom in any record mode.
In Playback mode, this toggle controls the digital enlargement of captured images, as well as the index display mode.
In Audio Playback mode, the toggle serves as the volume control, with the wide-angle side decreasing the volume and the telephoto side increasing it.

Focus / Protect Button: Directly to the left of the zoom toggle button,
in Record mode, this button cycles through the available focus modes: Autofocus
(no icon), Macro mode (flower symbol), Super Macro mode (flower symbol with
an "S"), Landscape mode (mountain symbol), Manual Focus mode ("MF"),
and Adjustable AF mode (AF with arrows), which lets you pick the AF area manually.
In Manual Focus mode, a numeric scale indicates the current focus setting in
meters, but only a few distances are marked, making it difficult to accurately
estimate the focusing distance you've selected. There's now an enlarged display
mode available to assist you in setting focus visually. A green frame indicates
the space that will be zoomed in once you start focusing with the up and down
arrows on the 5-way. Unlike similar features I've seen on other cameras, this
enlargement appears fullscreen, a nice touch. When you partially press the shutter
button, the view goes back to normal.
In Playback mode, this button marks the currently selected image as protected, or removes protection. ("Protection" simply means that the image cannot be altered in any way or deleted, except by a card format.)

Flash / Erase Button: Just on the left of the Focus / Protect button, this
button cycles through the available flash modes in any record mode. Flash modes
include Auto (no icon), Off, On, Auto/Red-Eye Reduction, and On/Red-Eye Reduction.
In Playback mode, pressing this button displays the Erase menu, which allows you to erase all images on the card or individual images, one at a time. (Press it once and the camera will ask you if you want to erase the current image. Other options appear across the bottom: press Menu to exit, press the Flash/Erase button again to erase all.)

Multi-Controller: Right about center in the camera's rear panel, this multi-directional
rocker, or 5-way button features four arrows and a center "OK" function.
In any settings menu, the arrow keys navigate choices and the OK button confirms
selections.
In Record mode, the up arrow key accesses the Self-Timer, Remote Control, and Continuous Shooting modes. In Playback mode, this button pulls up the DPOF on-screen menu, allowing you to mark individual or all images for printing as well as establish the number of print copies and activate a time and date stamp.
Also in Record mode, the down arrow displays the Mode menu, with options for Program AE, Night Scene, Movie, Panorama Assist, 3D Image, Landscape, Flower, Portrait, Self-portrait, Surf and Snow, Autumn colors, Sunset, Museum, Text, Food, Soft, Posterization, Digital Filter, User, and Marine. (Note that Full Auto mode, or Green mode, is available only with a press of the green Quick button on the back of the camera.)
The function of the left and right arrows are also configurable via a Setup menu option. By default, pressing the right or left arrow directions in Record mode changes the exposure compensation setting. (A handy feature, as this is a very frequently used setting, in my experience.) In the Setup menu (on the third screen of options), you can change the "Fn Setting" selection to let the left/right arrow keys control the resolution setting, JPEG quality, white balance, focusing area selection, AE metering pattern, ISO sensitivity, Fast Forward Movie, or instant review setting, Sharpness, Saturation, or Contrast. Very slick!

Menu Button: Below the lower left corner of the 5-way nav buttons, this
button displays the menu in any record mode, as well as in Playback mode.

Display Button: To the right of the Menu button, this Display button controls
the information and image displays on the LCD monitor. In Record mode, pressing
this once calls up a histogram display of the subject area (a graphical representation
of the light and dark values in the image), as well as a readout of basic settings
such as resolution, quality, white balance, etc. A second press dismisses the
histogram and information display, showing just the autofocus area, and a third
press disables the LCD monitor entirely. Pressing it once more restores the
default display.
In Playback mode, pressing the Display button pulls up the same histogram and information display, pressing it a second time clears all information overlays, showing just the image, and pressing it a third time restores the default display.

Playback Button: Off the upper right corner of the LCD monitor,
this button puts the camera into Playback mode.
 Quick
Button: By default, the Quick button puts the camera into Full Auto mode.
Only the zoom can be adjusted by the user. However, this is also a button that
can have its purpose reassigned in the Setup Menu. It can be made to bring up
the Shooting menu (in case you reassigned the down arrow button), White Balance,
Memory, Resize, Trimming, Copy Image and Sound, Alarm, Format, Sound, World
Time, or Startup Screen.
Quick
Button: By default, the Quick button puts the camera into Full Auto mode.
Only the zoom can be adjusted by the user. However, this is also a button that
can have its purpose reassigned in the Setup Menu. It can be made to bring up
the Shooting menu (in case you reassigned the down arrow button), White Balance,
Memory, Resize, Trimming, Copy Image and Sound, Alarm, Format, Sound, World
Time, or Startup Screen.
Camera Modes and Menus
Record Mode: In Record mode, the camera can capture still images or movie files. The Mode menu (accessed via the down arrow of the Multi-Controller) selects between Program, Picture, Night Scene, Movie, Panorama Assist, 3D Image, Digital Filter, and User modes, which provide varying levels of control over the exposure.
Playback Mode: This mode lets you review captured images on the memory card, erase them, protect them, set them up for printing, add voice annotations, or play them back in a slide show.
Menus: The following settings menus appear in any camera mode. However, not all Record functions are available in all Record modes.
- Record Mode Settings
 Recorded
Pixels: Sets the image size to 2,304 x 1,728; 1,600 x 1,200; 1,024 x
768; or 640 x 480 pixels.
Recorded
Pixels: Sets the image size to 2,304 x 1,728; 1,600 x 1,200; 1,024 x
768; or 640 x 480 pixels.
- Quality Level: Sets the JPEG compression level to Good, Better, or Best (one star being Good and three stars being Best).
- White Balance: Adjusts the overall color balance of the scene. Options include Auto, Daylight, Shade, Incandescent, Fluorescent, and Manual. (Manual being a very unusual and welcome option for a subcompact camera like the Optio S4i.)
- Focusing Area: Designates the area of the frame that the camera determines focus from, either Spot or Multiple (seven-point AF).
- AE Metering: Chooses how the camera determines exposure, choices are Spot, Center-Weighted, and Multi-Segment, the latter being the default.
- Sensitivity: Adjusts the camera's light sensitivity, options are
Auto, or 50, 100, 200 or 400 ISO equivalents.
 EV
Compensation: Brightens or darkens the overall exposure from -2 to
+2 EV in one-third-step increments.
EV
Compensation: Brightens or darkens the overall exposure from -2 to
+2 EV in one-third-step increments.
- 3D Mode: Sets the 3D recording mode to Parallel or Cross formats, which dictate how the 3D images will line up for viewing.
- Fast Forward Movie: Adjusts the frame rate of Movie mode to create a time-lapse effect. Options are Off, x2, x5, x10, x20, x50, and x100.
- Digital Zoom: Turns the 4x digital zoom on and off.
- Instant Review: Turns the Instant Review function off, or sets the review time on the LCD screen to 0.5, 1, 2, 3, 4, or 5 seconds.
- Memory: Specifies which camera settings are saved when the camera
is powered off. Options include Flash, Drive, Focus Mode, Zoom Position,
Manual Focus, White Balance, AE Metering, Sensitivity, EV Compensation,
Digital Zoom, Display, and File number. (secondary
screen)
 Sharpness:
Adjusts the overall image sharpness among five places.
Sharpness:
Adjusts the overall image sharpness among five places.
- Saturation: Controls the level of color saturation, with five adjustment levels. (An unusual and welcome feature in a subcompact digicam.)
- Contrast: Adjusts overall image contrast to one of five settings. (Another unusual and welcome feature.)
- Playback Settings
 Slide
Show: Activates an automatic slide show of images on the card. You can
set the image interval time.
Slide
Show: Activates an automatic slide show of images on the card. You can
set the image interval time.
- Resize: Changes the size of captured images to any of the camera's standard image sizes that is smaller than the original file.
- Trimming: Allows you to crop captured images and save a new copy.
- Copy Image and Sound: Copies files between the built-in memory and the SD card.
- Alarm: Allows you to set up to three alarms. When the alarm goes off, the camera beeps and you can set a certain image to be displayed.
- Record Voice Memo: Lets you toggle the voice recording option during playback on or off.
- Quick Zoom: When switched on, sets zoom button to maximum 4x on a single press, rather than zooming in smaller steps. (Once zoomed to 4x with Quick Zoom though, you can zoom back out in smaller steps.)
- Quick Delete: When switched on, displays delete screen with "Delete" highlighted instead of the default "Cancel."
- Setup
 Format:
Formats the SD or MMC card, erasing all files (even protected ones).
Format:
Formats the SD or MMC card, erasing all files (even protected ones).
- Sound: Controls the volume of the camera's startup, shutter, button operation, and playback sounds.
- Date Adjust: Sets the camera's internal date and time.
- World Time: Allows you to set the time for another city, so that you can display the time in London, for example, on the LCD monitor. A full list of cities is in the manual.
- Language: Changes the menu language to English, French, German, Spanish, Italian, Russian, Korean, Simplified Chinese, Chinese, or Japanese,.
- Start-up Screen: Sets what image appears on the LCD monitor when the camera starts up.
- Video Out: Sets the Video Out signal to NTSC or PAL.
- USB Connection: Selects whether the USB connection will be connected to a computer or PictBridge printer.
- Sleep Timeout: Turns the Sleep function off, or sets the camera to go to sleep after 30 seconds, or one or two minutes.
- Auto Power Off: Turns this feature off, or sets the camera to shut off after three or five minutes of inactivity.
- Custom Function: Allows you to select one function to be adjustable by the right and left arrows of the Multi-Controller in Record mode so you don't have to access the menu. The default function to control is Exposure Compensation. Other options include resolution setting, JPEG quality, white balance, focusing area selection, AE metering pattern, ISO sensitivity, instant review setting, or Fast Forward Movie option, sharpness, saturation, contrast, EV compensation.
- Quick button: Sets the function of the Quick button. Options are: Green mode (Full Auto), White Balance, Memory, Resize, Trimming, Copy Image and Sound, Alarm, Format, Sound, World Time, or Startup Screen.
- Reset: Resets all camera settings to their defaults.
In the Box
Packaged with the Optio S4i are the following items:
- D-LI8 rechargeable lithium-ion battery pack.
- Battery charger/cradle with AC plug cord.
- Video cable.
- USB cable.
- Wrist strap.
- Software CD.
- Operating manual and registration card.
- Large capacity SD or MMC memory card.
- Additional D-LI8 lithium-ion battery pack.
- AC adapter.
- Small camera case.
Recommended Software: Rescue your images!
Just as important as an extra memory card is a tool to rescue your images when
one of your cards fails at some point in the future. I get a lot of email from
readers who've lost photos due to a corrupted memory card. Memory card corruption
can happen with any card type and any camera manufacturer, nobody's immune.
A surprising number of "lost" images can be recovered with an inexpensive,
easy to use piece of software though. Given the amount of email I've gotten
on the topic, I now include this paragraph in all my digicam reviews. The program
you need is called PhotoRescue, by DataRescue SA. Read our review
of it if you'd like, but download the program now, so you'll have it.
It doesn't cost a penny until you need it, and even then it's only $29, with
a money back guarantee. So download PhotoRescue
for Windows or PhotoRescue
for Mac while you're thinking of it. (While you're at it, download the
PDF manual
and quickstart
guide as well.) Stash the file in a safe place and it'll be there when you need
it. Trust me, needing this is not a matter of if, but when... PhotoRescue
is about the best and easiest tool for recovering digital photos I've seen.
(Disclosure: IR gets a small commission from sales of the product, but I'd highly
recommend the program even if we didn't.) OK, now back to our regularly
scheduled review...
See camera specifications here.
Cycle times, shutter lag, battery life, etc. can be found here.
See the full set of my standardized test images and detailed analysis here. The thumbnails below show a subset of my test images. Click on a thumbnail to see the full-size photo.
 |
 |
 |
| |
|
|
|
|
|
|
| |
|
|
|
|
|
|
| |
|
|


For those readers interested in a set of less "standardized" photos, here's a link to a gallery of more pictorial shots snapped with the Optio S4i. Click on one any of the thumbnails shown on that page to see a larger image, and click on the larger view again to see the original image from the camera. (Photos in this gallery were shot by Shawn Barnett. Thanks Shawn!)
Test Results
In keeping with my standard test policy, the comments given here summarize only my key findings. For a full commentary on each of the test images, see the Optio S4i's "pictures" page.
As with all Imaging Resource product tests, I encourage you to let your own eyes be the judge of how well the camera performed. Explore the images on the pictures page, to see how the Optio S4i's images compare to other cameras you may be considering.
Not sure which camera to buy? Let your eyes be the ultimate judge! Visit our Comparometer(tm) to compare images from the Optio S4i with those from other cameras you may be considering. The proof is in the pictures, so let your own eyes decide which you like best!
- Color: Good color, but a tendency to oversaturate strong
reds and blues. Capable manual white balance, but trouble with highlights
under strongly-colored lighting. Overall, the Optio S4i delivered good
color under a variety of lighting. It tended toward a slightly warm color
balance in many cases, from the harsh outdoor lighting to the more controlled
lighting of the studio. I frequently chose the Manual white balance setting,
though the Auto setting also produced good results, depending on the situation.
Some of the tendency toward oversaturation of strong reds and blues that I
saw in last year's S4 now seems cured. Caucasian skin tones came out pretty
well, just very slightly pink, but the always-difficult blue flowers in the
bouquet in my Outdoor Portrait test came out a bit darker and more purplish
than in real life. The manual and incandescent white balance settings handled
the very difficult household incandescent lighting of the Indoor Portrait
very well, but the auto white balance couldn't cope with that light source
at all. In another plus, the tendency of last year's S4 to develop odd color
shifts in the face of high exposure compensation under strongly colored lighting
seems to be pretty much cured as well. On balance though, color rendition
was quite good.
- Exposure: Somewhat variable exposure, somewhat limited
dynamic range, but a helpful contrast adjustment option. The Optio S4i
had a tendency to underexpose some of my studio shots, while it overexposed
the outdoor house shot quite a bit. The high-key lighting of the Outdoor Portrait
gave the camera a little trouble, as I had to give up highlight detail in
order to get moderately bright midtones, even with the camera's variable contrast
option set down a notch or so. The contrast adjustment control worked pretty
well, although it mainly affected the shadows, rather than shadows and highlights
equally, and I would have liked to have seen more adjustment on the low-contrast
side of the slider. Indoors, the camera required an average amount of positive
exposure compensation, though the exposure was still a little dim. I had to
choose between a good exposure on Marti with hot highlights or a dimmer overall
exposure with the highlights in check. The Optio S4i had no trouble distinguishing
the subtle pastel tones on the Q60 target of the Davebox, however, despite
a slightly high exposure. Dynamic range was limited, and shadow detail was
usually moderate to low.
- Resolution/Sharpness: High resolution, 1,200 lines of
"strong detail." (Softness in the corners though.) The Optio
S4i performed fairly well on the "laboratory" resolution test chart.
It started showing artifacts in the test patterns at resolutions as low as
800 lines per picture height vertically, but as low as about 600 lines horizontally.
I found "strong detail" out to at least 1,200 lines horizontally,
and to around 1,100 lines in the vertical direction. "Extinction"
of the target patterns occurred around 1,500 lines.
- Image Noise: Higher than average image noise, ISO 400
is really unusable. It's an unfortunate fact of life that higher resolution
and smaller cameras invariably result in higher image noise. The Optio S4i
is no exception here, as you'll find image noise levels that are generally
about twice as high as those of the best full-sized cameras. (That is, the
S4i's image noise at ISO 50 is close to that of many full-sized digicams operating
at ISO 100.) How you feel about this will depend a lot on how you intend to
use the S4i's images: If you're mainly interested in prints 5x7 inches in
size or smaller, I suspect you won't notice the noise at all. On the other
hand, if you're addicted to 8x10 enlargements with significant cropping, you
may want to consider a larger camera with lower noise levels. My biggest complaint
about the S4i's image noise though, is that, unless you control the ISO manually,
the camera will automatically crank it's sensitivity up to ISO 400 under even
moderately dim lighting. The result is really unacceptable levels of image
noise, that can crop up without the user expecting it. Most consumer-level
digicams these days really fall apart at ISO 400, but the S4i seemed to be
a bit too quick to jump the ISO up to that level. Check my sample
pictures, to see for yourself how the Optio S4i performs.
- Close-Ups: A small macro area with good detail. Flash
does well up close. The Optio S4i captured a small macro area in its normal
macro mode, measuring 3.26 x 2.44 inches (83 x 62 millimeters). In Super Macro
mode, performance was even better, with a minimum area of only 1.58 x 1.18
inches (40 x 30 millimeters). Resolution was high in both shots. Corner softness
is strong in all four corners of the frame, but is the most obtrusive on the
left side. - A general shortcoming in digicam super-macro modes, but still
pretty strong on the S4i. The Optio S4i's flash throttling down pretty well
for the macro area, too.
- Night Shots: Somewhat limited low-light performance,
with higher than average image noise. Autofocus works down to about 0.75 foot-candle.
(Should just handle typical city night scenes.) The Optio S4i produced
bright, usable images down to 1/2 foot-candle at ISO 50, and 1/4 foot-candle
at ISO 100 and above. Like some other cameras, the S4i's maximum exposure
time varies with the ISO setting chosen. At ISO 50 and 100, the maximum exposure
time is 4 seconds, but that drops to 2 seconds at ISO 200, and 1 second at
ISO 400. Thus, while higher ISO settings will help you maintain higher shutter
speeds at any given light level, they don't extend the camera's ultimate low
light ability. The color balance is warm from the Auto white balance, and
image noise is higher than average at all ISO levels. The S4i's autofocus
system works down to light levels of about 0.75 foot-candle, and there's no
autofocus-assist light to help at darker light levels. Typical city street
lighting at night corresponds to a light level of about one foot-candle, so
the S4i should have little trouble shooting under such conditions, but it
won't be able to go much darker than that.
- Viewfinder Accuracy: A very tight optical viewfinder,
but an accurate LCD monitor. The Optio S4i's optical viewfinder was very
tight, showing only about 72 percent frame accuracy at wide angle, and about
77 percent at telephoto. Images framed with the optical viewfinder were also
slanted, likely due to a shifted CCD chip. The LCD monitor performed much
better, showing approximately 99 percent frame accuracy at both zoom settings.
Given that I like LCD monitors to be as close to 100 percent accuracy as possible,
the Optio S4i's LCD monitor is essentially perfect in that regard, but its
optical viewfinder could use some help.
- Optical Distortion: High barrel distortion and corner
softness. Optical distortion on the Optio S4i is quite high at the wide-angle
end, where I measured approximately 1.1 percent barrel distortion. The telephoto
end fared much better, as I found only 0.1 percent barrel distortion there
(about three pixels). Chromatic aberration is moderate, showing about seven
or eight pixels of relatively faint coloration on either side of the target
lines. (This distortion is visible as a very slight colored fringe around
the objects at the edges of the field of view on the resolution target.) The
biggest optical shortcoming of the S4i's lens though, is the fairly severe
softness in the corners of its images, extending quite far into the frame.
- Shutter Lag and Cycle Time: Quite good for a subcompact,
a 2-frame buffer memory helps greatly. The original Optio S was very slow
from shot to shot, but the S4i adds two frames of "buffer" memory,
which lets you grab two full-resolution images in about 2.6 seconds. (Provided
that the image review function is turned off.) Shutter response is also surprisingly
fast, only 0.38 seconds with full autofocus and the lens set to its wide-angle
position, and 0.88 seconds at telephoto. "Prefocus" shutter response
is a astonishingly fast 0.014 seconds.
- Battery Life: Surprisingly good battery life for a subcompact.
Battery life on the Optio S4i is surprisingly good for such a tiny camera.
Worst-case life (capture mode with the LCD turned on continuously) is about
100 minutes. A proprietary power connector kept me from conducting my usual
tests, so I can't say what the run time is with the LCD off. For what it's
worth though, last year's S4 had a continuous run time of over two hours with
the LCD off, and nearly six hours in "sleep" mode. - The S4i's performance
should be as good or slightly better, given that its worst-case run time was
slightly better than that of the S4. Still, my standard recommendation of
purchasing a second battery along with the camera stands.
| Free Photo Lessons | |
|


Follow Imaging Resource: