Olympus SP-550 UZ Design
The Olympus SP-550 UZ is one of the most attractive long zoom digicams I've had the pleasure to use. Not only are the controls right where you need them, but put the thing down on a coffee table and your Waterford will get jealous. Like most other long zooms, it looks like a small dSLR. That gives it room among its 4.6 x 3.1 x 3.1 inch (116mm x 78.5mm x 78mm) dimensions to house that big glass and four AAs in the grip. Pop a card and those batteries in the Olympus SP-550 UZ and it weighs a comfortable 17.13 ounces (485.5 grams), enough to hold steady without wearing you out.
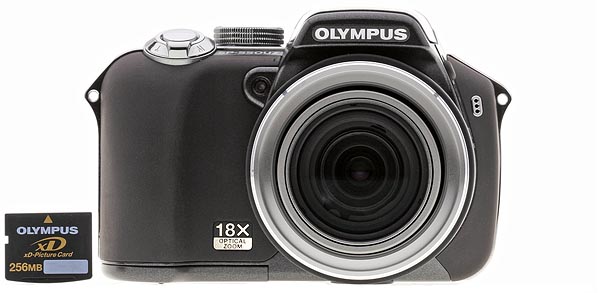
The front of the Olympus SP-550 UZ is dominated by the lens barrel which extends half-an-inch to wide angle at power-on, and out 2.5 inches at full telephoto. It has threads to attach the TCON-17 telephoto conversion lens. To the left of the lens is the self-timer lamp/AF illuminator and to its right is the microphone. The flash pops up from behind the company name above the lens.
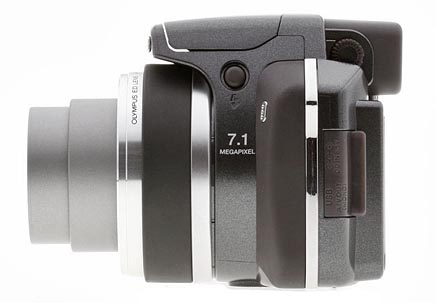
On the right side, behind the strap eyelet (which takes a small plastic-covered wire ring to which you attach the shoulder strap), is the rather large plastic cover to the card compartment.
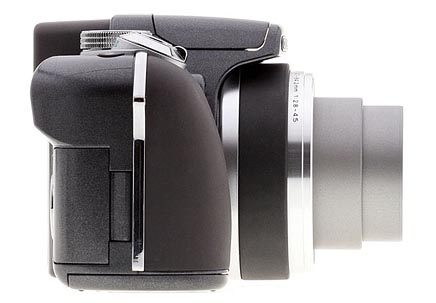
The left side of the SP-550 you can see the flash popup button just below the flash, the other strap eyelet, the diopter adjustment for the electronic viewfinder, and a rubber flap for the USB In/AV Out and DC in connections.
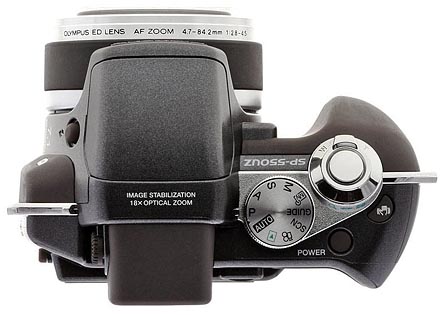
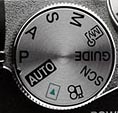
On top, the controls are all on the right side. The Zoom lever surrounds the Shutter button with the Power button to the rear of that combo. Nestled next to the zoom Lever is Digital Image Stabilization/Custom button with a shaking hand icon. To the left of this cluster and prominently raised above it is the Mode Dial with settings for Programmed Auto Exposure, Aperture Priority, Shutter Priority, Manual, Full Auto, Playback, Movie, Scene, Guide, and My Modes.
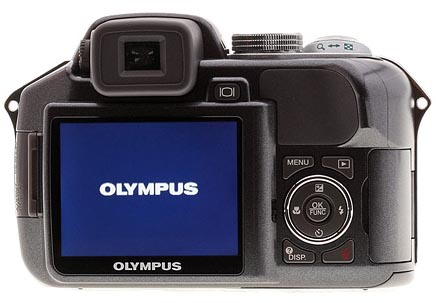
On the back of the Olympus SP-550 UZ, the large LCD dominates the landscape with the EVF just above it, its diopter adjustment dial to the left on the side and the toggle for the LCD/EVF display just to the right. To the lower right of the LCD is a small cluster of buttons that tap into the menu system and most camera options. At the four corners around the Arrow Pad are the Menu button (top left), Playback/Print button (top right), Erase button (bottom right), and Display/Guide button (bottom left). Surrounding an OK/Function button, the Arrow Pad holds an Up button to control Exposure Compensation, Right button to toggle through the Flash modes, Down button to select a Self-Timer option, and Left button to select a Macro mode. The arrow buttons also function as navigation devices when you use the Menu button to call up the LCD menu system. And the OK button confirms selections, as you might expect.
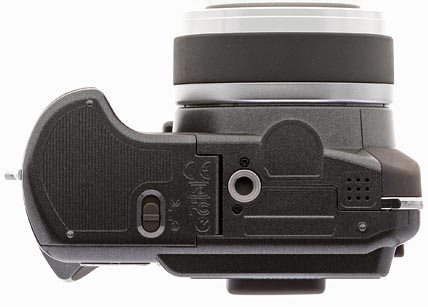
On the Olympus SP-550 UZ's bottom, the large battery compartment cover includes a switch to lock it shut. Next to it (making battery swaps impossible if mounted on a tripod) is a plastic tripod mount. And further to the right is the speaker.
Olympus SP-550 UZ External Controls
Power Button: In any Record mode, the monitor turns on and the lens extends. With the Mode dial set to Playback mode, the monitor turns on.
Mode Dial: Sets the desired Record mode or Playback mode. Options include:
 Auto: The camera makes all the exposure decisions.
 Programmed Auto: The camera sets aperture and shutter speed but you can adjust the exposure darker or lighter using Exposure Compensation.
 Aperture Priority: You select the aperture and the camera finds the corresponding shutter speed for the correct exposure. You may use Exposure Compensation to change the exposure.
 Shutter Priority: You select the shutter speed and the camera finds the corresponding aperture for the correct exposure. You may use Exposure Compensation to change the exposure.
 Manual: You select both the aperture and shutter speed using the Arrow pad and reading the exposure value on the LCD.
 My: This mode allows you to set each Record mode option manually to use as your own Record mode.
 Guide: This mode displays common problems like "Shooting into backlight" and steps you through the optimum settings.
 Scene: Sets the camera automatically for the following situations: Portrait, Landscape, Landscape & Portrait, Sport, Night Scene, Night & Portrait, Indoor, Candle, Self-Portrait, Available Light, Sunset, Fireworks, Cuisine, Behind Glass, Documents, Auction, Shoot & Select1, Shoot & Select2, Beach, Snow, Underwater Wide1, Underwater Wide2, and Underwater Macro.
 Movie: Captures movies with sound (if enabled) and zoom (if digital zoom is enabled). Image stabilization is also available in this mode but may overheat the camera.
 Playback: Conveniently switches to Playback mode from Record mode, displaying the last image taken.
Shutter Button: This button sets focus and exposure when halfway pressed, and fires the shutter when fully pressed. In Playback mode, pressing this button returns the camera to the selected Record mode.
Zoom Lever (see above image): Surrounding the Shutter button on the top panel, this lever controls the optical and digital zoom in any Record mode. In Playback mode, the lever controls the amount of digital enlargement applied to captured images, to a maximum of 10x, and accesses Index and Calendar display.
![]()
Stabilization/Custom Button: Enables or disables digital image stabilization in Record modes (using OK to confirm). Auto and Movie modes activate it by default. In P, A, S, M, My or Scene modes, you can assign a function to the button.

Flash Popup Button: Pressing this button opens the flash above the lens, enabling flash options.
![]()
Diopter Adjustment Dial: Directly to the left of the electronic optical viewfinder, this dial is used to adjust the dioptric correction of the viewfinder, accommodating eyeglass wearers.
![]()
Monitor/Viewfinder Button: Toggles the display between the LCD monitor and the EVF.
![]()
Menu Button: Displays the LCD menu system on the active display.
![]()
Playback/Print Button: In a Record mode, this button displays the last image captured. Pressing it again returns to the Record mode. In Playback mode with a printer connected to the camera, this button prints the image.
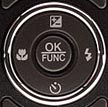
Arrow Pad: This circular controller is used to select menu options, Scene modes and navigation through captured images. It has four buttons incorporated into its ring and a center OK/Function button used to confirm selections.
- Up Arrow: The Up arrow also activates Exposure Compensation. Once activated, you can use the Left and Right arrows to change the value.
- Right Arrow: When the flash is popped up, this button displays a menu of the Flash modes. Options include Auto, Red-Eye Reduction, Fill-In, Fill-In and Red-Eye, Slow Sync, and Off.
- Down Arrow: This button displays a menu of the Self-Timer modes. Options include 12 seconds, 2 seconds and Off. Auto.
- Left Arrow: This button displays the Macro mode options of Normal, Super Macro, and Off.
![]()
Display/Guide Button: In a Record mode, this button toggles through the normal display of essential information, a simple display with just battery and focus indicators, frame assist display with a grid, and a more elaborate display with a live histogram. In Playback mode, the button toggles through the normal display, detailed display, no information display, and a histogram with data display. When using the menu system, holding this button down displays the menu guide explanation of the selected item. If the camera is off, pressing this button displays the current time and any alarm set for three seconds.
![]()
Trash Button: This button erases the currently displayed image after confirmation.

Battery Compartment Lock: This slide switch locks or unlocks the battery compartment door.
 Fujifilm GFX 50S Review
 Fujifilm X-T3 Review
 Olympus E-M5 III Review

Follow Imaging Resource