Sigma SD10Sigma's digital SLR uses Foveon's latest "X3" sensor technology to boost ISO and reduce image noise.<<Executive Overview :(Previous) | (Next): Viewfinder>> Page 3:DesignReview First Posted: 10/26/2003 |
Design
With an exterior that closely resembles a mid-sized 35mm film-based SLR, Sigma's SD10 digital SLR is an exciting new contender in the prosumer digicam marketplace. As with its predecessor, its body panels appear to be made of plastic - but the camera seems pretty substantial nonetheless, apart from a slightly "tinny" feel to the panels on its face. Equipped with a 3.43-effective megapixel Foveon X3 CMOS sensor featuring microlenses to increase light sensitivity, the SD10 is only the second camera after the SD9 that it replaces to offer a sensor capable of capturing red, blue, and green light with each pixel. Another innovation held over from the SD9 is its Sports Finder viewfinder display, which lets you see an extended area outside of the actual frame, unlike any of the digital SLR viewfinders from other manufacturers. An SA-type, bayonet lens mount accommodates a wide range of Sigma lenses, and an optional full manual exposure mode provides total user control. The SD10's somewhat bulky body requires a two-handed grip in most cases, and measures 6.0 x 4.7 x 3.1 inches (152 x 120 x 79 millimeters) excluding projections - exactly the same overall dimensions as the SD9. Excluding the lens, batteries, and memory card, the SD10 weighs a substantial 27.7 ounces (785 grams) - slightly lighter than the SD9, probably due to the removal of the CR123A batteries and the subsequent reprofiling of the handgrip. Like its predecessor, somehow the SD10 still manages to feel fairly light in the hand despite the figures looking fairly high.
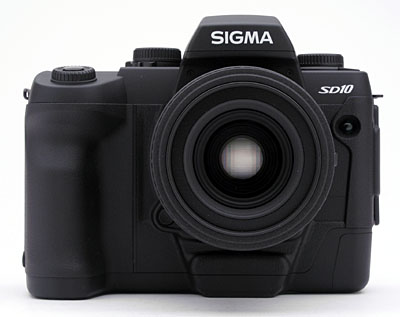
The front of the SD10 features the lens mount and only two control buttons. On the bottom, left side of the lens mount is the lens release button, which unlocks the lens so it can be rotated to remove it from the mount. A Depth of Field Preview button is on the upper right side of the lens mount (difficult to see in this view), while the remote control sensor in the upper right-hand corner of the body. The large hand grip, which has been subtly reprofiled compared to that on the SD9, provides a secure hold thanks to a rubbery coating that provides good friction against your fingers as they wrap around the camera.

The memory card compartment is on the right side of the SD10 (as viewed from the rear), protected by a hinged, plastic door. A latch on the back panel flips the door open, revealing the CompactFlash (Type I and II) / MicroDrive slot. Just above the card slot is one of the eyelets for attaching the neck strap. A minor ergonomic note: As with the SD9, the neck strap eyelets are positioned so the camera body will hang level by itself, but attaching a lens of any sort unbalances the camera, leaving it tilted down at a significant angle. While there's no way camera-mounted eyelets could possible balance even moderately long lenses, moving the eyelets as far forward as possible would let the camera hang nearly level with modest primes and short zooms attached. At bottom right of the memory card compartment is a cable release socket, protected by a tiny, plastic cap. My only concern here - and one that we also noted when we reviewed the SD9 - is that the tiny cap removes completely from the camera body, and thus could easily be lost.

The opposite side of the camera houses the connector compartment, which includes the Video Out, DC In, USB 1.1, and IEEE-1394 connector terminals. Just below the connectors is the battery compartment, which locks into place with a metal latch. Once unlocked, a tray (identical to the revised tray for the SD9) pulls out completely from the compartment. I really appreciate side battery access like this, especially on SLR cameras, as it lets you quickly change camera batteries without dismounting from a tripod. Many digicams provide battery access on the bottom panel, and put the battery compartment too close to the tripod mount. The second neck strap attachment eyelet is also on this side of the camera, just above the connector compartment.
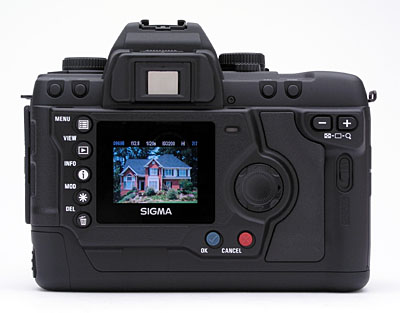
The majority of the SD10's external controls are on the rear panel, sharing space with the LCD monitor and optical viewfinder. The optical viewfinder eyepiece features a diopter adjustment control, just on top of the eyepiece. A Four Way Arrow pad on the rear panel navigates through the SD10's LCD-based menu system and scrolls through captured images on the memory card while in review mode. (As with the SD9, I felt the arrow pad on my evaluation sample was a little finicky about moving up and down in the menu system, but News Editor Mike Tomkins didn't seem to notice any similar problem so it may just come down to user preference...) The Menu, View, Info, Modify, and Delete buttons lines the left side of the LCD monitor, while the Resolution, ISO, AE Lock, and Exposure Compensation buttons line the top of the rear panel. Two enlargement (+/-) buttons control image enlargement while in image review mode. Just beside the top right corner of the LCD monitor, a small LED flashes whenever the camera is accessing the memory card. Finally, the OK and Cancel buttons used when changing settings in the menu system can be found to the right of and directly below the LCD display. A slight change compared to the original SD9 model we reviewed is that these buttons are now made of blue and red color rubber respectively, making it less likely you'll press the wrong button (the SD9 buttons were black with white silk-screened logos on them similar to most of the other buttons on the camera).
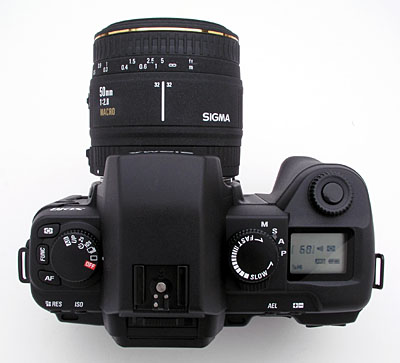
The SD10's top panel has no shortage of controls, including the Shutter, Metering, Function, and AF buttons, and Command, Mode, Shutter, and Drive dials. Also on the top panel is the external flash hot shoe and small status display panel. As with its predecessor, I generally really liked the SD10's control layout, as it was very clear what each control did, and very easy to select various camera functions. I appreciated having the major camera functions spread around on separate control buttons, rather than being ganged up on a control dial or actuated through combinations of two buttons at once.
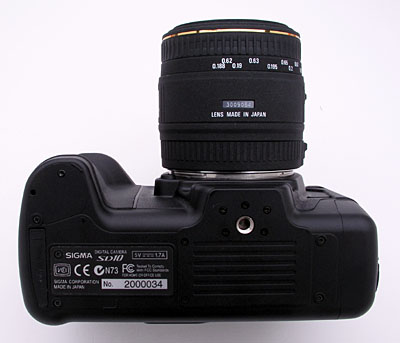
The SD10's bottom panel is smooth and fairly flat, with a metal tripod mount close to dead center. - It's located under the centerline of the lens, and positioned fairly far forward on the camera body. While it's impossible to position the tripod mount on an SLR under the lens' nodal point, having the mount located fairly far forward like this minimizes the amount of parallax distortion in panoramic shots. I also appreciated that there was a fair bit of flat area around the socket, making for a secure, stable attachment to tripod mounting plates. Also on the bottom panel is a power pack connection terminal (hidden beneath a rubber flap) that I assume is for an optional accessory handgrip. Gone is the CR123A battery compartment from the SD9, since the camera is now powered by only one set of batteries (a very welcome change).
Reader Comments! --> Visit our discussion forum for the Sigma SD10!

Follow Imaging Resource: