Olympus TG-5 Field Test Part I
Megapixel sanity meets enthusiast features
By Dave Pardue | Posted: 06/02/2017
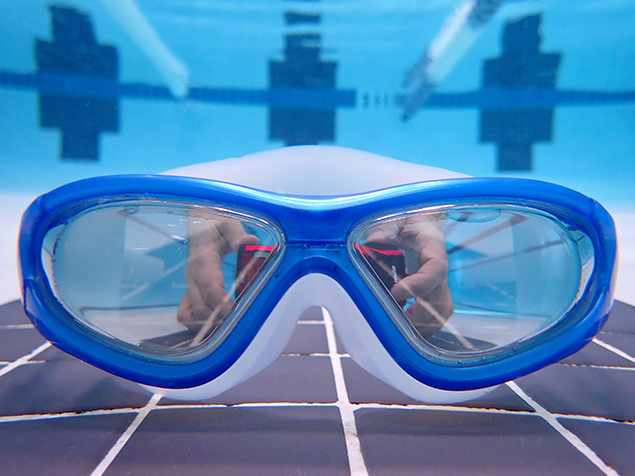 |
1/60s / f/2 / ISO 160 / 25mm eq. |
What a bold move by Olympus, going against the grain in the Great Megapixel Race with the 12mp TG-5. Yes, Sony did it with the full frame A7S series at 12mp, but they shielded themselves to a degree by the fact that buyers had choices for higher resolutions from them in the A7 and A7R lines as well. For Olympus, this is their only shot at luring potential buyers out there to invest in a tough camera, in an age where smartphones have already taken away so much of the compact camera market. A big gamble indeed.
We at IR have been very vocal about applauding any move away from the megapixel insanity, especially as relates to smaller sensor sizes. Complain all day if you want about how small a 1/2.3" sensor is, but the same crowd would complain a lot louder if the camera got too bulky as a result of a larger sensor. After all, these things also need room for protective seals and gaskets to keep the lethal water out, yet still fit snugly into a pocket, pouch or other water-bound carry-all. The Olympus TG-5 aims to be a complete waterproof, rugged solution for both novices and enthusiasts, and in addition to the healthy trimming down on the pixel count, it also comes sporting a number of rather interesting upgrades to the TG line.
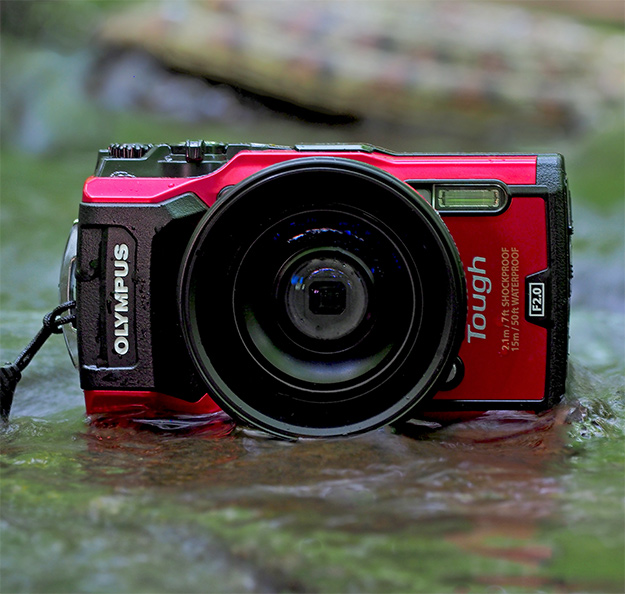 |
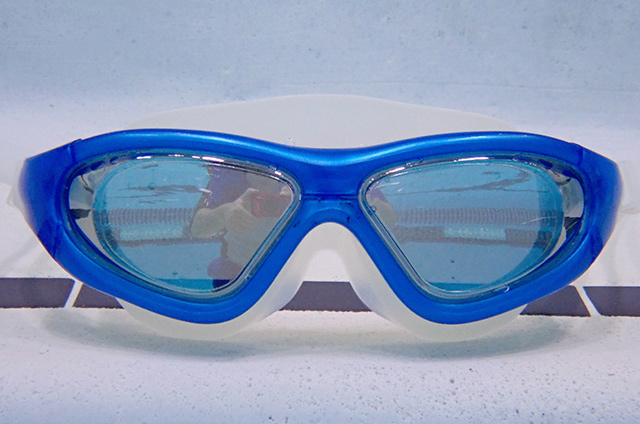
The Olympus TG-5 as shown with the optional FCON-1 wide angle fisheye converter |
Physically the TG-5 is quite similar in appearance to the TG-4 in most respects. The notable difference on the front of the camera is the very welcome new addition of a locking mechanism for the accessory mount surrounding the lens. This locks the accessory adapter into place just like interchangeable lenses lock into place, and prevents both the adapter and the supplied protective ring (used when no adapter is in place) from accidentally being unseated and lost. This is a nice touch.
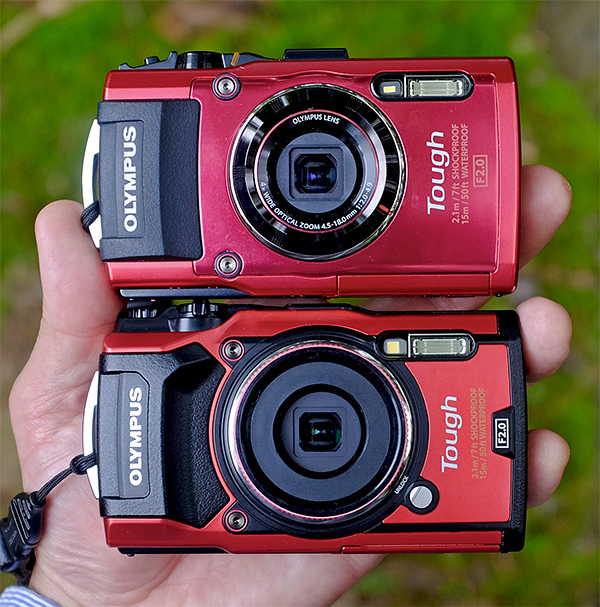 |
The TG-5 (below) retains much of the same external styling as the TG-4 before it, but adds a critical locking button to the accessory mount which keeps the adapter and accessories secure. |
On the top deck, the big newcomer is the control dial, a first for a rugged waterproof camera, as seen on the far right in the image below. This takes the place of the former zoom toggle, which now surrounds the shutter button. The one additional switch is the "log" lever, which engages the various built-in logging and tracking features such as GPS. And the one notable addition to the rear of the camera is adding the movie icon to the mode dial.
 |
The TG-5 (above) sports a welcome new control dial to the right, and moves the zoom lever to now surround the shutter button. A log on-off switch is also now added to the top deck. |
The control dial changes in operation depending on the mode the camera is in. For aperture priority it controls the aperture of course, and while in P, movie and microscope modes it controls the exposure value. Thanks to a helpful reader comment alerting us that it also assists with focus fine-tuning while in manual focus (I didn't yet have access to a manual during this first Field Test). Stay tuned for more to come, as I'll be exploring that a lot further now that we're aware of the manual focus aspect of its operation.
Another significant change from a user-standpoint can't be seen until you power on the camera, because the primary menu system has now been beefed up significantly. The former "compact camera" type system they've employed in the line up until now has been discarded and they've ported in the basic menu configurations from their higher-end PEN and OM-D cameras. Wow... what a nice surprise! Anyone familiar with Olympus cameras can now pick up the TG-5 and feel immediately comfortable, no big learning curve to speak of other than familiarizing yourself with things like the icons for engaging the optional accessories such as the teleconverters, of which we'll begin exploring below. (And for anyone new to Olympus menus, we find them somewhat odd and quirky but have grown to love them all the same, so just give it time and a sprinkle of patience for the first week or so.)
Olympus TG-5: Image Quality
This first sample we were treated to by Olympus has firmware version 1.0, and while we're told it's not from the final mass production line, it does appear armed with all the "right stuff" as a full review unit. As such, I couldn't wait to get it checked-in, charged up, and then out and about to start capturing images and giving it a shakedown cruise. I've shot extensively with the TG line since the TG-2 scored high marks in our Best Waterproof Roundup from 2013. It's interesting to note that the TG-2 was the last in the series to sport a 12mp sensor, and now here we are several models later back at that arguably more reasonable pixel count.
In addition to the sensible resolution, the camera shares the same "brain" (a.k.a. processor) as the one found in the flagship, award-winning E-M1 Mark II. Pairing these credentials with a bright f/2 aperture at the wide-angle yields the potential to deliver images that should, at least on paper, surpass anything delivered from the same sensor size before this. We've yet to put the camera through our rigorous lab testing, however, so time will tell there, but we now have plenty for you in the way of real world shots on both dry land and submerged.
As of the writing for this first Field Test there weren't any pools yet open to kids for the summer, but that allowed for some very calm pools in which to gauge underwater image quality. I'll circle back for the next Field Test with plenty from that chaotic side of life, but to get started down the image quality road, below are some underwater examples shot at wide angle (25mm eq.) and full telephoto (100mm eq.) at a variety of apertures and ISO settings.
 |
I.Q.: I shot this basic image at f/2, f/2.8 and f/8 to showcase the underwater IQ at each available aperture, while allowing the ISO to rise as needed. Click on any of the links for access to the full resolution version. |
(Images have been resized to fit this page, cropped and/or altered in post-production, primarily to balance shadows and highlights as needed. Clicking any image will take you to a carrier page with access to the original, full-resolution image as delivered by the TG-5. For additional images, access to RAW files and EXIF data please see our Olympus TG-5 Gallery page.)
For anyone wondering why lowering the resolution means potentially increasing the basic image quality, it all has to do with the size of the pixels, which are the actual mechanisms gathering the light for you. At this sensor size, the approximate pixel pitch is 1.54 microns, verses 1.34 microns for a 16mp sensor of the same physical size, such as that in the previous TG-4. Larger pixels are simply more efficient gatherers of light covering more surface area and can therefore detect more light without having to increase the ISO gain and risk introducing noise into your image.
I've personally found ISO 800 to be about as high as I can generally tolerate for most sensors this size, but the combination of larger pixels and a newer processor in the TG-5 could change that. I'm going to wait on that assessment until we have our lab First Shots series, as they level the playing field and allow controlled apples-to-apples comparisons, but in the meantime you'll find a variety of ISOs in our TG-5 Gallery. Below are a few to get you started, and as always clicking on an image will bring you more options and information.
 |
1/50s / f/4.9 / ISO 800 / 100mm eq. |
 |
1/320s / f/10 / ISO 100 / 35mm eq. |
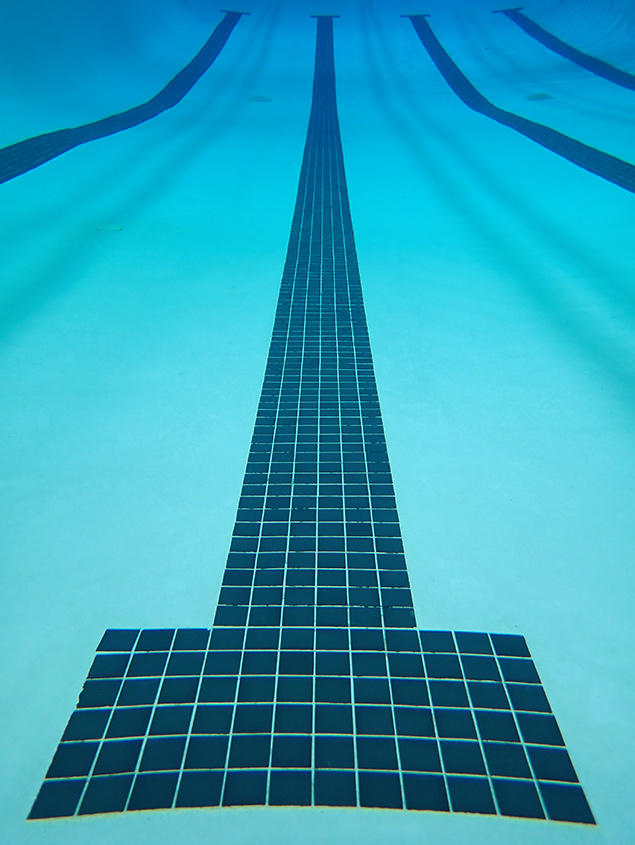
 |
1/30s / f/2 / ISO 250 / 25mm eq. |
Bright & spacious: This is an indoor shot you won't see with many compact "tough" cameras, because the TG-5 allows for an f/2 maximum aperture -- far brighter than is typical for this market segment. This allows the ISO to remain comfortably low while allowing for a 1/30s shutter speed here, and also gives a bit of subject-to-background isolation to the image, even at this fairly wide focal length. |
TG-5: In a Flash
The Olympus TG-5 is very much aimed at enthusiast photographers, and for this reason I really wish it had full manual exposure control. It was the first waterproof camera to even have a mode dial and is now the first to add a control dial (!) which I really love. Perhaps they'll consider full manual control at some point down the line, but for now there are still ample options for enthusiast photographers to fine-tune their shots, more than with most any other rugged camera out there, and one of these options is now the ability to have fully manual flash control. (The TG-5 also offers flash exposure compensation of up to +/-2.0 EV in most shooting modes, whereas in the TG-4, flash compensation was oddly only available in underwater modes.)
This was welcome news to me, as I really love having full control over the flash value, which now goes all the way down to 1/64 power, so you can pretty much dial it in any way you need. I don't like being able to tell when flash was used in a shot, but do enjoy using it subtly to help balance foreground and background objects. The two images below are examples of using it manually to dial in just enough to bring some pop to the foreground subjects without being otherwise noticeable.
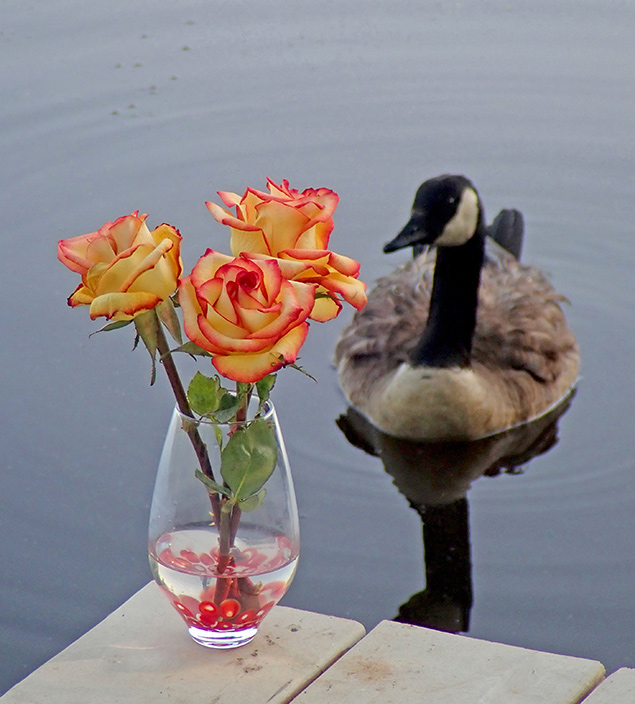 |
1/200s / f/4.9 / ISO 200 / 170mm eq. [TCON-01 170mm eq. teleconverter attached] |
A splash of flash: This was taken just after dawn and I needed a bit more attention given to the roses in order to set them off. Dialing in just a little pop of manual flash helped out with that, where "auto" flash would have likely overpowered the foreground. This is also the first shot in this Field Test taken with the TCON-01 170mm eq. teleconverter, and we'll discuss that and the FCON-01 more down below. |
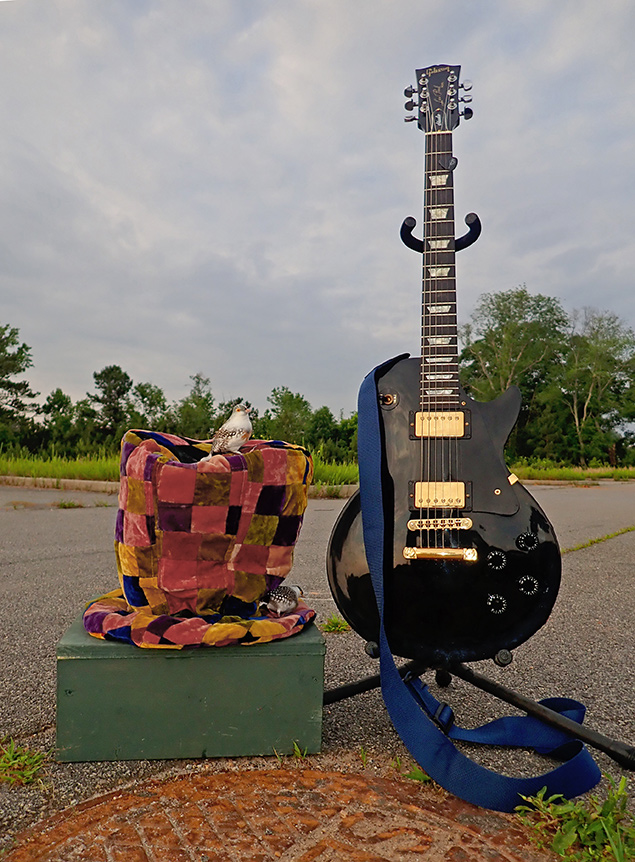 |
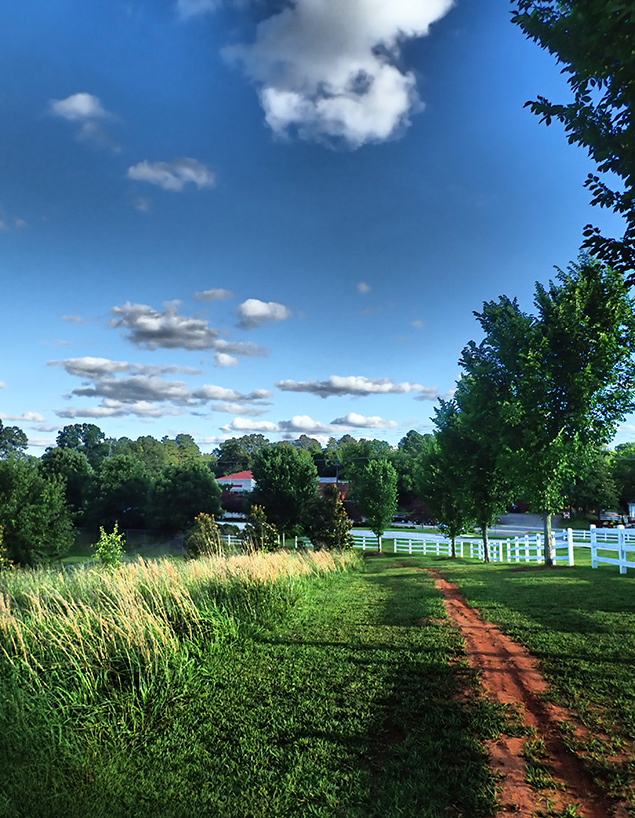
1/640s / f/2 / ISO 100 / 25mm eq. |
Balancing act: In order to not have the sky blown out I used a touch of manual fill flash here and was able to keep the exposure good for the sky by dialing the exposure down to -1.3EV, although I could have done a better job with it by dialing up a touch more flash and dialing the EV down even further. This is where manual flash control combined with E.V. is so handy. |
Olympus RC flash mode
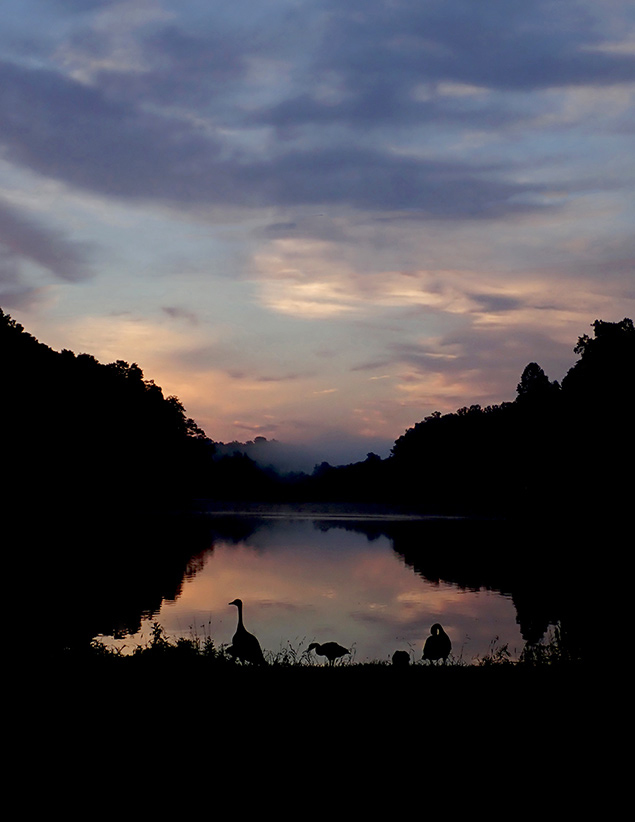
I was pleased to see "RC" as an option in the TG-5 flash menu. RC is the Olympus name for remote flash control, and I had only used it a few times before. We'd just received a sample copy of their flagship FL-900R flash unit, and I thought it'd be interesting to see if I could get this little tough camera to fire that nice, luxurious strobe, so I grabbed both and headed outside at dusk one evening.
I didn't have an instruction manual during this Field Test, but I was able to gather enough information from the TG-4 and 900R manuals to get myself in the ballpark. Then it was just a matter of remembering to swivel the flash body so that the front was facing towards the TG-5, so that it could "see" the RC signal being beamed over by the camera. Compose the shot, press the shutter, and what do you know... it worked!
 |
1/100s / f/4.9 / ISO 200 / 100mm eq. |
Remote flash from a tough camera: Using RC Mode I was able to trigger the Olympus 900R off-camera with the TG-5. It certainly worked for this shot, delivering far better results from a 45-degree angle towards the subject -- and employing a bit of bounce flash as well -- than what I could have achieved with the camera's built-in flash alone. |
The remote firing option is a nice addition to the camera's capabilities, but it did leave me yearning more for a manual exposure mode in the camera itself, and I'm not sure any reason why that shouldn't be possible at some point. The tricky balance between foreground and background imagery often demands fully manual control, but at least you now have an ample degree of control where flash value is concerned both on and off the camera.
[Note to readers: I had anticipated reporting the manual flash values for you after each selection above, but was disappointed to learn that our EXIF reader does not report these.]
TG-5: Image Stabilization
We'll take a deeper dive into the TG-series conversion lenses down below, but for an initial look at image stabilization on the TG-5, I've chosen this image which was shot using the optional TCON-01 teleconverter, which extends the available reach of the TG-5 to a generous 170mm eq. With this attached and the camera properly set to accommodate it (a setting in the menus), you're at full telephoto with a maximum aperture of f/4.9. This is wide enough to allow for at least some subject-to-background isolation depending on the shot, but is not bright enough to allow for fast shutter speeds at times such as dusk, when this image was taken. At a focal length of 170mm eq. and a shutter speed of 1/15s, I'm usually not steady enough to capture anything usable, but with the onboard sensor-shift I.S. enabled I was able to fare pretty well here. I didn't nail every shot that I attempted, as we're not talking about I.S. of the caliber found on a camera like the E-M1 II, but this is still a fairly good feat given the long focal length.
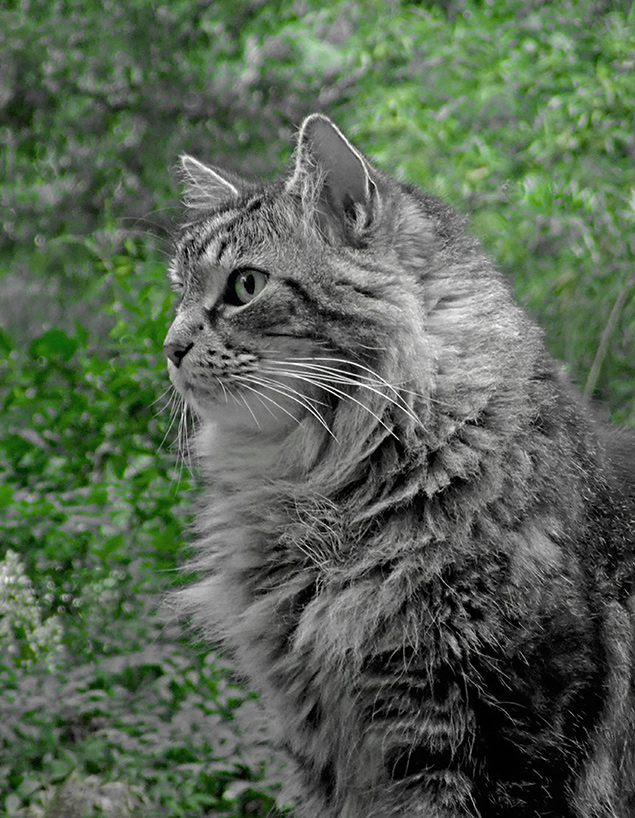 |
1/15s / f/4.9 / ISO 800 / 170mm eq. [TCON-01 170mm eq. teleconverter attached / Partial Color mode] |
Busy bokeh: The foliage behind my feline companion here is only about ten feet away, and yet for this sensor size the subject-to-background isolation is really not bad. Unfortunately the bokeh itself is fairly busy and hectic, but with a small sensor, you certainly can't be expecting the creamy bokeh possible from a larger rig. Your best bet with this set-up is to create more distance between your subject and background, and I'll aim to have more of those examples in the next Field Test. I also used Partial Color mode here, and we'll discuss more about filters in another section below. |
TG-5: Sporting specialty modes in spades
If you like specialty modes you're in luck with the TG-5, as it is made for anyone who enjoys going the extra mile to capture a certain shot. The more I've used them over the years, the more I've come to enjoy them, and having even more now ported down to a tough camera is just fine by me. We'll take a look at a sampling of them here and see how they compare to their higher-end versions on the OM-D cameras as well.
Pro Capture
New to the table for the TG line is Pro Capture, and if you've yet to use it on the E-M1 Mark II (where it made its debut), it's quite a useful feature for capturing action. While in this mode, you simply half-press the shutter button and the buffer begins to acquire images, including RAW files, at 10fps. These aren't written to the card until you fully depress the shutter, at which time up to a full ten seconds of the buffered images are then written to the card. You can also choose to keep firing at that point, although once the buffer fills then it will operate as is consistent with normal burst mode.
The possibilities are varied, especially for anything where magic moments happen rarely. In these cases in the past you've been forced to take your chances and eat up precious card space, but with Pro Capture you're armed to capture the magic with very little wasted card space and also very little time wasted time going through images later. I was thrilled to see it ported down to a tough camera so quickly, and having now used it once, I am certain I'll turn to it again as it really is quite easy to use in the field.
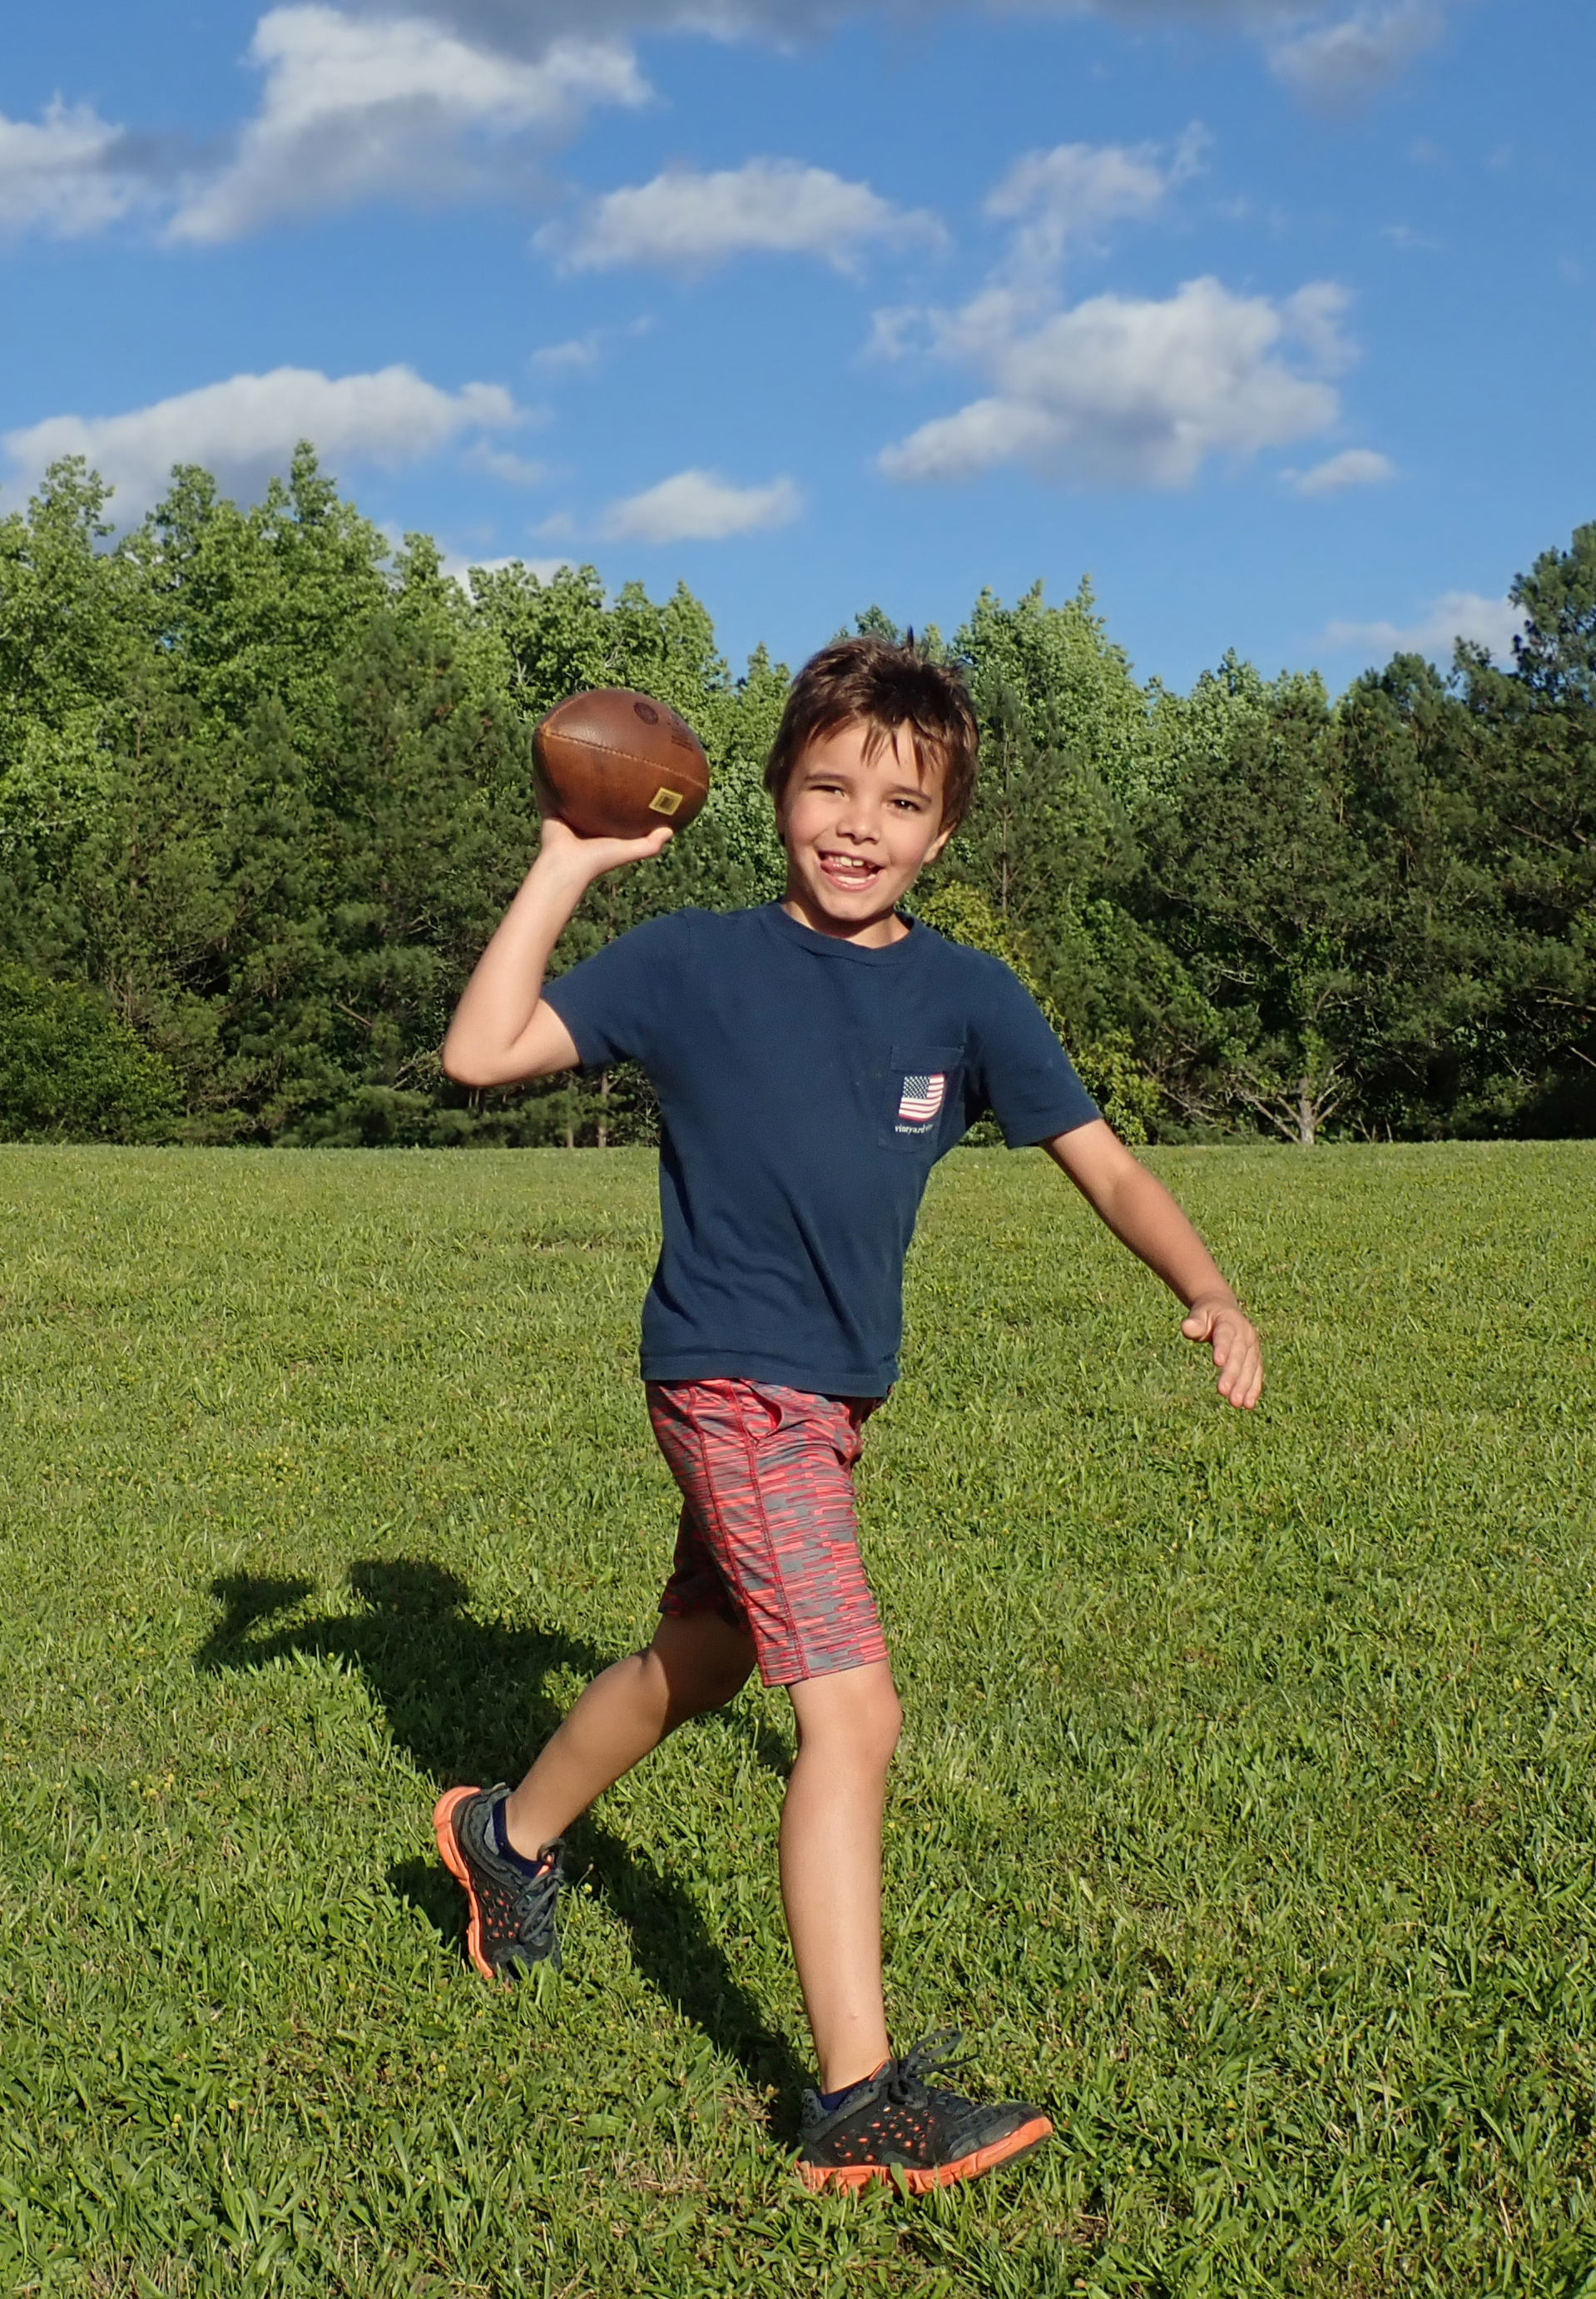 |
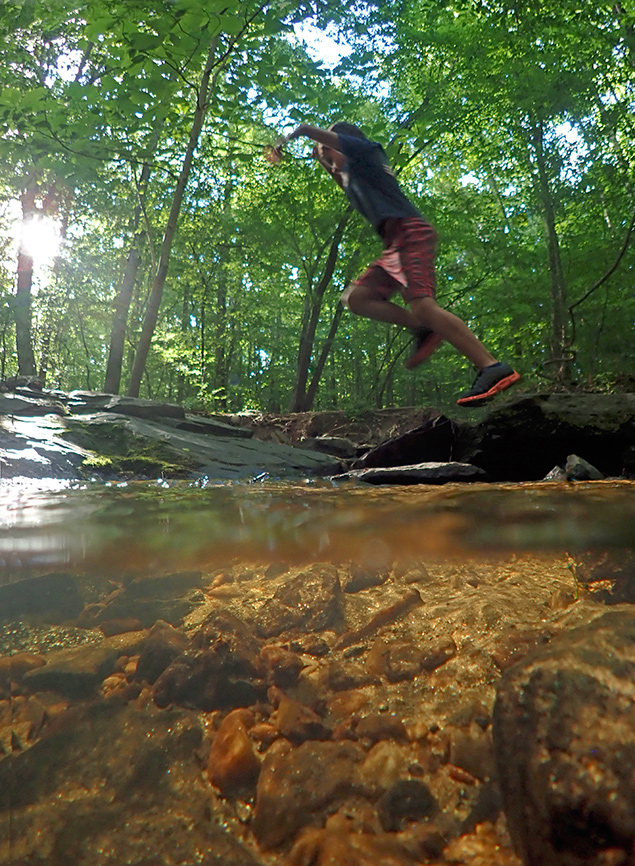
1/1000s / f/4 / ISO 100 / 40mm eq. |
The next Tom Brady?: Well, he is wearing New England Patriots' colors, so that's a start. This is the first time I'd gotten to try my hand at Pro Capture with the TG-5, and it was an interesting way to get started because he and I were doing passing drills. As such I was running laterally and half-pressing the shutter with one hand while also playing catch with the other. The one thing I wish you could enable is the ability to buffer continuously without having to half-press the shutter (or perhaps just half-pressing it once to acquire focus and exposure). Then, once the moment happens that you'd like to capture, you'd simply fully press the shutter release. I realize this would drain the battery a lot more quickly if you weren't paying attention and left it constantly buffering, but if it was something you could switch on and off then you'd learn quickly enough to "be careful" just how much you left in on while in that free-form buffering mode. But even having to half-press the shutter while buffering, the feature is simply terrific at allowing a shooter to continuously capture the action until just the right moment, at which time that moment is yours to acquire with hardly any waste of card space. A very neat feature indeed, and I can't wait to try it more for the next Field Test now that the local outdoor pools are finally open. |
Of course, the only real drawback to using Pro Capture is that you're obligated to use electronic shutter, which can potentially result in rolling shutter artifacts (the "Jello" effect seen on occasion in video). For this series he and I were both in constant motion, and I didn't notice any oddities of this kind in the images. I'll be shooting much more with this mode, including with faster subjects on the lake, and will report more on the rolling shutter potential in the second Field Test.
[You can view the entire Pro Capture burst series, unedited, in our Olympus TG-5 Gallery.]
In-camera RAW processing (Or, Slash meets the Mad Hatter!)
I was on a shoot with a higher-end rig early one morning, and when the session concluded I realized I had the TG-5 in the front seat of my car. ["Hang on... let me fire off just one or two more!" Quick -- fumble with exposure and enable a touch of flash so it's not just a silhouette.] If I'd had time I would have worked with RC mode and illuminated the shot with the Olympus 900R's (which I was using for the primary shot from earlier) but again, this was at the end of a long and grueling several-hour shoot, and I was desperate for more coffee. But... that just made the image all the better to use for trying the new in-camera RAW processing feature.
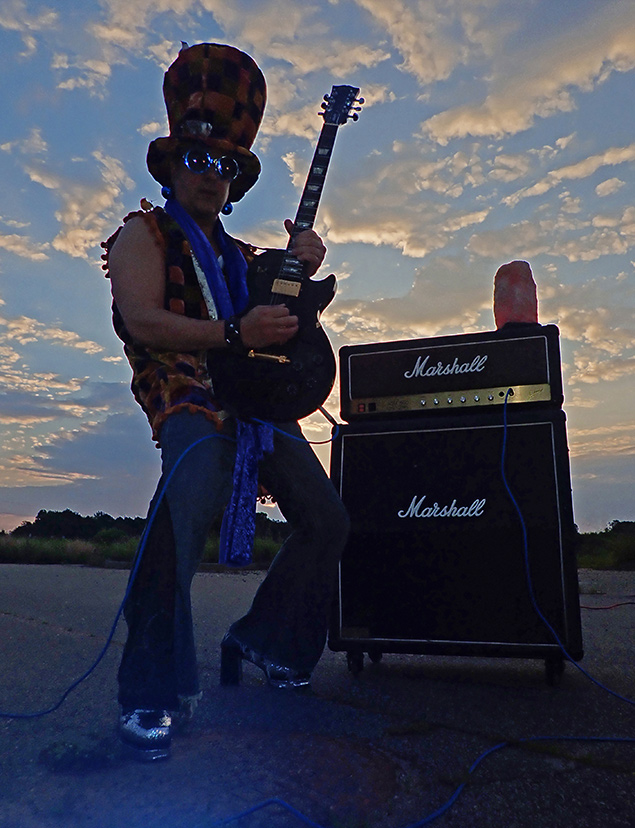 |
1/2000s / f/2 / ISO 100 / 25mm eq. [Original JPEG] |
Wandering in West L.A.: Without access to Manual mode, the Exposure Compensation becomes critical for getting the sky just right. Exposing for the subject here would have blown out the sky entirely and the shot wouldn't be the same. I should have stopped down for several reasons but, again, this was just a quick snap. |
So the shot's not bad given the rapid-fire necessity, but having the RAW image allowed me to run it through the internal processing engine once again. You're given the option to choose any or all of the presets for picture modes, and you can literally ask the camera to spit out 17 different incantations of the same shot for you! It only takes a few seconds given the speed of this processor, so it's a pretty neat little trick for a compact camera to be able to pull off.
Because I've loved Dramatic Tone for years now, but had not yet tried the new Dramatic Tone II which is monochrome, I decided that it might yield the more otherworldly look that I had in my head.
 |
[Converted in-camera to Dramatic Tone II from RAW] |
Welcome to the Jungle: Dramatic Tone II gave this street shot some added flair and grit in a pinch, processed after-the-fact from the RAW file in-camera. |
The RAW processing in the TG-5 is limited to the internal presets, and isn't for enthusiast-level tweaking of parameters such as contrast or highlights. But it's still a nice feature to have and is especially useful for on-the-fly conversions before uploading to the online world.
[Extra credit: Once you acquire a TG-5, try this: Output 3-4 of your favorite picture mode presets from the same RAW file in-camera and then stack them in Photoshop or your favorite photo editor. You can then use various masking techniques to bring out parts of each outputted image that you like, easily blending them. I did this using a combination of Dramatic Tone I & II, and you can view the resulting image here.]
Focus Stacking
I got to try my hand at Focus Stacking for this article with the E-M1 once it was upgraded to firmware v4.0. I found it to be quite a handy and nifty little feature, and it certainly brought a great deal of possibilities to the macro game that formerly required intensive post-processing. In short, the camera snaps a series of the same image at varying focus points and then blends them, or stacks them, together in-camera for you and produces one presumably crisp image with a deeper depth of field. I say "presumably" because it's not a perfect science, and if the camera has to skip too far between focus points, it can leave little unfocused "ripples" in the image.
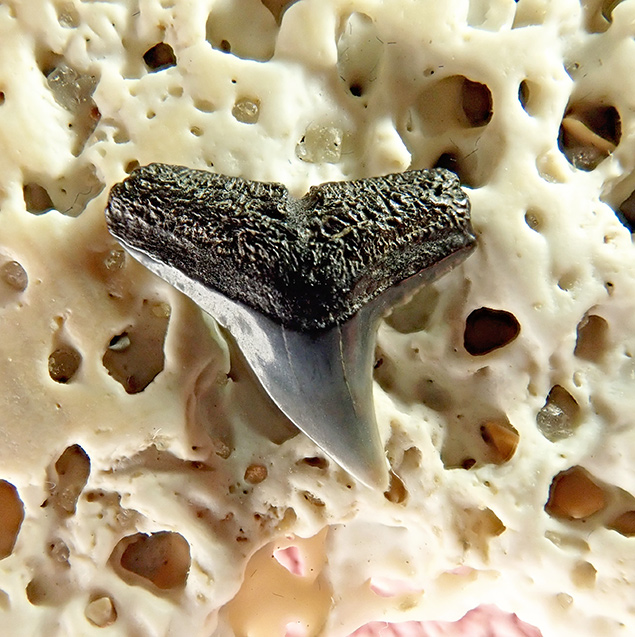
Fortunately with the E-M1 and now the E-M1 Mark II and a few additional OM-D bodies, you have some control over how the camera chooses these focus points, and can fine-tune the results all within the camera. The TG-5 doesn't come with any tweakable settings in this regard, and yet I was surprised at how good a job it did with focus stacking in general. I shot these handheld for reasons mentioned below, and have examples showing varying distances for comparison. The camera produces two images for you, one a single shot and the other "stacked" as seen below. In both images I've set the initial focus point on the shark's tooth.
 |
Above: Single image - not stacked / Below: Multiple focus-stacked image |
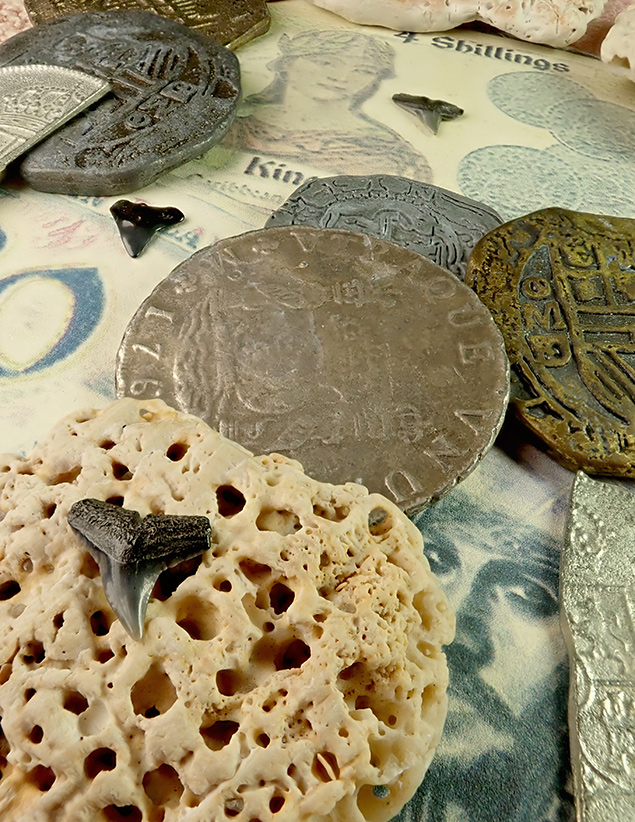 |
Now let's get a little more up close and personal. Below is the same baby shark's tooth atop the shell, and as you can see from the relative scale above it is quite small, perhaps 7-8 millimeters wide at most. I have the camera lens almost touching the tooth here, and these were both handheld. Using a tripod proved cumbersome in this case, and you can't use the timer to trigger the shutter anyway (although I've no earthly idea why that's the case), so I've found handheld is the way to go with these. The camera does a good job of aligning the images for you, just remain as still as you can when firing.
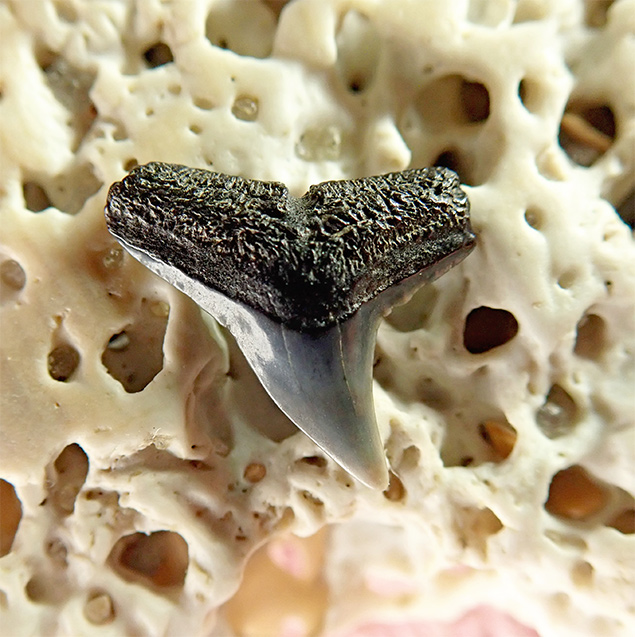 |
Above: Single image - not stacked / Below: Multiple focus-stacked image |
 |
TG-5 Conversion Lenses: Going wider and longer
Perhaps the true hidden jewels of the TG line are the optional teleconverter lenses. Of these, I've had the chance to shoot with the FCON-01 wide angle converter (18.5mm eq.) and the TCON-01 teleconverter (170mm eq.) across multiple TG cameras including for this article while paired with the TG-4. They're super-solidly built and make the line so much more enjoyable and compelling to shoot with. The feline shot from earlier in this Field Test used to showcase image stabilization was shot using the teleconverter, as well as the shot with roses and a goose for the flash section, and below is an example using the FCON-01.
 |
1/60s / f/2 / ISO 125 / 18.5mm eq. [FCON-01 18.5mm eq. fisheye converter attached] |
Sun streaming in : It took me a few passes to get the image I had in my head, but the real estate on the front of the FCON-01 (as seen in the first product shot at the start of this piece) allows an easy gauge for judging the water depth before firing the shutter. |
Of all the shots I've taken thus far with the TG-5, I believe this one showcases the power of the TG system perhaps more than any other. It's such a versatile system once you own the conversion lenses, and they're super-easy to attach. There's a converter ring that I tend to simply leave attached all the time, that's now secured with the new locking mechanism that I mentioned above. After that you simply screw on the lens of choice, let the camera know in the menus that it's affixed, and away you go.
Fun with filters
Yes, most enthusiast photographers shun filters, but I still very much enjoy Partial Color and Dramatic Tone, so I hope you enthusiasts out there won't begrudge me a few examples here. When the PEN E-PL7 came along, Olympus greatly expanded the available colors for this mode, and that expansion is now ported down to the TG-5 with 18 colors to choose from on a handy color wheel that you scroll as you make your selection while viewing the scene before you.
 |
1/100s / f/4.9 / ISO 200 / 100mm eq. |
Cat's Eyes : I admit this type shot looks superior on a larger sensored camera, but for the price and size the TG-5 image quality is really good! |
 |
1/200s / f/8 / ISO 100 / 25mm eq. |
[Update 7-25-17: You can view additional examples of creative modes from the TG line in this article from the TG-4. I had earlier mentioned Fragmented mode in this Field Test, naturally assuming that it was still offered on the TG-5 as in previous versions as well as the younger sibling TG-870, but thanks to a helpful reader email I now know that they have removed it from this flagship line. (Thanks, Arne!)]
TG-5 Field Test Part I Summary
A return to a more reasonable resolution for this sensor size, a control dial, the processor from the flagship E-M1 II, the basic menu layout from their higher-end models, and even in-camera RAW processing have indeed taken the Olympus TG-5 into uncharted territory for a rugged, waterproof camera. In combination with features already intrinsic to the line, these are amenities that enthusiasts discuss and crave, not bells and whistles added on to sell more numbers to novice buyers. From my first impressions in the field, I can say that this is a bona fide enthusiast camera for the tough world.
 |
1/160s / f/4.5 / ISO 200 / 85mm eq. |
 Fujifilm GFX 50S Review
 Fujifilm X-T3 Review
 Olympus E-M5 III Review

Follow Imaging Resource