Panasonic GH5 Field Test Part III
Dynamic range, 6K Photo and Field Test Wrap-up
by Jaron Schneider | Posted 04/17/2017
The last few things I want to go over with the GH5 have to do with the special photo modes as well as looking at dynamic range, since now the raw files are available to edit in Adobe Camera Raw.
The GH5 has good dynamic range performance, but not a big leap over GH4
When I look at dynamic range, I do so more from the perspective of what you can expect to get out of the files, and less from a scientific lab test point of view. That is to say, I'm not going to provide an exact number of stops of dynamic range that the sensor offers, but more how the sensor handles different lighting conditions and what you can expect to draw out of your photos.
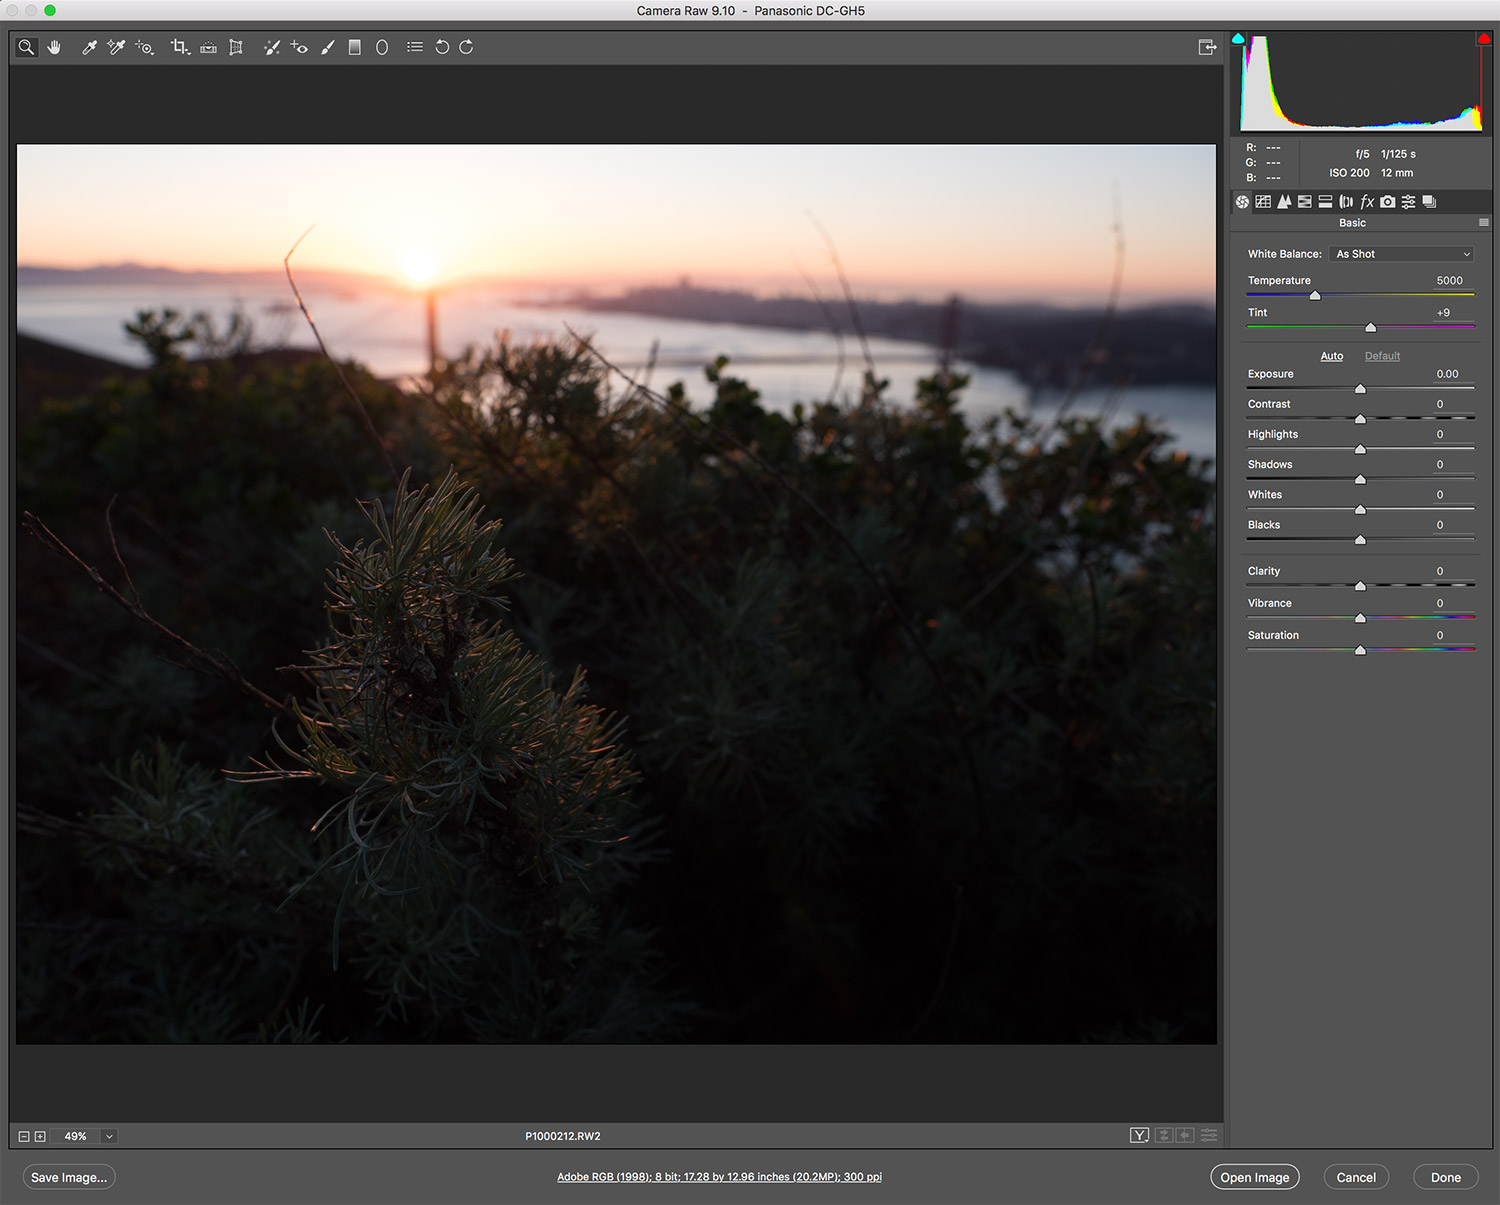
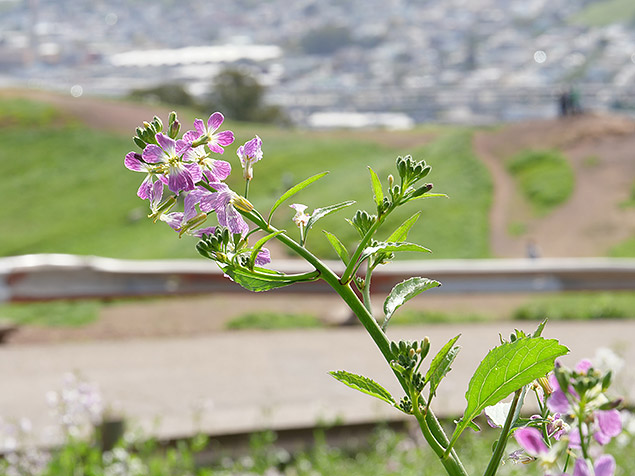
To do this, let's first take a look at two images with rather deep shadows, and then see how much detail can be extracted from those shadows. First, there is this image, which you might recognize from the first Field Test:
 |
Panasonic Leica 12-60mm f/2.8-4.0: 12mm, f/5, 1/3200s, ISO 200 |
In this image, I'll be looking primarily at the lower half of the image, and seeing how much detail can drawn out of the shadows in a photo taken at a low ISO (in this case, ISO 200). So after taking it into ACR…
 |
Click for larger version. |
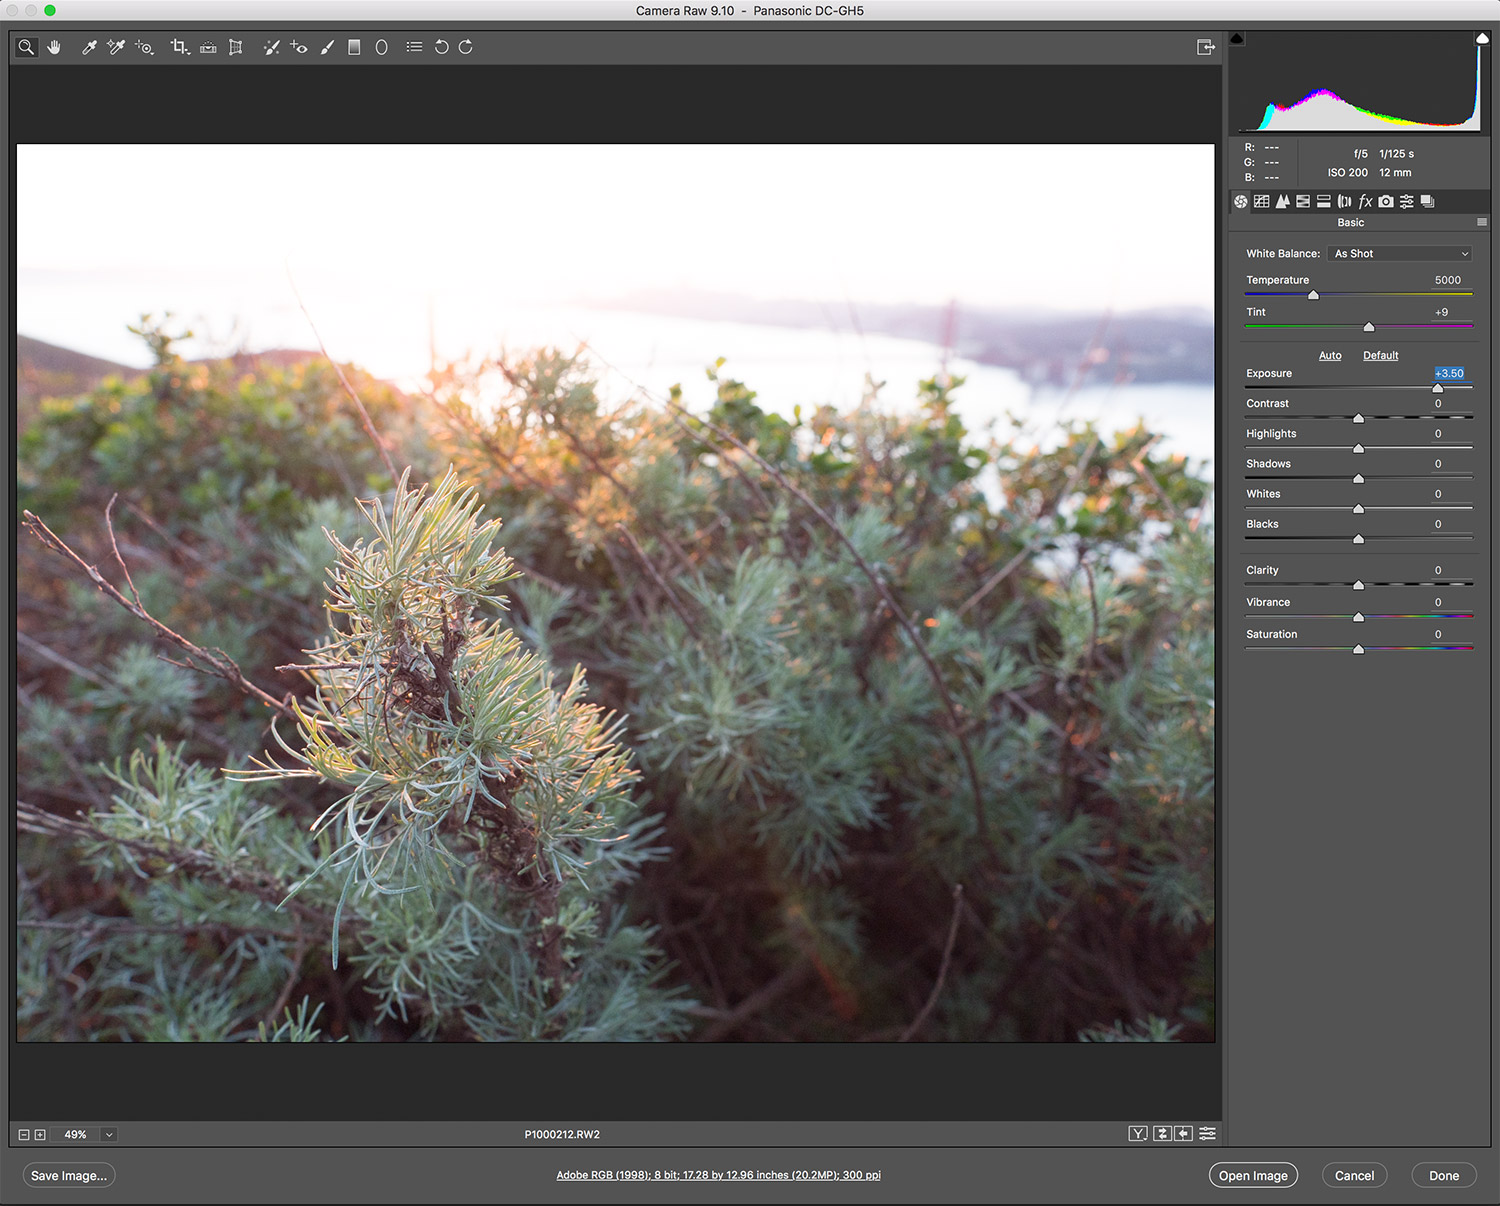
...I can move the exposure slider up until I have as much shadow detail as I'm going to get:
 |
Click for larger version. |
In this case, I didn't even need to max the slider to 5 stops, getting as much detail as I am going to get just moving up 3.5 stops. In this particular photo, it's not just the fact that I drew out the detail that's encouraging, but the fact that the detail looks really good. There is a little bit of noise in those shadows, but it's nothing extreme and it kind of adds a nice touch to the image. I understand this is subjective and might only apply to this particular shot, but I'm still happy with how the sensor performed here.
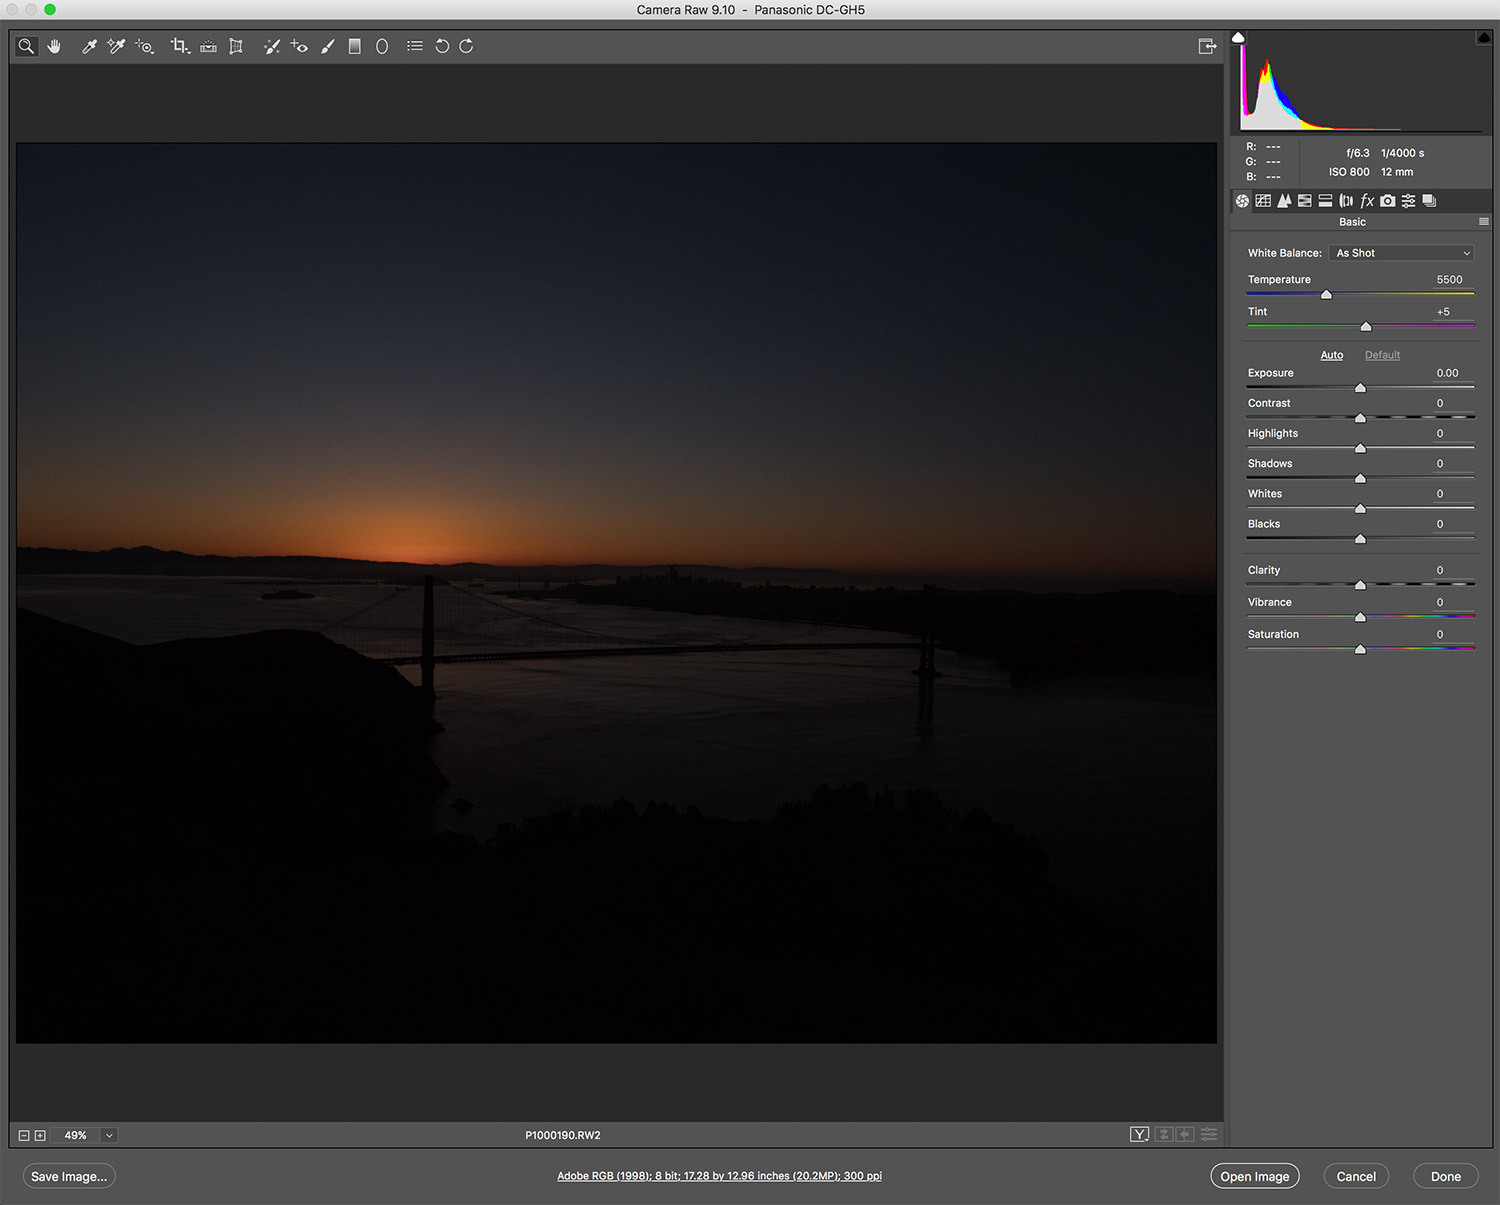
Let's take a look at a second example of shadow recovery, taken at a slightly higher ISO of 800:
 |
Panasonic Leica 12-60mm f/2.8-4.0: 12mm, f/6.3, 1/4000s, ISO 800 |
So after taking it into ACR…
 |
Click for larger version. |
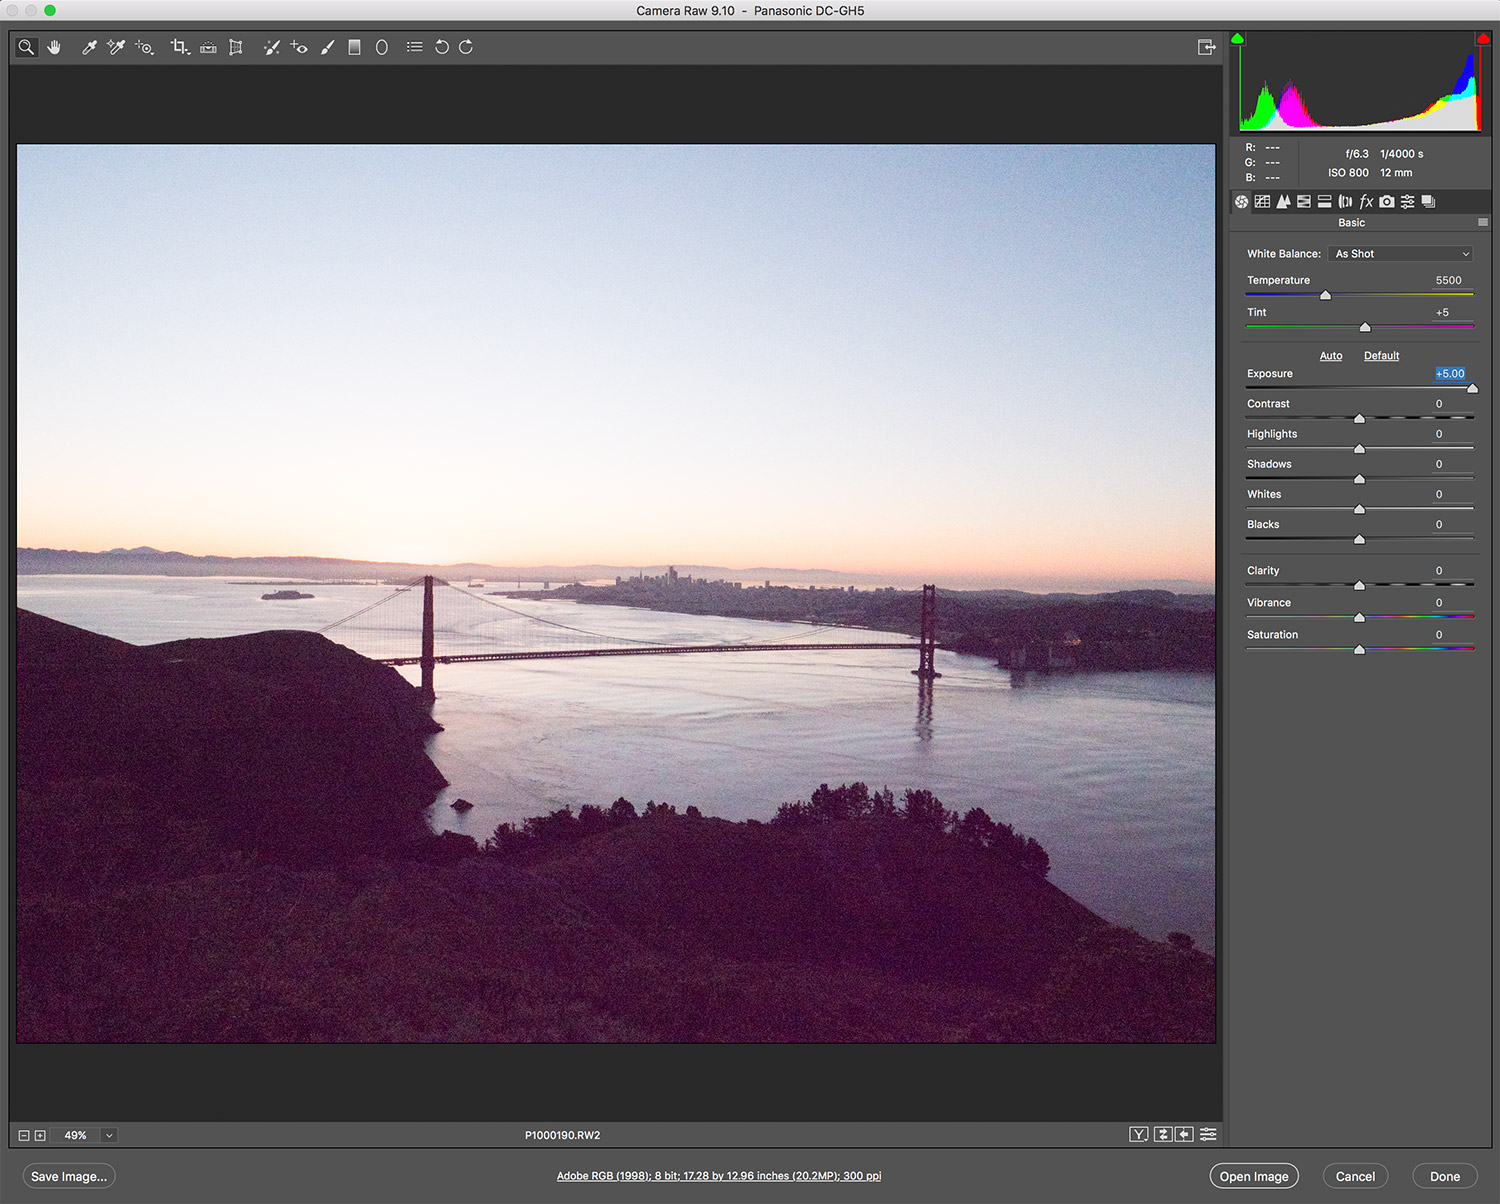
...and moving the slider up, I get:
 |
Click for larger version. |
As you can see, at a higher ISO and with a pretty similar image, the dynamic range really suffers. Not only is the image dotted with bad noise, I didn't really get any detail out of the shadows. Though you can tell that there is some kind of hill there, it isn't what I would call "properly exposed."
Granted, the shadows in the second image are a lot deeper than those in the first so this isn't necessarily all due to the higher ISO. What is due to it, however, are those pretty bad magenta noise pixels. Those were not visible at all in the ISO 200 image, so it's still fair to say that higher ISOs means poorer shadow recovery on the GH5.
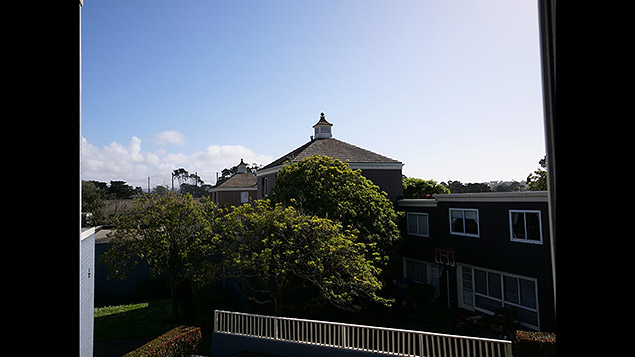
Next, let's take a look at highlight recovery. For this, let's take a look at a couple overexposed images and see how much detail I can get out of them. Let's start with this terrible photo I took that is horrifically blown out:
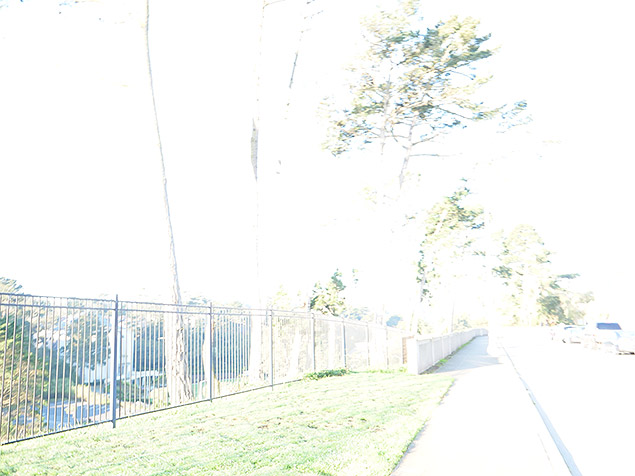 |
Panasonic Leica 12-60mm f/2.8-4.0: 14mm, f/3.5, 1/50s, ISO 200 |
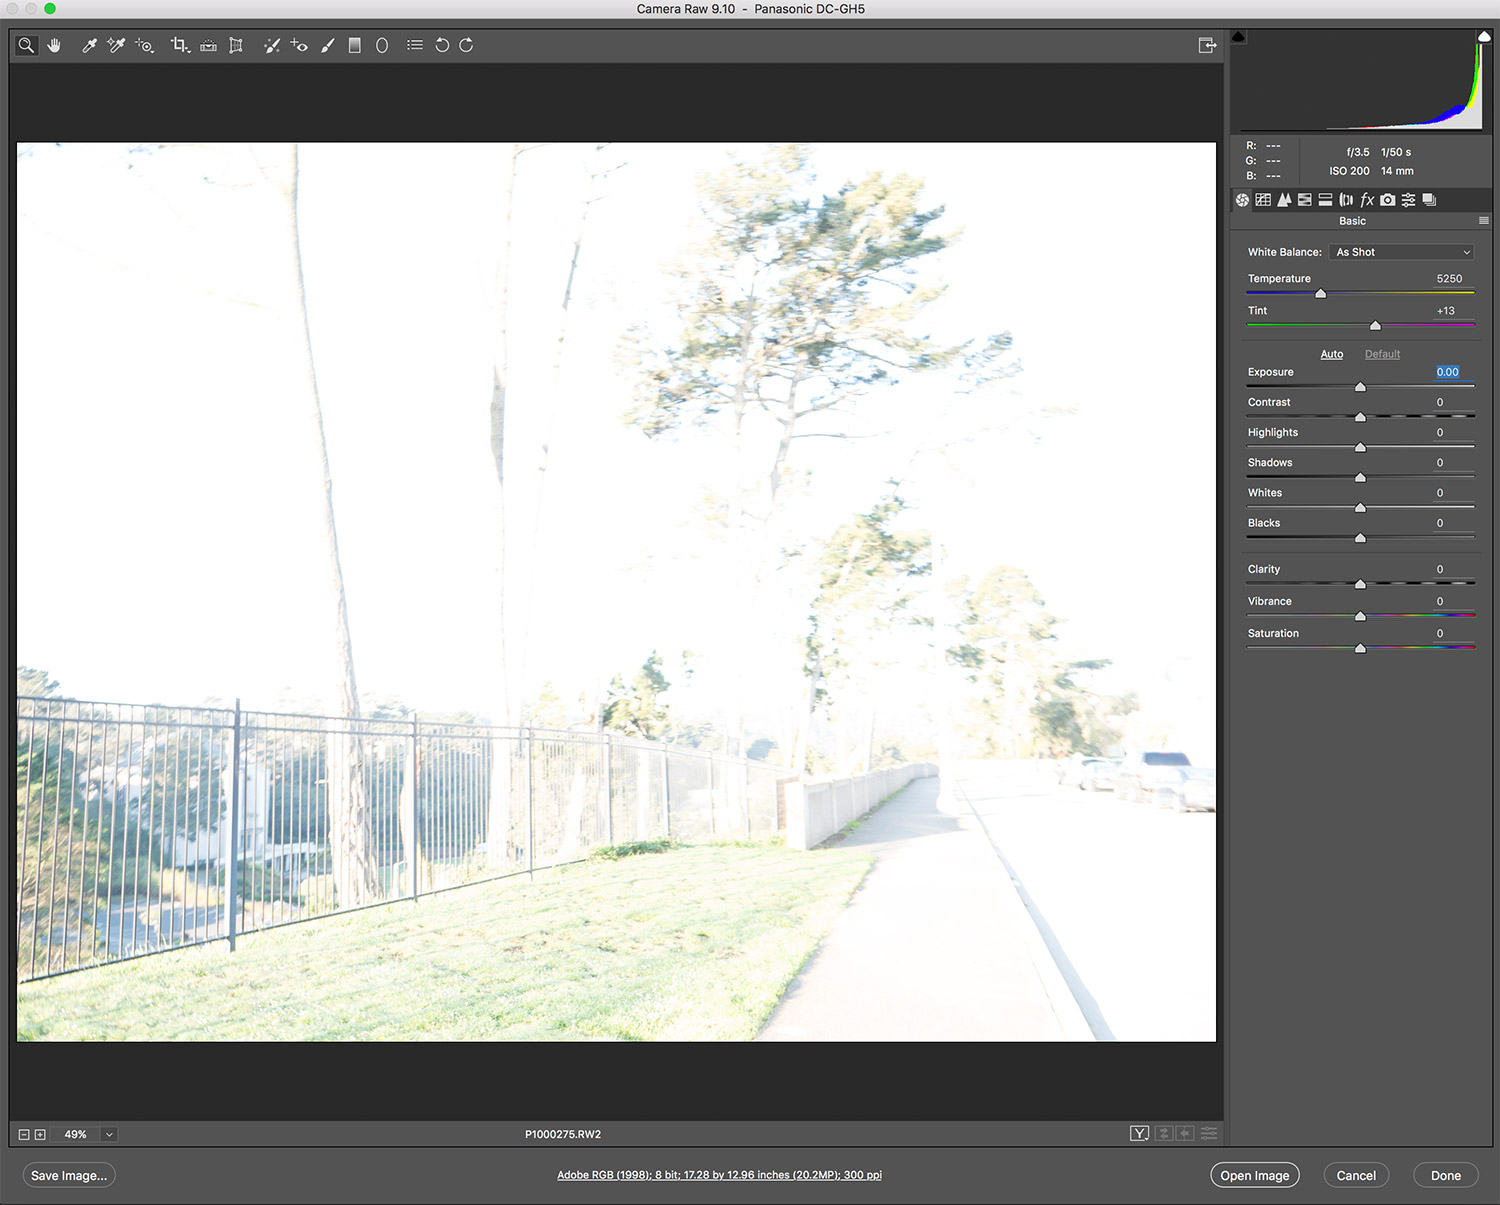
In ACR…
 |
Click for larger version. |
...I can pull the exposure down as far as possible, and see that some detail does come out:
 |
Click for larger version. |
Unfortunately, the blown out areas never really get their detail back. If you look at the grass, you'll notice that much of it still looks as though it were dodged too heavily, with bad contrast and poor color rendition. When comparing the before and after side by side, none if any of the highlighted areas that were not visible in the original come through after dropping exposure. What this is telling me is that in order to get any detail out of the highlights, there must be something there that is visible already. If you take a photo and part of it is so blown out that it is white, you won't likely be getting any detail back.
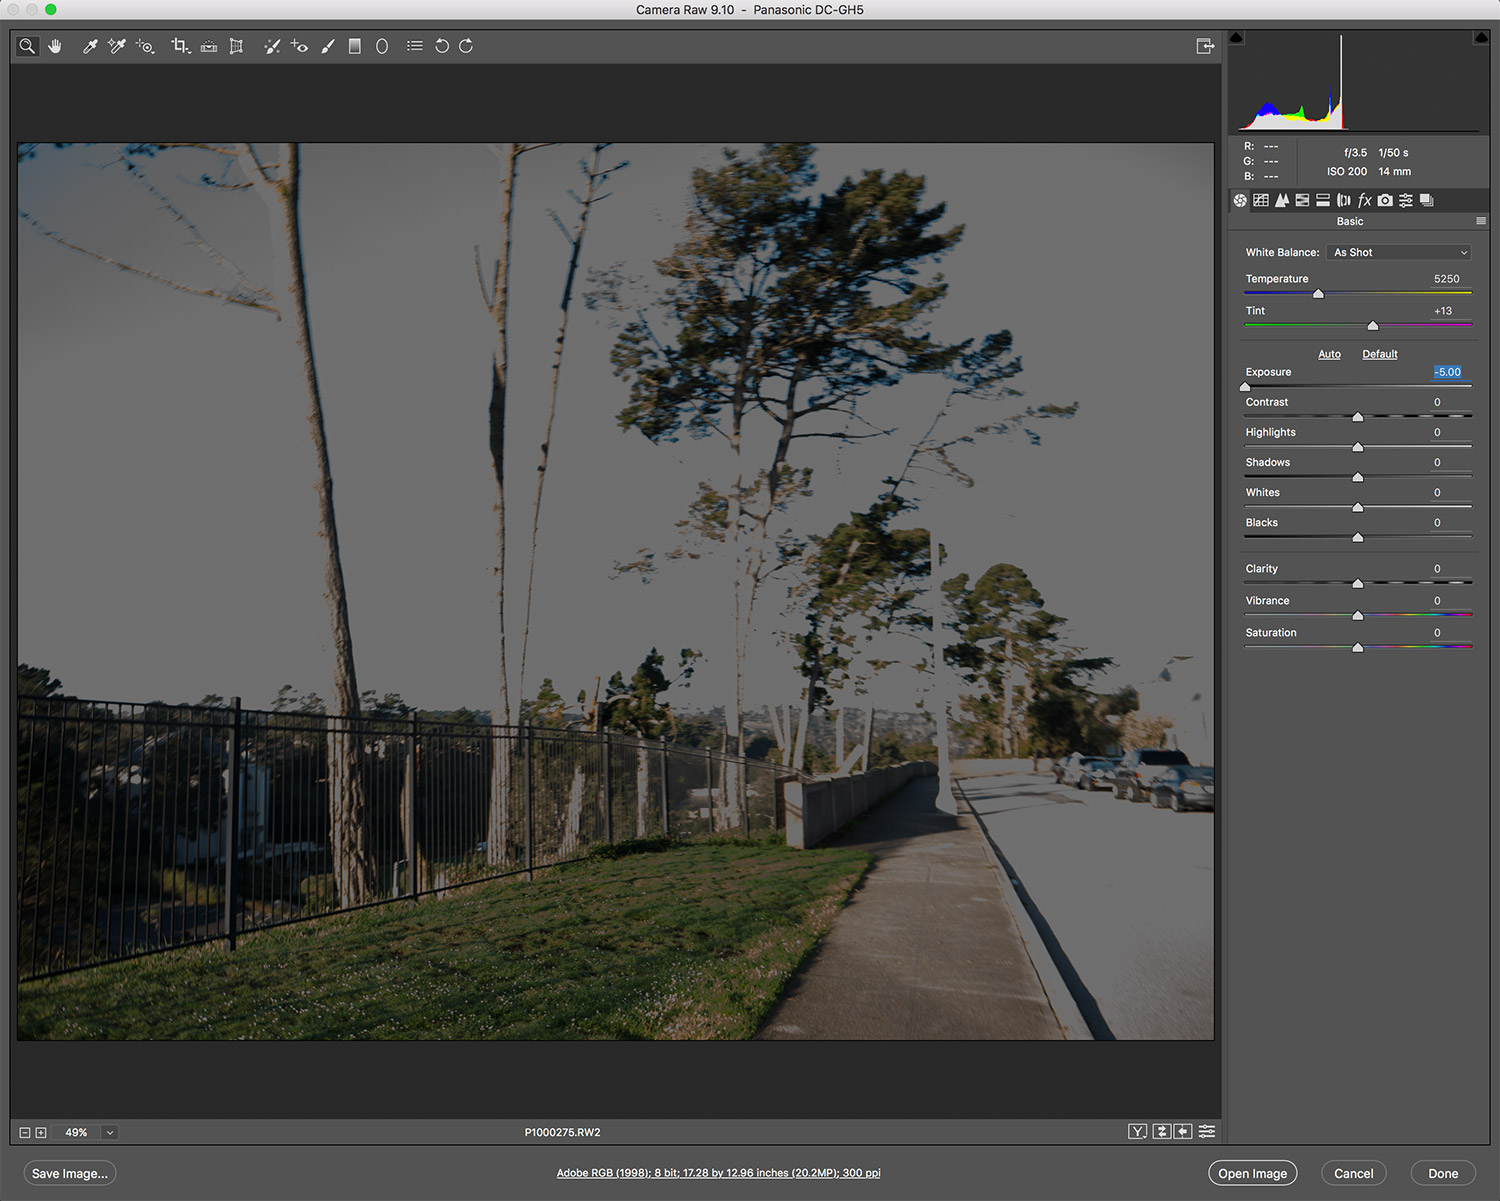
Let's now take a look at an overexposed image that is slightly less bad, but still contains a lot of blown highlights.
 |
Panasonic Leica 12-60mm f/2.8-4.0: 12mm, f/4.5, 1/100s, ISO 800 |
In ACR…
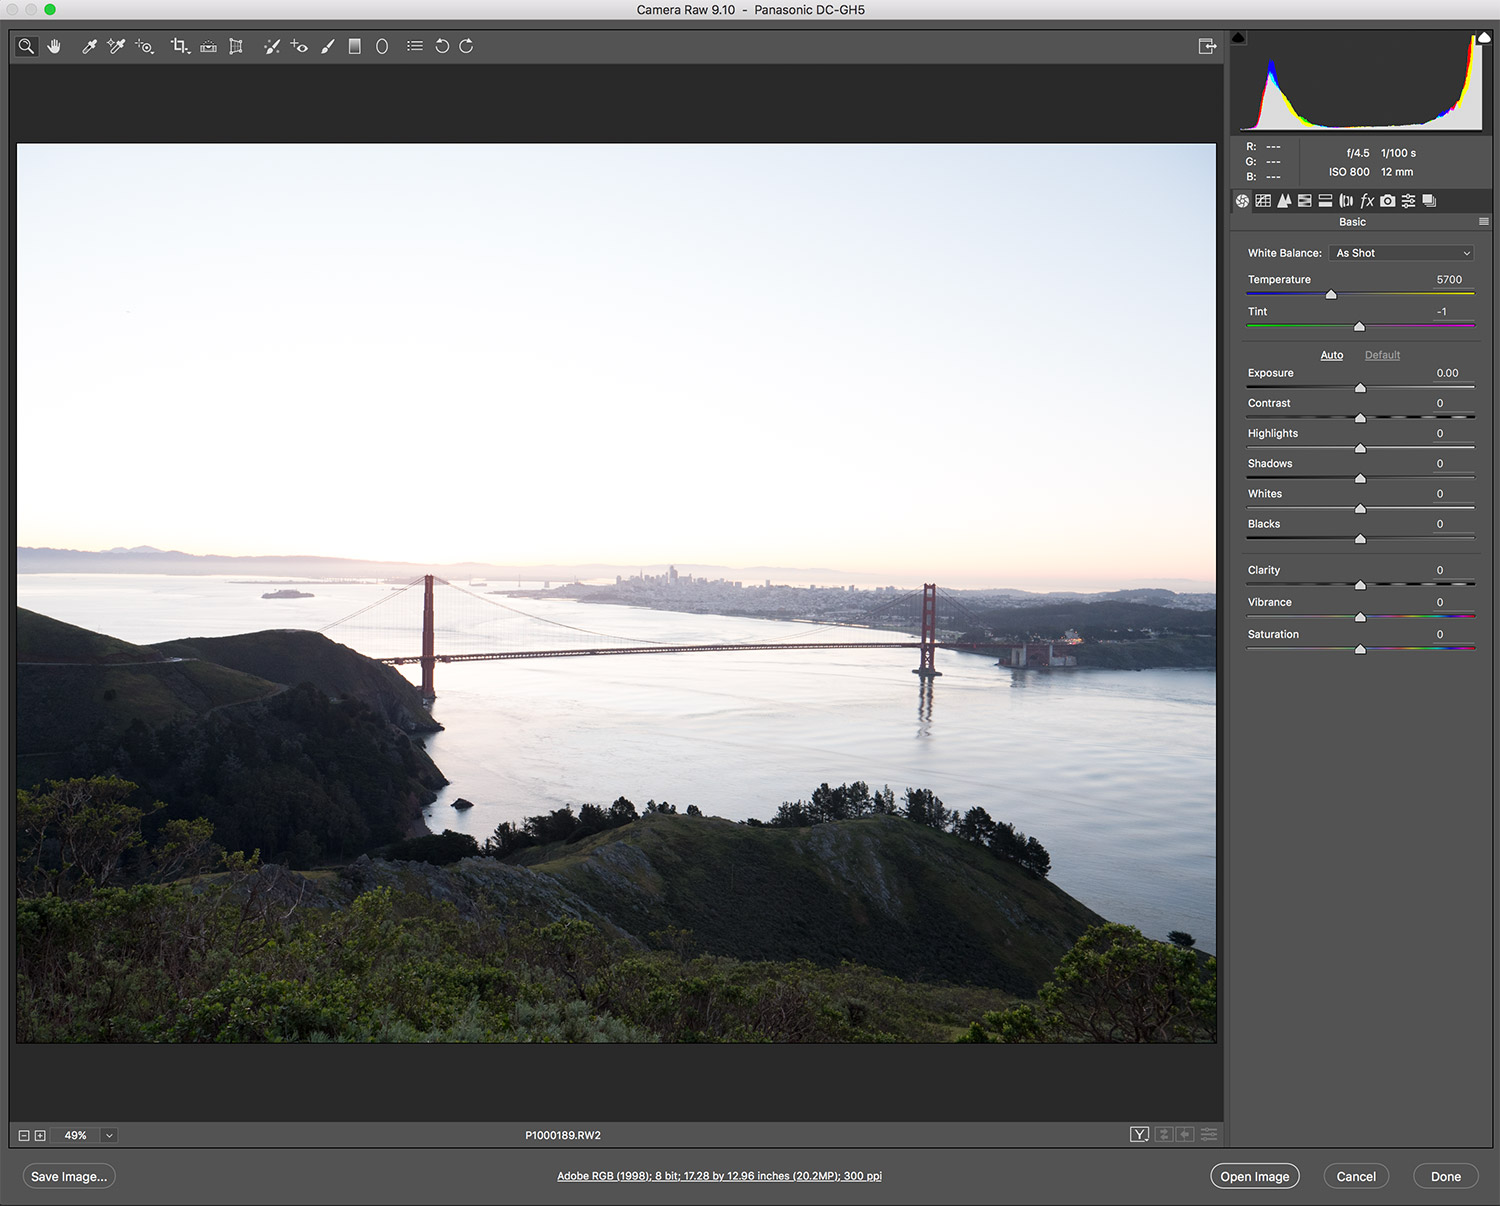 |
Click for larger version. |
...I can then take the exposure slider all the way down and see what details come back:
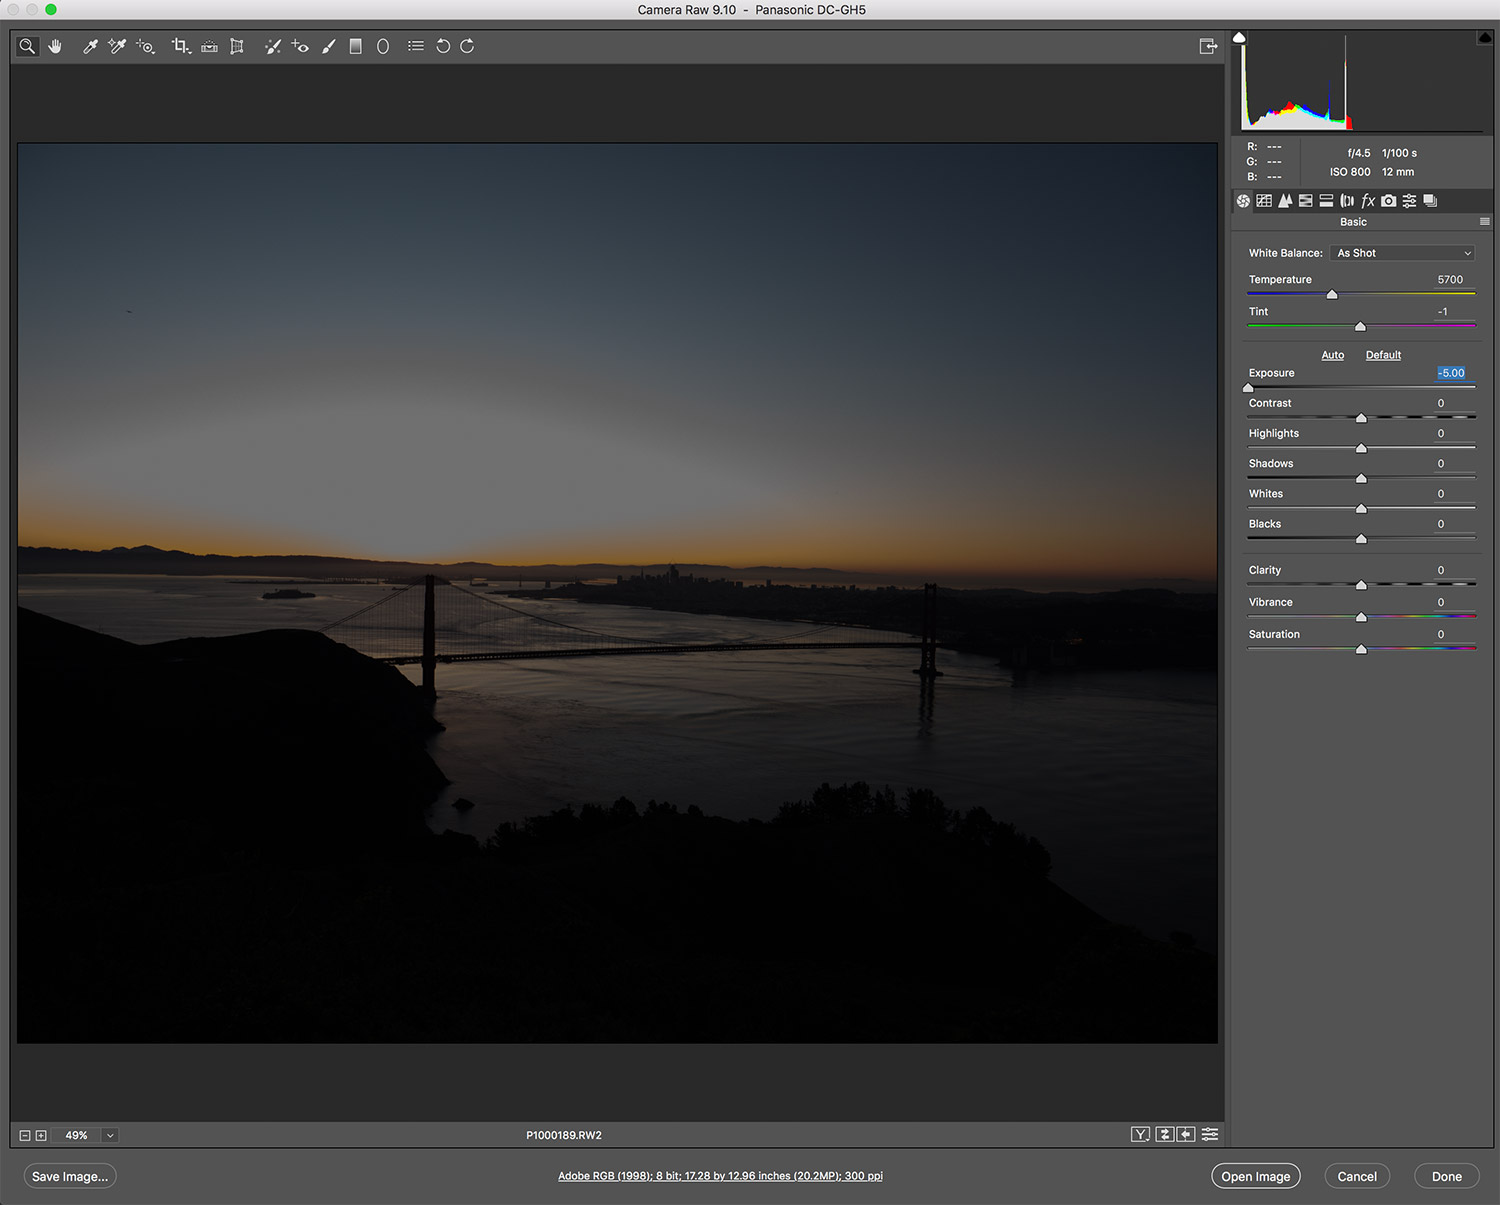 |
Click for larger version. |
In this particular case, detail in the entire bay comes back as well as color in a lot of the sky, but the most blown area of the photo, the sunrise itself, is not recoverable. This reinforces the previous results, showing that any truly blown out area isn't going to have any detail left in it.
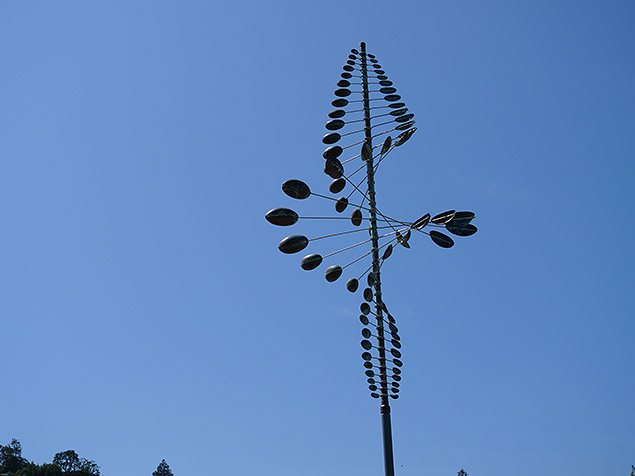
In one final test of the dynamic range, let's take an image with a gradual highlight-to-shadow gradation and examine how the sensor translates the transition of light. This is my favorite way to look at a sensor's dynamic range, as the smoother the transition (the greater the number of "colors" between a shadow and a highlight area), the "cleaner" the image appears to us at 100% and therefore the better the image looks to a viewer. A sensor's dynamic range directly impacts this shadow to highlight gradation. In addition to looking at the GH5 here, I want to compare this to how the GH4 performs in the same situation. Here are the images, the GH5 first followed by the GH4:
 |
GH5 Panasonic Leica 12-60mm f/2.8-4.0: 24mm, f/3.5, 1/50s, ISO 400 |
 |
GH4 Panasonic Leica 12-60mm f/2.8-4.0: 25mm, f/3.5, 1/50s, ISO 400 |
In these images, you can see that the highlight to shadow transition is gradual, which is what we are looking for. Let's zoom in to 800% on both and see how the pixels are handling that transition.
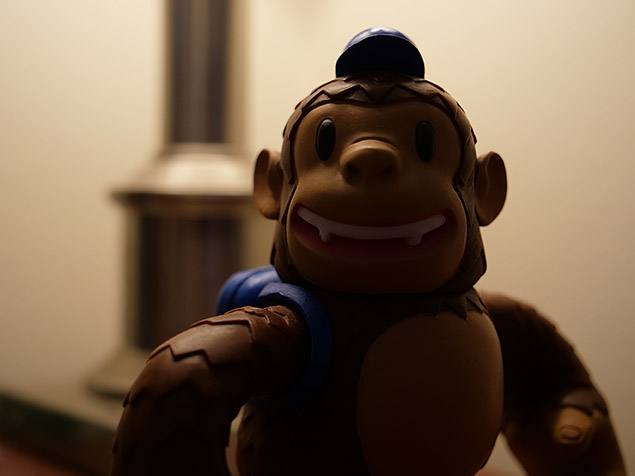
 |
This is an 800% zoom on the GH5 shot, where we can see a wholly shadow spot on the right, and a fully exposed shot in the middle (the monkey's cheek). I counted how many distinct lines of different colors I could see going from that darkest spot to the properly exposed area, and saw five.
Next is an 800% zoom on the GH4 shot taken in the exact same fashion:
 |
On this image, I also count five color lines during the transition from the darkest area to the lightest.
Overall, these results are not surprising, given my previous tests regarding ISO and image quality from Field Test Part I. From what I could tell in the images produced from the GH5, there was little to no changes made on the photo side from the GH4 apart from the higher-res sensor, of course. Panasonic may have added 4 MP in resolution, but I don't see any big changes to overall image quality performance. So while the dynamic range is good, it's not the best I have ever seen and doesn't really make any marked improvement. Especially concerning is the high level of noise introduced at just ISO 800, which will make a lot of images taken at what is considered these days to be a relatively low ISO rather problematic if you don't nail exposure in camera.
 |
| 6K Photo: Panasonic Leica 12-60mm f/2.8-4.0: 29mm, f/4.5, 1/2500s, ISO 200 |
6K Photo is great for casual users, but not the target audience for the GH5
6K Photo, previously capped at 4K, is a mode into which I know Panasonic puts a lot of effort/marketing. What is 6K Photo? On the GH5, you can select the 6K Photo Mode from the left dial and burst shoot in what is essentially enough frames per second to create a video, and then select individual frames for export to JPEG.
The GH5 can record 8MP (4K) stills at a 60 or 30 frames per second or 18MP (6K) stills at a 30 frames per second in three different shooting modes:
Burst: This mode will allow you to continuously record, making it ideal for instances where you need a fast frame rate in order to capture the best moment.
Pre-Burst: This mode is ideal for times when you're unsure of the critical moment to press the shutter button and will record images one second prior to and one second after pressing the shutter button.
Burst (S/S): This mode most closely follows the video recording process, and allows you to playback your video, pause at the chosen moment, and use the shutter button to mark a chosen frame from the video and save it as a single 8 or 18 MP frame.
6K Photo mode will not export to RAW, and the more ideal 18 megapixel finished image (as opposed to the 8 megapixel option) is slightly smaller (4992 x 3744) than if you were to just use photo mode (20MP; 5184 x 3888). 4K Photo is the same concept, only with a smaller end photo size.
 |
6K Photo: Panasonic Leica 12-60mm f/2.8-4.0: 60mm, f/4.5, 1/2500s, ISO 200 |
You must do the extraction of the frame on the GH5 itself before pulling files onto your computer, since whatever way Panasonic coded the MP4 that is used to generate the stills doesn't conform into anything usable on the computer (when I pulled that file into Premiere, I received a video file that was just a green frame, and looking at it on my Mac in the Finder showed an unplayable video file). So in short, if you plan to use 6K Photo, you must plan to extract the images you want on the GH5 itself. Below is a video showing how to do it:
Panasonic GH5: How to Export 6K Photos The Panasonic GH5 offers the 6K/4K photo mode, which allows you to take pictures at the speed of video and then export your favorite frames. Here is how you do it! |
6K Photo would be incredibly handy for photographing a child's soccer game or other sport where you don't want to miss the moment, and care less about making a perfect image. That means it's probably ideal for casual shooters and families more interested in documentation than art. That is why I'm a bit unsure of it being a major selling point of this particular camera, which is not aimed at that demographic at all.
 |
6K Photo: Panasonic Leica 12-60mm f/2.8-4.0: 29mm, f/11, 1/125s, ISO 200 |
The GH5, like its predecessor, offers a built-in intervalometer, or timelapse mode. It has the right amount of customization, including how many images to take over what interval and for how long (basically, all you need). Once the images are taken, the GH5 can internally turn them into an a single video clip in either 1080p or 4K resolution. The upside with this is that it can save you time if you're not familiar or comfortable with making timelapses on a computer. The downside is that it forces you to a maximum 4K resolution that features two black bars on the edges of the frame, since the photos the GH5 takes are not the same aspect ratio as a 4K video. It's not a clean solution, and if you want to avoid the black bars, you'll have to always export in 4K and intend your final video edit to be a maximum of 2K. I'm not really sure how useful the 1080p timelapse export is, since avoiding those black bars would be pretty much impossible at any HD resolution.
Update (04/27/2017): You CAN avoid the black box lines if you set the camera to record in 16:9 before starting a timelapse.
 |
As far as viability for timelapse on the GH5 goes, I'm not really sold. Because the GH5 photos are empirically not that great compared to other cameras, you aren't going to get the highest quality out of your timelapse if you decide to use it. It is nice that it has a built-in intervalometer, and outside of better options the GH5 will absolutely work, it's just not my first choice.
Panasonic GH5 Field Test Summary
What I like:
- The GH5 has a slightly larger body, which means it's easier to hold without increasing the size so much that it becomes unwieldy or bulky.
- The new full-sized HDMI port is a welcome change.
- Added and relocated buttons all work great, and I'm happy with how the camera body is laid out. I don't know that it can be better.
- The optional peripherals, the audio interface unit and the battery grip, both work great and make much more sense than the peripheral launched with the GH4.
- The two SD card slots are awesome, and allow for redundant video capture.
- The battery life on the GH5 is bananas, lasting more than two hours while continuously recording in the highest data rate possible.
- Autofocus in both photo and video is outstanding.
- ISO performance is much improved in video, allowing nearly the entire range to be used in some way.
- The addition of the on-sensor stabilization is a huge boon, and works really well. If you move slowly and deliberately, hand holding footage looks almost as good as gimbal-stabilized footage.
- On-sensor stabilization doesn't interfere with how the camera functions on a gimbal.
- 10-bit internal capture means shooting in VLOG and getting the most out of footage just got a lot easier.
- 60p 4K footage and expanded high frame rate (HFR) functionality adds excellent options for slow motion capture. All speeds of HFR look really good.
- Overall, the color rendition of the GH5 sensor is improved, giving colors more "pop" when shooting in the "Standard" image profile.
- Video clips, on the whole, look exceptionally good.
What I dislike:
- The two SD card slots are underutilized; let us capture proxy clips!
- The menu can be a bit challenging to figure out.
- There was basically no improvement made to the photographing capabilities of this camera.
- Though better, the ISO performance still lags far behind the market leaders.
- 10-bit footage inexplicably crashes video editing programs.
What I'm neutral on:
- 6K Photo is cool, though not super useful for the target market of this camera.
- Internal timelapse is nice, but the way the camera crops/builds clips together in-camera is not ideal. It should at least try and make the clip the same aspect ratio as the exported footage, rather than leaving black bars on the sides (which makes the footage pretty much useless for the resolution it exports to).
 Fujifilm GFX 50S Review
 Fujifilm X-T3 Review
 Olympus E-M5 III Review

Follow Imaging Resource