Sigma dp2 Quattro Field Test Part I
Getting a grip
By Eamon Hickey | Posted: 09/12/2014
 |
1/160s / f/4.0 / ISO 100 (converted using SPP v6.06) |
If you review a lot of cameras, it's a welcome pleasure to use one that's a break from the ordinary, so I tossed my name in the hat for the Sigma dp2 Quattro. I was curious to find out how well its unusual design would work in real-world shooting; I wanted to get a close look at images from the new Quattro sensor; and I wanted to see if Sigma has been able to improve on the performance limitations of their past cameras, including the DP1 Merrill that I reviewed last year.
Design & handling
I knew from the previews and videos created by my colleagues for the other sections of this review that the Sigma dp2 Quattro was not pocket-sized. Or pocket-shaped, for that matter, unless your tailor is prone to drink. The unusual shape did take a bit of getting used to first thing out of the box, but I found that my right hand fits the angled grip with no real discomfort. I also watched our video where Dave Etchells describes a somewhat unconventional way to hold the dp2 Quattro — which I will henceforth refer to as The Dave Hold — and from that video I learned to rest the camera on the ball of my left thumb. It turns out that this is acceptably comfortable, too, although it's a hard habit to get into if, like me, you've been shooting with your left hand under the lens for somewhere around 35 years. That said, whenever I do camera reviews I try to keep in mind that while something unfamiliar may seem awkward to me at first, it might be easy to get used to if I owned the camera and used it long term. My left hand could probably be re-trained.
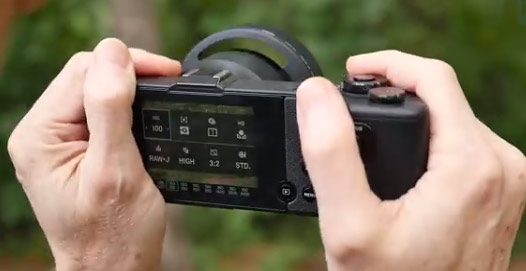 |
| The Dave Hold: The dp2 Quattro is indeed an odd-shaped animal, but getting just the right grip will help you get the shots you want. For more on this, watch this video. |
I should say that I have larger than average hands (Dave does, too), so that may help with handling the dp2 Quattro. I also did not have to significantly stretch or contort my fingers to reach the camera's crucial controls, but I would not be surprised if a person with smaller hands had more of a problem with this. Overall, I don't think I'd ever fall in love with the way the dp2 Quattro handles, but it's acceptable.
With the optional lens hood and VF-41 shoe-mount optical viewfinder that came with our sample Sigma dp2 Quattro, the whole apparatus is effectively as bulky as a DSLR — in other words, you're gonna need a shoulder strap or a camera bag of some sort. So be it; I threaded in the strap and headed out. I will say that I really enjoy the quirky retro/future mashup look of the dp2 Quattro body when it's paired with the old-school viewfinder. I expected to get some comments about it out on the streets of New York, but so far — after four different outings with it, including to one spot infested with other photographers — nobody has noticed.
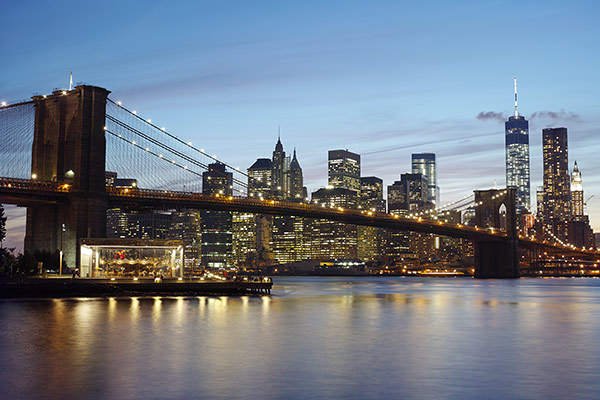
On that first outing, I went to Tompkins Square Park, and then a couple of days later I headed for East River Park where I put The Dave Hold to the test. There, in evening light, I shot a couple dozen pictures with shutter speeds from 1/50 to 1/125, including a carefully taken image of the 130-year-old Domino Sugar factory across the river in Brooklyn. On these shots and on subsequent more formal tests I found that I could get very sharp handheld shots more often than not at 1/60, and quite consistently by 1/125 or higher. The Dave Hold forces your elbows into a pretty stable position against your body. Bottom line: I feel comfortable that I can get most of the benefit of the dp2 Quattro's very high real resolution (more on that in part 2) even without a tripod, as long as I can shoot at 1/60, or ideally a little bit faster.
 |
1/250s / f/4.5 / ISO 200 (converted using SPP v6.06) |
 |
1/125s / f/5.6 / ISO 100 (converted using SPP v6.06) |
| The Dave Hold in action capturing the old Domino Sugar factory. |
Controls
I've praised the straightforward controls of previous Sigma DP cameras, and the dp2 Quattro improves on those earlier cameras with the addition of a second control wheel. There's no secret about how to set up twin control wheels, and Sigma didn't blow it — in manual mode one wheel controls f-stop and the other controls shutter speed, and in any automatic mode one wheel changes your exposure parameter and the other controls exposure compensation. Which wheel does which function is customizable in all four exposure modes, but I left these at their defaults, which were exactly right for me.
 |
Twin dials at the ready. The Sigma dp2Q controls are straightforward, intuitive and customizable. |
You can also set the LCD display to show you a live exposure histogram. As I've noted in many previous reviews, this combination of direct access to exposure parameters and a live histogram is a very powerful toolset for quickly getting a good exposure. It came in very handy when I was walking through the Dumbo neighborhood of Brooklyn (Dumbo stands for ‘Down under Manhattan Bridge overpass') on my way to Brooklyn Bridge Park. I turned a corner and spotted a lovingly maintained red Volkswagen Bus. It was sitting backlit on one of Dumbo's cobblestone streets, which still have freight railway tracks embedded in them, from the long-ago days when this was a warehouse district rather than the hip spot to spend $5 million for a condo. I was able to instantly dial in minus 2/3-stop exposure compensation and fire off a shot mere seconds before a crowd of 20 tourists swarmed the scene for an orgy of selfies with the Bus as their background prop.
 |
1/100s / f/5.6 / ISO 200 (converted using SPP v6.06) |
| Old school meets older school when a Volkswagen Bus parks on the cobblestone streets of Dumbo. |
I was on my way through Dumbo in order to make a twilight long exposure of the Brooklyn Bridge. (I make no claims to originality for this shot — this is the spot where I encountered a lot of other photographers, a hive of shutterbugs busily buzzing around their tripods.) On an earlier twilight shoot I had discovered that I had some trouble focusing on very dark subjects with the Sigma dp2 Quattro. My results with autofocus were inconsistent, and when I tried to focus manually, I had some difficulty judging sharpness on the LCD screen, even when I used the manual focus assist function which magnifies the image by 8X. (I have not had these problems in decent or good light.) So for this shot, I just set the focus for infinity using the manual focus distance scale which the camera displays on the LCD, and it worked perfectly. More generally, the dp2 Quattro makes it easy for me to control my focus options, with a one-click toggle between auto and manual focus. One click also calls up the focus point selection mode, letting me choose any one of 9 focus points or change their size.
 |
15s / f/8 / ISO 100 (converted using SPP v6.06) |
| Could I interest you in a unique real estate opportunity? The Brooklyn Bridge from its namesake park. Converted from raw with small adjustments to noise reduction and sharpening. |
Most other important controls on the Sigma dp2 Quattro are available through the QS (Quick Setting) button, which calls up settings for ISO, drive mode, white balance, and more. (You can also customize what functions are available in the QS menu.) Although this system is a little bit slower than having dedicated buttons for these functions, it's fast enough for most practical purposes.
LCD and viewfinder
The LCD on the Sigma dp2 Quattro doesn't tilt or articulate, and I really wish it did. I've been happy to shoot this camera handheld, but its great resolution makes it a natural for the kinds of shots you do with a tripod, where a tilting LCD comes in very handy. I had to do a bit of unwelcome crouching to see the screen for my Brooklyn Bridge and other tripod shots.
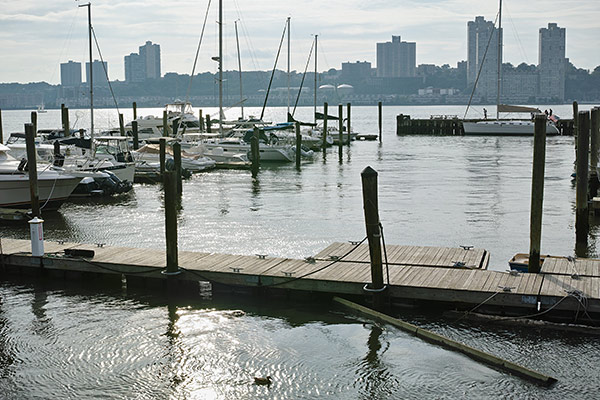
I also struggled to compose my shots precisely using the LCD a few times in bright light, especially one afternoon when I went for a walk along the Hudson River and shot some backlit images of boating life along the shore. Although I think some other LCDs I've used are a little better in bright light, none are fantastic, and I don't consider this a huge drawback for the dp2 Quattro.
 |
1/500s / f/8 / ISO 100 (converted using SPP v6.06) |
| Composing with the LCD was a bit hit-or-miss on this image shooting into the sun. Converted from raw with some highlight and shadow adjustments. |
I'm still coming to grips with the optical viewfinder that came with our Sigma dp2 Quattro. It doesn't give you a very precise idea of your actual framing and is obviously designed to be a quick viewing option for street and snapshot photography where you can shoot a loose frame and crop later. Equally important, you can use it instead of the LCD to save battery power.
So far, I haven't been able to get a good shot using it for what it was designed to do. On my first walk with the dp2 Quattro, I came across a punk rock band that had attracted a colorful crowd in Tompkins Square Park, and I saw a guy with a truly impressive mohawk. I tried to make a few grab shots of him using the optical viewfinder for quick framing, but my first two images were completely misframed. I ended up having to use the LCD to get him centered. Luckily, he thought the band was good and wasn't paying any attention to my misadventures.
 |
1/500s / f/2.8 / ISO 800 (converted using SPP v6.06) |
| If you had that mohawk, you'd keep the rain off it, too. Converted from raw with adjusted noise reduction settings. |
I discovered later that the optical viewfinder had slid a few millimeters backwards in the hot shoe — it's prone to sliding around a bit — which threw off its alignment pretty badly. A few days later, it fell completely off as I was exiting a bus, and I was lucky I heard the clunk or it would still be on that bus, somewhere in the far reaches of The Bronx by now. All in all, I like the idea and the look of the optical viewfinder, but so far it hasn't been much of a practical aid to my shooting with the Sigma dp2 Quattro. If I were going to use it long term, I'd probably try to engineer a locking mechanism for the foot, by which I mean I'd glob on a foot or two of electrician's tape.
Up next
In part 2 of my shooting report, I'll take a look at the dp2 Quattro's performance and its lens, as well as talk a bit about the images I'm getting from it. Please be sure to reference the note below regarding why we chose to only show conversions from RAW in this report, including the link to news story we ran after testing with the dp2Q with new camera firmware and SPP software updates.
[All of the images for this installment of our Sigma dp2 Quattro shooter's report were shot with camera firmware v1.0, using the raw+JPEG setting. As we noted when we published our initial lab test images from the dp2 Quattro, we discovered an issue with JPEGs from firmware v1.0. In subsequent testing, we also discovered some image quality issues with raw conversions using Sigma Photo Pro v6.0.5 or earlier. For full details, check out the story we recently published that shows examples of what we found and also shows the results of our tests with the newest camera firmware, v1.0.2, and the latest version of Sigma Photo Pro, v6.0.6. We were pleased to find that the new firmware/software largely eliminates the issues we had seen.
All this has left us with a bit of a dilemma regarding the in-camera JPEGs we shot for this installment of the shooter's report using firmware v1.0. We've decided to publish raw conversions from Sigma Photo Pro 6.0.6 instead, because these more accurately represent what the camera is capable of producing now for any photographer who uses the up-to-date versions of their camera firmware and Sigma Photo Pro.]
 Fujifilm GFX 50S Review
 Fujifilm X-T3 Review
 Olympus E-M5 III Review

Follow Imaging Resource