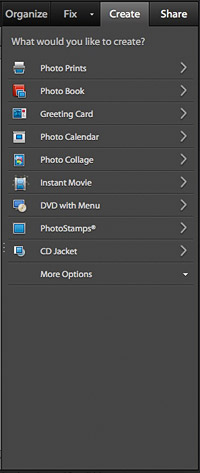
10th ANNIVERSARY YEAR
Elements 10 -- Video
For Photographers
By MIKE PASINI
Editor
The Imaging Resource Digital Photography Newsletter
Review Date: September 2011
With the launch of Elements 10 on Elements' tenth anniversary, Adobe hopes to bring compelling new magic to still photographers exploring video. With both still and video options on everything from smart phones to dSLRs, it's no longer a question of whether to shoot photos or video but of when to shoot which to best tell the story.
In fact, Group Product Manager Mike Iampietro told us at a recent briefing, video quality has surprised a lot of still photographers. They like what they see and want to do more with it.
But that, traditionally, has meant packing a bag to live in a film school for a few months. Elements 10 offers a more pleasant -- and affordable -- alternative.
Not that there isn't some photo magic in 10 too. That includes 30 new filters and effects, all of which can be combined with Quick Select and the Smart Brush to do some crafty techniques. There are also three new guided edits and a couple of other new tricks in the still photo bag.
After the briefing we installed Organizer, Photoshop Elements and Premiere Elements on an i7 MacBook Pro running Snow Leopard to see for ourselves.
SYSTEM REQUIREMENTS | Back to Contents
System requirements happily haven't really changed much from Elements 9's requirements. For Premiere Elements, the more demanding of the two applications, they are:
- 2-GB RAM
- 4-GB installation space plus 5-GB content space
- Graphics card with latest drivers
- 1024x768 monitor
- DVD-ROM drive (Blu-ray burner for Blu-ray discs)
- FireWire/IEEE 1394 interface or a USB 2.0 interface
- QuickTime 7
- Internet connection
Additional Mac system requirements include:
- Multicore Intel processor
- Mac OS X 10.5.8 or Mac OS X 10.7
Additional Windows system requirements include:
- 2-GHz or faster processor with SSE2 support; dual-core processor for HDV, AVCHD editing or Blu-ray
- Windows XP with Service Pack 2, Windows Media Center, Windows Vista or Windows 7
- Color monitor with 16-bit video card (you'll want a 24-bit video card)
- Microsoft DirectX 9 or 10 compatible sound and display driver
- Windows Media Player
For Photoshop Elements, the requirements are:
- 1-GB RAM or 2-GB for HD video
- 4-GB disk space for installation
- DVD-ROM drive
- Internet connection
Additional Mac system requirements include:
- Multicore Intel processor
- Mac OS X 10.5.8 or Mac OS X 10.7
- 1024x576 monitor
- QuickTime 7
Additional Windows system requirements include:
- 1.6-GHz or faster processor
- Windows XP with Service Pack 2 or 3, Windows Vista or Windows 7
- 1024x768 monitor
- 16-bit video card minimum (you'll want a 24-bit video card)
- Microsoft DirectX 9 compatible display driver
We were glad to see (right away) that the font size was viewable on a screen with 132 pixels per inch (which tends to shrink things).
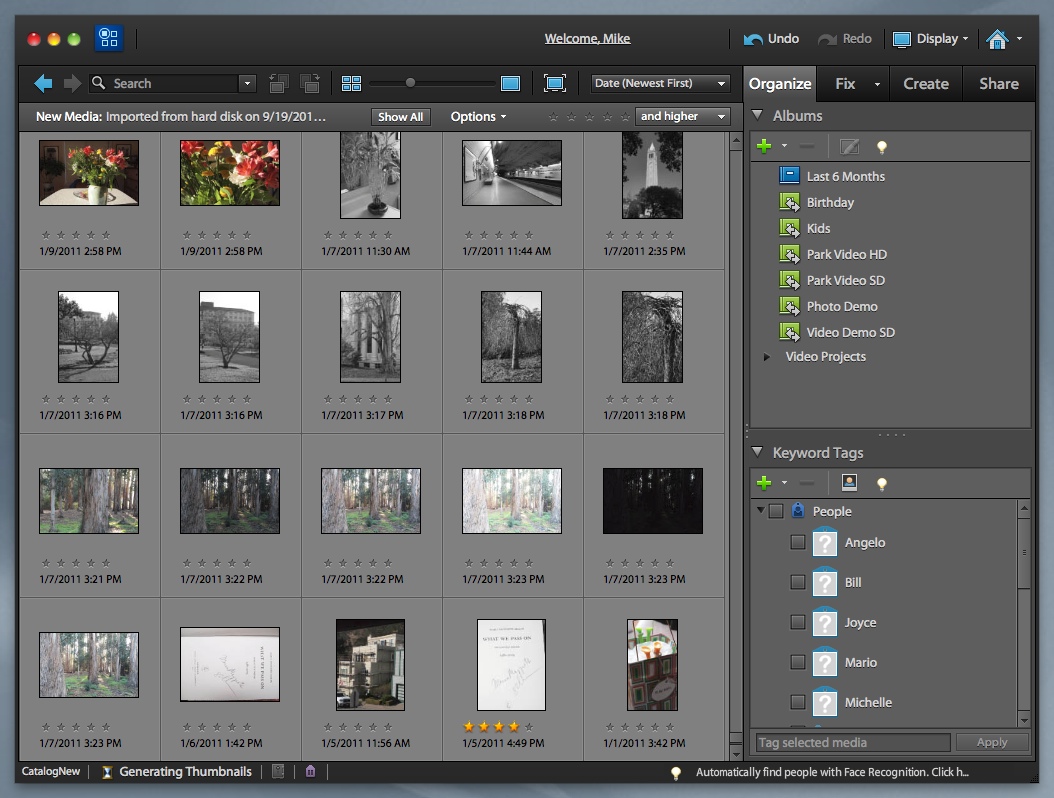
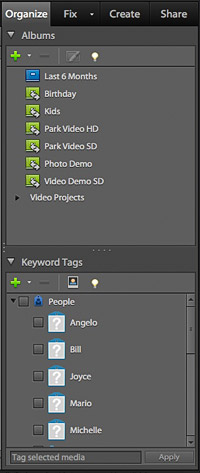
Organizer. Ships with both Photoshop Elements and Premiere Elements.
But we were pretty mystified at some basic performance issues. Dragging the Organizer window from the middle of the screen to the right side wasn't at all smooth. It stuttered so badly that we released the mouse before it moved and then watched it jump off the screen. What's up with that?
One thing up with that is that on the Mac, Elements is still a 32-bit application. On Windows, it's now a 64-bit application. That helps a lot in rendering video. But it really shouldn't matter for something as simple as dragging a window.
There were other performance issues. We noticed our cursor flashing continually when we first opened Photoshop Elements. No action was pending. We'd just launched the program and were admiring the colorful interface (which is somewhat jarring on Lion's monotone icon scheme). Sliders were balky and menus reluctant to pop up. Very strange stuff.
It was almost as if the program were running under emulation. And it spoiled quite a bit of the magic for us.
Iampietro told us the Elements code had gone to Gold Master the week before, so we weren't using a prerelease version of the software. And considering the horsepower we were throwing at it, we really can't explain the behavior on hardware.
One clue, though, is that the first thing Elements required of us was to sign in to our Adobe account. Apparently there's an online aspect to the software that may be behind the sluggish behavior. We noticed this again when we quit Photoshop Elements. It took a good long while to quit. Not at all typical behavior. As if we were signing off.
In subsequent sessions Elements did settle down quite a bit, although it was not as smooth as other applications. We suspect our initial experience had something to do with the online Plus account component.
We've asked Adobe what's going on and will report back when we get an answer. They haven't been able to duplicate the same performance issues we're experiencing.
Fortunately other things in Elements are easier to discover. In fact, the Organizer has a few very impressive tricks up its sleeve when it comes to finding your photos.
To test it, we imported about 900 images from earlier this year into an Elements catalog. The import was very quick, taking less than a couple of minutes, but generating thumbnails took considerably longer, though less than five minutes. A status line message at the bottom of the Organizer window keeps you informed.
Finally we had to build an index of the catalog, which again took a minute or two (not very long) before we could search for anything.
There are three image search options: Visual Similarity Search, Object Search and Duplicate Photo Search.
To search for similar images using the new Visual Similarity Search, you just drag one of them into the Search bar and Organizer displays the thumbnails that match. We tried one of our Twin Peaks zoom series and got quite a few hits. But even then, Organizer pushes the bar by looking for other "similar" images.
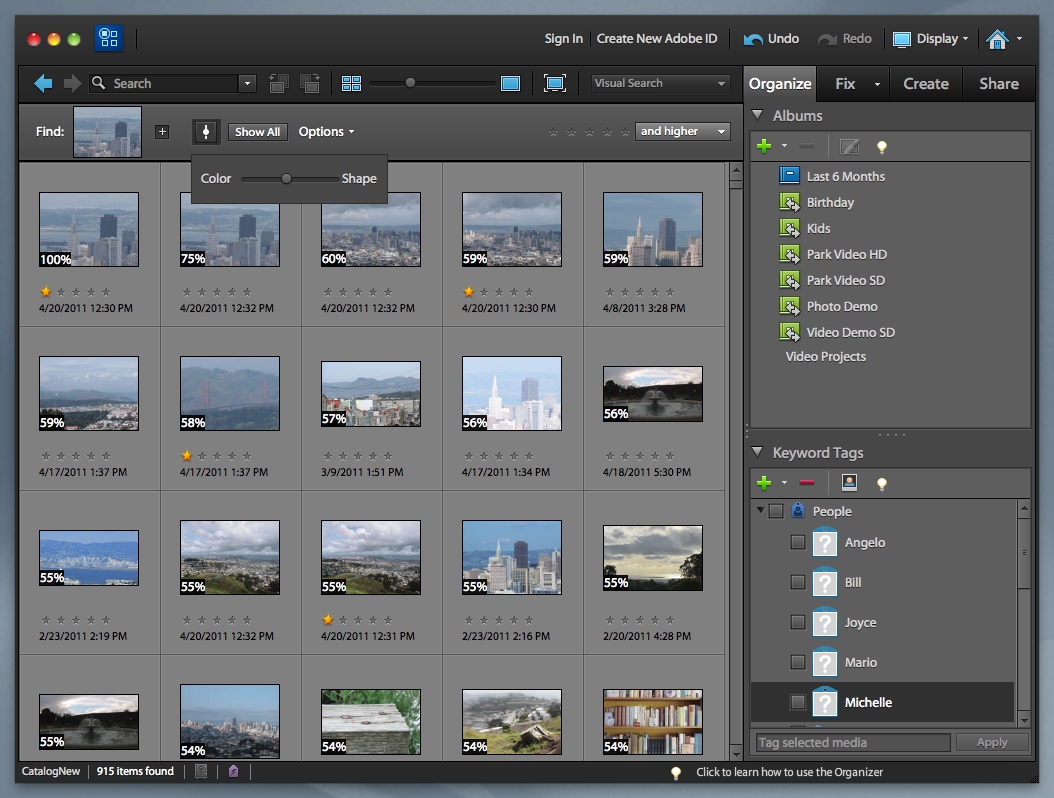

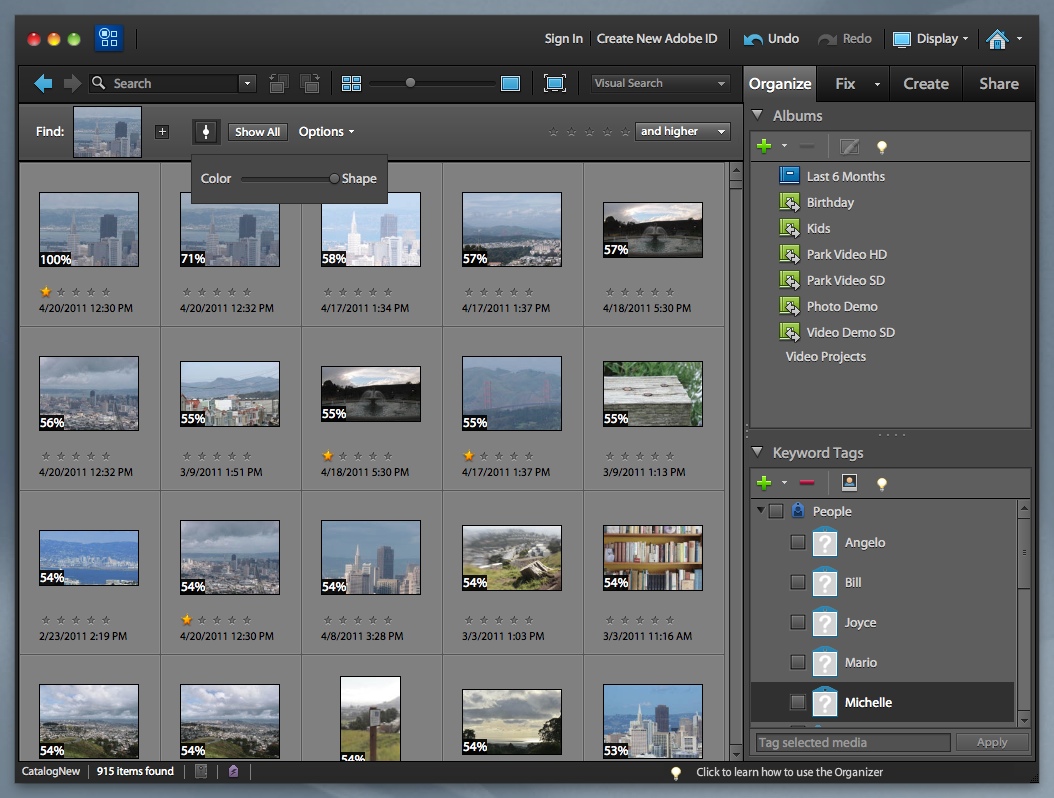
Visual Similarity Search. We look for our Twin Peaks images normally (top), by color (middle) and by shape (bottom).
In a striking act of humility rarely seen in software of any kind, it then grades itself, reporting in a small black box in the lower left of each thumbnail the percent likelihood the images is a match.
Wait, there's more. You can adjust the weight the search algorithm gives to the Color or the Shape of the image (it's a slider). And you can add images to refine the search, too.
With Show All clicked, you can change search methods. We tried Object Search next, dragging a portrait of three women into the search box and enlarging the target around the face of the central one as our search object. A small button below the target starts the search.
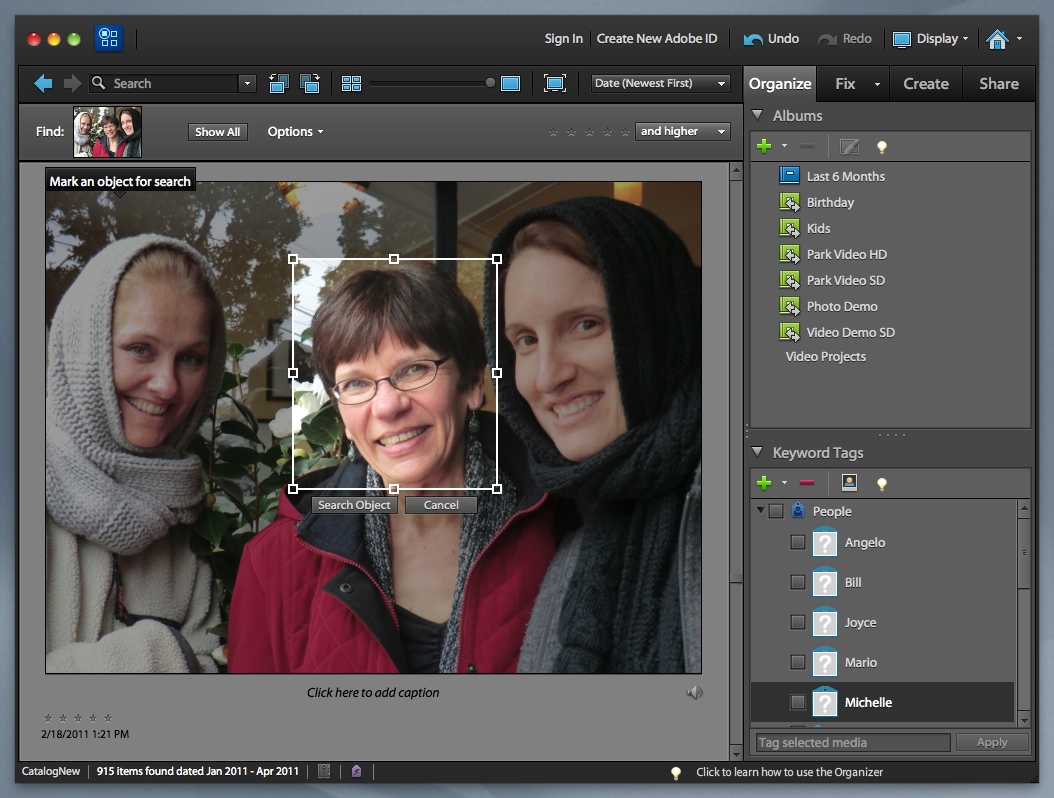
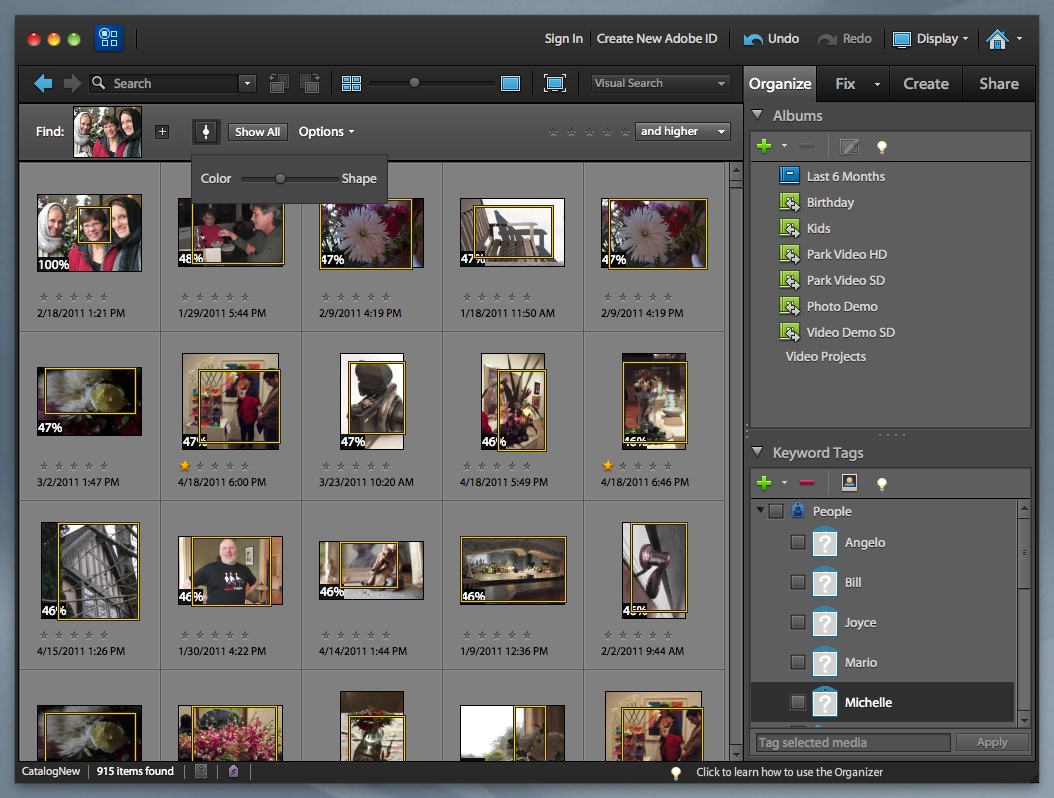
Object Search. We identify what to look for (top) and get some matches (bottom).
The results were amusing. A lot of flowers were matched but so was an old Polish professor we know. At least Elements had the intelligence to grade them as under 50 percent matches.
Duplicate Photo search (which should be much beloved by the lesser organized amongst us) simply runs through the catalog looking for likely matches. Once the catalog has been checked, a new window displays the matches. Only the thumbnail is shown, not even the filename accompanies it, so it can be hard to pick one to delete. And in some cases, the matches were a stretch.
Our catalog, it should be noted, did not have any actual duplicates. It did have similar images (with different camera settings or compositions) and some of these were tagged.
Iampietro's demo of these new searches was a lot more impressive than our actual experience with our own images, but we're pretty careful about our collection to begin with.
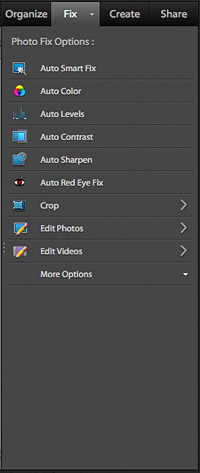
PHOTO EDITING | Back to Contents
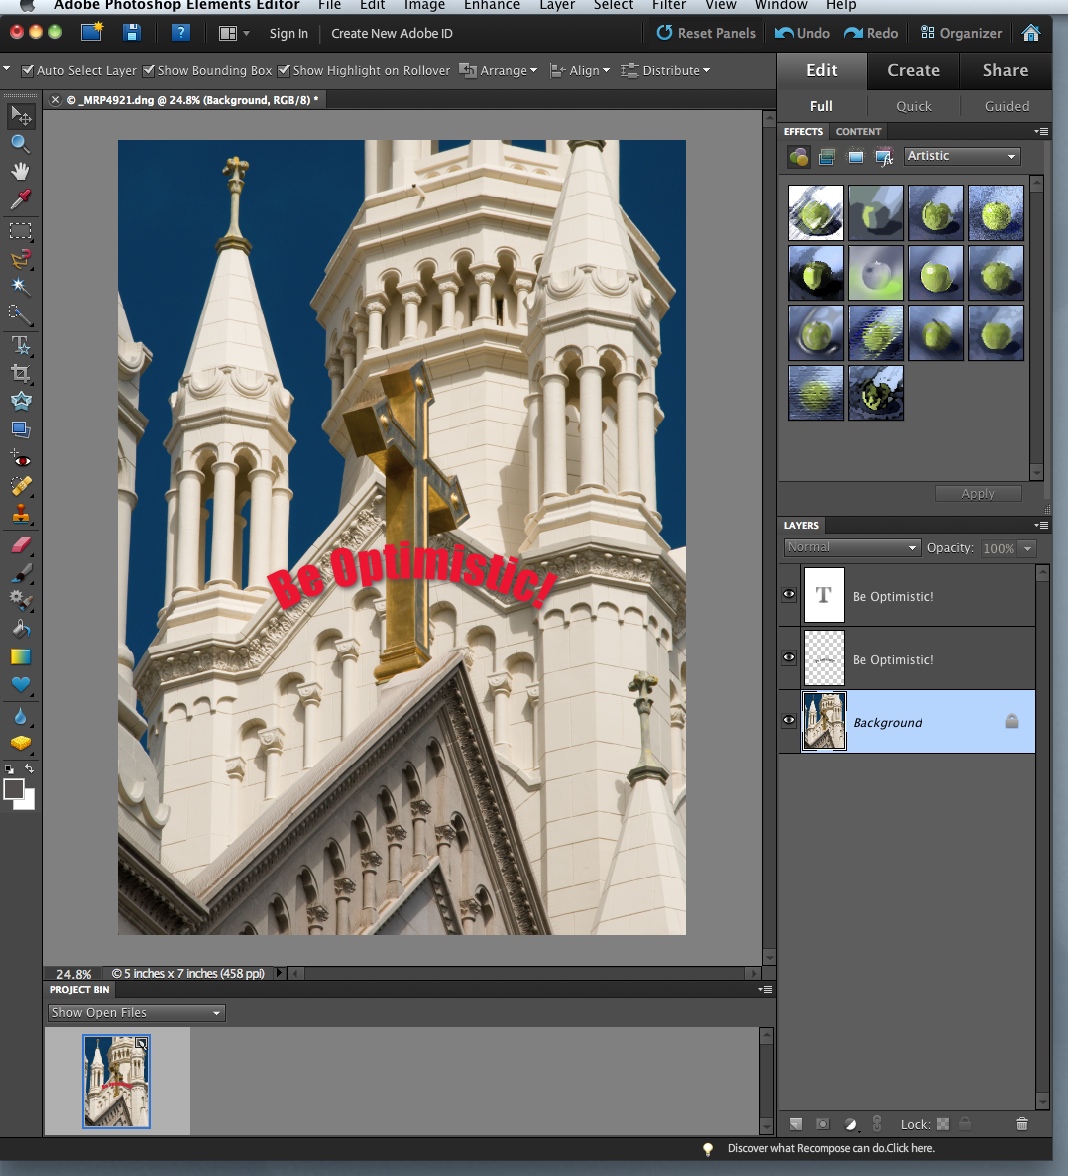
Iampietro highlighted four new tricks in Photoshop Elements for still editing: Cropping Guides, three new Guided Edits, Smart Brush and (simplified) Text on a Path.
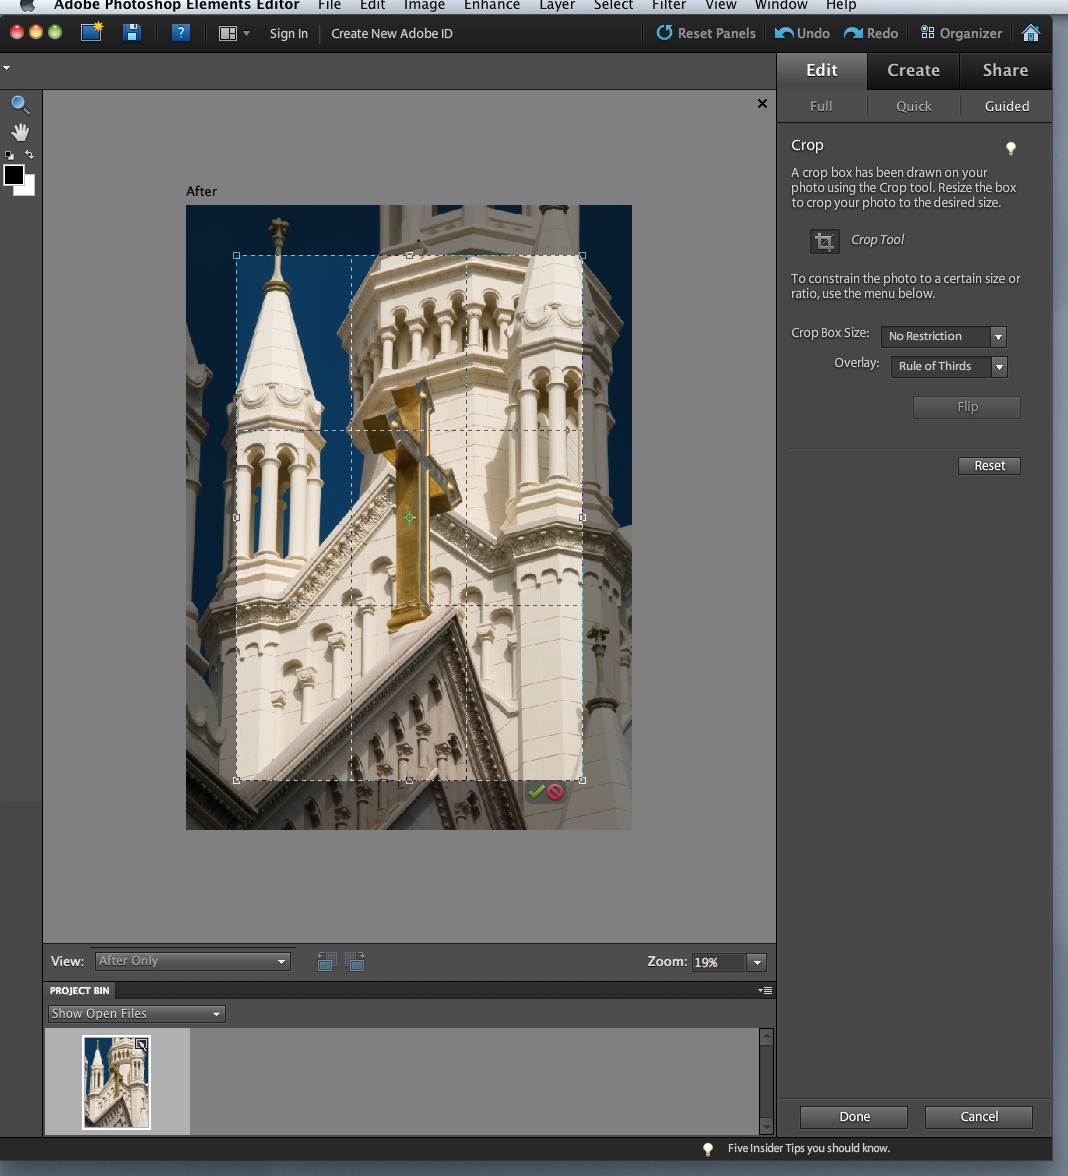
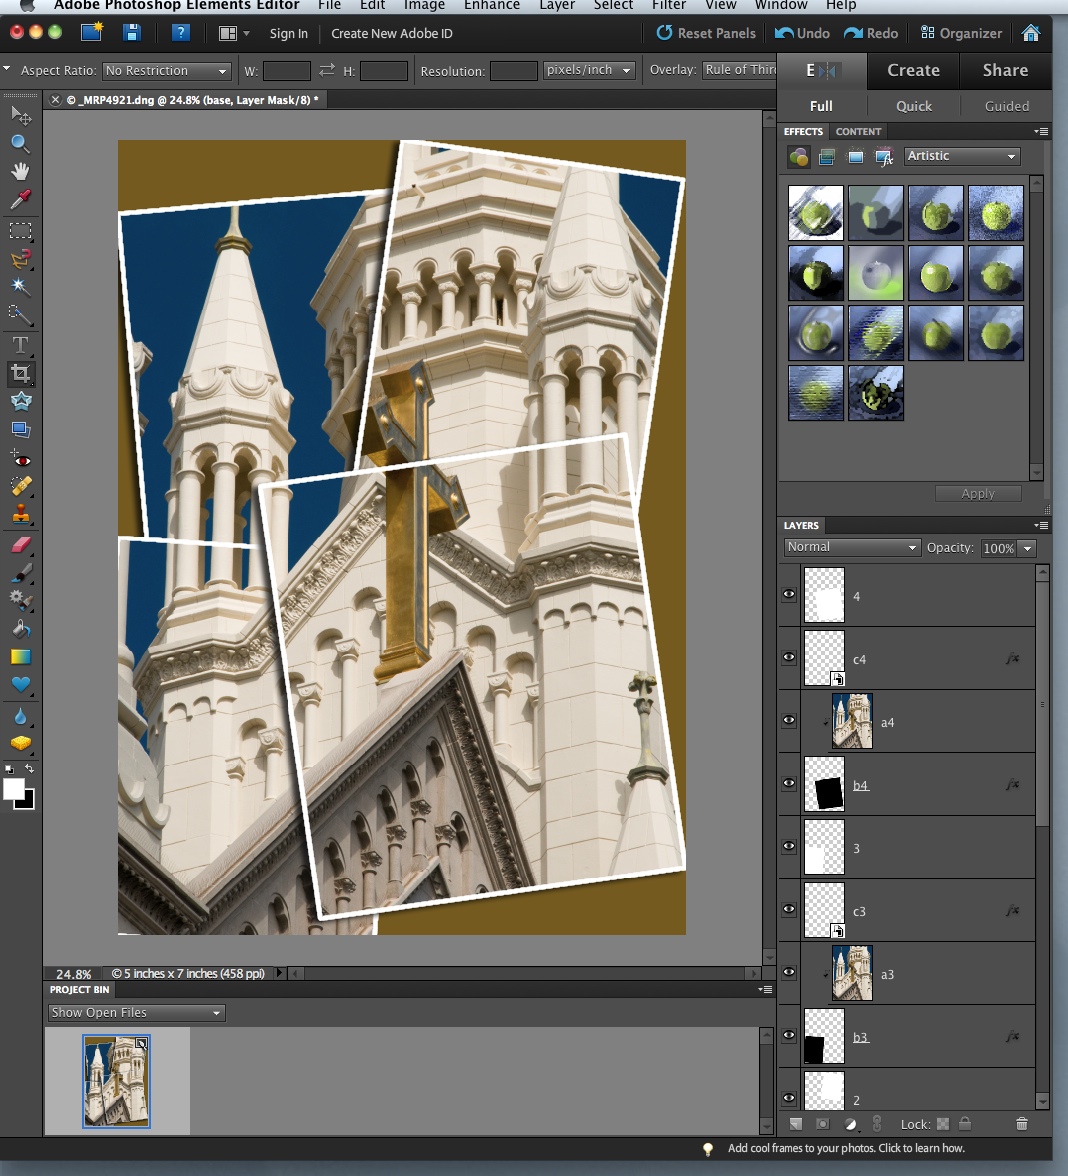
Cropping Guides help you not only stick to an aspect ratio (or shape) that will match your print (it knows that it needs a 2:3 aspect ratio for a 4x6 print or 4:5 for an 8x10, for example) but they also add some helpful overlays.

Crop Tool |
Guided Edit Crop |
You can get to this just using the Crop tool, but from the Edit screen, we clicked on Guided and selected the first one in Basic Edits, Crop Photo. Elements immediately draws a crop box on your image with a rather generous trim area. You don't have to draw the crop yourself, although it's fully editable.
The Guided Edit for crop, though, explains you can set two parameters to help you crop the image:
- The first is Crop Box Size, which can be set to No Restriction (the default), Use Photo Ratio, 16:9 and then 2.5x2 inches up to 8x10. Photo Ratio simply enforces the original shape of the image.
- The second is Overlay, which can be set to No Overlay, Rule of Thirds, Grid or Golden Ratio. Although it's nothing more than a simple overlay, this can be pretty useful. It helps you position a subject precisely instead of arbitrarily.
Orton Effect |
Type on a Path |
In Elements 10, you get three new ones:
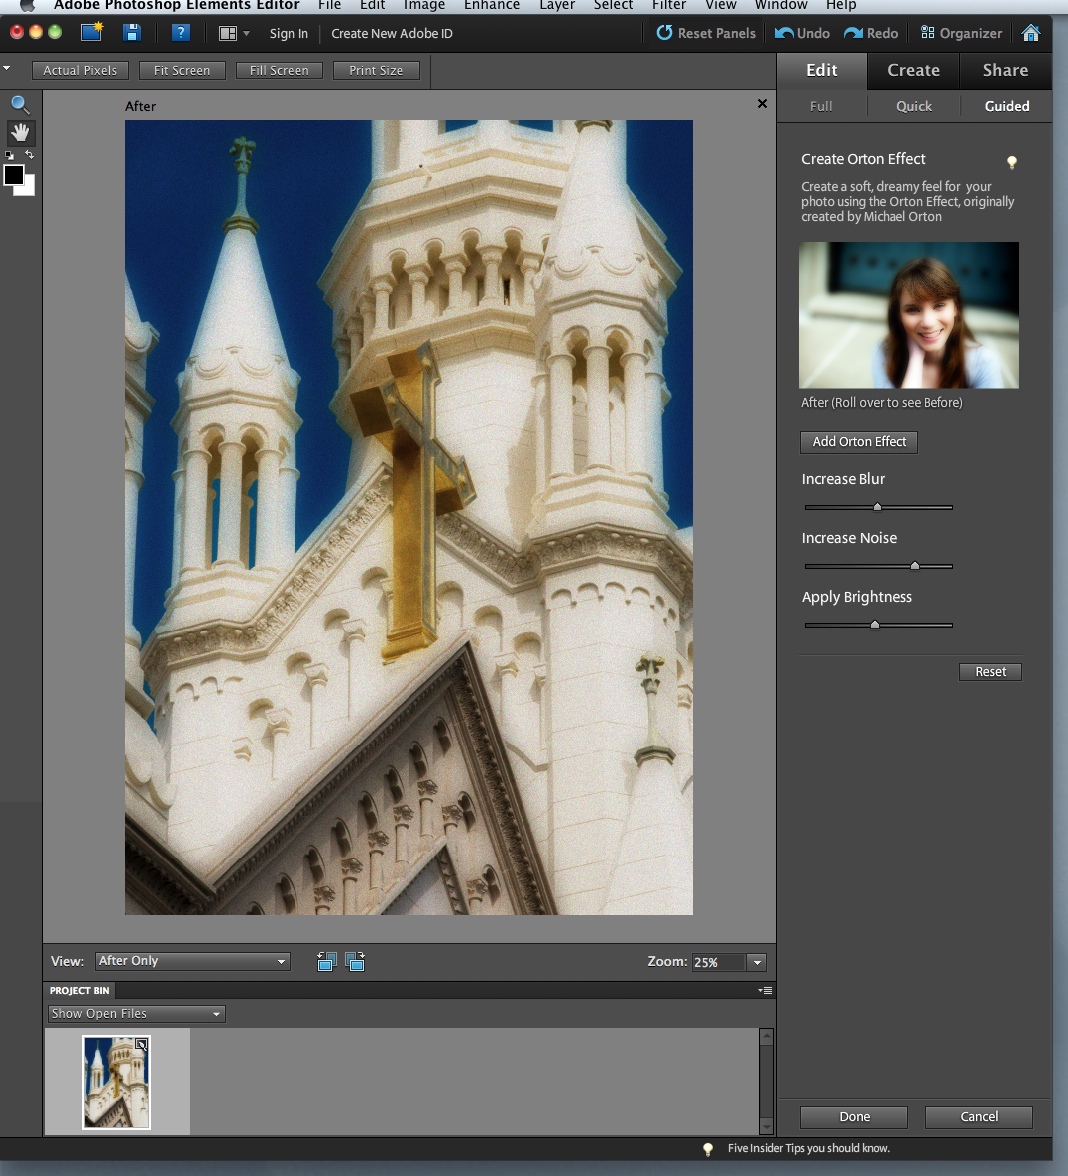
- The Orton Effect, named for photographer Michael Orton's variable focus images, presents three sliders to adjust the effect once you've clicked the Add Orton Effect button. Iampietro talked about the "headroom" in Elements, meaning that effects are by design not just slapped on an image but adjustable to individual preferences. And the three sliders -- to Increase Blue, Increase Noise and Apply Brightness -- are good examples.
- Depth of Field in Lens Effects addresses one of the amateur photographer's strongest desires: to blur that background. It's particularly challenging (well, impossible) on cell phones and digicams. But Elements 10 to the rescue -- in two ways. The Simple method uses a sweep of the Gradient tool around a central point to restore sharp focus to the blurred image. A slider lets you increase the default amount of blur. In a couple of seconds, you've done the impossible. The Custom method starts with selecting what you want to be sharp using the Quick Selection Tool, then Adding Blur with a button and finally increasing blur with a slider. It's a good deal less subtle than the Simple method, which we preferred for our test image.
- Picture Stack in Photo Play breaks an image into multiple images with borders (like bordered prints). You simply select the number of pictures (4, 8, 12 are the options), the border width (small, medium, large) and have an option to change the background on a new layer (you can use the Eye Dropper to select a color from the image itself).
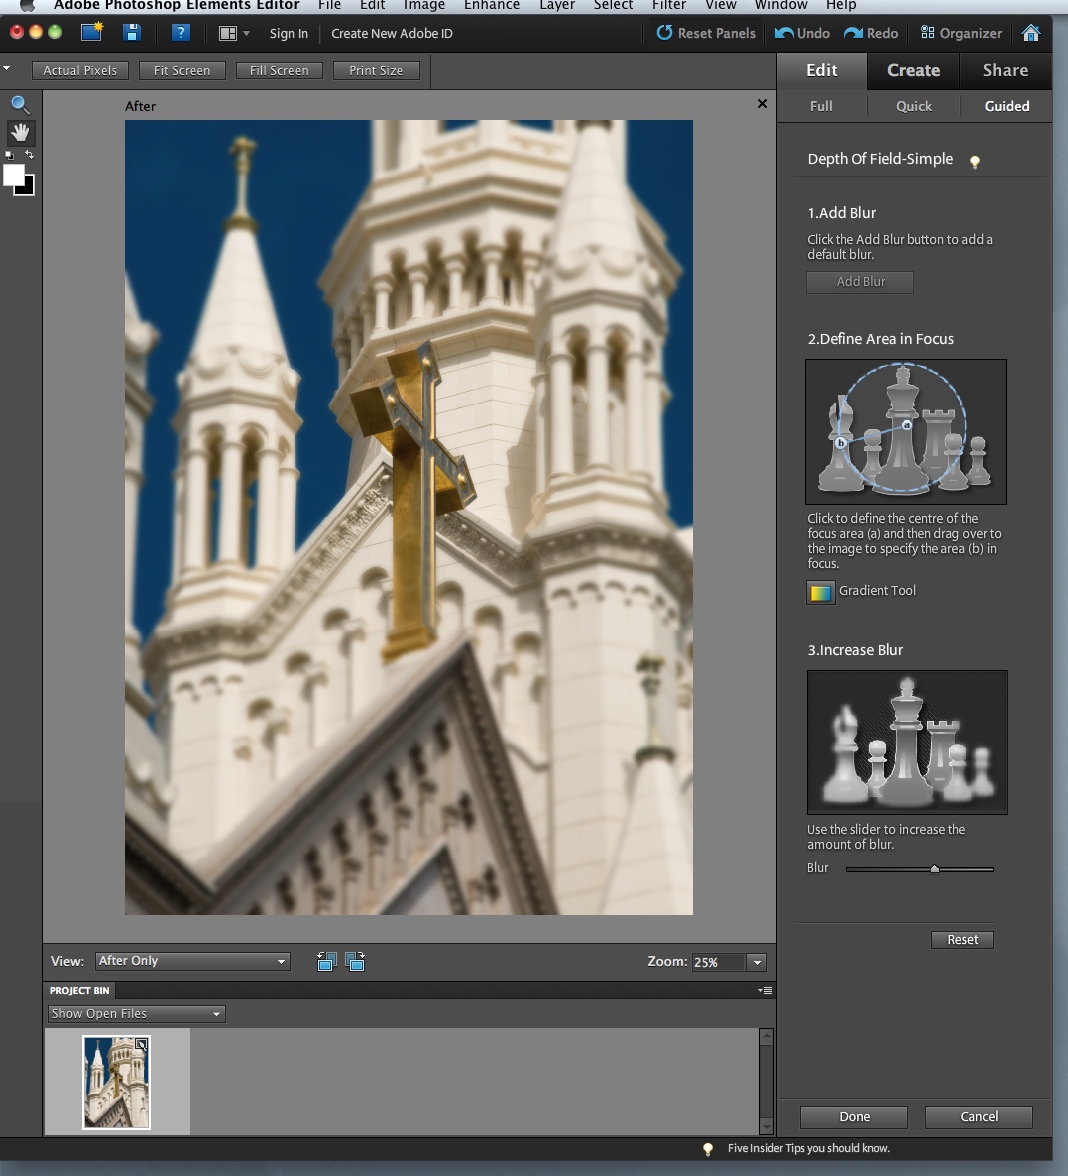
Simple |
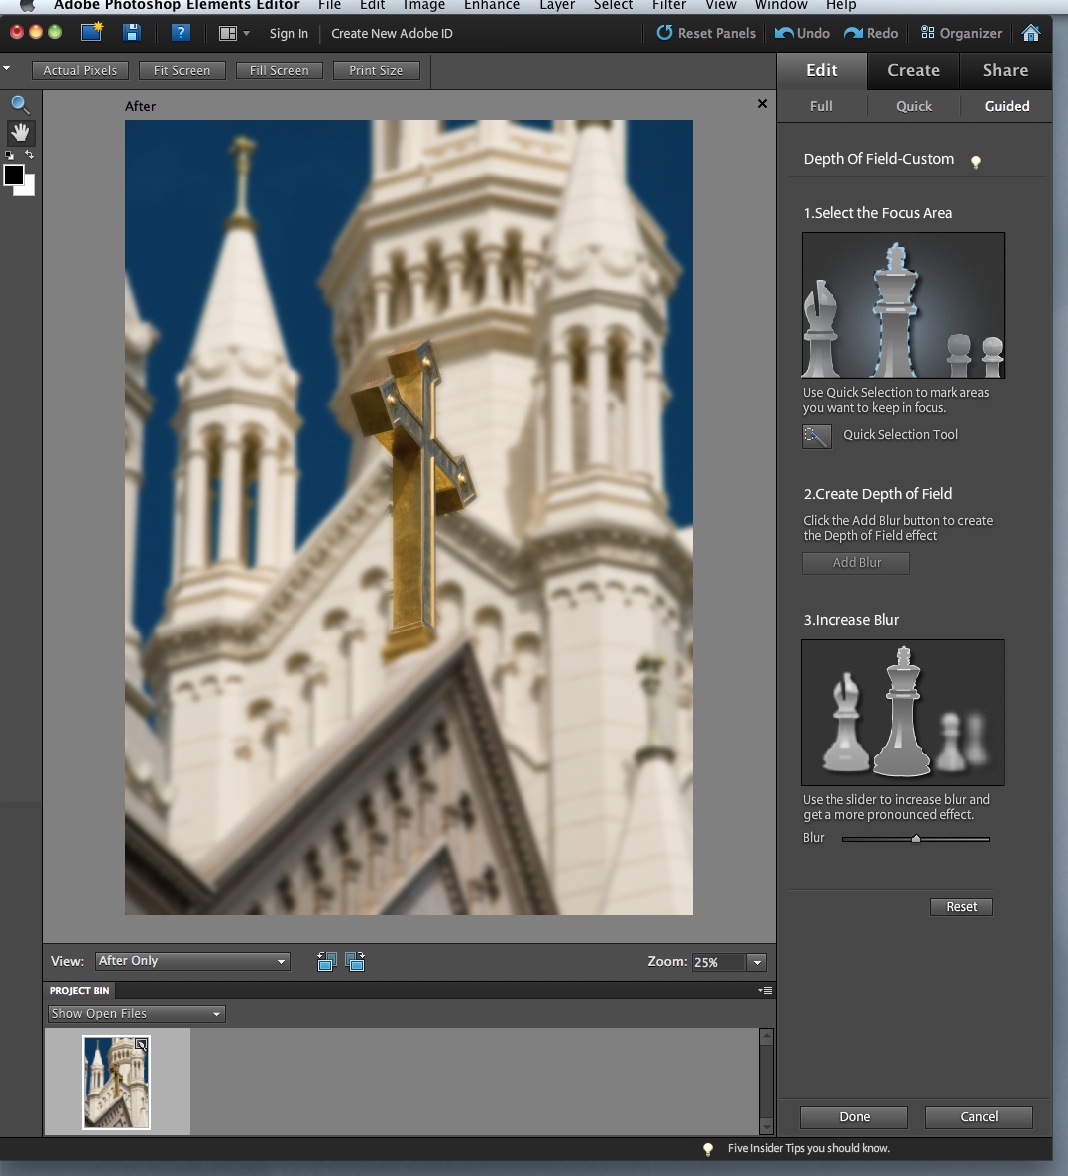
Custom |
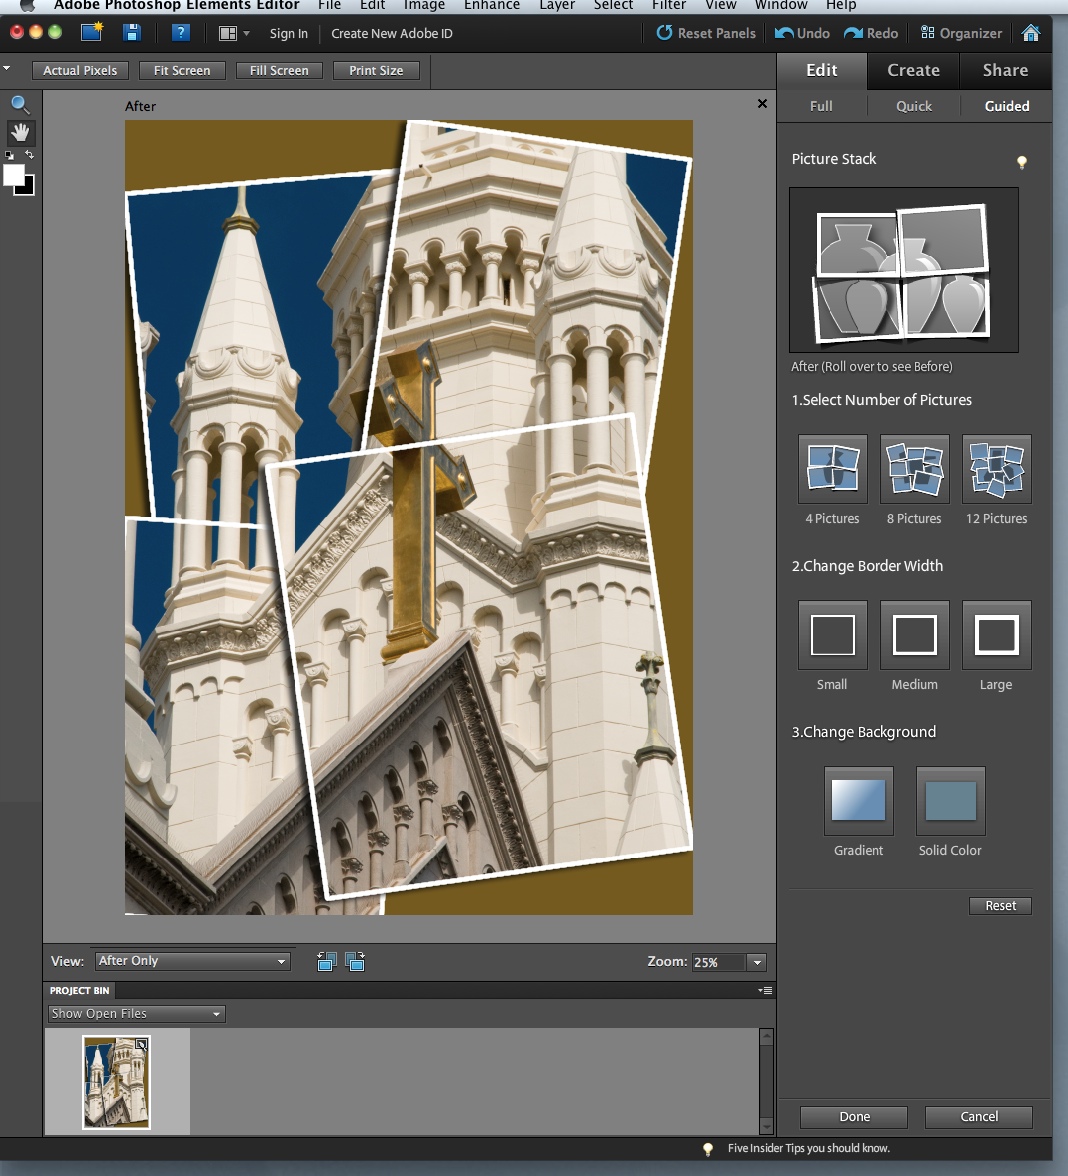
Picture Stack |
Stack Layers |
We had trouble using this feature at first. It's easy enough to select the Smart Brush from the Tools menu on the left. But we confused the active filter with the one displayed in the large Effects window on the right.
We should, instead, have been looking at the Smart Brush's tool bar just below the title bar of the Elements window. There, at the right end, is a small popup icon of the currently active filter for the Smart Brush.
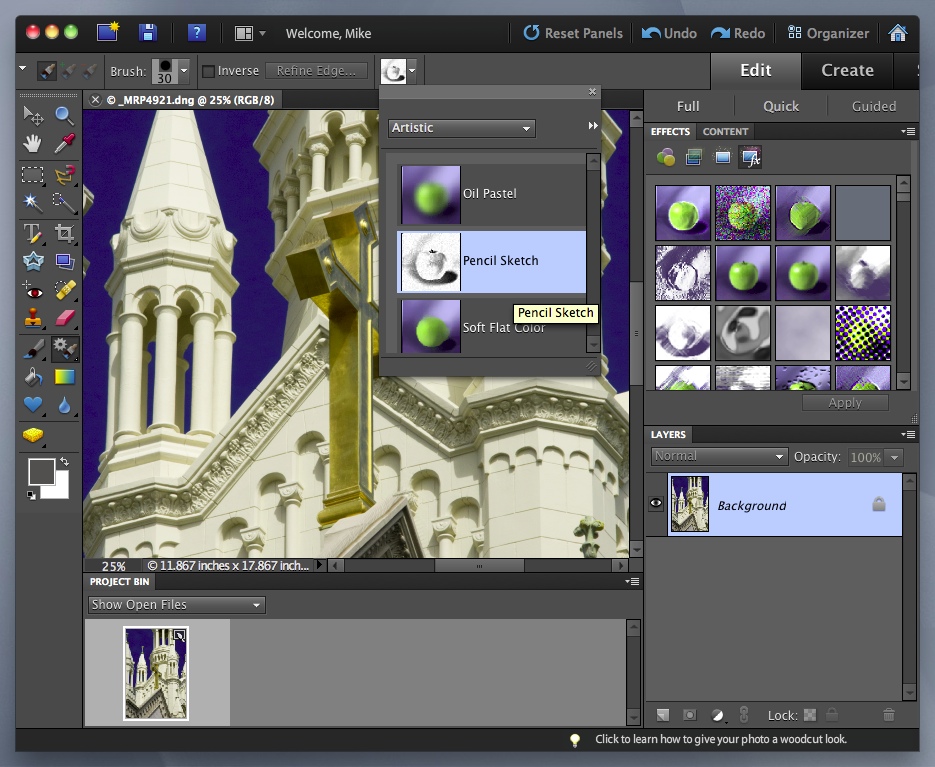
Selecting a Smart Brush Filter |
A Filter Applied |
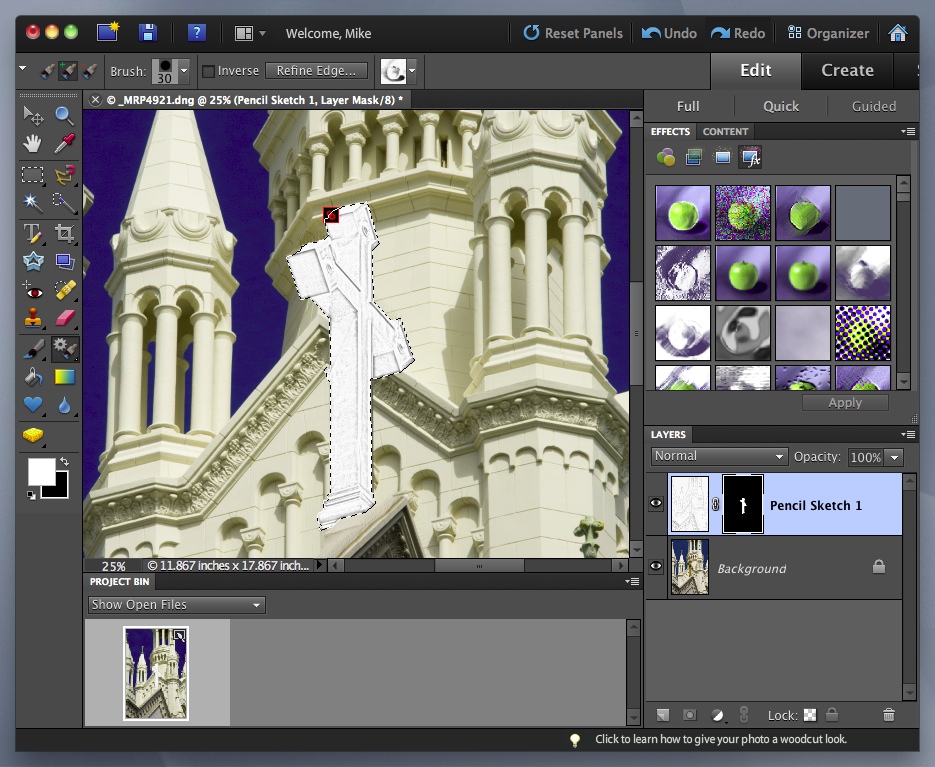
When you click on the small Down arrow, we chose the Pencil Sketch filter from among the Artistic filters. Then, when we used the Smart Brush to draw a selection on the image, it converted it to a pencil sketch.
The effect is saved on a layer of its own. The selection itself is distinct from any other selection so you can't simply select that layer and drag a new Effect to the selection.
You can, however, create a new selection and drag an Effect to it. It's just that Smart Brush selections are different from other selections.
You can reactivate the Smart Brush selection by either clicking on its small red icon in the image or its layer. Once active again, you can change the Effect using the tool bar popup.

Text on a Path (Source: Adobe)
Text on a Path was added, Iampietro told us, for the scrapbookers. But, in the grand Elements tradition, it's been simplified. The big problem with this feature as it's found in illustration programs is the path part. Paths are drawn freehand on the screen but refined by pulling on the handles of Bezier curves.
This is fun once you get the hang of it, but not at all second nature. So no Bezier handles. Just points on a path to drag around, delete or add until the path goes where you want it to go. Then you just click an insertion point and start typing. You can change the font, size, color and everything else you're used to changing.
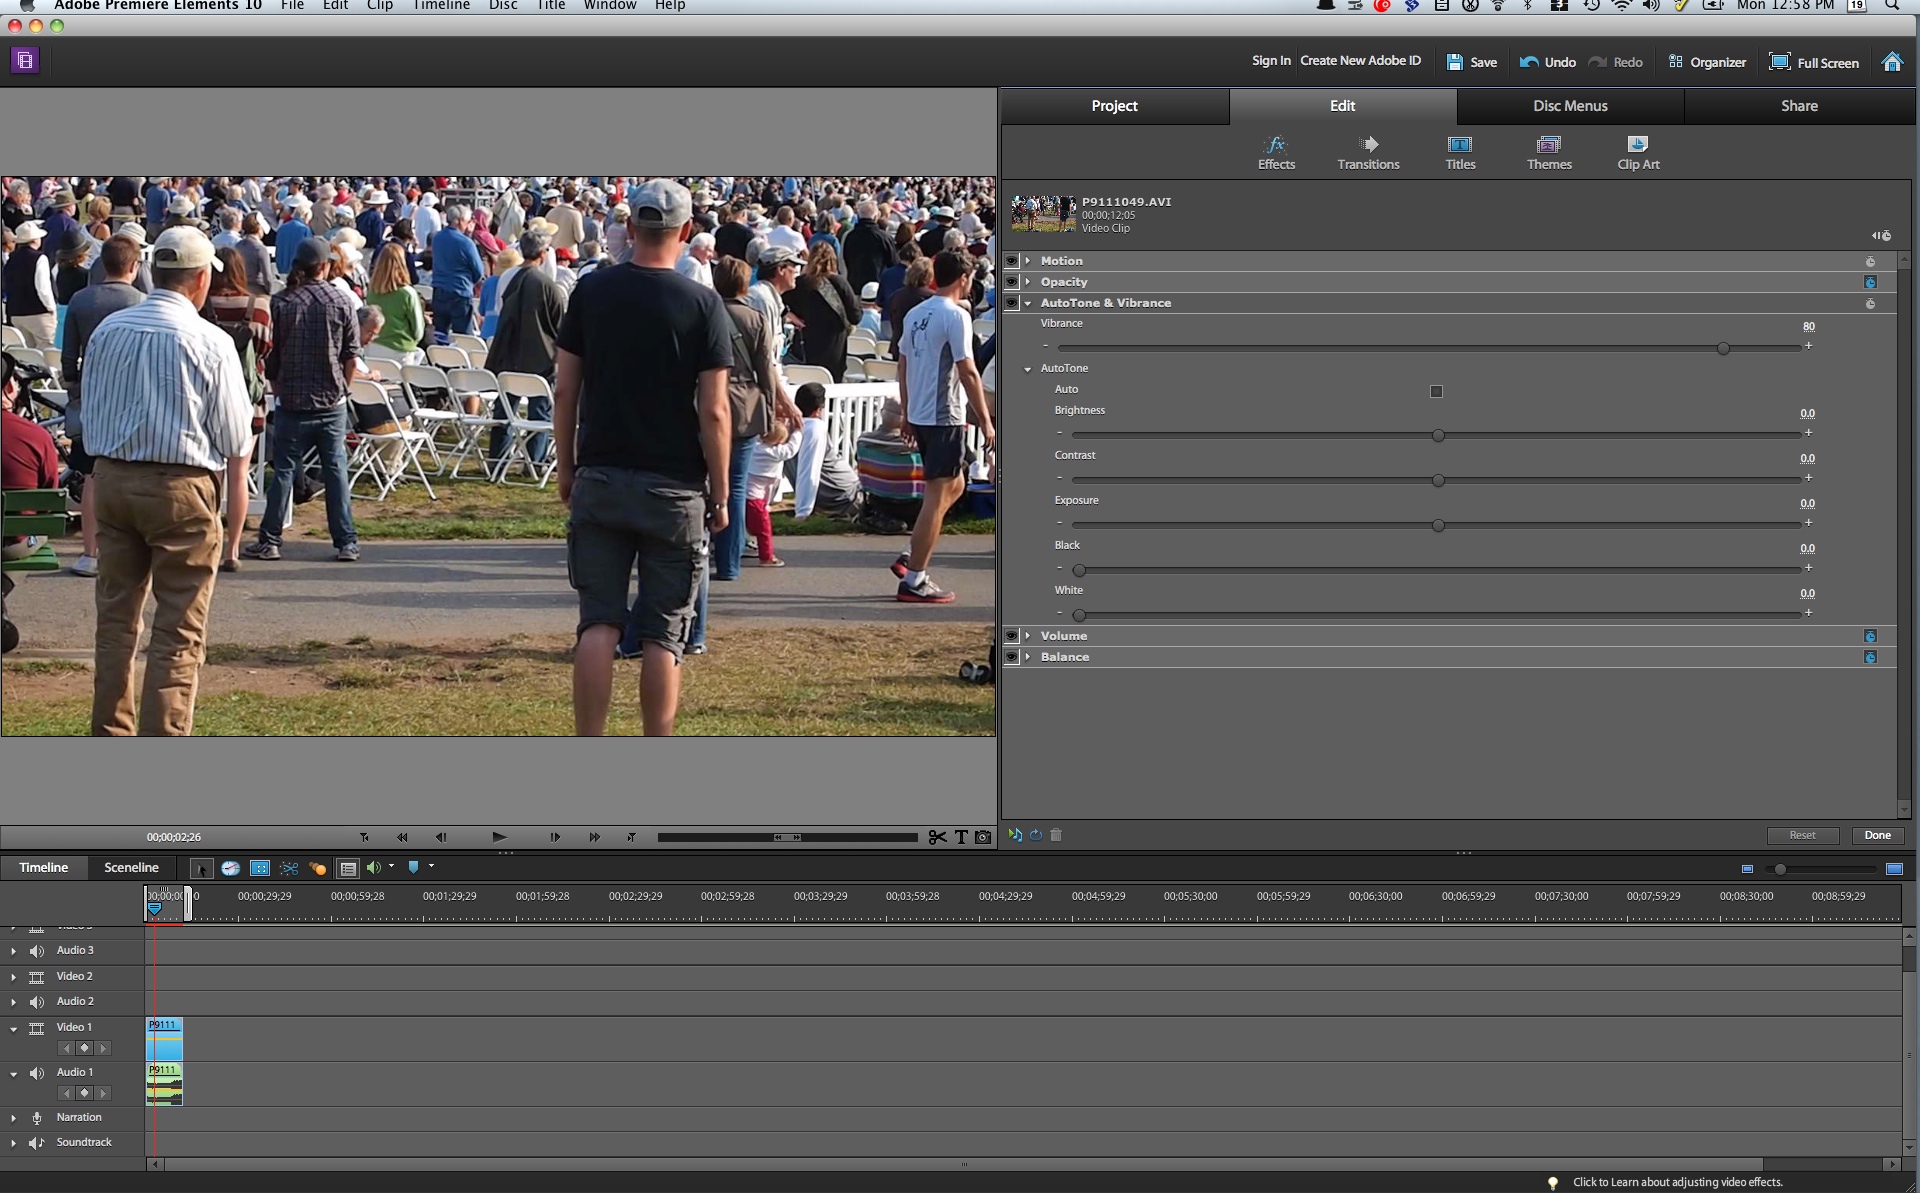
AutoTone & Vibrance
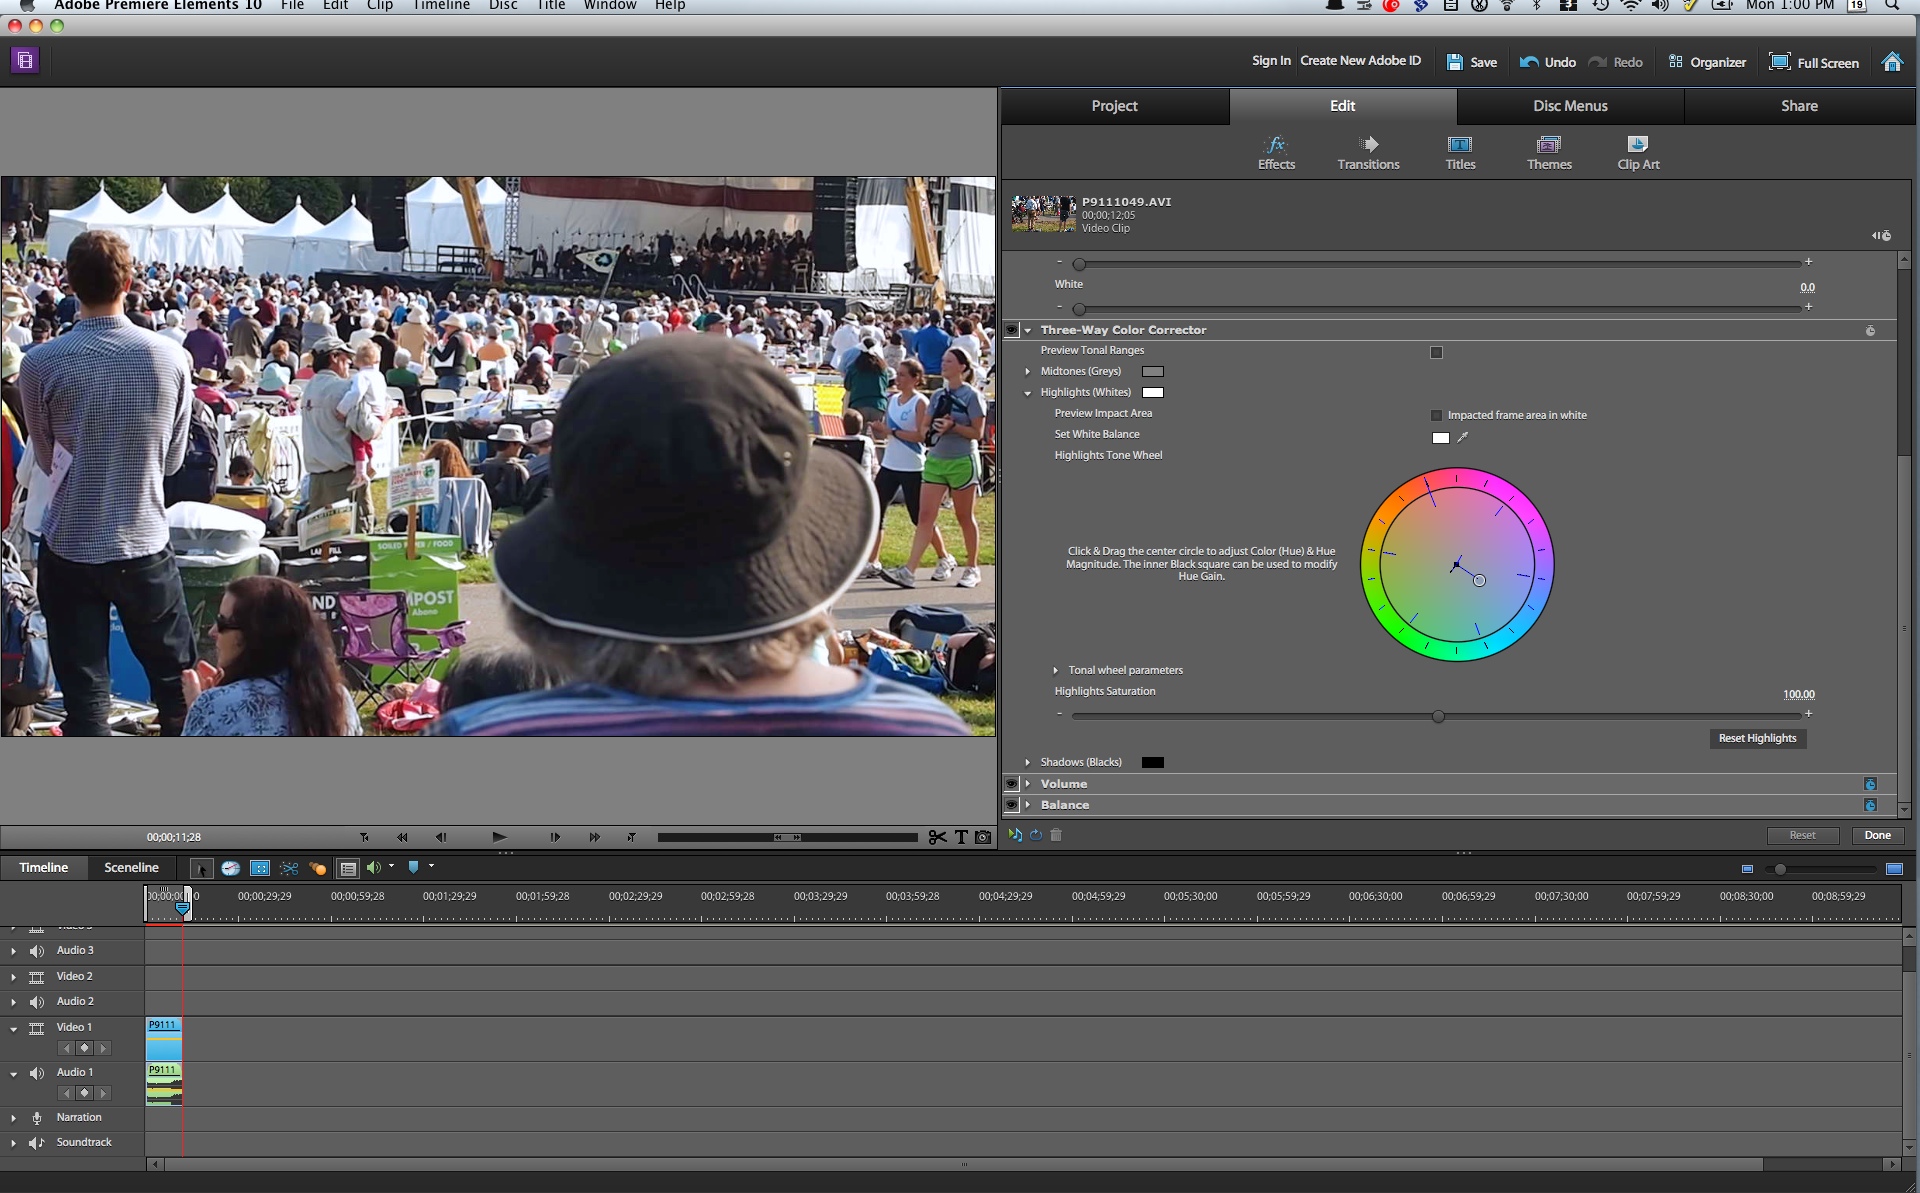
Three-Way Color Corrector
Movies from Photos
MOVIE EDITING | Back to Contents
In addition to being a 64-bit native application in Windows, which eliminates the 4-megapixel limit on stills used in video, the Premiere component of Elements 10 adds two exciting color correction options, a new slide show feature and even a few more tricks.
AutoTone & Vibrance for Video. Familiar to the still photographer, AutoTone and Vibrance are new to video. But they do the same job for video that they do for stills.
In fact, they're a little more important in video, optimizing color and tone automatically where it would otherwise take a lot of work.
AutoTone optimizes contrast, clipping to the shadow and highlight data, while Vibrance increases Saturation while protecting skin tones.
But the settings are not applied uniformly to the clip based on the first frame. Instead, they are intelligently adapted throughout the clip. And you can manually adjust the strength of these settings using sliders.
Three-Way Color Corrector. You might think you'd have to be a pro to appreciate Three-Way Color Correction (because Premiere Pro is where it comes from) but it's a pretty simple concept to grasp.
It simply masks the clip into three tonal areas: highlights, midtones, shadows. You then select which to affect with your edit.
So, for example, you can easily fix a sky without affecting the foreground. Just use the highlight area mask controls. In our example, we added a little blue to the white tents to make them look like they'd been washed in bleach. But notice the black hat in the foreground remained neutral.
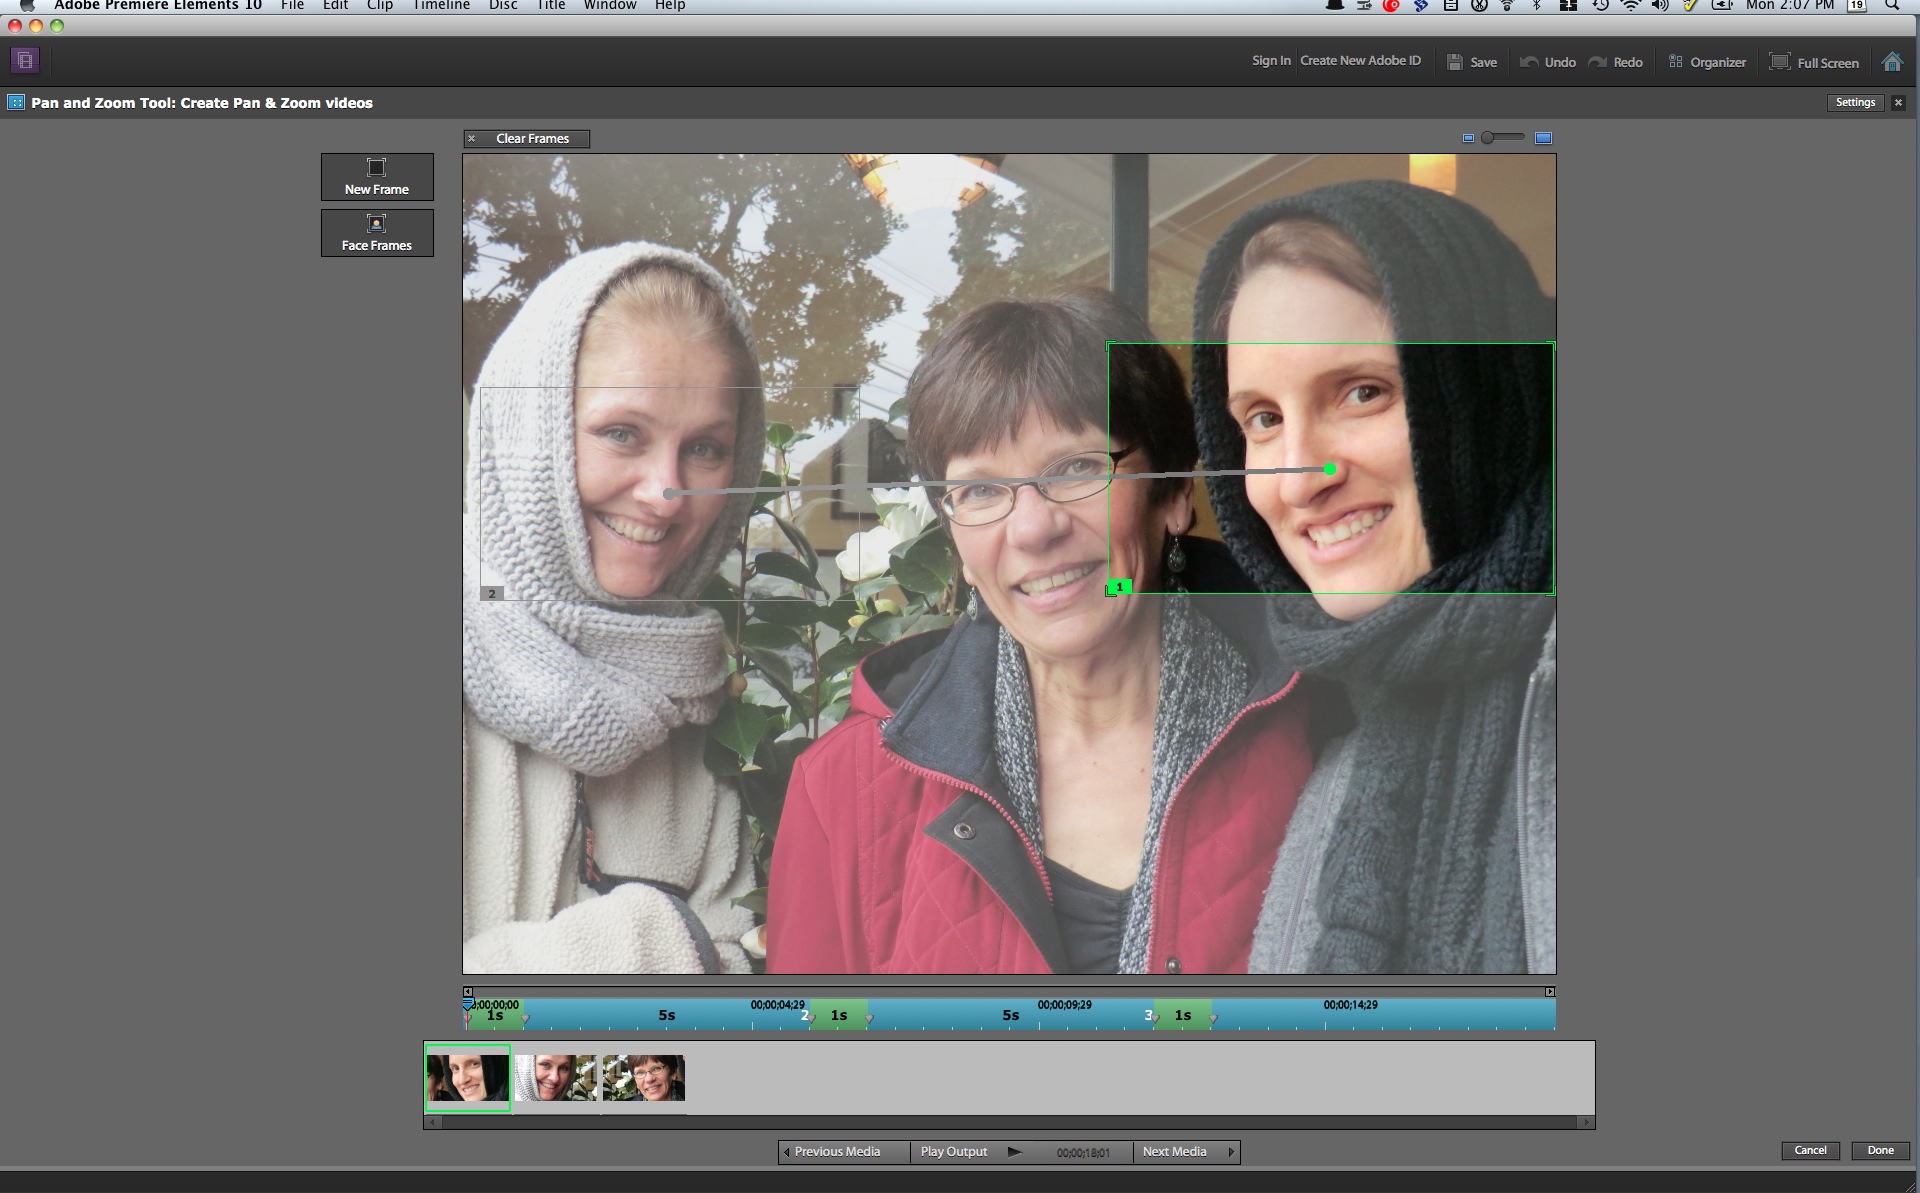
There's more, including a new approach to creating movies from stills. The Movies from Photos tool takes what had been a manual operation far behind competing products to a competitive offering of intelligent pan and zoom.
Two New Color Correction Options (Source: Adobe)

Movies from Photos (Source: Adobe)
Each image gets a start and end box you can move around and resize to create the animation. You can also affect timing, easily setting the time to hold on the frame as you enter and leave it and how long to take panning. A Face Frame option will use facial recognition to move to each face in an image and hold for a set time.
Iampietro observed that Elements 9 fans were excited about being able to burn Blue-ray discs but found they weren't for everything. Sometimes you just want to distribute a 20-25 minute production on less expensive DVD media. So Elements 10 offers HD video using AVCHD compression for those shorter productions that you can burn to DVD.
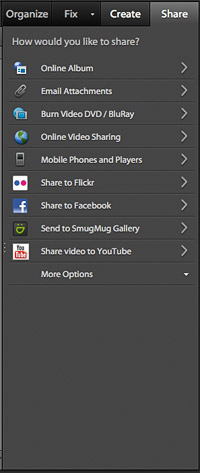
While you can upload an unedited video clip to Facebook straight from Organizer, Premiere lets you upload your edited production. It manages the login for you, encodes the production for Facebook and uploads it.
PRICE & AVAILABILITY | Back to Contents
Elements 10 is available as both a new product or an upgrade. And to mark the tenth anniversary of the Elements product, upgrade pricing is available for any version of the product.
It's also available bundled or separately. We've been calling it Elements 10 because it's one product to us, but if you prefer to use only the still photo capabilities you can buy Photoshop Elements. And if you just want the video capabilities, you can grab Premiere Elements.
As a new product, the bundle is $149.99 and the separate products are each $99.99
Upgrades to the bundle are $119.99 or $79.99 for the separate products.
In addition, Adobe offers a product called Elements Plus, which adds 20-MB of online storage for $49.99 a year. Plus also provides access to "exclusive libraries of how-tos, movie themes and video effects."
And it's shipping now.
Adobe likes to persuade confused reviewers that each of its products has its own swim lane. And, over the years, each product pretty much sticks to that lane.
But we think Elements is one of those products that, though it stays in its lane, still competes in more than one event. If you're a pro getting your feet wet in video production, for example, Elements offers some spectacular advantages over other entry-level products that make your final result seem polished with a pro product.
Similarly, we can't imagine any publication whose art department should be without these tools and special effects. They are quickly rendered and don't require expensive expertise to apply.
And yet, Elements remains the gold medal holder for the amateur who just wants to do more with photos and video. You know who you are. You polish the family silver, you get the oil changed regularly on the family car, you make your own invitations, you know the rewards of making something yourself. You just need a little help when it comes to your camera.
Elements has delivered that help for 10 years now. And Elements 10 just adds a little more magic to the wonders you can create with your images -- and video.