TABLET COMPOSITING
Photoshop Touch Lays It On
By MIKE PASINI
Editor
The Imaging Resource Digital Photography Newsletter
Review Date: May 2012
Updated for Photoshop Touch v1.2
Just a little while ago we were enchanted with compact netbooks that pretended to run big applications like Lightroom and now we're a little in love with tablets that admittedly don't run the big stuff but promise their own take on things. Like Photoshop Touch.
Apple had quite a head start on the operating system with OS X and the gestural user interface with the iPhone before it turned a sheet of glass into a tablet and launched an industry. Its imitators have found it a hard road to follow.
And even Apple's effort was a read-only start, with the first versions providing more of a window on the Web than a blank canvas to realize your vision. Still, it was an exciting start and development didn't lag for apps that could do things for photographers.
Indeed, photographers have found tablets handy companions. Not only for showing off a portfolio or photo shoot in an accessible and effective way, but even in the studio as a monitor for tethered shooting.
Still the limitations -- like no system-wide color calibration -- have been daunting. And, for the most part, haven't been addressed. Relaxed a bit perhaps (with more RAM) but not resolved.
Despite the constricting environment, app developers have been busy. We've been reviewing some of the more promising tools including WD Photos, Datacolor SpyderGallery, Nik Software Snapseed, Revel, Pholium and now Photoshop Touch.
These were all version 1.0 apps. Our approach when reviewing a new concept is to test the concept more than the implementation. So we come to the $9.99 Photoshop Touch not so much to compare it to Lightroom or Photoshop or iPhoto, which we think would be a mistake, but to evaluate it for what it is.
What is Photoshop Touch? It's a layers-based bitmap editor built for tablets running either Android, on which it was first released, or iOS.
LIMITATIONS | Back to Contents
The limitations of a tablet environment are worth pointing out. Not only do they include the lack of system-wide color calibration but they also restrict image size. And the desire to hide the file system from the user makes finding your images an app-by-app adventure.
Snapseed worked well within the same limitations, but it's important to note that it isn't the application but the operating system which imposes them.
Besides portability, one of the benefits of working on a tablet is the touch interface.
We've found, however, the touch interface profits from the use of a stylus with these applications. Your finger is precise enough for Web browsing (although that can be argued) but when it comes to precision drawing, you need a stylus.
One limitation Adobe has gotten around for this app, though, is the lack of a Flash player on iOS. Photoshop Touch uses the AIR runtime, which shares a lot with Flash. But primarily Photoshop Touch relies on Actionscript.
FINDING IMAGES | Back to Contents
The first tablet limitation we ran into was really one of a tablet's attractions: the invisible file system. You don't worry about where your image is because it tags along with the app that created it.
That's a problem -- eventually. And for image editing software, right away. You have to find an image to edit it, after all.
There are a lot of places for images to hide on a tablet where the file system is invisible to the user. It can be frustrating to work on an image in one app and not be able to find it in another.
Local photo storage on the iPad (which is what we used for this review) is either your Photo Stream or Camera Roll, the two places Snapseed can access. Photoshop Touch, however, can also grab an image with the tablet's built-in camera.
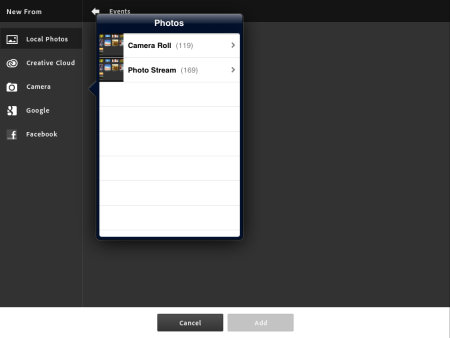
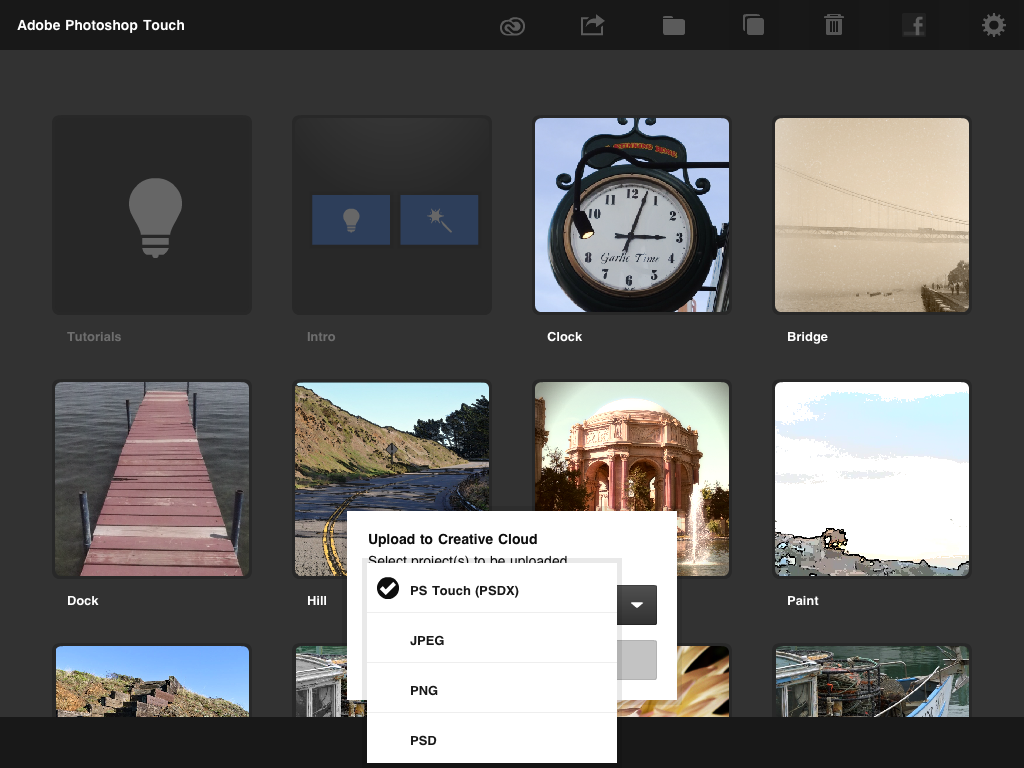
Files. Lots of sources, including Adobe's Creative Cloud.
And Photoshop Touch can access images that are not stored on the tablet. You can access Adobe's Creative Cloud, Google and Facebook. With the 1.2 revision, Photoshop Touch makes it easier to sync files with the Cloud in a variety of formats.
The images you pull into Photoshop Touch are downsized if they exceed the app's maximum file sizes.
But there are two file size options starting with v1.2. You can choose between a larger file size than the default but with fewer possible layers or stick with the default and the maximum number of layers.
If you want to use 16 layers, the maximum file size is 1,600 x 1,600 pixels. But if you can live with 10 layers, you can go up to 2,048 x 2,048 pixels. The app's default is 1,600 x 1,600 with 16 layers (the previous standard). You can change that in Preferences.
THE INTERFACE | Back to Contents
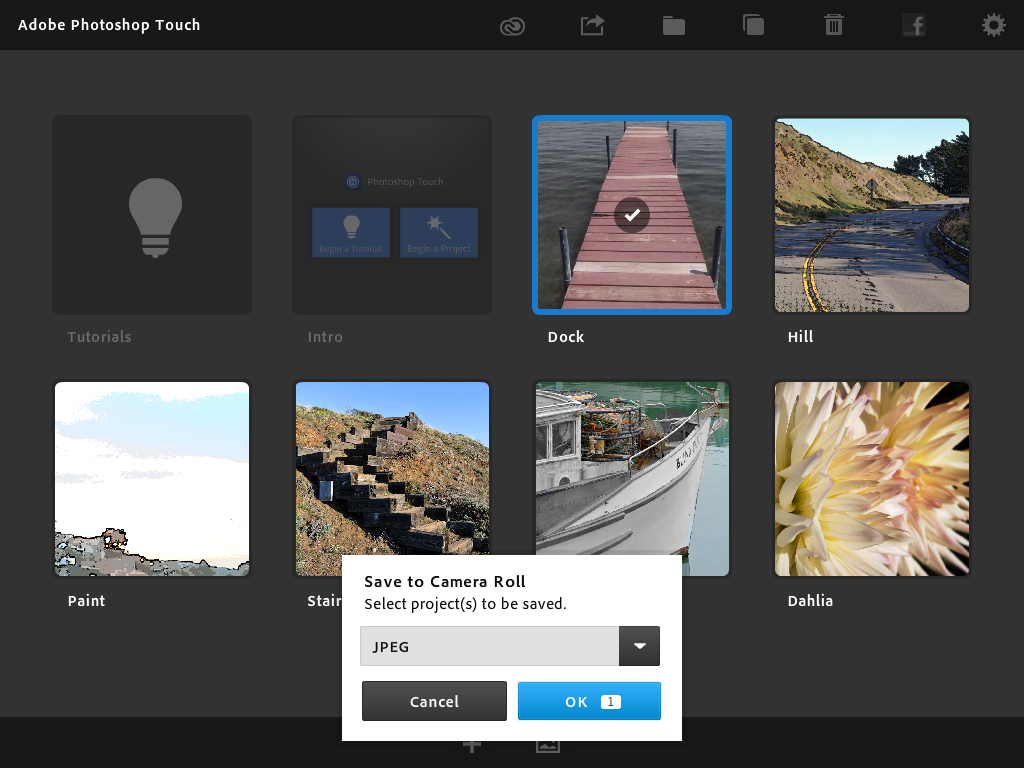
When you launch Photoshop Touch, you're presented with a signon screen that yields to a two-button screen. They don't look like buttons, but the two big blue boxes offer the option to Begin a Tutorial or Begin a Project.
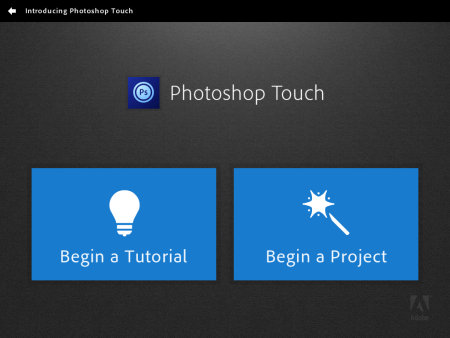
Two Buttons. Begin a Tutorial or a Project.
When you've saved a few projects, as Photoshop Touch calls them, that opening screen will display a light bulb button for the tutorials, a button with the two blue boxes and a thumbnail for each project you've saved.
There's also a menu of icons across the top of that screen. They are: Creative Cloud options, Save options (share and print), Folder options (add, move), Duplicate a project, Delete a project, Facebook and Settings. And at the bottom of the screen there's a Plus icon to add a new project (settings its dimensions) and another to create a new project from any source.
We'll go through the tutorials in a bit, but first let's look at the interface to the application itself.
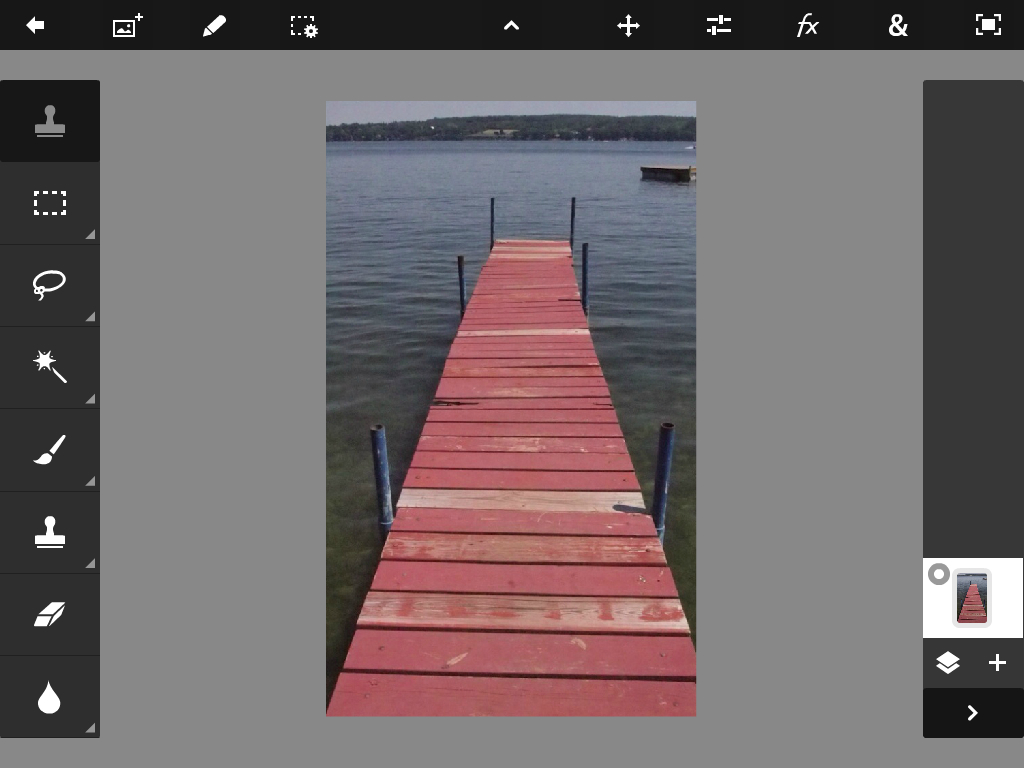
That interface is a gray background with a menu bar on top and darker gray sidebars (which you can easily slide off the screen by tapping the arrow at the bottom of them). The left sidebar displays tools and tool options when you tap a tool to access it. The right sidebar manages the image's layers.
|
The Interface at a Glance |
||
The Basic Interface |
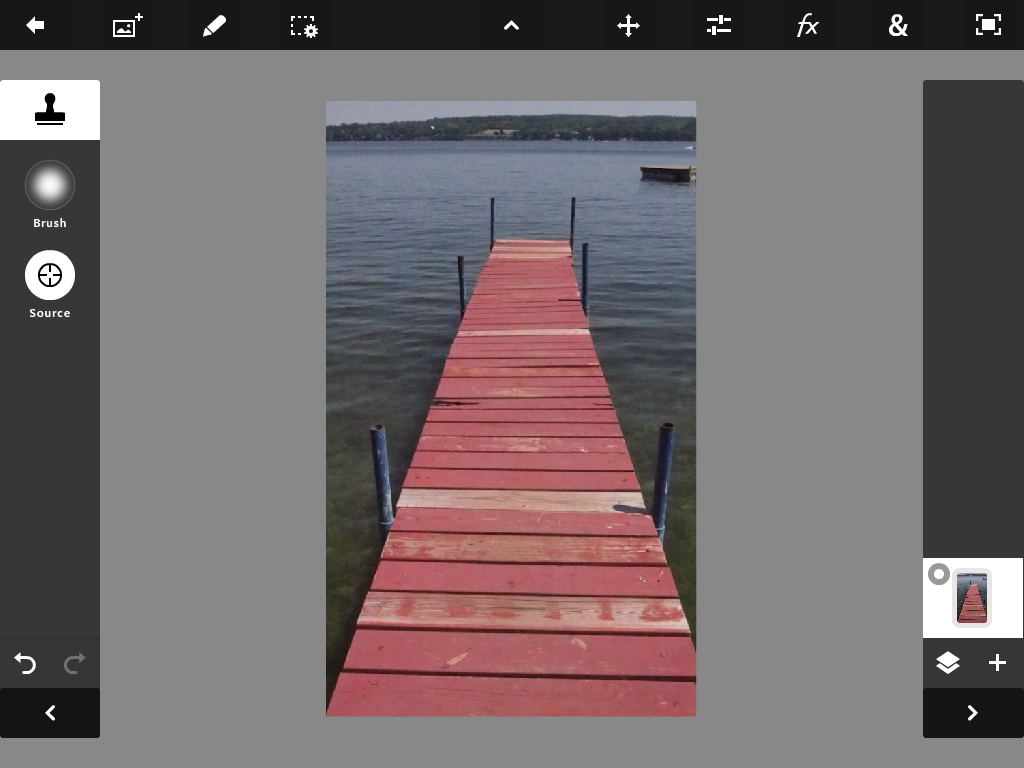
Clone Stamp Tool |
|

Add Layer |
Layer Options |
|

Crop |
Adjustments |
|
Effects: Basic Tab |

Effects: Stylize Tab |
|
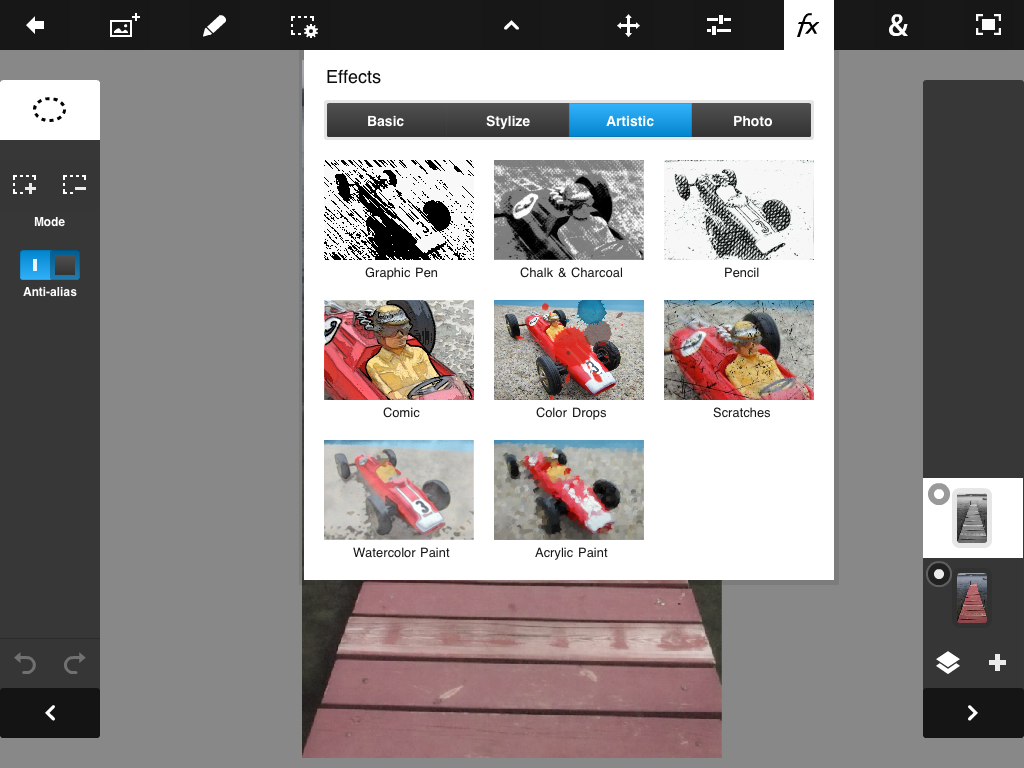
Effects: Artistic Tab (v1.2) |
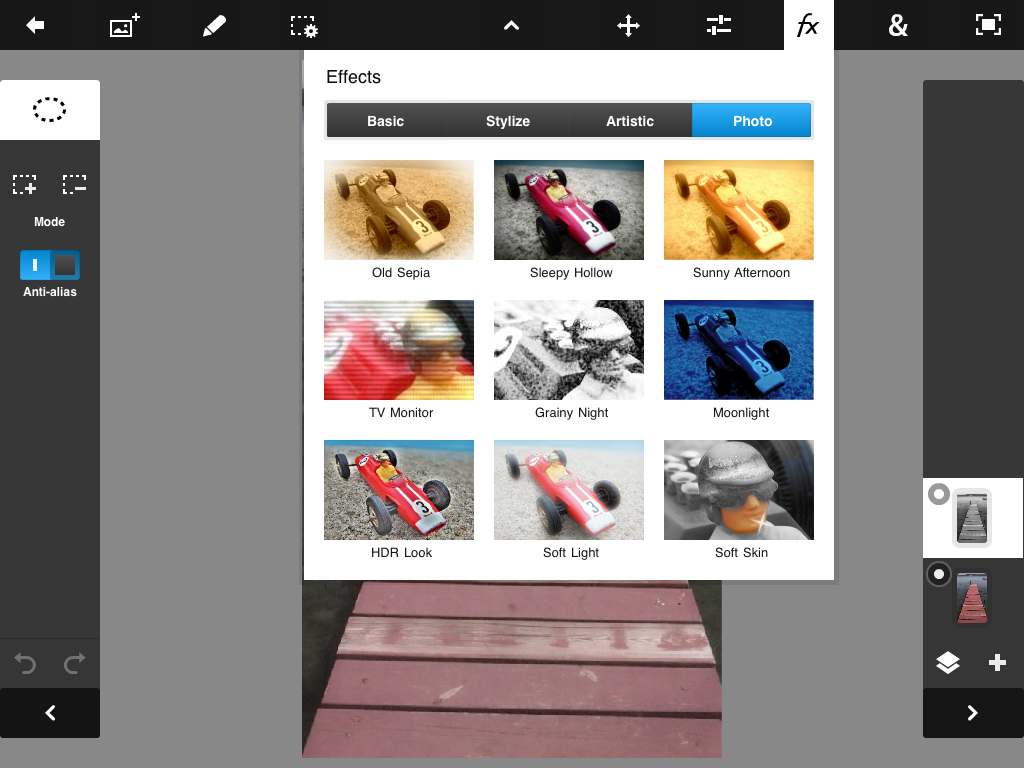
Effects: Photo Tab (v1.2) |
|

Miscellaneous |
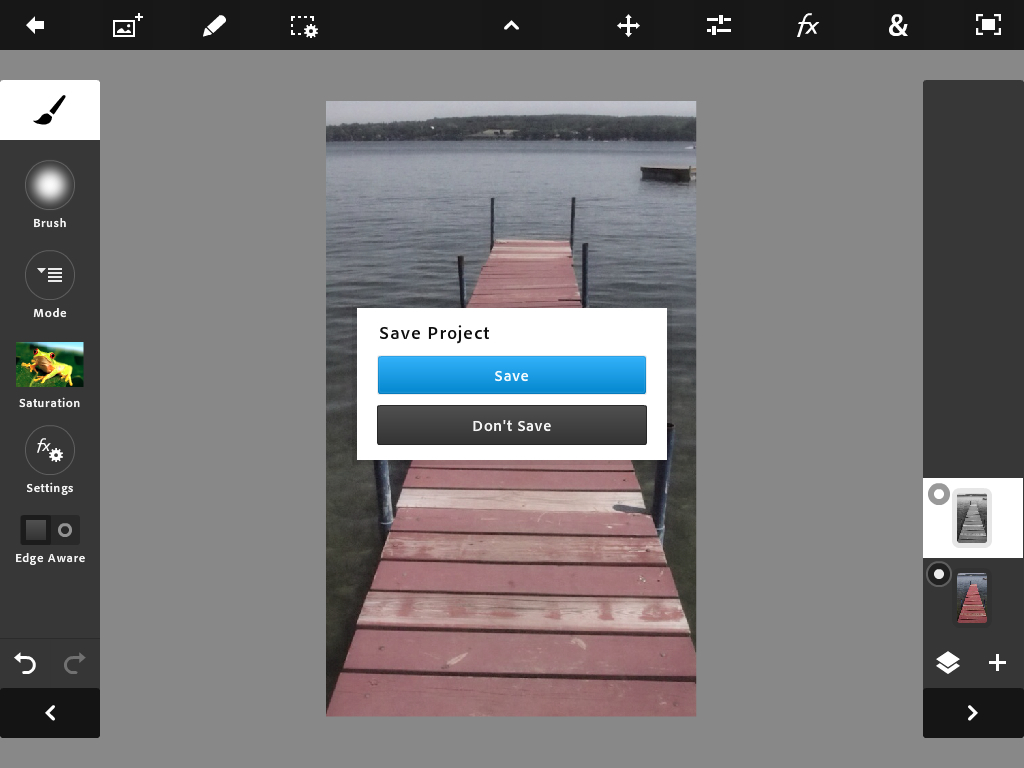
Save Project |
|
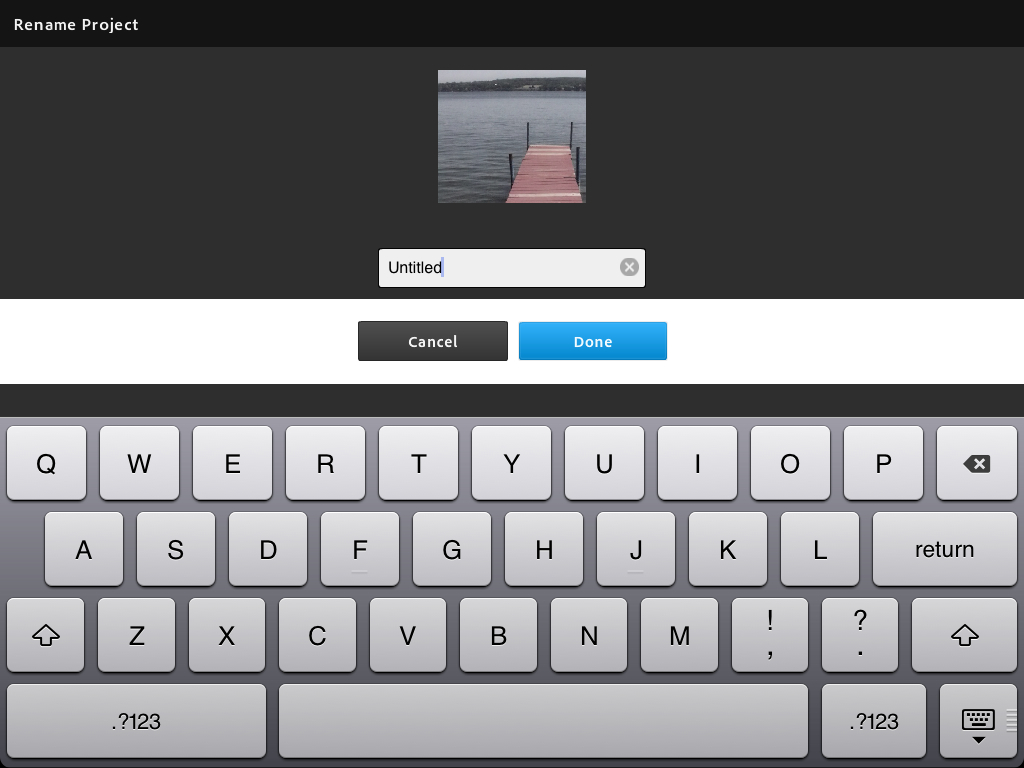
Rename Project |
Export Project to Camera Roll |
|
Dialog boxes do appear now and then. We had some problems with a few of them obscuring the image and being stubborn about where they were. We couldn't, that is, move them out of the way.
For example, using the Crop tool on a portrait-oriented image obscured the bottom two handles. We couldn't move the image or the dialog box out of the way.
Layers in 3D
You might think that the obvious solution is to rotate the tablet. But funny thing. Photoshop Touch doesn't change orientation. It stays in landscape mode.
Adobe revealed the secret to us finally. Move or resize the image with a two-finger gesture. We'd been brain locked in stylus mode.
While the interface itself is pretty simple, it packs a lot of power in its menus. In that it resembles Photoshop Mouse.

Layers
The menu bar, for example, has a left and right menu as well as a small arrow in the middle of the menu bar to hide it. The options are displayed only as icons rather than text. That can be a little disorienting at first (our preference would be text and in fact, that's what the pulldown menus display) but you quickly learn your way around.
And if you're working with a few layers and want to see exactly how they stack up, you can rotate your canvas in 3D to look at it sideways and see each layer explode from the one behind it (as illustrated above). This worked a little before v1.2, which flickers annoyingly as your try to rotate the image.
Otherwise, you can just use the target in the top left corner of the layer icon to enable or disable display of that particular layer.
A CATALOG OF COMMANDS | Back to Contents
With a touch interface, there are no secret key commands to learn. It's all staring right back at you from the interface.
So if we list all the commands here, you can use your Find command to look for any capability in Photoshop Touch that you might be interested in.
Menu Bar with Back, Add, Edit, Select and Transform, Adjustments, Effects, Miscellaneous, Full Screen
The left menu has four options:
- Back (which also saves or discards a project, so it functions like File)
- Add Image (which lets you bring a second image into the project)
- Edit (with Cut, Copy, Copy Merged, Paste, Clear, Extract, Show/Hide Pointer) and
- Select (Select All, Deselect, Select Pixels, Inverse, Feather, Resize, Refine Edge).
There are some powerful options there like Extract and Refine Edge.
On the right menu, there are five items:
- Transform (which adds a variety of handles to the layer and provides a popup menu of icons for Flip Vertical, Flip Horizontal, Constrain Proportions, Snap To, Undo, Redo with Cancel and Done buttons)
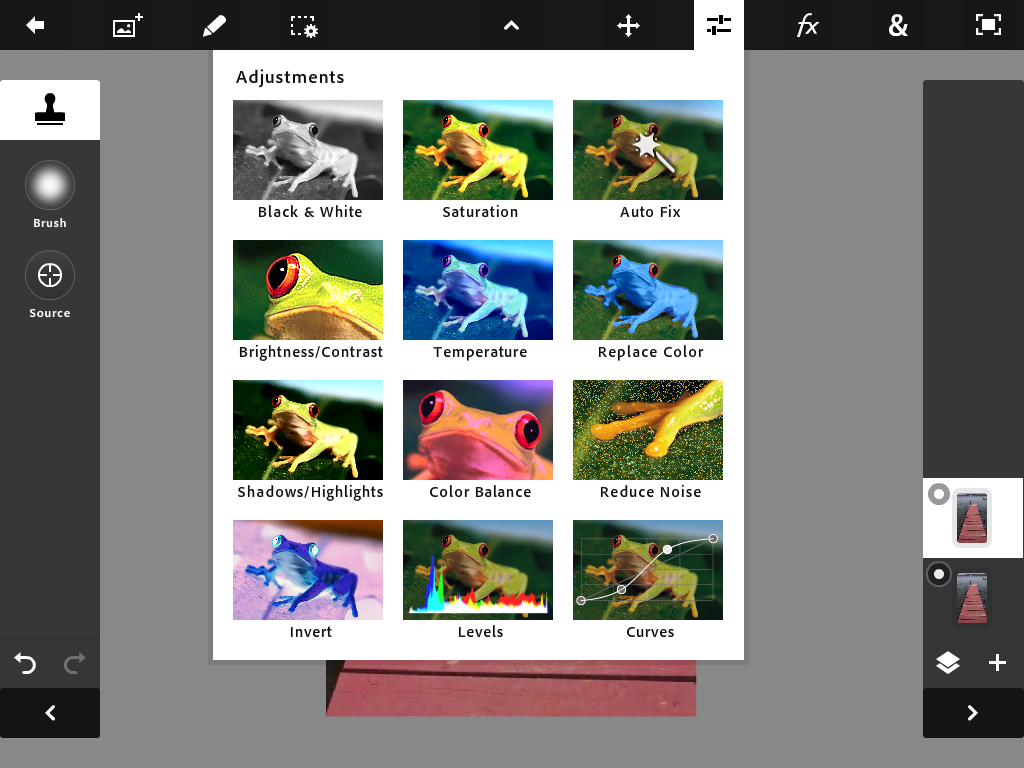
- Adjustments (Black and Whie, Saturation, Auto Fix, Brightness/Contrast, Temperature, Replace Color, Shadow/Highlights, Color Balance, Reduce Noise, Invert, Levels, Curves)
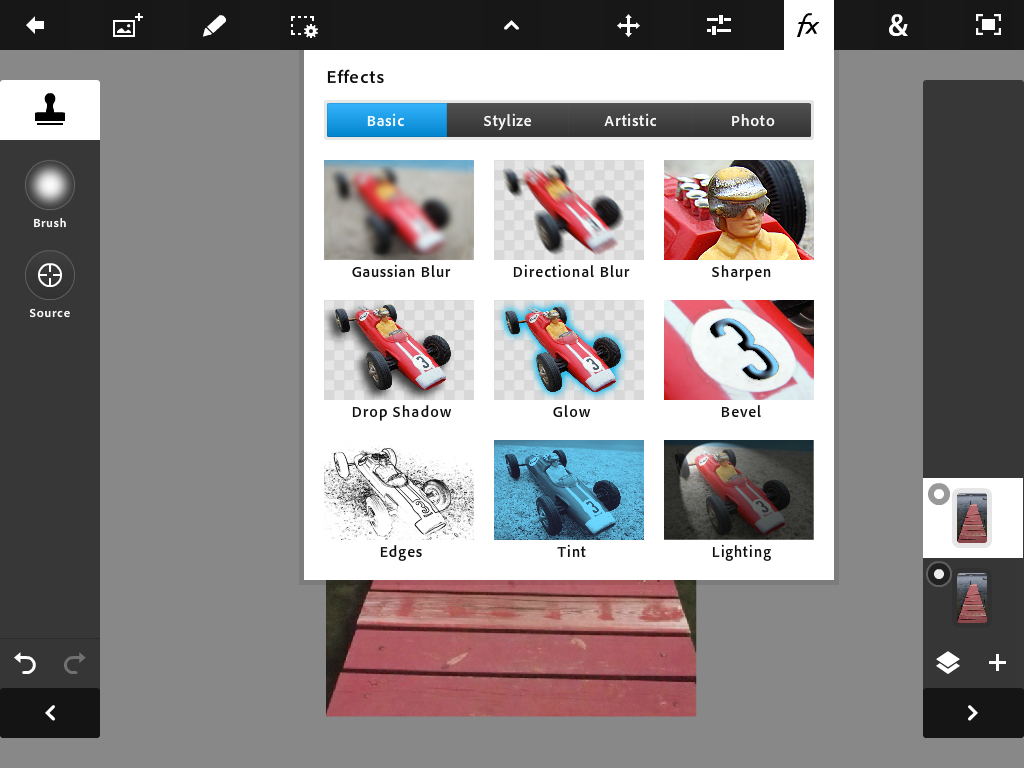
- Effects: Basic (Guassian Blur, Directional Blur, Sharpen, Drop Shadow, Glow, Bevel, Edges, Tint, Lighting), Stylize (Multi Gradient Map, Halftone Pattern, Threshold, Glass, Posterize Color, Old Photocopy), Artistic (Graphic Pen, Chalk and Charcoal, Pencil, Comic, Color Drops, Scratches, Watercolor Paint, Acrylic Paint), Photo (Old Sepia, Sleepy Hollow, Sunny Afternoon, TV Monitor, Grainy Night, Moonlight, HDR Look, Soft Light, Soft Skin)
- Miscellaneous (Crop, Image Size, Fill and Stroke, Add Text, Add Gradient, Add Fade, Warp, Add Camera Fill)
- Full Screen, which hides the interface
It's worthwhile listing the fonts included with Photoshop Touch, too. It's quite an extensive list, even if most of them are display fonts:

Tools Menu
Adobe Caslon Pro, Adobe Garamond Pro, Banshee Std, Birch Std, Blackoak Std, Brush Script Std Medium, Chaparral Pro, Charlemagne Std Bold, Cooper Std Black, Cottonwood Std Medium, Flood Std, Fusaka Std, Giddyup Std, Hobo Std Medium, Juniper Std Medium, Letter Gothic Std Medium, Lithos Pro, Madrone Std, Mesquite Std Medium, Minion Pro, Myriad Pro, Nueva Std, Poplar Std Black, Postino Std, Shuriken Boy Std, Stencil Std Bold, Strumpf Std Open, Tekton Pro Bold, Trajan Pro.
On the tools menu you'll find: Marque Selection, Lasso Selection, Magic Wand Selection, Paint Brush, Clone Stamp Tool, Eraser, Blur Tool. They're listed below the selected tool, which moves to the top as soon as you tap it.
Hold your finger or stylus on any of those commands to see the fly-out options. Marque can be rectangular or round, Lasso can be freeform or polygon, Magic Wand can be scribble or brush, Paint can be paint bucket or spray, Clone stamp can be clone or healing brush, Blur can be blur or smudge.
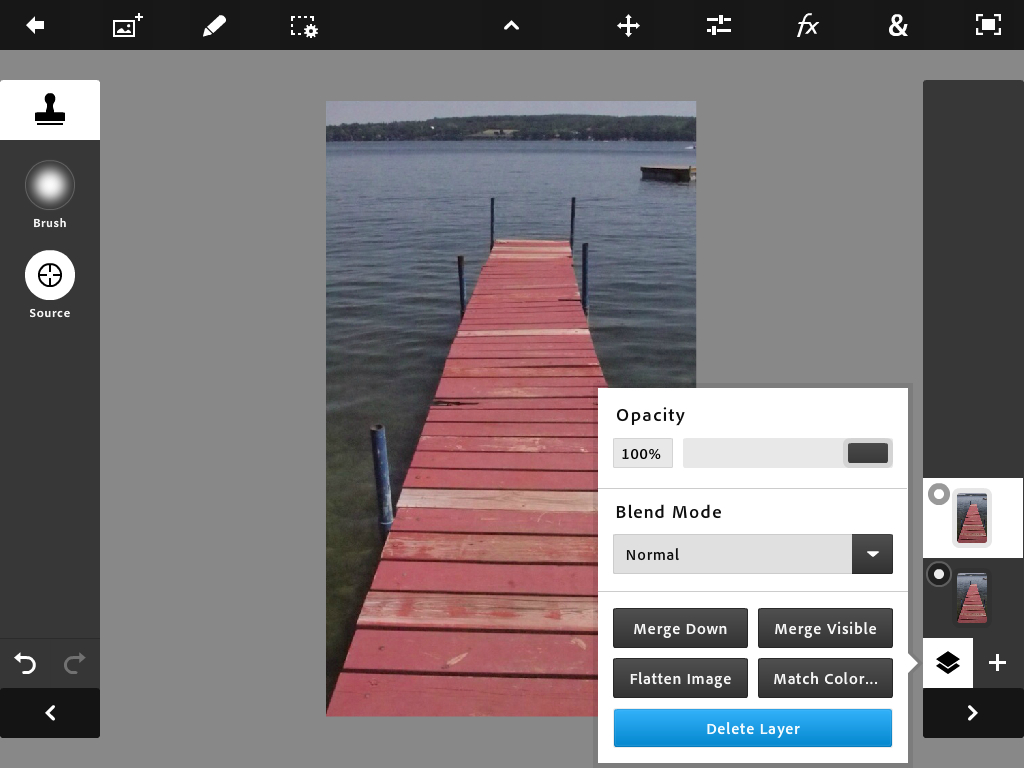
On the layers menu there is a button for layer settings and another to add a layer as well as a stack of layers with buttons to turn off their display. Layer settings include Opacity, Blend Modes (Normal, Darken, Multiply, Lighten, Screen, Linear Dodge (Add), Overlay, Difference, Subtract), Merge Down, Merge Visible, Flatten Image, Match Color, Delete Layer.
You can't name layers or group them and a few Photoshop blending modes are missing but it's a very good basic layers kit.
As you can see, that's not just a list of Photoshop Touch commands, it's an outline of the power of this release in a nutshell. Selections and layers (with a healthy assortment of blend modes) is at the heart of it. With the Healing Brush and Scribble Selection thrown in so you won't mistake it for Photoshop 3. And all of it is accessed from an icon-based menu system that will be immediately familiar to users of Photoshop Mouse.
Adobe doesn't provide a manual with Photoshop Touch. Where would they put it, you might wonder.
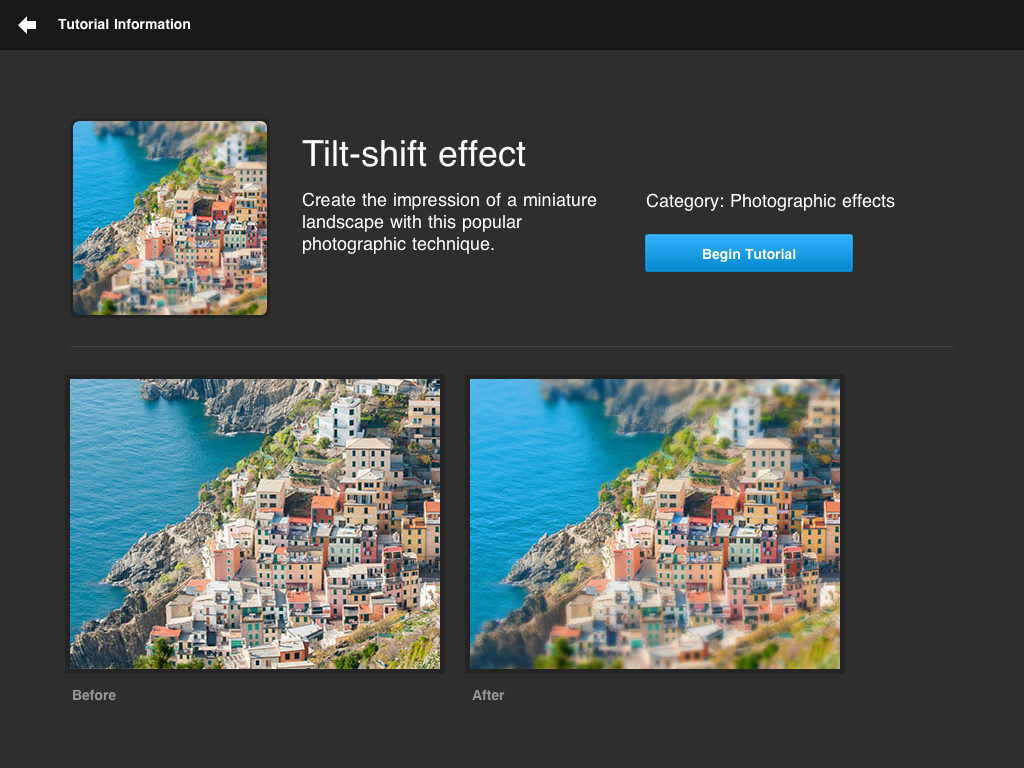
Tilt-shift Tutorial
We've admired the manuals that came with early versions of Photoshop, which took pains to teach the art of image editing to the growing numbers of Photoshop users. And we've admired early Photoshop Elements versions which did the same thing in HTML.
Adobe has abandoned documentation entirely, leaving the task of educating its users to third parties. Elements has since evolved into follow-the-steps dance lessons for image editing magic. Lightroom gives you five rules, period.
Photoshop Touch takes off on Elements's approach with a large set of tutorials that take you step by step through a job. It even recognizes if you get out step with the tutorial, letting you step back to get in sync again.
We went through each of them and describe them in the following notes:

- Layers & selections. As the first project, it introduces you to the concept of layers and how to poke holes in them with selections and the Extract and Clear edit commands. You also learn how to add to and remove from selections.
- Add dramatic flare. This project composites a girl seen from the back in daylight with a night sky. You learn to use Scribble Selection (which is better than some reviews have suggested), Refine Edge to clean up the selection, add a layer and apply Directional Blur, among other things.
- Paint with effects. In this project, you turn a color image of a horse's head into a black and white by painting the background with the black and white effect before painting the horse's head with a saturation brush.
- Replace colors. Your job is to turn a red stop sign at the beach into a blue stop sign. You learn how to use the Magic Wand, adjust tolerance, add to a selection and change the color of the selection by adjusting the color balance.
- Create camera layers. Provided with a layer that has a pirate hat and an eye patch, you add a camera layer of your own mug, taking a photo of yourself with the tablet, and align it to the costume layer to turn yourself into a pirate.
- Make a pencil sketch. Learn how to duplicate a layer, use the Pencil artistic effect and overlay it on the original layer.
- Create photo frames. Build a frame effect in an empty layer above an image.
- Add a tattoo. This project includes two layers: a tattoo and a bare shoulder. You combine them after resizing the tattoo, moving it to the right spot and rotating it. You also use Blend modes and change the opacity of the layer.
- Make a painting. Bump up the saturation of a landscape, duplicate the layer, apply the Acrylic Paint artistic effect, do the same to the original layer with different settings and learn how to compare the two with single tap.
- Add people to images. You start with two images, one with two people and the other with one. The trick is to get all of them into the same image. Use Scribble Selection, change the Feather value of the selection, Extract the two people from their background and apply a Gaussian blur to simulate depth of field to the other subject.
- Drop shadow text. Add some text to a beach scene, changing its size, font, color and location. Then add a drop shadow.
- Antique photos. Apply and adjust the Old Sepia photo filter before adjusting the midtones with Levels.
- Clean up a background. Zoom in to make a more precise selection with the Lasso tool, add to and feather the selection, Invert the selection, use the Clone Stamp tool to erase a figure in the background.
- Smooth image blending. You're provided two layers with images of the same location photographed at different times of the day. Add a fade to the sunset image, changing the gradient, then adjust the color balance of the background layer to match.
- Tilt-shift effect. In this project, you bump up the saturation, apply a Gaussian blur, add a gradient to it and reveal the sharper layer underneath to create a miniaturization effect.
There isn't one of those we haven't actually had to do in Photoshop over the years. They're real image editing tasks that are often hard to conceptualize. But once you know how to go about it, they're a piece of cake. And Photoshop Touch shows you exactly what to do.
The only one that stumbled a bit, but finally redrew the screen, was Make a Painting. Otherwise, everything ran very smoothly.
The trouble with tablet software is that there seems to be a different app for every possible function. You might prefer to set up a folder of radio station links in your browser but each station has its own app, an approach we find far from efficient.
|
A Portfolio of Examples |
||
Simple image enhancement |

Graduated mask with color correction |
|

Blended Drawing |

Monotoned color |
|

Muted Color |

Monochrome |
|
Paint Effect |
||
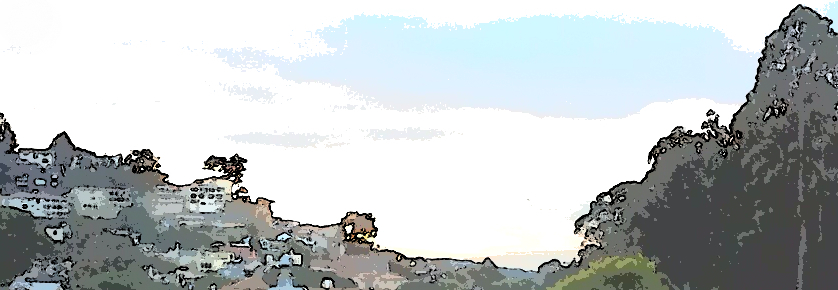
In the photo editing world, this rabbit-like reproduction gives us a lot of camera apps for phones and a lot of confusion when it comes to images. Some applications are just filter factories. Some are camera apps, enhancing the built-in hardware. Some focus on photo refinements. Some on photo sharing.
Photoshop Touch really doesn't compare to other offerings, even though there's a lot of editing overlap with products like Snapseed, Revel and iPhoto. It strikes us as the tool to use not when we want to tweak a photo so much as compose an image. And that composition might just be no more than a concept we want to work out, a design we want to sketch.
Of course, it's hard not to compare its editing features with other software.
One feature not available in Photoshop Touch that is in its desktop brother is Straighten. You can rotate an image layer freely or with snap-to enabled but there's no button to automatically straighten the image.
On the other hand, iPhoto promises to automatically straighten your image. You don't have to do anything (like draw a line on the horizon you want to straighten). It will find a horizontal to flatten. Whether you like it or not.
Those are, clearly, approaches as different as a stick shift and an automatic transmission. If you went to a beach party and spent too much time flirting with the keg, you may prefer the iPhoto approach. If you want to align one layer to another in a series of sunset shots, you might prefer the Photoshop Touch approach.
One's a convenience (when it works as you expect); the other's a tool.
That's just scraping the surface, though. The non-destructive editing of iPhoto is not quite how Photoshop Touch works. It's a bitmap editor. Your originals are not sacred, although when you save a project, you don't overwrite the original image file itself. You create a project file that is subsequently overwritten when you next edit it.

Adjusting a gradient
Our examples are all "after" images but for a peek at the power in Photoshop Touch, we took a screen shot of a gradient adjustment on a layer to give you some idea of where Photoshop Touch can take an image.
This one started out as a scan of a negative, which we copied to Creative Cloud and retrieved with Photoshop Touch. We used Levels to optimize the tones in the scan and then duplicated the layer to apply the new Soft Light photo effect. That was a bit strong for the entire image, so we added a gradient. In the screen shot we're adjusting the gradient to fall on the key parts of the subject. For the final image we drew a selection over the stylist's face and Extracted it from the layer beneath so it was perfectly sharp.
That's pretty elaborate photo editing.
What about those 19 megapixel images that iPhoto can handle? That's a clear advantage to iPhoto over the current version of Photoshop Touch, although v1.2 does improve from 7-Mp to 12-Mp images.
We haven't used the $4.99 iPhoto (it breaks our software review budget) but we find it about as appealing as its desktop sibling, which we don't use. Both seemed designed for simpler expectations than most of us have. They are self-contained worlds (with plenty of export options but no plug-ins) that resemble playpens more than studios.
CREATIVE CLOUD | Back to Contents
With Photoshop Touch, you get the core functionality of Photoshop on your tablet and can share projects you originate in Photoshop Touch with a desktop version of Photoshop.
Cloud Upload Options (v1.2)
Going the other way doesn't work as well, though, with Photoshop layers flattened on import into PS Touch.
You move a project to Photoshop by copying it from your tablet to Adobe's new Creative Cloud. You do that in Photoshop Touch. From the main screen, just tap the Cloud icon on the top menu bar, select the Upload option, then tap the project you want to upload. Assuming you're logged in, that's all there is to it.
To open the psdx project file in Photoshop, you have to install the Creative Cloud plug-in. The version we installed only worked with Photoshop CS5 but Adobe tells us "the plug-in has been updated. It should work fine with CS6."
In fact, the whole Creative Cloud seems updated since the first version of this review and we've updated our screen shots below to reflect the current layout.
|
Creative Cloud |
||

Cloud File Listing |
Individual File |
|
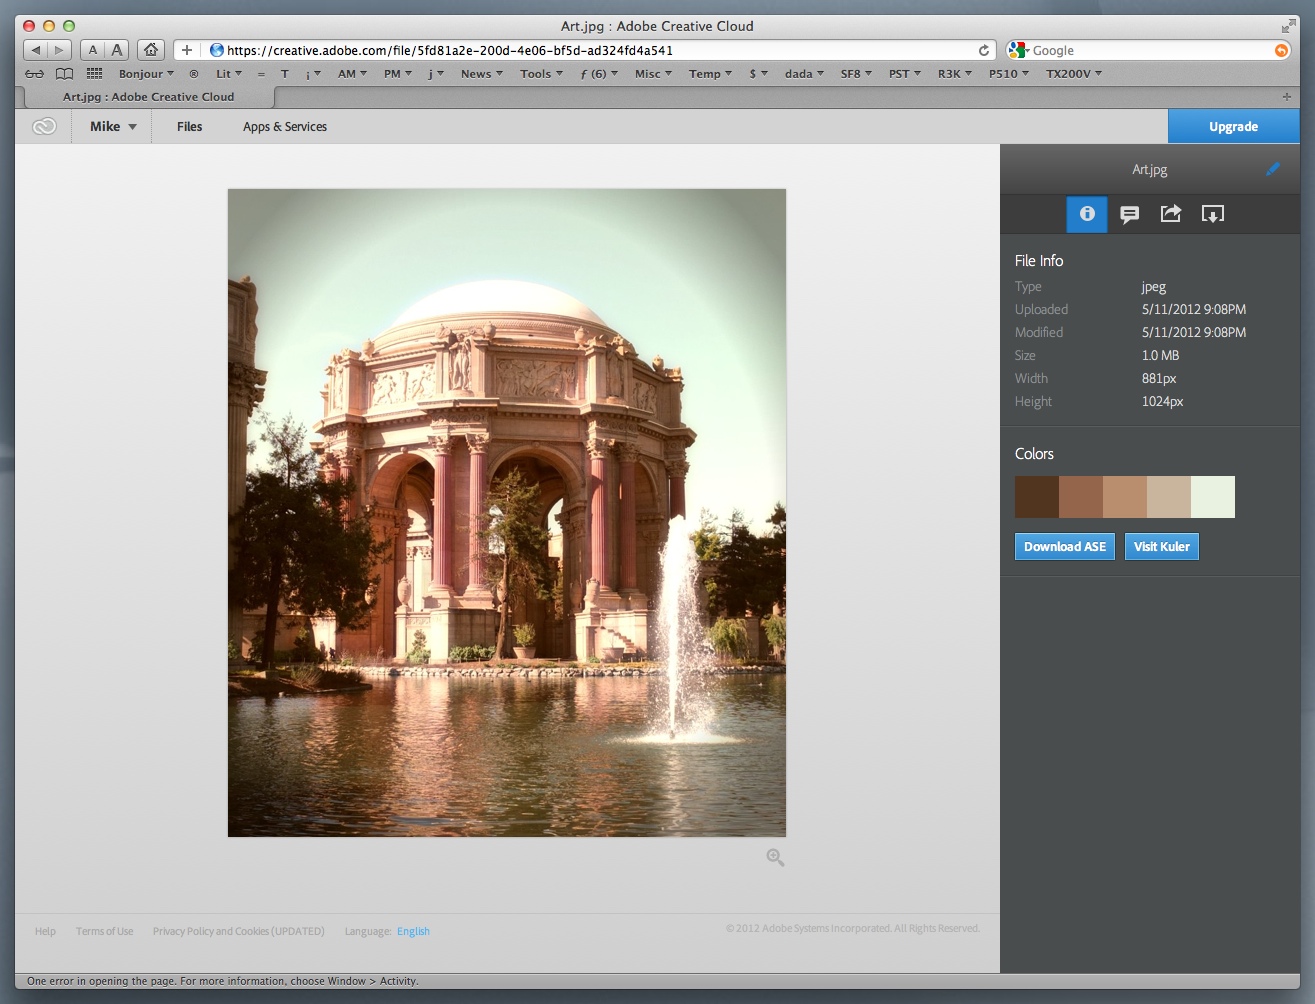
First log into the Web interface to your files on Creative Cloud and select the download icon (the last one) to copy the image to your local machine or just to open it in Photoshop CS5.
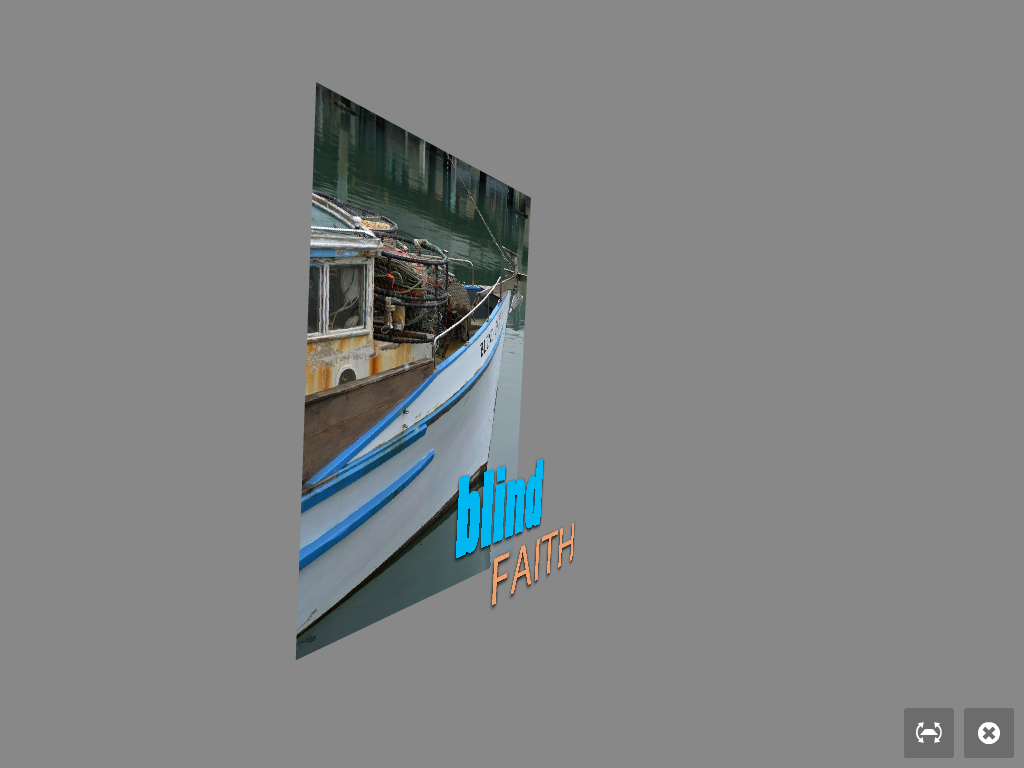
We did that with a book cover project called Blind Faith and all our layers came across just as we had set them up on the iPad. So our sketch of a cover turned into a real Photoshop project.
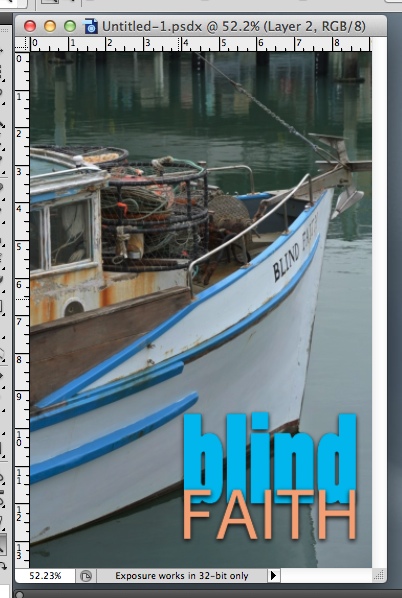
Touch File (psdx) in Photoshop
Of course, you can upload an image to the Creative Cloud to work on it in Photoshop Touch as well. Just use the Web interface you accessed to download a file and click the Upload icon.
RETOUCHING A SCAN | Back to Contents
We had a 35mm black and white scan to the Creative Cloud so we could pull it into Photoshop Touch. It took a while to show up on the iPad because it was a big file and took a while to upload. And when we opened it in Photoshop Touch, that took a while, too, as the app resized it to its 1,600 x 1,600 canvas.
We tried both Levels and Curves to adjust the rather dark image. While we found Curves to be a little too Fisher-Price, it did let us lighten the shadows and midtones while protecting the highlights.
As a simple black and white, though, the image lacked some drama. So we added a photo filter to make it a duotone, which we liked very much.
But as a scan, it had a bit of dust here and a thread there. So we tried both the Clone Stamp and the Healing Brush tools to clean it up.
JPEG export retrieved from Cloud
Clone Stamp wasn't easy. Like the Curves adjustment, it had a toy-like feeling on the iPad that we don't experience on our laptops. Where Curves seemed to make too large a change with a small shift in the curve, the brush seemed to make paint too broadly and make source selection difficult. It takes some getting used to.
The Healing Brush was likewise a bit less responsive than we're used to but it did do the job. Oddly, it too had a Source option. It could be that the iPad needs a little help with that.
We made retouching significantly easier by enlarging the image (zooming with a two finger spread) and using the brush on the enlargement. That worked.
THE PRICE, HILDA | Back to Contents
We've been using Photoshop Touch for weeks. Long before, that is, Adobe announced Creative Cloud and Creative Suite 6.
So for the most part, we've been considering it as a $9.99 photo editing app which you can buy from the iTunes App Store or Google Play. But special offers for Adobe Touch Apps will be available for customers who sign up for annual membership of Adobe Creative Cloud, the company said.
We popped into the Creative Cloud, which is just coming online now, and found the Touch apps are available, at least for 30-day trials.
So has Adobe sold us on the concept of layered image editing with the first release of Photoshop Touch?
Yes. It's well implemented. Everything you see works as promised. Except we wish we could see a bit more of our image when a dialog box covers it up.
And we look forward to seeing a little more layer power as tablet hardware matures. Tablets are funny devices. At first they pretended to be touch-activated browsers. But we expect them to be a lot more than that. We like the form factor and we like the gesture-based interface. But we want the horsepower we're used to on our laps, too.
Meanwhile Photoshop Touch is a nicely tailored version of layer-based editing for those of us who like to take our images somewhere beyond what the camera captured.
We prefer, that is, to use other apps (Snapseed comes to mind) to refine and fix our photos. Even to warp them into something a little different than the camera captured.
But when you want to experiment by compositing images or adding text, layers are the way to go. And Photoshop Touch can get you there. Already.