9 Top Camera Tips & Techniques for Improving your Bird & Wildlife Photography
posted Thursday, March 10, 2022 at 4:00 PM EDT

Spring is on the horizon here at IR HQ, and although wildlife photography can be a year-round activity, we're excited for the warmer weather, blooming flora and lots of critters being up and active. We're gathering our cameras, lenses and other photo gear and itching to get outdoors!
Yet, no matter the season, I am always excited to grab a long lens and explore nature and hopefully come away with some nice bird and wildlife photos. As I've said before, I'm not a professional wildlife photographer by any means. However, I certainly put myself in the enthusiast category, and I've been photographing wildlife as much as I can for several years -- and I always try to incorporate some nature photos into my camera and lens reviews here as much as I'm able. However, wildlife photography is more than just having a camera and pointing it at an animal. There are several tips and techniques, both in terms of composition and gear, that can help make wildlife photography easier and hopefully help you be more successful in capturing great photos of birds, critters and other animals.
Below is a list of important tips and techniques for birding and wildlife photography that I've learned over the years. These are some important techniques and tips that I try to keep in mind whenever I'm out photographing birds and other animals. Keep in mind that this list of tips is by no means exhaustive, but it does cover some important guidelines and suggestions for gear selection and shooting techniques, as well as some more artistic and creative tips for improving your wildlife and bird photos.
If you're looking to improve your success with wildlife photography, read on for some great tips. And if you have some good tips and tricks that I didn't include, please suggest some of your favorites down in the comments below!
Now, without further ado...
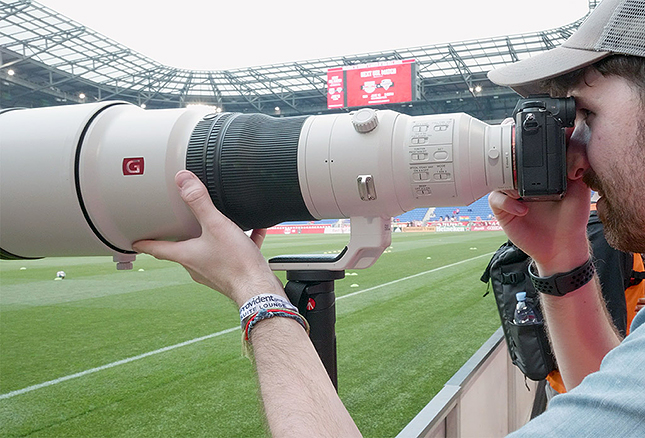
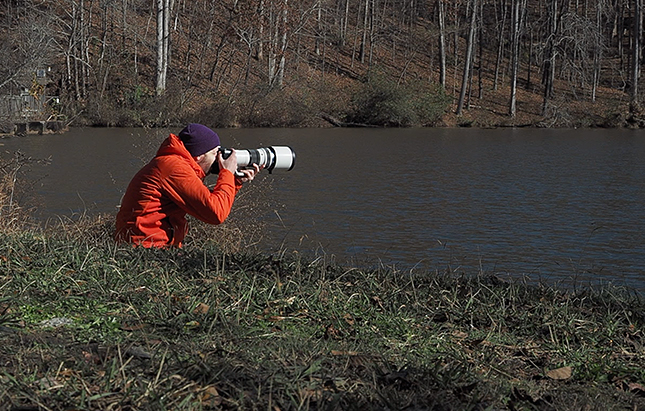
1) Get a telephoto lens, preferably at least 400mm in focal length
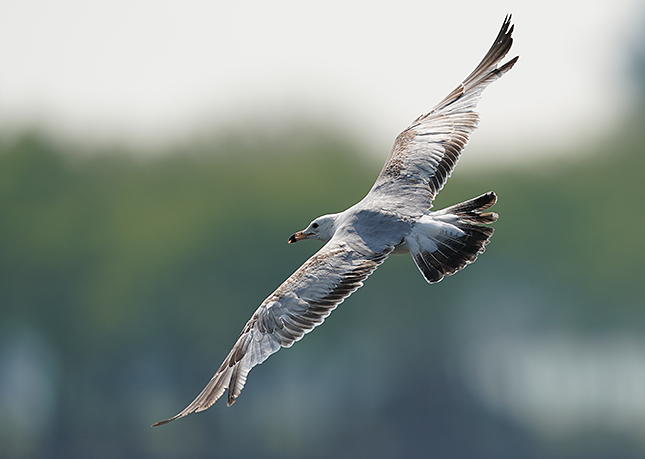
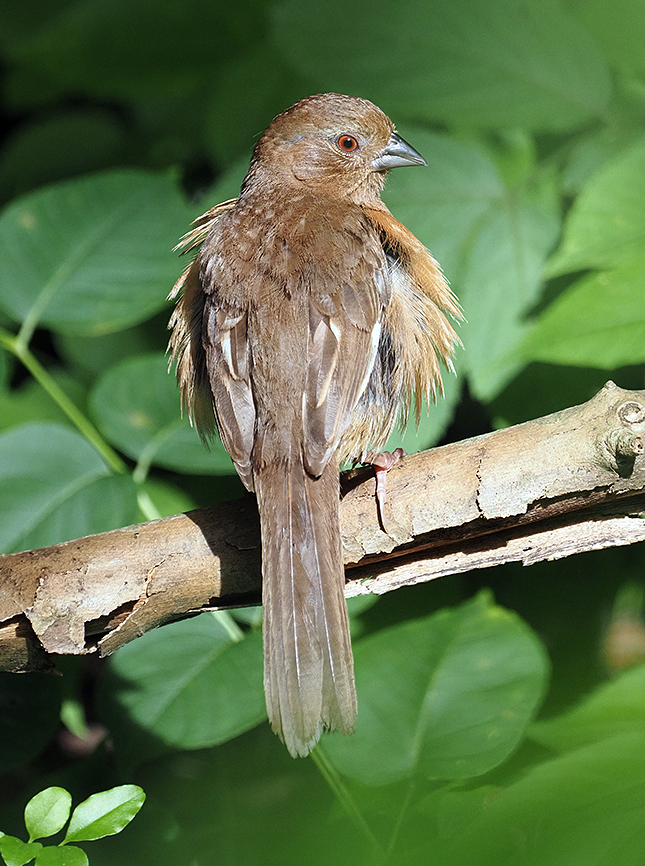
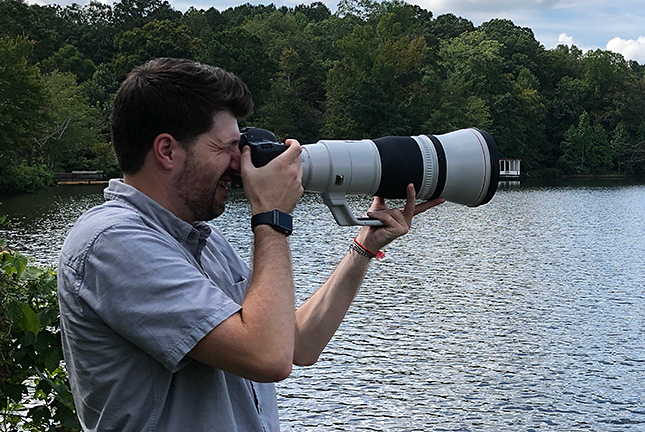
This first tip is, perhaps, a somewhat obvious one, especially if you're already familiar with birding and wildlife photography, but one key piece of photo gear for a good wildlife photography experience is a long, telephoto lens. There isn't one particular focal length that works best, and in general, birding and wildlife supertelephoto lenses start at around the 300mm range. However, I've found that a solid starting point is a focal length of at least 400mm. This focal works well for a variety of far-away subjects. I tend to find myself photographing small songbirds more often than larger birds or other animals, and these birds are both small and often far away, so I like having as much reach as possible. Small songbirds, in particular, are often farther away than you might realize. So getting a lens that’s as long as possible can really help bring that far-away subject up close as well as really isolate it with good subject isolation and background blurring.
Depending on your camera system, your options for an approximately 400mm-reaching telephoto lens can vary quite a bit, but be aware that supertelephoto lenses can quite often be expensive lenses. You also may also have options for a prime lens or a zoom. A prime, or single-focal length, supertelephoto can save both in cost and weight -- though there are definitely some extremely expensive supertelephoto primes with long focal lengths and fast apertures! However, optics such as the Nikon PF 500mm F5.6 for Nikon F-mount and the Olympus 300mm F4 IS PRO lenses offer long-reaching performance, compact size and weight, and relatively-affordable price points (when you consider the entire market of supertelephoto lenses).
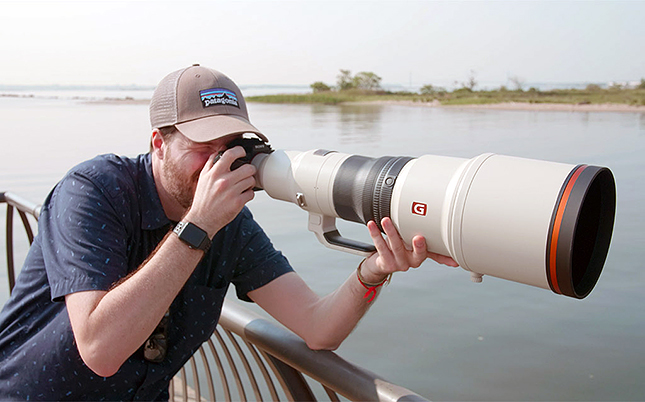
If you don't know exactly what type of wildlife subjects you'll be photographing most often, then a telephoto zoom lens could be a great choice that gives you some versatility. A fantastic choice for a great wildlife-centric supertelephoto zoom is a 100-400mm-style zoom or a 150-600mm zoom. Several manufacturers make these types of lenses, at both affordable and high-end price points. Some options may make optical comprises to some extent in order to make such a long-zoom lens reasonable lightweight and usable handheld, so you'll need to weigh what type of budget you're comfortable with and what kind of image quality performance you're looking for. All that being said, some telephoto zoom lenses we can definitely recommend are the Sony FE 100-400mm GM and Sony FE 200-600mm G, the Olympus 100-400mm F5.6-6.3 IS, the Sigma 150-600mm DG DN Sports and the Tamron 150-500mm F5-6.7 VXD.
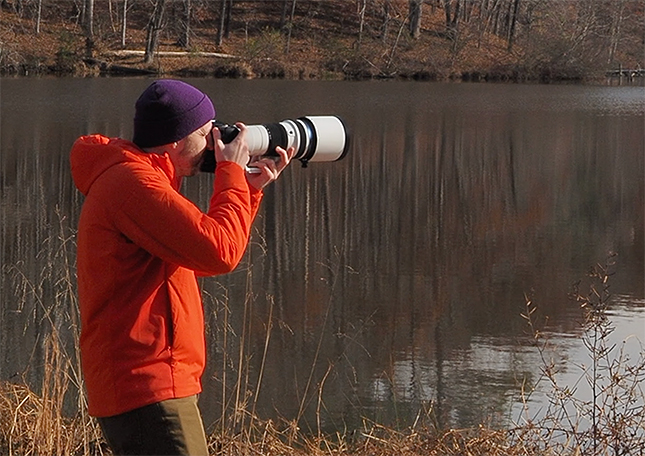
2) Find some support: Use a tripod, gimbal head or monopod, or use a lightweight lens and good IS
Many full-frame format supertelephoto lenses are quite large and heavy, so another great tip to keep in mind is using a tripod or monopod, or some form of support. Many of these lenses can hit in the 6, 7 or 8-pound range, which can get very tiring to use handheld for any length of time. And birding and wildlife photography takes patience.
Tired arms and general soreness means less steady hand-holding, which can result in missed shots, blurriness or missed focus, and just generally less enthusiasm to keep shooting. A good monopod or tripod can help get you sharper shots and keep you shooting for longer.
3) Use fast shutter speeds for stopping any fast motion and to avoid camera vibrations
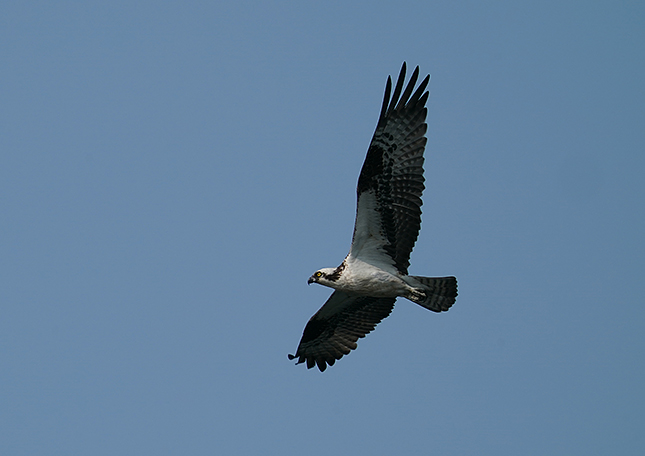
Another important tip is to keep an eye on your shutter speed, and in particular, use a faster shutter speed for sharper photos, especially for birds in flight. The traditional rule of thumb has been using a shutter speed of "1 / the focal length" (in terms of a 35mm full-frame camera). For example, if you're using a 500mm lens on a full-frame camera, a good starting point is 1/500ths of a second in order to avoid blurring from camera shake. However, that means the longer the lens, the faster the shutter speed needs to be. For birds-in-flight, however, a good starting point here is at least 1/1000s, but I'd recommend shooting with even faster speeds, such as 1/2000th of a second. But 1/1000th of a second at the minimum for birds in flight is a good starting point.

Additionally, these days with modern high-resolution cameras, such as the 61MP Sony A7R IV or 45MP Nikon Z7 II, the increase in resolution can make subtle blurring from camera shake or vibrations more noticeable. With these cameras, I'd also suggest using a faster shutter speed than the usual "1 / the focal length" rule. And again, long telephoto lenses exacerbate the issue further.
When it comes to photographing perched or slow-moving birds and wildlife, modern image stabilization systems -- especially those in several modern mirrorless cameras that combine sensor-shift IS and lens-based IS -- allow you to shoot at a slower shutter speed and thus a lower ISO setting. This is great when photographing wildlife in forests and other wooded areas, as they can be quite dark and hard to shoot in.
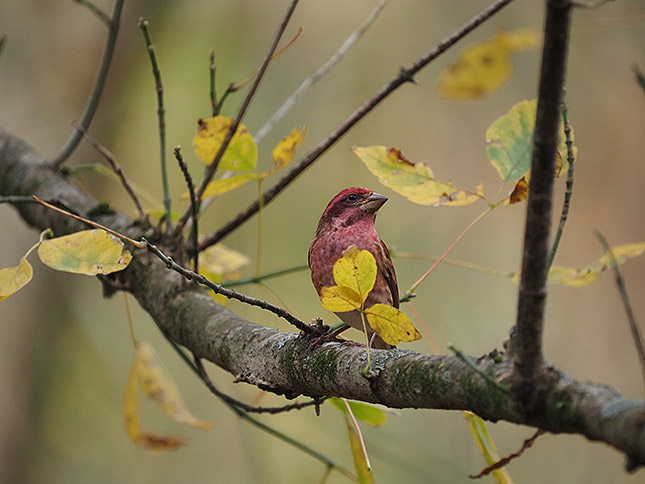
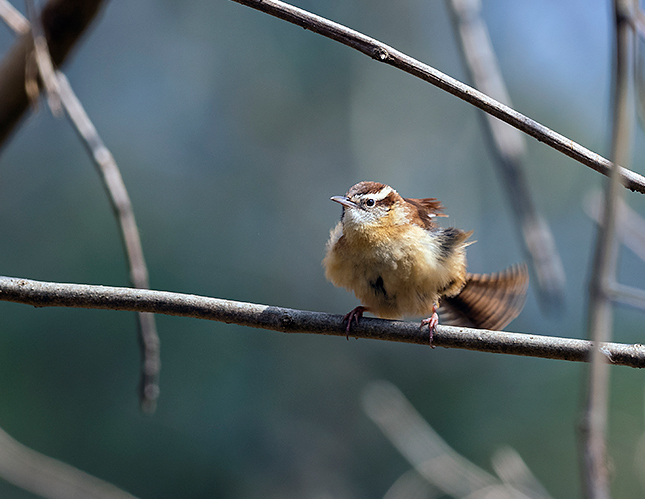
4) Watch for distractions - Pay attention to background elements
With a telephoto lens, you are able to bring faraway subjects closer in, and one of the best creative benefits to such a lens is the ability to isolate your subject and create smooth, blurry backgrounds. The ability to remove distractions is one of the great benefits to a telephoto lens. One of the tips I try to keep in mind is to be mindful of objects in the background. Particularly when photographing perched birds in trees, pay attention to leaves, tree branches or other objects that are positioned behind your subject.
Often I find myself concentrating more on nailing focus on the bird or waiting for a pleasing pose, only to later realize there's a distracting branch or bunch of lenses behind the subject. With the narrow field of view of a supertelephoto lens, only a small amount of movement or shift in your angle or position can make a big difference in the final image.
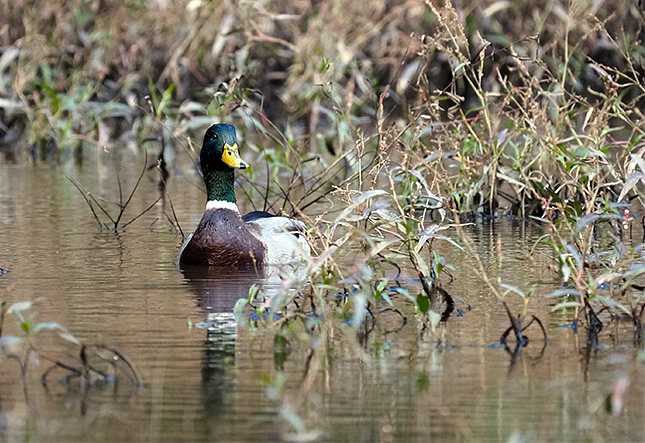
5) Get creative with your shooting angles
Speaking of angles, when it comes to photographing wildlife, especially birds, you'll likely find yourself pointing upward into the trees. While this can work and make for some interesting images, you'll often end up photographing the underside of the animal, which might not be the most attractive pose or position, or you may have to contend with your subject being heavily backlit with a bright sky.

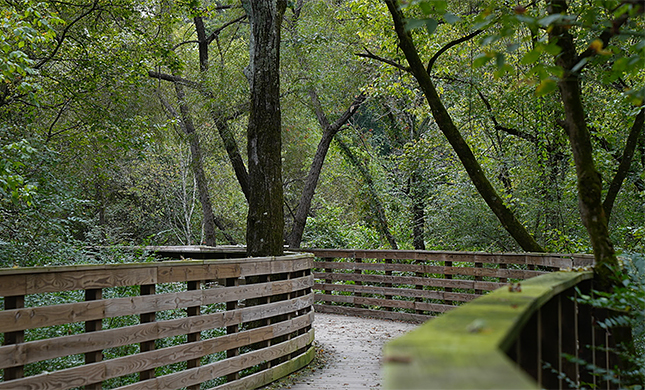
If possible, try to position yourself at a different elevation or more at the same level as your subject. As you might expect, this is easier when photographing ground-based animals, as you can more easily get down to a lower position and more at their level. For birds up in trees, this can be a difficult task, depending on your location and your surroundings. Getting level with birds, in particular, is more easily accomplished when photographing near bird feeders -- or if you're fortunate to find yourself in a location with elevated walkways or trails that put you more up into the trees. For shorebirds, water birds or other ground birds, again, the key here is to get down low to the ground and close to eye level. By doing so, you can create a really pleasing look to the water, and it really emphasizes the shallow depth of field and makes your subject stand out more.
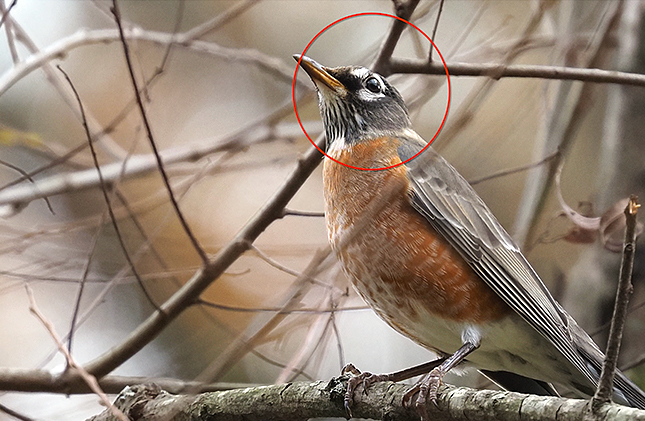
6) Try to keep the sun at your back
This next one is an important one: if possible, try to position yourself so that the sun is behind you. That way, you are positioned so that the sun is illuminating your subject, the bird. Rather than the other way around.

You don't want to be photographing a bird or other animal with the sun behind it as it will likely be harshly backlit and underexposed. With the sun illuminating your subject, you're able to capture all the beautiful colors and the sharp detail in fur or feathers of your subject.
7) Seek out good light - Photograph birds in flight when the sun is low in the sky
Here's another quick tip that is short and sweet. Much like the previous tip about minding the location of the sun, you should also keep in mind the time of day when photographing birds in flight. Much like the "golden hours" rule for landscape photography, these are also ideal lighting conditions for photographing birds in flight. Light is softer, has a warming glow, and properly illuminates the bird. If the sun is too high in the sky, the underside of the bird will likely be in shadow.
8) Research your shooting locations
These last two tips are more general bird and wildlife photography advice. The first one being to research your location before you go. While it's certainly fun to explore a new location sight unseen -- that is, of course, part of the research -- it helps to have some familiarity with your location to help better your chances for successful photography. You'll be more comfortable and aware of your surroundings, and you'll have already scouted some good locations for wildlife and be prepped to set up shop and wait for photo opportunities.
Is your shooting location on private property? What if it's a state or local park, and if so, what are the hours of operations? Are you able to get there and be in the park at the best hours of the day, such as golden hour? Also, are there any access fees involved?
It's also good to know how crowded a place might be. There are several parks, including a national recreation area near where I live. And while it's a great location to get outdoors and explore nature, it can often be crowded with other people, especially in good weather and on the weekends, which can make it a less than ideal spot for wildlife photography.
Also, rather than standard parks, which might be more crowded with other people, I also look for wildlife refuges or nature preserves that can be much more conducive to wildlife photography.
9) Be patient, be quiet and take your time
Last but definitely not least: be patient.
Birds and wildlife are unpredictable, and they won't often land or appear right where you want them. But that's part of the fun of this type of photo subject, the unpredictability of it all. However, wildlife photography takes patience. Traipsing through the woods will alert most animals to your presence, and so you'll want to get into a good spot and then wait, quietly. Eventually, the birds and animals will likely start to ignore you or become okay with your presence, so long as you're calm and quiet. One of the nice benefits to many modern mirrorless cameras is the ability to shoot with a silent burst mode. Thanks to the electronic shutter, you can fire off multiple frames quickly and silently without disturbing your often skittish subjects and better your chances of an interesting image. It's one of my favorite features of mirrorless cameras!
Along the same lines as being patient, it's also important to be diligent and observe your subject once you've spotted it. Don't just snap a single frame and call it a day. Watch for interesting behavior or certain poses that can bring the subject to life and show some of its personality.
• • •
Do you have any favorites birding or wildlife techniques or tips, I didn't discuss? Leave them down in the comments below!
Also, be sure to check out some of our other recent tips and technique articles: