Telling the story: five more tips for better travel photography
posted Monday, July 30, 2012 at 3:07 PM EDT
![]() I think the reasons we take travel photos are to remember where we were and to share those places with others. When we upload images to the web or make prints when we return home, we want our friends and families to see and enjoy the things we encountered.
I think the reasons we take travel photos are to remember where we were and to share those places with others. When we upload images to the web or make prints when we return home, we want our friends and families to see and enjoy the things we encountered.
However, just as there is a difference between tourists and travelers, the former flitting like bugs on the surface of things, the latter happily diving below the surface, so it is with photographers. Despite carrying expensive cameras, the tourist photographer spends little time in any one place. Mostly, they snap a few photos of local monuments, buildings, or some scenic setting, before they quickly move on.
In June, I shared some tips on how to improve your travel photography and then earlier this month I added three more compositional tips for better travel photos.
Now, here are five tips on how to tell a story with your travel photography.
1) Taking Time to Tell A Story
For the travel photographer, photography is a search for images that will tell the story of one’s odyssey. This narrative is the key to travel photography, and it is the backbone of great travel publications like the National Geographic.
However, storytelling takes time. The photo traveler needs to spend time in a place to get a sense of it, especially for color photography there is no way around seeing how the light changes the visual environment over time.
To illustrate this post, I’ve selected a series of images from a journey to Normandy. Sixty miles north of Paris, the Seine lazily meanders through rich farmland. The village of Les Andelys sits on one of these meanders and I made images in the course of a week’s visit there.
2) The Establishing Shot
The establishing shot is the image or images, which show the viewer where they are. We are familiar with them from the movies where they are usually shown under the opening credits. For still photographers, the trick to strong establishing shots is to find a good vantage point.
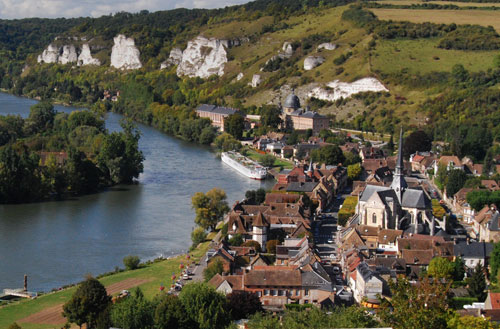
My first task then was to discover a location from where I could shoot my establishing shots. In the case of Les Andelys, I wanted a photo that showed how the winding Seine dominated the village and the land. To get an overview of the village for my establishing shot, I hiked up one of the nearby hills, from where, I could get clear shot of the village, the river, and the riverside white chalk cliffs.
Once up the hill, I took several dozen images of the village varying the relationship of the elements by using different focal length lenses. Usually I use wide-angle focal length lenses for establishing shots because I want to show a large swath of space. However, on this trip, the skies were cloudy all day so I ended up using normal and moderate telephoto lengths to reduce the amount of sky in the shots. In some images, I had more river than village and in others vice versa. The trick is to take lots of images so you have a lot to chose from when putting the story together later.
3) The Medium Shot
Once you have shown viewers where they are, the next job is to show them around. Having established the river as the central element of my story I began to walk along the walking path that lines the river for the entire length of the village. Although there are private houses all along the river, they are all set back from the promenade, allowing everyone to share and enjoy the river experience.
Photographers talk a lot about the “golden hours” and the quality of light around sunset. I have mixed feeling about shooting a thousand yellow-red sunset shots but on this trip I had little alternative. During the day, the overcast skies made the river an ugly steel gray. Consequently, I succumbed to shooting at dusk more than I normally would and took long evening walks to that end.
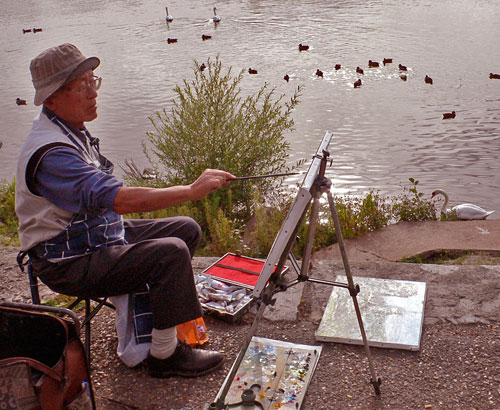
On one of my walks, I discovered a painter enjoying the light on the river. I love accidental encounters like this because they provide all sorts of unexpected picture opportunities. Photographing the amateur painter, gave me a way to show how the setting was “picture perfect.”
4) The Detail Shot
The detail shot is one of the most important elements of any photo story, yet also one of the most overlooked. After showing the big picture and the mid-size ones, the detail image rounds out the story. Given my focus on the river, I needed detail shots related to the river. Looking for details as I walked along the river path, I realized that a gaggle of swans had begun to follow me.
These wild birds were accustomed to begging and getting scraps of bread from picnickers and walkers. I suppose they thought I would be easy picking too. When I walked up to them at the river’s edge, they swam up to me. I began to take photos, resulting in the shot of one of them.

5) Remember to Turn Around
When I started out as a newspaper photographer, an older colleague gave me a good piece of advice. It was simply, “don’t forget to turn around.” By this, he meant that too often photographers focus on what is in front of them and miss the great photo opportunities happening around and behind them.
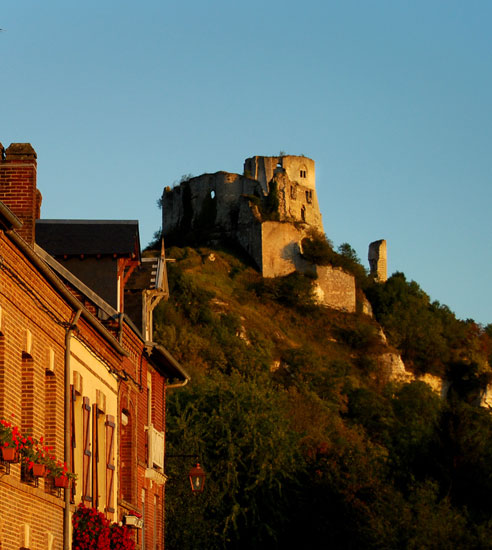
I remembered this one day, while walking on the river path. I was concentrating on the swans and the dimming light on the mid-river islands. Then for some reason, I remembered this advice and I turned around. Looking up I saw the Château Galliard, aglow in the fading light. The Château looms over the village and was built in 1196 by Richard the Lionhearted -- of Robin Hood fame -- and although it's a ruin, it's still very impressive.
Next time you’re traveling, try following these tips by organizing your photography along “storytelling” lines. The result of thinking in storytelling terms is that you will get better photos, and in shooting them you’ll have a richer travel experience.