Friday Photo Tip: How to shoot into the light to create dramatic, backlit images
posted Friday, October 5, 2012 at 10:33 AM EDT
There's a way to add interest and a touch of the dramatic to your photographs, purely by shooting "contre-jour" -- that is, against daylight. Normally when I take photos, just like most of you, I shoot with the sun over my shoulder and behind me so that my subjects are front lit. However, I am always on the lookout for special situations when the light source is behind the subject and produces intriguing effects, such as silhouettes or halos.
Note that consciously shooting contre-jour is different from what casual photographers often do, pointing their cameras directly at the sun. While this can be technically called contre-jour shooting, it's not at all what I mean. Shooting into the light is not the same as shooting directly at the light, which is a surefire way to get lousy pictures despite all sorts of technology from Backlight Compensation to HDR that is supposed to help.
Using contre-jour separates subjects from backgrounds, and adds a touch of drama to otherwise ordinary images. Yes, pointing the camera in the direction of the light source makes photography a little harder, but when it works it adds pop and sparkle to my images. Contre-jour should be in every photographer's toolbox of tricks.
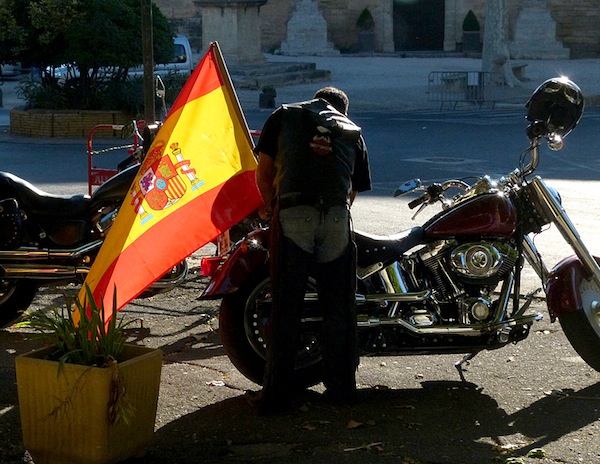
Here is a typical contre-jour photograph. The light coming down the street illuminates the cyclist’s Spanish flag against the church across the street in shadows.
What I learned from the movies
I learned about contre-jour and backlighting when I worked on movie sets shooting production stills. Whenever I could, I would hang out with the lighting gaffers as I wanted to learn their secrets, in particular how they set up lights.
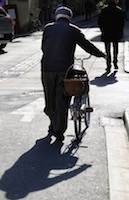
Shooting into the light but not at the light I got this shot. Notice, how the colors in the image are subdued and mostly midtones, despite the bright light this is a fairly low contrast image.
The main trick I learned was to frame a subject against a dark background and use the backlighting to separate the subject from it. To get an idea of what movie lighting people do and how ubiquitous contre-jour is, just watch any movie or TV series. No matter the scene's location, indoors in a small room or out on a mountaintop, almost in every frame I can guarantee there will be some amount of backlighting. Look closely and you will see a light behind the actors which brightens their hair and shoulders, creating a rim light that separates them from the background.
It is even more evident in night shots -- especially in police procedurals or sci-fi flicks -- where backlighting is used to heighten the drama and tension in a scene. It's often done to the extreme, with the contrast is so high it produces silhouetted images where actors in darkness are framed against shiny, wet streets or bright neon or street lights. This silhouetting adds visual interest by creating strong compositions of light and dark, and it occurs with high lighting ratios of at least 16:1.

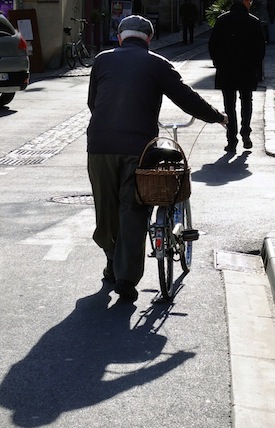
Backlighting lights up hair, even bright red hair, and helps to separate the subject from the background.
I got to try out these movie techniques myself when I was shooting stills for the TV movie "High Ice" in the Cascade Mountains of Washington. We were helicoptered up a mountain to the shoot location where David Janssen, TV's "Fugitive" was waiting. He was playing a forest ranger and he was supposedly climbing a rock face. For the scene, Janssen was actually just a few feet off the ground, but behind him, out of sight, was an incredibly bright, humongous Klieg movie light strapped to the mountainside as a backlight.
Tricks for contre-jour shooting
So how can you add shooting against the light into your repertoire? Here are some simple tricks I adapted from what I learned on the movie sets:
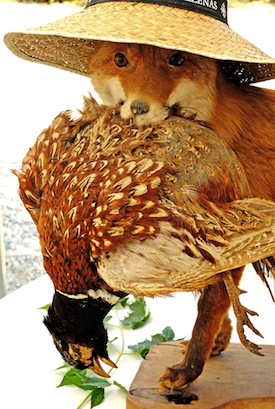
In this contre-jour photo the sun was shining but the taxidermy fox and pheasant was under tenting and in the shade. Shooting for the correct exposure for the animals, blew out the background.
1. Angle the camera/lens so the light source itself does not appear in the frame. Occasionally, I end up standing on my tiptoes to get the camera high enough to point it down and lose the sun. Again, many newbie photographers will often shoot right into the sun or light source and come up with terrible images.
2. Purposely place your subject between the camera and the light source. Doing this frames the subject and makes them pop from the background. I use this often in concert photography. Whenever I can, I position myself so that one of more of the stage lights will be hidden behind the performer. This creates a halo of light around the performer against darker areas of the stage.
3. Use a lens hood to reduce light flares. A good hood will keep stray light from finding the lens and producing unwanted flares, and it can also help improve the saturation of backlit subjects.
4. Practice and experiment. Contre-jour photography is tricky, and requires a lot of exposure adjustments to get just the right images. Some subtle bracketing can help, as can using exposure compensation to get the effects you want without losing the detail from your backlit subject.
I like to shoot contre-jour, despite the extra effort involved because itc produces dramatic images. Whether it's a nearly silhouetted image or one with just a rim-light, shooting against the light always makes for more interesting pictures because the light itself becomes part of the photograph.