Wide-angle macro photography: Positioning, depth of field and other tips and tricks (part 2 of a series)
posted Monday, July 22, 2013 at 2:01 PM EDT
Note: This is Part 2 in a series on Wide-Angle Macro Photography. Part 1 explains how wide-angle macro differs from traditional macro, and examines the approach and necessary equipment. Meanwhile, Part 2 looks at some best practices for getting excellent images. We strongly recommend you read Part 1 first.
When using a wide angle to set "macro" subjects in the context of their surroundings, you will need to get lower down than you think. With plants and insects, for example, I am often working down at ground level to maximize the visual impact.
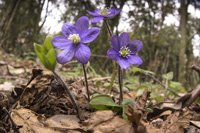
When you get down low you create the so-called "bug's eye view." Your subjects such as flowers and fungi then tend to loom over you in a way that definitely differs from the typical macro view. Being a bit out of the ordinary, it offers great potential impact -- provided, that is, all your images don't use the same viewpoint. You need to vary the angles a little once you get the hang of the wide-angle macro technique.
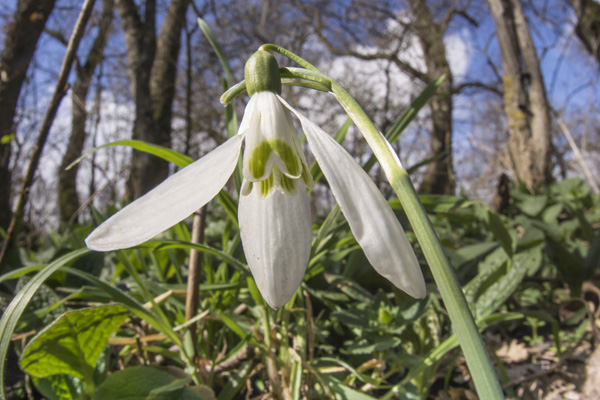
Getting your camera down as low as possible creates tremendous impact, and this perspective plus wide-angle distortion create subjects that loom over you.
Photo by Paul Harcourt Davies
How do you work so close to (or even on) the ground? I frequently use a low support such as the Novoflex Minipod -- which is also both light and strong -- and when this is not low enough I set the camera right on the ground (or a stone) and use a right-angle finder or the flip-up LCD screen on my Sony NEX 7 to focus.
An ever cheaper way to get low to to the ground is to buy a bean bag (or pouch) -- you can fill it to the right levels with beans, rice, polystyrene beads or -- since I'm in Italy -- tiny pastas! The camera compresses these when it rests on the beanbag and you get a superb, contoured support.
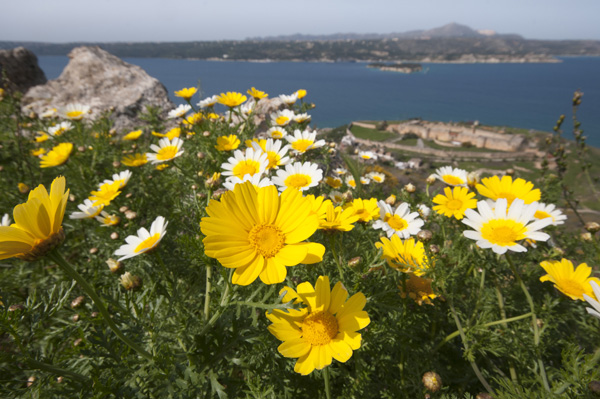
Colorful crown daisies in the foreground provide a unique context for the landscape of Crete.
Photo by Paul Harcourt Davies
Getting the right depth of field
As I discussed in Part 1, the depth of field you're looking for wide-angle macro is often the opposite of what you look for in traditional macro shots. Not only do you want the subject in the foreground to be in focus, but also the background -- that is, at least in soft focus. To maximize depth of field, you will usually need to be working at apertures of f/11 and smaller. Having a camera equipped with a depth of field preview function is immensely useful for checking out just how much of the background is in focus.
In the past, I was slightly obsessed with getting front to back sharpness and used tilt-shift (T-S) lenses and even T-S backs. It was never quick and easy, for you had to find something called the "hyperfocal distance" -- a point in the foreground on which you focus so that everything from there to infinity is in focus, yet some of the foreground is also sharp to a certain distance in front of that point. You can read more about hyperfocal distance here.
The location of this point depends on aperture: the smaller it is, the closer to your camera it will be. These days, however, I do not bother with finding the hyperfocal distance at all, for I've decided I rather like a slight soft focus in the background. Complete front to back sharpness can simply be too busy and distracting. But it's important to experiment and find what you like personally. Remember, there's no singular "right way" to shoot wide-angle macro.
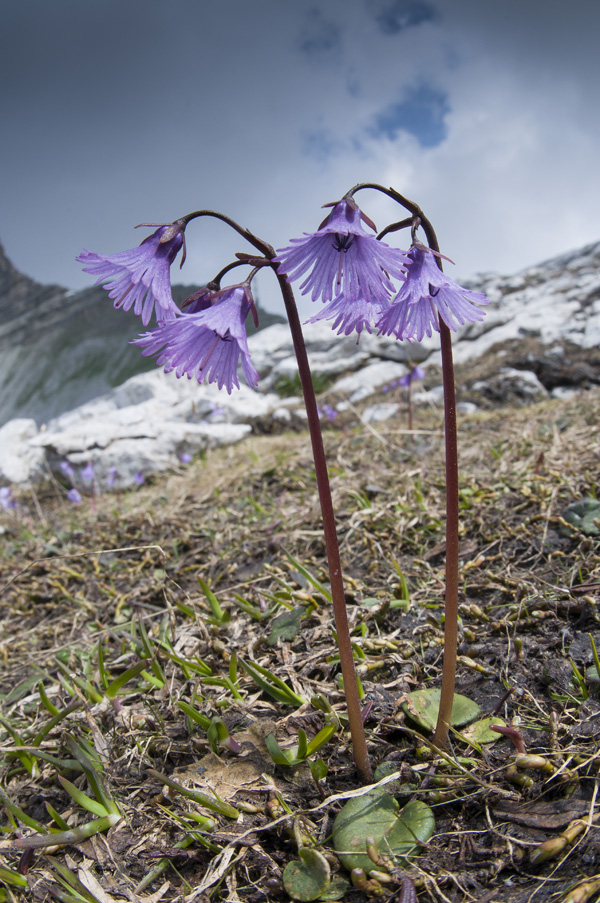
The Alpine Snowbells (Soldanella alpina) here were photographed using a right-angled viewfinder and camera braced on the ground. Note that the mountains are not pin sharp. This adds to the mood, accentuates subject sharpness and gives viewers full context of the surrounding environs.
Photo by Paul Harcourt Davies
To photograph the alpine flowers above necessitated lying on the wet ground with my camera angled slightly upwards. These flowers appear as the snow melts and have stems of 10cm (4 inches) or less. I wanted to capture the flowers to show the fringed bells and the Dolomite mountains behind -- they are not sharp, but they are obviously mountains. The lens was a Sigma 15mm f/2.8 diagonal fisheye, which is now a constant companion of mine.
Magnification range
Using zooms and macro lenses for regular photography we are spoiled because we get accustomed to a continuous focus and magnification range everywhere from infinity to close-up. However, when you use extension tubes (see Part 1 for more details) you get enlargement between fixed limits.
For example with a 20mm f/2.8 Nikkor wide angle and the 8mm PK11A tube the magnification can be varied from 0.38x - 0.5x by turning the focus ring, whereas unaided the maximum was 0.125x (1/8th life-size). You might want a degree of enlargement that you just cannot get with the lens and tubes you have in any combination. The answer is to take what you can and crop later.
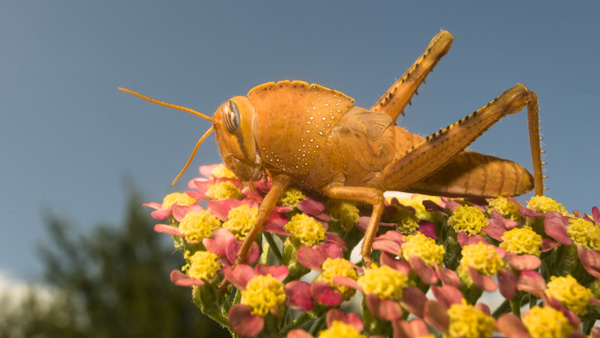
I took this image of a nymph of the Egyptian grasshopper where it happened to have settled just outside my studio. I used my 24mm f/2.8 AF with 8mm extension tube.
Photo by Paul Harcourt Davies
Other wide-angle macro best practices
The following are a handful of tips and tricks that I've picked up along the way during my years of shooting wide-angle macro images:
- Don't get too close for comfort. If you go to half life-size with both a 20mm lens and a 28mm lens and compare results, there is a noticeable difference in the amount of background you can cram in. The 20mm is wider (and wilder), but you are probably much closer to the subject.
- Don't scare off your subjects. Bugs and beetles might let you get up that close with a wide-angle lens but butterflies won't -- unless you set up your camera near a suitable flower and wait with a shutter release of some sort (or a phototrap using an infra-red beam). If you try to hold the camera manually and move in, then that well-known fear/flight reaction takes over. To take wide-angle macros with lizards or salamanders takes patience and good stalking technique. You might get one shot and then your subject, disturbed by the shutter noise, flees.
- Be mindful of your natural lighting. If the sun is anywhere behind you, then you will cast a shadow and will have to maneuver your position or try to use your flash. Reflectors can be tricky with ultra-wides since they come into the periphery of the frame unless you are very careful and alert to the possibility. (I'll discuss more about lighting in a future piece.)
- Mix and match your approach. However tempting, don't rely entirely on the wide approach -- you can mentally numb your audience (including yourself). Take a range of close-up and distant shots, and don't force wide-angle macro if it's not working. As they say, variety is the spice of life and it's important never to get locked into one way of taking photographs.
Of course, there's a lot more detail we can get into about wide-angle macro photography. But for the first two parts of this series, I wanted to share the essential high-level stuff. And I wanted to inspire you to go out and try the approach yourself since it's something you can do right in your own backyard. If you enjoy wide-angle macro, and want to learn more, you can check out my e-book on the subject (link below) and stay tuned here at Imaging Resource where I'll continue to share my insights.
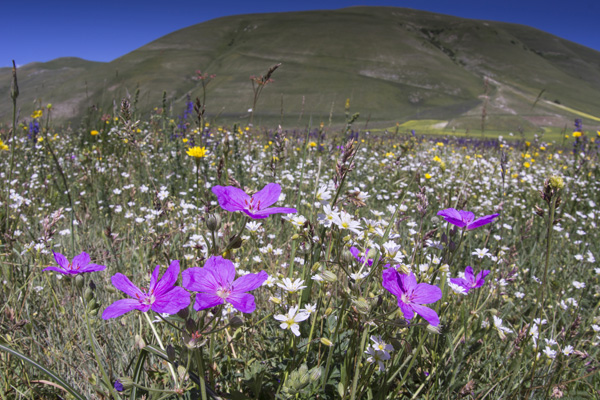
I shot this image of wild geraniums in Sibillini, Italy, with my Sony NEX-7 with an adapter and a Sigma 15mm f/2.8 diagonal fisheye. This is the basis of a highly portable kit for mountain hiking.
Photo by Paul Harcourt Davies
Paul Harcourt Davies is a long-time professional photographer, and an author of 19 books with a background that fuses technical and artistic elements to his life-long passion for photography of the natural world. We reviewed his e-book (that he co-wrote with frequent collaborator Clay Bolt): Wide-Angle Macro: The Essential Guide a few months ago, and we knew we wanted to share more of his insights and amazing images with our readers. (You can order a copy of the book here.) An experimenter and innovator by nature, he has long been on a mission through his writing and lectures to bring the techniques of macro photography to others. For the last 10 years he has been based in Umbria, central Italy, renovating an old farmhouse with a wild garden from where he organizes tours, workshops and much else.
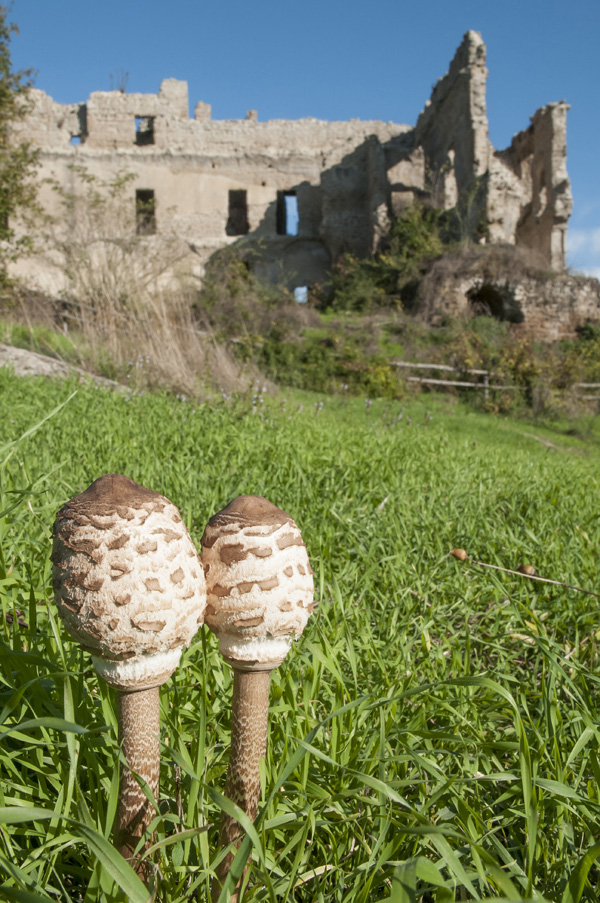
Use foreground interest to lead the eye into the frame. Here two shaggy inkcap fungi open up a vista to a ruined Italian abbey.
Photo by Paul Harcourt Davies