How to photograph indoor sports on a budget: A primer for beginners and novices (part 2)
posted Sunday, January 4, 2015 at 1:23 PM EDT

In part 1 of this tutorial we covered a lot of the basics required for getting good indoor sports shots on a budget. If you've yet
to read that section, please click here! For everyone else now joining us from page 1, we'll take a deeper look at some of the specialty settings, modes, composition, and also a closer look at the gear used for this piece.
Metering
Unless you're planning to shoot in manual mode (and this is not advisable until you've really honed your skills) you'll be relying somewhat on your camera to help you determine how much light it chooses to allow in. It does this by reading the scene and guessing how much light will suit that scene and then (depending on what shooting mode you're in) will help you adjust various parameters such as shutter speed and ISO settings. As such, there are different metering modes you can set the camera on that will yield varying types of results. To put this into simpler terms, if the camera doesn't meter correctly for the shot you're trying to get, it may over-expose and give you a washed-out-looking image, or under-expose and give you a dark-looking image. To some degree you can compensate for this in post-production software, but it's in your best interest to get as close as you can to a correct setting before tweaking in post.
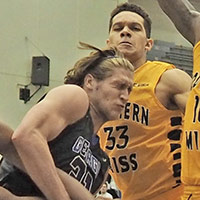
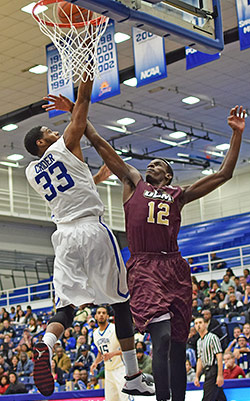
Most modern digital cameras have a metering setting called "evaluative" or "ESP" or "multi" that is meant to be a catch-all setting for most shooting needs. I find this setting tends to under-expose images while shooting indoor sports, because the camera sees the gym lights high above the court and takes that light into account, often underexposing the players' faces. Or if the background is overly dark as in some gyms, you may get the opposite issue. For these reasons, I usually set mine to "center-weighted" which looks more at the subjects in the middle than the whole frame. I suggest trying both and seeing which setting works better for your rig and shooting situation.

[original image]
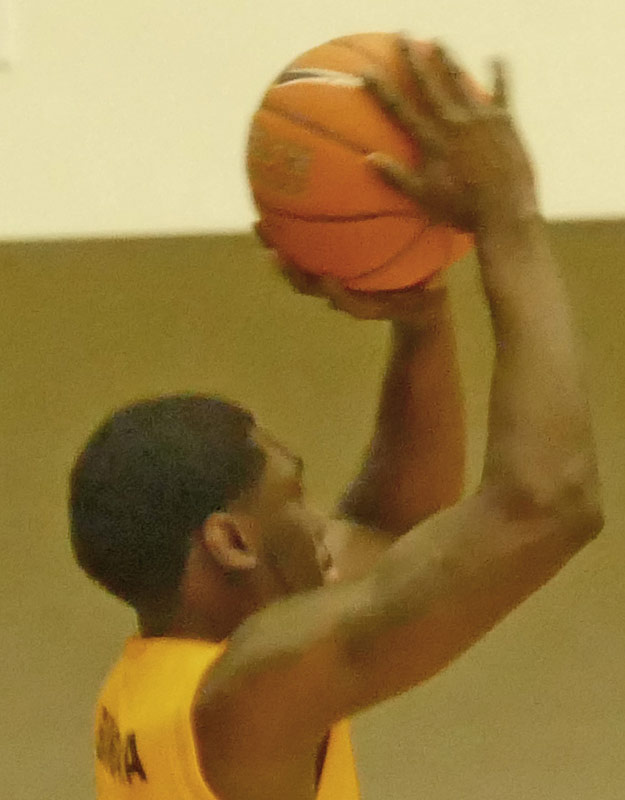
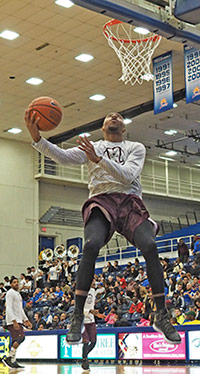
For anyone wanting to go the DSLR route on a budget, the D3300 is certainly capable of getting the job done, and the 35mm f/1.8 DX lens is a great value-added, and is a good all-around focal length to have at your disposal. This shot is an example of using "center-weighted" metering in order to expose more for the action in the center rather than worrying too much about what's going on in the background.
Electronic Viewfinder
EVF's are definitely not all made equally well. Some have better image quality, some have less lag time, and when you're on a budget this can vary a great deal from camera to camera. This article is a tutorial about shooting itself and not a comparison of EVF's, but I felt it important to make mention of the fact that you will want to explore our camera reviews to see what our reviewers have to say about the EVF for a given camera, whether it be built-in or supplied as an accessory. Either way, it's definitely a good idea to have an EVF at your disposal for most sports shots, so if your camera doesn't have one onboard it's best to buy an attachable EVF like the VF4 we used on the Olympus E-PL7.
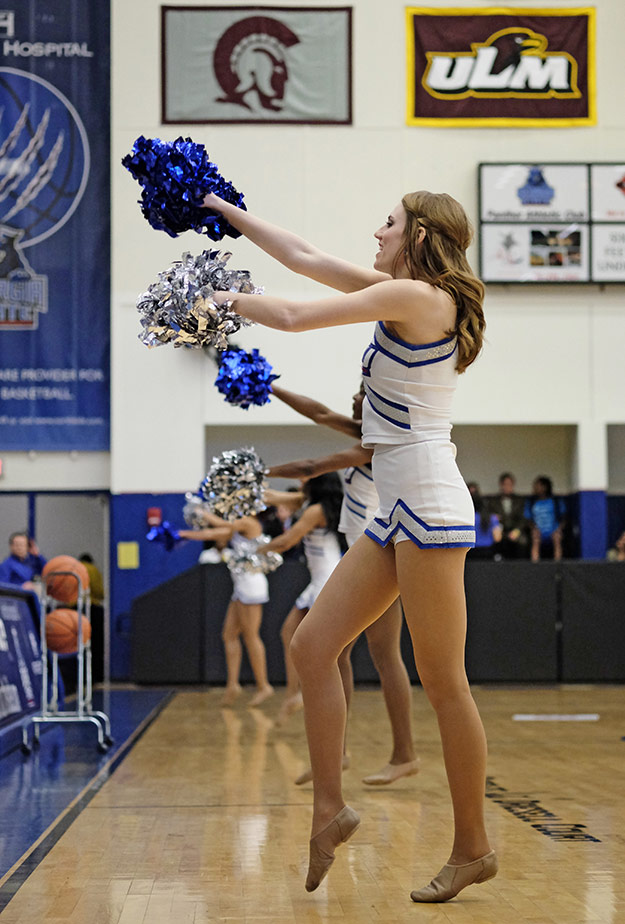
Composition
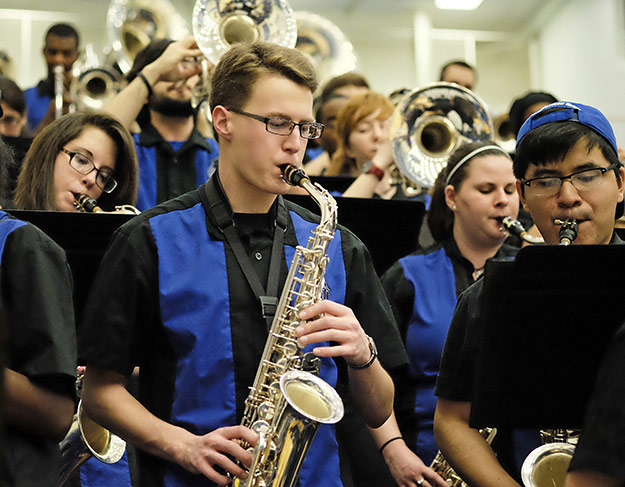
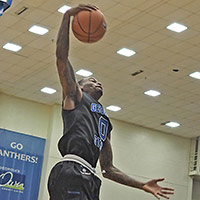
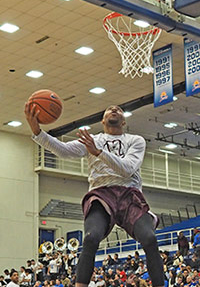
We've talked about the notion of getting close to the action, but there's much more to what consitutes a good sports shot. You may have read in other tutorials some of the common recommendations, such as trying to get the ball itself (or puck) into the shot when possible. My favorite shots tend to include more than one player, often locked in battle, and wherever possible the ball as well. All the better is when you can catch more than two players, or a coach or the fans' reactions. There's really no hard and fast rule though, and your first impression when reviewing the images on your computer can often be the best judge. Below are a few images somewhat off the beaten path from the traditional ones displayed so far here that I found interesting as moments in the game.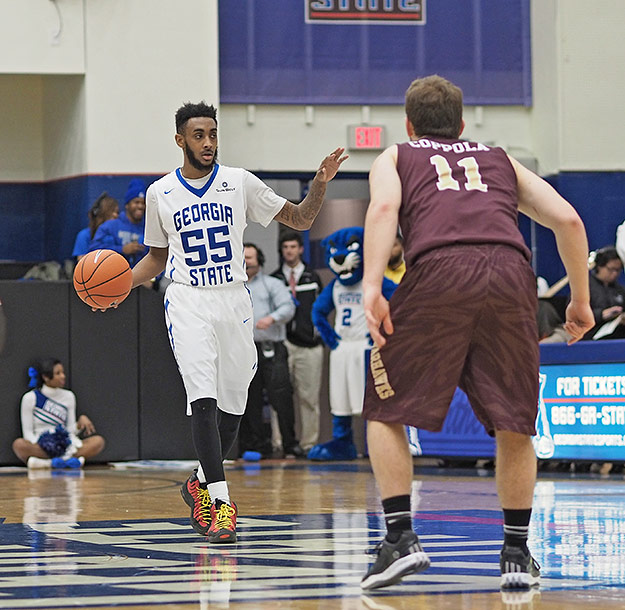
The gear used for this piece
We're very passionate about camera gear here at IR, and we certainly dream of owning high dollar rigs just like many of you do, but we also love finding out which cameras and combinations are the best for capturing certain subjects while on a budget. And sometimes it's not just the financial budget that's a constraint, but also size, because you may be limited in what you can carry or are allowed to take into an arena.
Fortunately the rigs outlined here are varying sizes of small as compared to a professional DSLR married to a sports zoom lens, so in addition to the cost savings you'll also enjoy the freedom of carrying a relatively small rig into the gym and hopefully not coming across as "The Distracting Photographer in aisle 7".
Beside each combination I'll list the current common "street price" available for comparison. There's quite a broad range, but even the priciest combination below is still less than half what you'll pay for an enthusiast sports camera and a constant f/2.8 zoom lens.
-
Nikon D3300 paired with the Nikon 35mm f/1.8 DX lens: currently ~$700
-
Sony A6000 paired with the Sony 50mm f/1.8 E lens: currently ~$850
-
Olympus E-PL7 paired with the Olympus 17mm f/1.8 lens: currently ~$1000
-
Olympus E-M10 paired with the Olympus 12mm f/2 lens: currently ~$1500
-
Fujifilm X-T1 paired with the Fujinon XF 35mm f/1.4 lens: currently ~$1700
A note about "equivalent" focal lengths
When we talk about focal lengths, there are two terms to consider - the actual focal length and the length that is equivalent to what you'd see on a full frame camera. This may seem confusing, but it's used because when the sensor sizes differ, the focal lengths do as well, for for instance on a Sony A6000 with the 50mm lens, that lens is actually at a 75mm "equivalent" length on a full frame camera. By using the equivalent term we can balance the field when discussing the lengths so that our brains can relate to what that lens will actually look like compared to other lenses across different sensor sizes. Don't worry if this doesn't make perfect sense, just make a mental note of it for when you're out lens shopping, as it may assist in determining the lens you choose.
"Dave, my camera has a "Sports" mode... why can't I just use that?"
Sports modes can work terrifically, especially in bright outdoor light. This is because even with a relatively dim kit lens (small aperture, especially when zoomed out) there's generally enough outdoor ambient light to allow for a fast shutter speed (which means little to no motion blur) while still keeping the ISO below 800 (which means no high-ISO noise). This tends to add up to a great sports image if the composition is a good one and well-timed.
But for indoor sports, I've found that for the most part the cameras can't gauge the best combination as well as I can. For instance, one of the models I was using when in "Sports" mode kept choosing a faster shutter speed than I really needed for basketball of between 1/1600 and 1/2000, and at the expense of cranking the ISO to 4000 or higher. It also didn't generally choose the fastest aperture, but would stop down a click or two. In other words, the camera decided that high ISO noise was "OK", when in fact it wasn't needed at all. Try this with your own rig and see!
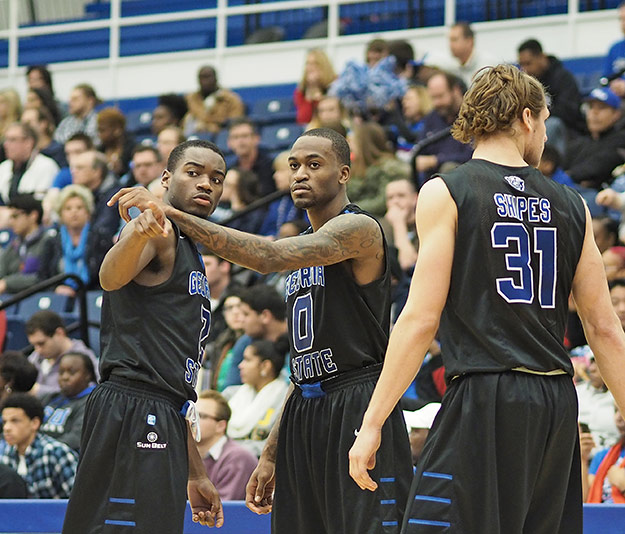
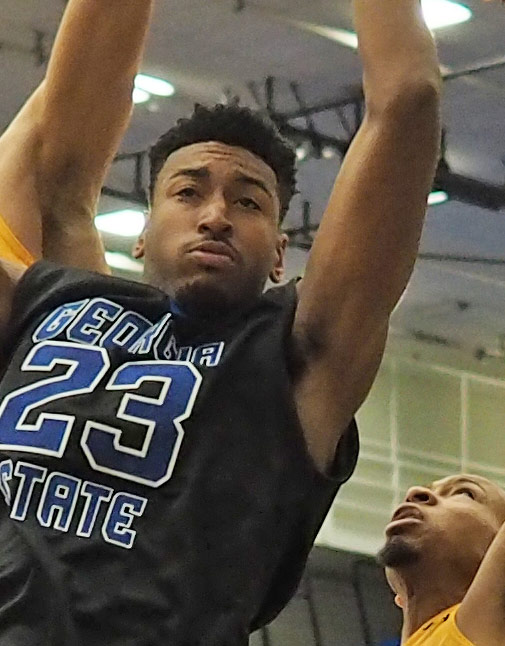
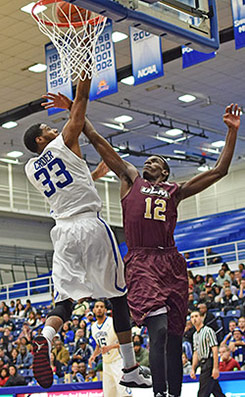
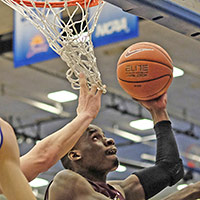
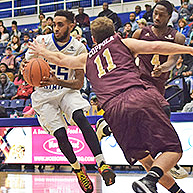
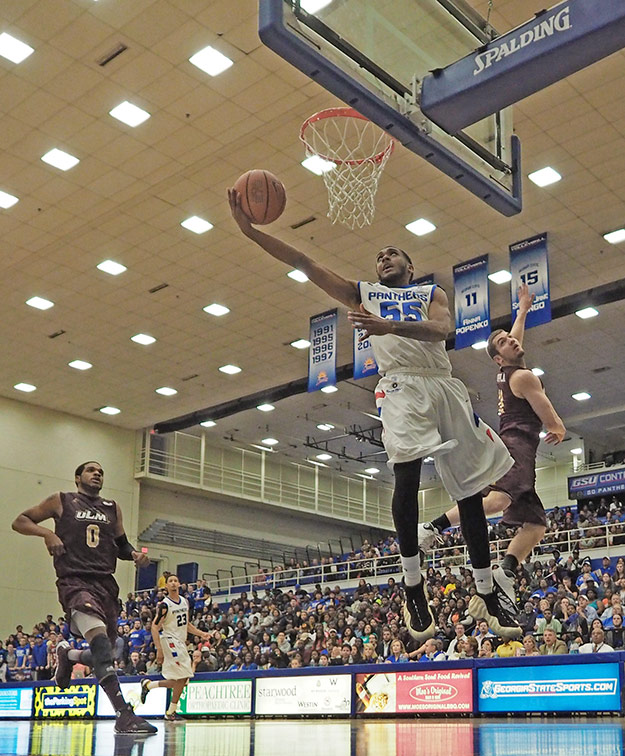
ISO 4000 is about as high as I ever want to go, and only then if the sensor is at least APS-C or larger. The cameras I tried that did have "Sports" modes often chose shutter speeds of 1/1600 or 1/2000 while cranking the ISO up to as high as 6400. I highly prefer to choose a lower shutter speed on my own, and in this case 1/1000s did the trick. The player on the left is out of focus due to the shallow depth of field and not the result of a slower shutter speed.
So by all means, experiment with various modes, and certainly try out "Sports" mode, and then use the results to fine-tune your own shots depending on the light levels and speed of the action.
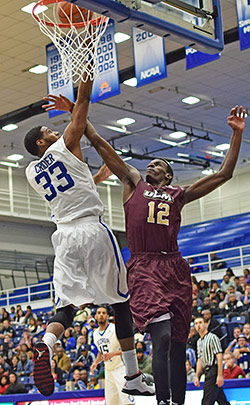
A word of caution about shallow depth of field
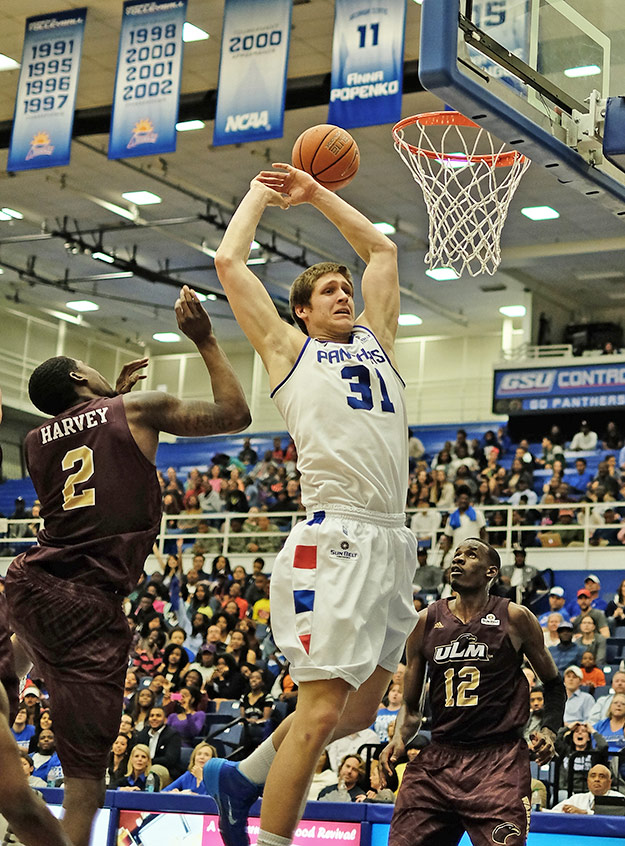
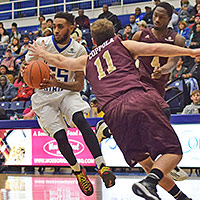
Using a wider aperture like f/1.8 or f/2 as we're often doing here is the big trick for allowing so much light to pass through to your sensor and allowing that fast shutter speed we need, and it also has an added benefit of creating more subject to background isolation. When the subject is sharp and the background is blurred, the subject tends to pop out of the image more and is often a desirable thing for a photograph, and the general subject of background blur is commonly referred to as "bokeh". However, there is a trade-off to these benefits while shooting sports, because the same physical phenomenon that creates that terrific subject to background isolation also makes it harder to get your subject in focus in the first place.
When shooting portraits of a still subject this is not an issue, but when the athletes are flying around and you're trying to nail the focus, this "shallow depth" becomes more and more like a thin razor upon which you need to land your focus. The above image is a good example, as one player is in focus and the other is noticeably out. In this case I don't believe it hurts the image too much, and maybe even gives it a dramatic effect, but I just wanted to make sure you knew the trade-offs of having it be that much tougher to nail focus. The remedy is to stop down to a smaller aperture (larger number) like f/2.8 or f/4, which will give you less isolation but a bit more focusing freedom. As you are now aware though, you should only consider stopping down as long as your shutter speed can remain high enough and your ISO low enough to produce a good image.
The balancing act never ends!
"Why can't I just use my new bridge camera... I've read they're good for sports."
I wish you could use them reliably for this purpose. If you've read my Olympus Stylus 1 shooter's reports, or the shooter's reports from Mike Tomkins for the Sony RX10 or Panasonic FZ1000, you'll see how much we love those cameras. All three won accolades in either our 2013 or 2014 Camera of the Year awards, and all three are very fine choices for outdoor sports photography. Indoors, however, at least in the average gym or arena, there's not enough light to get a fast enough shutter speed without cranking the ISO too high for those sensors. You can get good images of subjects not moving too fast, but once the real action fires up most of your images will either be too noisy or too blurry to be usable. All three of those models can go to f/2.8 (although the FZ1000 can only achieve this when the focal length is at wide angle) and I did mention earlier that f/2.8 is a good constant aperture for a sports zoom lens. But that was on bodies with larger sensors that can take the heat at ISOs above 1000, where these cameras start to show noise more quickly.
In the image below, with the aperture wide open to f/4 at the telephoto end of the range and in the same gym where all the other images were shot, the FZ1000 is only able to achieve a good exposure with a 1/200s shutter speed at ISO 3200. Even if I'd been at f/2.8 at the wide angle end, I'd still only be able to get a 1/400s shutter speed while still forced to ISO 3200. That's still a bit too slow for basketball, and the ISO setting is too high for this sensor size, but in this location that is the best you can achieve. This is not a criticism of this camera nor any bridge camera, as they have tremendous value in other areas, but I felt it necessary to show you with a concrete example just how much you can squeeze out of one in a typical basketball gym. For a closer inspection of what you're likely to get there is a 1:1 full resolution crop of the same image below, as well as a crop from a Four Thirds sensored camera for comparison.

[original image]
(Spike Lee will likely agree that we need a larger sensor for this shot)
[original image]
In a brighter gym, if you remain at f/2.8 and can get the shutter speed up to 1/500s or higher while keeping the ISO below 1600, you'll likely be able to get good images with one of the mentioned bridge cameras.
RAW files
Most of our enthusiast readers shoot and process from RAW files, as do we at IR for our testing and reviews, but I tend to turn it off for sports shooting because I take so many images that (for me at least) it becomes impractical. This goes double on a budget camera, as the time it takes to clear the buffer of a burst in RAW + JPEG can often create missed shooting opportunities. And 500 images in RAW + JPEG takes a ton of space and transfer time as well, so for me it simply becomes unnecessary. I did provide a few RAW files for our enthusiast shooters for some of the images in this piece, but again I don't receommend it for the reasons listed. If your camera is fast and you have a big, fast card and plenty of time on your hands, by all means shoot in RAW, but for everyone else I advise turning it off and avoiding missed shots.
However, it should be noted that not all in-camera JPEG engines are created equal. For anyone not familiar with the process, your camera creates a compressed JPEG version of the actual "RAW" file it captures (unless you disable JPEGs) and that compressed version is what you're delivered if "RAW" is turned on or off. RAW files are much larger, and thus the slower speed in capturing them to the SD card. But the process of compression is complex and the software coding required to achieve this differs across manufacturers and camera bodies. There are even internal tweaks (on most cameras) that you can make which will offer different types of JPEGs (for instance, more or less sharpening can often be applied depending on your tastes). If you tend to like the "look" imparted by a certain camera over others, part of that could be the JPEG rendering, so pay special attention if you find yourself looking more at one camera's images than others.
Exposure Compensation
Just look at exposure compensation like a "MayDay" call... you've set everything to your liking, but you don't like what you're seeing on the LCD or through the EVF. This is a quick-tweak to get the shot, but I don't advise relying on it much in the indoor sports arena. Consider it a last-ditch tool for last-minute tweaking, or you'll rely on it too much, because in this environment you need to keep your eye on shutter speed and ISO settings at all times, and just tweaking the EV dial or setting can throw one or the other off if you're not careful.
White balance
Similar to being able to adjust naturally to bright or dim environments, our eyes are also able to adjust to different color "temperatures" created by different lighting enviroments. For anyone who'd like to explore this avenue deeply there's a good description of it here, but for everyone else you just need to be aware that your camera can only try and guess the type of environment it's shooting in and compensate for the differences when set to AWB (auto white balance). To you the photographer, this means that when shooting indoors at night where the light tends to be somewhat yellow in cast, the camera needs to compensate the hues a bit so that the image isn't overly yellow, and this is similar for daylight shooting which tends to be more towards the blue part of the color spectrum.
I used auto white balance for all of the shots taken with the cameras used on this piece and found that they all tended to "get it right" in that the images you see closely reflect the color spectrum as my eye viewed the scene. So unless you want to explore this concept further all you really need to remember is this - if your images displayed in playback on your LCD or EVF look similar in color hues to what your eye is registering while in auto white balance then you're fine to forget all about it. But if the playback images look more yellow, or more any color for that matter, then you'd be best to go and select a white balance that suits your location. Simply find the white balance setting in the menu and scroll through the presets until you find one that works, and then leave it there until you move to a new location. (Don't forget to switch it back to AWB though, or your daytime sky may be some odd orange color!)
Your location
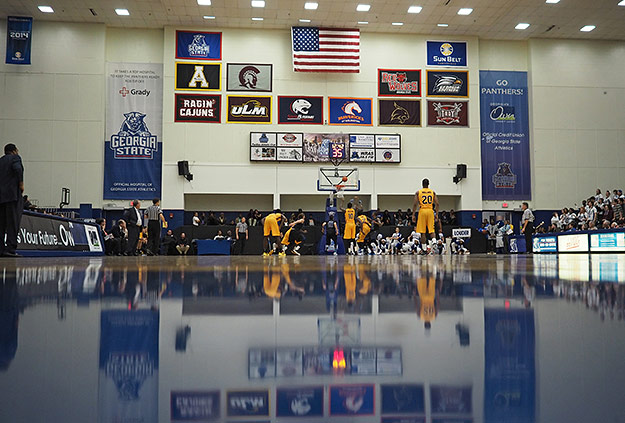
You may have noticed that I had a "prime" location for shooting at this game, courtesy of the kind and generous folks in the Georgia State athletic department. If you can get close to the action, especially a courtside seat, this is a great thing and you won't need a long focal length lens for much of your shooting. Also, some of the most dramatic shots are when you can position yourself below the athletes and shooting upwards, as the angle simply lends drama to the shot and puts the viewer into the action. However, understand that there are also difficulties to being so close.
For one, the action moves faster relative to your camera, which creates several issues. The first is you generally need faster shutter speeds, which as you now know are a premium commodity indoors on a budget. Also, you'll need to track and pan with the motion of the players much faster than if you're higher in the stands, as the pace of play can be daunting to follow with a camera up close. This is where the "end zone" seats or the "baseline" in basketball are generally where you see the pros shooting. It's close to the scoring, but it's also easier on the back and forth panning. Seats behind the baseline are usually cheaper or easier to come by, so as a photographer you can often use this to your advantage. In most sports, the players switch sides of the court at some point, so you'll get a chance for up-close shots of both teams in their scoring areas throughout the course of a game.
I mention all this because it may be in your best interest when just starting out to shoot from a distance rather than to try and get close to the court. It'll be easier learning, and you won't be in the spotlight so much either. Your call of course, but best to get acquainted with the basics from a distance if you can before going ringside.
Post production
We'll explore more about post-production in our extra-credit addendum section, but it does bear mentioning here. It's obviously best to try and get the shot right the first time, as it becomes harder and harder to fix trouble areas in post the further they stray from the desired outcome. But that being said, post-production editing and tweaking can take a good-looking image and often make it a great one with just a little help here and there. Perhaps it needs a contrast boost, or a bit of sharpening, or maybe some slight color balancing. Post-production tweaking is a deep art and a tutorial series all it's own, but for our purposes here just make sure that you take the time to at least learn the basics of manipulation after-the-fact, as it's an important art to know, and especially while using a budget rig.
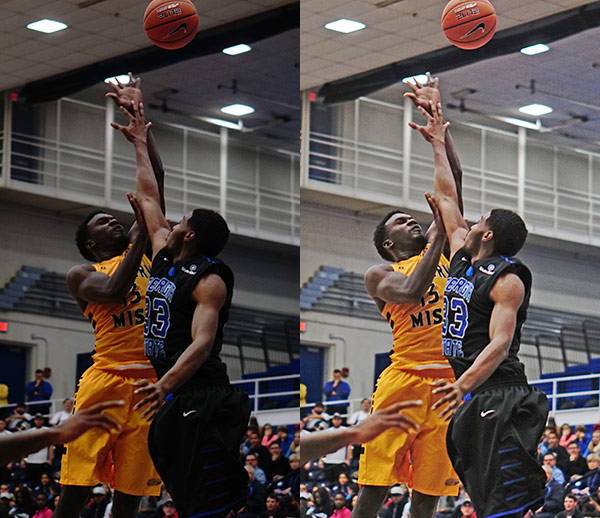
(The left image is the original while the right has had a number of tweaks after the fact.)
"Dave, why can't I just use a flash?"
To this I wholeheartedly say: "Just say no." Flash can be a terrific photographic tool in the right situations, especially with a lot of practice and know-how, but not for indoor sports shooting. No matter how much you try and justify it, the pop of a strobe (flash) can and will disrupt the players and potentially the coaches, referees and even the fans. It is a major disruption and should not be considered for these shots. Indoor sports shots with flash remind me of my old high school newspaper sports section, and don't look as natural as shots without it. Learn the techniques here, practice them, and also heed my advice and buy a large-aperture ("fast") lens, and you will eventually achieve the shots you want without giving the point guard a migraine headache or getting yourself thrown out of the gym.
[Special note: Some pros can & do use flash for indoor sports. They use a wireless trigger for ceiling-mounted strobes. This provides better exposure without the risk of direct, blinding light flashing into players' faces.]
One last thought on being respectful to the players is to make sure your camera's AF assist beam isn't an obnoxious one. Most beams look like little red lasers, and for the most part won't likely annoy the players, coaches or referees. But at least one camera I shot with on this shoot had a bright, white beam that I consciously turned off before going into the gym. For your camera, make sure the AF assist beam is turned "on" in the menu, then half-press the shutter in a dim room and see how bright the beam is. If it looks more like a torch than a minimal laser beam, turn it off before entering the gym or you may draw some odd stares. Also, while the gym is likely noisy, I always turn my camera's beeping sounds completely off. I can tell by the green box when it's in focus, and the noise is just distracting to myself, other photographers and anyone else close by. Be respectful of your surroundings in every way that you can, and try and minimize your own presence. And please don't dress flashy - your job is to not be noticed. Your photographs are what you want people to notice, not your distracting presence at the game. (Trust me on this!)
A few final words
Your "keeper" ratio
Remember that even pros with huge, expensive rigs don't nail every shot. I have my pick of fairly good gear here at IR, have good coaches and have been practicing indoor sports photography for a few years now, and I'm still lucky if I come home with 25-30% keepers. But if I take 500 or so images during the course of a game (carefully, not just wantonly firing but really going for solid shots) then this means I can still hope to capture plenty of good shots that make the trip and the effort worth it. (Not to mention all the time spent just trying to learn this stuff!) I do learn something new every time I go out and shoot, especially in the trying arena of low light sports shooting.
The point is, don't get too discouraged and keep going back out. Don't be afraid to try different gear until you find the rig that works for you if possible, and remember that you can always rent gear if you'd like to try it out first! Once you get your first indoor sports shot that turns a few heads, you'll be hooked.
We'll update this piece from time to time as new gear comes our way with newer capabilities on a budget. We wish you the best of luck with your gear selection and all your sports shooting, and as always, thanks for reading!
More indoor sports articles:
• Nikon D5500: The best indoor sports camera for under $1000 •
• Indoor sports with a fixed lens camera? Try the Panasonic LX100! •
[A special thanks to my mentors Dave Etchells, Luke Smith, Rob Murray and William Brawley for their guidance and patience with my endless questions. And a big thanks to the Georgia State Athletic Department and basketball program for allowing us to photograph their games. Lastly, thanks to Nikon, Fuji, Sony and Olympus for the sample equipment used in this piece.]

(The left image is the original while the right has had a number of tweaks after the fact.)
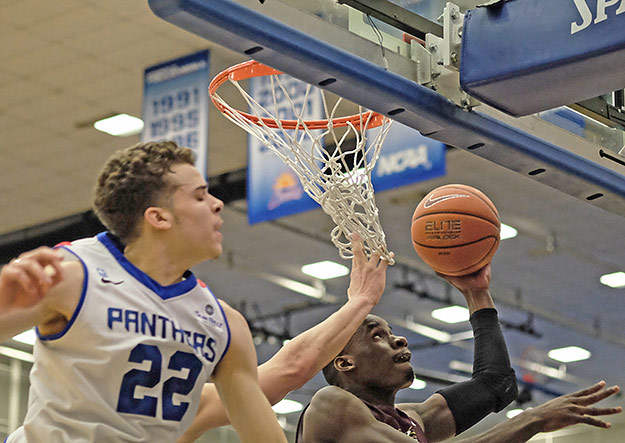
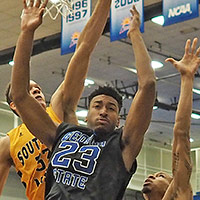
Shot by my partner William Brawley, who was reviewing the E-M10 at the time, this is one of my favorite indoor sports images. It has bodies flying through the air, other players rushing on and a very nice sense of dynamics. It also has a good combination of shutter speed to ISO, where a typical "sports" mode may have pushed the shutter speed faster and thus the ISO higher, this manual exposure yielded a really good blend. At ISO 1600 there is only a trace of noise, and only when you zoom in a good bit, and obviously the 1/1250s shutter speed captured the moment.