Caffeine Priority: Scouting locations
posted Tuesday, January 26, 2016 at 9:12 AM EDT
Location scouting is critical to my own landscape photography and putting in the effort allows me to capture better images and become a more efficient photographer in the field. Not only that, but the preparation allows me to be more relaxed and have more fun when making images. Fortunately, location scouting is becoming easier all the time with new and improving technologies.
Why does location scouting matter? Whether you're an outdoor portrait, landscape, or wildlife photographer, knowing more about your location (or finding new locations) can help you make better images. The less time you spend wandering around when the light is good, the more time you have to take advantage of good conditions and make great images. Without having scouted a location, you can end up relying heavily on luck to find great spots for the image you desire. If you put some research in before-hand, you can remove some of luck from the equation (although as many outdoor photographers will attest, there's always luck at play) and come home with a higher number of good images.
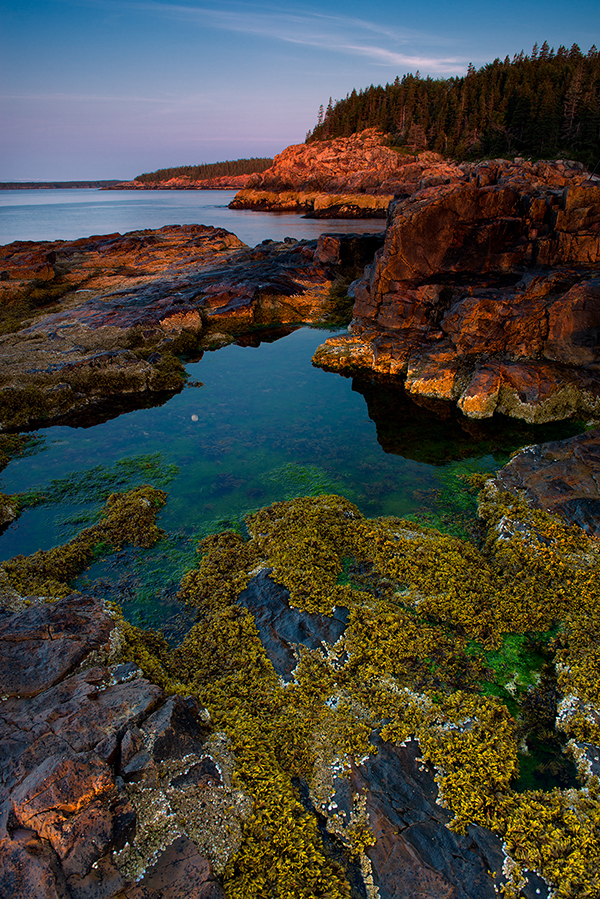
In my experience, scouting a location in-person is always preferred, but there are some steps I can take remotely to make better use of my time when physically scouting a location. Suppose I want to take an image of sunrise in Acadia National Park in Maine that includes the ocean. Well, it's a fairly large park, so my first step is to narrow my scope a bit. There are a few ways that I do this. First, I think about my own personal experiences in Acadia. I've shot there a lot, so I have knowledge of many locations already. Secondly, I visit websites such as Flickr, Panoramio, and 500px to look for great images and see if the photographers have provided location data. Let's suppose that images from the Park Loop Road in Acadia have caught my eye, and that's where I'd like to shoot a sunrise image.
I am now ready to actually go scout the location. The Park Loop Road is 27 miles long when it's fully open, so I can't expect to scout all of it at once. Wanting the ocean in my image, I can eliminate some of the Park Loop Road right off the bat by virtue of its layout. Having narrowed the possibilities down, I can choose a time to go scout the location, making note of the tide conditions when I visit (the tides can be very important when scouting ocean locations, as the changing tide can have a dramatic impact on what a scene looks like). I personally have found that mid-afternoon is a good time to be scouting locations because I can scout the location and then take advantage of nice late afternoon light and sunset to either test out the location or go shoot at a more familiar place.
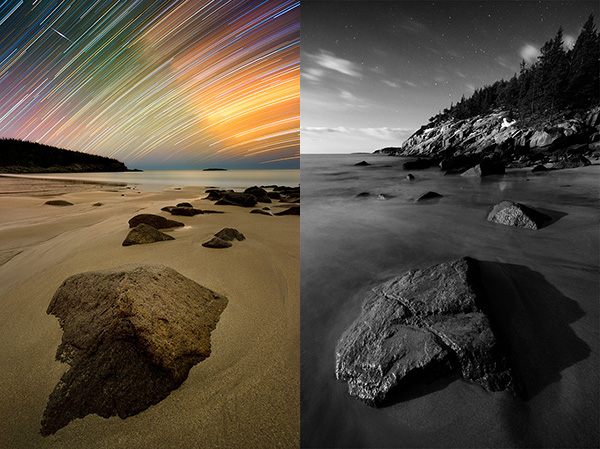
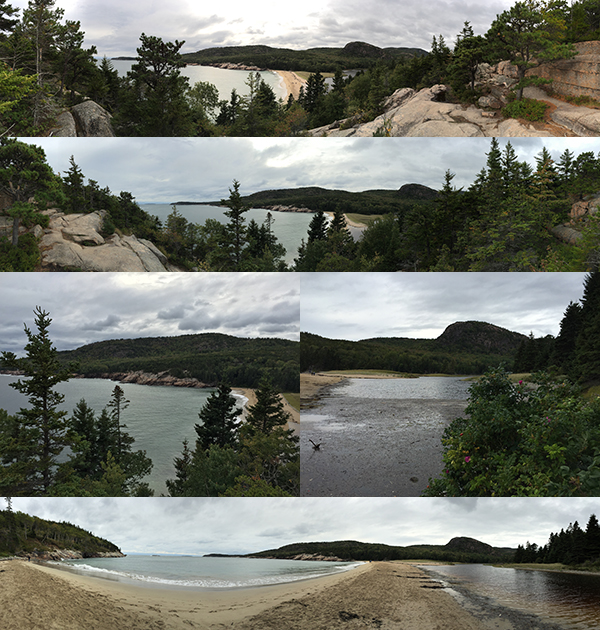
When scouting a location, I try to take in as much of the area as I can. I keep an eye open for particularly interesting image possibilities and check the directions with a compass (or if I don’t have a compass on hand, my phone’s built-in compass does a decent job). Even if I am scouting for a particular time of day, I always keep other possibilities in mind. I’ve found good night photo opportunities when scouting locations for sunrise images, for example. Even if the light is bad when I’m at a location, I’m always taking test shots (and sometimes test video) so that I can look back and remember more details of the area for future planning. There have been times I’ve gotten images I’m really happy with while scouting, so you never know, sometimes test shots can turn out nicely. Finally, as I mentioned above, I’m taking notes while scouting. These notes include the exact location, the time of day, tidal conditions when appropriate, possible images to be made at the location, and some general thoughts about the area including which direction I’m facing for different possible image options.
div class="ck-block float-none">
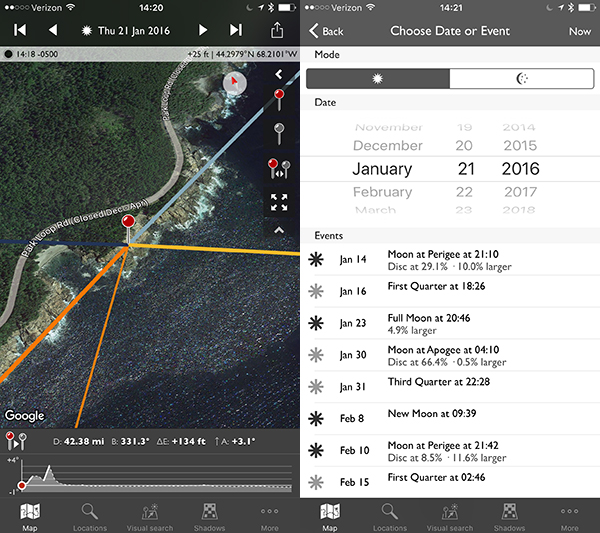
Sometimes it’s just not possible or too time-consuming to go scout a location. In these cases, there are a few resources that make it a lot easier to plan possible images in advance. An excellent mobile application is The Photographer’s Ephemeris (there’s also a free browser-based desktop app). You can use the app to predict how light will fall on a particular location at a particular time. It’s useful for both day and night images because it uses a sun and moon calculator. For planning night images, I also utilize the Sky Guide app to see what the sky will look like at certain locations and times. For getting detailed tide information, I use the TideTrac app.
This is how I go about location scouting. Perhaps some photographers work best with minimal planning, or maybe others have an extensive and highly-detailed catalog of all their images with location data and more information. As long as you’re enjoying your photography, you’re doing things the right way.
Readers, do you have any tips and tricks for location scouting? What works best for you? Let us know in the comments below!
• • •
[Want another shot of Caffeine Priority? ...We have Espresso!]

Caffeine Priority is a new series of short photo-tidbits to ease you into your day, and give us a chance to share a bit more of what life’s like behind the scenes here at IR. We're more like a group of friends testing and talking about cameras and lenses than the buttoned-down, big-corporation world that some of our friends at other companies work in; hopefully these little snippets will share some of that. So... grab another coffee and join in the conversation with us down below!