Caffeine Priority: A simple way to get better images with the 855mm eq. Nikon L840
posted Thursday, March 10, 2016 at 7:57 AM EDT
Wake up with IR... Here's today's dose of Caffeine Priority!
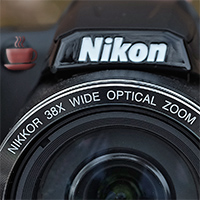
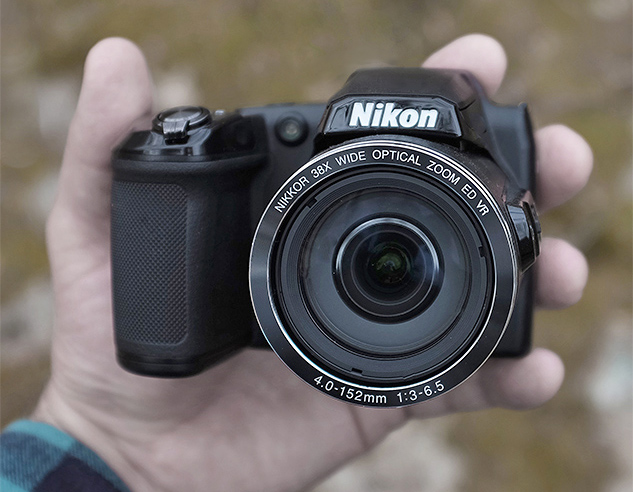
As we mentioned in our initial posts for the Nikon L840, an 855mm equivalent long-zoom is a lot of muscle to be carrying about for a reasonably small camera with a street price under $200. It's a 38x zoom range all told, with a generous 23mm eq. focal length at the wide end as well. Simply put, that's an enticing amount of versatility for the money!
"So, what's the catch?"
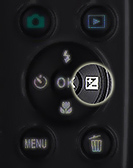
The catch is that the versatility is pretty much limited to the zoom range, and does not extend to the controls. Having been primarily reviewing mid-level enthusiast-grade cameras for the past several years of the likes of the Olympus Stylus 1, Sony A5100 and Nikon D5500, I've become accustomed to a wealth of controls, both externally and internally, and very much dependent on the PASM settings on the mode dial. There are no such settings on the Nikon L840, and other than accessing "Scene Modes" (which enthusiasts rarely use), you have one button that now becomes your best friend with this camera: Exposure Compensation.
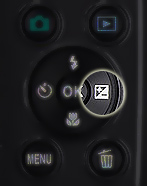
As such, dialing in compensation with the exposure value button (the right button on the 4-way controller on the back) is one of only two exposure control parameters offered with this camera, and in order to get the most out of your shooting situations, you'll need to use it. This is because in most situations, I've found that the camera over-exposes the images to a fairly noticeable degree, and this affects your images in two ways. The obvious is over-exposed images, but since you have no control over the aperture or shutter speed, you're also compromised in that the camera is quite often choosing a slower shutter speed than is optimal, and therefore, especially at longer zoom lengths, you're more at risk of blur due to camera shake or the movement of your subjects.
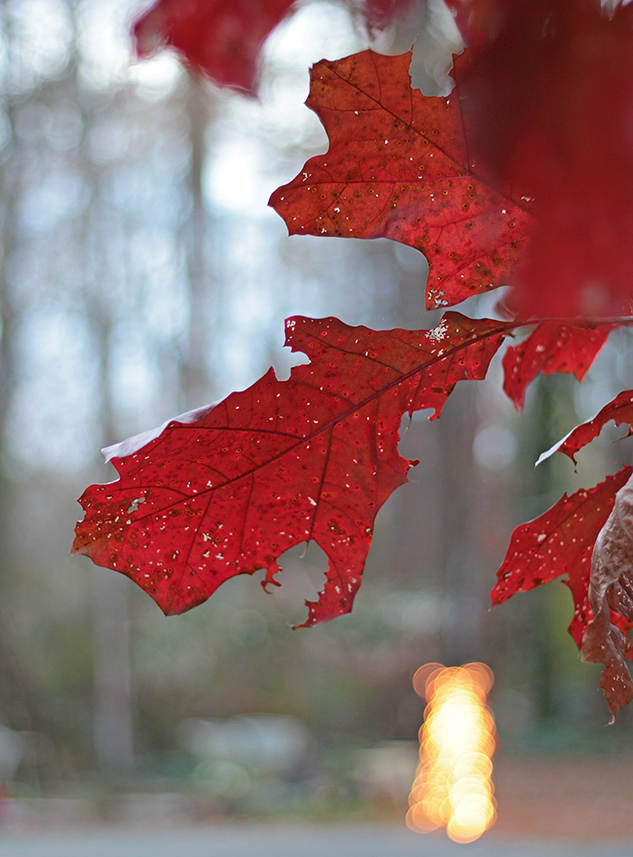
Dial it down!
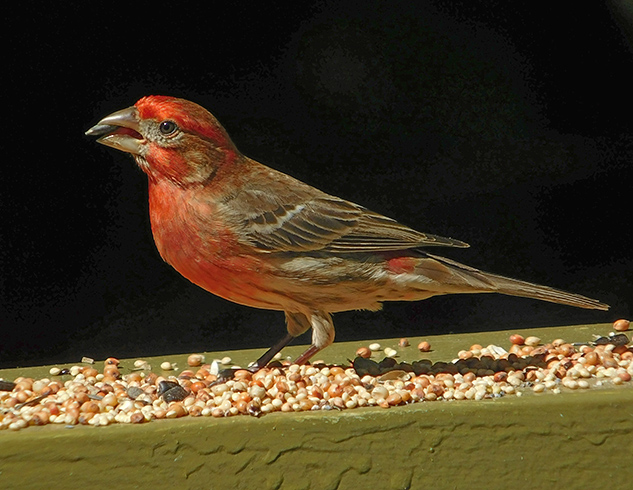
Dialing the EV down by 2/3rds of a stop here allowed the shutter speed to climb to 1/320s.
This was critical to the success of this image, as a slower shutter would have likely introduced
camera shake at this focal length, and likely not frozen the bird's fairly rapid movements.
(Images have been resized to fit this page, cropped and/or slightly adjusted in post, primarily to balance shadows and highlights. Clicking any image will take you to access to the full resolution image as delivered straight from the Nikon L840, as well as all relevant EXIF data.)
Zoom with caution
It's important to remember that the further you zoom, the greater your risk of blurry images due to camera shake, as zooming magnifies your movement. Try zooming to 855mm eq. and watch the LCD - you'll see your subjects dancing around quite a bit unless you have extremely steady hands. The L840 comes equipped with Vibration Reduction built-in, and we've found it works quite well! But like any image stabilization system, it can only work to a certain degree, so you still have to be mindful of your shutter speeds.
Therefore, due to the L840's tendency to overexpose images, by dialing back the exposure value to the point where you get an adequately fast shutter speed, you greatly increase your chances of gettng a sharp image. And it's also important to remember that it's much easier to adjust a slightly under-exposed image in post-production than it is to try and compensate for motion blur, which can often ruin an otherwise good image.
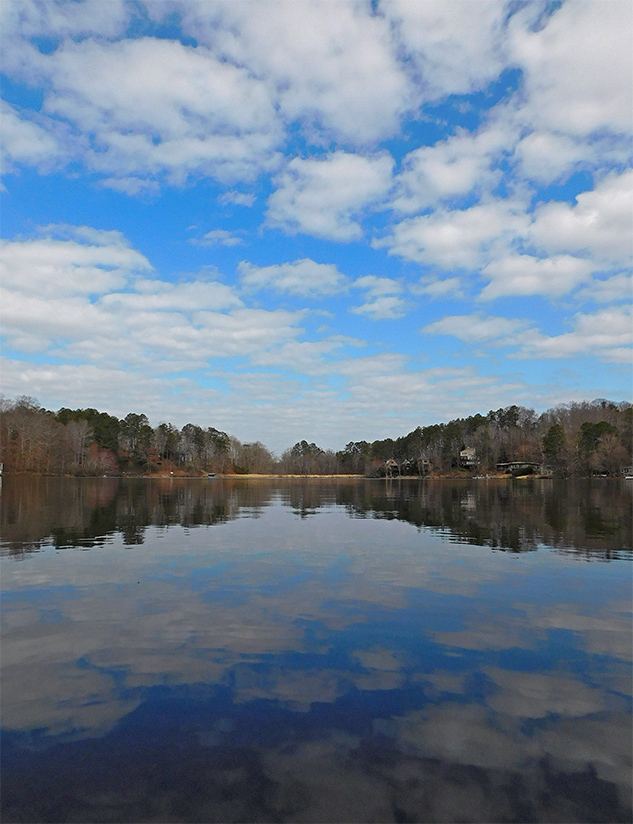
At the widest available focal length of 23mm eq., I certainly didn't need a shutter speed as fast as 1/800s, but anything slower would have yielded an overexposed image and blown out the contrast in the sky and clouds. This is an example of using the EV setting to dial it down a stop and avoid over-exposing the image, even though you might not need such a quick shutter speed given the wide focal length here.
Use the gain knob, but be mindful to put a lid on it
The second exposure control parameter open to you with the Nikon L840 is ISO, and you're fortunately offered two "auto ISO fixed range" settings that constrain the high value to either 400 or 800. With a sensor this small (and it needs to be small for this much zoom range in such a small package) you virtually never want to push the ISO above 800, so this is a very smart feature.
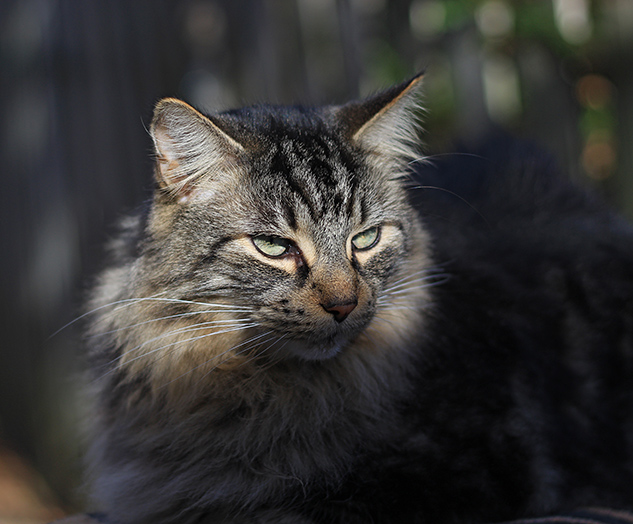
For the shot below, taken at a time of day approaching dusk, I set the auto ISO to a fixed range of 125-800, thereby allowing it to adjust itself as needed without going past the ISO 800 threshold that I consider usable for this sensor size. You'll find ISO settings in the basic camera menu, including the auto ISO fixed range settings mentioned above.

For this image I dialed the EV down a full stop. Combined with allowing the ISO to float in a contained manner, it allowed me to get a shutter speed of 1/125s. Thanks to the onboard IS, this produced a fairly crisp shot here at the 577mm equivalent focal length. You can see a hint of ISO noise in the background, but you really have to look for it, and given this sensor size it's really quite good. I suggest always keeping the ISO constrained to 800 and below on this camera, and any other cameras with 1/2.3 inch sensors for that matter. ISO settings higher than this just get too noisy to bear.
(By the way, I rather like the color rendering from this camera. Notice the subtle orange hues on his or her fur and tail, and the aquas of the lichen on the wood.... fairly good for a camera costing $199 I'd say.)
Summing it up
It's important to note that you don't have access to various metering modes on the L840 like you do with more advanced cameras, and so the two parameters mentioned above, Exposure Compensation and ISO, are the only real exposure controls available to you with this model. Use the EV setting to your advantage, keeping it dialed down as low as needed in order to ensure properly exposed images, and fast enough shutter speeds for the focal length you're zoomed to. Use the auto-ISO setting as well, when you need to bump up your shutter speeds even more, and either cap the ISO to 400 or 800, depending on your taste in noise levels.
With these two relatively simple adjustments you'll greatly maximize your potential for producing good images with the Nikon L840.
Nikon L840 is capable of delivering good images if you have just a few tricks up your sleeve.
Nikon L840 • Image Gallery • Deals and Prices
• • •


{Craving more Caffeine Priority? ...Please Help Yourself!}


Caffeine Priority is a new series of short photo-tidbits to ease you into your day, and give us a chance to share a bit more of what life’s like here at IR. We're more like a group of friends testing and talking about cameras and lenses than the buttoned-down, big-corporation world that some of our photo-friends at other companies work in; hopefully these little snippets will share some of that. So... grab another coffee and join in the conversation with us down below!