Caffeine Priority: Quick tip! Focus stacking landscapes in Photoshop is easy and creates tack-sharp shots
posted Saturday, October 15, 2016 at 5:59 AM EDT
Wake up with IR! Here's today's cup of Caffeine Priority...
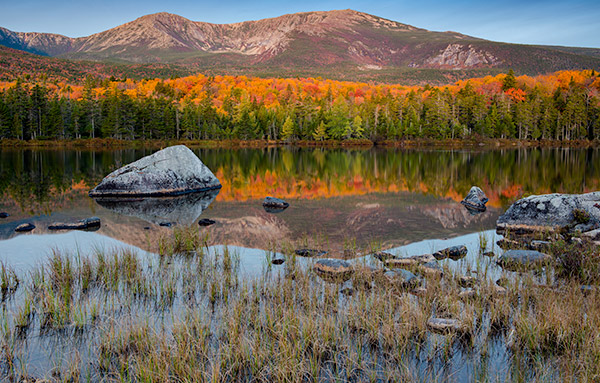
I regularly try to utilize an interesting foreground in my landscape images. However, this means that a single capture is rarely sharp from foreground all the way to the background, even at a wide focal length and small aperture. You can stop down further, but this introduces the issue of diffraction which will soften your entire image. For a long time, I didn't worry about my foreground being slightly soft. However, there is a relatively straightforward and simple way to utilize Photoshop to address the problem and create images that are tack sharp across the entire frame.
To do this, all you need is a tripod and Photoshop. When in the field, once you have your composition set and camera stabilized, you will need to capture multiple exposures at different focus distances. I typically go from background to foreground, but it doesn't matter as long as you're consistent. I find that I prefer using Live View to achieve focus for landscape photography, so I'll zoom in on a detailed part of the background and focus the lens. I'll take a shot and then without moving any of the equipment, I'll focus on the middle ground. Finally, I'll capture an image with the focus on the foreground. It's important to make sure that your exposure isn't changing in between shots, so it's best to shoot in manual mode to do this. It's worth noting that you can capture as many images as you want at different focus distances, but you need at least two. The longer your focal length and the closer your foreground is to your camera, the more shots you will want to capture for optimal results. I typically do between two and four different focus distances for stacking.
Once you have your images, you can load them into Lightroom and make adjustments or load them directly into Photoshop. From Lightroom, you can select the images, right click, select "Edit in Photoshop" and then click "Load as Layers." In Photoshop, go to File and then "Scripts" and "Load Files into Stack" before selecting the relevant files. Once you have your layers loaded in Photoshop, select them and go to "Edit," "Auto-Align" and then select "Auto" and press "OK." Photoshop typically does a great job aligning your frames. They need to be aligned because when you perform a large shift in focus, parts of the image will change their relative location. If you fail to align the images, when performing the next steps, some objects in the frame might appear to be cut off and it will require a lot more careful processing. For example, in the image I'm using to illustrate this technique, the large rock will be in a slightly different position in the frame depending on whether or not the image has close focus or near-infinity focus.
Once your layers are loaded and aligned, the magic happens. By the way, it is best to name your layers so you can keep track of where the focus is. Create a layer mask on your "background focus" layer and then select the gradient tool. Start from the bottom and then drag the gradient up the frame so that the foreground focus image in the layer below shows through. Remember that in Photoshop, when using layer masks black conceals and white reveals, so make sure you're painting over the in-focus foreground area with black. Be careful not to go too far as your middle ground will typically be soft in the foreground focus image. This is the easiest way to do it and it works well in most cases, but sometimes you need a much more precise tool and this is where you can utilize a combination of selection tools and brushes to create fine-grained layer masks.
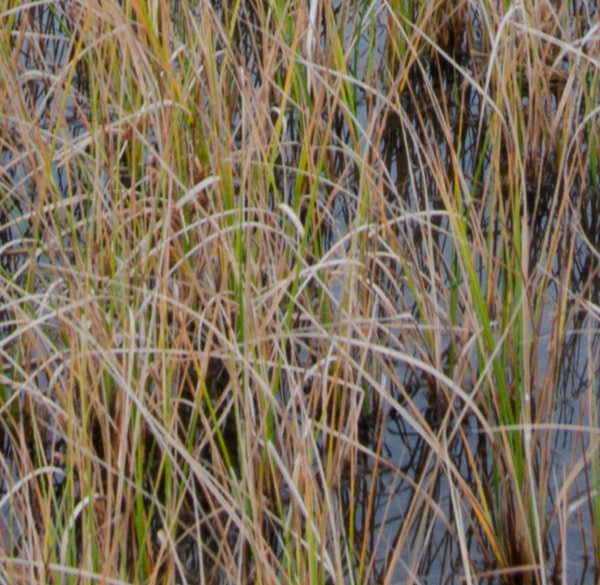
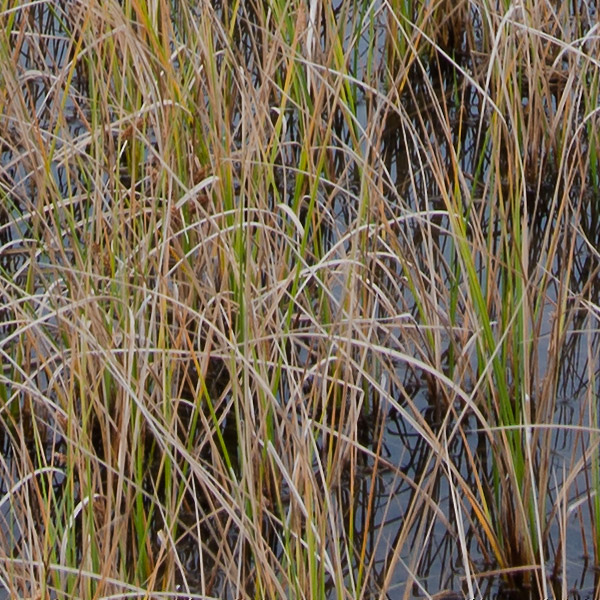
After stacking the images, I flatten the file and then proceed with my normal processing. In the two 100% crops below, you can see the vast difference in foreground sharpness between the frame with foreground focus and the background focus image. This won't typically show up when viewing on the web, but trust me, in a large print this technique can make a massive difference.
Caffeine Priority is a series of short photo-tidbits to ease you into your day and give us a chance to share a bit more of what life’s like here at IR. We're more like a group of friends testing and talking about cameras and lenses than the buttoned-down, big-corporation world that some of our photo-friends at other companies work in; hopefully, these little snippets will share some of that. So... grab another coffee and join in the conversation with us down below!


