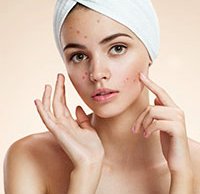
Five Photoshop tools for fixing skin blemishes and imperfections
posted Monday, April 3, 2017 at 12:00 PM EDT

Photographer Nathaniel Dodson of Tutvid has produced a new tutorial covering the five best ways to fix skin blemishes in Photoshop. Many portrait photographers rely on Photoshop for retouching portraits and Dodson’s tips and tricks should prove useful for beginners and veterans alike.
In the tutorial below, Dodson uses Camera RAW, the spot healing brush, the healing brush, the patch tool and frequency separation techniques in Photoshop. Considering using the camera RAW filter, the first thing you should do is convert your layer to a smart object. After doing so, go to Filter > Camera RAW filter. Then use the Spot Removal tool in Camera RAW and set the type to ‘Heal’ with feather reduced to around 20, in this case Dodson uses 17. If you’re a user of Lightroom, you’ll notice that it’s very similar to how spot removal works in Lightroom. It’s a powerful tool allowing you to choose the source for healing blemishes on the skin.
Another tool is spot healing. Dodson likes to create a new layer when using spot healing in Photoshop, which he renames so he knows that it’s his blemish healing layer. Unlike the Camera RAW technique, you don’t need a sample for the spot healing brush, it is essentially an automatic healing tool just requiring you to brush over areas you want to be healed. An advantage of doing this work on its own layer is that sometimes you could decide later that you removed too many imperfections from someone’s skin. Retouching sometimes requires a subtle hand as you want your subject to still look natural. To see the other three techniques for removing skin blemishes in Photoshop, watch the video below.
To see more tutorials from Dodson, see the Tutvid YouTube channel.
(Via Fstoppers)