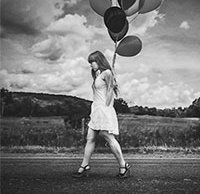
How to easily create classic-looking black and white images in Photoshop
posted Monday, December 4, 2017 at 11:30 AM EDT

Over at PiXimperfect, Unmesh Dinda has created a new video tutorial about creating "classic" black and white images in Photoshop. The first step is creating a black and white adjustment layer. That's a simple start! Once your adjustment layer has been created, Dinda suggests that you play with the various sliders. Every photograph is a bit different, so there is no one-size-fits-all approach to moving the sliders. You should move them in such a way that your focus remains on your subject.
Any slider that doesn't make a noticeable difference, leave it alone for now. Everything you do early on during the conversion process should be done solely to bring attention to your subject. When you've made your initial adjustments, you can start changing the sliders you had previously left alone. It can help to zoom in to see what subtle changes are made as you move the sliders.
When your initial conversion looks good, it's now time to make further adjustments, including a curves adjustment layer, level adjustments, vignette, simulated film grain, etc. Watch the video below to learn tons of new tricks for black and white conversions in Photoshop.
(Via PiXimperfect)