Glass for geeks: An in-depth tour of Nikon’s Hikari Glass factory
posted Tuesday, April 17, 2018 at 2:30 PM EDT
I've been on a lot of factory tours with various camera and lens manufacturers before, but had never had a chance to see how the optical glass was made that goes into the lenses we use every day. So I was really happy to receive an invite from Nikon to tour their Hikari Glass factory in Akita Japan, following the annual CP+ trade show in Yokohama this year.
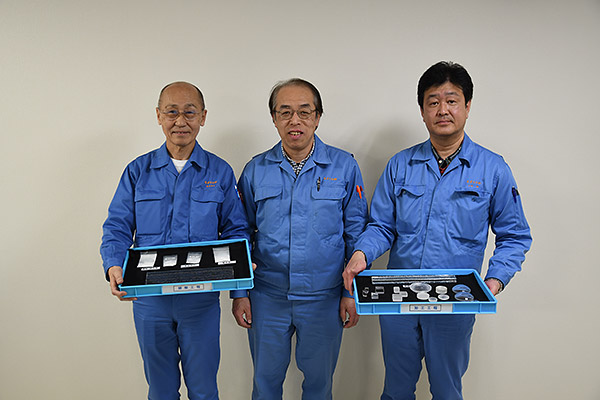
This was a pretty special tour, as we got to see the whole process, from start to finish, hosted by three of Hikari's top executives. Our hosts were Mr. Tatsuo Ishitoya, President-Director, Mr. Akio Arai, Corporate Vice President and Production General Manager, and Mr. Toshihiko Futami, Director and Management General Manager. Mr. Masaru Kobayashi, Assistant Manager of the Administration Section also accompanied us and contributed to the information we received. Arai-san is the person directly responsible for plant operations, and it was him who personally guided us on our extensive tour. All three executives briefed us before and after the tour itself.
As I said, I've been on a lot of factory tours with various manufacturers, but this qualifies as one of the most interesting ever. I'd previously had only a vague idea of how glass was made; it turns out to be a lot more involved (and more fascinating) than I'd imagined. Here's the story of our tour…

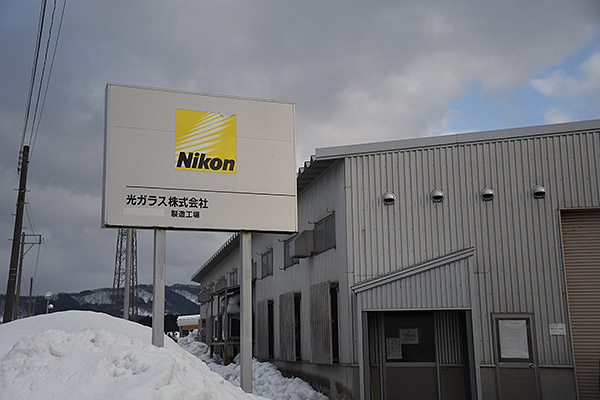
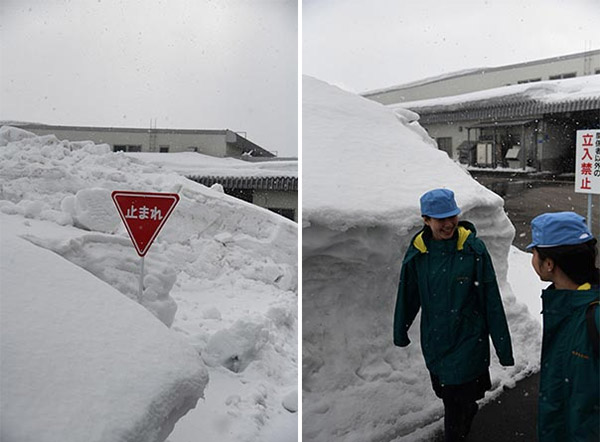
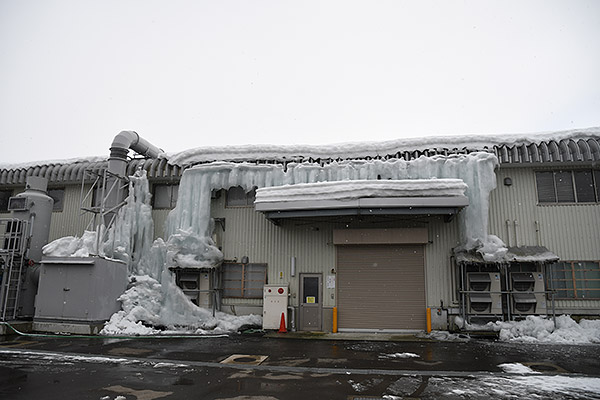
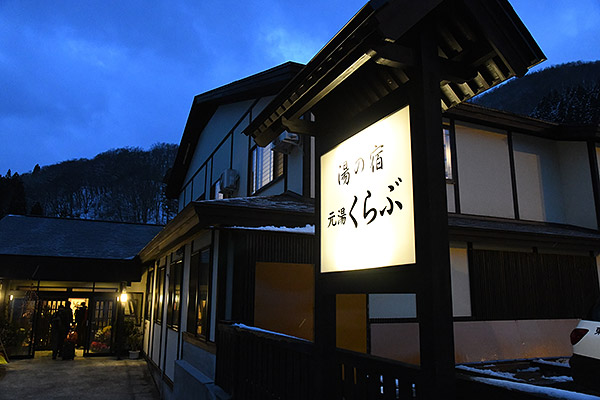
The Hikari factory is in northern Japan, in Akita Prefecture, just a little south and east of the capital city of Akita itself. Akita is on the western coast of Japan, so the prevailing winds blow for hundreds of miles across the Sea of Japan before hitting the coast, picking up a load of moisture along the way. These winds drop a lot of snow even in Akita proper, but when they hit the mountains, they really cut loose. There was a LOT of snow around the factory, and even more as we wound our way further up into the mountains, to spend the night at the very traditional Motoyu Ryokan, built over a free-flowing natural hot spring.
The basic recipe: Initial mixing and blending
Optical glass is a complex blend of ingredients, but some representative ingredients are quartz or silicon dioxide (SiO2). If you live near a beach, chances are a lot of the sand is quartz. All of Hikari's glass begins life as a blend of several basic ingredients, the main one being quartz, although Arai-san politely declined to list what they were. (He also asked that we not take photos of the area where the sacks of ingredients were piled up.)
(Deep geekery: We don't know the main components of Nikon's optical glass, but glass generally consists of SiO2, some sort of an alkali flux to lower the melting point, and stabilizers to make it insoluble in water and increase corrosion resistance. Modern glass frequently uses sodium oxide, typically added as sodium carbonate (Na2CO3) and a tiny amount of potash (K2O), added as potassium carbonate (K2CO3) for the flux. Finally, Lime (CaO) and Magnesia (MgO) are added as stabilizers, to increase corrosion resistance.)
It's important that the ingredients are blended thoroughly, which is the job of a pair of giant mixers like the one shown in the video below.
Ingredients enter the mixer from hoppers on the floor above, via the pipe you can see sticking down from the ceiling. The mixer handles batches of about 500kg at a time, or about 1,100 pounds. Once the ingredients have been delivered to the mixer, the operator sets it rotating for a fixed amount of time. The powdery mix is discharged from the bottom of the V-shaped mixing barrel into plastic bins, to be transported to the melting furnaces, in a nearby part of the facility.
First Melt
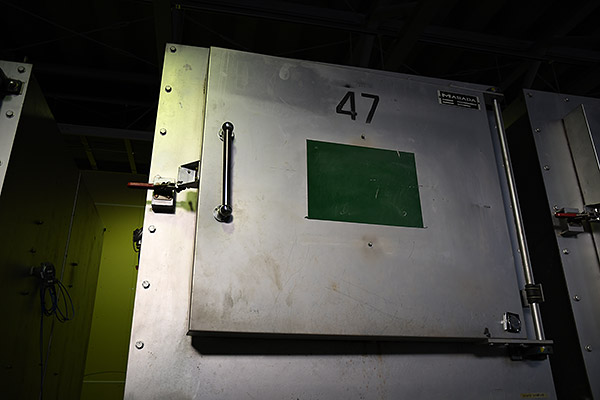
We couldn't show the furnaces used to melt the mixed powers, as some parts of them were proprietary. (It's too bad, they were pretty dramatic structures!) The furnaces were quite tall, with steps providing access to a platform for servicing the dosing mechanism.
This was interesting: I'd expected that the melting process would just consist of dumping the mixed power into a crucible of some sort, then shoving the whole thing into a furnace. It turns out that this wouldn't work very well, as the unmelted powder doesn't conduct heat very well. So a huge crucible full of it would take a long time to fully melt, working from the outside in.
Instead, they start with the crucible empty, and a mechanism drops small amounts of powder into a metal box on the end of a long mechanical arm. A hatch opens in the side of the furnace, the arm extends and the box flips upside down, to dump a small amount of powder into the hot crucible. This small amount of powder melts relatively quickly, after which the next allotment can be dropped on top of it.
In this way, the crucible gradually fills with molten glass, in a process that Arai-san said can take several hours or so.
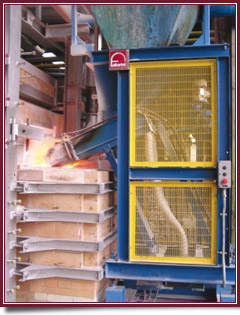
The photo on the right has nothing to do with the furnaces at Hikari Glass, but it's at least some sort of a batch charger, albeit a part of a very high-volume commercial glass production facility (the kind that makes glass for windows, auto windshields, etc). The general idea is the same; a hopper above feeds the glass mix down to the charger, where a bucket slides in and out of the furnace periodically, to deliver doses of the mix into the furnace interior.
The primary melting furnaces were fascinating contraptions, but unfortunately, we weren't allowed to take photos of them. I found out why this was probably the case, when I went looking for an illustration image to use to break up the text here: It seems to be an unusual arrangement, or at least everyone else who uses it considers their solution proprietary was well: I couldn't find a photo of a similar dosing or "charging" system anywhere, despite a lot of Google-searching. The image at right was the closest I could come.
The crucibles used for this melting process is made of fused silica, or … quartz! But wait a minute, didn't we just learn that glass is made from quartz? What keeps the quartz crucible from melting as well?
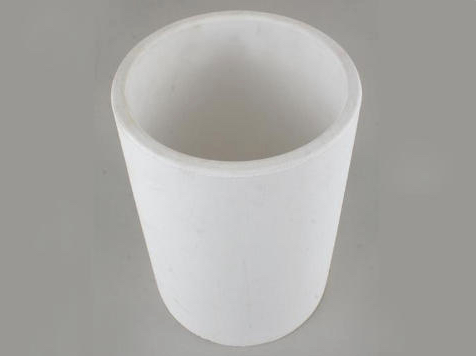
It turns out the quartz crucible does melt with each firing, but only a little bit, and the Hikari Glass engineers take this into account in their formulas for the powdery ingredient mix. They basically assume that they'll end up with a bit more quartz in their final glass than was present in the mixed powder.
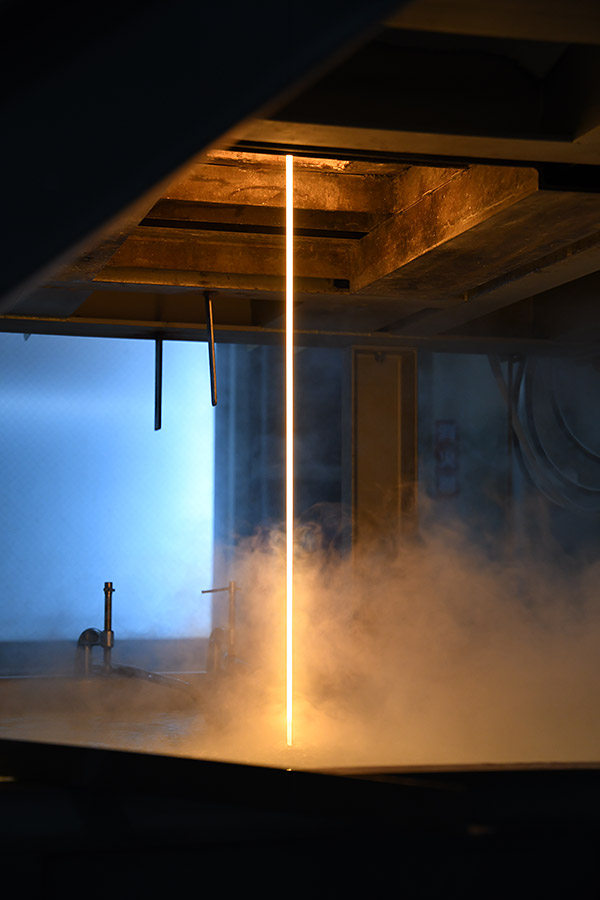
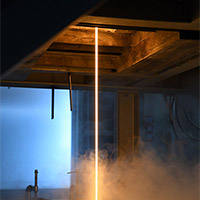
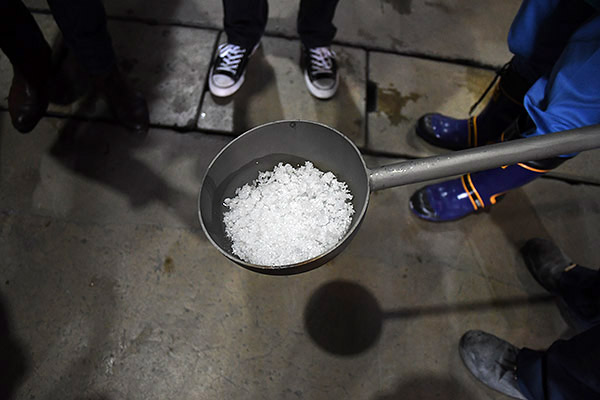
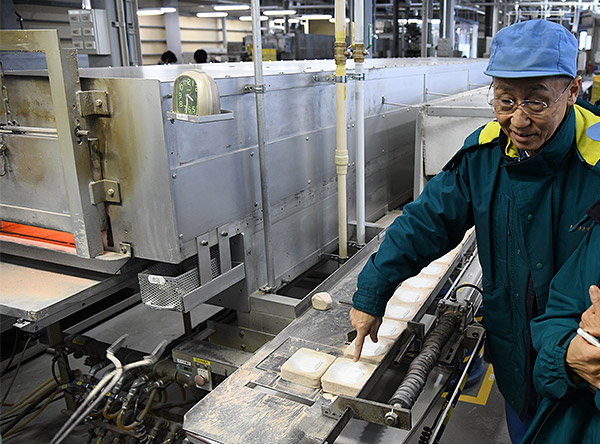
Once the batch of glass has fully melted, a worker melts a hole in the bottom of the crucible, letting the molten glass (~1200C) pour into a large water tank. (~6 x 6 x 4 feet?). Note that once he's got the glass flowing, he turns on a water jet that sprays across the stream of glass, just as it hits the water surface in the tank. This fractures the glass into tiny, snowflake-like shards, called "frit". Having the glass in the form of frit helps the next step, of homogenizing the glass that's been produced.
I always assumed that optical glass was made by just mixing together the various component, melting it, and pouring it out. It turns out though, that the composition of the glass can vary, depending on where it was in the crucible during melting. Parts that were up against the quartz crucible walls will have more SiO2 in them, and parts near the surface will have less of some more volatile components.
Something else I never knew about glass-making: Some of the compounds used have a higher vapor pressure than others at the melting temperature, so they actually evaporate away during the process. (Hence the need for the exhaust-gas scrubbing equipment shown at the beginning of this article.) So depending on the temperature cycle, you'll end up with less of some components than you initially mixed in, in parts of the melt that were near the surface.
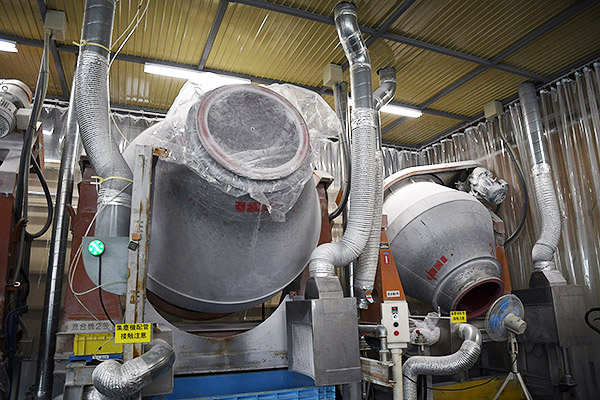
Between the crucible melting slightly each time and the evaporation of more volatile elements near the surface, there can be quite a bit of variation in frit coming from different parts of the melted glass. Consequently, after each melt is completed, the frit is tumbled for a while in a converted cement mixer, to homogenize the mix. The shot above shows two of the three huge mixers we saw in the room. (I'd estimate that the barrels were about 2 meters/6 feet in diameter.)
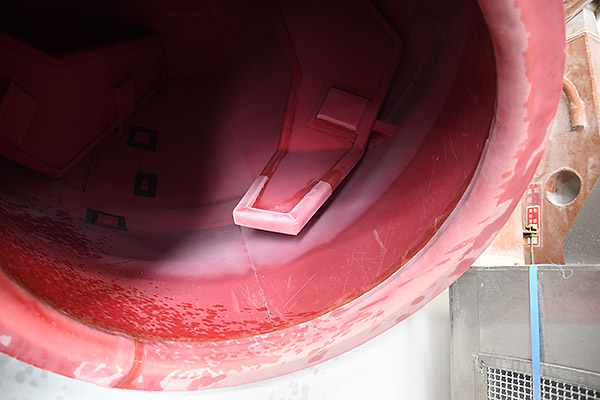
The problem with an off-the-shelf cement mixer is it has a steel barrel, and steel would contaminate the glass and change its optical properties. To avoid this, Hikari Glass fits them with thick natural-rubber liners, as shown above. Any tiny bits of rubber that abrade off into the frit mix end up burning off in the final melt so they have no effect on the glass itself.
I've shown the frit-mixing process as the next step, immediately following the melt and frit-production stage, but there's actually a step in between, where they melt a sample of the frit into a block of solid glass and measure its optical properties. Depending on where the refractive index of each batch ends up, they'll combine the output of different melts, to be able to hit the target refractive exactly on the money. (Although it occurs to me that there might be two mixing stages, one to make sure the frit from a given melt is homogenized, then a sample of it is melted and tested, after which frit from different batches is mixed together before the final melt.
Once the frit has been made and blended, it's time for the final or fine melt. The details of this are very proprietary, as it's the key to obtaining uniform, defect-free optical glass. Arai-san explained that every company makes its own final melting furnaces, and the details of them are very proprietary.
Unlike the initial melt, the final melt is done in platinum(!) crucibles. These must be extremely expensive, although the batch sizes for final melts are usually somewhat smaller than the initial melt. Still, a platinum crucible able to hold a couple hundred kilograms of molten glass must be a pretty pricey item! (In practice, I think they're platinum-lined rather than solid platinum. Still, they must be very costly!)
The reason they use platinum crucibles for the final melt is because the platinum won't dissolve into the molten glass and change its characteristics, the way the fused-silica crucibles do that are used for the initial melting.
Despite the use of platinum-lined crucibles, though, the composition of the glass will still change slightly due to the evaporation of some of its components, especially in the central, higher-temperature part of the furnace (see below). So this has to be taken into account, and the mixture adjusted to get the right final result.
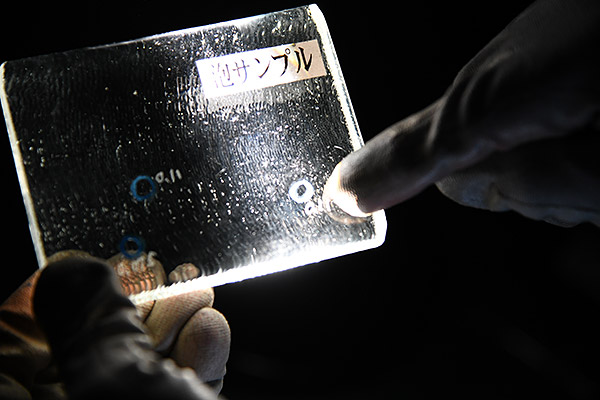
Bubbles are trouble
One trick in final melting is making sure there are no bubbles in the glass as it's cast into its final form. A bubble in the middle of a lens element would obviously be a problem, so great care is taken to eliminate them.
I was curious how they did this. I thought they might perhaps use a vacuum furnace, so any bubbles would expand and come to the surface. The actual solution is a bit more clever than that, taking advantage of the natural properties of hot glass.
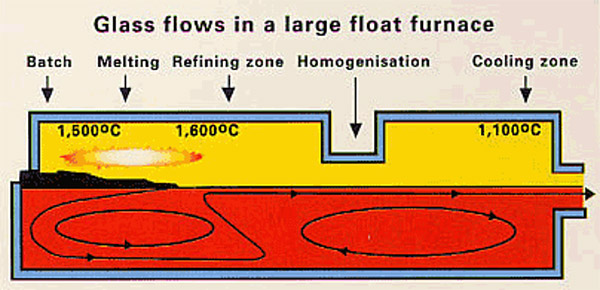
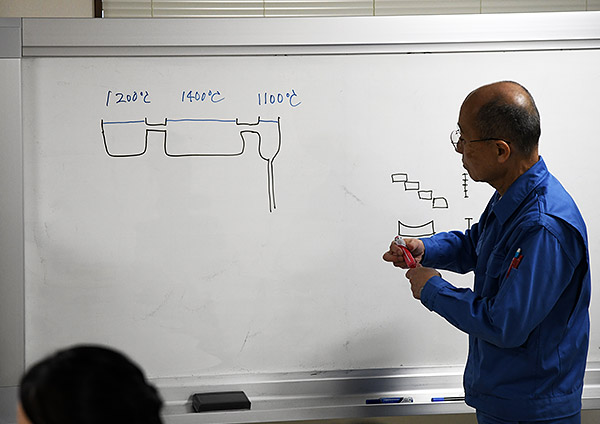
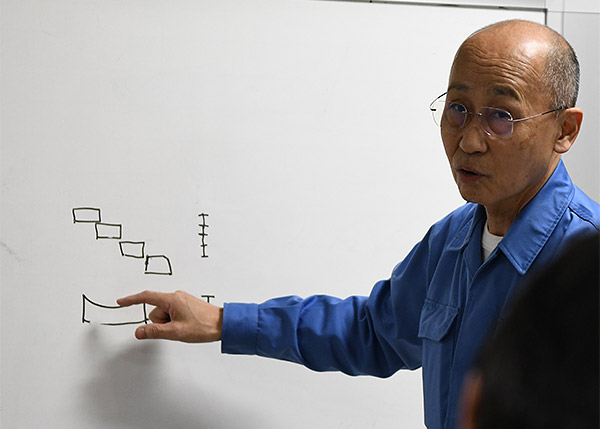
It turns out that air and other gases dissolve in hot glass, in much the same way that air dissolves in water (which is why fish can breathe underwater; they rely on the dissolved oxygen). As with water, cooler molten glass can hold more dissolved gas than hotter glass can. Hikari Glass takes advantage of this fact to eliminate dissolved gas, with a three-zone temperature profile in their final melting furnace.
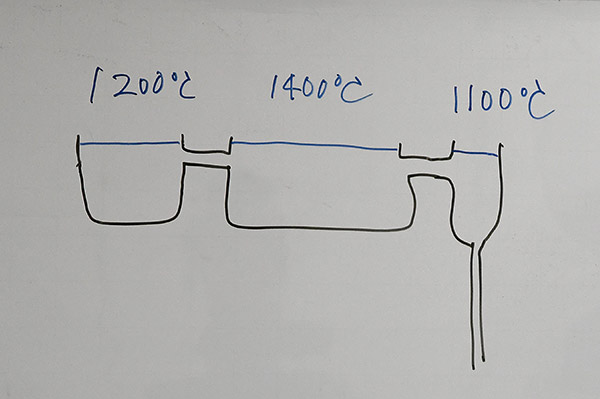
The setup is shown above in the rough diagram Arai-san has drawn on the whiteboard. The temperatures shown aren't the ones Hikari Glass actually uses, but they serve to illustrate the concepts involved. On the left, glass is initially melted in an input chamber to a temperature of about 1,200C, a similar temperature to that in the first melting crucible we talked about earlier. From there, the glass flows to a second chamber, held at ~1,400C. Because it is so much hotter, dissolved gas is driven out of the glass, into the surrounding atmosphere. Passing out of the high-temperature chamber, the glass flows into a final crucible that's held at ~1,100C. At this cooler temperature, any bubbles left in the melt from the higher-temperature chamber are dissolved back into the glass, leaving behind perfectly clear, bubble-free glass that's drained from the bottom of the crucible onto the continuous casting conveyor.
As we'll see, the process isn't 100% perfect, because some bubbles and other defects still make it through, and are caught by a subsequent visual inspection.
Casting
The final casting process is pretty amazing; the glass flows very slowly from the bottom of the final melting crucible onto a conveyor belt in a long, long oven, where it's gradually cooled. The casting process is continuous, lasting until the batch of glass in the final melting furnace is exhausted. Arai-san was deliberately vague about specific details of the final casting process, as it is heavily proprietary.
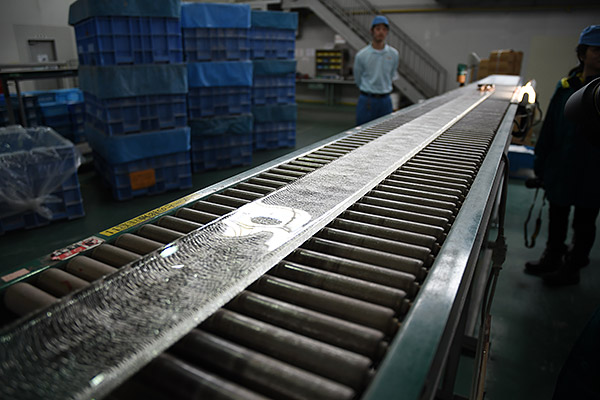
The glass is cast into ribbons of different widths and thicknesses, depending on the size of the lenses it will eventually be made into. We saw samples from ribbons that ranged from perhaps 125-150mm across and 15mm thick, down to maybe a 50mm across and 6-8mm thick.
At the end of the cooling tunnel, the glass ribbons very slowly inch along, propelled by an open-grid metal conveyor belt. When I asked how long it takes to complete the casting for one batch of glass, I was amazed to hear that it can take anywhere from a couple of days to a full month(!)
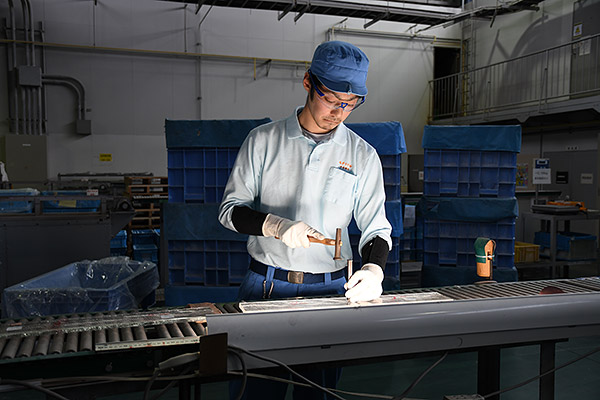
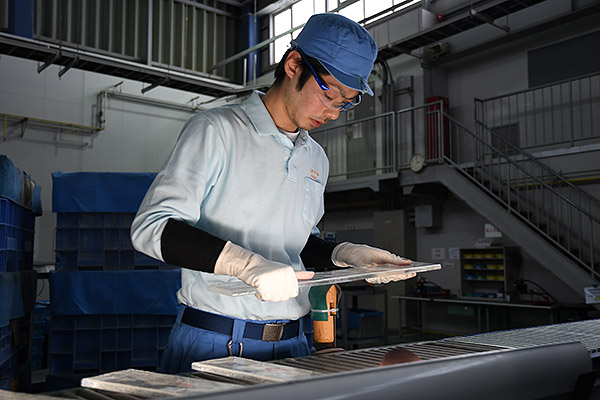
Visual inspection for defects
After the strips of glass come off the casting line, they're inspected visually for defects. This step involves checks for two different types of defect; bubbles and inhomogeneities.
The other thing to watch out for in optical glass is inhomogenieties caused by changes in the refractive index, resulting from the evaporation of component substances during the high-temperature portion of the three-step thermal processing used to eliminate gas bubbles. (Actually, evaporation occurs in all three thermal stages, but it is obviously most severe at the highest temperature. As mentioned earlier, parts of the melt close to the surface can become depleted of the more volatile components, and if that sort of glass makes its way to the final casting, its refractive index will be different than the rest. (Arai-san didn't give any but the most basic details of the final melting process, for obvious reasons of proprietary information, but I assume there must be some sort of mixing taking place within the three crucibles involved in the final-melt furnace. If the glass wasn't mixed, I would think there'd be a lot of homogeneity problems, or they'd have to waste a good portion of each melt, to avoid parts that had lost too much of their volatile components to evaporation.)
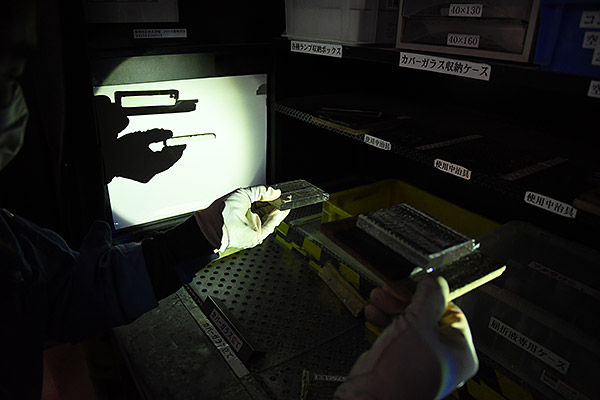
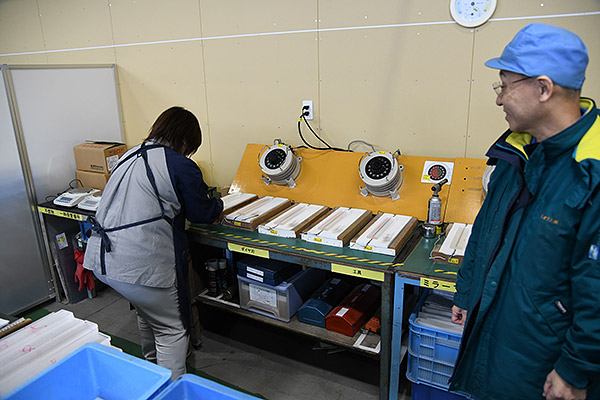
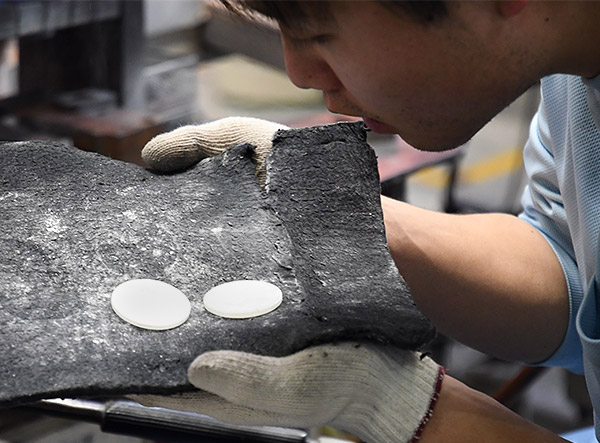
In the visual inspection, inhomogeneities are found by projecting light through the glass ingot onto a screen, and observing the light/dark patterns as the sample is rotated slightly about its long axis. The telltale optical artifacts are pretty subtle, so we cropped the image and radically adjusted the tone curve to highlight them. You can see the "striae" that the technician is looking for in the image above, as light/dark horizontal lines.
I asked whether glass ingots containing defects could be recycled by re-melting them, and was told that it depends on the type of glass involved. Some can be recycled, but my impression was that most could not. (I wonder if Hikari Glass could earn some additional revenue by selling rejected slabs of glass? I'd certainly pay a fair amount to have one as a keepsake/conversation-starter on my desk!)
Refractive index and light-transmission measurement
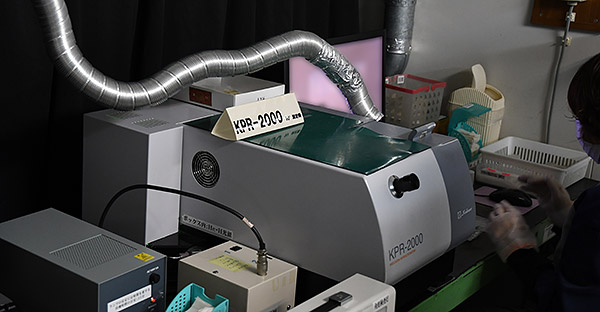
It's probably become clear from the preceding that refractive index is a key parameter that's controlled very precisely. It's no surprise then that it would be measured at various points throughout the production process. There's a separate room with precision optical instruments in it that measure both refractive index and optical transmission (how transparent the glass is).
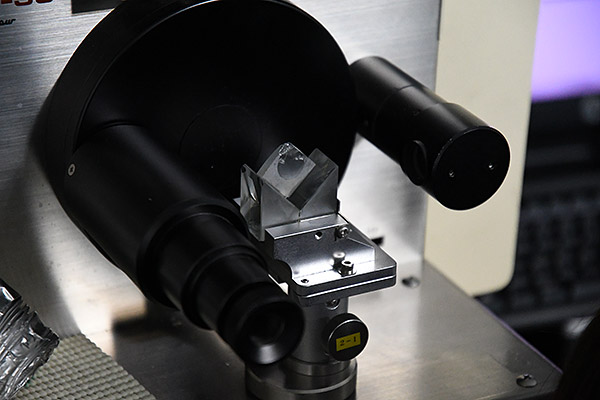
There were two different machines used for measuring refractive index, one somewhat more sophisticated than the other. Both bounce light through a square block of glass, and read-out the refractive index, but one of them measures refractive index at a single wavelength, while the other measures refractive index at several different wavelengths, to also measure dispersion. These refractive-index measurements are performed on small test blocks melted directly from the raw frit we saw earlier, as well as on blocks cut from the continuously-cast glass slabs. The final check on refractive index is performed after the annealing step (see below), to make sure it precisely matches specifications.
Light transmission measurement
In the same room with the two refractive index measurement instruments was another one that measured light transmission. I'm not sure what would cause glass to pass more or less light, but it's obviously an important parameter. The transmission-measuring instrument was just a large grey metal box, but there were three sets of glass samples sitting on top of it for us to see.
The problem with measuring light transmission is that light reflects off the surfaces of the glass you're trying to evaluate. And it's not just the front surface, where the light first strikes the glass; it'll reflect internally from the back surface, some of the internally reflected light will then bounce back off the front surface, etc, etc. When you're looking for very small differences in light transmission, any reflection will disturb the measurement.
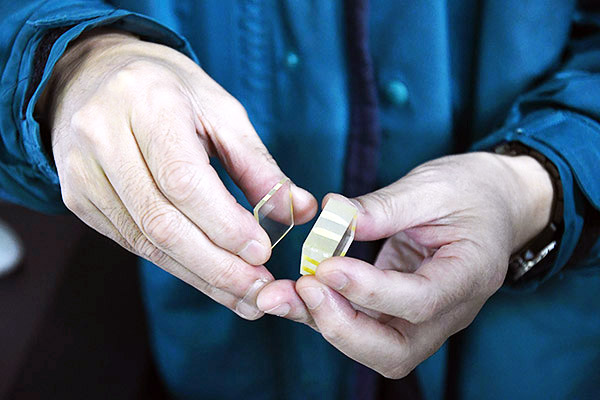
The solution turns out to be pretty simple: Just prepare two identical pieces of glass, differing only in their thickness, and measure them both. The surface reflections will be the same between the two samples, so any differences in transmission will be due to the difference in thickness between them.
Cutting into "dice"
After the continuously-cast slabs of glass come off the line and are quality-checked, they're cut into chunks before being pre-formed into lens shapes. This was another surprise for me, in that the glass is fractured, rather than being cut.
The first step is to split the glass ingots in two lengthwise. (At last I assume they're always split just into two halves, as that's what we saw being done. I guess it's possible larger slabs might be split into thirds, but it looked like the slabs were always sized laterally to be twice the width needed for the final preforms.)
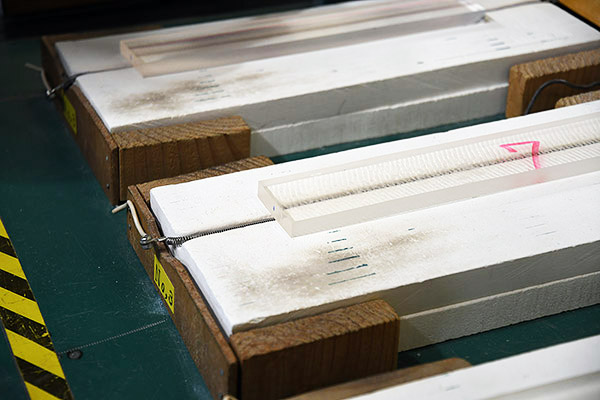
The lengthwise splitting was done using thermal shock. The slabs of glass were laid on some sort of temperature-tolerant substrate, with a coil of nichrome resistance wire running along a slot in the middle. The slabs of glass rested over this coil for a matter of a couple of minutes, until the heat from it had had time to work through the thickness of the glass immediately above it. The worker would then just touch one end of the piece of glass with what looked like a pointed wooden stick that had been dipped in water. The sudden shock from contacting the tip of the cool stick would make the glass crack at that end, the crack instantly propagating down the length of the slab. It happened in the blink of an eye, producing smooth, straight edges every time.
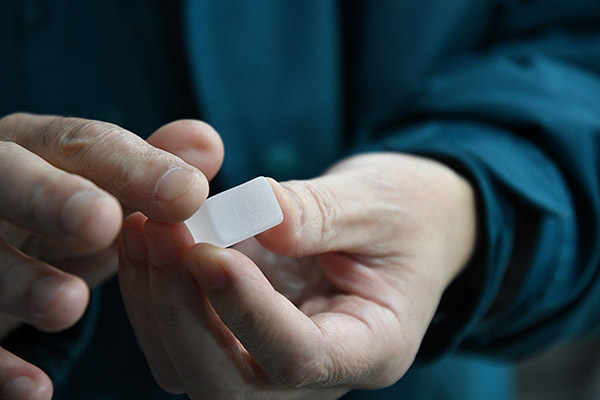
Once the glass ingots had been split in two, each half was chopped up into little chunks or "dice", each approximately the right size to create a lens preform.
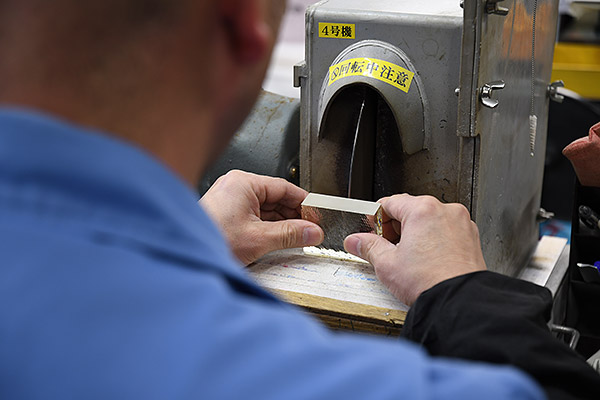
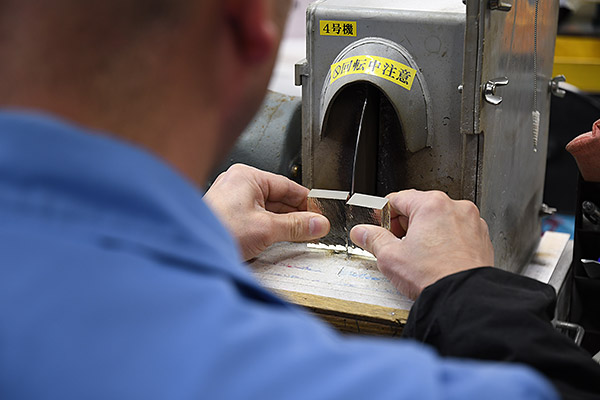
Here again, the chopping process was incredibly efficient, and relied on thermal shock to do the work. What looked like saw blades that the workers pressed the strips of glass against were actually smooth steel disks, with no teeth or abrasive on them at all. (Arai-san demonstrated how harmless they were by holding his hand against the edge of a "blade" while it was spinning.)
The video clip above shows a worker chopping the longer strips of glass into dice. It was interesting to watch, you could tell the moment that the fracture first formed, as a little line would suddenly become visible inside the block of glass, and the sound of the blade against the glass would change slightly. Very shortly after, the glass would split cleanly into two pieces.
Rather than using abrasive to cut the glass, pressure against the spinning steel disk produced heat from friction, concentrated at the point of contact. Thermal expansion of the glass in that immediate area resulted in a crack that then propagated almost instantly through the thickness of the block. As you can see in the video above, the process was pretty quick, with no kerf loss, powdered glass or expensive diamond blades required.
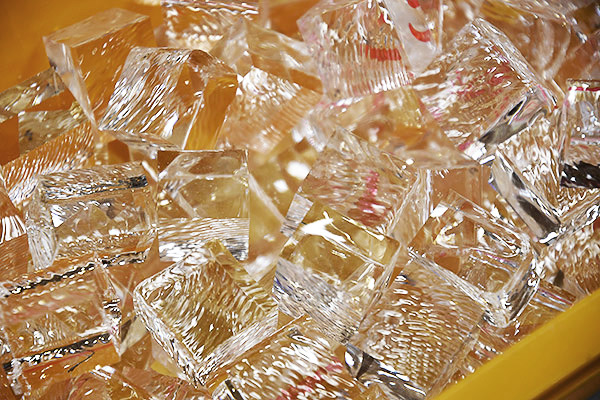
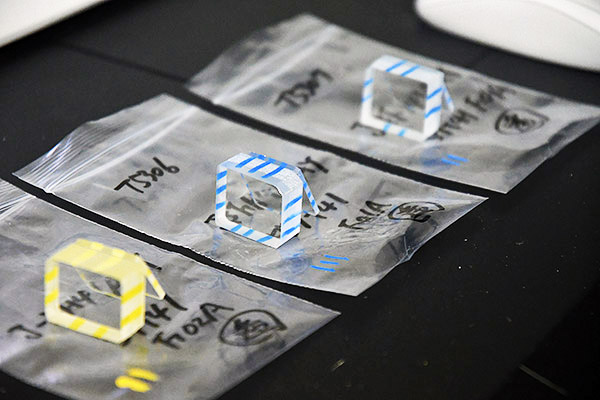
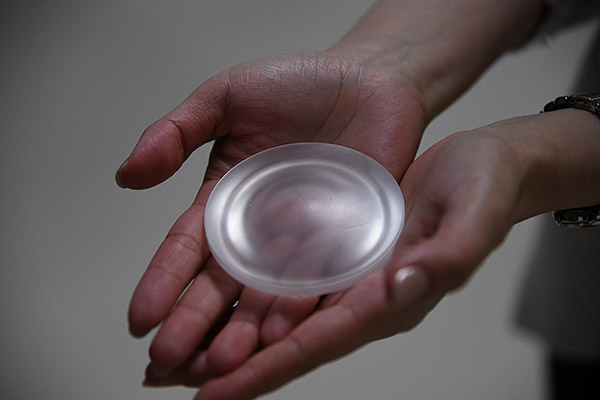
The little glass "dice" sparkled in their trays, thanks to their high refractive index. (The lead glass or "crystal" used in fine-dining glasses and chandeliers sparkles as it does because its high index of refraction bends light more, resulting in more internal reflections. The very high refractive index of cubic zirconia is why that gem sparkles so intensely as well. In fact, the too-high "fire" of CZ relative to diamonds is one give-away that this popular diamond substitute isn't the real thing.)
Weight-adjusting and rounding
While thermal and friction-cutting are very efficient, there's some variation, due both to the manual procedures involved, and slight variations in the width and thickness of the original glass ingots.
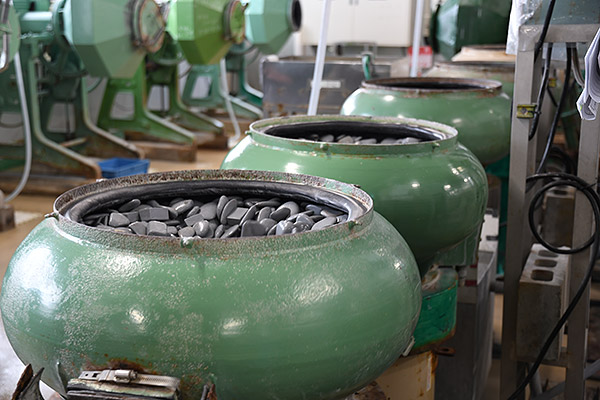
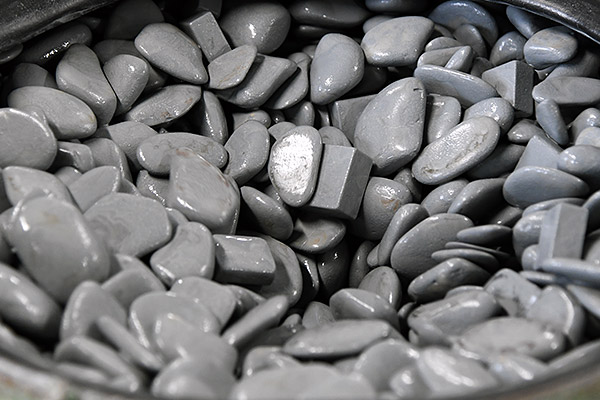
The final lens preforms have to be held to a fairly close weight tolerance, though, so there's a weight-adjusting step between cutting and pre-forming. This is done by grinding the glass dice in large tumblers, filled with smooth rocks, abrasive and a little water. The video above shows a large vibratory tumbler at work, performing this operation. As its name suggests, a vibratory tumbler uses vibration to grind its contents against each other, with the abrasive grit gradually abrading away the work pieces. These were pretty big units, with barrels that I'd estimate to be 2-3 feet (~70-100cm) across, and perhaps a foot (~30cm) deep. The smooth rocks that seemingly fill the barrel are just there to carry the grit and rub up against the optical glass dice that are being ground down.
Most of the tumblers being used were the vibratory types shown above. There were a number of smaller ones that we don't have pictures of, that were the more conventional rolling-drum type familiar to rockhounds, often used by hobbyists to smooth and polish colored glass, agates and semi-precious gemstones. (I had a couple of smaller versions of these as a boy, and have a tin of polished amethyst, quartz, jade and tigereye somewhere in the piles of detritus stashed in my basement. Vibratory tumblers were available even then, and were way faster than the drum-type ones that I had, but were priced way beyond my budget.)
Arai-san told us that this tumbling process was used to adjust the weight of the dice prior to preforming, but I didn't see how just tumbling a bunch of glass dice together would work to homogenize their weights. As I suspected, it turned out that the dice are pre-sorted into weight groups. The heaviest group is loaded into the tumbler first, and once the average weight has reached that of the next-lighter group, that group is added. This process continues until all four weight groups have been added, and the lot of them reduced in weight to bring them within the final size tolerance.
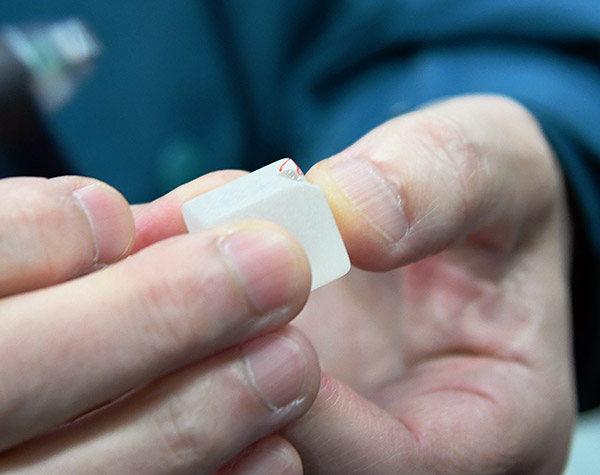
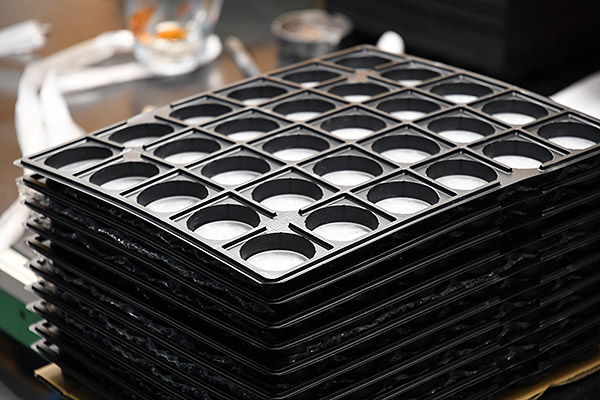
Post-tumbling QC and repair
The smoothed dice are visually inspected after tumbling, to check for defects. It seems that common faults are chips, where a small fracture along an edge resulted in a chunk flaking out of the die. Provided the defects aren't too large, some of these chipped dice can be recovered by grinding-out the edges of the chip, as shown in the shot below. (I'd think that this would result in the die involved ending up under-weight, but perhaps there's enough slack in the tolerance that this sort of post-facto repair can still be applied.)
Preforming
Optical glass is delivered to lens companies as "preforms", chunks of glass having the general shape of the lenses they're to become. Without thinking much about it, I'd always just assumed that these preforms were made from rectangular chunks of glass by rough-grinding them.
Of course this is a glass factory, though, whose stock in trade is molten glass. So the preforms are of course made by pressing heated, softened glass into rough molds. (I mean duh, right?)
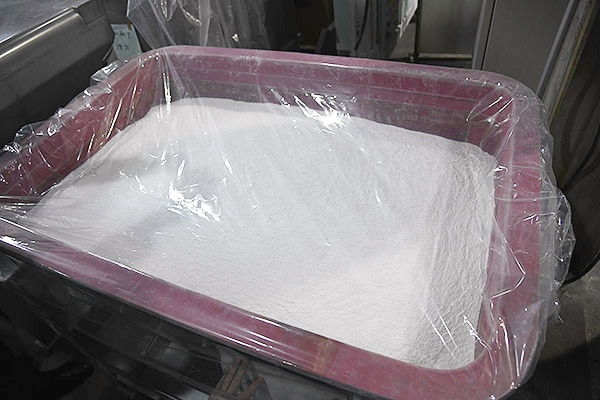
To keep the optical glass from sticking to the preforming molds, it's first coated with fine boron nitride powder. As you'd expect, this is a dusty operation, as the BN powder seemed to be about the consistency of coarse flour. The floor all around this area was a little slippery, thanks to a thin film of the powder that was ground into the cement. (They obviously kept it well-swept, but the powder settled into the fine pores of the concrete itself, making for a slick surface.
Soft glass can be kind of sticky, though, easily attaching itself to molds or tools. To prevent this from happening, the smoothed dice are covered with boron nitride powder, which acts as a mold release agent. Since preforming is carried out at a relatively low temperature (the glass is only soft, not molten), the BN doesn't contaminate the glass, and the outer layer containing it is ground away in the first stage of lens grinding.
Preform-pressing is done either automatically, by machines, or manually. Since the volume of finished preforms is made in Akita itself is lower than in the sister factory in China, most of the forming done there is manual. (Operational details of the one automated pressing machine we saw working while we were there apparently involved proprietary elements, so we weren't allowed to photograph the machine in operation.)
The preform pressing process was a closely-orchestrated dance between teams of either two or three workers. There's apparently some skill involved on the part of the press operator, who needs to judge how long to press each blank, depending on visual cues and monitoring the press operation itself.
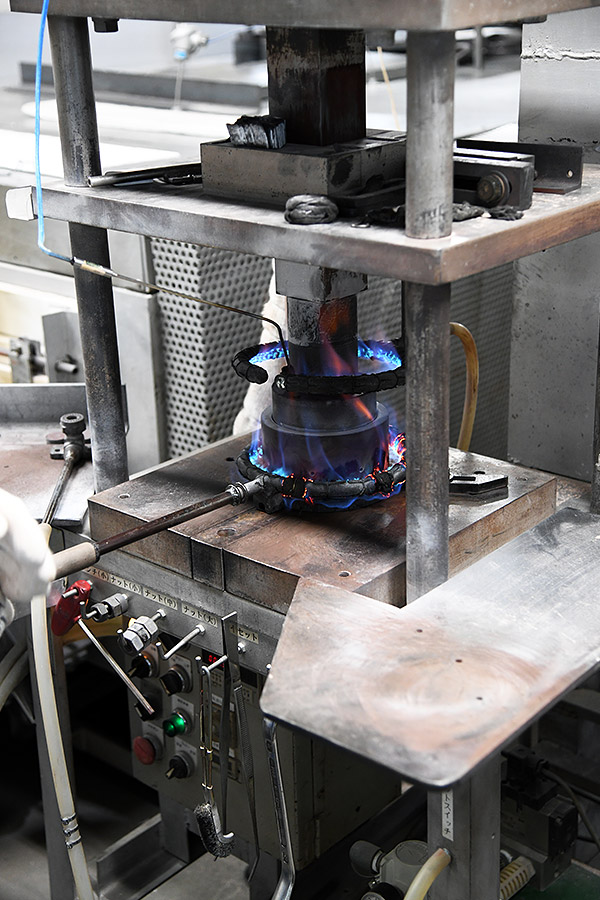
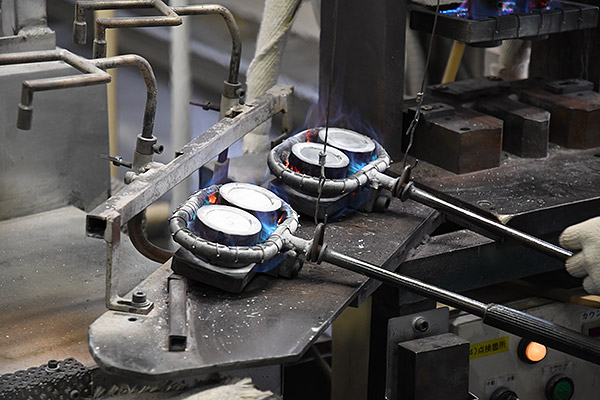
As seen in the video above, the manual-pressing operation evoked images of early-industrial metal foundries or the like: Dull-red chunks of glass were flopped into a mold/carrier, and pressed by a pneumatic ram, which was surrounded by gas flames to keep it hot.
Glass dice are placed in ceramic carriers, that cycle up and through a long heat-treating furnace. They exit glowing a dull red and are visibly soft and pliable as they're dumped into the bottom half of the mold. One worker pulls each softened die from the furnace and dumps it into a mold held by a second worker, who then places it beneath the heated ram, hits a treadle switch to trigger the ram, and then waits a little while, the duration determined by visual cues he's learned to judge, based on years of experience.
I asked Arai-san how the press-operator knew how long to apply the forming pressure, and he replied that there were three factors: 1) the softness of the glass, based on its appearance, 2) how the glass feels while pressing it, and 3) how the glass feels when it drops from the mold. I can imagine that it takes a lot of experience, to be able to take all these cues into account, to produce perfectly-pressed preforms!
Once the appropriate amount of time has passed, the press-operator triggers the ram's retraction, removes the now-preformed lens element and transfers it to a third operator. From there, it seems it briefly goes into an intermediate-temperature furnace, to relieve the worst of its internal stresses, then is transferred to another, longer-cycle oven, where it's gradually cooled to room temperature.
Annealing
In metallurgy, "annealing" generally refers to a thermal process that reverses the effects of hardening. Annealing can also mean a process that relieves internal stresses caused by too-rapid cooling.

In optical glass manufacturing, though, annealing has a much different purpose, namely adjusting the refractive index. (Stress-relief is important as well, but that would occur with much shorter cooling cycles. The most important function of annealing is to change the refractive index.)
This was the first time that I'd heard that refractive index could be adjusted by thermal processing, so I asked Arai-san how it works. He deferred the question until we could be back in the conference room, with a whiteboard available for him to diagram the process for me.
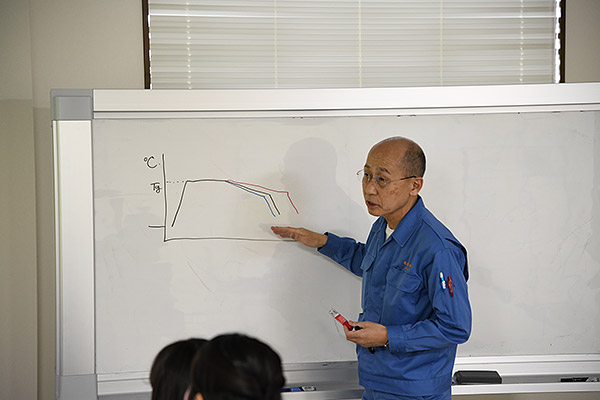
In an annealing cycle, the preforms are heated to Tg, held at that temperature for some period of time, and then slowly cooled to some temperature beyond which no further changes in optical characteristics would occur. During this process, the refractive index will change, depending on how quickly or slowly the cooling occurs. The density of the glass is the ultimate controlling factor, and different cooling cycles affect the refractive index because of the influence they exert on density. Slower/longer cooling cycles result in more dense, higher refractive-index glass, while faster/shorter ones produce less-dense, lower refractive-index glass. The annealing cycle needed for each batch of glass is determined by the refractive-index measurements made after the melting process.
It's not clear to me just why slower cooling cycles result in greater density; the details of that were beyond the scope of questions I was able to ask during the tour.
Take it as given, though, that slower cooling = higher refractive index, and that annealing gives Hikari Glass very fine-grained control over refractive index.
OK, so much about refractive index, but what about dispersion?
I was struck by how much emphasis was placed on fine-tuning refractive index, and how little discussion we had about dispersion. When I asked later, it turned out that this was because dispersion is a much more complicated topic, and a full discussion of it wouldn't remotely have fit in the time we had. (Especially given how many questions I ask ;-)
Dispersion refers to how much the refractive index varies based on color/wavelength. Dispersion is why a prism projects a rainbow from white light; all else being equal, high dispersion means you'll get a very wide rainbow, low dispersion means you'll see a much narrower rainbow. So-called "ED" glass is characterized by low dispersion.
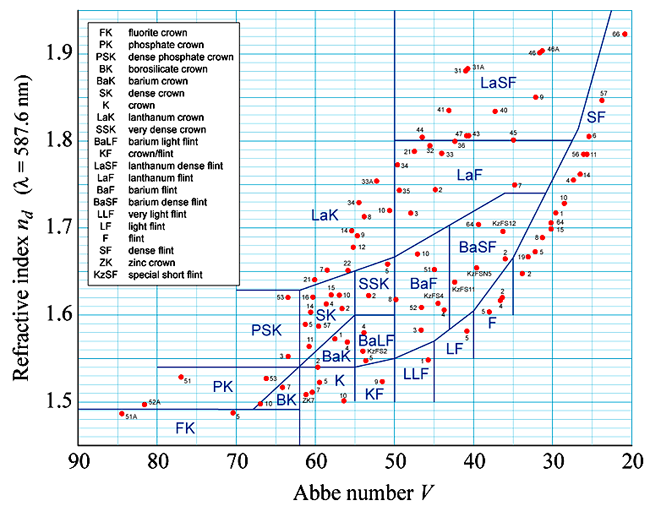
The image above shows the standard graph of Abbe number (a measure of dispersion, the thing that makes ED glass "ED") vs. refractive index that will be immediately familiar to any optical engineer. As you can see, there are a lot of different glass types, and this only shows the major categories! As an interesting side note, the general shape of this diagram calls to mind the shape of the Japanese archipelago, so Japanese optical engineers will often refer to a type of glass as a region of Japan. For instance, if an engineer is looking for a glass with low Abbe number but high refractive index (the extreme upper right of the diagram), they'd say they're looking for a "Hokkaido" glass. (Hokkaido is Japan's northernmost island.) On the other hand, a glass from the lower left-hand side of the diagram would be referred to as a "Nagasaki" glass. (Nagasaki is the capital of Kyushu province, and located at the far southwestern tip of Japan.)
When I asked about dispersion, it sounded like it's a fairly basic quality, affected only slightly by process variations. Apparently, dispersion is somehow set by the overall mix of components in the glass recipe, while the overall refractive index is subject to fine-tuning, by mixing different batches of frit, or (seemingly more routinely) by adjusting the annealing cycle. As noted above though, even a basic understanding of how dispersion is controlled would have required far more discussion than we had time for.
(Dispersion really does seem like a very deep subject, I wasn't able to find much in Google searches beyond dozens upon dozens of pages with the same basic description of what it is, vs how different glass ingredients affect it. I'd really like to learn about it and write up an article on it at some point; maybe I can convince a glass engineer to teach me about it, on another visit to Japan someday ;-)
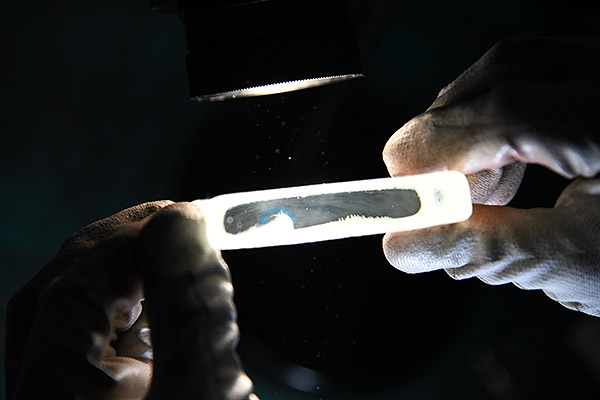
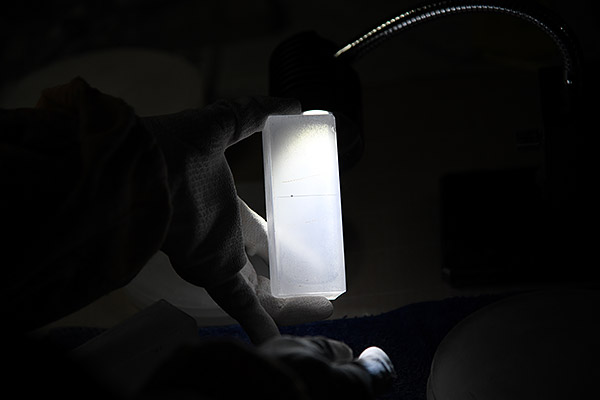
Visual preform QC inspection
After pressing, the lens preforms go through a visual inspection. Using a bright light in fairly dark surroundings, the workers look for any chips, cracks or other flaws. The shot below shows a preform for a binocular prism that has a crack on one side of it. (Hikari makes optical glass for all Nikon products. Camera lenses are a big part of that, but they also make glass for everything from huge semiconductor stepper lenses to microscope lenses to prisms for binoculars.)
Packing and shipping
At the end of the whole process, the finished preforms are packed for shipment to Nikon lens factories. It's a long, complex and fascinating process (at least if you're techno-geeks like us), and very impressive that Nikon maintains this entire operation, just to satisfy their internal needs for optical glass. (Or at least 90% to satisfy their internal needs; as mentioned earlier, 10% of Hikari's output is sold on to other manufacturers.)
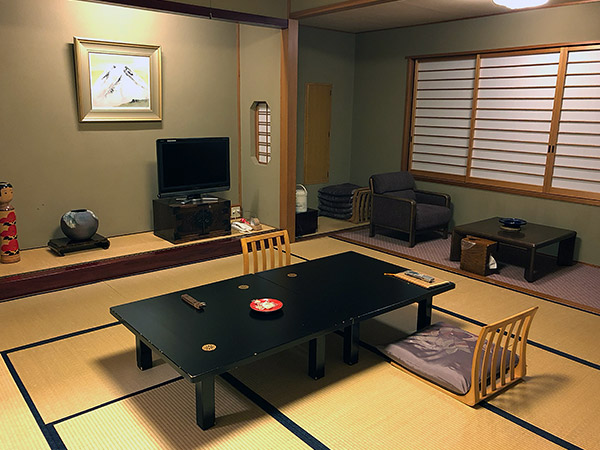
Epilogue: Motoyu Ryokan
It was a really long day by the time we were done; we'd departed from Tokyo's Haneda Airport fairly early in the morning (at least for a jet-lagged night owl like me), and it was a pretty intense day of asking questions and absorbing information. So we were pretty happy to roll into our overnight digs that evening, especially since it was a pretty long bus ride to get there from the Hikari factory.
Japan is on the Pacific "Rim of Fire", and many of its mountains are of relatively recent volcanic origin. (Recent in geologic terms, at least.) So there's a lot of magma close to the surface in many places, and hence a lot of natural hot springs as well. So Onsen (hot spring spas) are a significant cultural thing there, and a lot of ryokan (traditional Japanese inns) are built around them. This was probably the fourth or fifth time I've stayed in a traditional ryokan (yes, I'm truly fortunate, and realize it :-), but this was a particularly nice one. I don't know its history, but it's apparently a pretty well-known one, and as always was a great experience.
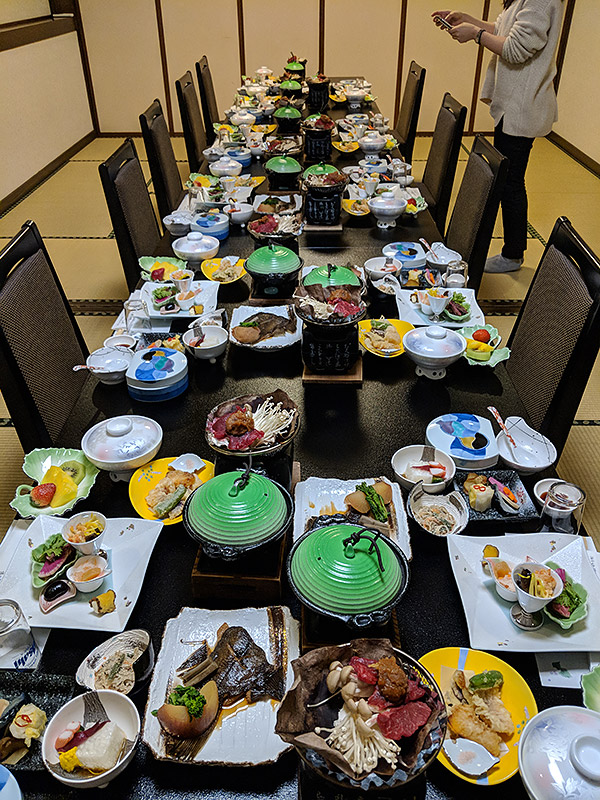
Although I don't have many photos to show from the dinner that evening, it was an unusually lavish affair, with more than a dozen little courses/small plates, all delivered more or less simultaneously to the table. We also had some of the best sake that I've ever tasted. The best was a "raw" sake, meaning it still had live yeast in it. It was one of the tastiest liquids I've ever put in my mouth, and I so wanted to bring a couple of bottles home with me. Unfortunately, though, the live yeast meant that it had to be drunk within a week or so of its manufacture, so it would have been past its prime before I even left Japan. (And I had a series of meetings scheduled for a full week following our visit to Akita, so even with my prodigious sake capacity, I wouldn't have been able to do justice to it from my hotel room in Shibuya :-/ )
All in all, our tour of Nikon's Hikari glass factory was an extraordinary experience. As I said at the beginning, it was easily one of the most interesting factory tours I've been on, and that covers a lot of ground. It was certainly a tour in which I learned an incredible amount, about things that I had no knowledge of previously.
Nikon obviously wanted us to draw from the experience the impression that they have a unique ability among camera manufacturers, in that they exercise an unparalleled amount of control over the quality of the most basic material that goes into their lenses, namely the glass itself. Even allowing for the obvious PR intent for the trip, though, we came away very impressed with just that: Nikon really does have a unique ability to control their own destiny and optical designs, all the way from the raw materials to their finished lenses.
Entirely apart from the intended PR message, this was a remarkably informative tour, that left us knowing far more than we did before it began. Many thanks to Nikon Tokyo and Hikari Glass for their hospitality and patience, in answering all our many (many!) questions!
Thanks for reading! See more of our recent factory tours by clicking here.