Video: Everything you need to know about capturing the northern lights
posted Friday, March 4, 2022 at 4:00 PM EDT
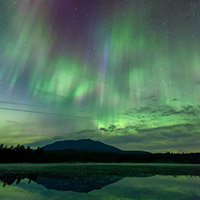
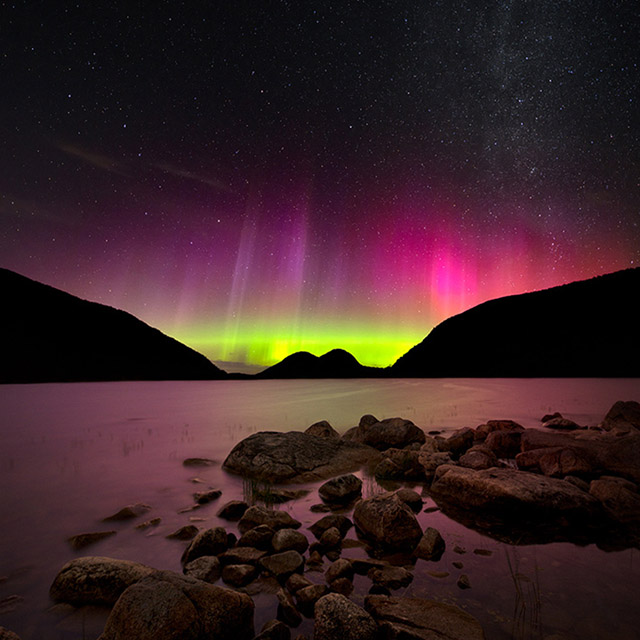
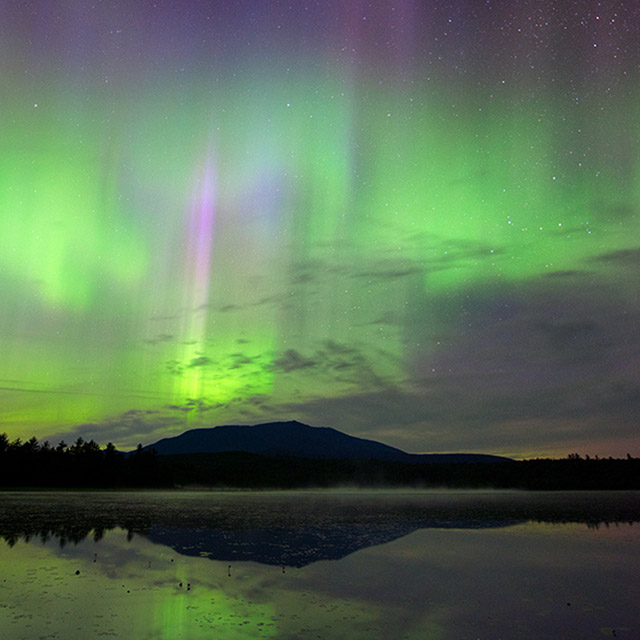
Capturing beautiful photos of the northern lights, also known as the aurora borealis, is tricky. The first challenge is that the phenomenon is rare, especially if you're not located at extreme latitudes. Even if you're lucky enough to witness northern lights, capturing night photos is notoriously difficult. However, there are plenty of steps you can take to improve your odds and ensure that if you're able to witness northern lights for yourself, you'll come home with fantastic photos. Photographer David Swindler joined the B&H Event Space to discuss everything you need to know to give yourself the best opportunity to capture images of the northern lights. While the discussion is about northern lights, the tips also apply to the southern lights, or aurora australis.
In the presentation below, Swindler starts by explaining what causes aurora borealis. There's a lot of great detail in the video below, but the summary version is that the phenomenon is caused by solar activity. Some particles can escape the gravitational pull of the Sun; depending upon the magnitude of solar activity, these particles escape faster or slower. This is known as solar wind.
Solar activity correlates to sunspots. More sunspots typically result in increased activity, which means more and faster solar wind. The solar wind can take about three days to reach Earth. When the particles arrive, they slam into the Earth's upper atmosphere, or ionosphere. The Earth's magnetic field mostly protects us, but this field is weaker at the poles, and the particles in the solar wind are directed toward the poles. The particles interact with our atmosphere and can cause beautiful interactions, which can be seen as the northern (or southern) lights when it's dark enough. The chemical composition of the atmosphere determines the colors.
The best time for viewing auroral displays is near the vernal and autumnal equinoxes, as these months are when the interplanetary magnetic fields are best aligned, allowing more particles to enter the atmosphere. This means that the best time is from February through April and August through October. You can, of course, see aurorae at other times. No matter what time of year it is, you will need dark skies to see the northern lights. It can be photographed with a bright moon, but it will be difficult to see the display with the naked eye unless it's very dark. You should also be in a location with minimal light pollution.
Your latitude also significantly affects your ability to see aurorae. If you are near the poles, you can see beautiful displays even when activity is minor. However, the further you get from the poles, the less likely you are to see auroral displays unless they are powerful. For example, if you're in New York, you may not be able to see the impact of a moderate geomagnetic storm, whereas the sky could be lit up in northern Quebec. You can learn more about the odds of seeing different auroral displays in your location by checking out this article by the Space Weather Prediction Center, a department of the National Oceanic and Atmospheric Administration.
There's so much excellent detail about understanding and forecasting the aurora borealis in the presentation above, but let's move on to camera gear and settings. What kind of camera do you need to photograph the northern lights? Fortunately, you don't need a super expensive camera. Does a camera with a larger sensor and better low-light capabilities help when doing night photography? Absolutely. However, you can capture great shots with Micro Four Thirds, APS-C and full-frame camera systems.
On the other hand, the same cannot be said for lenses. Good glass is critically important, and some lenses will significantly limit your night photography. You want a wide-angle lens with a fast maximum aperture. You will also need to use manual focus, so a lens that's easy to focus to infinity is a plus. There are too many great night sky photography lenses to list, but you will primarily want something that is F2.8 or faster and likely between 12mm and 30mm in length.
Getting the right shutter speed for your night sky photographs can be tricky. The optimal shutter speed depends not only on the ambient light conditions and the strength of the auroral display. It also depends upon your focal length. Lonely Speck has an excellent advanced shutter speed calculator to help you determine the optimal shutter speed for your camera sensor size, megapixel count and lens focal length. When in doubt, you can also use the 500 Rule. This is straightforward. You take 500 and divide it by the focal length of your lens to determine the longest shutter speed where the stars in your photos will still be sharp. For example, if you have a 20mm lens, the 500 Rule says you can use a 25-second exposure and still have visibly sharp stars. It's a bit too simple for optimal results, but it works okay in a pinch.
There's other critical gear for night sky photography aside from a suitable camera and lens. You also need a sturdy tripod. Your shutter speeds can be as slow as 30 seconds, depending on the situation, and any minor movement of your camera will ruin your photos. A remote release will also help reduce camera shake. You can use a self-timer on your camera if you don't have a remote, but some sort of wired or wireless release is a worthwhile investment if you intend to do a lot of night sky photography.
As for camera settings, there are some key ones to consider. Every night is different, but no matter the conditions, you will want to remove filters from your lenses, cover any bright lights on your camera, switch your lens to manual focus, shoot in manual mode, and use a fast aperture setting on your lens. You also always want to shoot RAW. As an aside, the auroral activity can impact the optimal shutter speed. Some storms move quickly in the sky, requiring a fast shutter speed (maybe even as fast as a few seconds long) to capture the action. If you need to increase your shutter speed, you will also need to increase your ISO.
If you are interested in photographing aurorae, please watch the full presentation above. Swindler covers a wide range of additional topics, such as tips for manual focus, capturing long exposure foreground shots for exposure blending, using noise reduction software and much more. To learn more about David Swindler's work, visit his website and follow him on Instagram.
(Via B&H)