Video: How to create dramatic black and white images in Photoshop
posted Monday, June 6, 2022 at 11:30 AM EDT

Earlier this year, photographer Sean Tucker started a portrait retouching tutorial video series on his YouTube channel. We've written about a couple of the portrait tutorials, including one on natural-looking skin and eye retouching, and a second video about how to utilize subtle dodging and burning techniques in Photoshop to shape light. Since starting his retouching series, Tucker has received a lot of questions from viewers about how he creates a black and white conversion of a color portrait. As Tucker says in the video below, you may think it's too obvious a tutorial. Surely you can just desaturate the image, right? There's a lot more to a good black and white conversion. You want to use the color information stored in the image to create a black and white portrait with "pop" and "shape."
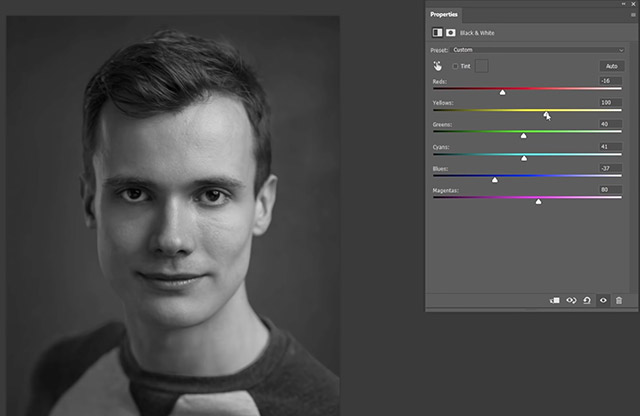
In the video below, Tucker shares his technique for creating a compelling, well-toned black and white portrait with contrast and shape. Unlike the other portrait retouching videos, a good black and white conversion technique applies to any genre of photography, not just portraits. Tucker first discusses a couple of ways people create black and white photos in Photoshop. The first is simply selecting "Desaturate." It's technically a black and white image, but it's flat. A second, better technique is using a Black and White "adjustment layer." This gives you more creative control, thanks to its color sliders. Despite working with a monochromatic image, you still utilize the color information from the original photo to tweak the look of the black and white shot.
No matter a subject's race, our skin is some gradation of orange, which means that in the shadows of portraits, there'll be red tones, and in the highlight areas, there'll be yellow tones. You can use this to employ a technique – which Tucker recommends using lightly – to dial down the red slider and push up the yellow slider. You can create a lot of contrast in the skin using just these two color sliders. "Less is more with this technique," says Tucker. If you overdo it, you can pick up some red blotchiness and start to cause issues with your subject's skin.
Next, go to Adjustment Layers and select "Gradient Map." You can use the Gradient Map to brighten highlights. It will look excessive at first, as you can see in the video above, but don't worry, because you'll adjust the adjustment layer's opacity after. It's a quick and easy way to add a bit more contrast.
Tucker then likes to add a "Curves" adjustment layer, but this is an optional step depending on how your image already looks. You can add a bit more tone using curves to adjust shadows, midtones and highlights separately. As always, subtlety is important. There are a couple more steps, which Tucker shows in the video above.
As you can see, while there are more steps than the bare minimum required to make a black and white image, it's still a relatively fast and straightforward process. As you get more experienced, you could easily perform all these steps in a minute or two. By putting in the effort, you're rewarded with a dynamic black and white image with a full range of tonality.
To see more from Sean Tucker, visit his website and YouTube channel. You can also follow him on Instagram.
(Via Sean Tucker)