Back
to Full Epson Stylus Photo 780 Review
Back
to Full Epson Stylus Photo 780 ReviewUp to Imaging Resource Printers Page
Use your browser's "Back" button to return to the previous page, or the links at the top and bottom of this page to navigate to related information. If you have difficulty fitting the text on this page onto your printer output, simply resize your browser window to a narrower width and print again.
Remember us when it's time to buy!
Dave here: Have our reviews been helpful to you? (Is this article you're reading right now useful?) Preparing this level of information on as many products as we do is incredibly hard work, not to mention expensive. Things on the Internet may look like they're free, but they're not. (As a lot of big dot.com companies are finding out these days.) Somewhere, somebody has to pay to produce worthwhile content. YOU can help us though, by remembering us when it comes time to make your purchase. Would you consider coming back to our site and clicking-through to one of our advertisers to make your purchase? Every dollar you spend with one of our advertisers helps us directly (in affiliate fees) or indirectly (the advertiser will keep renewing their ad contract with us). To make it easy for you to support us, here's a URL you can visit, to see all our current advertisers, with links to click on that will register your visit to them as having come from our site. It's up to you where you buy, but Mike, Mike, Kim, Yazmin, Marti and I would be really grateful if you'd help us out by choosing one of our advertisers to purchase from.
Thank you for your support!
Dave Etchells, Founder & Publisher
Visit our "Buy Now" Page:
https://www.imaging-resource.com/buynow.htm
Back
to Full Epson Stylus Photo 780 Review
Up to Imaging Resource Printers
Page
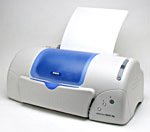
Epson Stylus Photo 780Epson's 2880dpi letter-size photo printer delivers *quality* prints, with BorderFree option, at an incredible price! Review First Posted: 7/19/2001 |
|
[an error occurred while processing this directive] [an error occurred while processing this directive] [an error occurred while processing this directive] [an error occurred while processing this directive] [an error occurred while processing this directive] [an error occurred while processing this directive] [an error occurred while processing this directive] [an error occurred while processing this directive]