Back
to Full Nikon CoolPix 4500 Review
Back
to Full Nikon CoolPix 4500 ReviewGo to Nikon CoolPix 4500 Data Sheet
Go to Nikon CoolPix 4500 Pictures Page
Up to Imaging Resource Cameras Page
Use your browser's "Back" button to return to the previous page, or the links at the top and bottom of this page to navigate to related information. If you have difficulty fitting the text on this page onto your printer output, simply resize your browser window to a narrower width and print again.
Remember us when it's time to buy!
Dave here: Have our reviews been helpful to you? (Is this article you're reading right now useful?) Preparing this level of information on as many products as we do is incredibly hard work, not to mention expensive. Things on the Internet may look like they're free, but they're not. (As a lot of big dot.com companies are finding out these days.) Somewhere, somebody has to pay to produce worthwhile content. YOU can help us though, by remembering us when it comes time to make your purchase. Would you consider coming back to our site and clicking-through to one of our advertisers to make your purchase? Every dollar you spend with one of our advertisers helps us directly (in affiliate fees) or indirectly (the advertiser will keep renewing their ad contract with us). To make it easy for you to support us, here's a URL you can visit, to see all our current advertisers, with links to click on that will register your visit to them as having come from our site. It's up to you where you buy, but Mike, Mike, Kim, Yazmin, Marti and I would be really grateful if you'd help us out by choosing one of our advertisers to purchase from.
Thank you for your support!
Dave Etchells, Founder & Publisher
Visit our "Buy Now" Page:
https://www.imaging-resource.com/buynow.htm
Back
to Full Nikon CoolPix 4500 Review
Go to Nikon CoolPix 4500
Data Sheet
Go to Nikon CoolPix 4500
Pictures Page
Up to Imaging Resource Cameras
Page
Nikon CoolPix 4500Nikon updates the hugely successful Coolpix 995, adding a full 4.0-megapixel CCD! Review First Posted: 5/29/2002 |
|
 |
|
4.0-megapixel sensor delivers 2,272 x 1,704 images |
|
|
Typically well-designed Nikon user interface
& controls |
|
|
|
32 Megabyte SDRAM buffer for
two second cycle time |
|
|
|
Enormous creative control and flexibility |
|
|
|
White balance bracketing and noise reduction modes extend capability. |
Manufacturer Overview
Nikon is one of the few companies that you can say truly needs no introduction
in the world of photography. Their name has been identified with professional
and high-end amateur photography for a good 5 decades now, and they've been
very successful at translating that long history of expertise into the digital
arena. Their 2.1 megapixel Coolpix 950 and 3.3 megapixel Coolpix 990 and Coolpix
995 digicams have led the popularity charts at the high end of the "prosumer"
market segment since their respective introductions. The key has been their
combination of excellent picture quality with an amazing range of features,
all calculated to give the photographer the maximum control over the picture-taking
process.
Now, Nikon has updated the 995's design to create the Coolpix 4500. The biggest
change in the new model is an increase in resolution to 4.0 megapixels, rather
than the 3.1 megapixels of the 995. The case design is also quite different,
retaining the swivel design that's been a hallmark of this line of Coolpix models
since their introduction, but adopting a much sleeker, smoother contour overall.
The popup flash now hides completely inside the case when not in use, greatly
contributing to the smoother outline. Along with the case redesign, the user
interface is slightly modified as well, to cope with the removal of one button
that was present on the 995 but not on the new model. Having now seen a production
model of the 4500, I can say that its image quality is very much in line with
that of the 995 it replaces: I think this is going to be a very popular model.
Probably not enough differences to entice 995 owners into upgrading, but it'll
certainly be an attractive option for owners of 990s or 950s wanting to take
the next step. Read on for all the details!
High Points
What's New
Since many of our readers are already familiar with the previous Coolpix 995 model, I thought it'd be helpful to include a list of the new features Nikon has included on the 4500. Here's what I noticed as new to the 4500:
(This is a quick digest of the rest of the review. If you plan on reading the whole review, you can skip this page and continue on with the Design section that follows.)
With a slightly revamped style and sleeker look, the new Coolpix 4500 combines the advanced features from the previous 995 model with a few updated ones that make the new model even more appealing. Most important is the larger, 4.0-megapixel CCD, for even higher resolution images, but there are a number of other tweaks and enhancements that together add up to a significant upgrade. Also important to many potential buyers (but frankly not that significant in terms of actual durability), the 4500 returns to the all-metal-alloy case design of earlier models. Nikon continues with the swivel-lens design that's been a hallmark the Coolpix line from its inception. The swivel design enhances the camera's optical flexibility, greatly easing tricky low- or high-angle shots. Control layout is essentially the same, though some buttons have swapped places, and there's one fewer button overall, as well as no separate mode dial. The camera provides both a real-image optical viewfinder and an LCD monitor display for image composition, and the LCD offers an extensive information display that reports a variety of exposure information, including aperture and shutter speed settings. The 4500's user interface retains much of the speed and flexibility of the earlier design, in that it lets you adjust the most frequently used camera controls without having to resort to the LCD menu system. I regret the loss of the small status display panel that graced the top of the 995, but as it turns out, the main LCD screen now stands in for most of the functions the smaller display provided in the past. I don't think the new control arrangement is quite as effective as that on the 995, but it's still a very well thought out interface. In Playback mode, the LCD gives an informative readout on captured images and also offers both an index display of thumbnails and a playback zoom option.I've been impressed with the Coolpix line from the start. The previous Coolpix
995 was an excellent camera, and from the looks of things, the Coolpix 4500
will do just as well. The larger 4.0-megapixel CCD increases the camera's resolution
capabilities, and the addition of a 16-mode Scene exposure mode increases its
automatic flexibility. I've no doubt that many users who held off from upgrading
to the 995 out of disdain for plastic camera bodies will be newly tempted by
the 4500's return to an all-metal chassis. Just like the 995, the 4500 offers
a completely automatic mode for novices, but all the controls advanced users
could ask for. Happily, my tests of a production-model 4500 showed it to have
image quality as good or better than that of the 995. Given the success of the
9xx series of Nikon Coolpix digicams, it's a safe bet that the Coolpix 4500
will be another huge hit.
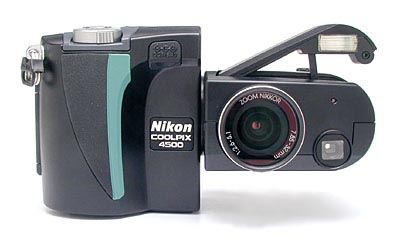
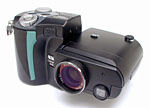
With the lens facing forward, the front of the camera is pretty sparsely populated.
The lens itself doesn't protrude much from its barrel, and is protected by a
tiny, spring-loaded lens cap, which tethers to the camera body to prevent it
from being accidentally lost. The Self-Timer lamp and front side of the optical
viewfinder fit snugly beside the lens. Underneath the lens barrel, at the back
of that part of the housing, is the diopter adjustment dial for the optical
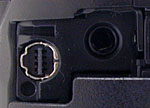
viewfinder. A redesigned, sleeker pop-up flash unit is on the top side of the
lens barrel along with the Flash Mode / ISO button and the external flash sync
socket (covered by a tiny, and easily lost, plastic cap). Also visible from
the front of the camera is the DC power input jack, just inside the hand grip
and covered by a soft rubber flap.

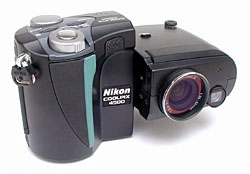
Looking at the top of the camera body, there's a Power switch, Shutter button,
Mode and Function buttons, and a small Command dial for changing various camera
settings. The Function button is programmable through the Setup menu in Manual
exposure mode to access various exposure options. This was designed specifically
to allow one handed camera operation, as you can hold down either of the top
buttons with your index finger and scroll through the chosen options with the
Command dial. The normal function for this button is to change the camera's
exposure compensation. Also on top of the camera is a small microphone to record
audio with movies, or voice annotations for captured images.
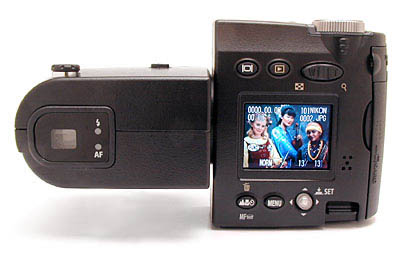
The majority of the controls are located on the back panel of the camera, along
with the LCD monitor. The layout of the controls is nearly identical to the
previous Coolpix 995, with the addition of a new joystick-like Multi-Selector
button, and the deletion of the size/quality button. The Monitor, Playback,
and zoom control buttons line the top of the LCD panel. Beneath the LCD are
the Focus Mode and Menu buttons, and the new Multi-Selector joystick control
(the "Set" button consists of just pressing down on the joystick).
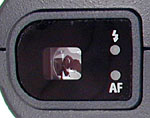
In the bottom right corner is a speaker and an eyelet for attaching the neck
strap. When the lens is rotated to point forward, the optical viewfinder is
visible from the back panel. Two LEDs located directly beside the viewfinder
report the status of the autofocus and flash.
The joystick-like Multi Selector control is new on the 4500, and I found myself liking it quite a bit more than the typical rocker pad as used on the 995. It seemed much easier to navigate menus with it, and I never found myself moving the menu cursor when I was just trying to access the "set" function (by pressing down on the center of the control), as I sometimes do with rocker pads.

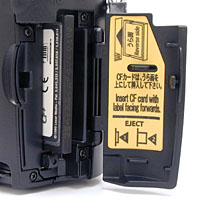
I like the hand grip on the right side of the camera, which provides a firm,
secure hold. The soft rubber surface fits directly under your fingers, providing
additional friction for a good grip, and the angle of the grip itself is just
right. Located inside the hand grip are the USB I/O jack, the A/V Out jack,
and the CompactFlash compartment. The digital and video inputs are covered by
a soft, flexible rubber flap at the top of the grip that presses into place
quickly and securely. The placement of the CompactFlash slot makes it easy to
change cards when the camera is mounted on a tripod and the plastic door simply
flips open and shut. There is no access light to let you know when the camera
is accessing the card, so you'll have to pay attention to the LCD monitor to
know when it's OK to change cards. (It's important to never remove a memory
card while the camera is writing to it, lest you corrupt your images or even
damage the card.) Also on the hand grip is another eyelet for the neck strap.
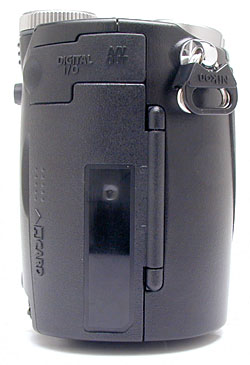
There's not much to say about the left side of the camera, as there are no
connectors or controls on it. The whole left side of the camera acts as a hand
grip for your left hand when the camera is in its normal operating position,
with the lens facing forward and the LCD pane oriented vertically.

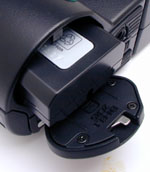
Finally, the flat bottom of the camera holds the battery compartment and a plastic
tripod mount that are unfortunately too close together to allow battery changes
while on a tripod. (A necessary consequence of the swivel design.) The battery
compartment has a sliding latch that keeps the door tightly shut. A sliding
lock next to the tripod mount controls the amount of lens swivel. When slid
towards the lens, the switch allows the lens to rotate through its full range
of roughly 280 degrees. Sliding the switch towards the tripod mount limits the
lens rotation to 180 degrees, from the front to the back.
 Viewfinder
 The 1.5-inch, 110,000 dot, low temperature, polysilicon TFT, color LCD monitor
on the back panel operates both as a viewfinder and information display while
in any capture mode. As I first observed on the Coolpix 995, the LCD on the 4500
has a very high refresh rate, so images of moving objects usually appear sharp
and clear. A series of autofocus targets can be continually displayed on the LCD,
to tell you where the camera is judging focus from. The Monitor button controls
the LCD monitor's display, cycling through no display, image and information,
and image only. The information display reports a nice selection of camera settings,
including aperture and shutter speed (when in Manual capture mode). The 4500's
LCD monitor tested out at 96% accuracy. This is pretty good coverage, but I really
prefer a full 100% display in LCD viewfinders.
The 1.5-inch, 110,000 dot, low temperature, polysilicon TFT, color LCD monitor
on the back panel operates both as a viewfinder and information display while
in any capture mode. As I first observed on the Coolpix 995, the LCD on the 4500
has a very high refresh rate, so images of moving objects usually appear sharp
and clear. A series of autofocus targets can be continually displayed on the LCD,
to tell you where the camera is judging focus from. The Monitor button controls
the LCD monitor's display, cycling through no display, image and information,
and image only. The information display reports a nice selection of camera settings,
including aperture and shutter speed (when in Manual capture mode). The 4500's
LCD monitor tested out at 96% accuracy. This is pretty good coverage, but I really
prefer a full 100% display in LCD viewfinders.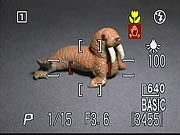 The
Coolpix 4500 features Nikon's powerful zone-based autofocus system. The camera
can automatically select between five different autofocus zones, or you can lock
it in on any one of them manually. Either way, the viewfinder highlights the currently
active zone in red.
The
Coolpix 4500 features Nikon's powerful zone-based autofocus system. The camera
can automatically select between five different autofocus zones, or you can lock
it in on any one of them manually. Either way, the viewfinder highlights the currently
active zone in red.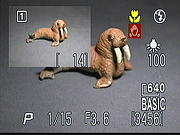 A
particularly nice feature that was new on the 995, but is now common across the
high end of the Coolpix line is the "quick review" function. This lets
you quickly check the last exposure while still in Record mode, simply by pressing
the Playback button. I liked the "picture in picture" review mode (shown
here), which opens a playback window in the upper left-hand corner of the display
screen, keeping the viewfinder image live on the remaining LCD area. Note too,
that this image isn't restricted to the most recently captured photo. You can
scroll through all the images on the memory card by pressing the rocker button
arrows. The first press of the Playback button activates the picture in picture
review mode, a second press enables full-screen playback, and a third press returns
you to full capture mode. At any point, pressing the Shutter button returns you
to capture mode and snaps a picture. Very slick!
A
particularly nice feature that was new on the 995, but is now common across the
high end of the Coolpix line is the "quick review" function. This lets
you quickly check the last exposure while still in Record mode, simply by pressing
the Playback button. I liked the "picture in picture" review mode (shown
here), which opens a playback window in the upper left-hand corner of the display
screen, keeping the viewfinder image live on the remaining LCD area. Note too,
that this image isn't restricted to the most recently captured photo. You can
scroll through all the images on the memory card by pressing the rocker button
arrows. The first press of the Playback button activates the picture in picture
review mode, a second press enables full-screen playback, and a third press returns
you to full capture mode. At any point, pressing the Shutter button returns you
to capture mode and snaps a picture. Very slick! In
Playback mode, the LCD offers a wealth of information via several display pages.
In total, no fewer than six information screens are available, accessed by turning
the Command wheel. The first display is the standard Playback information readout,
which reports the date and time of the shot, file name, quality setting, and the
image number on the card. The next three screens show a long listing of camera
and exposure settings, including the firmware version, focal length, shutter speed,
ISO, etc. A fourth information page contains a histogram view of the image, showing
the distribution of brightness values in the image, with the left edge corresponding
to pure black, and the right edge to pure white. Once you learn how to read it,
a histogram is very handy for determining whether you've managed to capture a
good exposure or not. Ideally, a well-exposed image would produce a histogram
curve that just filled the graph from left to right, indicating that it contained
a full range of tonal values. Histogram displays won't always show you if only
a small portion of your image is blown-out. To address this need, the 4500 blinks
those parts of the image that are overexposed, letting you see exactly where you're
losing highlight detail. The final information screen shows lens, shutter, and
focus settings, and indicates (by the green brackets) what the autofocus system
had locked onto when the picture was taken.
In
Playback mode, the LCD offers a wealth of information via several display pages.
In total, no fewer than six information screens are available, accessed by turning
the Command wheel. The first display is the standard Playback information readout,
which reports the date and time of the shot, file name, quality setting, and the
image number on the card. The next three screens show a long listing of camera
and exposure settings, including the firmware version, focal length, shutter speed,
ISO, etc. A fourth information page contains a histogram view of the image, showing
the distribution of brightness values in the image, with the left edge corresponding
to pure black, and the right edge to pure white. Once you learn how to read it,
a histogram is very handy for determining whether you've managed to capture a
good exposure or not. Ideally, a well-exposed image would produce a histogram
curve that just filled the graph from left to right, indicating that it contained
a full range of tonal values. Histogram displays won't always show you if only
a small portion of your image is blown-out. To address this need, the 4500 blinks
those parts of the image that are overexposed, letting you see exactly where you're
losing highlight detail. The final information screen shows lens, shutter, and
focus settings, and indicates (by the green brackets) what the autofocus system
had locked onto when the picture was taken. Also
in Playback mode, the LCD offers a thumbnail index display, showing either four
or nine images to a page depending on the setting. You can cycle between single-image,
four, or nine image views by pressing the wide-angle end of the zoom rocker button.
A playback zoom feature enlarges captured images up to 6x, letting you get a reasonably
good idea of how well-focused the image is, check the framing, and examine details
to see if you got the shot you wanted. A new feature in Playback mode is the Perspective
setting, which copies the displayed image and alters the vertical perspective.
Also
in Playback mode, the LCD offers a thumbnail index display, showing either four
or nine images to a page depending on the setting. You can cycle between single-image,
four, or nine image views by pressing the wide-angle end of the zoom rocker button.
A playback zoom feature enlarges captured images up to 6x, letting you get a reasonably
good idea of how well-focused the image is, check the framing, and examine details
to see if you got the shot you wanted. A new feature in Playback mode is the Perspective
setting, which copies the displayed image and alters the vertical perspective.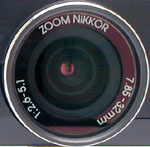 Optics
A Nikkor 4x zoom, 7.85-32mm lens is built into the Coolpix 4500 (the equivalent
of a 38-152mm lens on a 35mm camera), with ten optical glass elements in eight
groups. Maximum apertures range from f/2.6 to f/5.1, depending on the zoom setting.
(The larger effective aperture corresponds to the wide angle focal length.)
Nikon has continued to use the seven blade iris diaphragm first seen in the
995, which gives very fine-grained aperture control, useful for controlling
depth of field, but more so for working with external flash and precisely controlling
the balance between flash and ambient exposure. The contrast-detect TTL autofocus
features an autofocus mechanism with a very fine step size (although Nikon no
longer reports how many AF steps there are), and a working range from 0.8 inches
(20.32 millimeters) to infinity (this includes the macro range). When shooting
in the Auto capture mode, the autofocus remains in the Continuous setting while
using the LCD monitor but reverts to the Single autofocus mode when the LCD
is off (which means you must halfway press the Shutter button to set focus).
However, the Manual capture mode gives you the freedom to choose between Continuous
or Single autofocus, regardless of LCD status. The Continuous focus mode results
in the lens continually "hunting" for the best focus as you move the
camera around, settling down when the camera and/or subject stops moving. Autofocus
tracking speed isn't terribly high (mentioned in case you were expecting pro-level
AF tracking as on Nikon's F5 film camera), but the Continuous AF option definitely
helps with moving subjects. The downside is that it burns more battery power
than Single AF mode.
You can manually adjust focus by holding down the Focus Mode button and turning
the Command dial. A distance scale appears in the LCD monitor, with an adjustment
bar that stretches from macro to infinity positions. For some reason, Nikon
has chosen not to provide a numerical distance readout, which can be very helpful
in setting manual focus. The Focus Confirmation option (selected via a setup
menu entry) snaps the LCD monitor into exaggerated sharp focus when the lens
is properly focused. This is very helpful for setting focus manually when you
can see your subject clearly, but it would still be helpful to have a distance
readout for those times when you cannot. (Nighttime candid and wildlife photography
are both situations where I've found an explicit distance readout helpful.)
The 4500's autofocus mechanism employs the same sophisticated zone-sensitive
system from previous Coolpix models, featuring several operating modes. It has
five possible focus zones (center, top, bottom, left, right), useful for achieving
accurate focus on off-center subjects. The Focus option under the settings menu
allows you to choose modes in which the camera chooses the focus zone automatically,
or in which you can explicitly select the focus area you want to use (a nice
feature that works well when combined with the spot metering mode, which can
likewise be directed to determine exposure from the same five zones). In the
"Auto" option for focus area selection, the camera chooses the area
corresponding to the object closest to the camera. When the area focus option
is set to Off, the camera bases focus on the central AF area. (One Playback
mode information screen displays a focus area overlay, and shows which focus
area was chosen for each image, by highlighting the appropriate set of marks
in red.)
The lens itself has the same 28mm filter threads as the preceding Coolpix models,
which accommodate the full range of Nikkor accessory lenses for wide-angle,
telephoto, macro, and fisheye focal lengths, as well as a slide copying adapter.
Once an accessory lens is attached, you'll need to select the corresponding
lens type in the lens settings menu. (The camera adjusts its operation for different
lens types by restricting the zoom range to avoid vignetting, switching to center-weighted
metering for the fisheye adapter, etc.)
The 4500's digital telephoto feature is enabled through the Zoom option under
the Setup menu, and enlarges images up to 4x. An indicator on the LCD monitor
displays the range of digital zoom at each step (from 1.1x to 4.0x). Keep in
mind that digital telephoto only enlarges the center of the image, resulting
in reduced resolution as more digital zoom is used. The camera automatically
switches to center-weighted metering and the center autofocus target when digital
zoom is active. Also under the Zoom option, you can set the startup position
of the lens (either wide or telephoto) and activate the Fixed Aperture function,
which keeps the aperture fixed as the lens zooms.
This looks like the identical lens used on the 995, so it should come as no
surprise that it has very similar optical characteristics. (Although the focal
length range is listed by Nikon as being very slightly different: 7.85-32mm,
vs 8-32mm on the 995.) Geometric distortion is a bit high at the ends of its
zoom range, showing 1.04% barrel distortion at wide angle, and 0.53% pincushion
at telephoto. Chromatic aberration is about average, showing about 5-6 pixels
of color around high contrast objects in the corners of its images.
Macro fans will be pleased to learn that the 4500 is every bit a Coolpix in
that category: Its minimum macro coverage area is approximately 0.84 x 0.63
inches (21.2 x 15.9 millimeters)
Perspective Correction
This is more of a post-exposure sort of thing, but its effect is decidedly "optical,"
so I opted to include it in the Optics section of the review. One of the attractions
of digital photography is that you can manipulate the images on your computer
after the fact, to correct deficiencies in the original shot. A common problem
with essentially any camera other than a professional "view" camera
has to do with perspective distortion. When you tilt your camera up to snap
a photo of a tall building, perspective makes the vertical lines of the building
converge, giving the appearance that the building is leaning backward. This
effect is quite easy to correct on a computer, but a lot of users will lack
the software needed to do so. On the 4500, Nikon's built a perspective-correction
function into the playback menu, so the camera can perform a limited amount
of perspective correction on its own. This is the first I've seen of an advanced
image processing function like this on a digicam, but I won't be surprised if
we see more such in the future. To use this function, you call up the photo
you want to correct in playback mode, select "Perspective Control"
from the playback menu, and the press the Multi Function lever up or down to
vary the effect. When you've got things the way you want, press the lever to
"set" the function, and wait while the camera makes a new copy of
the photo with the correction applied. (The original image is left unchanged.)
Pretty slick! This clearly won't eliminate the need for programs like Adobe's
Photoshop(tm), but it's a neat feature I've not seen before in a digicam.)
|
Exposure
|
As I've come to expect with Nikon's cameras, both digital and film-based, the
Coolpix 4500 offers extensive, flexible exposure control. A range of exposure
modes are available, including Program, Flexible Program, Aperture Priority,
Shutter Priority, Manual, Auto, and Scene modes. Thanks to a user interface
design that makes extensive use of external buttons and a Command dial, changing
the 4500's modes and exposure settings is very fast, and should only rarely
need to delve into the LCD menu system under normal shooting conditions.
Auto exposure mode puts the camera in charge of everything, with the exception
of flash mode and the image size and quality settings. Scene mode offers 16
preset "scenes" to choose from, each setting up the camera for specific
shooting situations. Scenes include Portrait, Party/Indoor, Night Portrait,
Beach/Snow, Landscape, Sunset, Night Landscape, Museum, Fireworks Show, Close
Up, Copy, Backlight, Multiple Exposure, Panorama, Sports, and Dusk/Dawn. (Panorama
and Multi Exposure are both new to the Coolpix family. The Panorama option is
particularly nicely done, showing you a "ghosted" version of the previous
shot on the LCD as an aid to lining up the next one.) Once Scene mode is selected
by pressing the Mode button and turning the Command dial, the Menu button displays
the available scenes (as well as the image quality and size adjustments). In
Program AE mode, the camera takes control of shutter speed and aperture, while
you adjust the remaining exposure settings. The Flexible Program option goes
a step further by letting you select from a range of valid shutter speed and
aperture combinations, simply by rotating the Command dial while in Program
exposure mode. The camera determines the required exposure, but you can choose
whether it achieves that exposure with a shorter shutter speed and wider aperture,
or a longer shutter speed and smaller aperture. (Simply turn the Command dial
on its own while in Program mode, and an asterisk appears next to the "P"
in the LCD display. Further rotation of the Command dial will cycle through
the available combinations of shutter speed and aperture.) Shutter Priority
lets you select shutter speeds from 1/2,000 to eight seconds, while the camera
selects the appropriate corresponding aperture. Likewise, under Aperture Priority,
you can select the lens aperture while the camera selects the best shutter speed.
Manual mode gives you control over both aperture and shutter speed, but increases
the shutter options to include a Bulb setting for longer exposures (up to five
minutes). In any mode, if the camera's metering system disagrees with your exposure
choices, the shutter and aperture values will display in red to indicate that
this may not be the best exposure option. Important note: The 1/2,300
shutter speed is only available in Auto and Scene exposure modes. Maximum shutter
speed in all other modes is 1/2,000.
Exposure compensation lightens or darkens the overall image by -2 to +2 exposure
equivalents (EV) in one-third increments. Additionally, under the Image Adjustment
option on the settings menu, you can increase or decrease contrast. A Saturation
adjustment offers a range of saturation levels, as well as a Black & White
monochrome mode. The Coolpix 4500 offers a full range of sensitivity settings
including an Auto option, as well as specific ISO equivalents of 100, 200, 400,
and 800 (activated by pressing the Flash / ISO button and rotating the Command
dial). In-camera sharpening is adjustable to Auto, High, Normal, Low or Off
under the Sharpening option of the settings menu.
I mentioned earlier that the Coolpix 4500 has a "bulb" exposure mode
that allows exposures as long as five minutes. This is an exceptionally long
exposure time, but would normally be almost useless due to the amount of CCD
noise that can accumulate in that interval. The 4500 uses a form of "dark
frame subtraction," whereby a second exposure is snapped immediately after
the first, but with the shutter closed. The pattern of noise in this "dark
frame" is then subtracted from the image itself, resulting in a drastic
reduction in apparent noise levels. (I suspect that the actual algorithm is
more complex than simple subtraction though, involving data substitution to
prevent black pixels where the noise current saturated the CCD photosite.)
In my tests of a production model 4500, it performed very well in the low-light arena, capturing bright, clear images at light levels as low as 1/16 foot-candle (0.67 lux) at all ISO settings tested from 100 to 800. Low light focusing was another matter though: Under relatively favorable test conditions, with a high contrast subject, the 4500's autofocus system could only achieve a focus lock in light levels of 1/2 foot-candle (5.5 lux) or above. Anything darker than that, and you'll have to set the focusing distance manually, a task made much more difficult than it might be by the lack of any numeric distance readout while in manual focus mode. Image noise under low light conditions was very low at the lower ISO settings, creeping up slightly with the 400 and 800 ISO settings. The camera's Noise Reduction option was very effective at removing so-called "hot pixel" noise, but has no effect on the random image noise that results from higher ISO settings. (With the Noise Reduction off, the 4500's images showed the amount of noise I'm accustomed to seeing in prosumer digicams at competing price levels. With the Noise Reduction on though, image hot pixel noise was virtually eliminated.
White balance options include a matrix-based Auto setting (meaning it uses color
information from multiple points across the frame to gauge color balance) as
well as Fine (Outdoors), Incandescent, Fluorescent, Cloudy, Speedlight (flash
balanced), and Preset (or Manual). The Preset option lets you set the camera's
white balance to almost any lighting condition, simply by pointing the camera
at a white object and saying (in effect) "make this white." For more
fine-tuned color balance, you can adjust the fixed white balance settings (all
modes except Auto and Preset) from -3 to +3 in arbitrary units, to increase
the warm or cool tones in the image. I really like this white balance adjustment
option, as I often find myself wishing I could "tweak" a camera's
color balance. The step size and range provided on the 4500 are just right in
my opinion, offering fine-grained control, and a reasonably wide range of adjustment.
A White Balance Bracketing option captures a series of three images at different
white balance settings. After the first image is taken at the regular white
balance value, the camera alters the white balance with a reddish tint, and
then a bluish tint. (The adjustments are triggered by each actuation of the
Shutter button, until the series of three images has been taken.)
By default, the Coolpix 4500 employs a 256-segment Matrix metering system, which
divides the image into 256 segments and balances the exposure based on readings
from each segment. Through the Record menu, you can change the metering system
to Center-Weighted, Spot, or Spot AF Area. Center-Weighted metering bases the
exposure on a large area at the center of the image, while Spot metering takes
a reading from the very center, good for high contrast subjects. The Spot AF
Area mode works with the autofocus target system, basing the exposure reading
on the same target location that you've assigned the AF area to (through the
Focus Options sub-menu). You can lock the exposure by pressing the center of
the Multi-Selector button. "AE Lock" appears in the LCD display, and
exposure remains locked until the Shutter button is fully pressed or the Multi-Selector
button is pressed again. (You can also set the Multi-Selector to lock exposure
and focus together.)
 Flash
Flash
The Coolpix 4500 features a popup flash design, with five flash modes: Auto,
On, Off, Red-Eye Reduction, and Slow-Sync. Through the settings menu, flash
power is adjustable from -2 to +2 exposure equivalents (EV). The Slow-Sync option
is useful when shooting subjects with dark backgrounds (such as night scenes)
because the camera actually leaves the shutter open longer and then fires the
flash before the shutter closes. This allows more ambient light into the image
and can provide a nice motion blur effect. Red-Eye Reduction mode fires a pre-flash
before the main exposure, to reduce the reflection from the subject's pupils.
The 4500's pop-up flash gives it an advantage in the Red-Eye category, as it
provides a little extra separation between the flash and the lens to help avoid
Red-Eye. Keep in mind that the flash is automatically switched off when shooting
in the Infinity focus mode; the Continuous, 16 Shots or VGA Sequence modes;
when using the Best Shot Selector; when using a lens converter; or when the
AE Lock option is on.
An external sync socket means you can connect a more powerful external flash,
and the camera allows both external and internal flashes to work together. (The
socket connects to Nikon Speedlight models SB-80DX, 50DX, 28DX, 28, 26, 25,
24, and 22, using the proprietary three-prong Nikon sync connector.) Simultaneous
with the release of the 4500, Nikon has also announced a new "Macro Cool
Light" accessory, a ring flash unit for macro photography. The external
sync connection provides a "quench" signal to the flash, allowing
the 4500 to control the total light delivered by the external strobe unit. Note
though, that there are limitations here when compared to the flash capabilities
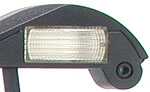
of Nikon's film cameras. First, the flash metering is not TTL (through
the lens). The flash exposure sensor is located in a tiny window next to the
internal flash head. Second, since the external sync connector only transmits
a quench signal to the remote strobe, no distance-feedback information can be
passed, limiting the capabilities of Nikon's high-end speedlights. If you're
planning on buying a high-end Nikon SLR at some point in the future, go ahead
and get the SB-80, 50, or 28DX speedlight. Otherwise, there's relatively little
advantage to buying anything but the least expensive speedlight available.
Continuous Shooting
The Coolpix 4500 offers several "motor drive" rapid-exposure modes
for capturing quick sequences of images. Four modes (Continuous, Multi-Shot
16, Ultra High-Speed Continuous, and Movie) are selectable under the Continuous
option of the settings menu. The Continuous mode captures frames very quickly,
at whatever resolution and image quality the user has selected. Multi-Shot 16
mode subdivides the image area into 16 sections and captures a collage of small
images (568 x 426 pixels), which fills-in a 4x4 array within a single high-resolution
image as the shooting progresses. Ultra High-Speed Continuous mode captures
approximately 30 frames per second, up to about 80 QVGA-sized images (320x240
pixels). Finally, the Movie mode captures up to 35 seconds of moving images
with sound at approximately 15 frames per second (QVGA size). (Sound
recording is one of the new features added to the 4500 over the earlier 995.)
Actual movie times will vary with the amount of available memory card space,
and available recording time appears in the LCD monitor.
Other Features
You can save up to three sets of user settings for focus, exposure, and other
camera options, for rapid recall via the shooting menu. This can be a real time
saver in rapidly switching between widely different sets of shooting conditions.
(Switching between the stadium and locker room for sports coverage? Indoor and
outdoors at a family party? - You get the idea...) The Auto Bracketing feature
brackets five or three steps around the set exposure value while the Best Shot
Select (BSS) snaps several images in rapid succession, with the camera choosing
only the sharpest (least blurred) to be saved. Best Shot Select makes it feasible
to handhold the camera for surprisingly long exposures: I've routinely captured
half-second handheld exposures with Coolpix cameras. You can also check your
own work immediately as the camera gives you a quick preview of the captured
image (when shooting with the LCD monitor) and gives you an option to delete
or save the image (this function can be turned off through the Setup menu, under
Monitor Options). The 4500's Self-Timer offers a three or 10-second countdown
before firing the shutter, allowing you compose images and then jump into the
exposure.
Shutter Lag/Cycle Times
When you press the shutter release on a camera, there's usually a lag time before
the shutter actually fires. This time is to allow the autofocus and autoexposure
mechanisms time to do their work, and can amount to a fairly long delay in some
situations. Since this number is almost never reported on, and can significantly
affect the picture taking experience, I now routinely measure it with a custom
test system I constructed for the purpose. (With crystal-controlled timing,
accurate to 0.01% and with a timing resolution of 1 millisecond.)
|
|
||
|
|
Normal Card |
|
| Power On -> First shot |
|
Variable, depending on zoom startup setting, 5.0 seconds
is about typical. Slightly faster than the 995.
|
| Shutdown |
|
"Shutdown" can be zero if card isn't writing,
as no external lens retraction to wait for. Longest time shown is when
camera is writing a TIFF file, until card can be removed.
|
| Play to Record, first shot |
|
Shortest time is from quick review to first capture.
Next time is for playback mode/full screen to first capture. Both are
quite fast.
|
| Record to play (max/min res) |
4.38/5.13 |
Longest time is for TIFF file format, shorter times
are for max/min res JPEG formats. (Small file oddly takes longer to
display than larger one. )Second set of times are for switch to playback
immediately after capturing a file. (Not auto review.) JPEG times are
quite fast overall, but immediate switch to playback times are a bit
slow.
|
| Shutter lag, full autofocus |
|
A good bit slower than average, albeit faster than the prototype 4500 I originally tested. (Average is about 0.9 - 1.0) Oddly, lag time is longer for wide angle shots than telephoto. (Most digicams are faster at wide angle.) |
| Shutter lag, continuous autofocus |
|
Actually, slightly slower than normal autofocus. |
| Shutter lag, manual focus |
|
Rather slow for manual focus mode. (Average is about 0.50) |
| Shutter lag, prefocus |
|
About average, slower than some competing models. (Average is about 0.3 across all cameras tested, but higher-end models are frequently faster.) |
| Cycle time, large/fine files |
|
Shorter time is for first 5-7 shots, then slows to second time shown. Moderately fast before buffer full, large buffer, and quite fast response after buffer is full. Post-buffer cycle time is ~4.7 seconds with slower cards. Buffer clear time ranges from 10.4 seconds for fast card like SimpleTech 512, to ~23 sec for slow card like Mr. Flash 256.) |
| Cycle time, small/basic files |
|
Somewhat variable times, oddly not much faster than large/fine files. |
| Cycle time, TIFF files |
|
TIFF mode files are huge, take a long time to write. (A fast card is a help here, faster times shown are with SimpleTech 512 and Lexar 12x 256 - times within a second or so between the two.) No buffer available, you have to wait this long before you can snap the next shot. A fair bit faster than the 995 though. |
| Continuous mode, large files |
14.7 to buff clear |
First time is for first 7 shots, then wait for buffer to clear. (Buff clear time on fast card) |
| Continuous mode, small files |
0.75 |
Huge 100 frame buffer capacity for small/basic files, but surprisingly long buffer clear time even with fast card. |
| Ultra High Speed |
(30 frames/sec) |
Pretty amazingly fast, but some jitter between frames.
Great for golf/tennis swings, but not so good for scientific applications.
|
Speed tests on the 4500 were a little disappointing. Shot to shot cycle times were quite good, but shutter lag was slower than average, even when the lens was manually focused. All timings were confirmed with a production model.
My gripes about the missing data readout aside, the 4500's control system works well and is well thought out. Once you learn where the functions are, operation is quick and intuitive, thanks to the multiple control buttons and the Command dial. The inclusion of a programmable Function key adds flexibility, allowing you to customize the camera to your specific shooting needs by moving frequently-used settings up to the top-panel Function button. (This key is normally used to set exposure compensation though, so you'll have to delve deep into the LCD menus for exposure tweaks if you assign any other setting to the Function key.) Exposure compensation, exposure mode, ISO value, as well as focus controls (manual focus setting, macro, and infinity focus), and flash mode, can all be adjusted without having to enter the menu system. When you do have to deal with the LCD menus, navigation via the joystick-like Multi-Selector button is intuitive and quick. One quirk I found was entering the Setup menu: It wasn't at all obvious when I first looked at the camera and I kept looking for a Setup mode or option in the main menu. (I almost had to read the manual!) What you have to do is call up the Shooting menu, then push the Multi-Selector to the left. Once I figured it out, it became perfectly obvious that there was a Setup menu icon at the top of the screen. I do think the more familiar menu tab system used on previous Coolpix digicams was a better user interface though.
Control Enumeration

Shutter Button: Located on top of the camera and encircled by the Power dial, this button sets focus and exposure when halfway pressed and fires the shutter when fully pressed.
Power Dial: Surrounding the Shutter button on the camera's top panel, this dial turns the camera on or off.

Mode Button: Just below the Power dial on the top panel, this button selects the main exposure mode (Program, Shutter Priority, Aperture Priority, Manual, Auto, and Scene Mode) when used in conjunction with the Command dial. Hold down the Mode button while turning the Command dial while in capture mode, and the camera will cycle through its exposure mode options. In Manual exposure mode, a quick press of this button selects either the aperture or shutter speed setting, allowing you to change it by turning the Command dial. A second press toggles to the other exposure parameter.

Exposure Compensation / Function Button: Directly to the right of the Mode button, this button adjusts the amount of exposure compensation (from -2 to +2 exposure equivalents (EV) in one-third step increments) when held down while turning the Command dial. This button can also be programmed through the Setup menu to access other exposure settings instead of exposure compensation. (The other options are continuous shooting mode selection, image quality setting, white balance options, and metering pattern.)
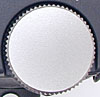
Command Dial: Protruding slightly from the top right corner of the camera, this dial is used in conjunction with other buttons in Record mode to adjust exposure options. By itself, it will adjust the aperture or shutter speed settings in Aperture and Shutter Priority or Manual exposure modes.
In Playback mode, the dial cycles through the six information pages associated with each captured image, giving you an unparalleled amount of information about each photo (image information page, camera firmware page, image adjustment page, exposure histogram, and focus confirmation).
![]()
Monitor Button: Just above the top left corner of the LCD monitor, this button recalls or cancels the color LCD screen information display and viewfinder display.
![]()
Quick Review / Playback Button: To the right of the Monitor button, this
button drops you into playback mode temporarily so you can check your recent
shots. Pressed once, it calls up the most recently shot picture as a small thumbnail
in the upper left hand corner of the screen. Pressed a second time, it expands
the thumbnail to fill the whole display. You can navigate forward and back through
images on the card using the Multi controller joystick. A third press of this
button will return you to capture mode, as will pressing the shutter button.
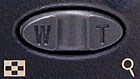
W and T Zoom Rocker Buttons: Directly to the right of the Quick Review / Playback button, this rocker button controls the optical zoom in all capture modes. When the digital telephoto option is enabled, it likewise controls the amount of digital zoom (from 1.1x to 4.0x).
In single-image playback mode, pressing the "T" button repeatedly zooms in on the image (you can scroll around in the enlarged image by using the Multi controller joystick control). Pressing the "W" button cancels zoomed playback. Continuing to press the "W" button accesses the four and nine-image index displays.

Focus Mode / Erase Button: The first button in a series directly beneath the LCD display, this button has several functions. When held down while turning the Command dial, it controls the manual focus setting in Record mode. Also in Record mode, pressing this button alone cycles through Infinity focus, Macro, and Self-Timer modes.
In Playback mode, this button acts as the Delete command for the currently
displayed image (indicated by the trash can symbol above it).
![]()
Menu Button: Adjacent to the Focus Mode / Erase button, this button calls
up the settings menu in all capture modes as well as in Playback mode. It also
cycles through individual menu pages and cancels the menu display.
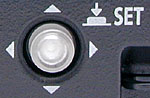
Multi-Selector Button: Just below the lower right corner of the LCD monitor,
this raised "joystick" button can rock up, down, left, and right.
Different menu items are selected via the up/down arrows. Pressing the lever
to the right selects an item, generally taking you into a sub-menu. Pressing
toward the left takes you back out again. Once in a sub-menu, the up/down arrows
again step between items, while a right-arrow selects. This process continues
until you arrive at the final point of selection, upon which pressing the center
of the button confirms the menu selection.
In Record mode, pressing the center of the button locks exposure and/or focus,
depending on what value is selected in the Setup menu. When Manual AF Area mode
is active, this button sets the current AF area (highlighted in red on the LCD
display).
In Playback mode, the right and left directions scroll through captured images
one at a time. In zoomed playback mode, you can use this control to pan around
within the enlarged image.

Flash/ISO Button: On top of the lens barrel, this button cycles through
the flash modes (Auto, On, Off, Red-Eye Reduction, and Slow-Sync). Holding this
button while turning the Command dial cycles through the variable ISO settings
(Auto, 100, 200, 400, and 800).
![]()
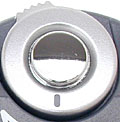
Diopter Adjustment Dial: Located directly beneath the optical viewfinder
eyepiece (on the underside of the lens half of the case), this small, black
dial adjusts the viewfinder to accommodate eyeglass wearers.
 White
Balance: Displays a sub-menu with seven white balance options: Auto, White
Balance Preset, Daylight, Incandescent, Fluorescent, Cloudy, and Speedlight
(flash balanced).
White
Balance: Displays a sub-menu with seven white balance options: Auto, White
Balance Preset, Daylight, Incandescent, Fluorescent, Cloudy, and Speedlight
(flash balanced). Image
Quality: Offers Hi (TIFF), Fine, Normal, and Basic file quality settings.
Image
Quality: Offers Hi (TIFF), Fine, Normal, and Basic file quality settings. Exposure
Options: Controls the AE Lock function, as well as the exposure compensation
setting. (While exposure compensation can be set from this menu entry, you
would more commonly do so via the top-panel +/- button and function wheel.)
Exposure
Options: Controls the AE Lock function, as well as the exposure compensation
setting. (While exposure compensation can be set from this menu entry, you
would more commonly do so via the top-panel +/- button and function wheel.)
 Noise
Reduction : Activates the Noise Reduction feature for shooting in low-light
situations.
Noise
Reduction : Activates the Noise Reduction feature for shooting in low-light
situations.
Setup Screen
(Not accessible in Auto or Scene modes.)
 Monitor
Options: Displays a sub-menu to adjust the brightness of the LCD monitor
display, or the display mode (options are Monitor On, Review Only, Preview
Only, Monitor Off).
Monitor
Options: Displays a sub-menu to adjust the brightness of the LCD monitor
display, or the display mode (options are Monitor On, Review Only, Preview
Only, Monitor Off).
Playback Mode: Accessed by pressing the Quick Review / Playback button
twice, this mode lets users view captured images and movies. Pressing the Multi-Selector
button to right and left scrolls through images while the Delete and Index Display
buttons offer quick image deletion and display. Pressing the Menu button in
this mode pulls up the Playback settings menu:
Screen One
 Delete:
Erases the Selected Image, All Images, Folder, Transfer, or Print Set. ("Transfer"
refers to images marked to be automatically transferred to a computer. A "Print
Set" refers to the set of images currently marked for printing, using
the DPOF (Digital Print Order Format))
Delete:
Erases the Selected Image, All Images, Folder, Transfer, or Print Set. ("Transfer"
refers to images marked to be automatically transferred to a computer. A "Print
Set" refers to the set of images currently marked for printing, using
the DPOF (Digital Print Order Format))
Setup Screen
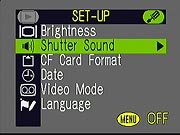 Brightness:
Lets you adjust the brightness of the LCD display.
Brightness:
Lets you adjust the brightness of the LCD display.
 Image
Storage and Interface
Image
Storage and Interface
|
Resolution/Quality 16MB Memory Card |
|
|
|
|
|
| Full Resolution 2272x1704 | Images | 1 | 8 |
|
|
| Approx. Compression/Size |
1:1 12.2 MB |
6:1 1.94 MB |
980 KB |
490 KB |
|
| High Resolution 1600x1200 | Images |
|
|
|
|
| Approx. Compression/Size |
|
990 KB |
509 KB |
271 KB |
|
|
|
Images |
|
|
|
|
| Approx. Compression/Size |
|
640 KB |
336 KB |
189 KB |
|
|
|
Images |
|
37 | 69 | 121 |
| Approx. Compression/Size |
|
6:1 427 KB |
10:1 230 KB |
18:1 131 KB |
|
|
|
Images |
|
84 | 139 | 216 |
| Approx. Compression/Size |
|
5:1 189 KB |
8:1 115 KB |
13:1 74 KB |
|
Interface to the host computer is via a USB port. Mac OS and Windows ME & later users will be happy to hear that the 4500 presents itself as a "storage-class" device. This means that it needs no special software drivers under Mac OS 9 or later, and Windows ME and later. (Older versions of Windows still require separate driver software.) Testing the 4500's transfer rate when connected to my G4 PowerMac, I clocked it at 593 KBytes/second, a very respectable rate.
Lost Images? - Download this image-recovery program so you'll have it when
you need it...
Since we're talking about memory and image storage, this would be a good time
to mention the following: I get a ton of email from readers who've lost photos
due to a corrupted memory card. It's tragic when it happens, there are few things
more precious than photo memories. Corrupted memory cards can happen with any
card type and any camera manufacturer, nobody's immune. "Stuff happens,"
as they say. A surprising number of "lost" images can be recovered
with an inexpensive, easy to use piece of software though. Given the amount
of email I've gotten on the topic, I now include this paragraph in all my digicam
reviews. The program you need is called PhotoRescue, by DataRescue SA. Read
our review of it if you'd like, but download the program now,
so you'll have it. It doesn't cost a penny until you need it, and even then
it's only $29, with a money back guarantee. So download PhotoRescue for
Windows or PhotoRescue for
Mac while you're thinking of it. (While you're at it, download the PDF
manual and quickstart
guide as well.) Stash the file in a safe place and it'll be there when you need
it. Trust me, needing this is not a matter of if, but when... PhotoRescue
is about the best and easiest tool for recovering digital photos I've seen.
(Disclosure: IR gets a small commission from sales of the product, but I'd highly
recommend the program even if we didn't.) OK, now back to our regularly
scheduled review...
 Video Out
US and Japanese versions of the Coolpix 4500 include an NTSC video cable for
connecting to a television set. European models will doubtless include PAL-compatible
cabling, given the Video Mode option for PAL timing in the settings menu. All
images that would normally appear on the LCD are routed to the external video
display so that the television screen becomes an enlarged version of the LCD
monitor and can be used both for image playback and composition.
 Power
Power
The Coolpix 4500 runs on either a 2CR5 non-rechargeable Lithium battery, or
Nikon's rechargeable EN-EL1 lithium-ion battery pack. Both are housed inside
the hand grip, and the compact power source contributes to the compact hand
grip dimensions. (As compared to a camera using a set of AA cells.) The 4500
can also operate from an external AC adapter which plugs into the front of the
camera. Nikon estimates that a fully charged battery pack should provide about
100 minutes of recording time, with the LCD monitor enabled, which is only a
little optimistic compared to my own measurements. Working with the LCD monitor
disabled will slightly increase battery life, and the ability to switch the
autofocus mode from Continuous to Single saves some battery power as well. The
Coolpix 4500 also features an Auto Power Off option which shuts the camera off
after 30 seconds, or after 1, 5, or 30 minutes of inactivity.
The table below shows my usual power measurements, taken under various operating
conditions.
|
|
(@ 8.4 v) |
(650mAh, 7.4v EN-EL1) |
| Capture Mode, w/LCD |
|
85 |
| Capture Mode, w/LCD, continuous AF |
|
82 |
| Capture Mode, no LCD |
|
107 |
| Half-pressed shutter w/LCD |
|
88 |
| Half-pressed w/o LCD |
|
111 |
| Memory Write (transient) |
|
n/a |
| Flash Recharge (transient) |
|
n/a |
| Image Playback |
|
151 |
Overall, the 4500 is a somewhat power-hungry camera, with shorter than average run times in its worst case mode. Also, turning off the LCD makes surprisingly little difference in its power consumption, meaning that you really need to shut the camera off between pictures to make the most of your battery life. (Use the auto-off feature to do this.) The 4500's high power consumption with the LCD turned off was an unpleasant surprise relative to the earlier 995.
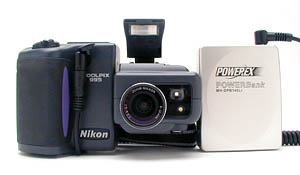
Another consequence of the LiIon battery technology is that the 4500 requires
a higher voltage on its external power jack to operate. This isn't an issue
for studio use, but it does mean that most of the NiMH-based external power
packs out there won't power the 4500 in the field. Fortunately, Maha makes a
LiIon external "PowerBank" (shown above with the previous 995 model)
that will power the 4500 just fine. For about $60, this (very nicely packaged)
unit will power the 4500 for a total of over 5 hours in capture mode with the
LCD operating, when used in together with the internal battery. (!) This is
a really excellent run time, just what you'd need for all-day intensive shooting!
One note - Maha makes both NiMH and LiIon versions of the PowerBank, make sure
you get the LiIon model for the 4500. (Model number MH-DPB140LI.) You can order
these online from Thomas-Distributing.
Highly recommended!
Included Software
| |
||
|
Packaged with the Coolpix 4500 is a software CD containing Nikon View Version
5, and ArcSoft's software suite, consisting of PhotoImpression, VideoImpression,
Panorama Maker, and PhotoBase for PDAs. A USB cable also comes with the camera,
for quick connection to a PC or Macintosh. The Nikon View software allows you
to quickly download and organize images, and works with the camera's Auto Transfer
option (in the Playback menu). When Auto Transfer is turned on, Nikon View will
automatically download images as soon as the camera is connected, saving you
a little time. ArcSoft PhotoImpression provides image editing and enhancement
tools, allowing you to make minor corrections, as well as apply creative effects.
VideoImpression performs similar functions with video files, while Panorama
Maker does just what its name implies, stitching together sequences of overlapping
photos into large panoramic images. PhotoBase is a basic image-database application.
All of the applications provided with the 4500 are fully cross-platform, working
on both Mac and PC computers.
In the Box
Packaged with the Coolpix 4500 are the following:
Test Results
|
As always, I strongly urge readers to study my sample pictures page for the 4500, which has far more detail on the results of my tests than you'll find here in this condensed summary.
Overall, the Coolpix 4500 delivered excellent image quality, with good resolution and excellent color throughout my testing. (Astute readers may notice a lot of similarity between my comments for the 4500 and 5700: Nikon seems to have settled in on a very consistent (and accurate) color handling for their cameras, which they successfully carry across even fairly disparate models. In the case of the 4500 and 5700, color and tonality were very similar to each other.) Colors were natural and accurate, with appropriate saturation levels. (Strong yellows end up slightly undersaturated, but the effect isn't too evident except in highly saturated yellows.) The camera's automatic white balance setting produces good results under a wide variety of lighting conditions. Like most cameras I test, the auto white balance had a very hard time with the very yellowish light provided by household incandescent lighting (a very common light source for amateurs to shoot under), but the 4500's manual white balance option performed superbly under that shooting condition.
As with the 5700, my main criticism of the 4500 is that images shot with it under harsh lighting conditions (eg, full noonday sun) came out very contrasty, with a tendency to lose highlight detail when the midtones anywhere near bright enough. The "low contrast" option on the 4500's shooting menu doesn't help much either, only seeming to affect overall brightness, darkening the image, without really decreasing the contrast any. This one quibble about the contrast aside, the 4500 delivered very pleasing images. Under more normal lighting, its tonal range was acceptable (although still slightly more contrasty than I'd personally prefer), and its color rendition was very good as well. I also liked the control offered by the camera's color saturation adjustment, which provided a useful range of variation.
Image noise on the 4500 is pretty good, although not as low as that of its big brother, the 5700. On long exposures, the 4500 uses a "dark frame subtraction" noise reduction method to eliminate "hot pixels"(isolated, bright pixels) from the final images. This is quite effective, and low light shots are surprisingly "clean." The camera can time exposures out to 8 seconds, but bulb exposures as long as 5 minutes(!) are possible. Low light focusing is another matter though, as the 4500's autofocus system only worked at light levels of 1/2 foot-candle (5.5 lux) or above in my tests. (This is a factor of two darker than typical city night scenes, so the camera will work fine for typical outdoor night scenes under good illumination, but the camera can acquire bright well-exposed photos in conditions much darker than it can focus in. - And the lack of any distance readout in manual focusing mode further hampers its low light aspirations.) On a positive note though, the 4500's optical viewfinder is usable in lighting as dim as you can see in. - There are no limitations imposed by an electronic viewfinder.
The Coolpix 4500 performed well on the "laboratory" resolution test chart. It started showing artifacts in the test patterns at resolutions as low as 800 lines per picture height vertically and horizontally. I found "strong detail" out to 1,250 lines horizontally and 1,200 lines vertically, and "extinction" of the target patterns didn't occur until about 1,450 lines. Excellent job!
Optical distortion on the Coolpix 4500 is moderately high at the wide-angle end, where I measured a 0.84 percent barrel distortion. The telephoto end fared only slightly better, as I measured a 0.63 percent pincushion distortion. The barrel distortion is about typical (although still too high in my opinion) for the cameras the 4500 competes with, while the pincushion distortion at telephoto is a good bit higher than average. Chromatic aberration is moderate, showing about five or six pixels of coloration on either side of the target lines. (This distortion is visible as a very slight colored fringe around the objects at the edges of the field of view on the resolution target.)
The Coolpix 4500's optical viewfinder was a little tight, showing approximately 88 percent frame accuracy at wide angle, and approximately 92 percent at telephoto. (This is a bit better than average though, among consumer digicams I've tested.) The LCD monitor was much more accurate, showing 98 percent accuracy at wide angle, and about 100 percent at telephoto (just a hint "loose" here, with only very slight cutoff.) I generally prefer LCD viewfinders to be as accurate as possible, so the Coolpix 4500 performs very well here.
Like the rest of Nikon's Coolpix line, the Coolpix 4500 performed very well in the macro category, capturing a tiny minimum area of just just 0.84 x 0.63 inches (21.2 x 15.9 millimeters), one of the best macro areas I've seen. Resolution was very high, with excellent detail in the printed details of the dollar bill I use as part of my test target. Color was also good. The Coolpix 4500's flash does a good job throttling down for the macro area, although it did create just a small shadow at the bottom of the frame. An excellent job! (If you really need to do a lot of close macro shooting, it's hard to beat the Coolpix line!)
Overall, I liked the Coolpix 4500 a lot, most particularly its very natural, "filmlike" color rendition. As I've noted elsewhere, Nikon seems to have hit upon a particular "look" in their color and tonal handling and have done a good job duplicating it across their product line. In the case of the 4500, the color is very much in line with other Coolpix models, but the camera's tone curve produces more contrasty images than other models I've tested. In the areas of its greatest strength, its macro and low light capabilities are really exceptional. My favorite feature is the (magical) Best Shot Selector feature, which lets me capture reasonably sharp handheld exposures at shutter times as long as 1/2 second.(!) All in all, I think the 4500 will prove to be a very popular digicam.
Conclusion
With its larger, 4.0-megapixel CCD and a return to an all-metal body, the Coolpix
4500 looks like a great update to what was already an excellent digicam, the
Coolpix 995. In working with the prototype unit, I was really struck by how
well it fit my hands, and how pleasant it was to interact with. The smaller,
sleeker body looks like a real winner, if my own reaction is any indication.
The 4500 offers the same great exposure control and image attribute options
of the 995 model, but with the addition of a maximum five-minute bulb exposure
time and 16 preset scene shooting modes. The ease of full automatic exposure
is great for consumers who just want to point and shoot, while the variable
exposure controls offer room to learn and all the features an advanced user
could wish for. With its flexibility and extensive options, the Coolpix 4500
should satisfy a wide range of users, from novices to pros. About the only significant
disappointments I found were a slower than average shutter response and slightly
higher than normal contrast. Apart from those issues though, the 4500 is an
excellent performer that fits the hand well, snaps good photos, and that caters
equally well to relative novices and advanced users.
<<CoolPix 4500 Test Images | Additional Resources and Other Links>>
Reader Comments!
Questions, comments or controversy on this product? Click
this link to see what other Imaging Resource readers have had to say about
the Nikon CoolPix 4500, or add comments of your own!