Back
to Full Sony MVC-CD250 Review
Back
to Full Sony MVC-CD250 ReviewGo to Sony MVC-CD250 Data Sheet
Go to Sony MVC-CD250 Pictures Page
Up to Imaging Resource Cameras Page
Use your browser's "Back" button to return to the previous page, or the links at the top and bottom of this page to navigate to related information. If you have difficulty fitting the text on this page onto your printer output, simply resize your browser window to a narrower width and print again.
Remember us when it's time to buy!
Dave here: Have our reviews been helpful to you? (Is this article you're reading right now useful?) Preparing this level of information on as many products as we do is incredibly hard work, not to mention expensive. Things on the Internet may look like they're free, but they're not. (As a lot of big dot.com companies are finding out these days.) Somewhere, somebody has to pay to produce worthwhile content. YOU can help us though, by remembering us when it comes time to make your purchase. Would you consider coming back to our site and clicking-through to one of our advertisers to make your purchase? Every dollar you spend with one of our advertisers helps us directly (in affiliate fees) or indirectly (the advertiser will keep renewing their ad contract with us). To make it easy for you to support us, here's a URL you can visit, to see all our current advertisers, with links to click on that will register your visit to them as having come from our site. It's up to you where you buy, but Mike, Mike, Kim, Yazmin, Marti and I would be really grateful if you'd help us out by choosing one of our advertisers to purchase from.
Thank you for your support!
Dave Etchells, Founder & Publisher
Visit our "Buy Now" Page:
https://www.imaging-resource.com/buynow.htm
Back
to Full Sony MVC-CD250 Review
Go to Sony MVC-CD250
Data Sheet
Go to Sony MVC-CD250
Pictures Page
Up to Imaging Resource Cameras
Page
Sony MVC-CD250Sony adds features, and brings the price down on a 2 megapixel CD Mavica! Review First Posted: 02/20/2002 |
|
 |
|
CD-RW provides 156 megabytes of write-once or rewritable storage! |
|
|
2-megapixel CCD delivers up to 1,600 x 1,200 pixel images. | |
|
|
Surprisingly compact for a disc-media camera. | |
|
|
Excellent image sharpness, color, and low light shooting capability. |
Manufacturer Overview
The year 2002 brings important new capabilities to Sony's revolutionary CD-Mavica digital camera line, which first began in late Spring 2000 with the introduction of the Mavica CD1000. Storing their images on CD-R (and now CD-RW) discs, the CD-Mavicas are a logical extension to Sony's original and enormously popular floppy-disk-based Mavica design. With each 80mm CD-R/RW disc storing 156 MB of data for well under a dollar at retail, the CD-Mavicas make nearly perfect traveling companions, since you can fit gigabytes of permanent storage into less space than that occupied by one paperback novel.
Sony seems to be making a habit of practically flooding the digicam market with new models each year at the Spring PMA show. (At least I certainly feel flooded with new models here, needing review! ;-) This year, in addition to three new P-series Cyber-shot units, Sony has also introduced a pair of new CD-Mavicas, the MVC-CD4000, and the MVC-CD250 that's the subject of this review.
As with last year's CD-Mavica introductions, Sony has again updated the technology to improve performance and enhance features. The biggest news of this year's Mavica announcements is the addition of large buffer memories to both cameras. The buffer memory not only reduces shot to shot cycle times, but also allows a "confirm before write" option, that lets you preview photos before deciding whether to keep them or not. This was perhaps the feature most mentioned by readers as topping their wish lists for future CD Mavicas.
With introductory list prices of $599 and $899 for the MVC-CD250 and CD400 respectively, the new models also bring CD-R(W) technology down market, competing with conventional digicams at fairly modest price premiums. Of course, all the whizzy CD technology would be meaningless if the cameras didn't perform up to par with other non-CD models on the market. Fortunately (for Sony and our readers alike), my preliminary tests indicate that the new cameras perform very well indeed, on a par with the top models in their respective resolution categories. (Emphasis on the word "preliminary" there: The images from the prototype models I looked at were a little noisy, something that will hopefully be addressed in the production models.) Given the low cost of the (very high capacity) media and their relatively compact sizes, these new cameras could be the ideal "vacation cameras," perfectly suited for extended trips without a computer to offload images. If you're planning a long trip this summer, you'd do well to seriously consider one of these new CD-Mavica cameras!
High Points
Design
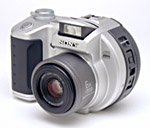
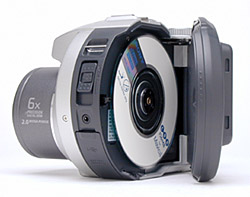
The Mavica MVC-CD250's body design conforms to the round, three-inch storage
media, giving the camera a smooth, curved appearance similar to the CD300 model.
Although it's still a handful, the CD250 is surprisingly compact given its large
media size. At 5.31 x 3.74 x 3.98 inches (138 x 95 x 101mm), it definitely won't
fit into most pockets, but it does come with a neck strap and is easily carried
in a small accessory camera bag (highly recommended to protect the camera).
At 22 ounces (608 grams), including the battery, the CD250 is reasonably lightweight,
with a hard, plastic body that gives it a strong, solid feel.
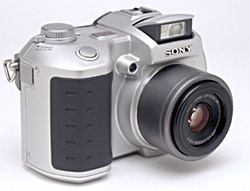
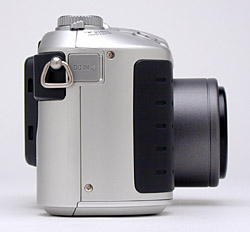
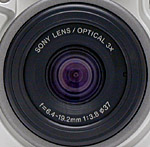
The non-telescoping lens dominates the left side of the camera's front panel,
sharing its space with a small self-timer lamp, the flash, and the AF light.
A rubberized finger grip protrudes from the right front side, providing a comfortable
hold for your right hand, which should fit comfortably around the curve of the
bulky hand grip. A plastic, spring-lock lens cap protects the lens surface,
and can tether to the camera body via a small strap. A set of 37mm filter threads
just inside the lip of the barrel accommodates standard accessory lenses and
filters.
The hand grip (right) side of the camera has a neckstrap attachment eyelet,
and the Command dial nearby (barely visible at the upper left corner, facing
the rear or the camera), for adjusting exposure settings on the camera's LCD
monitor. Just adjacent to the eyelet is the DC In connector jack, covered by
a soft, plastic flap that remains attached to the camera when opened.
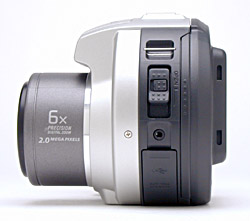
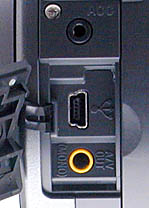
The left side of the camera has the second neckstrap eyelet on top (which also
secures the lens cap tether), and a CD-R compartment "Open" latch,
external accessory connection jack , and connector compartment below. A small,
hard plastic cover protects the connector compartment, which houses the USB
and A/V Out connection jacks. The external flash connection jack, labeled "ACC,"
hosts Sony's HVL-F1000 flash unit, as well as a handful of Sony accessories.
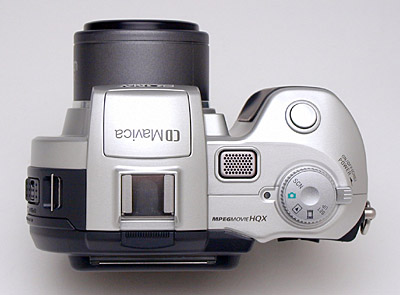
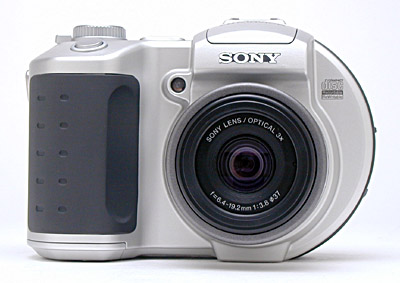
The CD250's top panel features a microphone, Shutter button, Mode dial, and
Power switch. There's also a small, green LED lamp next to the power switch
that glows steadily whenever the camera is powered on. The pop-up flash unit
has been moved forward on the camera body, in comparison to the CD300 model,
most likely in an effort to prevent the lens from blocking the flash on close-up
subjects.
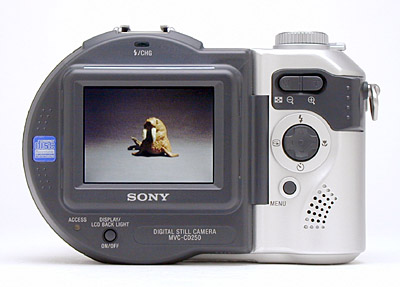
The remaining features and controls are on the CD250's back panel. These include
the color LCD monitor, speaker, and control buttons. An orange LED lamp above
the LCD monitor lights when the flash is charging or when the camera is powered
off and the battery is charging via the AC adapter. In addition to serving as
a navigational tool in the LCD menu system, the Four-Way Arrow pad controls
several camera functions through its four arrow keys, including Flash mode,
Macro, Self-timer, and Quick Review.

The CD-R compartment takes up the entire left side of the back panel, with the
compartment door holding several camera control buttons and the LCD monitor.
The compartment door flips open when the release lever is opened, but does not
deactivate the LCD monitor. Instead a message on the LCD monitor reads "Cover
Open." A tiny, red LED lamp beneath the LCD monitor lights whenever the
camera is accessing the CD-R.
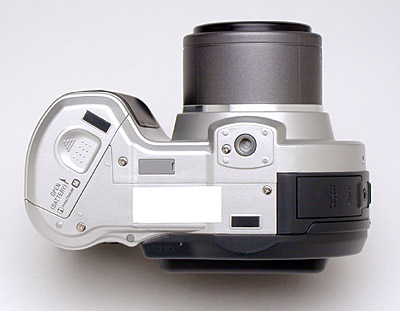
Finally, the CD250 features a fairly flat bottom panel with a battery compartment door and tripod mount. The angled battery compartment and the distance between the compartment door and tripod mount allow for quick battery changes while working with a tripod (something I always notice, given the amount of studio shooting I do with the cameras I test). A sliding, plastic door protects the battery compartment, and a small catch inside locks the battery into place and releases it when you're ready to recharge or replace the battery cell. The tripod mount itself is metal, a detail I always appreciate, especially on heavier units like the CD250. Also on the bottom panel (beneath the LCD monitor) is a tiny Reset button for use by service technicians, and a hidden compartment for a button battery to maintain the CD250's clock and calendar when the main battery is removed.
 Viewfinder
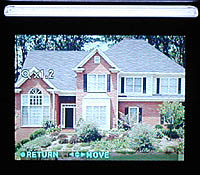
The LCD on the CD250 incorporates a "Solar Assist" (tm) feature, which
I've seen on other manufacturers' cameras, and which was actually introduced
by Sony a few years ago, on the MVC-FD81 camera. It consists of a small translucent
window at the top of the LCD (visible in the photo above as the very bright
bar on top of the LCD), which lets in ambient light behind the LCD screen to
boost the effective brightness of the backlight. This feature works only in
very bright surroundings, and the effectiveness will vary, depending on the
orientation of the camera relative to the primary light source. (It works best
when the sun is directly overhead.) Overall, I found the "assist"
window to be quite helpful when using the LCD outdoors on a sunny day, making
the CD250's LCD one of the most usable I've encountered for outdoor shooting.
You can change the strength of the LCD backlight through the Setup menu, with
options of Normal and Bright.
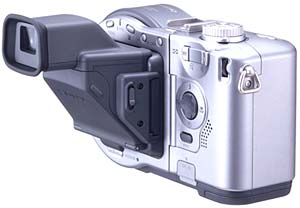
Back when I posted the original CD-300 review Sony emailed to inform me of
their clip-on eye-level viewfinder/magnifier for the CD Mavicas. Called the
DSAC-MVC, this gadget has a complete optical system in it, including a diopter
adjustment, and purportedly provides enough magnification of the high-quality
TFT LCD that it's quite usable for manual focusing. US selling price is $79.95
US. I haven't had the opportunity to test this gadget extensively, but have
played with it a bit at shows, and it seems to work pretty well. (It is a
tad bulky though.) This optical viewfinder adapter (shown above attached to
the CD300) also fits the LCD on the CD250 and 400 as well. - This could be
very handy if you need to do a lot of shooting in very bright outdoor ambient
lighting, or if you're in an environment where the large, bright LCD screen
would be a distraction for others. (Theatre photography?)
 In
Record mode, the LCD monitor's information display reports a bounty of information,
including image resolution, JPEG compression level, number of remaining images
(plus available CD-R space), exposure compensation, flash mode, and an excellent
feature unique to Sony cameras: the number of minutes remaining on the battery.
The LCD also reports the current shutter speed and aperture settings, when
the Shutter button is halfway pressed.
In
Record mode, the LCD monitor's information display reports a bounty of information,
including image resolution, JPEG compression level, number of remaining images
(plus available CD-R space), exposure compensation, flash mode, and an excellent
feature unique to Sony cameras: the number of minutes remaining on the battery.
The LCD also reports the current shutter speed and aperture settings, when
the Shutter button is halfway pressed.
In my testing, I noticed that the CD250's viewfinder was a little "loose,"
in that it showed a larger image area than what was actually in the captured
frame. So, you'll need to back off a little when framing subjects, ensuring
you have enough extra space around all four sides.
 In
Playback mode, the LCD monitor offers an Index display mode as well as a 1.1
- 5x Playback Zoom, which enlarges captured images for closer inspection.
Once enlarged, the arrow buttons enable you to scroll around inside the image.
A Trimming function lets you crop the enlarged image, which I found to be
a useful tool. A very detailed information display includes all exposure settings,
and is accessed through the "W" side of the Zoom control. The Playback
image information includes the file type (movie or still), image size, where
the image falls in the Playback index, remaining CD-R capacity, file name,
date and time the image was taken, and the remaining battery power. The CD250
provides an LCD brightness adjustment through its Setup menu, which changes
the display to Bright, Normal, or Dark, depending on the shooting situation.
In
Playback mode, the LCD monitor offers an Index display mode as well as a 1.1
- 5x Playback Zoom, which enlarges captured images for closer inspection.
Once enlarged, the arrow buttons enable you to scroll around inside the image.
A Trimming function lets you crop the enlarged image, which I found to be
a useful tool. A very detailed information display includes all exposure settings,
and is accessed through the "W" side of the Zoom control. The Playback
image information includes the file type (movie or still), image size, where
the image falls in the Playback index, remaining CD-R capacity, file name,
date and time the image was taken, and the remaining battery power. The CD250
provides an LCD brightness adjustment through its Setup menu, which changes
the display to Bright, Normal, or Dark, depending on the shooting situation.
 Optics
The CD250's macro shooting mode produced great results, capturing a minimum area of 1.78 x 1.34 inches (45.28 x 33.96 millimeters) in my testing. Color and exposure looked good, but the corners of the images get fairly soft when you're shooting at the minimum range of 3 cm. (Do note that, like many cameras, the best macro performance is achieved when the zoom lens is set all the way to it's wide angle position.)
In other test shots, I saw a moderate amount of distortion from the CD250's lens, most noticeably some softness along the left side of the frame. The lens produced an approximate 0.85 percent barrel distortion at the wide-angle setting, and an approximate 0.35 percent pincushion distortion at telephoto, both numbers fairly typical of other cameras I've tested. That said, chromatic aberration was very low, as I only saw two very faint pixels of red coloration on the side of the target lines in the corners of the resolution target. (This distortion is most visible as a very slight colored fringe around the objects at the edges of the field of view on the resolution target.)
The lens also features filter threads to accommodate a variety of Sony lens
conversion kits. Unlike the CD400, since the CD250's lens does not telescope
out when the camera is turned on, normal 37mm-thread accessories can be used
directly with the camera. (No special barrel adapter is required.) When working
with a Sony lens conversion kit, you need to inform the camera (via the Setup
menu) that the lens is attached, so the camera's autofocus can allow for the
additional optical element.
The 2x Precision Digital Zoom function is enabled through the camera's Setup
menu, effectively increasing the CD250's zoom capabilities to 6x. When engaged,
digital zoom takes over once you've zoomed past the normal telephoto range.
You can see the change from optical to digital zoom by observing the marker
in the zoom range indicator on the LCD panel. As always though, I warn readers
that digital telephoto is not the same as optical zoom and that it causes
noticeable deterioration in image quality by adding excess noise and possibly
softening the image. That said, I've always experienced great results with
Sony's Precision Digital Zoom, as it does a nice job of holding on to image
detail and sharpness. Also, as we get into larger and larger CCD imagers,
digital zoom becomes useful at correspondingly larger file sizes. - With the
CD250 though, its 4 megapixel CCD means you can only achieve lossless digital
zooming with the 640x480 image size.
 The
built-in, pop-up flash on the CD250 has three settings that are activated by pressing
the Flash button on the Arrow rocker pad: Auto, Forced, and Suppressed. Auto puts
the camera in charge of whether or not the flash fires, based on existing light
levels. Forced Flash means that the flash always fires, regardless of light level,
and Suppressed Flash prevents the flash from firing, regardless of light levels.
The flash is released from its compartment once the Shutter button is halfway
pressed in either Auto or Forced modes. A Red-Eye Reduction mode is activated
through the Setup menu, and works with both Auto and Forced flash modes. Red-Eye
Reduction fires a small pre-flash to reduce the occurrence of red-eye effect in
people pictures. When shooting in Twilight Portrait mode, the camera times the
flash with the slower shutter speed, so that subjects in the foreground are well
lit, and the darker background shows more ambient light.
The
built-in, pop-up flash on the CD250 has three settings that are activated by pressing
the Flash button on the Arrow rocker pad: Auto, Forced, and Suppressed. Auto puts
the camera in charge of whether or not the flash fires, based on existing light
levels. Forced Flash means that the flash always fires, regardless of light level,
and Suppressed Flash prevents the flash from firing, regardless of light levels.
The flash is released from its compartment once the Shutter button is halfway
pressed in either Auto or Forced modes. A Red-Eye Reduction mode is activated
through the Setup menu, and works with both Auto and Forced flash modes. Red-Eye
Reduction fires a small pre-flash to reduce the occurrence of red-eye effect in
people pictures. When shooting in Twilight Portrait mode, the camera times the
flash with the slower shutter speed, so that subjects in the foreground are well
lit, and the darker background shows more ambient light.
Clip Motion and Multi Burst
This is a slick little feature that I've really enjoyed on many Sony digicams. Clip motion first appeared on the Sony DSC-P1, and now seems to be a pretty standard option on all the latest Sony models. The Clip Motion capture mode turns the CD250 into an animation camera, recording up to 10 frames of still images, which are combined into a single GIF file for animated playback. Frames can be captured at any time interval, with successive presses of the Shutter button. When you've captured as many photos as you need, you just press the center of the Four Way Arrow pad to tell the camera to finish the sequence. Available image sizes are Normal (160 x 120 pixels) and Mobile (80 x 72 pixels), and the number of actual captured frames may vary with image size and available CD space. (You have a maximum of 10, but could be constrained to fewer if your memory is very full.) Files are saved in GIF format, and are played back with (approximate) 0.5-second intervals between frames. Unlike Movie mode, flash is available with Clip Motion.
Multi-Burst is a new recording option I first noticed on the DSC-P51 and DSC-P71 Cyber-Shot models. The mode appears to capture an extremely rapid burst of images, which are played back as a single movie (giving a slow-motion effect). You can select between Fine and Normal quality settings, and available frame intervals include 1/7.5-, 1/15-, or 1/30-second.
Special Record Modes
Like the earlier CD200 and many other Sony digicams, the CD250 gives you several file format options for still images. Through the Record menu, you can select TIFF for uncompressed images, Voice (mentioned above), E-mail, Burst 3, or Normal modes. E-mail mode records a smaller (320 x 240-pixel) image size that's small enough to be easily sent to friends and family by e-mail. The e-mail image is recorded in addition to the image size selected through the Record menu's Image Size option. (The TIFF option likewise records a maximum-resolution TIFF image in addition to a JPEG at whatever size and quality setting you've selected.) Burst 3 mode lets you capture a maximum of three frames in rapid succession, at 0.5 second intervals. Actual frame rates might vary with the image resolution and amount of information to be recorded, but in all my tests, it came in at a solid 0.5 seconds per frame.
Like the CD300 and many other Sony digicams, the CD250 gives you several
recording format options for still images. Through the Record menu, you can
select TIFF for uncompressed images, Voice (mentioned above), E-mail, Burst
3, or Normal modes. E-mail mode records a smaller (320 x 240-pixel) image
size that's small enough to be easily sent to friends and family by e-mail.
The e-mail image is recorded in addition to the image size selected through
the Record menu's Image Size option. (The TIFF option likewise records a maximum-resolution
TIFF image in addition to a JPEG at whatever size and quality setting you've
selected.) Burst 3 mode allows you to take a maximum of three frames in rapid
succession, at 0.5 second intervals. Actual frame rates will vary with the
image resolution and amount of information to be recorded.
|
|
||
|
|
|
|
| Power On -> First shot |
|
When the camera is already familiar with the disc,
startup times are much faster; inserting an unknown disc requires the
camera to scan through it to read its directory structure, thus taking
much longer to start up.
|
| Shutdown |
|
Shutdown time is effectively zero, since there's no lens to retract. If you're still recording an image though, it could take several seconds before the CD is ready to be removed. (If you've just shot a TIFF image, it will take 28 seconds before the disc stops spinning.) |
| Play to Record, first shot |
|
Very fast. |
| Record to play (max/min res) |
0.88/4.75 small/basic file size |
First time in each set is for switch to playback mode after camera has finished saving the image. The second (and longer) time is for immediate switch to playback right after shutter is tripped. |
| Shutter lag, full autofocus |
|
Wide angle time is somewhat slow, tele time is average or better than average. (Very surprising, usually shutter lag is longer in tele than wide.) |
| Shutter lag, manual focus |
|
A bit slower than average. (Average is about 0.5 seconds.) |
| Shutter lag, prefocus |
|
A good bit faster than average. (Average is around 0.3 seconds.) |
| Cycle Time, max/min resolution |
|
Excellent cycle times, thanks to big buffer. (Buffer holds 10-12 frames, depending on scene content.) |
| Cycle time, post buffer fill, max/min resolution |
(28.2 seconds for TIFF) |
Even after buffer fill, cycle times remain excellent. TIFF is the obvious exception, requiring fully 28 seconds to write the huge file to the CD. |
| Cycle time, continuous mode |
|
Bursts limited to 3 frames, but quite fast, at 2 frames/second. |
| Frame rate, multi-burst |
|
Small (320-240) sub-pictures stored in single 1280x960 image as a mosaic. Frame rates are very high, my measurements match Sony's claims of 7.5, 15, 30 fps. |
Thanks to a huge buffer memory, the CD250 is quite fast from shot to shot. Startup can be *very* long though, particularly if the CD is nearly full, with multiple sessions (finalize/initialize) on it. Unfortunately, there's no option for adjusting the power-saving automatic shutdown interval. (The camera shuts itself off automatically after 3 minutes of inactivity.) If you tend to shoot on & off over a long period of time, you may need to train yourself to periodically switch the camera into play and back again, or half-press the shutter button, to keep it from going to sleep on you. The other speed issue is autofocus: Shutter lag isn't horrible (well, not too bad anyway) at wide angle, although still longer than I'd like to see. At telephoto it's quite long though. One possible saving grace though, is that the prefocus shutter lag is very short. Overall, the huge buffer memory made the camera feel very responsive when I was shooting with it, but the shutter lag could be an issue if you'll need to deal with fast-paced action on a regular basis.


Power Switch: Just beneath the Mode dial, this switch turns the camera on or off.
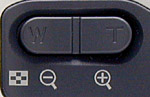
Zoom Buttons: In the upper right corner of the back panel, the Zoom buttons
control the optical and digital zoom (when enabled) in any capture mode. In
Playback mode, the wide angle button activates the Index Display mode, while
the telephoto button controls the Playback Zoom up to 5x (the wide angle button
also zooms back out). Once in Index Display mode, pressing the wide-angle side
again displays the image information for the highlighted thumbnail, including
exposure information.
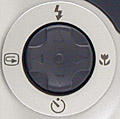
Four-Way Arrow Rocker Pad (also: Flash, Quick Review, Macro, and Self-Timer
Buttons): Situated just below the zoom buttons, this button serves a variety
of functions. On its surface, the pad features four arrows, one pointing in
each direction. When any settings menu is engaged, these arrows navigate through
the menu options. Once an option is selected, you confirm the selection by pressing
on the center of the button. (You will hear a dual tone when you press the center,
as opposed to the single tone you hear when you press an arrow.) In Playback
mode, the right and left arrows scroll through captured images, while the up
and down arrows control the playback volume. If a movie file is displayed, pressing
the center of the button triggers the movie playback. When Playback zoom is
enabled, pressing the center of the button returns the LCD to the normal 1x
image display.
In addition to menu scroll functions, the Arrow Pad also controls certain exposure
and camera settings. The Up Arrow button is marked with a flash symbol, and
cycles between the Auto, Forced, and Suppressed Flash modes (in all capture
modes except Movie). The Right Arrow button, marked with the macro flower symbol,
enables and disables the camera's Macro mode. The Down Arrow controls the Self-timer
mode, cycling between Normal and Self-timer capture modes. Finally, the Left
Arrow activates and deactivates the Quick Review function, which displays the
most recently captured image on the LCD screen.

Menu Button: Located directly below the Four Way Arrow Pad, on the left
side, this button activates and deactivates the settings menus in any camera
mode except Setup (which automatically displays the menu upon entering the mode).

Display Button: Just beneath the LCD monitor, on the far left side, the
Display button controls the LCD display in all camera modes except Setup. In
Record mode, this button turns both the information and image display on and
off. Pressing the Display button in Playback mode sequentially cycles through
three modes: No display; image and information display; and image display only.
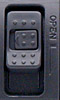
Open CD-R Compartment Latch: Tucked in the side of the CD-R compartment,
just above the external flash connection jack, this sliding button opens the
CD-R compartment door.
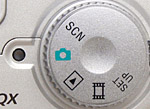
![]() Program AE:
Marked on the Mode dial with a green camera symbol, Program mode places the
camera in control of both the aperture and shutter speed settings, letting you
set the remaining exposure variables (White Balance, ISO, Exposure Compensation,
Image Size, Picture Quality, Flash, and Normal or Spot Metering).
Program AE:
Marked on the Mode dial with a green camera symbol, Program mode places the
camera in control of both the aperture and shutter speed settings, letting you
set the remaining exposure variables (White Balance, ISO, Exposure Compensation,
Image Size, Picture Quality, Flash, and Normal or Spot Metering).
![]() Scene: Scene
mode provides access to four preset shooting modes: Twilight, Twilight Portrait,
and Landscape. The actual scene choices are made through the shooting menu,
via the Scene setting menu. Twilight mode uses a slow shutter speed to accommodate
darker shooting situations. Twilight Portrait uses the flash, in a slow sync
mode, capturing the subjects in the foreground with the flash, and using the
longer shutter speed to record ambient light from the background. Landscape
mode uses a small aperture opening to keep both the foreground and background
settings in focus. The Portrait mode uses a large aperture opening to decrease
the depth of field, thereby keeping the subject in sharp focus and slightly
blurring the background. Most exposure variables, except for aperture and shutter
speed settings, are available in the Scene modes.
Scene: Scene
mode provides access to four preset shooting modes: Twilight, Twilight Portrait,
and Landscape. The actual scene choices are made through the shooting menu,
via the Scene setting menu. Twilight mode uses a slow shutter speed to accommodate
darker shooting situations. Twilight Portrait uses the flash, in a slow sync
mode, capturing the subjects in the foreground with the flash, and using the
longer shutter speed to record ambient light from the background. Landscape
mode uses a small aperture opening to keep both the foreground and background
settings in focus. The Portrait mode uses a large aperture opening to decrease
the depth of field, thereby keeping the subject in sharp focus and slightly
blurring the background. Most exposure variables, except for aperture and shutter
speed settings, are available in the Scene modes.
![]() Setup: Setup
mode lets you change basic camera settings.
Setup: Setup
mode lets you change basic camera settings.
![]() Movie:
Movie mode, marked on the Mode dial with a film strip symbol, captures MPEG
movies with sound by default. Most exposure options are available, except for
flash and ISO. If the Clip Motion option is selected from the Setup menu, Movie
mode will capture up to 10 sequential still images, and combine them into a
single animated GIF file. When Multi Burst is selected in the Setup menu, the
camera records a rapid burst of frames, saved in a single image frame but played
back on the camera as a slow motion animation.
Movie:
Movie mode, marked on the Mode dial with a film strip symbol, captures MPEG
movies with sound by default. Most exposure options are available, except for
flash and ISO. If the Clip Motion option is selected from the Setup menu, Movie
mode will capture up to 10 sequential still images, and combine them into a
single animated GIF file. When Multi Burst is selected in the Setup menu, the
camera records a rapid burst of frames, saved in a single image frame but played
back on the camera as a slow motion animation.
![]() Playback:
Captured images and movies can be reviewed and played back in this mode. Images
can also be erased, write-protected, copied, resized, set up for printing on
a DPOF device, or played back in a slide show.
Playback:
Captured images and movies can be reviewed and played back in this mode. Images
can also be erased, write-protected, copied, resized, set up for printing on
a DPOF device, or played back in a slide show.
 Record
Mode: The Record menu is accessible in all capture modes by pressing the
Menu button, however, not all menu options are available in all capture modes.
(The menu is normally overlaid on the live viewfinder display. I've blocked
the lens to produce a black background here, to help keep down the size of the
screenshot GIF.)
Record
Mode: The Record menu is accessible in all capture modes by pressing the
Menu button, however, not all menu options are available in all capture modes.
(The menu is normally overlaid on the live viewfinder display. I've blocked
the lens to produce a black background here, to help keep down the size of the
screenshot GIF.)
 Playback
Menu: This mode allows you to review captured images on the memory card,
erase them, protect them, set them up for printing, etc. When playing back movie
files, you can opt for "cue/review" playback, which skips through
the movie file quickly, several frames at a time. Pressing the Menu button displays
the following options:
Playback
Menu: This mode allows you to review captured images on the memory card,
erase them, protect them, set them up for printing, etc. When playing back movie
files, you can opt for "cue/review" playback, which skips through
the movie file quickly, several frames at a time. Pressing the Menu button displays
the following options:
 Set-Up
Menu: The following three-page Set-Up menu automatically displays when entering
this mode:
Set-Up
Menu: The following three-page Set-Up menu automatically displays when entering
this mode:
Image Storage and Interface
 A
small CD icon on the camera's LCD display lets you know how much of the disc is
full and how many images are available, depending on the current resolution and
quality settings. An "R" or "RW" below the icon lets you know
what sort of disc is currently loaded in the camera. In Movie mode, the LCD reports
the available recording time at the current movie quality setting. The CD400 allows
you to protect individual images on the disc from accidental erasure or alteration
through the Playback menu. The freedom of a CD-R drive has many advantages over
saving images to floppies (as on some Mavica models), the main one being an increased
amount of storage space -- 156MB.
A
small CD icon on the camera's LCD display lets you know how much of the disc is
full and how many images are available, depending on the current resolution and
quality settings. An "R" or "RW" below the icon lets you know
what sort of disc is currently loaded in the camera. In Movie mode, the LCD reports
the available recording time at the current movie quality setting. The CD400 allows
you to protect individual images on the disc from accidental erasure or alteration
through the Playback menu. The freedom of a CD-R drive has many advantages over
saving images to floppies (as on some Mavica models), the main one being an increased
amount of storage space -- 156MB.
|
Resolution/Quality 156 MB CD-R disc |
|
|
|
|
| High Resolution 1,600x1,200 |
Images (Avg size) |
19 5.76MB |
131 1.2MB |
235 664KB |
| Approx. Compression |
1:1 | 5:1 | 9:1 | |
| Standard Resolution 1,280x960 |
Images (Avg size) |
|
800KB |
451KB |
| Approx. Compression |
|
|
|
|
|
Resolution 640x480 |
Images (Avg size) |
|
237KB |
121KB |
| Approx. Compression |
|
|
|
|
A note about media: Whenever you put a non-Sony CD-R or -RW into the CD250, it flashes the message "Mavica DISC RECOMMENDED" on the LCD as it starts up. For the record, non-Sony CD-Rs seemed to work just fine in my test unit, but prior conversations with Sony technical staff revealed that inexpensive third-party media sometimes has problems with concentricity between the center hole and the data tracks, which can cause read/write problems. I never encountered this while working with third-party media in various Sony CD Mavicas, but just now did have a problem with expanded-capacity media in the CD400 test unit I have. Expanded-capacity CD-R media has been commonplace with full-sized CDs for some years now: The standard spec for full-sized CDs is a capacity of roughly 650 megabytes, but 700 megabyte discs are now quite common. In the same fashion, while the "official" spec for 80mm media is a capacity of 156 MB, you can find third-party discs on the market with capacities of 185 MB. This is an appreciable increase in capacity, to the extent that you might be tempted to give it a try. If you do, I'd advise checking it out carefully before you entrusted your precious photos to it. I was using a 185 MB disc in the CD400 during some of my test shooting, and ended up needing to reshoot a series of test photos. The problem was that, while the camera appeared to recognize and utilize the expanded capacity, after finalizing the disc, I was unable to retrieve the last dozen or so shots I'd recorded on the disc. It's possible that I might be able to access those photos via the USB port, but I haven't had time yet to wrestle with the software on my balky main Windows PC. Even if it does work in that scenario, I'd still advise against using expanded-capacity media as an inherently risky proposition.
Notes for Mac owners: In order to avoid a 1MB limit on writeable file
size, Sony had to go with the Level 3 ISO CD standard, which supports larger
data sizes in packet-writing mode. This means that Macs need a UDF format extension
to be able to read the resulting discs. NOTE that the "UDF Volume Access"
extension that ships with OS9 is apparently not adequate to the task. Although
Apple's UDF Volume Access claims support for Version 1.5 of the UDF ("Universal
Disk Format (tm)") specification, the Adaptec
UDF Volume Access Version 1.04 extension is apparently required to read
the version of the UDF format used by the Mavica MVC-CD400. I can, however attest
to the fact that the iMac supports both the 80mm disc size, as well as the Adaptec
Volume Access extension, as I was able to successfully read "finalized"
CDs from the MVC-CD400 on our slot-loading iMac. (A 400MHz DV model, running
Mac OS 9.0.4.)
 Video Out
Both United States and Japanese models of the CD250 come equipped with an NTSC
video cable for connection to a television set. (I assume that European models
come with a PAL cable, since there is a PAL setting on the camera.) Once connected
to the TV, you can review images and movies or record them to video tape.
 Power
Power
The CD250 is powered by an NP-FM50 InfoLITHIUM battery pack (M series) and comes
with an AC adapter which doubles as an in-camera battery charger. The InfoLITHIUM
battery packs exchange information with the camera, reporting approximately
how many minutes of battery life are left. This information is displayed on
the LCD monitor with a small battery graphic. The AC adapter plugs into a small
socket on the camera's hand grip (just beside the neck strap eyelet). It can
run the camera without a battery inserted, or charge the battery when the camera
isn't in use.
The Li-Ion battery packs used in Sony cameras prevented me from making my usual
power measurements, but the good news is that the InfoLITHIUM system reports
projected camera runtime while the battery is being used in the camera. The
following runtimes were reported by the CD250 with a freshly charged battery,
in Capture and Playback modes. (Note that the runtime with the LCD backlight
turned off will doubtless be longer than what is indicated on the LCD monitor,
but since the time-remaining readout is only shown on the LCD screen, that information
is unavailable.) While these are some of the best runtime numbers I've seen
among digicams I've tested, I still always recommend users purchase and pack
along a second battery. (Another advantage of the Li-Ion technology used in
the InfoLITHIUM batteries is that they don't "self-discharge" like
conventional NiMH rechargeable cells do, and so can hold their charge for months
on the shelf or in your camera bag.)
|
|
|
| Capture Mode, w/LCD |
|
| Image Playback |
|
Included Software
The Sony Mavica-CD250 comes with a software CD loaded with a package called
ImageMixer, and PTP manager (Picture Transfer Protocol, a protocol used by Windows
XP). As of this writing, I haven't had a chance to evaluate this software package,
so will defer comment on it until I've tested a full production version of the
CD250
In the Box
Included in the box are the following items:
Conclusion
Combining the ease of a full automatic, point-and-shoot digicam with the convenience of CD-R image storage, Sony's Mavica MVC-CD250 provides an inexpensive option for CD-R image capture. The camera features the same options and user interface that has made Sony so popular in the digicam arena, making the CD250 yet another welcome addition to the line. Good image quality and the availability of creative shooting modes recommend the CD250 to even the most inexperienced novices. Given the past performance of Sony Mavica digicams, I think the CD250 will do very well for itself.
<<MVC-CD250 Sample Images | Additional Resources and Other Links>>
Reader Comments!
Questions, comments or controversy on this product? Click
this link to see what other Imaging Resource readers have had to say about
the Sony MVC-CD250, or add comments of your own!