Back
to Full Sony Cyber-shot DSC-R1 Review
Back
to Full Sony Cyber-shot DSC-R1 ReviewGo to Sony Cyber-shot DSC-R1 Data Sheet
Go to Sony Cyber-shot DSC-R1 Pictures Page
Up to Imaging Resource Cameras Page
Use your browser's "Back" button to return to the previous page, or the links at the top and bottom of this page to navigate to related information. If you have difficulty fitting the text on this page onto your printer output, simply resize your browser window to a narrower width and print again.
Remember us when it's time to buy!
Dave here: Have our reviews been helpful to you? (Is this article you're reading right now useful?) Preparing this level of information on as many products as we do is incredibly hard work, not to mention expensive. Things on the Internet may look like they're free, but they're not. (As a lot of big dot.com companies are finding out these days.) Somewhere, somebody has to pay to produce worthwhile content. YOU can help us though, by remembering us when it comes time to make your purchase. Would you consider coming back to our site and clicking-through to one of our advertisers to make your purchase? Every dollar you spend with one of our advertisers helps us directly (in affiliate fees) or indirectly (the advertiser will keep renewing their ad contract with us). To make it easy for you to support us, here's a URL you can visit, to see all our current advertisers, with links to click on that will register your visit to them as having come from our site. It's up to you where you buy, but Mike, Mike, Kim, Yazmin, Marti and I would be really grateful if you'd help us out by choosing one of our advertisers to purchase from.
Thank you for your support!
Dave Etchells, Founder & Publisher
Visit our "Buy Now" Page:
https://www.imaging-resource.com/buynow.htm
Back
to Full Sony Cyber-shot DSC-R1 Review
Go to Sony Cyber-shot DSC-R1
Data Sheet
Go to Sony Cyber-shot DSC-R1
Pictures Page
Up to Imaging Resource Cameras
Page
Sony Cyber-shot DSC-R1Sony "breaks the mold" with a unique SLR/all-in-one hybrid design. Review First Posted: 09/20/2005, Updated: 11/18/2005 |
|
 |
|
10.3-megapixel CMOS sensor delivers uninterpolated images as large as 3,888 x 2,592 pixels. |
|
|
Large sensor (almost APS-C size) offers improved noise performance | |
|
|
5x optical zoom lens covers a 24-120mm equivalent focus range. | |
|
|
Pop-up, 2.0-inch LCD monitor that swivels 270 degrees. |
NOTE: This review has now been updated, based on test results from a full production sample of the Sony DSC-R1.
Sony DSC-R1 Overview
Sony's Cyber-shot DSC-R1 is one of the latest in the long (and incredibly broad) line of digital cameras that reflects Sony's commanding position in the digital camera marketplace. The Sony R1 (considerably) extends the high range of the Cyber-shot line, offering a full 10.3 megapixels of resolution, via a Sony-built CMOS sensor. The CMOS sensor in the DSC-R1 is just slightly smaller than the "APS-C" size imagers used in most current digital SLRs, and brings with it the expected improvement in image noise levels and ISO sensitivity that naturally accompany larger sensor chips. At the same time though, the Sony DSC-R1 takes advantage of the low power consumption of CMOS to provide a live electronic viewfinder display, something missing in typical SLR camera designs. Because it needs no bulky mirror assembly, the rear element of the Sony DSC-R1's 5x zoom lens can get much closer to the sensor's surface, greatly reducing chromatic aberration and improving corner to corner sharpness. A unique, 2.0" top-mounted, swiveling LCD monitor rounds out the package. Taken as a package, the Sony DSC-R1 delivers excellent optical and image quality at an affordable price, and is sure to present a compelling proposition for many photographers who might otherwise be considering a digital SLR. Read on for all the details on this unique digital camera.
Sony DSC-R1 Highlights
Sony DSC-R1 User Report
By Shawn Barnett
 Sony is not timid. When they commit to a product concept, especially one that will charge in a new direction, their engineers take it all the way. That truth is as clear as the thud their new DSC-R1 makes when you set it on the table. I've spent some time with it, and I have to say, I'm now more impressed than I was initially. At its original intended price of $1,200, it was hard to imagine how the R1 would succeed in a market dominated by lower-priced digital SLRs. But since Sony dropped the price to $999 at announcement, it's clear: The R1 is going to be very popular among Sony aficionados, and will have a place in many a photography hobbyists bag. It is a powerful tool with an excellent lens, and it has most of what the camera enthusiast is looking for.
The concept
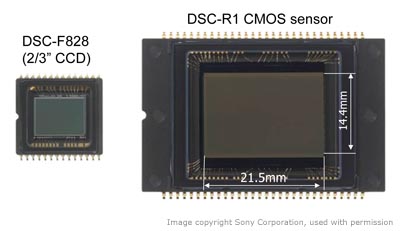
The Sony DSC-R1 is unique in many ways, but one of its chief benefits is that it offers a sensor that is as large as today's affordable SLRs, but with a live LCD preview. No current digital SLR offers full-time color LCD preview, something modern digicam owners have grown to like, so Sony saw an opportunity. They've created a digicam whose sensor is just slightly smaller than APS C--the size used on most modern digital SLRs--but in a package that gives the market live-preview capability. The benefit of a larger sensor over other digicams with smaller sensors, like Sony's own F828, is that a larger sensor has bigger pixels. Bigger pixels can gather more light. More light means the camera's processor can make better decisions about what color and intensity to make each pixel, and that information makes for the cleanest, truest possible image. That is the single most significant argument in favor of digital SLRs, one made weaker with the introduction of the Sony R1.
Now, Sony's not exactly anti-digital SLR, as they've already announced their intention to work with Konica Minolta on a new generation of digital SLR; but the DSC-R1 may be a sign of what's to come from the relationship whose first fruits are slated to appear in 2006.
Along with the benefit of larger pixels, Sony DSC-R1 users will have a lens whose quality and focal length range cannot be found in any comparable camera for the same amount of money. Ranging from 24-120, the R1's f/2.8, 5x Carl Zeiss lens is big, bright, and sharp. Unlike an SLR, this lens is not interchangeable, but Sony claims its extremely short back focus significantly reduces chromatic aberration and coma (blurring in the corners), something our tests have borne out in dramatic fashion. Sony has pointed out that they can achieve this because they don't have the impediment of an SLR's reflex mirror in the mix. As a result, when Sony says "Very Short Back Focus," they're indicating that the rear lens element is 2.1mm from the sensor plane, whereas most SLR lens designs end around 25mm from the sensor plane.
Though I don't think anyone should throw away their digital SLR, it's an interesting point. But the more important benefit from a photographer's standpoint is getting a 24mm equivalent lens on a one-piece digicam, one whose quality may rival what would be a very expensive digital SLR lens. And while there are cheaper all-in-one digicams, none of them has a lens that quite matches this 24-120mm equivalent lens for quality.

Another point of interest is the sensor's pixel density. It's one statistic that we aren't necessarily swayed by ourselves, because the difference between an 8 megapixel and a 10.3 megapixel sensor is almost negligible. The illustration above shows the difference in the number of pixels between the Sony R1 and the Canon Digital Rebel XT. What's interesting is that this is the first time Sony has used a CMOS sensor in one of their cameras, and it's the first sensor that can deliver a live image without overheating. The basic sensor design used in the R1 has already appeared in another impressive digital SLR. Sony was sly about not telling us that it was the Nikon D2X, but we're pretty sure that's what they're referring to. In addition to a slightly lower resolution than the D2X, the sensor in the R1 enters a very low power mode that makes it able to draw a live image without overheating the sensor.
Experience
Dave discusses the finer details of the Sony DSC-R1 later in the review, but I'm really here to talk about the shooting experience. Overall, I enjoy shooting with the R1. With a little time, I think anyone could get used to its interface and set about making some pretty impressive images. There are a few idiosyncrasies to deal with along the way, however. In their drive to make the R1 unique, they made it somewhat difficult to use compared to other digital cameras. Sometimes it's downright frustrating. Some of my frustration might be due to my familiarity with other camera designs, but much of it will be a problem for anyone. We'll get to that soon.
Size
When you first see a picture of the Sony DSC-R1 by itself, it seems only a little bigger than the average long zoom digicam. It is quite a bit bigger than that, however, with only a Canon 20D or Nikon D70 slightly eclipsing its profile; the Rebel XT and Pentax *istD are miniature by comparison. Measuring 5.5 x 3.87 x 6.25 inches (139 x 97 x 156mm) and weighing 2.3 pounds (36.9oz or 1.04kg), the R1 is firmly established in the 20D/D70 weight class. I don't consider that a flaw, by the way, it's just important to know if you're looking for something light and small.
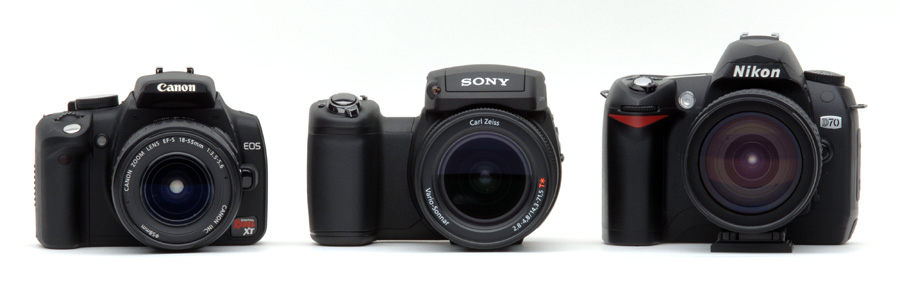
Size comparison: Canon Digital Rebel XT, Sony DSC-R1, and Nikon D70
Though it has size and weight in common with semi-pro SLRs, it is designed more like a long zoom digicam, with its predominant features being a large lens barrel, a big grip, and a large protrusion across the top that houses the LCD and flash. This latter protrusion is shaped like those big aerodynamic HVAC units commonly seen on the top of motorhomes. Extending over an inch from the back panel, jutting out from beneath the big protrusion, is the rather pronounced eyelevel viewfinder, or EVF (Electronic Viewfinder).
As if to further define this niche Sony has identified between the digital SLR and digicam, though the R1 looks like a digicam, it is built more like the aforementioned 20D or D70: very solid, with very little body flex. It's a big step up from most long zoom EVF-based digicams in terms of quality, both inside and out.
Grip
When I first held the Sony DSC-R1, I didn't like the grip much. It's a bit on the big side, which can be as annoying as a grip that's too small. Right away, a joint in my thumb began to hurt like it did after only a short time with the formidable Nikon D2X. Once I learned how to palm the grip properly, though, I was fine with it. Those with longer fingers will rejoice, because there's plenty of room to wrap long digits all the way around the grip. I'd prefer a slightly deeper recess for my thumb, but this works well as is. The camera is heavy enough that you'll need to use your left hand to support it when shooting. Because it has a manual zoom ring on the lens rather than a thumb-driven rocker, you'll need that left hand anyway.
I eschew camera straps and hold the camera in my right hand most of the time, and this grip's depth offers lots of surface area to make that a more secure option. When I shift it to my left hand, which I do frequently with heavier cameras, I find I have to be more cautious. The zoom ring on the lens is nice and stiff, but the focus ring behind it spins more freely. I could see myself forgetting this and dropping the camera, so be advised: use four fingers around the lens and cradle it in your left hand rather than squeezing the lens barrel for better security.
Interface
Digital cameras these days are much like sedans: it's difficult to distinguish one from the other in most cases. They all have Five-way navigation systems, a thumbwheel, a big LCD, and most of the controls are on the camera's top or back. But every once in awhile, someone decides to be different. Sometimes it's great, sometimes things might have been better left alone. The R1 is like that.
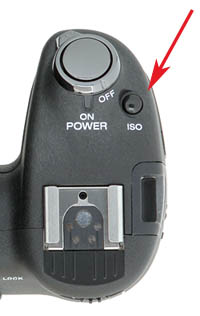
First there are the buttons on the Sony DSC-R1. They're all over the place, and a few are oddly placed. I think my favorite odd placement is the ISO button. It's the only button besides the shutter that's on the camera's top surface. It's nestled just to the right rear of the shutter button, in fact, and the skin of your index finger will touch it every time you reach for the shutter. I kept forgetting that it was there and instead looked for the ISO control where you usually find it on a Sony: in the Menu. Instead, you have to press the button, find the active display, and turn the Main command dial to adjust the ISO.

The display menu is located more than an inch away from either of the displays that it will control, on the back of the grip, just below the upper thumbwheel. I have no problem with the flash and white balance button being on the left side by the lens, nor the focus controls, since they are relevant to the lens. Anyone can get used to that, and the big button is necessary for the "Push Auto" focus control when in Manual Focus mode, so it belongs on the left side. But why the Playback button is perched on a cliff right of the EVF with a barely visible small blue icon to indicate its purpose, I don't know.
Dials, wheels, and joysticks are next. Other manufacturers have used as many as are used here. The Canon 20D as an example has two command dials and a joystick, but they're used differently. With the R1, it's tough to remember which one you need to use for a given function. To move through the menus, you have to use the five-way toggle mounted in the center of the big Sub-command dial. To change selections among Flash settings, you have to press the Flash button and remember to use the thumb dial on the grip, which they call the Main Command Dial. EV and Zoom in playback mode are controlled by the bigger, Sub-command dial surrounding the Multi-selector joystick. Admittedly, much of my confusion with this aspect of the interface is due to my familiarity with other interfaces, including Sony's own. But still more is owing to the unusual LCD/EVF arrangement. Most of the rest can be learned in short order, but using almost all of these controls requires you to see either the LCD or EVF; without them, you're blind to what settings you're changing and how.
Finding the viewfinders
I was intrigued when I first heard about the top-mounted LCD. I thought it made sense, and I wondered why no one had yet done it. Turns out there are a few reasons. My initial hope was that it would be easy and fun to shoot from the hip, a vantage that has always offered a unique angle, not to mention nostalgia for the days of folks posing the family while looking down into their twin-reflex cameras ("Okay, just one more step back, Johnny. Johnny?!"). You can shoot from the hip now with most swing-out displays, but if nothing else this seemed novel.
The problem is complex to explain. I'll start by saying that there's a three-position switch under the huge EVF protrusion that's labeled "Finder, Auto, LCD." To select either the EVF or LCD, you set it far left or far right. If you really want to make good use of the camera, you set it to Auto. In the Auto position, the camera defaults to the LCD until you put the camera to your eye. Then an infrared sensor detects an object nearby and turns the LCD off so you can see an image through the viewfinder. Perfect, right? Wrong.
At least the way I use the camera, which is with the LCD facing up and locked down flush, this auto mode just frustrates. We've taken to calling Auto the "Belly Detection mode," because when you want to take that classic from-the-waist shot, you hold the R1 near your stomach. Get it to within an inch of your belly, and the LCD turns off. The same goes for when you want to play your images back and relax with the camera near your body. Hey, when the LCD is on top of the camera, you're going to want to hold it this way. But unless you make the effort to hold it out away from your body, that LCD is going to turn off. Naturally, it also happens while you're trying to adjust settings.
Why not flip up the LCD and tilt the camera down? I suppose that is the sane thing to do. But compared to other LCD solutions, that does leave the little 2 inch screen vulnerable to impact. It also just seems odd to have a pop-up screen on such a big camera. The combination blocks your view of the scene, and I instinctively kept closing the screen as I moved from place to place to avoid damaging it, which left it in the down position when I next needed to frame a shot or change a setting. With other solutions we've seen, the LCD is always right there next to most of the control buttons so you can see what you're doing. Here you have to remember to either flip up the screen or bring the EVF to your face to adjust or check anything.
The LCD, very nice in its own right, collects fingerprints like a crime scene investigator. Worse, the oily smudges have a tendency to obscure the LCD in bright light (I should also mention that without fingerprints, the transflective TFT performs very well in direct sunlight).
The good
So those are my main gripes. For its part, though the big rubbery EVF protrusion complicates holding the R1 as much as the flip-up LCD does, it also offers a nice relief for the nose. My biggish nose just barely touches the Mode dial. It's also a high-eyepoint viewfinder, very easy to see corner to corner, even with glasses. Speaking of optical correction, the diopter correction is adjusted with a big lever right under the EVF protrusion, and adjustment is easy because of the significant room under there.
The flip-up LCD tilts downward just enough for over-crowd shots, though a little more wouldn't have hurt. It turns left 90 degrees and right 180 degrees. It also snaps closed facing down to protect the LCD in transit.
The big power switch surrounds the R1's shutter release and turns on with that signature Sony quality. Of all recent power switches, this one makes the most sense to me, and it has a better feel than similar Nikon and Pentax designs.
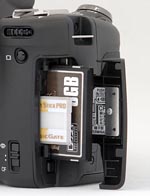 A stiff door covers the CompactFlash and Memory Stick slots on the right of the R1's grip. I particularly like how the door reaches a point in its smooth swing and then locks open. Most just swing to and fro until you shut them.
Right next to the R1's pop-up flash is Sony's now nearly ubiquitous amber AF Assist lamp. It's just as bright as the lamp on other Sony cameras; perhaps the only disappointment is that it wasn't the amazing laser AF assist found on the F828 and V3. The other big surprise is the flash mount perched right atop the R1's grip. Unusual placement, but very logical given the already significant weight out by the camera's lens. I think adding a flash would go a long way toward balancing the camera. Yep, I just tossed another manufacturer's flash on there, and the balance is far better; looks cool too. It just needs a battery grip to complete the picture, though there are no signs that there will ever be one because the battery door is not removable.
Another aspect worth praise is Sony's use of the standard menu system on the R1, with elements common among Sony digicams. Though it's completely different from anyone else's, it works very well, looks contemporary, and is familiar to Sony fans.
Shooting
Out in the field is where the fun begins. The Sony DSC-R1 is one of those cameras that makes each shutter click feel like the best shot you've ever taken. Cameras like the Nikon D2X, Canon 20D and 1D Mark II among others have this feel. It's both a blessing and a curse, and you'll do well to have a computer nearby for a reality check if the shoot is important. The good news is that the sense of fun when shooting with the R1 very often does turn into good and interesting pictures. I suppose the 24mm lens contributes as well. A 24mm lens is sufficiently close to the average human's field of general attentiveness, so you're able to include more of your world in your pictures. As such, any digital camera or digital SLR/lens combination that includes this focal length should be on the photography hobbyist's top ten list.
I love the zoom ring on this camera. When you pay this much for a camera/lens combination, you don't want a sloppy fly-by-wire pseudo-mechanical zoom, you want the fine control and speed that a real mechanical zoom ring delivers. Crazy enough, despite the R1's size and weight, it was the live LCD display and overall design that kept me searching for the zoom toggle on the back of the camera from time to time. There are so few digicams with a zoom ring that it took some getting used to.
Despite all the interface problems I experienced with the Sony R1, I still found myself inspired to get creative. I wished for some event with lots of people to really put the camera through its paces, but I think the camera is more suited to art photography. Artists are wont to spend more time on an image, and it seems this camera is tuned to cater to that kind of user. I think that's true of cameras like the Canon G6 as well.
I also ran the camera though the toddler test, since I have one at my home testing lab. After about 20 shots, I got one I liked. It was in sharp focus and was framed well (my ISO-standard son is a gadget freak like his father, so it's tough to get shots of him doing anything but trying to get close so he can grab my latest review camera). I got far more good shots of my ISO-standard 7-year-old, who was more likely to sit still, at least while doing her homework.
The camera focuses quickly, about on par with SLRs in its class (although it's noticeably slower at telephoto focal lengths), so in theory, it should be fine for kid pictures and other action shots. Because I was shooting in Auto mode, I suspect I may have had trouble with depth of field, since I could usually detect a band of focus somewhere in the shot, but it wasn't always on the critical part of the child. Much of this is due to unfamiliarity with the camera's sweet spots, but of all the shots I took, few were crystal sharp. The ones that were did impress indeed. A particular shot of my son's face yields an amazingly sharp view of his eye when zoomed in to 100 percent on a computer monitor.
Out in the field, sharpness was a mixed bag, but in the Imaging Resource Lab, the images were very sharp. Chromatic aberration is indeed quite low as Sony claimed, and sharpness is pretty consistent from center to corner.
Getting back to action performance, the other impediment to calling this an action camera is the slow shutter lag numbers we got, combined with the low burst depth of three frames. Now, you do get all of those frames in one second if the shutter's set fast enough, but you really have to time your usage of the burst mode, because it's a full 3 to 4 second wait until you can fire your next burst.
Video
One thing Sony engineers weren't able to do with the new sensor design in the R1 was include that old digicam staple: Video. It seems that though they were able to clock the sensor fast enough to draw sufficient pixels for a live preview, there wasn't enough of something to process and store video without heating up the sensor to the point that it produced a lot of noise. That might put off a few prospective buyers, and there are plenty of other cameras to buy if that's important to you. For the user considering a digital SLR, this is something they're already going to have to give up for the sake of greater image quality and ISO performance.
Market
As I mentioned at the outset, the Sony DSC-R1 was destined to a mediocre performance in the market if it came out priced at $1,200. That's true even though it does have quite a bit of merit as a quality digicam. The downward price pressure is high, and when $200 can buy you a whole 3x digicam, it amounts to a lot when customers have SLRs tempting them for less money. The $999 price point is just about right for a 5x zoom camera with a relatively bright f/2.8 lens that reaches back to 24mm, and a 10.3 megapixel sensor slightly smaller than APS-C sized, and that exceeds the pixel count of the SLRs they're looking at. It's enough to make the spec-savvy buyer feel like they're getting a bargain.
It would be hard to get the features offered in the Sony R1 from a digital SLR without paying quite a bit more. To reach that 24mm point, you'd need to buy two lenses, one at the wide end and another at the medium, because most lenses made for these cameras start at about 27mm; reaching 24mm equivalent requires something in the range of a 10mm or 12mm to 24mm lens. In general, these two lenses will cost in the range of $500 to $900 apiece. Having two lenses means you'll have to change them periodically, which will expose your digital SLR to the danger of getting dust on the sensor. That's not as likely with the Sony R1, because the lens never comes off. That's not to suggest that digital SLRs have no advantages, of course. But these are advantages to the Sony R1 worth considering.
Though it has its quirks, the Sony R1 will be tough to send back at the end of the review period. I think it will be very popular among Sony aficionados. They will scoff at my critique and learn to love every foible and difficulty they encounter as part of the wonderful personality of the Sony R1. And as long as they're happily capturing the fine images this camera is able to produce, they'll be right.
Technology Notes
By Dave Etchells
As you may have gathered from Shawn's User Report above, the Sony DSC-R1 is an unusual beast in a number of areas, as it incorporates a few technological twists not found in any other digital camera currently on the market. There's enough that's new here to deserve some separate attention to the technology itself. Here are our notes on a few of the developments embodied in the R1:
Big Sensor + Live Viewfinder
Clearly, the heart of the Sony DSC-R1 story is that it combines a slightly less than APS-C sized image sensor with a live LCD viewfinder display. The larger physical pixel dimensions made possible by larger image sensors lead to improved light sensitivity and lower image noise levels, while the live LCD viewfinder carries the usual benefits of precise framing, the ability to preview white balance and exposure, and flexible shooting angles. The sensor in the DSC-R1 is the same size as those found in a majority of digital SLRs currently on the market, and its ISO and noise performance are at least in the same category as those cameras. The illustration below shows the difference between the sensor used in Sony's earlier DSC-F828 and that used in the R1.
As image sensors become larger and larger, it takes more and more power to clock the data off the array. This isn't a problem when you're only concerned about reading out the image data two or three times a second, but keeping an LCD viewfinder truly "live" means clocking the data off at least fifteen times a second, preferably even more. With an ordinary CCD imager the size of the one in the Sony DSC-R1, this would require a couple of watts of power, about half the amount required to power a typical household night-light. A bit much for a digital camera, to say the least.
On the DSC-R1, Sony is using CMOS sensor technology to beat the power problem. CMOS sensors in general require less power to read data out of the array, and some designs also permit some level of random access to the pixels, further reducing power requirements. In the R1's chip, Sony has apparently worked some electronic magic to reduce the power levels below what even conventional CMOS imagers would require. Comparing the R1 to the earlier DSC-F828 , total power associated with image readout (driver circuitry, the sensor chip itself, and the output sample/hold circuit) has been reduced from 0.75 watts to only 0.2 watts, even while the array size has been considerably increased. Besides making the live LCD viewfinder possible, this also contributes to improved battery life overall.
While the through-the-lens optical viewfinders of digital SLRs provide accurate framing and generally better low-light usability than electronic viewfinders, they can't show exposure or white balance effects the way an LCD can. As alluded to above, the R1's tilt-swivel LCD also greatly facilitates overhead or ground-level shooting. When it comes to low light shooting, the live viewfinder on the Sony DSC-R1 does better than most when faced with dim surroundings, but still doesn't work down to as low a light level as is possible with a human eye behind a typical optical viewfinder eyepiece. Overall though, the R1's combo of live LCD display and near-APS-C sensor size is quite an accomplishment, and opens the door to other camera improvements as well.
Closing out the discussion of the Sony R1's huge image sensor though, there's one very typical all-in-one digicam feature that's missing: Movie capture. Apparently the large sensor size just doesn't permit rapid enough readout or data processing to provide a movie mode. That's a shame, as movie capability is one of the key advantages of all-in-one digital camera designs over the d-SLR format, and a feature that's increasingly popular with consumers.
Optics: Short Back-Focus
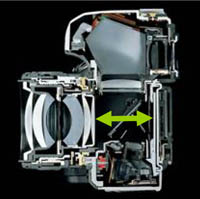 While a live LCD viewfinder display is a nice feature, it's actually not the biggest benefit of the Sony DSC-R1's design. It turns out that eliminating the large mirror box required in digital SLRs conveys huge optical benefits to the lens system. What's involved is reducing the "back-focus distance" of the lens, which makes it much easier to reduce chromatic aberration and other optical defects. The illustration at right shows a cutaway view of a typical digital SLR. The green arrow highlights the distance between the rear lens element and the sensor surface. (Image courtesy Sony corporation.)
As noted, back-focus is basically the distance between the rear element of the lens and the surface of the imager, and has much to do with how difficult it is to engineer the lens system for low chromatic aberration and other distortions. One way to understand this is to consider that the lens has to "project" the image across the gap between the back of the lens and the sensor itself. It makes sense that the smaller this distance, the more accurate the "projection" would be.
In a conventional SLR, the minimum back-focus distance is set by the space required for the rotating mirror assembly. SLRs built on conventional 35mm bodies typically have back-focus distances of 30mm or more, while special digital-specific lenses (like Canon's EF-S series) have back-focuses of about 20mm. By contrast, the R1's optical system has a back-focus distance of only 2.1mm. This should translate into noticeably lower chromatic aberration at wide angle focal lengths, and in fact, we saw very little chromatic aberration with the R1 our test shots. (There was a small amount of chromatic aberration present, but it was quite a bit less than we'd normally expect on a high-end "prosumer" digital camera.) The DSC-R1's lens also showed considerably better corner sharpness than we're accustomed to seeing from cameras anywhere close to its price range.
The excellent optical quality of its lens does a lot to shore up the Sony DSC-R1's competitive position relative to removable-lens digital SLRs: While you can get a very nice d-SLR with lens for about what you'll have to pay for the Sony R1, you'd have to shell out a lot of cash to match its combination of focal length range and genuinely excellent optical quality. (You could easily pay more than the cost of the entire R1, just for a lens or pair of lenses to equal its optical capability and quality.)
Color Rendering: "Vivid" mode
Most cameras have a color mode that boosts color saturation. Here again though, Sony's briefing materials called special attention to the "Vivid" mode on the DSC-R1. The briefing document seemed to focus on "depth of sky" (deeper, richer hues in sky colors) as the primary intent of Vivid mode, and it does appear to emphasize and deepen blues a fair bit. Overall though, Vivid mode appears to emphasize all the additive primary colors (reds, greens, and blues) about equally, leaving purples, some cyans, and yellows more or less untouched.
Color saturation is a pretty subjective thing, with different people having widely varying preferences. - So there'll likely be a wide range of reaction to Vivid mode on the Sony DSC-R1. We personally tend not to be big fans of highly saturated color, so ourselves much prefer the R1's Standard color rendering. Fans of bright, saturated color may well love it though.
A.G.C.S. - Advanced Gradation Control System
Because the range of brightness in the natural world is so much greater than can be properly shown on a CRT or a print, a perpetual challenge for photographic systems has been how to make the best use of the limited tonal range they have to work with. This problem can be particularly acute with digital cameras, most of which tend to expose like slide film, easily losing highlight detail, and plugging shadows. Many digital cameras have contrast adjustments that let you make fairly coarse adjustments to their tone curves, but the results are often hit or miss, as they're made without reference to the actual image itself.
The Sony DSC-R1 introduces a new technology that Sony has dubbed the Advanced Gradation Control System (AGCS for short). More than just a contrast adjustment, AGCS analyzes the tonal distribution of the scene (the intensity histogram), and then stretches or compresses the tonal scale as needed to make best use of the total tonal range. The action taken depends on the particular scene being shot: A low contrast subject will have its tonal scale stretched (increasing contrast), while a subject with a very wide tonal range (such as a backlit subject) will have its tonal range compressed. Because it's histogram based, AGCS should do better dealing with different parts of the tonal scale in the same image: Duller highlights may be pushed higher up the tone scale and somewhat compressed, while dark shadows will also be pulled up the tonal scale, but have their tonal range expanded.
In our own test shooting with the DSC-R1, the effects of AGCS were very subtle, to the point that we could only see its operation clearly on a single image. We had hoped that this function would get tweaked a bit as the camera moved from prototype to full production, but that doesn't appear to be the case: AGCS produces only very subtle effects under most shooting conditions where we would expect it to apply. The concept of AGCS is an excellent one, but it needs to be tweaked a little more, to have a greater impact on typical subjects.
Technology Summary
While a tweaked "vivid" mode will appeal to some users, and A.G.C.S seems to hold some nice potential, the big story with the Sony DSC-R1 is its combination of large sensor and live LCD viewfinder, and most particularly what that combination did for the overall optical design. See below to see a sample of what the R1's optical system can do.
Design
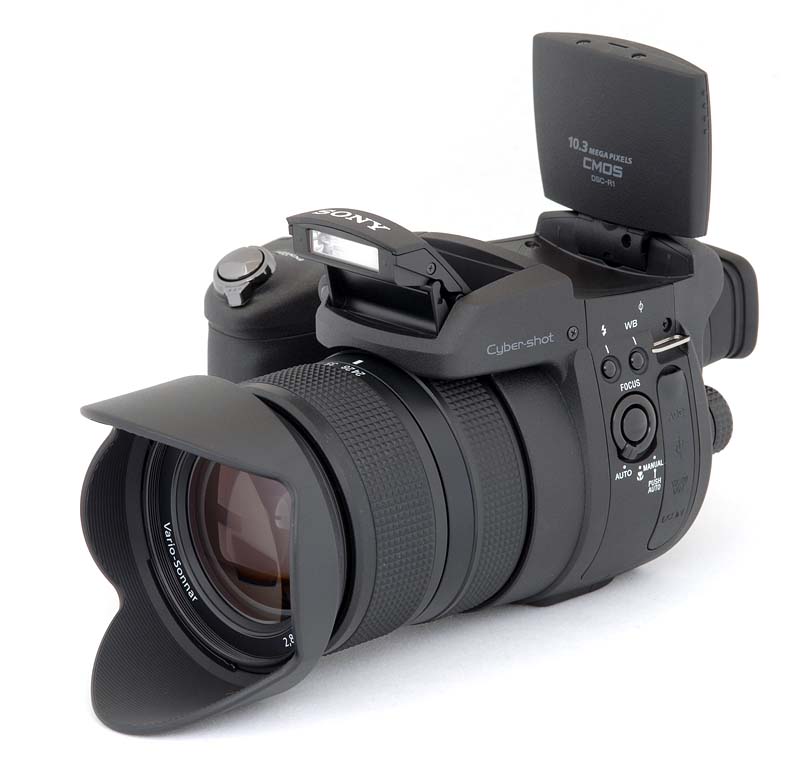
Extending a legacy of high-end digital cameras from Sony stretching all the way back to the original D700 model (introduced in September of 1998), the DSC-R1 updates the line with a 10.3-megapixel CMOS sensor and a very unique pop-up LCD monitor. The R1's actual camera body is really quite small, but the large 5x lens, top-mounted LCD monitor, and large handgrip add to the bulk and make for an impressive appearance. In addition to the large sensor, the R1 makes waves with its pop-up, 2.0-inch LCD monitor that also swivels 270 degrees - a truly unique design. The elongated lens barrel comprises most of the camera's mass, but the R1 offers a very substantial handgrip to help balance out the weight. The camera measures about 5.5 x 3.8 x 6.25 inches (139 x 98 x 156 millimeters) with the lens at its shortest position, but the plastic body panels do help cut the weight somewhat, the camera weighing in at approximately 36.9 ounces, or 1047 grams with battery pack, lens hood, and Memory Stick. An accessory camera bag would certainly be the preferred method of carrying and storing the R1, but the camera does come with a neck/shoulder strap.
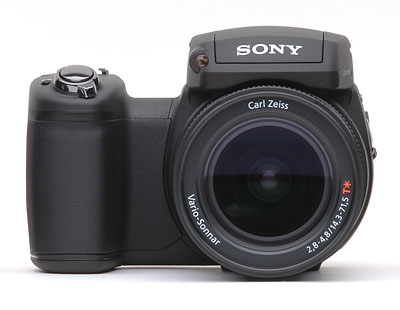
The camera's front panel features the Carl Zeiss Vario-Sonnar 14.3-71.5mm 5x zoom lens and the AF assist / Self-Timer light. Also visible is the front of the pop-up flash compartment. Encircling the lens are two adjustment rings: a rubberized grip on the front end for actuating the zoom lens, and a second Manual Focus ring at the base of the lens. A set of 67mm filter threads on the inside lip of the zoom lens accommodates filters and conversion kit accessories, but I'd caution readers to be careful how heavy a lens they attach there. Because the threads are on the lens barrel itself, the zoom mechanism must support any weight attached there. (At least the zoom lens is built around a manually-actuated mechanism, which strikes me as being quite a bit more rugged than the electronically-actuated designs used on most digicams.) A pair of tabs on the outside edge of the lens serves as a mount for the included lens hood, which slides into the grooves and then turns to click into place.
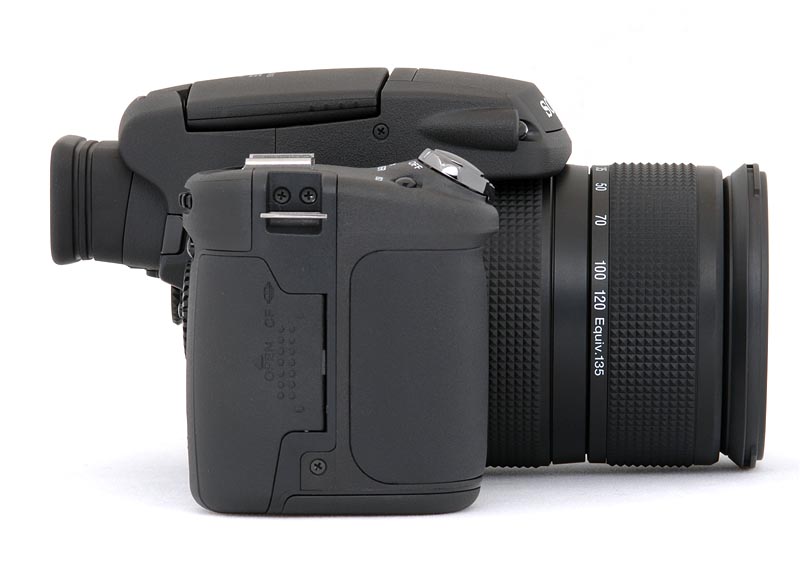
The right side of the camera holds the multi-format memory card slot, covered by a hinged plastic door. The R1 accommodates Type I or II CF memory cards, including MicroDrives, as well as Sony Memory Sticks. At the very top of the right panel is one of the two neck strap attachment eyelets.
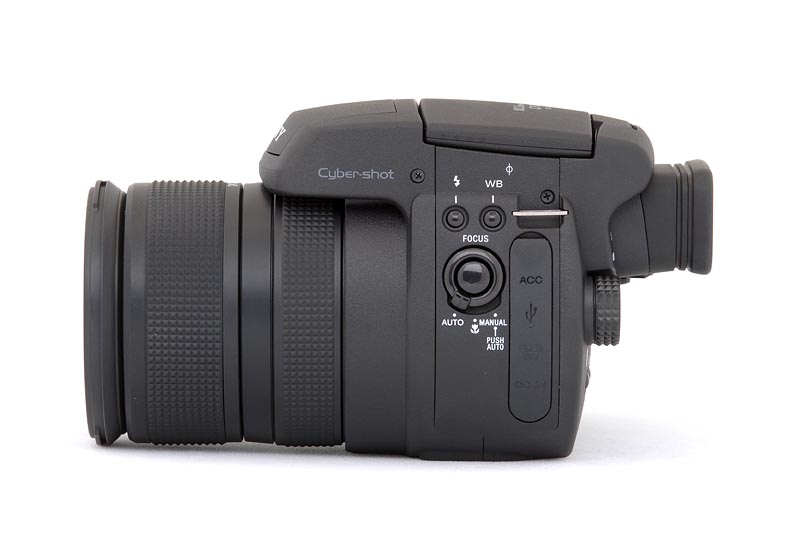
The left side of the camera features a handful of control buttons, including the Flash, White Balance, and Focus buttons, with a Focus mode adjustment dial as well. The second neck strap attachment eyelet is at the top, behind of the White Balance button. A set of connector terminals is safely protected by a plastic along the right edge, and include the ACC, USB, Video Out, and DC In terminals.
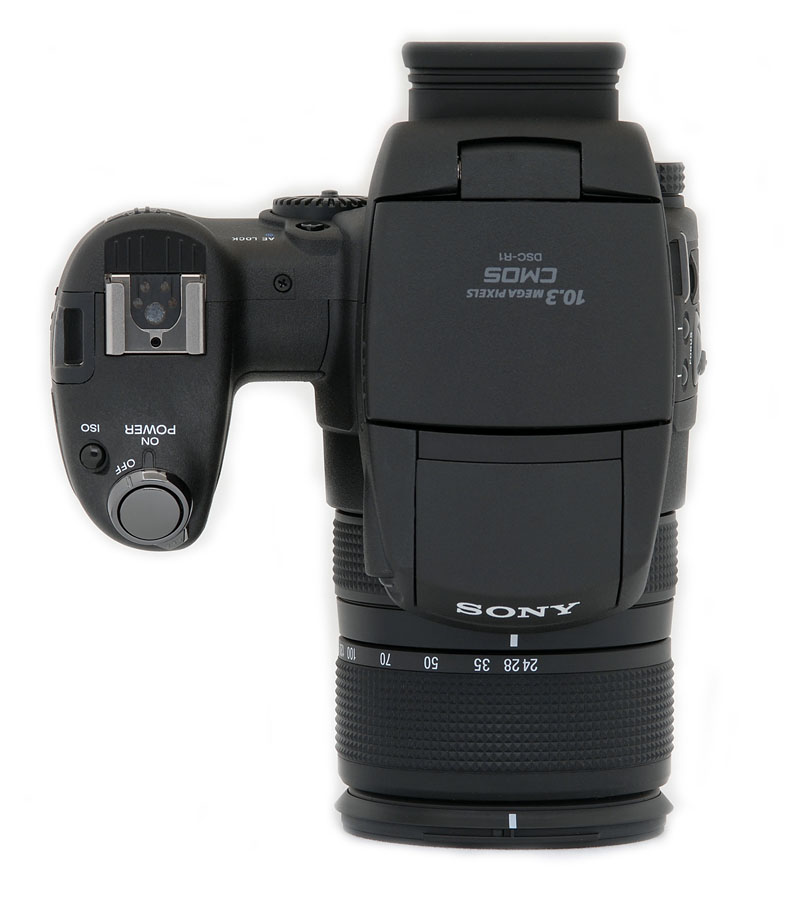
The R1's top panel accommodates the pop-up flash compartment, as well as the pop-up LCD monitor just behind the flash compartment. At the top of the handgrip are the Shutter button and Power dial, as well as the ISO button and a hot shoe for connecting external flash units.
The LCD monitor actually lifts upward 90 degrees, and can then swivel 270 degrees to face just about any shooting angle. Once the LCD monitor is facing backward (toward you), you can also lay it down flat, which aids in framing low shots.
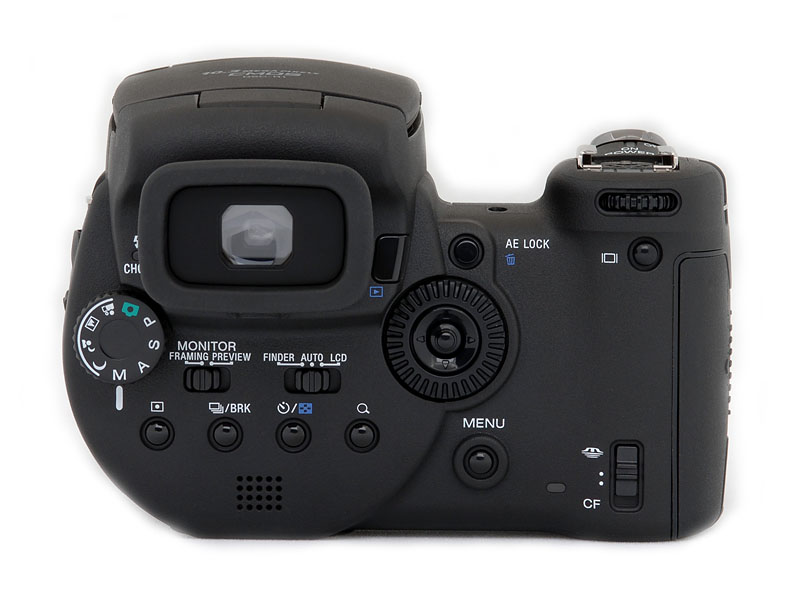
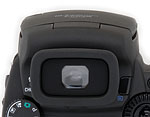
The remaining controls are on the camera's rear panel, along with the electronic viewfinder eyepiece. The R1's electronic viewfinder (EVF) is surrounded by a rubber eyecup for cushioning, and features a dioptric adjustment lever just below the eyecup. Control buttons on the back panel include the Mode, Main Command and Sub Command dials, as well as the Metering, Drive/BKT, Self-Timer/Index, Magnify, Menu, AE Lock/Delete, Display, Playback, and OK buttons. Also on the rear panel are two sliding switches associated with viewfinder operation (Labeled "Monitor") and a memory card format selection switch. A toggle in the center of the Main Command dial is used for menu navigation, and to step through previously captured images in playback mode. (Because of the protruding eyepiece, some camera controls are a little difficult to see in the shot above.)
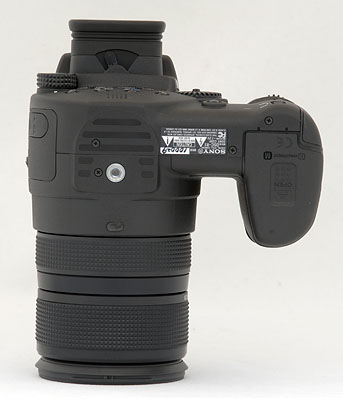
The camera's bottom panel is fairly flat, with a slightly textured grip pad surrounding the metal tripod mount. Also on the bottom panel is the camera's battery compartment, which features a locking, hinged door. The battery compartment is just far enough from the tripod mount to allow quick battery changes while working with most tripods, something I always look for in a digital camera, given the amount of studio shooting I do.
Viewfinder
 The R1's electronic optical viewfinder (EVF) features a 0.44-inch full color TFT display, with 235,200 pixels. A set of sensors inside the eyepiece automatically switches the view from the LCD monitor to the EVF when it detects an object behind the eyepiece, if the Monitor switch on the rear panel is set to Auto. (You can also fix the display to Finder or LCD settings, something we found ourselves doing most of the time, to avoid the view from switching back and forth whenever we held the camera near our bodies.)
The EVF shows the same image and information display that appears in the larger LCD monitor, with a default information overlay that reports basic camera information such as image resolution and quality settings, camera mode, exposure mode, exposure information, the number of available images, AF area, and any other exposure settings.
As noted earlier, the LCD is one area where the Sony DSC-R1 differs significantly from any other camera currently on the market, the LCD screen being mounted on the top of the camera, rather than the back. The display deploys by tilting upward, and can rotate far enough to tilt downward just slightly. I'd really like to see it rotate a bit further down: As it is, it's definitely a help for over-the-head shooting, but it'd be much more convenient if it would just rotate another 10-15 degrees or so. Once tilted up, the LCD can rotate 270 degrees, to face front, back or to either side. The LCD can be folded down against the top of the camera, but facing up. In this position, the camera shoots a lot like a medium format film camera, but we found that the exposed LCD surface became an absolute magnet for fingerprints. Stowed facing the camera body though, the LCD is well protected, and the camera profile quite sleek.
 Pressing the Display button on the rear panel controls the image and information displays. A single press adds a histogram and cancels the information overlay, while a second press disables everything but the AF area. A constant display at the bottom of the screen shows the aperture and shutter speed settings, as well as an EV indicator that shows the amount of over or underexposure for the selected settings. A Diopter Control dial hidden beneath the eyepiece adjusts the viewfinder to accommodate eyeglass wearers. If enabled via the camera's Setup menu, a "zebra" display will mark blown-out highlights in Histogram mode. Finally, the "Expanded Focus" setting on the setup menu enables a 2x magnification when focusing the camera manually, as an aid to determining proper focus. (I have to say though, that a 2x magnification on the LCD screen really isn't nearly enough to judge focus accurately enough for a 10 megapixel sensor.)
The pop-up, 2.0-inch, TFT color LCD monitor also offers a bright, clear image display. The LCD monitor lifts off of the top panel (just behind the flash compartment) and swivels a total of 270 degrees to face just about any shooting angle. You can also close the LCD monitor with the panel exposed, which aids in framing low shots, letting you look down onto the view as you would a standard viewfinder on medium-format cameras (such as the Hasselblad 500 series). A bonus with this design is that you can close the LCD monitor facing the camera and thereby protect it from incidental scratches and dust. We did find though, that the top-mounted LCD was an absolute fingerprint magnet, and fingerprints on its surface made it much harder to see the image in bright ambient lighting.
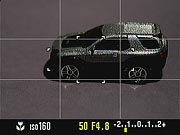 Like the electronic viewfinder, the LCD monitor displays the same range of exposure and camera information, controlled by the Display button. A Grid display option (enabled through the menu system) divides the image area into nine small squares, like grid paper, so that you can more easily align subjects.
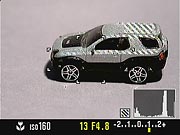 Another interesting display mode is the Zebra option, set through the camera's Setup menu. When enabled, Zebra mode appears with the histogram display, and overlays a zebra pattern on the image area to assist with exposure compensation adjustments. Any portion of the screen with the diagonal zebra pattern indicates overly bright luminance values, or overexposure.
For flicker reduction when shooting under fluorescent lighting, the Monitor mode switch on the rear panel offers Framing and Preview settings. The Framing setting reduces the flicker that sometimes appears on LCD monitors under fluorescent lights, and brightens the LCD display somewhat in the process. Preview mode keeps the LCD at its normal brightness level, and doesn't reduce any flickering. Through the Setup menu, you can specify the flicker frequency (60 Hz in the US, 50 Hz in Europe), or set flicker reduction to Auto. (NOTE though, that the Framing option does increase shutter lag significantly.)
 In Playback mode, the R1 optionally displays a fair amount of image information, which is again controlled by the Display button. The Self-Timer/Index button calls up an index display, showing nine thumbnail images at a time. Additionally, the Magnify button also enlarges captured images to 2x (JPEG only, not RAW format), so that you can more closely check on fine details, or you can turn the Sub Command dial to enlarge images as much as 5x. Pressing the Display button in the normal Playback display enables three histograms, showing the tonal range for red, blue, and green channels.
Optics
| Free Photo Lessons | |
|
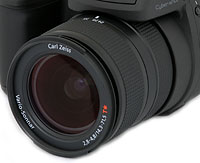 Equipped with a 14.3-71.5mm, Carl Zeiss Vario-Sonnar lens, the R1's zoom range is equivalent to a 24-120mm lens on a 35mm camera. The 24mm wide angle setting is particularly welcome, since most digicam lenses don't go that wide without accessory lens adapters. Likewise, 120mm is a relatively good telephoto length. Unlike most all-in-one digital cameras on the market, the lens zoom operates by rotating a collar around the lens barrel, coupled mechanically to the lens elements themselves. I like the precise control this gives, as opposed to the rocker switch-controlled motor that most digital cameras use to rack the lens in or out. It definitely requires two hands, but the direct manual control will feel great to photographers accustomed to film-based SLRs. A set of 67mm filter threads around the inside lip of the lens barrel accommodate accessory lenses and filters, and a set of tabs around the outside of the lens anchors the included lens hood. A plastic lens cap with spring-loaded catches hooks into the inside lip of the lens, protecting it from dirt and scratches. The lens cap on the DSC-R1 doesn't offer any way to tether it to the camera body, so you'll have to keep it secure while shooting.
As noted in the Technology Overview, the Sony DSC-R1's optical system is quite different from that of conventional digital SLRs. Because there's no need to leave room for a mirror assembly, the rear element of the R1's lens can get a lot closer to the sensor. This drastically shorter "back focus" distance (shown in the illustration above) greatly eases the task of reducing image aberrations in the corners of the frame, and the R1's images show this. Chromatic aberration is significantly lower than we're accustomed to seeing from cameras in this price range, and corner sharpness is also much better than average.
Aperture control can be either manual or automatic, with a maximum aperture of f/2.8 at wide angle and f/4.8 at telephoto. Focus is specified as ranging from 13.87 inches (35 centimeters) to infinity in normal mode, but i our own testing, it didn't seem to get nearly that close. Activated by a rotating switch on the camera's left panel, a Macro focusing mode focuses in on smaller objects, though at the time of this writing, the minimum focus distance was not reported by Sony. Our tests seemed to indicate that the minimum macro range was in fact about 14 inches, with best macro performance being obtained with the lens set at the telephoto end of its range. The resulting minimum macro area of 3.84 x 2.56 inches (98 x 65 millimeters) is on the large side of average. (In considering the focusing distance numbers just mentioned, note that the R1 follows the practice from film-based photography of specifying focusing distance from the "film" (CMOS image sensor) plane of the camera, rather than the front element of the lens. This avoids confusion over distances as the length of the lens changes in response to zoom adjustments, and the "film plane" marker is noted on the left panel of the camera.)
The R1's autofocus system offers Single, Monitor, and Continuous AF settings, available through the Record menu. In Single AF, the camera only sets the focus when the Shutter button is halfway depressed. Monitor AF automatically adjusts the focus before the Shutter button is pressed, but locks focus once the exposure is set by half-pressing and holding down the shutter button. In Continuous AF mode, it adjusts focus at all times, even after exposure lock is completed by half-pressing the Shutter button. The R1 lets you determine the area of the image the camera uses to set the focus from, by selecting one of three autofocus options: Multipoint AF, Center AF, and Flexible Spot AF. The default option is Multipoint, indicated by a set of widely-spaced brackets in the viewfinder image. Center AF bases focus on the very center of the frame, while Flexible Spot AF lets you manually select the spot AF area. In Flexible Spot mode, a tiny set of brackets indicates the spot area, which you can move around the frame using the Multicontroller.
The Focus switch on the camera's left side offers Auto, Macro, and Manual positions. When you select Manual mode, you can manually adjust the focus using the rubberized adjustment ring on the lens barrel. You can also opt to let the camera set the focus by pressing the Focus button in the center of the Focus dial, then fine-tune the focus with the adjustment ring.
In addition to the 5x optical zoom, the R1 offers two digital zoom options, Precision and Smart zoom. Smart Zoom allows variable digital enlargement up to 15x, depending on the image resolution setting. The maximum 15x enlargement (5x optical plus 3x digital) is only available at the 1M resolution, to avoid too much loss of detail, while no enlargement at all is available at the 10M resolution setting. Precision digital zoom instead digitally enlarges the image by 2x (for a maximum total optical + digital zoom of 10x), at any resolution size, and thus results in greater loss of quality at the higher resolutions. I always remind readers that digital zoom always trades off resolution for magnification, since the center of the sensor image is simply "stretched" and enlarged to fit the screen. Sony's Smart Zoom does at least avoid the softness produced by stretching the image data, by limiting the amount of digital zoom to that which can be accomplished without interpolation.
Lens Tests(!)
Blur Index |
|
| Chromatic Aberration  |
Vignetting (Shading) ) |
Distortion) |
(Click on the thumbnails to see full-size graphs and interactive charts.) |
For details of how we conduct these tests, just what they reveal, and equally importantly, what they don't reveal, visit SLRgear.com, and check out the links covering these topics on the right hand side of the home page.
Meanwhile, here are the results from our evaluation of the DSC-R1. Click on one of the thumbnail images at right, to view either the full-size graph, or to launch an interactive viewer to see how blur and chromatic aberration vary as you change the focal length and aperture.
We need to make a very important note about the results seen here, before we actually discuss them. The Blur Index graphs are showing a measure of "softness" that's derived from MTF curves measured at multiple points across the image plane. This measure correlates very well with visual perceptions of sharpness, but is also quite susceptible to variations in the sharpening applied to an image. To remove this factor as much as possible in our measurements, we choose the sharpening setting for each camera that produces the most accurate edge profile, that shows the steepest slope as an edge transitions pixel boundaries, but with the least possible overshoot or undershoot on either side of the edge, caused by the sharpening algorithm. In the case of the DSC-R1, the default sharpening produced a rather large overshoot on the light sides of edges, indicating significant over-sharpening of the image. As it happens, the "low" sharpening setting on the camera produced a nearly ideal edge, with a clean, relatively steep profile, and virtually no overshoot. For this reason, we chose to shoot the DxO targets with the in-camera sharpening set to low. This results in higher values than would otherwise be the case, but the default sharpening produced artificially low ones. Based on the contour of the edge profiles, the graphs shown above right should correlate fairly well with the results on SLRgear.com, obtained with Nikon and Canon d-SLR bodies, because we chose sharpening settings on those cameras to produce the sort of clean edge profiles we see in the R1's images captured at its low sharpening setting. (This serves to illustrate quite well the difficulty of making cross-camera comparisons with the DxO data, and the care needed in doing so.)
With all the above as a caveat, when we look at the R1's optical test results, we see graphs so good that they're almost boring. Sharpness across the frame and across the aperture and focal length range is almost perfect, as shown by the exceptionally low and uniform blur numbers.
Worst-case chromatic aberration is likewise low, and the average CA numbers are lower still, indicating that what CA is present doesn't extend very far into the frame. Shading (or vignetting, as it is more popularly called) is also very low, reaching a maximum of about a third of an f-stop at the 24mm equivalent focal length and maximum aperture, but in all other cases being less than 1/4 stop.
Worst-case geometric distortion is about 0.8% barrel, at maximum wide angle, dropping rather rapidly to about 0.2% pincushion at 20mm actual/35mm equivalent focal length, rising just a bit at 50mm equivalent, and then gradually decreasing to nearly zero at maximum telephoto.
To understand just how good these results are, you'll need to visit SLRgear.com and look at some of the test results for the more expensive lenses there. Even a cursory comparison will reveal that you'd easily have to spend several thousand dollars on lenses alone to get this kind of optical performance with a conventional digital SLR.
What would it cost to duplicate the Sony DSC-R1 conventionally?
It's of course impossible to do a direct apples-to-apples comparisons between the DSC-R1 and a kit assembled from a conventional digital SLR and a kit of lenses, but it's interesting to put together a shopping list to see roughly what it would take to achieve similar performance. Let's take a look at a Canon kit that approximates the DSC-R1's capabilities: (Note that in the following, we're including only lenses that match the optical performance of the R1's lens. There are certainly cheaper lenses that will cover the same focal length range, but their optical performance doesn't approach that of the R1.)
| Camera | Sony DSC-R1 |
Canon Rebel XT Kit I |
Canon Rebel XT Kit II |
| Components | DSC-R1 | Rebel XT Canon EF 17-40mm f/4 Canon EF 24-70mm f/2.8 |
Rebel XT Canon EF-S 10-22mm f/3.5-4.5 Canon EF 17-40mm f/4 Canon EF 24-70mm f/2.8 |
| Focal Length Range (equiv) | 24 - 120mm f/2.8 - 4.8 |
27 - 112mm f/2.8 - 4.0 |
16 - 112mm f/2.8 - 4.5 |
| Megapixels | 10 | 8 | 8 |
| Shutter Lag (Full AF) |
0.33 - 0.71 | 0.20 - 0.24 | 0.20 - 0.24 |
| Single-shot cycle time | 1.27 | 0.38 | 0.38 |
| Continuous mode cycle time | 0.31 | 0.35 | 0.35 |
| Buffer depth | 3 | 13 | 13 |
| Typical online price | $999 (May drop) |
$2700 (Based on XT body-only, plus lenses) |
$3400 (Based on XT body-only, plus lenses) |
From the above, it's clear that the SLR systems win on responsiveness, cycle times and buffer depth, as well as future expandability. The DSC-R1 very much holds its own optically with them though, and at a cost that's much lower. Our personal preferences lean toward the concept of building a system around a given manufacturer's lenses, and upgrading our body every few years, but if you were faced with a budget that would only tolerate an expenditure of a thousand dollars or so over the next several years, the DSC-R1 makes a compelling case for itself.
Exposure
| Free Photo Lessons | |
|
In straight Auto mode, the camera controls everything about the exposure, except for flash, zoom, and focus. Program AE mode keeps the camera in charge of the exposure, while you have control over all other exposure options. A Program Shift option lets you cycle through a range of equivalent exposures, placing emphasis on shutter speed or aperture, simply by turning the Main Command dial in Program AE mode. Aperture Priority mode lets you select the lens aperture setting, from f/2.8-f/4.8 to f/16 depending on the zoom setting, while the camera selects the most appropriate corresponding shutter speed. In Shutter Priority mode, the user selects the shutter speed, from 1/2,000 to 30 seconds, while the camera chooses the best corresponding aperture setting. (Available shutter speeds also depend on the current ISO setting.) Switching to Manual mode gives you control over both shutter speed and aperture, with a Time setting available for longer exposures. The Time setting is identical to a traditional Bulb mode, where you can keep the shutter open for as long as you need to, up to the 30 second maximum time. Like many other higher-end digital cameras, the R1 also offers a "program shift" capability, where you can step through a series of equivalent aperture/shutter speed combinations by rotating the Main Command dial. This is often more useful than shutter- or aperture-priority mode, as you can still let the camera decide all the exposure variables, but simply tell it to bias its decision toward larger or smaller apertures, slower or faster shutter speeds. This avoids the problem of inadvertently selecting a shutter speed or aperture that would result in an over- or underexposure, but still gives you good control over depth of field and motion blur.
As described above, the R1 also offers four preset scene modes, accessed via the Exposure Mode dial. Portrait mode produces better-looking people shots by enhancing skin tones and using larger lens apertures to reduce the depth of field (creating a slightly blurred background). Landscape mode focuses on distant subjects, and is best for broad vistas of scenery. In Twilight Portrait mode, the camera uses a slower shutter speed to allow more ambient light into the image, however it also records true black values and preserves the bright colors of artificial lighting. In standard Twilight mode, the camera uses a slower shutter speed as well, but disables the flash to preserve the color and ambiance of the scene.
The R1's default metering mode is a Multi evaluative system, which takes readings throughout the image to determine exposure. Center-Weighted and Spot metering options are also available. Spot metering is useful for high-contrast subjects, as it bases the exposure reading on the very center of the image, letting you set the exposure based on a small portion of your subject. Center-Weighted metering also bases the exposure on the center of the image, but the camera takes its readings from a much larger area in the middle of the frame. You can also hold or lock the exposure reading for a particular part of the image (without also locking the focus) by pressing the AE Lock button on the back panel.
As we mentioned earlier, the Sony DSC-R1 has a much larger sensor than any other "all in one" digital camera, the chip dimensions approaching those of the "APS-C" size sensors used in many digital SLRs. Larger sensor pixels naturally convey greater light sensitivity, and lower noise levels than do smaller ones, so the R1's ISO capability approaches that of many digital SLRs currently on the market. The R1's light sensitivity can be set to Auto, or to ISO equivalents of 160, 200, 400, 800, 1,600, or 3,200. While the camera lets you set its ISO as high as 3,200, we found little value in doing so: Images shot at that sensitivity level were pretty much unusable due to high image noise and noticeable color shifts. Exposure compensation is adjustable from -2 to +2 exposure equivalents (EV) in one-third-step increments, and an auto-bracketing option can snap three shots in rapid succession, varying the exposure between each in steps of 0.3, 0.7, or 1.0 EV units. If you have the histogram display enabled on either viewfinder, you can see the effect of the exposure compensation adjustment on the live image area. Exposure compensation is adjusted by turning the Sub Command dial on the rear panel. The Auto Exposure Bracketing option is enabled through the Drive button, and you can set the bracketing parameters once you've selected Bracketing mode.
The R1's white balance system offers a total of seven options, including Auto, Daylight, Cloudy, Fluorescent, Incandescent, Flash, and One Push, which is the manual setting. The One Push mode determines white balance by snapping a picture of a white card. The camera then adjusts its color balance to render the white card with a neutral hue, and saves the setting as the One Push option. Three color modes are also available, and include Adobe RGB, Vivid, and Standard. You can also adjust image contrast, sharpness, and saturation, or record images in black and white or sepia tones.
A new offering under the R1's contrast setting is an option for A.G.C.S. (Advanced Gradation Control System). Because the range of brightness in the natural world is so much greater than can be properly shown on a CRT or a print, a perpetual challenge for photographic systems has been how to make the best use of the limited tonal range they have to work with. This problem can be particularly acute with digital cameras, most of which tend to expose like slide film, easily losing highlight detail, and plugging shadows. Many digital cameras have contrast adjustments that let you make fairly coarse adjustments to their tone curves, but the results are often hit or miss, as they're made without reference to the actual image itself.
More than just a contrast adjustment, AGCS analyzes the tonal distribution of the scene (the intensity histogram), and then stretches or compresses the tonal scale as needed to make best use of the total tonal range. The action taken depends on the particular scene being shot: A low contrast subject will have its tonal scale stretched (increasing contrast), while a subject with a very wide tonal range (such as a backlit subject) will have its tonal range compressed. Because it's histogram based, AGCS should do better dealing with different parts of the tonal scale in the same image: Duller highlights may be pushed higher up the tone scale and somewhat compressed, while dark shadows will also be pulled up the tonal scale, but have their tonal range expanded.
In our own test shooting with the DSC-R1, the effects of AGCS were very subtle, to the point that we could only see its operation clearly on one or two images. We'd hoped that the final production version of the camera's firmware would cause AGCS to have a broader impact, but it doesn't appear to have been the case. The concept of AGCS is an excellent one, if it can just be tweaked a little to have a greater impact on typical subjects.
Continuous Shooting
The R1 features a Continuous Shooting mode, accessed through the Drive button on the rear panel. The camera can capture a rapid series of up to three images without pausing. The three-frame limit applies regardless of the resolution images you're shooting, it seems to be a buffer memory limit involving the handling of the image data as it comes off the CMOS image sensor. The frame rate during the three frame burst is a very respectable 3.23 frames/second, but the camera has to pause between three and four seconds between bursts, to copy the data to the memory card, before it can continue. - The three-frame limit is one rather disappointing characteristic of the R1 relative to some of its competition, but is adequate for most situations other than sports shooting. (And even there, a well-practiced trigger finger is more valuable than almost any continuous shooting mode.)
A 10-second Self-Timer mode is also available, by pressing the Self-Timer/Index button on the rear panel.
Shutter Lag/Cycle Times
When you press the shutter release on a digital camera, there's usually a delay or lag time before the shutter actually fires. This time allows the autofocus and autoexposure mechanisms to do their work and can amount to a significant delay in some situations. Likewise, the delay from shot to shot can vary greatly, and is also important to the picture-taking experience. Since these numbers are rarely reported by manufacturers or reviewers (and even more rarely, reported accuracy), I routinely measure both shutter lag and cycle times using an electronic test setup I designed and built for the purpose. (Crystal-controlled timing, with a resolution of 0.001 second.) Here are the numbers I collected for the DSC-R1:
|
|
||
|
|
(secs) |
|
| Power On -> First shot |
|
Average for its class, slower than most d-SLRs.
|
| Shutdown |
|
First time is simple shutdown, second time is worst-case buffer-clearing time. Worst-case time is on the slow side, corresponds to clearing two RAW+JPEG images. Buffer clears in 6 seconds after forty large/fine JPEGs in single-shot mode.
|
| Play to Record, first shot |
|
Time until first shot is captured. Almost immediate.
|
| Record to play |
|
First time is that required to display a large/fine file immediately after capture, second time is that needed to display a large/fine file that has already been processed and stored on the memory card. First time is a little slow.
|
| Shutter lag, full autofocus ("Framing" viewfinder mode) |
|
First time is at full wide-angle, second is full telephoto. These times measured with the LCD monitor in "Framing" mode, which gives a noticeably faster refresh, but doesn't allow previewing depth of field or flicker reduction for fluorescent lighting. Only average for "prosumer" cameras, quite a bit slower than most d-SLRs. |
| Shutter lag, full autofocus ("Preview" viewfinder mode) |
|
First time is at full wide-angle, second is full telephoto. These times measured in "Preview" mode, which gives slower LCD/EVF refresh, but faster shutter lag and cycle times. |
|
Shutter lag, continuous autofocus, wide angle zoom setting |
|
These times are for "Monitor" autofocus mode. First time is for LCD/EVF in Framing mode, second is for Preview mode. First time is still fairly sluggish, second time is quite fast.
|
| Shutter lag, flash enabled | 0.53 | Time is for Preview viewfinder mode, lens at wide angle focal length, single-shot autofocus. Very slightly slower than best times without the flash, nice that there appears to be very little shutter lag penalty for using the flash. |
| Shutter lag, manual focus |
0.042
|
Very fast. (!) Only Preview viewfinder mode is available when manually focusing. |
| Shutter lag, prefocus |
0.007
|
Time to capture, after half-pressing shutter button. Extremely fast. |
| Cycle Time, RAW + max jpg resolution |
2.12 / 1.37 |
Times are averages. Shoots 2 frames this fast, then slows. First time is for Framing viewfinder mode, second is for Preview. Both are on the slow side, particularly relative to d-SLRs. After buffer is full, slows to about 8.7 seconds per shot with a Lexar 80x CF card, about 6.1 seconds with a Memory Stick Pro. Overall, not too bad, but not wonderful either, and two-shot buffer capacity is very limiting. |
| Cycle Time, max / min resolution, Framing viewfinder mode |
1.66 / 1.91 |
First number is for large/fine files, second number is time for small/normal files. Times are averages. In both modes, shoots this fast seemingly indefinitely. In large/fine mode, the buffer takes 6 seconds to clear after 40 frames. In small/normal mode, the buffer clears after each shot. (Buffer clearing times measured with a Lexar 80x CF card. Slower cards are likely to take longer to clear.) Not bad, considering it can seemingly shoot at this rate all day, but the shot to shot time is again quite slow compared to the d-SLRs the R1 will be competing with. |
| Cycle Time, max JPEG resolution, Preview viewfinder mode | 1.27 | Here again, much faster in Preview viewfinder mode. Also, Preview mode avoids the "pre-press penalty" of Framing mode. (In this mode, if you release and press the shutter button immediately after the previous shot, the camera will snap the next picture as soon as it's able.) Shoots this fast for eleven shots, then slows to 1.76 seconds/shot with a Lexar 80x CF card. Slower cards may produce slower cycle times after buffer fill. (We didn't test this mode with a Memory Stick.) Buffer empties in just over a second after the last shot, regardless of how many shots captured. |
| Cycle Time, Flash exposures | 6 | Flash at maximum power output. About average. Would be unimpressive, but the R1's flash is pretty high power (has excellent range), so some allowance must be made for just how much energy is being loaded back onto the flash capacitor after a full-power pulse. |
| Cycle Time, continuous mode, max/min resolution | 0.31 / 0.32 (3.23 / 3.17 fps) |
First number is for large/fine files, second number is time for small/normal files. Times are averages. Shoots 3 frames this fast in large/fine mode, then shoots pairs of shots with about 3.5 second pauses between groups. In small/normal mode, shoots groups of three frames with about 3.7 second pauses between groups. (Buffer clearing times were measured with a Lexar 80x CF card, slower cards would result in correspondingly longer buffer clearing times.) Three frames/second isn't a bad rate, but a three-frame limit is surprising in a camera at the R1's price point. (Again, typical d-SLRs do much better.) |
While the Sony DSC-R1's performance isn't bad when compared to most "prosumer" digital cameras, many people considering it for purchase will also be considering buying a d-SLR. When stacked up against almost any d-SLR, the Sony R1's timing performance leaves much to be desired. Its best-case shutter lag of 0.33 second compares favorably with the lower end of the digital SLR market, but in most operating modes, shutter lag is between 0.5 and 0.75 second, definitely slower than the d-SLR competition. At 1.27 seconds (best case) between frames, single-shot cycle times are reasonably fast compared to other all-in-one digital cameras but once again slow relative to d-SLRs. In continuous mode, it's fast enough at a bit over 3 frames/second, but is crippled by an inadequate 3-frame buffer capacity. It does offer a RAW+JPEG recording mode, but here again, its cycle time is a rather modest 2.12 seconds, and it can capture only two frames in this mode before slowing to nearly 9 seconds per frame with a fast CF card, or 6.5 seconds with a Memory Stick Pro. (CF card timing data collected with a Lexar 80x card, slower cards will empty the buffer more slowly, and show slower cycle times after the buffer is full.) The one bright spot is that the camera is blazingly fast when it's "prefocused" by half-pressing and holding down the shutter button before taking the shot. - Its shutter lag is an astonishing 0.007 second (7 milliseconds) in that mode.
Operation & User Interface
The DSC-R1's user interface is similar to other members of the Cyber-shot line, although the scattered arrangement of external buttons may be a little confusing on first approach. You can control a lot of the essential camera functions without having to resort to the on-screen LCD menu system, though the LCD menu system is simple to navigate when needed. The Mode dial on the rear panel adjusts the main exposure mode, with a sprinkling of option buttons on the rear and back panels. Though you'll likely be able to snap a quick picture or two with the camera right out of the box, you'll need a little time to get acquainted with the control layout. Though once learned, the DSC-R1's user interface is a snap.
Control Enumeration

Zoom Ring: Surrounding the end of the lens barrel, this rubberized grip adjusts the optical zoom.
Manual Focus Ring: Behind the Zoom ring on the outside of the lens barrel, this narrower rubberized ring adjusts the camera focus in Manual focus mode.

Power Dial: Surrounding the Shutter button on top of the camera, this dial turns the camera on and off.
Shutter Button (see above): Located in the center of the Power dial, this button sets exposure and focus (in autofocus mode) when half-pressed, and trips the shutter when fully pressed.

ISO Button: To the right of the Shutter button, this button adjusts the camera's sensitivity setting when pressed while turning the Main Command dial.
![]()
Main Command Dial: This ridged wheel sits at the top of the rear panel, conveniently accessible to your thumb. In Aperture Priority and Shutter Priority exposure modes, this dial controls either the aperture or shutter speed settings. In Manual mode, the dial controls aperture. This dial also makes a range of camera adjustments, when turned while pressing a control button.

Display Button: Directly beneath the Main Command dial, this button controls the information and image displays in the LCD monitor and EVF.
![]()
AE Lock / Delete Button: Left of the Display button, this button locks the exposure when pressed in any shooting mode. In Playback mode, this button pulls up the Delete menu, for deleting captured images.

Playback Button: Practically hidden on the right side of the EVF eyepiece, this button puts the camera into Playback mode. A second press returns to normal record mode, as does half-pressing the Shutter button.
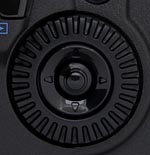
Sub Command Dial: This large, notched dial sits about center in the rear panel, and controls a range of camera settings when turned while pressing control buttons. In Manual exposure mode, turning this dial adjusts the shutter speed. In any other exposure mode, this dial adjusts the exposure compensation. In Playback mode, turning the dial controls the amount of digital enlargement, up to 5x.
Multicontroller (see above): This joystick-like controller is in the center of the Sub Command dial, and acts as a four-way navigational tool. Moving the controller in any direction navigates through menu options, while pressing down on the center makes selections. In Playback mode, the left and right directions scroll through captured images, and moving the tool in any direction lets you pan through enlarged images. In capture modes, pressing the controller cycles through available autofocus area options. When in Flexible Spot AF mode, moving the stick left or right, up or down moves the active AF area around the frame.

Menu Button: Just below and to the right of the Sub Command dial, this button displays the settings menu in any camera mode. A second press cancels the menu display.

Memory Card Switch: In the lower right corner of the rear panel, this sliding switch designates the type of memory card in use. Choices are Memory Stick or CompactFlash.

Magnify Button: The rightmost button in a series running right to left under the EVF eyepiece, this button enables the digital zoom in any record mode (if enabled through the Record menu). In Playback mode, this button enlarges the displayed image 2x.

Self-Timer / Index Button: Left of the Magnify button, this button puts the camera into Self-Timer mode in any record mode. In Playback mode, pressing this button enables a nine-image index display.

Drive / Bracket Button: Left of the Self-Timer / Index button, this button accesses the camera's Continuous Shooting and Auto Exposure Bracketing modes, when pressed while turning the Sub Command dial.

Metering Mode Button: The final button in the series beneath the EVF viewfinder, this button accesses the camera's Multi, Center Weighted, and Spot metering modes, when pressed while turning the Sub Command dial.
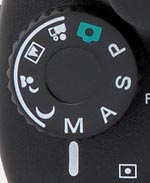
Exposure Mode Dial: On the far left of the camera's rear panel, this dial selects the camera's exposure mode. Options are Manual, Aperture Priority, Shutter Priority, Program AE, Auto, Portrait, Landscape, Twilight Portrait, and Twilight modes.

Monitor Switch: The leftmost sliding switch beneath the EVF eyepiece, this switch puts the LCD displays into Framing or Preview modes. In Framing mode, the LCD brightens and reduces any flickering from fluorescent light sources. Preview mode is the standard display.

Monitor Display Switch: To the right of the Monitor switch, this switch puts the viewfinder display in Finder or LCD modes, or puts it under Auto control. The Auto setting automatically determines where to locate the display, based on whether or not your eye (or anything else for that matter) is in front of the EVF.
![]()
Diopter Control Lever: Hidden under the bottom edge of the viewfinder, this tiny lever adjusts the viewfinder display to accommodate eyeglass wearers.

Flash Button: Located on the left panel of the camera, this button adjusts the flash mode when pressed while turning the Main Command dial. If held down, it pops up the flash compartment. (Assuming that the flash popup option on the setup menu is set to "manual".)

White Balance Button: Just behind the Flash button, this button adjusts the white balance mode when pressed while turning the Main Command dial.

Focus Switch: Below the Flash and White Balance buttons, this rotating switch controls the camera's focus mode. Options here are Auto, Macro, and Manual.
Focus Button (see above): In the center of the Focus switch, this button automatically sets focus in Manual focus mode, so that you can fine tune focus with the manual focus ring.
Camera Modes and Menus
Still Capture Mode: Accessed by turning the camera on, this is the mode for all still-image capture operations. The Exposure Mode dial on the rear panel selects between Auto, Program AE, Aperture Priority, Shutter Priority, Manual, Twilight, Twilight Portrait, Landscape, and Portrait modes.
Playback Mode: The Playback button on the right side of the viewfinder eyepiece puts the camera into Playback mode, for image review.
Shooting Menu
 Image Size: Sets the pixel resolution of captured still images. Choices are (10M) 3,888 x 2,592; (7M) 3,264 x 2,176 3:2; (5M) 2,784 x 1,856; (3M) 2,160 x 1,440; and (1M) 1,296 x 864.
 AF Mode: Sets the AF mode to Single, Monitor, or Continuous.
 Expanded Focus: If activated, this setting enlarges the viewfinder image 2x when the focus is being adjusted manually, as an aid to determining correct focus.
 Format: Formats the CompactFlash card, erasing all files.
 LCD Backlight: Sets the brightness of the LCD backlight to Bright, Normal, or Dark.
 File Number: Specifies how the camera numbers files. Series continually numbers images, regardless of the media, while Reset begins a new series with each new memory card.
Playback Menu Options
The Playback menu offers three pages of options, all accessed by pressing the Menu button.
 Folder: Selects the folder for image playback.
Image Storage and Interface
The DSC-R1 uses Memory Sticks or CompactFlash Type I or Type II memory cards for image storage, and is compatible with the Hitachi MicroDrive. The dual memory slot is on the right side of the camera, covered by a hinged plastic door that opens easily and snaps shut crisply. A slide switch in the lower right corner of the rear panel selects the type of memory in use.
The R1 lets you lock individual images or groups of images through the Playback menu. Once protected, images cannot be erased or manipulated in any way, except through card formatting. The camera's Playback mode also lets you delete images shown in the LCD display, view an index display, create a custom slide show, set images up for printing on DPOF compliant printers, and enlarge, crop, or resize images.
Five image resolution settings are available: 3,888 x 2,592; 3,264 x 2,176 3:2; 2,784 x 1,856; 2,160 x 1,440; and 1,296 x 864. Files may be saved in any one of two JPEG compression levels, as well as a compact RAW format. (By its nature, the RAW format only saves the full-resolution image size.) The R1's RAW mode simultaneously saves images in both RAW and JPEG formats, allowing you to have the convenience of JPEG files but the security of a RAW copy of your images should you desire the maximum quality later. The number of remaining images that can be stored on the memory card appears in the upper right corner of the status display panel, in addition to the selected Resolution and Compression settings.
The table below summarizes the compression ratios and number of images that can be stored on a 256MB memory card (a common size that might typically be used with the camera), with each Resolution / Quality (JPEG Compression) combination.
|
Resolution/Quality 256 MB Memory Card |
Fine | Standard |
RAW + JPEG
|
RAW + JPEG
|
|
| 3,888 x 2,592 | Images (Avg size) |
50 5 MB |
101 2.5 MB |
9 |
10 |
| Approx. Compression |
6:1 | 12:1 | 1.2:1 | 1.3:1 | |
| 3,264 x 2,176 | Images (Avg size) |
65 3.9 MB |
120 2.1 MB |
10 24.9 MB |
11 23.2 MB |
| Approx. Compression |
5.4:1 | 10:1 | 0.9:1 | 0.9:1 | |
| 2,784 x 1,856 | Images (Avg size) |
97 2.6 MB |
195 1.3 MB |
10 23.8 MB |
11 22.7 MB |
| Approx. Compression |
5.9:1 | 11.8:1 | 0.7:1 | 0.7:1 | |
| 2,160x 1,440 | Images (Avg size) |
162 1.6 MB |
325 787K |
11 22.7 MB |
11 22.2 MB |
| Approx. Compression |
5.9:1 | 11.9:1 | 0.4:1 | 0.4:1 | |
|
|
Images (Avg size) |
459 557K |
976 262K |
11
21.7 MB |
12
21.3 MB |
| Approx. Compression |
6:1 | 12.8:1 |
0.2:1
|
0.2:1
|
|
A USB 2.0 High Speed cable and interface software accompany the R1 for quick connection and image downloading to a PC or Macintosh computer. Downloading files to my Sony desktop running Windows XP (Pentium IV, 2.4 GHz), I clocked it at 2102 KBytes/second, a very rapid pace.
Lost Images? - Download this image-recovery program so you'll have it when you need it...
Since we're talking about memory and image storage, this would be a good time to mention the following: I get a ton of email from readers who've lost photos due to a corrupted memory card. It's tragic when it happens, there are few things more precious than photo memories. Corrupted memory cards can happen with any card type and any camera manufacturer, nobody's immune. "Stuff happens," as they say. A surprising number of "lost" images can be recovered with an inexpensive, easy to use piece of software though. Given the amount of email I've gotten on the topic, I now include this paragraph in all my digicam reviews. The program you need is called PhotoRescue, by DataRescue SA. Read our review of it if you'd like, but download the program now, so you'll have it. It doesn't cost a penny until you need it, and even then it's only $29, with a money back guarantee. So download PhotoRescue for Windows or PhotoRescue for Mac while you're thinking of it. (While you're at it, download the PDF manual and quickstart guide as well.) Stash the file in a safe place and it'll be there when you need it. Trust me, needing this is not a matter of if, but when... PhotoRescue is about the best and easiest tool for recovering digital photos I've seen. (Disclosure: IR gets a small commission from sales of the product, but I'd highly recommend the program even if we didn't.) OK, now back to our regularly scheduled review...
Video Out
The R1 provides a video output jack with an accompanying video cable. The signal timing can be set to NTSC or PAL via the Setup menu. The Video output duplicates the contents of the LCD in all modes, permitting it to be used as an auxiliary viewfinder or to display a slide show on an external monitor. (The R1 doesn't record sound or movies, so there's no audio output.)
Power
The Sony DSC-R1 uses a custom rechargeable LiIon battery for power, and has a custom external power adapter connection. This means that we weren't able to conduct our usual direct measurements of power consumption, but Sony's InfoLITHIUM battery technology has proven to be quite accurate in reporting remaining run times for their cameras. Accordingly, the run times listed below are those reported by the camera itself, given a fully-charged battery pack.
|
|
(Minutes) |
| Capture Mode, LCD |
|
| Capture Mode, EVF |
|
| Image Playback, LCD |
|
| Image Playback, EVF |
|
The numbers above make it clear that one area where the Sony DSC-R1 really shines is in battery life. Despite the relatively modest size of its battery, worst-case run time is just short of five hours, and playback time is well over nine hours. I normally strongly advise readers to purchase a second battery right along with their digital cameras, but the R1's battery life is good enough that most users probably won't find a need for a spare.
In the Box
The Sony DSC-R1 ships with the following items:
Recommended Accessories
We ran the Sony R1 through our usual battery of tests, and have summarized our findings here. To see the full set of our test images, with explanations of what to look for in them, see the Sony Cyber-shot R1 Sample Pictures page. For a complete listing of all our test and "gallery" shots, go to the Thumbnails page.
A collection of more random, pictorial images can be found in the Sony Cyber-shot R1 Photo Gallery.
Not sure which camera to buy? Let your eyes be the ultimate judge! Visit our Comparometer(tm) to compare images from the Sony R1 with those from other cameras you may be considering. The proof is in the pictures, so let your own eyes decide which you like best!
Zoom
A good 5x optical zoom range, with good performance.
 |
 |
 |
|
24mm
|
120mm
|
Digital Zoom
|
The Sony R1 zooms over the equivalent of a 24-120mm range, a range that's a bit larger than average, and one that reaches much wider than that of most cameras on the market. Details are slightly soft at wide angle, though definition is still pretty good. The R1 offers both Smart and Precision Digital Zoom, which effectively take magnification to 15x, albeit with the loss of quality that digital zoom invariably produces. Though details are clearly softer with the digital zoom, there's still quite a bit of fine detail here, but only because the R1 started out with a very crisp 10 megapixels.
Macro
A slightly larger than average macro area with good detail and high resolution. Flash coverage is fairly even, but the shot was underexposed slightly.
 |
 |
| Standard Macro | Macro with Flash |
The Cyber-shot R1's macro setting performs well, though it captures a slightly large minimum area of 3.83 x 2.55 inches (97 x 65 millimeters). Detail is strong and resolution high, though details are slightly soft overall. On the other hand, there's very little additional softening in the corners from the lens. (Most cameras have some softening in the corners in macro mode, the R1 does much better than most in this respect.) The flash throttled down very well for the macro shot, though it underexposed the shot slightly (possibly due to the glare from the brooch).
Distortion
Very low barrel and pincushion distortion.
This is the tendency for the lens to bend straight lines outward (like a barrel--usually at wide angle) or inward (like a pincushion--usually at telephoto). The Cyber-shot R1's 0.2% barrel distortion at wide angle is very low, as is its 0.03% pincushion at telephoto. (Quite a few cameras show very low distortion at telephoto focal lengths, but it's almost unheard of to find barrel distortion this low at a lens' wide angle setting, let alone in a lens that goes as wide as that of the Sony R1.)
| Barrel distortion at 24mm is 0.2% |
| Pincushion at 120mm is 0.03% |
Chromatic aberration
Moderate overall, with small effect on images, though pixels are somewhat bright at wide angle.
 |
 |
| Wide: moderate, top left @ 200% | Wide: fairly bright, top right @ 200% |
 |
 |
| Tele: very low, top left @200% | Tele: very low, top right @200% |
Chromatic aberration is moderate at wide angle and very low at telephoto lens settings. (This distortion is visible as a very slight colored fringe around the objects at the edges of the field of view on the resolution target.) At wide angle, the colored fringes are quite bright, albeit limited in their extent. At telephoto, there's very little coloration at all.
Corner Sharpness
Much less softening in the corners of the frame than we normally see.
 |
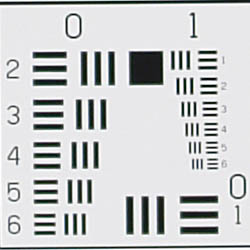 |
| Wide Angle: Just slightly soft in the lower left corner. |
Wide Angle: Center sharpness, for comparison |
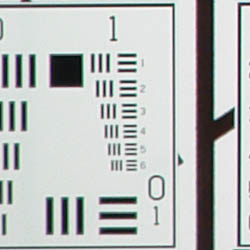 |
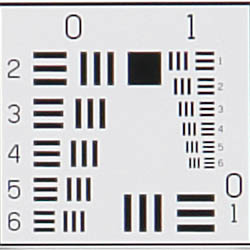 |
| Telephoto: Again, slightly soft in the lower left. |
Telephoto: Center sharpness, for comparison |
The Cyber-shot R1 produced pretty consistent sharpness from corner to corner. Details were just slightly soft in the lefthand corners. The worst case was in the lower left, but even that was much better than we're accustomed to seeing in the cameras we test. Overall, the Sony R1's optical performance was quite a bit better than average, even among high-end prosumer cameras, and also significantly exceeded the performance of lenses typically bundled in "starter kits" with digital SLRs.
Exposure and White Balance
Indoors, incandescent lighting
Problems with auto white balance, marginal with Incandescent, but good results with the Manual white balance setting. More exposure compensation required than usual.
 |
 |
| Auto White Balance +1.3 EV | Incandescent WB +1.3 EV |
 |
|
| Manual White Balance +1.3 EV |
Color balance indoors under incandescent lighting looked best with the Manual white balance, as the Auto setting was quite warm and orange-colored, and the Incandescent setting just a little too yellow for our tastes. The Cyber-shot R1 required a +1.3 EV exposure compensation boost to get a good exposure, a bit higher than average on this shot. Overall color looks pretty good, though the blue flowers are slightly dark and purplish, and Marti's skin tone a little pink. (A very common outcome for this shot.) Our test lighting for this shot is a mixture of 60 and 100 watt household incandescent bulbs, a pretty yellow light source, but a very common one in typical home settings here in the US.
Outdoors, daylight
Pretty good color balance with bright colors. Better than average exposure accuracy.
 |
 |
 |
 |
Outdoor shots generally showed accurate exposure with a slight tendency to lose highlight detail under contrasty lighting. Shadow detail was pretty good, if a little noisy. Exposure accuracy overall was better than average, even under the harsh lighting of the "Sunlit" Portrait, as the camera required a little less positive exposure compensation than we're accustomed to seeing.
See full set of test images with explanations
See thumbnails of all test and gallery images
Resolution
Very high resolution, 1,600 - 1,700 lines of strong detail.
Our laboratory resolution chart revealed sharp, distinct line patterns down to about 1,600 lines per picture height vertically, and 1,700 lines horizontally, with extinction out past 2,000. (The camera did produce slight color artifacts at lower line frequencies though, visible in the full-sized res target shots.) Use these numbers to compare with other cameras of similar resolution, or use them to see just what higher resolution can mean in terms of potential detail. Beware that while you might be able to make out what looks like distinct lines at numbers higher than those we've mentioned here, the camera is just doing its best to continue interpreting the lines, and what you're actually seeing are artifacts, not the original lines of the test target.
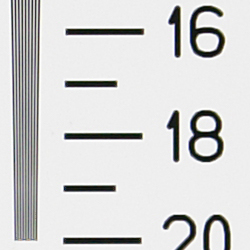 |
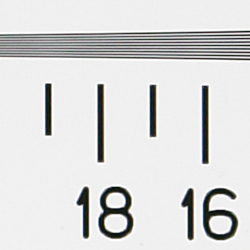 |
| Strong detail to 1,700 lines horizontal | Strong detail to 1,600 lines vertical |
See full set of test images with explanations
See thumbnails of all test and gallery images
Sharpness & Detail
Lots of detail, but the default in-camera sharpening coarsens fine details. Slight blurring of subtle detail from noise suppression.
 |
 |
| Pretty good definition of high-contrast elements. Slightly soft overall, but takes sharpening very well. | Subtle detail: Hair Noise suppression tends to blur detail in areas of subtle contrast, as in the midtones of Marti's hair here. |
The Cyber-shot R1's images show a lot of detail, although the camera's internal sharpening overdoes things a bit, coarsening fine detail somewhat. (Edge enhancement creates the illusion of sharpness by enhancing colors and tones right at the edge of a rapid transition in color or tone.) This results in images that are a little soft-looking right out of the camera, but that print fairly well at modest sizes on inkjet printers. Sharpening the images in Photoshop(tm) or other imaging software does reveal a good bit of additional detail, but is limited by the artifacts left by the in-camera sharpening in the first place. Fortunately, the R1 produces almost perfect edges if you set its sharpening adjustment to the Low setting. Images shot this way take unsharp masking very well indeed.
Noise-suppression systems in digital cameras tend to flatten-out detail in areas of subtle contrast. The effects can often be seen in shots of human hair, where the individual strands are lost and an almost "watercolor" look appears. The Sony R1 does this to some extent, but the overall impact isn't as great as on many cameras we test, at least at low ISO settings. The crop of Marti's hair above shows some noise suppression in darker midtones areas, though brighter, individual strands have better definition.
 |
 |
| The R1's default sharpening results in soft-looking images, and a certain coarseness in fine details. | Instead, try shooting with the sharpening set to Low, and then applying strong/tight unsharp masking in Photoshop. (In this case, 400% at a radius of 0.3 pixels.) |
The real secret to getting incredible detail from the Sony R1 is to shoot with the camera's internal sharpening control on its Low setting, and then apply strong/tight unsharp masking in Photoshop(tm) or other imaging software. The crops above show the difference this makes. With the internal sharpening dialed down, the images get very soft, but the artifacts caused by the camera's sharpening are almost completely eliminated. To compensate for the absence of the camera's sharpening, you need to apply quite a lot of unsharp masking (try 400% or more), but if you keep the radius very small (0.3 pixels, 0.4 at most), the result is very crisp images, with virtually no sharpening artifacts, and exceptional fine detail. (In the images above, note how the R1's default sharpening coarsened the delicate stems on the leaves, and how soft the edges of the leaves appear, particularly when compared with the results of the Photoshop sharpening. - Click on either crop to see the full-size image.)
One slightly odd note: In playing with the R1's color modes, we felt that images shot in the Adobe RGB color space were slightly less sharp than those shot in the normal sRGB color space. A res-target test and examination of the edge profiles in Imatest revealed that there was indeed a slight but consistent difference in the steepness of the edge profiles between the two color spaces, with edges in the normal sRGB color space being somewhat sharper. The difference isn't dramatic, but we thought it worthwhile to mention, in case any readers noticed this phenomena themselves. It's real, but a fairly subtle effect.
8-, 10-, and 12-megapixel comparison
We thought it might be interesting to compare images from some conventional d-SLRs with those from the Sony R1, just to see what the differences between 8, 10, and 12 megapixels look like. We didn't have an inexpensive 8-megapixel camera on hand when we were testing the R1 (a Canon Digital Rebel XT or Olympus eVolt E-500), so the cameras we had available to compare with the R1 were both models that sell for much more than the R1 does. Still, the comparison is interesting because it shows that, more than pure pixel count, the post-capture processing performed by the camera or on a computer has a great deal to do with the final image quality.
For this comparison, we shot a complex piece of embroidery work with the Sony DSC-R1, a Canon EOS-20D, and a Nikon D2x. For control purposes, we inserted a small resolution target in the lower left-hand corner of the embroidery piece, to help guide our decision making when it came time to apply unsharp masking to the images. The embroidery work made an excellent subject, because it had a range of detail as well as areas of very subtle contrast between detail elements. This last provided great places to look for the effect of each camera's noise-reduction processing.
We shot the test images with the best optics we had available for each platform. In the case of the D2x, this was a Nikkor 105mm f/2.8 macro lens, and for the 20D, it was the equivalent Canon lens, a 100mm f/2.8 macro. For the R1, we set its lens to the focal length and aperture that our lens testing had shown to produce the sharpest results.
In the interest of time, we kept things simple, working from JPEGs, to avoid questions of which RAW converter and which processing methodology would extract the most detail from each camera's RAW files. - This isn't meant to be any sort of a definitive "shootout" between the three cameras involved, as I don't think anyone would seriously be trying to choose between an R1 and a D2x. The purpose of the exercise was to simply get an idea of the R1's image quality, and see how well it held up against cameras that are to one extent or another standard points of reference in the digital photo world.
For each camera, we shot two images, one using its default setting for in-camera sharpening, the other with its sharpening set to its lowest value, to provide the best file for subsequent unsharp masking in Adobe Photoshop(tm). The sharpening parameters were hand-tweaked for each camera, to produce the crispest-looking image, stopping short of the point at which sharpening artifacts would appear. Here are the results:
| Detail comparison: Images as-shot, default sharpening | ||
| EOS-20D | DSC-R1 | D2x |
 |
 |
 |
 |
 |
 |
| 20D (usm 280%, 0.25 pixel radius) |
R1 (usm 400%, 0.3 pixel radius) |
20D (usm 490%, 0.3 pixel radius) |
| Low sharpening, unsharp masking in Photoshop | ||
Right away, before the Canon fans jump on us for not using as much unsharp masking on the 20D's image, we need to underscore that we gave each image as much USM as it could handle, without producing artifacts. In the case of the 20D, if we went any beyond about 280%, we began to see very visible halos around the bars in the small res target patch. (By the way, "default" on the 20D here means Parameter 1.)
In this particular comparison, it's clear that the D2x is the hands-down winner in the resolution derby. Probably no surprise relative to the 20D, as the D2x has 50% more pixels. What we found interesting was both how well the R1 did against its higher-priced competitors, as well as the ways in which it didn't quite measure up. For high-contrast objects, the R1 clearly displays its full 10 megapixels of resolution (provided of course, that you work from unsharpened images and apply unsharp masking in the computer). When dealing with lower-contrast detail though, the R1's noise-suppression algorithms come into play, flattening-out the detail. You can see this in various places, but the most obvious is in the light brown threads crossing the stem of the flower, towards the top of the page. It seems that either the R1's sensor/electronics inherently have a bit more noise than those of the 20D and D2x, or a decision was taken to just flatten the noise a bit more to produce cleaner images in areas of flat tint (skies, for example).
While it loses a little detail to noise suppression, the DSC-R1 nevertheless produces excellent pictures with exceptional optical quality at a (relatively) bargain price. Also, it's important to note how far from any rational application the above 1:1 on-screen crops are. This sort of pixel-squinting is an interesting exercise, but bears less correlation with print quality than you might think, at least up to print sizes of 11x14 or higher. (Printed full-frame at 13x19 inches on the Canon i9900 printer here in our studio, these differences in these images were certainly discernible, but it took some squinting, under good light.)
ISO & Noise Performance
Low to moderate noise at the normal sensitivity settings, even at ISO 400, though very high levels at the highest settings.
 |
 |
 |
| ISO 160 | ISO 200 | ISO 400 |
 |
 |
 |
| ISO 800 | ISO 1,600 | ISO 3,200 |
The Cyber-shot R1's lower ISO settings produced low noise, with only slightly blurred detail in the darker areas, and even at ISO 400, results were still very good. Noise increased visibly and detail degraded as the ISO increased, from 800 through 3,200. The images at ISO 800 were very usable though, just a little softer than those shot at ISO 400, and even ISO 1,600 images would be fine for many uses. The ISO 3,200 setting was just plain unusable though, for anything other than 4x6 snapshot prints, and even those showed significant color shifts.
Looking at prints from the Sony R1 (which should always be the method by which noise levels are evaluated, if that's intended to be the final output format), ISO 1,600 shots were noisy but probably acceptable when printed at 8x10 inches, but looked entirely fine at 5x7. As noted though, ISO 3,200 shots were noisy but acceptable when printed at 4x6 inches, but had very noticeable color shifts that would lead us to reject them for most uses.
Extremes: Sunlit and low light tests
High resolution with good overall detail, but slightly high contrast. Good low-light performance, capable of capturing bright images under average city street lighting and much darker conditions.
 |
 |
 |
| +0.0 EV | +0.3 EV | +0.7 EV |
Sunlight:
Because digital cameras are more like slide film than negative film (in that they tend to have a more limited tonal range), we test them in the harshest situations to see how they handle scenes with bright highlights and dark shadows, as well as what kind of sensitivity they have in low light. The shot above is designed to mimic the very harsh, contrasty effect of direct noonday sunlight, a very tough challenge for most digital cameras. (You can read details of this test here.)
The Cyber-shot R1 performed pretty well under the deliberately harsh lighting in this test, but contrast was a little high and highlights a bit washed out as a result. (The shots above were captured with the R1's contrast control set to the "low" setting.) Noise suppression is visible in the darker shadows, but shadow detail is still pretty good. The +0.3 EV exposure adjustment left the lower midtones and shadows a bit darker than we'd like, but any higher setting just lost way too much highlight detail. (In "real life", be sure to use fill flash in situations like the one shown above; it's better to shoot in the shade when possible.)
| 1 fc 11 lux |
1/2 fc 5.5 lux |
1/4 fc 2.7 lux |
1/8 fc 1.3 lux |
1/16 fc 0.67 lux |
|
| ISO 160 |
1.3 sec f2.8 |
2.5 sec f2.8 |
8 sec f2.8 |
20 sec f2.8 |
30 sec f2.8 |
| ISO 200 |
1 sec f2.8 |
2 sec f2.8 |
7 sec f2.8 |
15 sec f2.8 |
30 sec f2.8 |
| ISO 400 |
1/2 sec f2.8 |
1 sec f2.8 |
3 sec f2.8 |
8 sec f2.8 |
15 sec f2.8 |
| ISO 800 |
1/4 sec f2.8 |
1/2 sec f2.8 |
1.6 sec f2.8 |
4 sec f2.8 |
7 sec f2.8 |
| ISO 1600 |
1/8 sec f2.8 |
1/4 sec f2.8 |
1/1 sec f2.8 |
2 sec f2.8 |
4 sec f2.8 |
| ISO 3200 |
1/15 sec f2.8 |
1/8 sec f2.8 |
1/2 sec f2.8 |
1 sec f2.8 |
2 sec f2.8 |
Low light:
The Cyber-shot R1 performed very well here, capturing bright images down to the lowest light level we test at, even at its minimum ISO setting. Color balance was slightly pinkish in a few shots from the Auto white balance setting, but improved at the longer exposure times, and overall was quite good. The camera's autofocus system worked only to just under the 1/2 foot-candle point unassisted, but performed well past 1/16 foot-candle with the AF assist lamp. The camera's noise reduction system worked fairly well, though the higher ISOs (800 - 3,200) showed high noise. Given that city street lighting corresponds to a light level of about one foot-candle (the brightest level we test at), the Sony R1 should do an excellent job with average city night scenes, and subjects a good bit darker.
Saturation & Hue Accuracy
Slightly oversaturated color (especially reds and blues), generally good hue accuracy.
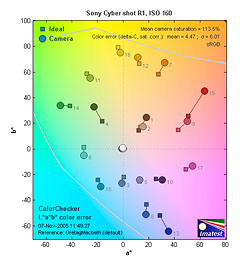 |
| In the diagram above, the squares show the original color, and the circles show the color that the camera captured. More saturated colors are located towards the periphery of the graph. Hue changes as you travel around the center. Thus, hue-accurate, highly saturated colors appear as lines radiating from the center. |
The other important part of color rendition is hue accuracy. Hue is "what color" the color is. Here, the R1 did unusually well. After correcting for the saturation boost, the overall color error of the Sony R1 was among the lowest we've measured.
(For a more in-depth discussion of the Sony DSC-R1's color handling as well as noise levels, dynamic range, and resolution, see the Sony R1 Imatest page.)
 |
 |
 |
Our random "Gallery" shots showed very pleasing color across a wide variety of subjects. (See our Sony Cyber-shot R1 Photo Gallery for more shots taken with the camera.)
Coverage
Excellent accuracy from the electronic optical viewfinder (EVF).
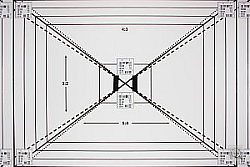 |
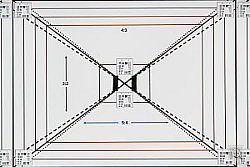 |
| 24mm eq., EVF | 120mm eq., EVF |
The Cyber-shot R1's EVF proved quite accurate, showing almost exactly 100% frame accuracy (within the limits of accuracy of this measurement) at both wide angle and telephoto zoom settings.
Coverage and Range
The R1's flash is fairly bright, though our standard shots required slightly more exposure compensation than average. Range is 14+ feet at ISO 160.
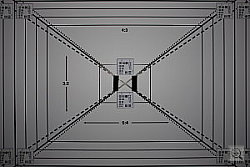 |
 |
| 24mm equivalent | 120mm equivalent |
 |
 |
| Normal Flash +1.3 EV | Slow-Sync Flash +1.3 EV |
Flash coverage was uneven at wide angle but more uniform at telephoto. In the Indoor test, the R1's flash underexposed our subject at its default setting, requiring a +1.3 EV exposure compensation adjustment to get reasonably bright results. Even here, the exposure is a little dim, with a strong orange cast. The camera's Slow-Sync flash mode produced similar results, though coverage was more even and the orange cast a little stronger. The Slow-Sync mode also required a +1.3 EV exposure compensation adjustment.
| 8 ft | 9 ft | 10 ft | 11 ft | 12 ft | 13 ft | 14 ft |
1/50 sec f4.8 ISO 160 |
1/50 sec f4.8 ISO 160 |
1/50 sec f4.0 ISO 160 |
1/50 sec f4.5 ISO 160 |
1/50 sec f4.5 ISO 160 |
1/50 sec f4.5 ISO 160 |
1/50 sec f4.8 ISO 160 |
The R1's flash illuminated the test target at 14 feet, with good intensity.
Print Quality
Excellent print quality, great color, excellent 13x19 inch prints. ISO 1,600 images are soft but usable at 8x10, excellent at 5x7. ISO 3,200 images are marginal, even at 4x6 inches.
Testing hundreds of digital cameras, we've found that you can only tell just so much about a camera's image quality by viewing its images on-screen. Ultimately, there's no substitute for printing a lot of images and examining them closely. For this reason, we now routinely print sample images from the cameras we test on our Canon i9900 studio printer, and on the Canon iP5000 here in the office. (See the Canon i9900 review for details on that model.)
Prints from the Sony DSC-R1 were just beautiful: Even at 13x19 inches, images were crisp and held together very well. Colors were bright without appearing overdone, and tonality was very good. At a reference print size of 8x10 inches, image noise was essentially up to ISO 400 and barely discernible at ISO 800. At ISO 1,600, the noise became more visible, and the image got a little softer-looking due to the camera's anti-noise processing, but the final results were still eminently acceptable. At ISO 3,200 though, things really fell apart, with ugly noise and a pronounced greenish color shift. ISO 3,200 prints were only marginally acceptable at 4x6 inches, and even there, the color shift would probably consign them to the waste basket. (We really found ourselves wondering why Sony bothered to put an ISO 3,200 setting on the camera.)
Sony Cyber-shot R1 Timing
Good to average speed for a prosumer camera, but it still doesn't compare to most digital SLRs.
| Startup/Shutdown: | |
| Power On to first shot | 1.0 second |
| Shutter response (Lag Time): | |
|
Full Autofocus Wide
|
0.76 / 0.48 second
|
|
Full Autofocus Tele
|
0.77 / 0.74 second
|
|
Continuous AF Wide / Tele
|
0.33 / 0.37 second
|
|
Prefocused
|
0.007 second
|
| Cycle time (shot to shot) | |
| Normal large/fine JPEG | 1.66 / 1.27 seconds |
| Flash recycling | 6 seconds |
| Continuous mode | 0.31 second 3.23 frames/second (3 large/fine frames) |
| Download speed | |
| Windows Computer, USB 2.0 | 2,103 KBytes/sec |
While the Sony DSC-R1's performance isn't bad when compared to most "prosumer" digital cameras, many people considering it for purchase will also be considering buying a dSLR. When stacked up against almost any dSLR, the Sony R1's timing performance leaves much to be desired. Its best-case shutter lag of 0.33 second compares favorably with the lower end of the digital SLR market, but in most operating modes, shutter lag is between 0.5 and 0.75 second, definitely slower than its dSLR competition. The "Preview" viewfinder mode does produces somewhat faster shutter response than the "Framing" option (which permits slower refresh rates, to give a brighter viewfinder display in dim lighting), but seemingly only when the lens is set towards the wide angle end of its zoom range: Shutter lag at telephoto focal lengths appears to be unaffected by the Preview/Framing selection, at least at reasonably bright light levels. One bright spot though, is that the camera is noticeably faster when running in continuous focusing ("monitor") mode, where shutter lag drops to only about 0.33 second at wide angle and 0.37 second at telephoto, putting it at least in the same ballpark as most d-SLRs.
At 1.27 seconds (best case) between frames, single-shot cycle times are reasonably fast compared to other all-in-one digital cameras but once again slow relative to most d-SLRs. In continuous mode, it's fast enough at a bit over 3 frames/second, but is really crippled by an inadequate 3-frame buffer capacity. It does offer a RAW+JPEG recording mode, but here again, its cycle time is a rather modest 2.12 seconds, and it can capture only two frames in this mode before slowing to nearly nine seconds per frame with a fast CF card, or 6.5 seconds with a Memory Stick Pro. (CF card timing data collected with a Lexar 80x card, slower cards will empty the buffer more slowly, and show slower cycle times after the buffer is full.) The one bright spot is that the camera is blazingly fast when it's "prefocused" by half-pressing and holding down the shutter button before taking the shot. - Its shutter lag is an astonishing 0.007 second (7 milliseconds) in that mode.
Battery
Excellent battery life with either the LCD or the EVF.
|
|
|
| Still-image capture mode LCD |
290 minutes
|
| Still-image capture mode EVF |
304 minutes
|
| Image playback LCD |
491 minutes
|
The Sony DSC-R1 uses a custom rechargeable LiIon battery for power, and a custom external power adapter connection. This means that we weren't able to conduct our usual direct measurements of power consumption, but Sony's InfoLITHIUM battery technology has proven to be quite accurate in reporting remaining run times for their cameras. Accordingly, the run times listed above are those reported by the camera itself, given a fully-charged battery pack.
The Sony DSC-R1 really shines is in battery life. Despite the relatively modest size of its battery, worst-case run time is just short of five hours, and playback time is well over nine hours. I normally strongly advise readers to purchase a second battery right along with their digital cameras, but the R1's battery life is good enough that most users probably won't find a need for a spare.
Storage
No card is included with the Sony Cyber-shot R1, although it accepts both CompactFlash and Memory Stick cards.
|
256MB Memory Card |
Fine | |
| 3,888 x 2,592 | Images | 50 |
| File Size | 5.0MB | |
| 3,264 x 2,176 | Images | 65 |
| File Size | 3.9MB | |
| 2,784 x 1,856 | Images | 97 |
| File Size | 2.6MB | |
|
|
Images | 162 |
| File Size | 1.6MB | |
|
|
Images | 459 |
| File Size | 557K | |
I strongly recommend buying at least a 256MB Memory Stick Pro card, preferably an even larger one, to give yourself extra space for extended outings.
The Bottom Line
| Pro: | Con: |
|---|---|
|
|
| Free Photo Lessons | |
|
<<DSC-R1 Sample Images | Additional Resources and Other Links>>
Reader Comments!
Questions, comments or controversy on this product? Click
this link to see what other Imaging Resource readers have had to say about
the Sony Cyber-shot DSC-R1, or add comments of your own!