 Back
to Full Minolta Dimage S304 Review
Back
to Full Minolta Dimage S304 ReviewGo to Minolta Dimage S304 Data Sheet
Go to Minolta Dimage S304 Pictures Page
Up to Imaging Resource Cameras Page
Use your browser's "Back" button to return to the previous page, or the links at the top and bottom of this page to navigate to related information. If you have difficulty fitting the text on this page onto your printer output, simply resize your browser window to a narrower width and print again.
Remember us when it's time to buy!
Dave here: Have our reviews been helpful to you? (Is this article you're reading right now useful?) Preparing this level of information on as many products as we do is incredibly hard work, not to mention expensive. Things on the Internet may look like they're free, but they're not. (As a lot of big dot.com companies are finding out these days.) Somewhere, somebody has to pay to produce worthwhile content. YOU can help us though, by remembering us when it comes time to make your purchase. Would you consider coming back to our site and clicking-through to one of our advertisers to make your purchase? Every dollar you spend with one of our advertisers helps us directly (in affiliate fees) or indirectly (the advertiser will keep renewing their ad contract with us). To make it easy for you to support us, here's a URL you can visit, to see all our current advertisers, with links to click on that will register your visit to them as having come from our site. It's up to you where you buy, but Mike, Mike, Kim, Yazmin, Marti and I would be really grateful if you'd help us out by choosing one of our advertisers to purchase from.
Thank you for your support!
Dave Etchells, Founder & Publisher
Visit our "Buy Now" Page:
https://www.imaging-resource.com/buynow.htm
Back
to Full Minolta Dimage S304 Review
Go to Minolta Dimage S304
Data Sheet
Go to Minolta Dimage S304
Pictures Page
Up to Imaging Resource Cameras
Page
Minolta Dimage S304Minolta packs Dimage technology & optics into a compact 3.3 megapixel prosumer camera! Review First Posted: 9/13/2001 |
|
 |
|
3.3-megapixel CCD delivers uninterpolated images up to 2,048 x 1,536 pixels |
|
|
High-resolution Minolta GT lens with 4x optical zoom (35-140mm equivalent focus range) | |
|
|
CxProcess image processing and Large Scale Integration image processing chip | |
|
|
12-bit Analog / Digital conversion for more than 4,000 levels per channel (Red, Green, Blue) |
Manufacturer Overview
Minolta Corporation is a traditional camera manufacturer of long experience, making a slow but calculated entry into the digital marketplace. Like its popular line of 35mm SLRs, the Maxxum Series, Minolta's Dimage Digital Cameras are developing a reputation for innovative technology in light metering, exposure control, and compact autofocus lens design. In 1996, Minolta introduced the Dimage V, the first digital camera with a detachable lens that enabled users to preview pictures with the camera body in one hand, while holding the lens at a distance in the other. Eventually Minolta developed the EX1500, a modular digital camera used as the framework for an amazingly effective 3D capture system, developed in partnership with the software firm MetaCreations (renamed Viewpoint Corporation in Fall 2000). In addition to conventional and digital cameras, Minolta manufactures high-quality light meters, spectrophotometers, colorimeters, and an award-winning line of film scanners, including the Dimage Scan Elite, Scan Dual II, and Scan Multi II.
Spring 2001 marked the introduction of three new Dimage digicam models -- each representing a separate price point to appeal to different segments of the digital market. The Dimage 7, reviewed elsewhere on the site, is designed to appeal to serious photographers who want high resolution (5.24 megapixels), a long-range wide-angle-to-telephoto zoom lens (equivalent to 28-200mm), and a sophisticated user interface with extensive creative controls. The Dimage 5 is the midrange model, with the same sophisticated controls, but a smaller 3.34-megapixel CCD and shorter 35-250mm equivalent lens. Finally, the compact, autofocus Dimage S304, targeted for the amateur market, shares the same microprocessor and most of the same technology, but with a 3.34-megapixel lens and 4x zoom lens equivalent to a 35-140mm on a 35mm camera. All three models are currently in the market. (September, 2001)
Highlights
Executive Overview
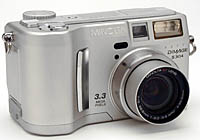
One of three new models scheduled for release in Summer 2001, the Dimage S304 Digital Camera is a high-end consumer digicam with a 3.3-megapixel CCD, 4x optical zoom lens, and Minolta's exclusive CxProcess image processing technology. It incorporates many of the high-tech features of the more advanced Dimage 7 and Dimage 5 models, including a high-resolution Minolta GT lens and an advanced 12-bit Analog / Digital converter -- providing wider dynamic range (more detailed highlights and shadows) than conventional 10-bit processors.
The S304 sports a smaller point-and-shoot style body than the Dimage 7 and 5, though it is still a bit too large (and heavy) to carry in an average size pocket or purse. It measures 4.7 x 2.4 x 3.2 inches (113.5 x 64.5 x 58.5mm) with the lens retracted, and weighs approximately 16 ounces (450 grams) with the batteries and card installed. The silver-tone body is made of a sturdy aluminum alloy, with a telescoping 7.15-28.6mm (4x) zoom lens (equivalent to a 35-140mm lens on a 35mm camera) that extends an additional 0.8 inch from the body at maximum telephoto.
The camera's external controls are distributed evenly throughout the top and back panels, providing quick and easy access to the camera's main Mode dial, which includes Auto-Recording, Multi-Function, Playback, Movie-Recording, Setup, and Data-Transfer settings; five Flash modes; Self-Timer (with optional Remote Controller) and Drive selector, with Single-Frame, Continuous, and Bracketing functions; Exposure Compensation adjustment, and Digital Subject Program selections, including Macro, Portrait, Landscape, Night Portrait, and Text settings -- each of which is programmed to select the best aperture and shutter speed settings for shooting specific subjects. The Multi mode setting also offers three additional exposure options: Program, Aperture Priority, and Manual. Finally, LCD menu options let you adjust contrast, sharpness, and color saturation.
The Auto Exposure mode offers fairly limited exposure control, with fixed metering, white balance, and sharpness settings. However, you can use any of the external controls mentioned above and set the image size and compression ratio through the camera's on-screen menu. The Multi exposure modes offer a wider range of exposure adjustments, which vary slightly with the three exposure options mentioned above. All three options allow you to choose from five White Balance settings (Auto, Cloudy, Daylight, Tungsten, Fluorescent, and Custom); a choice of five ISO equivalency ratings (Auto, 100, 200, 400, and 800); two Metering options (Multi-Segment and Spot); and three Focus options (Manual, Full-Time Auto, and Autofocus).
The Dimage S304's multi-segment metering system divides the image into 256 segments, placing emphasis on the main subject, luminance values, color, and autofocus information to accurately calculate exposure. The spot metering option reduces the emphasis to a specific spot in the center of the frame. The Exposure Bracketing setting, which is also accessible in Auto Mode, records three consecutive exposures of the same scene -- one at the metered exposure, one overexposed, and one underexposed. The degree of exposure variance between images, can be adjusted in the Multi mode, Custom 1 menu. Options include +/- 0.3, 0.5, or 1.0 exposure equivalents (EV).
The camera's Autofocus system is powered by a Large Scale Integration (LSI) chip that rapidly processes image data through a high-speed 32-bit RISC processor. In Multi-Function mode, you can select between Manual and Autofocus options. Manual Focus is controlled with the Up and Down Arrow buttons of the Five-Way Controller, and reads out distance settings at the bottom of the LCD monitor in metric units. Autofocus has two options: Normal and Full-Time Autofocus, the latter of which continuously focuses on the image in the viewfinder, rather than waiting until you press the Shutter button halfway. Also in Multi-Function / Autofocus modes, you can choose between Wide Focus Area, which is indicated on the LCD monitor by two large brackets in the center, or one of five Spot Focus areas. In both Auto and Multi modes, a 2x Digital Zoom is available as a default option, accessed by zooming past the optical zoom range (or you can choose to turn it off through the on-screen menus).
The camera's 1.8-inch interline-transfer CCD records still images at one of four resolution settings -- 2,048 x 1,536, 1,600 x 1,200, 1,280 x 960, and 640 x 480 pixels -- and stores them at one of four Quality settings: Super Fine (uncompressed TIFF), Fine, Standard, and Economy (Compressed JPEGs). Movies are recorded as motion JPEG files at 320 x 240 pixel resolution (304 x 240 effective pixels). Additional features include Voice Memo, Date Imprint, and Instant Playback options in Auto mode, plus Color or Black-and-White settings, and Sharpness, Contrast, and Saturation adjustments in Multi mode (Custom 2 menu).
In addition to standard Digital Print Order Format (DPOF) technology, which allows you to set the number of prints you want made in the camera's onboard menu system, Minolta has also incorporated Epson's new PRINT Image Matching technology, which ensures that all S304 files output on compatible Epson printers will be automatically color balanced to provide true-to-life hues and saturation.
Powered by four AA alkaline or NiMH rechargeable batteries (an optional AC power adapter is available), the Dimage S304 delivers a very versatile package for the serious amateur photographer.
Design
The Dimage S304 is similar in design to traditional 35mm point-and-shoot camera,
with a rather large hand grip on the right side, and a telescoping zoom lens
on the left. The camera measures 4.7 x 2.4 x 3.2 inches (113.5 x 64.5 x
58.5mm) with the lens at its shortest position, and weighs approximately 16
ounces (450 grams) with batteries and storage media installed (the majority
of the weight is centered over the right side of the camera). Its brushed aluminum
alloy body is of very sturdy construction, with a champaign color surface and
silver highlights and details. The S304 is a little too large to fit comfortably
into a pocket, but it comes with a wide neck strap, and an optional camera bag
is available from Minolta or other camera accessories vendors.
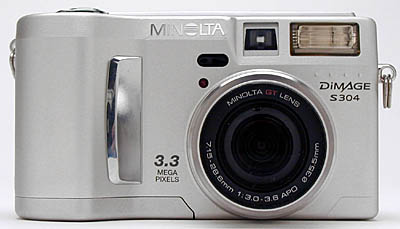
The camera's front panel houses the Minolta GT 4x Zoom lens, Self-Timer light,
and Remote Control Receiver. (The remote control unit is an optional accessory.)
Above the lens is a built-in flash unit on the left, and the optical viewfinder
window on the right. A set of 35.5mm filter threads is provided on the inside
lip of the zoom lens to accommodate filters and lens conversion kit accessories.
(We'd advise caution in attaching auxiliary lens units or filter there though,
as telescoping lens mechanism provides the only support. Be careful not to attach
too heavy an accessory here, and to not over-tighten lenses or filters!) The
right hand grip is very large in the front (to accommodate the four AA batteries
and memory card stored on the inside) with a long silver ridge that runs vertically
along the right edge, to give fingers a place to grasp the camera.
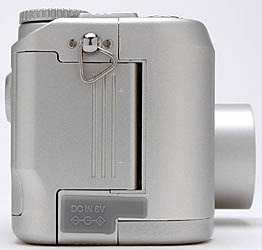
The camera's right panel holds the CompactFlash memory card slot, covered by
a hinged plastic door, and a small black latch on the bottom that is used to
eject the card from the camera. Next to the memory card slot, covered by the
same plastic door, are USB and AV-Out jacks for connecting the S304 to a computer
or television (respectively). On the outside of the CompactFlash compartment,
located below the plastic door, is a small gray rubber cover that protects the
AC Adapter connection. And at the top of the right panel is one of the two neck
strap attachment eyelets. One design gripe here: The S304's right neckstrap
eyelet is just above the memory card-I/O jack door, and will flop down in the
way as soon as the door is opened, if no neckstrap is attached to hold it up
out of the way. Definitely annoying!
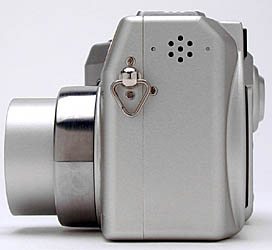
The camera's left panel contains only the audio playback speaker holes and the
second neck strap attachment eyelet.
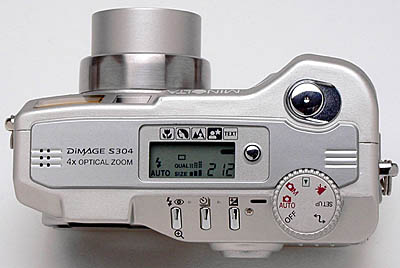
The top panel accommodates the Mode Dial / Main Power switch, with Auto-Record,
Multi-Function, Playback, Movie-Record, Setup, and Data-Transfer modes; a Shutter
button in the front; a small Data Panel display in the center that shows battery
status, camera settings, and the number of images remaining; and a Subject Program
button (directly adjacent to the Data panel) that allows you to choose from
one of five specialized shooting presets: Macro, Portrait, Landscape, Night
Portrait, and Text.
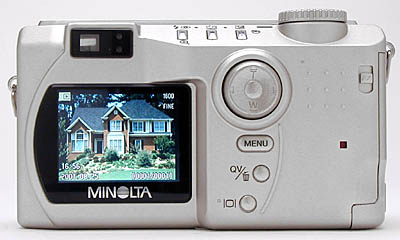
The remaining controls are on the camera’s back panel, along with the viewfinder
eyepiece, 1.8-inch LCD monitor, and Five-Way Controller pad. Three of these
controls are lined up horizontally along a sloping panel, directly below the
Data display. They include (from left to right): Flash Mode / Magnification,
Self-Timer / Drive Mode, and Exposure Compensation buttons. Below these buttons,
at the top of the camera's back panel is the Five-Way Controller for scrolling
through and selecting menu options, followed by a Menu button, a QuickView /
Delete button, and a Display button for turning the LCD monitor on or off and
controlling the amount of information shown. On the far right side is a set
of raised bumps where the thumb grips the camera, and small release latch that
opens the storage compartment door. A tiny red light below the thumb grip indicates
when the camera is accessing the memory card. (Do not open the compartment door
when the light is on.) Two LED lamps are positioned on the right side of the
optical viewfinder. The top one glows green when the image in the viewfinder
is focused and flashes when the camera has trouble focusing. The bottom lamp
glows red / orange when exposure is set and flashes if it has difficulty determining
the correct exposure.
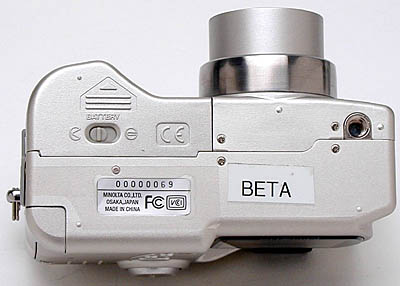
The bottom of the camera is relatively feature free, with only a battery compartment door and sliding latch on the right side, and a metal, threaded tripod mount on the far left. The uneven tripod mount placement is necessary to make up for the concentrated weight on the battery compartment side, but it also serves to separate the tripod mount from the battery compartment door, so you can change batteries while the camera is mounted on a tripod.
 Viewfinder
For composing images, the S304 features a real-image optical viewfinder that zooms along with the optical telephoto, and a 1.8-inch, TFT color LCD monitor, comprised of about 122,000 pixels. The optical viewfinder has no diopter adjustment dial, and a relatively low viewpoint, meaning that you're likely to lose some of the corner view when shooting with thick eyeglasses.
 The LCD monitor is automatically engaged when you power up the camera, but you can turn it off by pressing the Display button at the bottom of the camera's back panel (one push eliminates the text display and two pushes turns the monitor off completely). The information display is very complete, with icons to indicate just about every camera mode in use. Fortunately, the same information is displayed in the Data panel on top of the camera, so you can make changes to the menus and external controls with the LCD monitor turned on, and still be able to view the settings with the monitor turned off. Macro and Movie modes automatically require use of the LCD monitor, as does the Manual Focus mode.
 Optics
The Dimage S304 is equipped with a 7.15-28.6mm aspherical glass lens, the equivalent of a 35-140mm lens on a 35mm camera. This lens is made up of 11 elements in 9 groups, including one AD glass element and two double-sided aspheric elements. Aperture is manually or automatically controlled, with a maximum setting of f/3 at wide angle and f/3.6 at telephoto. Focus ranges from 1.6 feet (50cm) to infinity in normal mode, and 6 inches to 2 feet (16 to 60 centimeters) in Macro mode. The Macro mode is one of the five preset program modes, and when set, automatically adjusts the lens to its maximum telephoto range. A plastic lens cap with a spring-loaded catch hooks into the inside lip of the lens, protecting it from dirt and scratches, and a small eyelet on the side allows you to tether the lens cap to the camera's neck strap to prevent accidental loss.
The S304 provides Manual, Autofocus, and Full-Time AF controls. The camera's specification sheet describes the autofocus system as a "Video AF system." While we're not familiar with that terminology, conversations with Minolta engineers revealed that the three new Dimage cameras (7, 5, and S304) all use phase-detection focusing rather than the more common contrast-detection system. The advantage of the more complex phase-detect approach is that the camera not only determines whether or not the lens is in focus, but also how far out of focus it is, and in which direction (near or far). With this information, the camera should be able to focus much more quickly, since it "knows" roughly how much, and in which direction, to adjust the focus, rather than having to "hunt" for the best focus at the outset. The AF system will still have to do some hunting for the best setting, but it should spend less time doing so than a contrast-based system. In practice, we've found that Minolta's autofocus technology is neither more nor less effective than the schemes used on other cameras, but is definitely different in what it'll focus on and what will give it problems. We've seen the Minolta cameras sometimes have trouble focusing even when the subject contained sharply contrasting detail, which would be an ideal target for conventional contrast-detect autofocus systems. On the other hand, we've seen the Dimage cameras focus very well with low-contrast, lightly textured subjects that would give normal autofocus fits. The final chapter on digicam autofocus technology clearly isn't written yet, and in the real world, Minolta's phase-detect AF appears to be just a different approach, without overwhelming strengths or weaknesses.
In normal Autofocus, the camera sets the focus when the Shutter button is halfway depressed. In Full-Time AF mode, it adjusts focus at all times, continuously keeping the frame in focus. You can also determine the area of the image the camera uses to judge the focus, by selecting one of two autofocus options: Wide Focus Area and Focus Area Selection. The default option is Wide Focus area, indicated by a wide set of brackets in the viewfinder frame. By pressing (and holding) down on the center of the Five-Way Arrow controller pad, the camera switches between Wide Area and Spot Point autofocusing modes (the latter indicated by a series of five "boxed" spot focus targets in the viewfinder). If you release the controller pad when the Spot AF targets are displayed, you can then use the four arrow buttons to move around the focus areas, highlighting the selected target in blue when it's activated (On the Dimage 5 & 7, this is known as Flex Focus Point AF).
Wide Area AF bases its focus on the most prominent subject detail in the center of the frame, delineated by the viewfinder area that falls within the brackets. If you watch closely, you will see one of the five targets appear on the LCD monitor when Autofocus is set, indicating the exact area used to determine focus.
You can switch to Manual Focus through the Multi-Function's Basic menu. In Manual Focus, you use the Up and Down Arrows to adjust focus, and the distance is displayed in meters at the bottom of the LCD monitor. The camera appears to have a fairly continuous range of focus adjustment, judging by the sound of the stepper motor driving the focus assembly, but it only displays the focus distance on the screen in fairly broadly-spaced steps. To access the Manual Focus function when that mode is enabled, you press down on the center of the Five-Way Controller pad to highlight the word "Focus" at the top of the monitor. To go back to "Zoom," press down on the center until Zoom is highlighted.
In addition to the optical zoom, the Dimage 7 offers a 2x Digital zoom which is turned on or off through the on-screen menu system. When turned on, Digital Zoom automatically engages when you zoom past the maximum optical telephoto. (Keep in mind that digital zoom simply enlarges the central portion of the CCD image digitally, rather than magnifying it optically and, as a result, image quality is usually degraded in the form of lower resolution and increased noise.)
A set of 35.5mm filter threads around the inside lip of the lens accommodates accessory filters and conversion lens kits. (We really liked having the fixed filter threads on the front element of the zoom lens, making it easy to attach auxiliary lenses and filters without any additional adapters or other gadgets, but do worry somewhat about the delicacy of the telescoping lens mechanism. Certainly, caution is called for in attaching or removing filters, and you'd want to avoid heavy auxiliary lenses altogether.)
Exposure
The Dimage S304 has incorporated many of the exposure options available in the Dimage 5 and 7, but presents them in a more compact and abbreviated user interface. The Mode dial on top of the camera controls the six basic operating modes: Auto-Record, Multi-Function, Playback, Movie-Record, Setup, and Data Transfer. Auto-Record is the "point-and-shoot" mode, in which the camera makes all of the basic exposure decisions. You have access to external controls, such as Flash, Exposure Compensation, and Mode drive, plus you can choose from a selection of five preset exposure modes: Macro, Portrait, Landscape, Night Portrait, and Text. Within the Multi-Function mode, you have three more exposure options: Program, Aperture Priority, and Manual. Finally, there is a Movie-Record mode, which captures digital video with sound.
Among the Multi-Function Exposure modes, Program is similar to Auto-Record, in that it determines the shutter speed and lens aperture, but you have the added options of choosing White Balance, Sensitivity (ISO), and Metering modes. Aperture Priority allows you to select the lens aperture setting, from f/3 to f/8 depending on zoom, while the camera selects the most appropriate corresponding shutter speed. Switching to Manual mode gives you control over both shutter speed and aperture (1/1,000 to 4 seconds), with a Bulb setting for longer exposures. (Bulb exposure is determined by how long you hold down the shutter button, up to a maximum of 15 seconds.) Light sensitivity can be set to Auto, or ISO equivalents of 100, 200, 400, or 800.
The S304’s default metering system is a Multi-Segment evaluative mode, which takes readings from 256 points throughout the image area and averages them to determine exposure. A Spot Metering mode is available through the Custom 1 section of the Multi-Function recording mode (it is not available in Auto-Record mode). Spot metering is useful for high-contrast subjects, as it bases the exposure reading on a very small area in the center of the viewfinder. When Spot Metering is selected, the LCD monitor automatically turns on (if it is off) and a small circle appears in the center of the image area, indicating where the exposure will be measured. You can determine the area you want to have properly exposed by centering it in the viewfinder, depressing the Shutter button halfway, and then recomposing the image before completing the exposure. If the LCD monitor is turned off, the Spot Metering mode remains active until you change the menu selection or change to another setting on the Mode dial.
Digital Subject Program Modes
The Dimage S304 provides five preset exposure modes, including Macro, Portrait, Landscape, Night Portrait, and Text, accessed by pressing the Digital Subject Program button next to the small status display panel on top of the camera (an indicator highlights each mode as it's selected). Macro mode automatically sets the lens on maximum telephoto and activates the LCD monitor so you can view exact framing -- focusing on objects that are 6 inches to 2 feet (16 to 60 centimeters) from the camera. Portrait mode produces better-looking people shots by enhancing skin tones and decreasing the depth of field (to create a slightly blurred background). Landscape mode uses a small aperture setting to provide maximum depth of field for focusing on near and far subjects. In Night Portrait mode, the camera uses flash to illuminate the subject, and a slow shutter speed to allow more ambient background light into the image. The final preset mode is Text, which optimizes the camera for capturing black text on a white background, keeping the contrast level high so the camera doesn't expose for neutral gray. With the exception of Macro, all Subject Program modes are available only in Auto-Recording mode, and in all but the two Portrait modes, the flash will not fire if set on Autoflash. (You must select Fill-Flash to force the flash exposure.)
Exposure Compensation
Exposure Compensation is available in both Auto-Recording and Multi-Function modes (with the exception of Aperture Priority and Manual Exposure modes) and is adjustable from -2 to +2 exposure values (EV) in one-third-step increments. You activate Exposure Compensation by pressing the far right button under the Data display panel. Once activated, use the Left and Right Arrow keys to adjust the setting, and the amount of compensation will be shown next to the Exposure Compensation icon on the LCD monitor. After you've selected the desired setting, press the Exposure Compensation button a second time to set the exposure. The Aperture and Shutter Speed settings displayed on the monitor will reflect the new exposure. (Note: If the Flash mode is set to Auto, the flash will not fire. It must be set to Fill Flash to operate.)
White Balance & Color Control
White Balance adjustment takes place in the Basic menu of the Multi-Function mode. Options include Auto, Cloudy, Daylight, Tungsten, Fluorescent, and Custom, which is the manual setting. In Auto, the default mode, the camera's exposure system reads the color temperature of the surrounding light and makes the necessary adjustments to balance the color. Custom mode is particularly helpful in mixed lighting conditions, where the camera may have some problem determining the correct color temperature. In this mode, you calibrate the white balance by exposing a white sheet of paper under the existing light. The camera automatically adjusts the color balance to achieve a neutral white.
The S304 also offers Color, Contrast, Sharpness, and Saturation adjustments through the Custom 2 menu in Multi-Function mode. Color mode simply sets the camera to a "Color" or "Black-and-White" option. Sharpness hardens or softens detail in the image, with three levels of adjustment: Hard, Normal, and Soft. Contrast increases or decreases contrast in the scene at one of three levels: High, Normal, and Low. And Color Saturation brightens or subdues color in the scene by setting the option to High, Normal, or Low. (Note: Changes implemented through these menu items are not as visible on the LCD monitor as they will be when viewed on a computer monitor.)
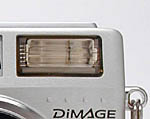 Flash Mode
The S304's built-in flash offers five options, selectable by pressing the far left button under the Data display panel. They include: Autoflash, Fill-Flash, Flash Cancel, Auto Flash w / Red-Eye Reduction, and Fill-Flash w / Red-Eye Reduction. In Fill-Flash mode, the flash fires with every exposure, regardless of lighting conditions. Red-Eye Reduction fires a series of small pre-flashes before firing the flash at full power with the exposure, which reduces the occurrence of red-eye effect. Flash Cancel prevents the flash from firing, even in low light.
The flash status is indicated by a small orange lamp, located to the right of the optical viewfinder window, below the Focus lamp. When the lamp glows steadily, the flash is charged and ready to go. If it blinks quickly, the flash is still charging and the shutter will not release. If it blinks slowly, it is a "camera-shake" warning that means the shutter speed is too slow to handhold without the flash.
The effective flash range varies, depending on the lens position. According to the User Manual, flash range is 1.6 to 11.5 feet (0.5 to 3.5 meters) at the wide-angle position, and 3.0 to 9.8 feet (0.9 to 3.0 meters) at the telephoto position.
Drive Modes
The S304 has four "Drive" settings, selected by pressing the middle button under the Data display panel. The default setting is Single-Frame Advance, which records one image when you press the Shutter button. Continuous Advance captures multiple images in rapid succession. Bracketing mode captures three consecutive images, each at a different exposure, when you depress the Shutter button. One is recorded at normal exposure, one is underexposed, and one is overexposed, allowing you to select the best out of the three exposures. The amount of exposure variation between images is determined by adjusting the Exposure Bracket option in the Multi-Function mode, Custom 1 menu. Options include 0.3, 0.5, and 1.0 exposure values (EV).
Self-Timer mode delays the exposure for 10 seconds after you press the Shutter button, giving you time to move into the picture area for a self portrait or group portrait. During the countdown, the Self-Timer lamp on the front of the camera blinks slowly for about 8 seconds, then blinks rapidly for the last 2 seconds, and glows steadily immediately before the exposure. An audio signal accompanying the blinking lamp can be turned off through the Setup menu.
Shutter Lag/Cycle Times
When you press the shutter release on a camera, there's usually a lag time before
the shutter actually fires. This time allows the autofocus and autoexposure
mechanisms time to do their work and can amount to a fairly long delay in some
situations. Since this number is almost never reported on, and can significantly
affect the picture taking experience, we now routinely measure it using an Imaging
Resource proprietary test system.
|
|
||
|
|
|
|
| Power On -> First shot |
|
About average for cameras with telescoping lenses. |
| Shutdown |
|
Time until lens retracted and ready to put away. A bit faster than average. |
| Play to Record, first shot |
|
Time until first shot is captured, from playback mode. Quite a bit faster than average. |
| Record to play (max res) |
|
Quite a bit faster than average. |
| Shutter lag, full autofocus |
|
Somewhat faster than average. (Higher number is for telephoto lens setting, lower is for wide angle.) |
| Shutter lag, manual focus |
|
Quite a bit faster than average |
| Shutter lag, prefocus |
|
Quite a bit faster than average. |
| Cycle Time, max/min resolution |
1.1-1.3 31.9 |
Camera captures four shots before slowing in large/fine mode, indefinite number (70?) in small/basic mode. Cycle times when writing to the buffer are very fast. Last time is for TIFF mode. |
| Cycle time, continuous mode |
(0.93 fps) |
Quite fast. Bursts range from 4-5 frames at max res/quality to about 70 frames in lowest res/quality mode. Very zippy! |
Overall, the Dimage S304 is a pretty fast camera. Startup and shutdown times are about average for a camera with a telescoping lens, but shutter lag and shot to shot cycle times are quite fast, with the cycle times particularly so. We said earlier that we hadn't seen any particular advantage to Minolta's phase-detect autofocus technology, but in the case of the S304, it seems to pay off in shorter than average shutter delays. Quite impressive overall.
Operation & User Interface
The majority of the Dimage S304's user controls are accessed via the camera's external buttons and Mode dial, which are clearly marked and relatively easy to learn. The on-screen menus are more extensive than the Dimage 5 and 7 models, taking some of their external adjustments and incorporating them into the menu system. There are also quite a few "hidden" controls, especially in Manual mode, where one button may perform a variety of functions. Overall, we were pleased with the operation and user interface once we learned its many nuances.
Control Enumeration

Shutter Button
Located on the top right side of the camera, this button sets exposure and focus when half-pressed, and trips the shutter when fully depressed. When fully depressed in Self-Timer mode, the Shutter button triggers the 10-second countdown before exposure.

Mode Dial / Main Switch
In the right rear corner of the top panel, this knob turns the camera on or off and selects the main operating modes. Options include: Auto-Recording, Multi-Function Recording, Playback, Movie-Recording, Setup, and Data Transfer modes.

Data / Status Panel
Not a control per se, this data readout panel is located in the center of the top panel and displays icons and numbers indicating the status of a wide range of camera settings.

Subject Program Button
Just to the right of the status panel, this button cycles the camera through its five "Digital Subject Programs," including Macro, Portrait, Landscape, Night Portrait, and Text Modes.

Flash Mode / Magnification Button
The first control (left to right) in a set of three buttons located below the Data / Status panel, pressing this button in Auto or Multi modes scrolls through the available Flash settings. Options include: Autoflash, Fill Flash, Autoflash w / Red-Eye Reduction, Fill Flash w / Red-Eye Reduction, and Flash Cancel. In Playback mode, pressing this button magnifies the image displayed on screen up to 3.2x, and then returns it to normal magnification.

Drive Mode Button
The second control in a set of three buttons located below the Data / Status panel, the Drive mode button controls the rate and method images are recorded. Options include Single-Frame Advance (default), Self-Timer / Remote Control, Continuous Advance, and Auto Bracketing.

Exposure Compensation Button
The third control in a set of three buttons located below the Data / Status panel, the Exposure Compensation button is used in Auto or Program exposure modes to adjust the lightness and darkness of the final image. Pressing the button once activates Exposure Compensation. Pressing the Left and Right Arrow buttons adjusts the amount of compensation from +2 to -2 exposure values (EV) in one-third-step increments. Pressing the button once more, after choosing the desired exposure, sets the EV. In Manual mode, pressing this button highlights the shutter speed or aperture setting. The highlighted setting is then adjustable with the Left and Right Arrow buttons of the Five-Way Controller (below).

Five-Way Controller
Located at the top of the back panel, this rocker control is used to step through selections within the LCD menu system and to interact with various status messages or requests for confirmation that appear on the LCD screen. You navigate the menus by pressing one of the four arrows around the control's periphery, and confirm selections by pressing the center of the controller.
When Autofocus is engaged, the Up and Down Arrows are used to control the zoom of the lens (Up zooms toward Telephoto, Down zooms toward Wide-Angle). When Manual Focus is selected, the Up and Down Arrows are used to control Focus or Zoom. Pressing the Controller's center button switches between the two functions, highlighting the active setting in blue.
When Manual Exposure mode is engaged, the Left and Right Arrows are used to select Shutter Speed or Aperture, along with the Exposure Compensation button (above). When Aperture-Priority mode is engaged, the Left and Right Arrows are used to select the aperture setting only.
In Multi-Function capture mode, pressing and holding the five-way controller switches between spot focusing and wide area focusing. When switching to spot focusing, the four arrow keys select from among five standard spot-focus locations.
In Playback mode, pressing the Left and Right Arrow buttons scrolls through saved images, while pressing the Up Arrow calls up an information display with detailed information about the on-screen image. (Pressing the Down Arrow brings back the normal display.)

Menu Button
Located directly below the Five-Way Controller, this button calls up the on-screen menu system and turns it off again.

QV / Delete Button
Below the Menu button, the Quick View / Delete button lets you quickly switch from Record to Playback mode to view the most recently captured image. When viewing an image in Playback, pressing this button prompts the camera to ask if you want to delete it.

Display Button
At the bottom of the back panel, this button controls the amount of information displayed on the LCD screen while in Record and Playback modes, and it activates the Index display in Playback mode.

Card Slot Door Release
This sliding button is located in the upper right corner of the back panel. Pressing down on it springs the memory compartment door, uncovering the memory card slot, USB port, and AV-Out terminal.
Battery Compartment Latch
Located on top of the battery compartment door, this latch locks and unlocks the battery compartment cover.
Camera Modes and Menus
Drive Modes: Accessed by pressing the middle button under the Data Status Display panel, Drive modes determine the rate and method by which images are recorded. All Still image capture modes offer the following Drive mode options:

Auto-Recording Mode: Accessed by turning the Mode dial to the red camera symbol marked "Auto," the Auto capture mode automatically sets all exposure settings, with minimum exposure adjustment options, such as Flash, Exposure Compensation, and Image Size and Quality. While in Auto mode, you can select one of five Digital Subject Program modes by pressing the Drive button to the right of the Data Status Display panel:
Macro: Used for taking close-up images between 6 inches and 2 feet (16-60cm), the Macro mode automatically sets the zoom to the full telephoto position. This is the only Subject Program that can be used in Multi-Function mode.
Multi-Function Recording Mode: Accessed by turning the Mode dial to the red camera symbol marked with an "M," Multi-Function offers three Exposure modes, each selected through the Multi-Function Basic menu:
All three modes have expanded menu options listed below.

Playback Mode: Indicated by the standard "Playback arrow" symbol, this mode enables playback of previously captured images and movies.

Movie-Recording Mode: Marked by a movie camera icon, this mode sets up the camera to capture QuickTime movie sequences with sound.

Setup Mode: Displays an LCD menu system allowing configuration of deeper camera operating modes, such as memory card formatting, menu language choice, and date and time settings.

Data-Transfer Mode: Indicated by the standard "double arrow" symbol, this mode activates the USB port for downloading images to a host computer.
 Auto Recording Mode Menu
Multi-Function Recording Menus
 Basic Menu
 Custom 1 Menu
 Custom 2 Menu
Playback Menus
 Basic Menu
 Custom 1 Menu
 Custom 2 Menu
Setup Menus
 Basic Menu
 Custom 1 Menu
 Custom 2 Menu
 Data-Transfer Menu
 Image Storage and Interface
The Dimage S304 uses CompactFlash Type I memory cards for image storage; a 16MB card comes standard with the camera. The CompactFlash slot is on the right side of the camera, covered by a hinged plastic door that opens easily and latches securely. The card inserts with the electrodes going in first, and the front of the card (indicated by an arrow) facing the front of the camera. A small button beside the slot ejects the card by popping it up slightly, allowing you to pull the card the rest of the way out.
Although individual CompactFlash cards cannot be write-protected or locked against erasure or manipulation, the S304 allows you to lock individual images or groups of images through the Playback menu. Once protected, images cannot be erased or manipulated in any way, except through card formatting. The Playback menu also allows you to delete images in the LCD display, select the number of images shown in the Index display, create a custom slide show, set images up for printing on DPOF-compliant printers, and copy images to camera memory or a new CF card.
Four image resolution settings are available: 2,048 x 1,536, 1,600 x 1,200, 1,280 x 960, and 640 x 480 pixels. Files may be saved in any one of three JPEG compression levels, as well as uncompressed TIFF (indicated on the camera LCD as "SuperFine"). Both settings are changed via the on-screen menu system. The number of remaining images that can be stored on the memory card is reported on the lower right corner of the LCD and Data Panel, in addition to the selected Resolution and Compression settings.
The table below summarizes the compression ratios and number of images that can be stored on the included 16MB memory card with each Resolution / Quality (JPEG Compression) combination.
|
Resolution/Quality 16MB Memory Card |
|
|
|
|
|
| Full Resolution 2048x1536 | Images (Avg size) |
1 9.4 MB |
8 2.0 MB |
1.0 MB |
0.7 MB |
| Approx. Compression |
1:1 | 5:1 |
|
|
|
| UXGA Resolution 1600x1200 | Images (Avg size) |
5.8 MB |
1.1 MB |
0.7 MB |
0.4 MB |
| Approx. Compression |
|
|
|
|
|
|
|
Images (Avg size) |
3.7 MB |
0.8 MB |
0.5 MB |
0.35 MB |
| Approx. Compression |
|
|
|
|
|
|
|
Images (Avg size) |
0.9 MB |
0.34 MB |
0.25 MB |
0.20 MB |
| Approx. Compression |
|
|
|
|
|
A USB cable and interface software accompany the S304 for quick connection and image downloading to a PC or Macintosh computer. (We didn't test the download speed of our prototype unit, since production models will quite possibly perform differently.)
![]() One
of the first things any new digicam owner will need is a larger memory card
for their camera: The cards shipped with the units by the manufacturers should
really be considered only "starter" cards, you'll definitely want a higher capacity
card immediately. - Probably at least a 32 megabyte card for a 1.3 or 2 megapixel
camera, 64 megabytes or more for a 3, 4, or 5 megapixel one. (The nice thing
about memory cards is you'll be able to use whatever you buy now with your next
camera too, whenever you upgrade.) To help you shop for a good deal on memory
cards that fit the S304, we've put together a little memory locater, with links
to our price-comparison engine: Just click on the "Memory Wizard" button above
to go to the Minolta memory finder, select your camera model , and click the
shopping cart icon next to the card size you're interested in. You'll see a
list of matching entries from the price-comparison database. Pick a vendor &
order away! (Pretty cool, huh?)
One
of the first things any new digicam owner will need is a larger memory card
for their camera: The cards shipped with the units by the manufacturers should
really be considered only "starter" cards, you'll definitely want a higher capacity
card immediately. - Probably at least a 32 megabyte card for a 1.3 or 2 megapixel
camera, 64 megabytes or more for a 3, 4, or 5 megapixel one. (The nice thing
about memory cards is you'll be able to use whatever you buy now with your next
camera too, whenever you upgrade.) To help you shop for a good deal on memory
cards that fit the S304, we've put together a little memory locater, with links
to our price-comparison engine: Just click on the "Memory Wizard" button above
to go to the Minolta memory finder, select your camera model , and click the
shopping cart icon next to the card size you're interested in. You'll see a
list of matching entries from the price-comparison database. Pick a vendor &
order away! (Pretty cool, huh?)
 Video
Out
Video
Out
The S304 provides a video output jack with an accompanying video cable. The signal timing can be set to NTSC or PAL via the Setup menu. An adapter cable terminating in a male RCA plug is included with units shipped to the U.S. European models will presumably include cabling appropriate to PAL systems. The Video output duplicates the contents of the LCD in all modes, permitting it to be used as an auxiliary viewfinder.
 Power
Power
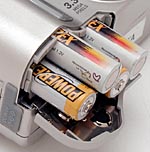
The S304 is powered by four AA Alkaline, Li-Ion, or NiMH batteries (four alkaline
batteries are shipped with the camera). We suggest investing in several sets
of rechargeable NiMH batteries and a battery charger, as most digital cameras
are power hogs. Minolta offers an optional AC Adapter for running the camera
in the studio or for downloading images to a computer, as well as an External
Battery Pack Kit EBP-100, which provides a portable source of power in the form
of a high-power lithium-ion battery holder and charger. The below shows the
power drain numbers we measured, and the projected run times in various operating
modes.
|
|
(@ 6.0v) |
(1600 mAh) |
| Capture Mode, w/LCD |
|
|
| Capture Mode, no LCD |
|
|
| Half-pressed shutter w/LCD |
|
|
| Half-pressed w/o LCD |
|
|
| Memory Write (transient) |
|
|
| Flash Recharge (transient) |
|
|
| Image Playback |
|
|
Overall, the Dimage S304 is a little power-hungry in its worst case mode, but overall isn't too bad, with 100 minutes of estimated run time in that mode, and 200+ minutes with the LCD turned off. Playback time is a bit over 2 hours of continuous operation. (All numbers based on 1600 mAh of capacity from high-capacity NiMH rechargeable cells.)
 About Batteries
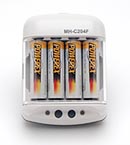
We've gotten so many emails about power issues for digicams, that we're now inserting this standard notice in the reviews of all AA-powered cameras on our site: Don't even *think* about using alkaline AA batteries in a digicam! Despite their being packed in the box with many cameras, they simply don't have the juice to handle typical digicam demands. (Even the "high power" ones the battery manufacturers say are designed for devices like digital cameras.) Spend the $35-40 or so it takes to get a set (or two) of high-capacity NiMH rechargeable batteries and a good charger! The few dollars up front will save you literally hundreds of dollars in the long run, not to mention the hassle of wimpy batteries running out in the middle of the action. We suggest you buy two sets of batteries, so one can always be in the charger, ready to go, and so have two sets available for longer excursions. Good brands of batteries include Maha (our favorite), GP, Kodak, and Nexcell. Also, buy the highest capacity AAs the manufacturer makes, the few extra dollars for the extra capacity is usually well worth it. Getting a good charger is critical though, almost more so than buying good batteries. We recommend the Maha C-204F (see the photo at right), the charger we use the most in our own studio. - Read our review of it for all the details. Or, just click here to buy one, you won't regret it.
Software
The S304 ships with Dimage Image Viewer Utility and ArcSoft PhotoImpression 2000 software programs. Dimage Image Viewer allows you to open, sort, and delete thumbnail images, perform color matching, adjust tonal curves, set white and black points, and correct individual RGB channels. PhotoImpression provides minor correction tools, plus a large selection of calendars, cards, frames, textures, and album effects for enhancing your images.
Like the other recent high-end Minolta cameras (the Dimage 5 and Dimage 7), the S304 captures images in its own proprietary color space. The good part of this is that the S304 can capture a broader range of colors than conventional cameras based on the sRGB standard. The downside though, is that most computer software and consumer-level printers assume sRGB as the default color space. This means that you'll need to convert essentially all your images from the S304's color space to the sRGB standard. (Losing some colors in the extreme reds and blue/greens in the process.) The Dimage Image Viewer utility program can batch-convert images from the S304's color space to sRGB and several others. The process isn't terribly onerous, and we support Minolta's efforts to break out of the limitations of sRGB. It is an additional step however, that potential owners need to be aware of.
Test Results
In keeping with our standard policy, our comments here are rather condensed, summarizing our key findings. For a full commentary on each of the test images, see the S304's "pictures" page.
As with all Imaging Resource camera tests, we encourage you to let your own eyes be the judge of how well the devices performed. Explore the images on the pictures page, to see how well the S304 performed, and how its images compare to other cameras you may be considering buying.
Overall, the S304 produced accurate color during most of our testing. The raw images from the camera appear a little flat, with lower saturation, but running them through the Dimage Image Viewer software to convert to the sRGB color space brightens them up to produce generally good color. The camera's White Balance system handled most of our test lighting well, with the Auto setting produced the most accurate results most of the time. For our difficult Indoor Portrait (without flash), the Incandescent setting produced the best results, though the Manual white balance option came in as a close second. The S304 performed well on our Davebox target, distinguishing the tough tonal variations and reproducing the large color blocks well (if not with somewhat weak saturation). The blue flowers of the bouquet featured in our Outdoor and Indoor portraits had a strong purple tint, a surprisingly common failing among digicams (these blues are difficult for many cameras to get right).
The S304 performed very well on our "laboratory" resolution test chart. It started showing artifacts in the test patterns at resolutions as low as 650 lines per picture height, in both horizontal and vertical directions. We found "strong detail" out to 900 lines horizontally, and 850 lines vertically. "Extinction" of the target patterns didn't occur until about 1,200 lines.
Optical distortion from the S304's lens was lower than average at the wide-angle end, where we measured approximately 0.55 percent barrel distortion. The telephoto end fared much better, as we couldn't even find one pixel of pincushion or barrel distortion. Chromatic aberration was very faint, showing only about two or three very light pixels of coloration on either side of the target lines. Overall, the S304's lens appears to be of very high quality.
The S304 generally performed well in the low-light category, and captured clear, bright, usable images at light levels as dark as 1/16 foot-candle (or 0.67 lux) at all four ISO settings. Color was excellent (although there was a bit of a magenta cast), as was overall brightness (even at the ISO 100 setting). Noise was significantly higher at the 800 ISO setting (as you might expect), though noise levels were considerably lower at the 400, 200, and 100 ISO settings. Even at ISO 100 though, noise levels were much higher than we've become accustomed to seeing in recent high-end consumer digicam models. We recommend Mike Chaney's Qimage Pro for readers interested in a software application that does an excellent job of removing image noise without disturbing the underlying image detail.
The S304's optical viewfinder was a bit tight, showing approximately 80 percent frame accuracy at wide angle, and approximately 84 percent accuracy at telephoto. There was also strong evidence of a shifted CCD sensor, as images framed with the optical viewfinder were markedly slanted, sloping down toward the lower left corner. The LCD monitor performed much better, showing approximately 98 percent frame accuracy at both wide angle and telephoto settings. Given that we generally prefer LCD monitors to be as close to 100 percent accuracy as possible, the S304's LCD monitor did an excellent job.
The S304 also performed pretty well in the macro category, capturing a slightly large minimum area of 4.03 x 3.02 inches (102.28 x 76.71 millimeters). This is a larger minimum area than we've come to associate with high-end consumer cameras, but still not bad. Color and resolution were both good, though the gray background has a pinkish cast. Details were reasonably sharp on the coins and brooch, with just a faint hint of softness in the corners of the image. The dollar bill details were also nice and sharp, with good color and definition. The S304's flash did a reasonably good job of throttling down for the macro area, though the brooch causes a bright reflection and coverage is uneven (illuminating the upper left corner the most).
All in all, the S304 performed well throughout our testing. We'd like to see more vibrant color, but accuracy is good (apart from the always-difficult blues in the model's pants and blue flowers on our outdoor portrait shot) and the adjustable saturation settings provide some flexibility in this regard. Resolution and detail were very good in our tests, with the camera picking up a nice level of detail even in distant subjects. Combined with excellent low-light and macro shooting capabilities, the S304's flexible exposure options can tackle just about any subject.
Conclusion
The Dimage S304 packs a lot of functions into a very compact package. Minolta has managed to take the majority of features found on the higher end Dimage 5 and 7 models, and reworked them for a smaller camera size. While this puts more emphasis on the LCD monitor and menu system than we generally like to see, you can still access most basic functions with one of the many well-placed external control buttons. Add to that a sharp 4x zoom lens, advanced image processing, and a 3.3-megapixel CCD, and you've got an excellent camera for business users or serious amateurs who want quality and control at a reasonable price.
<<Dimage S304 Sample Images | Additional Resources and Other Links>>
Reader Comments!
Questions, comments or controversy on this product? Click
this link to see what other Imaging Resource readers have had to say about
the Minolta Dimage S304, or add comments of your own!
