Nikon CoolPix 775Nikon packs advanced Coolpix technology & superior ease-of-use into a tiny, affordable 2 megapixel camera!<<Optics :(Previous) | (Next): Shutter Lag & Cycle Time Tests>> Page 6:Exposure & FlashReview First Posted: 07/23/2001 |
Exposure
The Coolpix 775 is designed primarily for the point-and-shoot photographer, with a basic Programmed "Auto" exposure mode and seven preset "Scene" modes -- each of which automatically determines the aperture, shutter speed, flash, and focus settings -- based on existing light levels and (in the case of Scene modes) the nature of the subject and its surroundings. The user has limited exposure overrides in Auto mode, including Exposure Compensation, White Balance, Flash settings, and Image Size and Quality. Some of these options carry over into the Scene modes, depending on the subject and its specific exposure requirements, but for the most part, all of the exposure decisions are left up to the camera.
The primary advantage of this system is its simplicity. The Auto and Scene modes are selected by turning a large, clearly marked Mode dial on the camera's top panel. Each mode is marked by an easily identifiable icon (we particularly like the party hat and confetti, which marks the Party / Indoor setting). The Flash mode is quickly adjusted by pressing the middle button located under the LCD monitor, and the remaining exposure options are selected through the on-screen menu system, which is relatively short compared to most digicam models, with only two pages of options (the second one with only two menu items).
The obvious disadvantage of this system is its lack of flexibility. While the previous 800 model offered a choice of ISO settings, three metering modes, and displayed both aperture and shutter speed settings on the LCD monitor, the 775's ISO is set at 100, with no user adjustment; it has only one metering option; and the shutter speed and aperture are never revealed to the photographer. To most point-and-shooters, these limitations are of little significance, but to the more advanced photographer, they can be somewhat frustrating (which is why we recommend this camera for novice / amateur photographers).
The following overview briefly covers each of the 775's exposure systems and controls:
Auto mode: The camera automatically determines all exposure settings based on light readings taken with the built-in sensor.
Scene modes: These include seven preset exposure modes that are optimised for specific shooting conditions. Options include: Party / Indoor, which uses a slow shutter speed to record more detail in dark interior settings (should be used with a tripod); Backlight, for subjects that have sun or bright light behind them, the flash automatically fires to fill in shadows in the foreground; Portrait, uses a large lens opening to maintain sharpness in the subject and slightly blur the background; Night Portrait, slows the shutter speed to record more of the background detail and fill flash to eliminate shadows in the subject's faces (use a tripod); Landscape, employs a small lens opening for maximum depth of field and switches to Infinity focus; Beach / Snow, adjusts exposure compensation for brightly lit scenes so the camera doesn't underexpose the image; and Sunset, which also adjusts exposure compensation to better record the dark scene and capture the rich colors of the sunset.
Metering: The 25-element Matrix Metering is one of Nikon's trademark features. It evaluates 256 different spots within the image, and judges the contrast, brightness, and dark areas to determine the best overall exposure setting. While this metering system functions very well under general lighting conditions, we would like to see an additional spot metering option for difficult-to-meter situations, such as high-contrast or back-lit scenes.(Although again, such features would take the 775 away from the point & shoot simplicity it's market demands.)
Exposure Compensation: This user-selectable option is controlled through the Shooting mode menu, with adjustable Exposure Compensation settings from +2 to -2 exposure equivalents (EV) in one-third-step increments. Exposure compensation is primarily used to adjust for extreme lighting situations, such as very bright or dark subjects / scenes, or when shooting in high-contrast settings. The general rule-of-thumb is to select positive values when photographing very bright scenes (such as snow, water, or sand), or when the background is much lighter than the subject, and to use negative values when photographing very dark scenes (such as deep forest settings), or when the background is much darker than the subject.
White Balance: Also accessed through the Shooting mode menu, White Balance compensates for different color temperatures produced by various light sources. White Balance options include: Auto (the camera determines WB), White Balance Preset (manual adjustment), Fine (sunlight), Incandescent, Fluorescent, Cloudy, and Speedlight (flash). The manual Preset adjustment is determined by selecting White Bal Preset option in the White Balance menu, highlighting the Measure option, holding a bright white sheet of paper in front of the camera lens, and pressing the right Arrow button. The camera will zoom out, release the shutter, and take a reading of the light coming from the paper. It then makes whatever adjustments are required to render that particular color pure white in subsequently captured images.
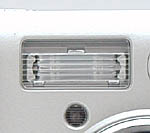 Flash
FlashThe 775 features a built-in flash with five operating modes, each of which is accessed by pressing the Flash / Index button centered under the LCD monitor. Flash mode options include: Auto, which automatically triggers the flash when the camera determines that additional lighting is needed; Flash Cancel (flash off), which prevents the flash from firing under any conditions; Anytime Flash (fill flash), which automatically fires the flash, regardless of lighting conditions; Slow Sync, which combines flash and a slow shutter speed to let in more ambient light (best used for nighttime shots and backlit subjects, tripod recommended); and Red-Eye Reduction, which emits a preflash before unleashing the full flash power to reduce the effects of red-eye in the subjects' eyes. A small icon indicating each flash mode appears at the top of the LCD monitor.
Nikon reports the flash range for the 775 at three different lens settings: Macro range is 7.9 inches to 7.9 feet (20 to 240cm); Normal is 1.3 to 9.8 feet (40 to 300cm), and Maximum zoom is 1.3 to 5.6 feet (40 to 170cm). Our own test results were a little odd, in that the flash seemed somewhat dim at all distances, and not appreciably more so at the 14 foot limit of our test than at the 8 foot starting point. Given that most of our flash test shots are taken with the lens at or near maximum zoom, it's likely that we were beyond the unit's rated range. (Short flash range is the bane of many subcompact digicams, and the 775 seems to share this difficulty somewhat.)
Special Exposure Modes
Movie
The Coolpix 775 features a Movie recording mode, accessed by turning the Mode dial to the movie camera icon. Real time action is recorded at 15 frames per second, 320 x 240-pixel (QVGA) resolution, without sound, and stored on the memory card as QuickTime files (designated by .MOV at the end of the name). Recording begins by pressing the Shutter button once and continues for 15 seconds, or until the memory card runs out of space. You can end the recording before the 15 seconds are up by pressing the Shutter button a second time. Flash, Macro and Infinity Focus, and Digital Zoom options are not available in Movie mode.
In Playback mode, Movie files are displayed as single image frames with a movie camera icon in the lower left corner of the LCD display. To start the movie playback, press the right arrow button once to begin playback and press it a second time to pause. While in pause mode, the up and down arrow keys can be used to rewind or advance the movie one frame at a time.
Self-Timer
Controlled by the Focus / Self-Timer / Delete button on the camera's back panel, the Self-Timer function is used to set up the camera for delayed exposures. The 775 offers two countdown durations -- 3 or 10 seconds -- determined by the number of times you depress the Shutter button to activate the Self-Timer (one press for 3 seconds and two presses for 10 seconds). The shorter countdown is ideal for triggering the shutter quickly, without risking camera shake when your finger comes in contact with the Shutter button. The longer countdown time enables you to frame a shot, depress the Shutter button, and quickly take up a position in front of the camera before the shutter fires. This is particularly helpful when taking group photos (just remember to bring the tripod!)
In most shooting modes, the Self-Timer is activated by scrolling through the Focus / Self-Timer button options: Autofocus (no icon), Autofocus / Self-Timer (clock icon), Infinity Focus (mountain icon), Macro Focus (flower icon), and Macro Focus / Self-Timer (flower + clock icon). Only those options that display a Self-Timer icon will activate the countdown. Once the Shutter button is depressed, a Self-Timer lamp on the camera's front panel starts blinking, and will continue to blink until one second before the shutter is released, when it will glow steadily until the shutter fires. You can also track the countdown by watching the Self-Timer icon on the camera's LCD monitor, which displays the seconds remaining until the exposure is complete.
We're pleased to see that Nikon has engineered the 775 so that the Self-Timer can be used in either Macro or Autofocus modes. The earlier 800 model had the Self-Timer and Macro functions as two separate options on the same control -- making it impossible to use the Self-Timer in Macro mode.
Continuous Shooting
The 775 features a Continuous shooting option in the Auto menu for selecting one of three capture modes: Single, Continuous, and Multi-Shot 16. Single capture is the default setting, in which the camera records a single exposure each time you press the Shutter button. The Continuous option records a rapid sequence of images at a rate of about three photos every two seconds, for as long as you hold down the Shutter button. (Note: The capture rate will decrease if the camera's memory buffer fills up, displaying an hourglass icon until it has had a chance to process the images.) The third option, Multi-Shot 16, records 16 consecutive 400 x 300-pixel thumbnail images and combines them into a collage measuring 1,600 x 1,200 pixels. (This option is only available when the image size is set to Full.) Flash is not available in the Continuous and Multi-Shot 16 modes. Focus, White Balance, and Exposure are set with the first image in the series and applied to all subsequent exposures.
Best Shot Selection
The Best Shot Selection (BSS) feature records continuous exposures in the same manner as the Continuous mode, except that the camera then analyses the series and chooses the sharpest image to record to the memory card. This is particularly useful in situations where there is an increased potential for camera shake, such as in Macro mode, when the lens is zoomed out to maximum telephoto range, or when the lighting is poor and you can't use the flash. The sequence is limited to 10 shots, and Focus, White Balance, and Exposure are all set with the first image in the series. Flash is not available in BSS mode.
Image Sharpening
The Image Sharpening menu provides several options for sharpening images in-camera. Auto Sharpening makes adjustments based on the image, so the amount of sharpening will vary from shot to shot; Normal applies the same level of sharpening to all images; High increases image sharpness, making edges more distinct. Low reduces the amount of sharpening normally applied; and Off shuts down the sharpening function completely. These options are only available in the Auto exposure mode. In Scene modes, the camera determines the level of sharpening based on the subject matter. (Note: The effects of Image Sharpening are not visible on the LCD monitor.)
Reader Comments! --> Visit our discussion forum for the Nikon CoolPix 775!

Follow Imaging Resource: