Olympus D-460 ZoomOlympus updates a popular 1.3 megapixel model with improved features and a simpler interface.<<Shutter Lag & Cycle Time Tests :(Previous) | (Next): Camera Modes & Menus>> Page 8:Operation & User InterfaceReview First Posted: 6/14/2000 |
User Interface
We found the user interface on
the D-460 simple to understand and navigate, with most of the controls located
on the back panel of the camera and a very straightforward LCD menu system. The
camera is quickly activated by sliding open the lens cover, and just as quickly
deactivated by closing it. The Playback mode is accessed by closing the lens
cover and then pressing the Display button once the camera has shut off. One
problem we had with the earlier D-450 model was that some of the icons for the
buttons were a little tricky to decipher. In the D-460 Zoom, Olympus has taken
care of this problem by first of all, removing some of the buttons, and
secondly, using the standard icons for each function on the remaining control
buttons. Everything else on the camera is just as straightforward, with the
SmartMedia slot beneath a hinged plastic door on one side and the digital, video
and DC jacks all together beneath another plastic door on the opposite
side.
Shutter
Button
Located on the top right of the camera, this button sets focus and
exposure when halfway pressed and takes the exposure once fully
pressed.
Zoom
Lever
Located directly to the right of the shutter button, this lever
rocks back and forth to control the optical zoom from wide angle to telephoto
when in Record mode.
In Playback mode, pressing the lever towards the "W"
or wide angle end activates the index display mode, showing previously captured
images as groups of 4, 9, or 16 "thumbnails". Pressing the lever towards the "T"
or telephoto end enables the playback zoom feature. (Photos can be enlarged up
to 3x on the LCD screen.)
Dioptric Adjustment Dial
Clicks up and down to visually
correct the viewfinder image and located to the left of the optical
viewfinder.
Flash Button (Delete Button)
Located directly to the
right of the optical viewfinder. In Record mode, allows you to select from the
following flash settings (Forced Off mode is accessed by simply closing the
flash):
- Auto Flash Mode: The camera controls when the flash fires based on
existing light conditions

- Red-Eye Reduction: Reduces the Red-Eye effect by emitting a
preflash before the full flash.
- Fill-In Flash: Always fires, regardless of light conditions.
- Slow: Fires with slow shutter speeds for night scenes and backlit
subjects.
- Slow with Red-Eye Reduction: Same as Slow but with the addition of the Red-Eye Reduction preflash.
In Playback mode (when the lens cover is closed), deletes the image currently
displayed on the screen, with an option to cancel.
Self-Timer Button (DPOF
Button)
Located to the right of the Flash button. In Record mode,
activates the camera's Self-Timer which counts down from 12 seconds before
firing the shutter.
In Playback mode, serves as the DPOF button which
allows you to designate DPOF printing options for the image displayed. DPOF
stands for Digital Print Order Format. It lets you specify the number of prints
you want made from each image on a memory card, and a DPOF-compliant printer
(with a card slot, of course) can then output your print order
automatically.
Macro/Digital Telephoto Button (Protect Button)
Located
to the right of the Self-Timer button. In Record mode, this button activates the
Macro mode when pressed once and activates the 2x digital telephoto when pressed
a second time. Pressing the button a third time puts the camera back into
regular Record mode.
In Playback mode, this button protects individual
images from accidental erasure (except from card formatting).
Display Button
In
Record mode (lens cover is open), the Display button turns the LCD monitor on
and off for conservation of battery power. If hit twice in a row while in this
mode, puts you in Quick Display mode, where you can scroll through previously
captured images with the arrow buttons.
In Playback mode (lens cover is
closed), when the LCD button is pressed, the camera checks the card and displays
the last picture taken. From here, you can access the Playback menu and scroll
through captured images via the arrow buttons.
Menu Button
In Record mode,
this button accesses the Recording Menu.
In Playback mode, the Menu
button accesses the Playback Menu.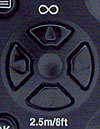
Up Arrow Button (Infinity Quick Focus
Button)
One of the four arrow buttons which are located in the bottom
right of the back panel. In Capture mode, the up arrow button allows you to
change settings within menus. If pressed at the same time that the shutter
button is halfway pressed, it serves as the Infinity Quick Focus button, useful
when quick shooting is required.
In Playback mode, this button also
navigates through the Playback menu.
Down Arrow Button (2.5/8ft Quick
Focus Button)
One of the four arrow buttons which are located in the
bottom right of the back panel. In Capture mode, the down arrow button allows
you to change menu settings within menus. If pressed at the same time that the
shutter button is halfway pressed, it serves as the 2.5/8ft Quick Focus button,
useful when quick shooting is required.
In Playback mode, this button
also navigates through the Playback menu.
Right and Left Arrow
Buttons
In both Record and Playback modes, these buttons navigate through
menu options. In Record mode, when digital telephoto is enabled, these buttons
zoom in and out of 2x digital enlargement.
In Playback mode, these
buttons scroll through captured images in single display and index display
format. All four arrow keys allow you to scroll around within an enlarged image
when using playback zoom.
OK Button
In any mode, the OK button confirms menu
selections and changes.

Follow Imaging Resource: