|
|
 |
|
2.1 megapixel sensor, 1792 x 1200 "native" resolution |
|
|
Uncompressed storage mode (a first for Kodak) | |
|
|
External flash support | |
|
|
FlashPoint's "Digita" scripting system | |
|
|
|
Unbelievable(!) low-light capability |
![]()
Readers have requested free-formatted versions of our reviews (without the graphical accouterments of our page design), to make printing easier. We are accommodating this request with special copies of each review, formatted to allow the text flow to be dictated by the browser window. Click here for a print-optimized page.
Manufacturer Overview
Kodak is without question one of the dominant companies in the field of photography.
While the bulk of their enormous business is built upon conventional film-based
photography, they clearly recognize that the future lies with digital. Accordingly,
they have developed arguably the broadest line of digital cameras in the business,
ranging from basic point & shoot models to professional ones costing in
excess of $20,000.![]()
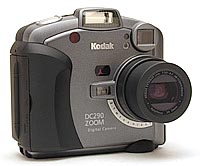
The DC290 represents the current (November, 1999) top of their consumer digicam
lineup, extending their Digita(tm)-based camera line to the 2 megapixel realm.
The DC290 represents more than just an increase in pixel count over the earlier
models though, as it also includes significant improvements in image quality,
a long-requested uncompressed storage mode, and absolutely astonishing low-light
(time-exposure) capabilities.![]()
Highlights
- 2.1 megapixel CCD delivering 2240 x 1500 (Ultra), 1792 x 1200 (High), 1440
x 960 (Medium) and 720 x 480 (Standard) pixel resolutions.

- F/2.0 to F/4.7, 8 to 24mm, 3x optical zoom lens (equivalent to a 38 to 115mm
lens on 35mm) with additional 2x digital zoom.
- ISO 100 rating
- Shutter speeds from 1/512 to 16 seconds
- Auto and manual focus options.
- 2.0 inch (50mm) color LCD monitor.
- Built-in flash with four modes (Auto, Red-Eye, Fill and Off).
- External flash sync cord plug-in.
- Burst exposure mode capturing between four and 16 images with one press
of the shutter button.
- Ten second self-timer function.
- Time-lapse feature captures shots at user defined intervals.
- IrDA Infrared Communication for camera-to-camera connections.
- Audio record and playback feature (up to two minutes).
- Date and time, logo, graphic and text watermark feature.
- JPEG (EXIF Ver. 2.1) and uncompressed TIFF file formats.
- DPOF (Digital Print Order Format) compatibility.
- USB, Serial and PC Card interfaces.
Executive Overview
The DC290 offers the convenience of a compact and rugged body and the ease of
a virtually all automatic exposure mode. The back of the square plastic body
features a soft, textured coating where your hands go and there's lots of finger
and hand grips, so you get a good, firm hold. We were pleased with the location
of the battery and CompactFlash compartments (right next door to each other
on the side of the camera) making them accessible while mounted on a tripod.
The retractable lens features a tethered lens cap that keeps you from worrying
about where you put it last. Another bonus on the camera design is the inclusion
of an external flash sync. A hot shoe would have probably been a little more
convenient, keeping you from having to hold the flash or use a separate flash
bracket. On the other hand, a sync cord gives you more control over the location
of the flash, a benefit in many shooting situations.![]()
The DC290 offers both a real image optical viewfinder and a color LCD monitor.
An interesting feature on the LCD monitor is the interactive information display.
The top line gives information on the camera, letting you know it's ready to
take a picture or that the subject is too far out of range. The bottom line
corresponds to the three softkeys beneath the monitor, allowing you to view
setting information and change between Still, Burst and Time-Lapse photography.
This is helpful when you don't want to go through the camera's extensive menu
system, which can become tedious once you get to know the camera.![]()
The DC290 sports a glass, eight to 24mm 3x zoom lens (equivalent to a 38.4 to
115.2 mm lens on a 35mm camera) with maximum apertures of F/3 and F/4.7 at the
wide angle and telephoto ends respectively. Autofocus ranges from 1.0 feet (0.3m)
to infinity and manual from 1.6 feet (0.5m) to infinity. Although there are
no filter threads on this lens, the Kodak accessory literature offers a close
up lens kit and various lens adapters for this model.(At least two third-party
adapters are available as well, see the main body of the review.) Since the
camera doesn't come with a macro function, you might want to purchase the close
up kit for any macro shooting. The 2x digital zoom function on the DC290 doubles
the zoom range to 6x, but remember, quality is always sacrificed with digital
zoom. Three focus options are available on the DC290: Multi-Spot Autofocus,
Single-Spot Autofocus and Manual focus. ![]()
As far as exposure goes, you're pretty much in automatic mode all the time,
with a few manual adjustments available to you. Lens aperture is only directly
adjustable in external flash mode. Likewise, shutter speed is only controllable
when using the long time exposure setting. You do have control over white balance,
exposure compensation (EV), flash, image quality, resolution and the type of
exposure (burst, time-lapse, etc.). White balance gives you five options (Auto,
Daylight, Fluorescent, Tungsten and Off) and exposure compensation is adjustable
from –2 to +2 EV. The built-in flash offers Automatic, Red-Eye Reduction,
Fill and Off settings. You also have a variety of image quality and resolution
settings, with pixel sizes from 720 x 960 to 2240 x 1500. (Note though, that
the "Ultra" resolution mode is interpolated, and offers little real
improvement beyond that of the uninterpolated 1792 x 1200 mode.)![]()
When it comes to exposure modes, the DC290 offers several options. Burst mode
allows you to take between four and 16 images, depending on quality settings,
in rapid succession. Time-lapse lets you set up the exposure and choose an interval
from one minute to 24 hours in between each shot. You also specify the total
number of shots. The Advanced Exposure Mode setting under the settings menu
gives you the option of Programmed AE, Long-Time Exposure, Exposure Lock and
External Flash. Programmed AE is pretty straightforward, putting the camera
in control of everything. Long-Time Exposure gives you from 0.5 to 16 second
exposures for low light subjects (flash is disabled). Exposure Lock does exactly
what it sounds like and locks the exposure settings to create a series of consistent
images. (Useful for panorama shooting.) External Flash merely works with an
external flash and allows you to set the aperture of the camera.![]()
One of the most intriguing aspects of the DC290 is its incorporation of FlashPoint's
"Digita" scripting system, which allows you to write "scripts"
(simple programs) to automate processes, or give the camera unique capabilities.
The DC290 comes with several default scripts already installed, adding various
functions. For example, the bracketing script shoots three images consecutively
with three different EV values (you get to set the exposure increments). Another
example is the Resolution Series script which shoots a range of pictures with
different resolutions. The only complaint we have is that this process is a
little time consuming once you understand how the camera works, since it goes
through several information screens before actually performing the task. It's
very informative on your first attempt, but after that, you want to speed up
the process a little. (One of the advantages of the scripting system is that
you can fairly easily reconfigure the scripts to customize them to your own
needs.)![]()
We thought it was interesting that the DC290 includes a small sound recording
function, allowing you to record up to two minutes of sound for an image (a
useful tool for keeping vacation shots straight).![]()
As befits its computer-like processing capability, high resolution, and
large LCD screen, DC290 really eats batteries, especially when using the LCD
monitor. It runs on four AA alkaline or AA NiMH rechargeables and we strongly
recommend keeping some spares or the AC adapter around. (To their credit, Kodak
provides high-capacity rechargeable batteries and a charger in the box with
the DC290.) An NTSC audio/video cable comes with the camera (PAL for European
models), allowing you to view images on a television set and hear any of the
sounds you may have recorded (especially nice for the slide show playback option).![]()
We liked the inclusion of the Adobe PhotoDeluxe and PageMill software programs,
giving you extended photo manipulation capabilities and web tools. We were also
thrilled with the included USB cable. It's interesting, however, that for Windows
users, the accompanying software is only compatible with Windows 98. All other
versions (Windows 95 and NT 4.0) require a trip to Kodak's website for a quick
little connection kit. Mac users should have no problems if running OS 8.5 and
higher.![]()
The DC290 is a good camera to have around for impromptu events or casual
rambles, perfect for those consumers who don't want to mess with the technical
side of things too much. On the other hand, its scripting capability makes it
a natural for system integrators or tinkerers interested in developing custom
applications. (As a complete aside, we recently learned of an individual who's
coded a complete videogame emulator for the DC290, letting you run old video
games like PacMan on your camera!)![]()
![]() Design
Design
What the DC290 lacks in pocketability, it makes up for with some interesting features and the addition of sound. The DC290's square shape stands out a little in the current digicam market, which is full of the standard, rectangular body shape. Its plastic body (hard front and soft, textured back) makes the camera lighter than its size would suggest, at 1.2 pounds (525g) without the batteries. With dimensions of 4.6 x 2.5 x 4.2 inches (118 x 63 x 106mm), the DC290 just might find its way into a medium sized purse or a backpack when traveling.![]()
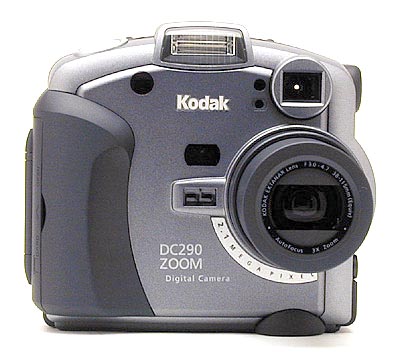
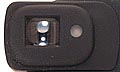
The front of the DC290 holds the 3x optical zoom lens, autofocus sensor, flash, self-timer light, optical viewfinder, light and flash sensors and a nice, thick hand grip. The lens is protected by a tethered lens cap (so you won't lose it) and slides out of its compartment when the camera is turned on. There's also a tiny finger grip just beneath the lens that makes the camera feel comfortable in two hands.![]()
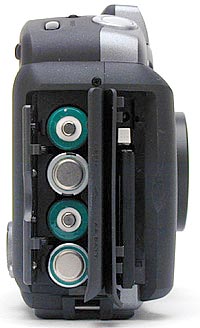
On the hand grip side of the DC290 lie the CompactFlash and battery compartments, side by side. Both simply pop open and click back into place. The side placement of the batteries makes working with a tripod a lot easier, as you can change batteries without removing the camera from the mount.![]()
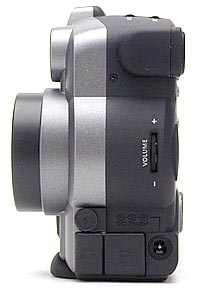
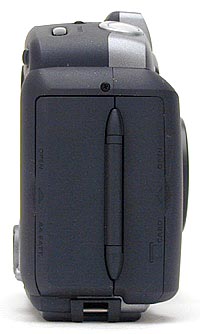
The opposite side of the camera features the volume control in the center with the external flash, Audio/Visual, data and power jacks on the bottom. All jacks with the exception of the power port feature small rubber covers that snap in and out of place quickly.![]()
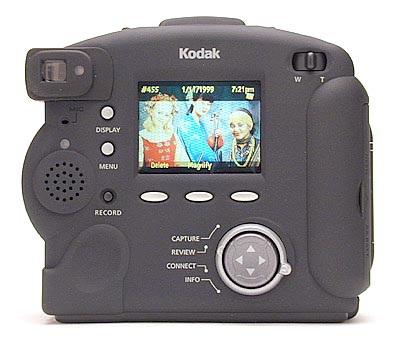
The back of the DC290 is where most of the action takes place. The optical zoom control, optical viewfinder, speaker and LCD monitor live back here, in addition to the camera controls. A small thumb grip makes a comfortable rest for your left thumb when holding the camera with two hands.![]()
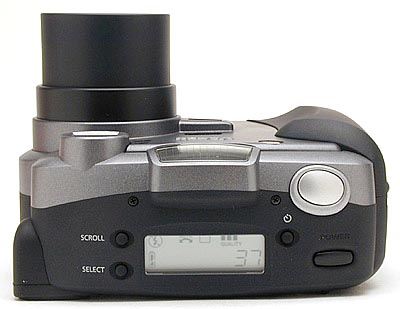
On top of the DC290, the small status display panel tells you the camera's settings. The shutter button, power control and the self-timer, Scroll and Select buttons also live up here. ![]()
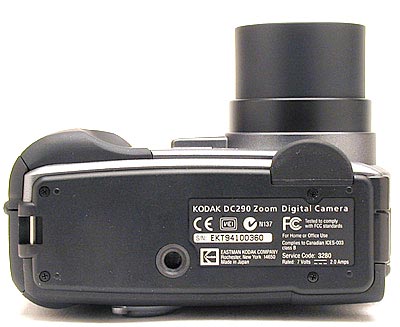
The DC290 features a nice flat bottom (providing a good, stable tripod mount), with the plastic tripod socket just a little off center.![]()
 Viewfinder
The DC290 sports both an optical viewfinder and an LCD monitor. The real image optical viewfinder features center autofocus and exposure target marks as well as cropping marks at the top of the image for use when shooting close-in subjects. ![]()
The 2.0 inch (50mm) color LCD monitor is triggered by the Display button on the back panel. When the image is displayed on the monitor, information is also displayed by default in small black strips at the top and bottom of the image. The bottom menu corresponds with the three softkeys beneath the monitor and offers various choices depending on the mode. The top bar of information gives you updates on the actual exposure such as "Ready" or "Out of Range." These status displays can be disabled by pressing the "Overlay" soft key under the display.![]()
We found the LCD display of the DC290 to be a bit noisy and on the dark side, but much, much more responsive than those of the earlier DC260 and DC265. Also, while we refer to the LCD as "a bit on the dark side", it's actually more visible in bright light than those of many cameras we've tested. - Like any LCD, it's hard to see in very bright surroundings, but we were somewhat surprised to find that it actually produced a visible image in direct sun.![]()
The optical viewfinder is about typically accurate among digicams we've tested, showing 85% of the final image area at telephoto, increasing to 89% at wide angle. (We did find a roughly half-degree of rotation in the optical viewfinder as well though: Not enough to worry about in normal shooting, but a possible concern for architectural photography, where you may have verticals and horizontals close to the edges of the frame.) Like all Kodak digicams though, the LCD viewfinder was 100% accurate, a huge benefit when you're trying for critical framing! Like most digicams with digital telephoto modes, the lower-resolution LCD viewfinder display in this mode of the DC290 made it hard to align our test target accurately. It does appear that the frame coverage in digital telephoto is still 100%, but we ended up mis-aiming in the vertical direction by 5 percent or so.![]()
In playback mode, the DC290 lets you magnify the image by two or four times, by pressing a soft key marked "Magnify" after the camera has had time to fully read the image. The first press enlarges the LCD image 2x, a second press enlarges it again to a total magnification of 4x. You can scroll around the enlarged image by using the 4-way rocker toggle control. This feature is very useful for closely inspecting your pictures to be sure you caught the detail you were interested in, or to see that they're framed properly.![]()
Optics
A glass, eight to 24mm 3x zoom lens comes on the DC290 (equivalent to a 38 to 115 mm lens on a 35mm camera). Maximum aperture at the wide angle end is f/3 and at the telephoto end is f/4.7. Minimum aperture is f/11 in normal programmed (automatic) exposure mode, or f/16 in external flash mode. (These numbers were determined by our own testing, not Kodak's official documentation, which doesn't state minimum aperture values.) Autofocus ranges from 1.0 feet (0.3m) to infinity and manual from 1.6 feet (0.5m) to infinity. ![]()
The DC290 doesn't have a separate macro mode, focusing down to a working distance of 12 inches in its normal autofocus mode. This gives a moderate close-up ability, with a minimum capture area of 3.0 x 4.5 inches (76 x 114 mm). For serious close-up work, we highly recommend a third-party macro kit, such as the LensMate or Xtend-A-Lens systems mentioned below.![]()
The lens is of surprisingly high quality in many areas, with almost no geometric or chromatic distortion. Barrel distortion is an almost undetectable 0.25% at the wide-angle end, decreasing to zero at the telephoto setting. Chromatic aberration is likewise almost non-existent, only 0.03% at wide angle, and none detectable in telephoto. About the only weakness we found was that our prototype unit was noticeably soft on the left-hand side of the image when at full telephoto. No such tendency was noted with it set to the wide-angle end of its range. (It's also possible that the softness was a result of a misalignment during prototype production that may not appear in the final models.) ![]()
Apart from the noted softness, resolution is quite good, with our resolution test showing a pretty solid 650 lines per picture height in both horizontal and vertical directions, and with detail easily visible to 700 lines per picture height. ![]()
Although there are no filter threads on this lens, the Kodak accessory literature offers a close up lens kit and various lens adapters for the DC290, though we've yet to actually see these kits available in a retail store. Filter-thread adapter mounts are also available from two third-party outfits, along with close-up lens kits. Both adapters are quite similar. The Xtend-A-Lens from PhotoSolve is made of PVC, with a metal filter-thread ring on one end, and a firm rubber liner on the other. It press-fits over the heavy body ring around the base of the lens, and provides 49mm filter threads on the other end. The LensMate is made from a single piece of machined aluminum, with the filter threads cut directly into the body material. It also has a friction-fit lining on the other end, to mount to the body ring. Both units work quite well, although the friction-fit is firm enough that we'd caution readers to be patient when attaching or removing them from the camera. Both units cost only $20, and add so much to the camera's versatility and usefulness that they should really be considered mandatory additions: If you're buying a DC290 (or 260 or 265), absolutely be sure to buy one of these adapters! Here again are links to find the LensMate and Xtend-A-Lens. ![]()
The 2x digital zoom function on the DC290 doubles the amount of zoom up to 6x, but remember, quality is always sacrificed with digital zoom, because all it's doing is cropping into the center of the CCD, throwing away data from the pixels on the edges. While pressing the zoom lever controls the optical zoom, it also controls the digital zoom once you get to the end of the optical telephoto range. ![]()
The DC290 offers three focus options: Multi-Spot Autofocus, Single-Spot Autofocus and Manual focus. Multi-Spot uses an algorithm to determine the focal distance using three separate areas in the field of view. Single-spot determines focus based on the center of the image and Manual allows you to adjust the focus yourself. The manual focus menu provides a total of 9 settings from 1.5 feet (50cm) to infinity. All settings are reached through the settings menu.![]()
Exposure
The DC290 really only offers an automatic exposure mode that allows you to make some adjustments to the image, such as exposure compensation (EV), white balance, flash, etc., although the external-flash mode allows you to set aperture values independently. ISO is rated at 100.![]()
The DC290's specifications of ISO 100, f/3.0-f/16, and shutter speeds of 16 to 1/512 seconds should translate into a usable lighting range of EV 4 to EV 22, using our previous terminology, or 0.13 to 32,000 foot-candles (1.4 to 350,000 lux). This is an extraordinarily wide range, and the low-light end of it in particular left us rather skeptical as we began our testing. We have to say though, that we were totally amazed at the DC290's low-light capabilities! As compared to other cameras we've tested, even the longest exposure times showed remarkably little image noise, and excellent color balance. This is really hard to overstate: Based on our experience with other cameras, the 16-second exposures should have been almost obliterated by CCD noise, but instead were quite usable. In the studio tests, the camera produced surprisingly high-quality images all the way down to a light level of 0.26 foot-candles (2.8 lux). Outdoors, a 16-second time exposure with the DC290 easily showed image details that were completely invisible to the unaided eye. (At least our unaided eyes!) One caveat in this glowing report though: Since the DC290's ISO rating is only 100, and no variable-ISO option exists, the extreme low-light performance is gained at the cost of rather long exposure times. Thus, if you're interested in shooting moving subjects under low-light conditions, the DC290 probably wouldn't be the camera to choose. For non-moving objects though, the DC290 easily surpasses any other sub-$1000 digicam currently on the market! (November, 1999)![]()
An interesting feature is that the DC290 emits little "camera sounds" with each camera action. For example, when you fire the shutter, the camera clicks like a 35mm camera would. Pressing menu buttons and making selections also produce a range of sound effects. A benefit of the shutter click noise is that your subject knows when to relax and so do you if you're using the self-timer. Another interesting feature is the ability to remotely fire the shutter via a USB shutter release cable (available as an accessory on the Kodak website). (Remote triggers like this are very handy for studio or other work with a tripod.)![]()
The DC290 offers a variety of script options to perform programmed functions (Camera Introduction, Set Sharpening, Exposure Bracketing, Resolution Series and Picture Quality). The Camera Introduction script runs a program on the LCD monitor that simply acquaints you with the camera and its functions. We had a little trouble with the 'Take a Picture' setting of the introduction, as it tended to hang up the camera and we had to power it off to reset it. Set Sharpening allows you to adjust the sharpness of the image. The Exposure Bracketing script is nice, taking three pictures with three different exposure compensation values that you set. Resolution Series takes 15 pictures over the course of about eight minutes at different resolutions and Picture Quality just lets you adjust the image quality. All scripts guide you with instructions on what to do next and always provide an option to cancel.![]()
 Sound
Sound
Although the sound recording feature isn't really an exposure setting, we didn't know where else to put this in the review. The DC290 lets you record up to two minutes of sound and attach it to a recorded image. Recording begins when the Record button is pressed and ends when the same button is pressed again. This feature could be helpful for labeling shots or amusing when playing back images in the slide show presentation format.![]()
![]()
 Flash
Flash
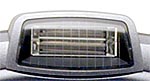
The DC290 features four options for its built-in flash (Auto, Red-Eye, Fill and Off) with a working range of approximately 1.6 to 13 feet (0.5 to 4.0m). Auto lets the camera decide whether or not to fire the flash based on existing light levels. Red-Eye Reduction emits a small pre-flash before triggering the full-power flash to reduce the Red-Eye Effect. The Fill setting fires the flash every time the shutter button is pressed, regardless of light conditions, and the Off setting does the reverse by not firing at all. The external flash sync on the side of the camera allows you to plug in a more powerful flash via sync cord to achieve special effects and you can adjust the external flash settings through the setup menu. For those interested in using the DC290 with external slave triggers, the flash is a "single pop" design, meaning it can be used with conventional trigger units.![]()
The DC290's external flash option lets you choose the f-stop the camera is working at, and also sets the minimum shutter duration at 1/57 of a second. The aperture for use with external flash can be set in 1-stop increments, which should be sufficient resolution to match the requirements of any standard auto-exposure flash unit on the market. (Although smaller aperture steps would offer more control over the exposure itself when working with external flash units.)![]()
Exposure Compensation (EV)
The DC290 allows you to adjust exposure compensation in 0.5 EV increments from –2 to +2. Although it's a bit non-obvious to figure out at first, setting the exposure compensation is relatively simple: The Scroll button on top of the camera scrolls through flash, exposure compensation, picture type and quality settings displayed on the top-panel status readout LCD. When the exposure compensation icon begins blinking in response to your pressing of the Scroll button, the Select button will then scroll through the EV settings available. You lock-in your setting by halfway pressing the shutter button. We found this adjustment a little inconvenient, in that there isn't any way to go backwards with the setting: If you want to decrease the exposure compensation by a half-unit, there's no alternative but to cycle through the entire range until it wraps around to a lower value. We'd prefer to see the rear-panel rocker toggle used to adjust these settings, permitting bi-directional EV control.![]()
White Balance
You have five options for white balance on the DC290: Automatic, Daylight, Fluorescent, Tungsten and Off. Automatic lets the camera do all the work while Daylight adjusts for average daylight conditions. Fluorescent and Tungsten refer to the types of artificial light you may be using and Off means that no white balance adjustment is applied. White balance has its own menu option under the settings menu.![]()
Burst
The DC290 features a Burst exposure mode that allows you to fire off anywhere from four to 16 shots at rapid intervals, depending on how much space is available on the CompactFlash card and the amount of image information. You can set the frame rate for burst-mode shooting at anywhere from 0.1 to 2 frames per second in high-resolution mode, and 0.1 to 3 frames per second in low-resolution mode. In actual practice, we clocked the maximum rate at 2 frames per second in high-resolution mode, and 2.7 frames per second in low-resolution mode.![]()
Time-Lapse
For time-lapse photography, the DC290 takes pictures at the intervals specified in the settings menu and continues to take pictures until you press the shutter button a second time, hit Stop or until the maximum number of images has been taken. Intervals can be set anywhere from one minute to 24 hours. Under the time-lapse settings menu, you can set flash, quality, resolution and the number of pictures in addition to the interval setting. An interesting note here is that if you set a long interval between exposures, the camera turns itself off to save batteries and then turns itself back on to take the next picture. (We can imagine some neat school science projects built around this feature. - Only problem is that Mom or Dad will have to go without their camera for a couple of weeks while the bean plants grow! ;-)![]()
Self-Timer
The self-timer on the DC290 gives you 10 seconds from the full press of the shutter button before triggering the shutter. The self-timer light on the front of the camera lights solid and then flashes for the last couple of seconds before the shutter fires. An audible click notifies you that the picture has been taken.![]()
Advanced Exposure Modes
Under the Advanced Exposure Modes option in the settings menu, you have four options for advanced exposure control. Programmed AE uses the programmed automatic exposure setting which selects the appropriate flash and aperture settings. Long-Time Exposure disables the flash and offers exposure times from 0.5 and 16 seconds in 0.5 second increments. Exposure Lock locks the exposure settings, creating a series of pictures with a consistent setting. Exposure Lock is determined by the flash, exposure compensation (EV), programmed AE, white balance, focus and picture type settings used for the first picture of a series. It is canceled by selecting a different option on the settings menu. The fourth option is External Flash, which disables the built-in flash and allows you to set the camera's aperture, as described above.![]()
Shutter Lag / Cycle Times
When you press the shutter release on a camera, there's usually a lag time before the shutter actually fires. This time allows the autofocus and autoexposure mechanisms time to do their work and can amount to a fairly long delay in some situations. Since this number is almost never reported on, and can significantly affect the picture taking experience, we now routinely measure it using an electronic test system.![]()
The DC290 is a bit slower to focus than many competing cameras, a full autofocus cycle requiring about 1.5 seconds to complete. If the lens and exposure/white balance system is preset by half-pressing the shutter button before the shot itself, the lag time decreases to about 0.7 seconds, still a bit slow relative to other current cameras. When manual focus is used, the lag time also decreases to about 0.9 seconds.![]()
The DC290 is quite responsive in its shot-to-shot cycle times though, thanks to its large "buffer" memory, which stores picture data until it can be processed and saved to the memory card. In either high or low resolution mode, we found we could snap one frame after another with only a 4 second delay between shots. In high-resolution mode, we could grab up to 4 images before having to wait for the buffer memory to empty enough to take another picture (which took fully 20 seconds). In low-resolution mode, we never reached the limits of the buffer memory, but it's clearly a large number of images (more than a dozen, at least).![]()
As mentioned earlier, in Burst mode, the maximum frame rate is 2 frames per second in high-resolution mode, or 2.7 frames per second in low-resolution mode.![]()
User Interface
The DC290's user interface will be instantly recognizable to anyone who's seen one of the previous-generation DC220/260/265 cameras. Its strong point is a very clear arrangement of myriad functions and options into a series of easily-understood LCD-based menu screens. The result is a complex camera that's very approachable even for neophyte users. The downside of the user-friendly interface though, is that it can be fairly time-consuming for an experienced user to navigate the controls, particularly when manipulating an option that's buried several layers deep in the menu structure. (One example of this would be the external-flash aperture setting, which requires no fewer than 10 button actuations to access.) We'd like to see some sort of an "expert mode" in the menu system that would exchange some of the "friendliness" for a more cryptic but faster-to-navigate structure. The attractive screens and menus also seem to come at the cost of a slightly less-responsive user interface: When scrolling rapidly through the menu screens, we often found ourselves getting ahead of the screen updating a bit, to the point that the menus could lag behind our control actuation by a fraction of a second. - Not a major problem by any means, but a bit annoying nonetheless. Again, an option for a secondary "expert mode" interface system would be nice.![]()

Shutter Button
Located on the top of the camera, this button is silvery smooth and oval in shape. In Capture mode, this button sets exposure and focus when halfway pressed and fires the shutter when fully pressed.![]()

Power Button
Located on top of the camera, just below the shutter button, this turns the camera off and on.![]()

Self-Timer Button
Located on top of the camera, this small, rubber button is marked with the traditional self-timer symbol. In Capture mode, this button puts the camera into Self-Timer mode which gives you a 10 second countdown once the shutter button is fully pressed.![]()
![]()
Scroll Button
Located on top of the camera, this small, rubber button sits directly to the left of the status display. When in Capture Mode, this button scrolls through each feature displayed on the status display panel, allowing you to change the settings (i.e., flash, exposure compensation, quality, etc.).![]()
![]()
Select Button
Located on top of the camera, directly beneath the Scroll button. Used in conjunction with the Scroll button, this button allows you to change camera settings once they've been scrolled to. For example, the Scroll button accesses the flash mode and the Select button allows you to choose the mode setting.![]()

Zoom Lever
Located on the top right of the back panel, this lever is marked with a 'W' and a 'T.' In Capture mode, this button controls the optical 3x zoom. Once the furthest end of the optical telephoto range has been reached, the 'T' end of the lever controls the 2x digital zoom function.![]()

Display Button
Located to the left of the LCD monitor, on the back panel of the camera, this button turns the LCD monitor on and off while in Capture mode.![]()

Menu Button
Located to the left of the LCD monitor, below the Display button. In Capture and Review modes, accesses the settings menu.![]()

Record Button
Located below the Menu button on the back panel of the camera. In Review mode, this button allows you to record up to two minutes of sound to attach to a recorded image. It also cancels the recording.![]()

Softkeys
Located directly beneath the LCD monitor, these three silver keys directly correspond with the labels on the bottom of the LCD monitor. In Capture and Review modes, these keys perform various functions depending on the labels displayed on the screen.![]()

Mode Dial
Located on the bottom left of the back panel, this silver dial selects between Capture, Review, Connect and Info camera modes.![]()

Rocker Toggle Button
Located in the center of the mode dial, this button is marked with four arrows.
- In Capture and Review modes, this button navigates through menu items in the settings menu
- In Capture mode, with the manual focus function turned on, the right and left buttons adjust the focus.
- In Review mode, the right and left buttons scroll through recorded images. In the same mode, when images are magnified, the arrow buttons allow you to scroll around an image.
![]()
![]()
Volume Control Dial
Located on the I/O side of the camera, this dial controls the volume of camera sounds.![]()
Camera Modes and Menus
Capture Mode
Accessed by turning the mode dial to the Capture position, this mode allows you to capture images and record them to the CompactFlash card. Pressing the Menu button pulls up the following submenus and options:![]()
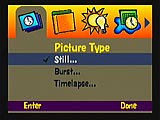
Picture Type Menu
- Still: sets the camera for individual still images.
- Burst: takes from four to 16 images with one press of the shutter button at rapid intervals.
- Time-lapse: takes a specified number of images at specified intervals from one minute to 24 hours with options for setting flash, resolution, quality, interval and number of pictures.
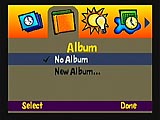
Album Menu
- No Album: turns off the album feature.
- New Album: creates a new album for image storage.
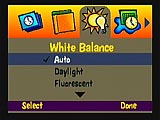
White Balance Menu
- Auto: camera adjusts white balance automatically.
- Daylight: adjusts white balance for daylight conditions.
- Fluorescent: adjusts white balance for fluorescent lights.
- Tungsten: adjusts white balance for tungsten (incandescent) lights.
- B: makes no white balance adjustment.
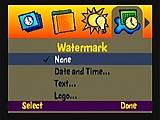
Watermark Menu
- None: no watermark appears on the image.
- Date and Time: specifies whether the date, time or both appear on the image.
- Text: allows you to place text on an image.
- Logo: allows you to place a logo on an image.
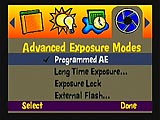
Advanced Exposure Modes Menu
- Programmed AE: uses the programmed automatic exposure setting which selects the appropriate flash and aperture.
- Long-Time Exposure: disables the flash, assuming that a long-time exposure is needed for capturing ambient lighting environments. Set the exposure time between 0.5 and 16 seconds in 0.5 second increments. (Amazingly, even the 16-second exposure produces usable images.)
- Exposure Lock: locks the exposure for a series of images with consistent exposure settings, based on the first image shot after setting is made. (Also lock-in flash, exposure compensation, programmed AE, white balance, focus and picture type).
- External Flash: disables the built-in flash and allows you to set the camera's aperture.
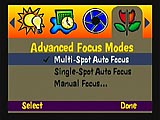
Advanced Focus Modes Menu
- Multi-Spot Autofocus: camera uses a multi-spot focus algorithm to determine focus from three positions in the field of view.
- Single-Spot Autofocus: camera determines focus based on the center of the field of view.
- Manual Focus: allows you to adjust focus manually with the right and left arrow buttons.
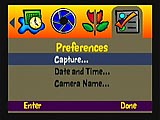 Preferences Menu
- Capture: sets the preferences for Capture mode with these options:
- Quickview: displays the picture just taken for a duration of 0.5 to 30 seconds.
- Auto Rotate: rotates pictures automatically in response to a sensor that determines the orientation of the camera and rotates images accordingly.
- System Sounds: turns on and off the system sounds that accompany camera actions.
- Sleep Time-Out: sets the number of minutes the camera sits inactive with the LCD monitor on before it goes into a power conservation (You can still take a picture in "sleep" mode, if the status display panel is on). Set sleep times ranging from 1 to 5 minutes.
- Remote Shutter: allows you to take pictures remotely using a USB shutter release cable accessory sold separately. (While we didn't get to test this, remote shutter releases are one of our personal favorite accessories, for studio and macro work!)
- Quickview: displays the picture just taken for a duration of 0.5 to 30 seconds.
- Date and Time: allows you to set the date and time and choose the format.
- Camera Name: allows you to set a camera name.
Kodak Scripts Menu
- Camera Introduction: runs a script to introduce you to the camera and its features.
- Set Sharpening: allows you to alter the image sharpness
- Exposure Bracketing: records three images with three different EV settings, which are adjustable.
- Resolution Series: takes 15 pictures in eight minutes at different resolutions.
- Picture Clarity: allows you to adjust the image clarity.
![]()
Review Mode
Accessed by turning the mode dial to the Review position, this mode allows you to view captured images and play back accompanying sounds. Pressing the menu button in this mode pulls up the review settings menu with these options:

Move to Album: lets you move images into an album and create a new one.
![]()
 Review Preferences: allows you to adjust the following preferences:
![]()
- Overlay: turns the overlay function on and off (overlay displays the softkey labels on the LCD monitor).
- Slide Show: allows you to adjust the duration of images during a slide show presentation as well as turn the sound on and off or select a continuous loop.
- Video: selects between NTSC and PAL video formats.
- Playback: specifies Burst, Time-lapse or Album playback preferences.
- Format Card: allows you to format the CompactFlash card.
- Print Order: allows you to set DPOF (Digital Print Order Format) settings for individual or all images.
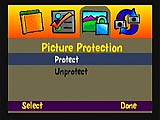
- Picture Protection: allows you to protect or unprotect individual images or all images.
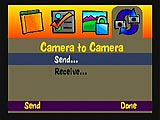
- Camera to Camera: allows you to send or receive information to or from another camera via infrared communication.
- Applications: allows you to access applications on memory cards that extend the functionality of the camera.
Connect Mode
Accessed by turning the mode dial to the Connect position, this mode allows you to connect to a computer and download images.
![]()
Info Mode
Accessed by turning the mode dial to the Info position, this mode displays information about the camera's firmware..![]()
![]()
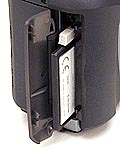 Image Storage and Interface
The DC290 utilizes CompactFlash memory cards for image storage. A 20MB card comes with the camera, and you can purchase additional cards in 10MB, 32MB, 48MB and 64MB sizes. (We applaud Kodak's generous provision of a 20 megabyte card: The days when the 8MB card supplied with most cameras was adequate are long past...).![]()
The DC290 organizes images into storage folders, named /DC290_xx (where xx equals 01, 02, 03, etc.). Within each folder, images are numbered from 0001 to 9900 and each folder holds up to 100 files. The DC290 creates three different types of folders (Album, Time-Lapse and Burst) to handle the corresponding images. The manual provides a very detailed description of the DC290's naming conventions and directory structures if you need more explanation.![]()
Individual images can be protected on the CompactFlash card with the Protect option under the settings menu in Review mode. Individual file protection prevents the accidental erasure of images (unless the card is formatted). If you do want to erase images, the information display at the bottom of the LCD monitor offers a Delete function accessible by hitting the corresponding softkey. The card can also be formatted through the settings menu in Review mode and you are immediately asked to confirm the action. (Note that formatting a card will wipe it completely clean, removing not only images, but scripts as well!)![]()
A handy feature of the DC290 is that you can remove the CompactFlash card while the camera is on, just make sure you don't try to remove the card while the red LED inside the slot is blinking, as this could damage the media. (Working in the studio, it's very convenient when to be able to remove a camera's memory card without disturbing the camera setup, including zoom lens position, white balance settings, etc.)![]()
The table below shows the range of image capacities and compression ratios for the included 20 MB card:![]()
![]()
|
||||||||||||||||||||||||||||||||||||||||||||||||||
On their higher-end units, Kodak has been one of the early supporters of the high-speed USB data-transfer standard, and the DC290 allows you to use either it or the older RS-232 connection. We checked transfer times using the USB connection, and were duly impressed: Transfer times are very quick, with a 1.0 megabyte file taking only 7.1 seconds to download. That's a transfer rate of 141 Kbytes/second - Pretty impressive! (Ok, all you other camera manufacturers out there, when are we going to see USB designs from you as well?)
Video Out
An NTSC audio and video cable comes with the DC290 (European models come with PAL cables and the camera can be set for either format). The video connection allows you to view your captured images with their accompanying sounds on a television.![]()
Power
The DC290 uses four AA 1.5 volt alkaline or AA 1.2 volt NiMH rechargeable batteries and a set of both comes with the camera. Kudos to Kodak for including the NiMH cells and charger! (Important note: Be sure not to mix battery types, and do NOT try to recharge the alkaline batteries in the provided NiMH charger!) The high resolution CCD, large LCD, large buffer memory, and powerful processor of the DC290 combine to draw large amounts of power, shortening battery life accordingly. We found the DC290 to be a bit power hungry, going through batteries relatively quickly (especially with the LCD monitor on). The table below summarizes the DC290's power consumption under various operating conditions. (Note that these measurements are made via the external power supply connector, which operates at a higher voltage and consequently lower power drain than does the battery pack. What's more, the DC290 uses a relatively high 7 volt external supply, which makes the resulting power-drain numbers somewhat less than on cameras operating at a 6 volt external supply voltage. The bottom line? We managed to make a few power measurements inside the battery compartment on the DC290, and found that the camera gobbles an incredible 1390 mA when operating in capture mode with the LCD enabled! This is really a very high power drain: Don't even think about using alkaline batteries in this camera! - Kodak's high-capacity NiMH batteries work well though.) Here's the results of our (external) power-drain measurements:
|
|
|
| Capture Mode, w/LCD |
|
| Capture Mode, no LCD |
|
| Capture, half-pressed shutter w/LCD |
|
| Capture, half-pressed w/o LCD |
|
| Memory Write (transient) |
|
| Flash Recharge (transient) |
|
| Image Playback |
|
| "Sleep" Mode |
|
Included Software
A standard RS-232 serial and USB cable come with the DC290 for quick connection to a Macintosh or PC. Additionally, if your PC is compatible, you can take advantage of the IrDA infrared connection as well. Three software CDs come with the camera, one offering Kodak digital camera programs for Windows and Macintosh (featuring various utilities for downloading such as watermark conversions and mounters). The two remaining CDs hold Adobe PhotoDeluxe and Adobe PageMill (one for Macintosh users and the other for PC users). Software is compatible with Macintosh OS 8.5.1 or higher and Windows 98 (a connection kit for Windows 95 or NT 4.0 is available online when you register your camera with Kodak's website).![]()
The Kodak software is relatively simple to use, allowing you to grab images from the camera and move them to your computer. The CD itself has a very friendly MacroMedia interface which guides you through the setup process and points you to Kodak's web utilities. The included Adobe PhotoDeluxe gives you fairly expansive photo manipulation capabilities, with a variety of filters and manipulation tools. There are templates for labels, greeting cards, frames, t-shirt setups, etc. An impressive feature is the Internet connectivity selection, which helps you get your images ready for the web. Adobe PageMill carries your web capabilities further by allowing you to setup simple web pages with your photographs.![]()
We've reviewed a number of Kodak cameras in the past that used Kodak's "Mounter" software. This is a fairly slick driver program for Windows that actually mounts the camera on the desktop as if it were just another disk drive. With serial-connected cameras, the mounter interface sometimes strikes us as more nuisance than it's worth, given the slowness of the connection. With a speedy USB connection though, the equation changes considerably, and the drag-and-drop functionality becomes a real convenience. This is the case with the DC290, which worked smoothly with the Mounter software on our Windows 98 test machine. As noted above, transfer times are very quick, with a 1.0 megabyte file taking only 7.1 seconds to download. That's a transfer rate of 141 Kbytes/second - Very impressive!![]()
Test Results
Overall, the DC290 produced excellent pictures: It carries on the tradition of bright, accurate, saturated "Kodak color" that we've observed in other digicams made by Kodak. (Kodak cameras consistently have some of the best color handling among all the digicams we test.) The image processing algorithms in earlier versions of this camera (DC260/265) tended to obscure fine detail in areas of low contrast, such as the model's hair in our outdoor test shot. The DC290 shows none of this behavior though, and in fact also (finally!) offers an uncompressed image-storage mode that users have clamored for for quite some time.![]()
The DC290's lens is distinguished by some of the lowest geometric distortion we've measured to date, ranging from an almost-imperceptible 0.25% barrel distortion at the wide-angle end of its range, to zero at the telephoto end. Chromatic aberration is likewise almost non-existent, only 0.03% at wide angle, and none detectable in telephoto. We did observe though, that the lens on our test unit showed some softness in the image at full telephoto, more apparent on the left-hand side of the image. Side-to-side variation in the performance of the lens itself is extremely unlikely though: Some physical misalignment (possibly caused by shipping damage?) is the most likely cause of this lateral variation in sharpness. (Most digicams we test show a slightly softer focus with their lenses at the telephoto setting.![]()
In our resolution tests, the DC290 performed well, about mid-range for the current crop of 2.1 megapixel digicams, with a solid 650 lines per picture height in both vertical and horizontal directions, and detail clearly visible to 700 lines.![]()
The DC290's viewfinder system is better than most. The optical viewfinder was about typically accurate in our tests, showing 85% of the final image area at telephoto, increasing to 89% at wide angle. We did find a roughly half-degree of rotation in the optical finder, but we doubt this would cause problems for all but the most exacting work. Like that on other Kodak cameras we've tested though, the LCD viewfinder is exceptionally accurate, showing exactly 100% of the final image area, with no rotation or offset at all. (If your photography requires precise framing, Kodak digicams are a great choice, thanks to this LCD accuracy.)![]()
The DC290 lacks a true macro photography mode, the lens focusing down to 12 inches under normal autofocus control. This results in a reasonable if not microscopic minimum capture area of area of 3.0 x 4.5 inches (76 x 114 mm). For closer work, see our recommendations in the body of the review for the Xtend-A-Lens and LensMate adapters and macro lens sets.![]()
The biggest surprise of our testing came in the low-light work we did with the DC290: Kodak has managed both a lower-than-average noise level and exceptional color balance for the camera even in very long time-exposures. While the ISO 100 sensitivity means you'll need to use long shutter times to get low-light pictures, the pictures that the DC290 captures under low-light conditions surpass any we've seen to date (November, 1999) with any other camera.![]()
Conclusion
The DC290 is an impressive offering from Kodak, extending their Digita(tm)-based product line into the 2 megapixel arena. This latest model provides high resolution (including an uncompressed storage mode for the first time), superb color, and unmatched low-light capability. Studio users will appreciate the external-flash capability, system integrators will like the powerful Digita scripting language, and everyone should like the high-quality images the DC290 produces. Overall, a very worthy extension and significant upgrade to the high end of Kodak's consumer digicams.
![]()
Reader Sample Images!
Do you have a DC290 camera? If you'll post an album of your samples
on one of the photo-sharing services and email us at [email protected],
we'll list the album here for others to see!![]()
- Steve Twaddle's Sample Images There are some really nice pictures here!
- Ralf Brown's DC290 Albums:
For More Info:
View the DC290 Sample Pictures Page![]()
View the Imaging Resource Data Sheet for the DC290![]()
![]()
Visit the Comparometer(tm) to compare with other cameras.![]()
Visit the Kodak home page for the DC290![]()

Follow Imaging Resource: