The Imaging Resource
Quick Review
Kodak DX3600 Digital Camera
|
|||||||||||||||||
|
||||||||||
Introduction
Eastman Kodak Company has a long history of bringing professional
imaging processes to the everyday consumer. Kodak's new EasyShare System is
the company's digital equivalent to its turn-of-the-century Brownie box camera,
which came with pre-loaded film and no manual controls (once users shot all
their film, they simply sent the boxes back to Kodak for processing and printing).
While the first two Kodak EasyShare digicams, the DX3500 and DX3600, are much
more sophisticated than a Brownie, they do feature the same "just press
the button" simplicity, with fully automatic controls and an optional docking
station that takes all of the guesswork out of digital image manipulation, management,
and sharing. The Kodak Picture Software is extremely easy to use -- walking
you through every step of the uploading, enhancing, and emailing process --
and has a more graphically intuitive interface than almost any other consumer
imaging software I've seen. It automatically sizes the images for printing or
emailing, stores copies, applies simple effects, and allows you to make image
corrections, such as color, brightness, and contrast adjustments. Overall, the
DX3600 and its non-zoom-equipped little brother the DX3500 are possibly the
simplest, most goof-proof cameras currently available. (If you've already read
my review of the DX3500, you can save yourself some reading here: Apart from
the zoom lens on the 3600, the two cameras are virtually identical.)
Camera Overview
The Kodak DX3600 Digital Camera is the ultimate in point-and-shoot simplicity -- from snapping a picture, to downloading it to your computer, to making simple corrections, to printing (or emailing) the results -- Kodak fulfills its ongoing promise, "You press the button, we do the rest." The difference is not so much in the camera, since it looks and operates similar to many point-and-shoot models. What really sets it apart is Kodak's new EasyShare System -- a combination of digital camera, software, and docking station. Together, they take a lot of the "high-tech" out of the digital learning curve.
The DX3600 has very few external controls and the menu system is short and easy to navigate (see "Camera Operation" for more details). An internal storage option eliminates the need for expensive memory cards, though it has very limited storage space (only 8MB), so I recommend buying additional memory. Should you choose to upgrade, you can purchase Kodak's own Picture Card brand or any CompactFlash Type 1 card on the market. The camera comes complete with a USB cable for downloading images directly from the camera to the computer, or you can opt to buy the $80 Docking Station, which with one press of a button, automatically launches the Kodak Picture Share program on your computer, and walks you through image downloading, storage, organization, editing, printing, and emailing. You barely have to be computer literate. Software installation is a breeze, and a little exploration of the software's many features will make you an expert in no time at all.
The DX3600 makes all exposure decisions automatically. Its 2x optical zoom lens is perfect for photos of individuals or small groups, indoor or outdoor activities, and environmental surroundings like gardens, street scenes, architecture, and landscapes. It has just enough optical zoom for close-up portraits, though not quite enough for getting in close on fast-paced sports like Little League games. The focusing range is 1.6 feet (0.5 meters) to infinity with the lens set on normal, and 10-24 inches (20-60cm) with the close-up (macro) lens in place. The DX3600 also features digital video recording (QuickTime movies) with sound. Recording time is limited only by the amount of memory available on the CompactFlash card (limited to a maximum of 35 or 90 seconds with the 8MB internal memory, depending on the size/quality of the video images recorded). Image quality is very good, with bright accurate colors and enough resolution to make photographic prints as large as 8 x 10 inches.
Basic Features
- 2.2-megapixel CCD (Good for prints to 8x10 inches)
- Optical viewfinder
- 1.8-inch color display
- 2x optical zoom lens (equivalent to 35-70mm)
- 3x digital zoom
- Built-in flash
- Internal 8MB storage
- CompactFlash memory optional
- USB computer connection
- 2 Lithium AA batteries included / NiMH AA Rechargeables optional
- Optional Camera Dock (includes rechargeable batteries & charger)
- Kodak Picture Software for Mac and PC
Special Features
- Digital video and audio
- Macro (close-up) lens setting
- Self-timer option for delayed shutter release
- Slide show playback feature
- 30mm body threads for lens attachments (Kodak sells a 30mm-37mm lens thread adapter to permit use with standard accessory lenses)
- NTSC video cable for viewing images on a TV
- Direct digital printing (from the card) on DPOF compatible printers
Recommendation
The Kodak DX3600 is highly recommended for novice to amateur photographers who want good-quality images with the absolute minimum of fussing with camera settings. This camera has virtually no manual exposure controls, so if you want to "grow into" a more sophisticated digital camera, we'd suggest you look into a more advanced point-and-shoot model. However, if you're looking for an inexpensive, fun-to-use camera, with excellent automatic exposure control, sharp pictures, and excellent color performance, it's about your best bet on the market. It also offers a great selection of software and optional accessories -- from the computer Docking Station to Kodak Lens Kits-- so you can build up a nice digital package with a minimal investment. (Of course, users must own a computer or some other digital display device (like a digital picture frame) to store and share their images.)
Camera Design
The Kodak DX3600 has a slightly bulbous silver / gray body, with lots of smooth curves and round edges, making it a very comfortable camera to hold. Though it appears somewhat bulky, the camera actually measures only 4.7 x 2.9 x 2.0 inches (120 x 74 x 50mm) and weighs just 7.2 ounces (205 grams) without batteries, so it's small enough to carry in a large pocket or purse or with the supplied nylon wrist strap. (I recommend you buy a carrying case if you plan to take it on outings).
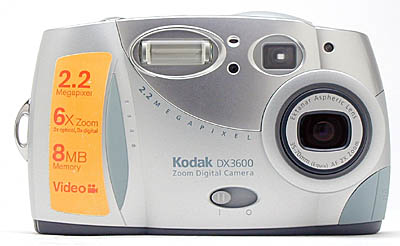
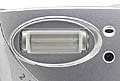
The sturdy polycarbonate body features a telescoping 2x optical zoom glass lens in front (equivalent to a 35-70mm lens on a 35mm camera) with a built-in sliding lens cover. Above the lens is a generous-sized viewfinder window, with ample magnification for even "visually challenged" users. Next to the viewfinder is a built-in flash unit and two very small windows -- one for the light sensor and one for the microphone. To the left of the lens is a Self Timer indicator lamp that blinks when the Self-Timer is counting down. On the bottom of the front panel is an On / Off Switch for turning the camera on and off.
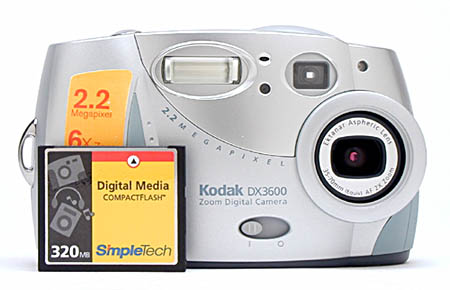
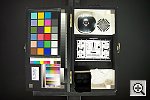
It's often hard to tell how big a camera is in our product photos, when the
camera appears by itself. To help get a sense of the scale of the DX3600, we've
shot the photo above, with a memory card propped in front of it.
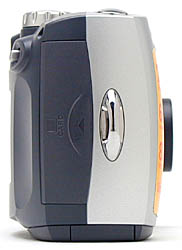
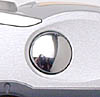
The right side of the camera houses the Picture Card (CompactFlash) storage compartment covered by a sliding plastic door. Next to the door is a large silver wrist strap eyelet, which is strong and easy to thread, but also interferes with the smooth operation of the flash compartment door.
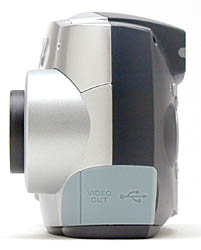
The camera's left side is partially formed by the lens barrel casing with no visible camera controls. At the bottom of the side panel is a heavy rubber flap, that when pulled back, reveals the Audio / Video Out and USB connectors.

The top side of the camera holds the Shutter button on the right, a built-in speaker on its left, and an adjacent Mode dial in between, with four operational settings: Video, Still, Review, and Setup.

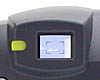
The DX3600's back panel features a larger-than-average LCD monitor (1.8 inches) for previewing or reviewing images, a four-way Arrow Pad for navigating through menus and captured images, a Zoom button, plus three external control buttons: Flash, Menu, and Select. Next to the Viewfinder window is a small indicator lamp to signal camera processes.
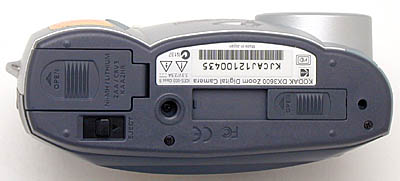
The bottom of the camera holds several key items -- clustered very close to one another -- which take up most of the available space. On the right is the battery compartment opening, accessed by a sliding plastic cover similar to the one used on the CompactFlash compartment (but easier to open). Next to it is a small black Eject button that pops out the CompactFlash card from its slot. A plastic threaded tripod mount is positioned slightly to the right of the camera's center of balance, but close enough to serve its purpose. On the left side of the bottom plate, occupying a large piece of real estate, is the Docking Cradle connector, with an inch-long sliding hatch that covers and uncovers the connection port.
Camera Operation
The DX3600's external controls are very simple and straightforward. They include a Power switch, Mode dial, Zoom button, Flash control, Menu and Select buttons, and a four-way Arrow pad for navigating menus and captured images. All other functions are carried out through the camera's on-screen menu system, which is very basic and easy to become familiar with. The User's Manual is lengthy, but it's well illustrated, easy to read, and has a simple table of contents to help you find sections quickly. If you've never picked up a digital camera before, you can expect to spend about 30 minutes reading through the manual and learning basic operations.
External Controls
Flash: On the left side of the camera's front panel is the built-in automatic flash, with options for Auto Flash, Red-Eye Reduction, Fill Flash and Off (see Flash Button below). Flash range is 1.6 to 10.5 feet (0.5 to 3.2 meters), with a recharge time of approximately 7 seconds.
Viewfinder Window: To the left of the flash is the viewfinder window. The viewfinder is of rangefinder design, meaning that it does not give you an exact view of what the lens sees, only an approximate view. The closer you are to a subject, the more chance that the recorded image will look different than what you see in the viewfinder.
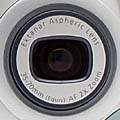
Lens: The lens is a 2x optical zoom lens (equivalent to 35-70mm), with a focus range of 1.6 feet (0.5 meters) to infinity with the lens set on normal, and 10-24 inches (20-60cm) with the close-up (macro) lens in place, and a maximum aperture of f/3.3-4, depending on the zoom setting.
Self-Timer Light: Located directly over the lens, on the left side, is the Self-Timer light. When the Shutter button is pressed in Self-Timer mode, this light glows red for approximately 8 seconds and then blinks the last 2 seconds before the shutter is released and the picture is taken.
Microphone: Next to the top left corner of the flash unit is a small microphone for recording sound with movies.
Light Sensor: Under the microphone is the light sensor, which measures the amount of light in a scene and helps the camera's metering system determine what settings should be used to record an image.

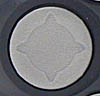
On / Off Switch: In the bottom center of the front panel, this button turns the camera on and off.
Shutter Button: The Shutter button is on the right side of the camera's top panel, close to the front. Depressing the button halfway sets the exposure and locks it until you completely depress the Shutter button or release it. Depressing the Shutter button fully in Self-Timer mode begins the 10-second countdown until the shutter is released.
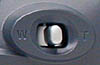
Zoom Button: Located in the upper right corner of the camera's back panel, this button adjusts the zoom lens from wide-angle to telephoto.
![]()
Flash Button: Located in the upper left corner of the camera's back panel, this button scrolls through the following flash options: Auto Flash, in which the camera determines when to fire the flash based on existing light conditions; Off, which prevents the flash from firing under any circumstances; Fill, which fires the flash for every exposure regardless of light levels; and Red-Eye, which fires a pre-flash to shrink the subject's pupils and reduce the red-eye effect.

Menu: To the right of the Flash button is the Menu button, which activates the appropriate menu for any of the three Mode Dial settings.

Select: The last of three small buttons on the camera's back panel, the Select button is used to choose menu options and to verify settings in any one of the menu modes. In Still capture mode the Select button turns the LCD preview monitor on and off.
Four-Way Arrow Pad: The Arrow buttons are used to navigate through menus in any mode and to scroll through recorded images in the Review mode. In Still capture mode, the Left Arrow button calls up the most recently recorded image with an option to delete it; and the Right Arrow button displays the current camera settings in a Status Bar across the top of the LCD monitor.
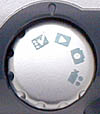
Mode Dial: Located on top of the camera, behind the shutter button, the Mode dial is used to select one of four main camera modes: Video for taking movies with sound, Still for recording still image captures, Review for displaying captured images and playing videos on the LCD monitor, and Setup for customizing camera settings.
Menu Options
 Setup Menu: This menu is used to customize your camera settings. The following options are available:
- Display Brightness: Adjusts LCD screen brightness from +2.0 (white screen) to -2.0 (black screen) in one-half-step increments. (Arbitrary units)
- Date & Time: Sets the camera's internal calendar and clock.
- Video Out: Sets the video out format to NTSC or PAL.
- Language: Sets the menu language to English, Japanese, German, Spanish, French, Italian or Portuguese.
- Image Storage: Selects image storage media to Auto (CompactFlash) or Internal Memory.
- About: Displays camera model and firmware version.
- Format: Formats camera's internal memory (Format Memory) or CompactFlash card (Format Card).
 Review (Playback) Menu: This menu is used to access image Review features. The following options are available:
- Magnify Still: This menu item comes up when reviewing a still image. Once selected, it automatically magnifies the currently displayed image at 2x. Pressing the four Arrow buttons enables you to scroll around inside the image.
- Video Play: This menu item comes up when reviewing a video. Once selected, it activates the video playback. If the video is playing, it pauses the playback. The Up and Down Arrow buttons adjust playback volume. The Left Arrow button rewinds the video and the Right Arrow button skips to the next video or still image.
- Delete Still / Video: Provides the option of deleting the currently displayed still or video image, or all of the images on the CompactFlash card or in the internal memory.
- Image Storage: Selects image storage media to be Auto (CompactFlash) or Internal Memory.
- Print Order: Allows you to set up still images for printing on DPOF-compatible printers.
- Protect: Automatically locks the currently displayed image or video, protecting it from accidental erasure (but not from card formatting).
- Slide Show: Activates an automatic playback Slide Show, with options to Begin, Exit, or set Intervals between pictures from 5 to 60 seconds.
- Copy: Allows you to copy one or all pictures from the CompactFlash or Kodak Picture Card to the Internal Memory or to copy images from the Internal Memory to the storage card.
- Picture / Video Info: Displays information about each picture or video stored in the camera.
 Still Menu: This menu is used to access Still capture features. The following options are available:
- Close-up: Turns the Macro or Close-up option on or off.
- Quality: Offers two quality options, Best (1,800 x 1,200) and Good (900 x 600). The current quality option is displayed on the monitor by one (Good) or two (Best) stars.
- Image Storage: Enables you to select the image storage media as Auto (CompactFlash) or Internal Memory.
- Self-Timer: Sets the self-timer to count down 10 seconds before triggering the camera's shutter.
- Date Stamp: Turns the Date Stamp On or Off. Date Stamp records the date on each image, with one of three possible date formats.
- Quickview: Turns Quickview On or Off. Quickview displays the most recently recorded image briefly on-screen after each exposure.
 Video Menu: This menu is used to access Video capture features. The following options are available:
- Close-up: Turns the Macro or Close-up option on or off.
- Video Quality: Offers two quality options: Best (320 x 240) and Good (160 x 120). The current quality option is displayed on the monitor by one (Good) or two (Best) stars.
- Image Storage: Enables you to select the storage media as Auto (CompactFlash) or Internal Memory.
- Self-Timer: Sets the self-timer to count down 10 seconds before triggering the camera's shutter.
- Video Length: This menu option allows you to select one of four video length settings: Unlimited (default) or 5, 15, or 30 seconds. In Unlimited mode, the camera will continue to record the video until you stop recording or until the storage media is full.
- Quickview: Turns Quickview On or Off. Quickview displays the first frame of the most recently recorded video immediately after you take it, with the option of deleting it.
Software
The Kodak Picture Share software (a Macromedia product) is one of the most user-friendly programs we've encountered, packed with useful features that you will find yourself using for all of your images, no matter how you recorded them. Installation is very simple, with a single Installer icon that puts every component in its place. Once installed, it will automatically launch every time you copy images to your computer -- whether its through the Kodak Camera Dock, a third party card reader, or another manufacturer's digicam. If you choose not to use the Picture Share software, you simply quit the program after it launches.
![]()
If the software detects a connection to an outside drive with pictures (such as the camera connected to the Kodak Camera Dock), the first screen will give you the option of transferring the images to your computer.
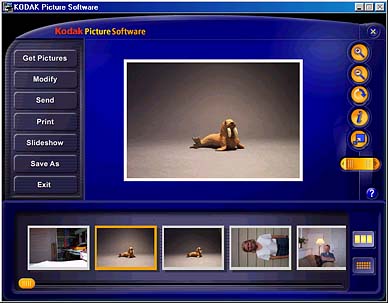
Once the images are transferred and stored, the program's editing screen comes up with the first recorded image in a large window on top, and a filmstrip of smaller thumbnail images along the bottom. You can choose which image you want to view by highlighting the appropriate thumbnail. The magnifying glass in the upper right corner allows you to zoom in on the subject.
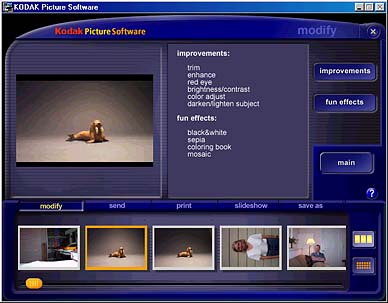
Clicking on the Modify button (second from the top, left side) provides a list of possible modifications. These include two main categories: Improvements and Fun Effects.
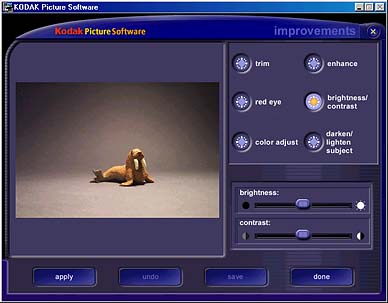
Improvements such as Brightness and Contrast controls provide sliders that you can use to view the effects of the adjustments before you save them. The Red-Eye adjustment includes a small square that you can size and position over your subject's eye.
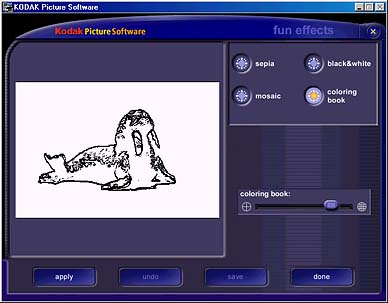
The Fun Effects options are somewhat limited. The Mosaic effect is simply a pixelated version of the image, while the Coloring Book gives you a black-and-white outline that resembles a color book before you fill in the spaces.
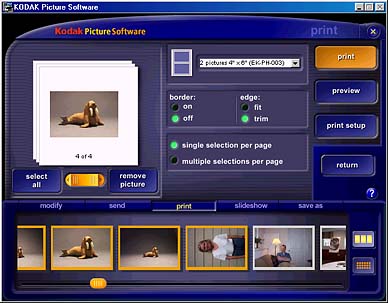
Among the most useful functions of this program are the Print and Send options. You can choose one or more pictures for processing by clicking on the thumbnails along the bottom. Once you've selected pictures for printing, the software's interface asks you to fill in all of the necessary criteria, such as image size, layout, borders, and the number of images per page for printing.
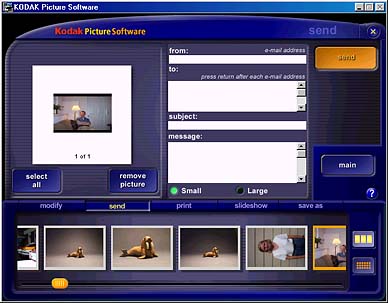
The Send interface includes a space for your email address, a list of recipients' addresses, the subject, and an attached message. You can choose to send either a large or small screenshot of the picture(s) and the software automatically sizes them for transmission. (Note: You must be logged onto your Internet Service before you launch the Picture Share software!)
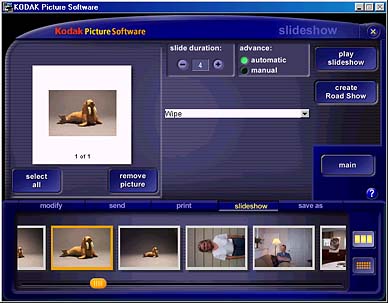
The Kodak Picture Software can also be used to build a slide show, with adjustments for Slide Duration (the length of time the images stay on screen), Automatic or Manual Advance, and a list of special effect transitions between images: Random, Wipe, Center Out, Reveal, Vertical Blinds, and Dissolve.
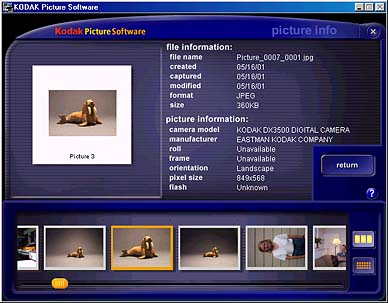
By clicking on the Picture Info button, you can view the file name, the date it was taken, the format, file size, camera, and pixel dimensions (among others).
Overall, the Kodak Picture Software pretty well covers all the most common things the average user would want to do with their pictures, and does so in an extremely simple, intuitive fashion. Imaging software literally doesn't get much easier than this, with a simple, seamless package that combines the camera & software into a single easy-to-use package.
Sample Pictures
You can visit the Sample Pictures page for the DX3600, to see a number of test shots with a detailed commentary on each. The table below shows a representative sampling of these though: Click on each image to see the full-sized version, exactly as it came from the camera.
 |
 |
 |
|
|
|
|
|
|
|
|
|
|
|
|
|
|
|
|
|
|
|
|


Specifications
See the specifications sheet here.
Picky Details
Cycle times, shutter lag, battery life, etc can be found here.
Test Results
Our tests indicate that the DX3600 provides very good picture quality for the point-and-shoot class of digital cameras.
- Color: The DX3600 delivered very good to excellent color under an incredible range of lighting conditions. Outdoors, indoors, mixed lighting, it didn't seem to matter, the DX3600 either nailed the color, or got awfully close in just about every test. Despite the lack of a white balance adjustment, the DX3600 delivered excellent results, almost regardless of the lighting. Color was also accurate and appropriately saturated. Overall: Excellent!
- Exposure: The majority of images were well exposed, particularly the average, well-lit scenes that one would encounter outdoors or in well-lit interiors. The DX3600 responded remarkably well to high-contrast scenes one would encounter in harsh sunlight, maintaining highlights and flesh tones without any problem. The camera offers no user-accessible exposure controls, but seems to handle most situations quite well without them.
- Sharpness: The resolution was on target for cameras in the 2.2-megapixel range, which typically make very sharp 5 x 7-inch prints and good quality 8 x 10's. Images were slightly soft, so 8x10 prints won't be quite as crisp as with some two megapixel cameras, but results were still well within the acceptable range.
- Close-ups: The macro (close-up) feature was pretty limited, covering a rather large 6.4 x 4.8-inch minimum shooting area. Color, detail, and resolution were all good, and the flash worked well at a close shooting distance, except for a large hot spot in the center of the image.
- Night Shots: The low-light performance was below average for cameras in the 2.2-megapixel category, put pretty in line with the capabilities of a fully automatic, fixed focal length camera. The DX3600 has a relatively small, fixed lens opening, which lets in less light than cameras with more sophisticated lens designs. Likewise, the maximum shutter time is somewhat limited as well. While the camera performed well in normal room light, you'll need to use the flash for most low-light or nighttime photographs.
- CompactFlash card (at least 16MB)
- Kodak Camera Dock or USB card reader
- Rechargeable NiMH batteries and charger (One set of batteries and charger included with optional Kodak Camera Dock)
- Small camera bag
- Lens Adapter kit
- Screw-mount Lens Adapter for Kodak Lens Kits
- Kodak Lens Kits: Close-up, Wide-Angle, and Telephoto
Conclusion
Kodak aimed the DX3600 at the entry-level user, and to my mind, hit a home run. Normally, I don't like cameras without exposure or white balance controls, but I was consistently amazed by the excellent results the DX3600 produced under a wide variety of shooting conditions. It wouldn't be your first choice for after-dark available-light photography, nor for super closeups of small objects, but for just about anything else, the DX3600 delivers excellent photos with the simplest operation of any camera I've reviewed to date. An excellent choice for first-time digital owners, or anyone wanting a simple camera that takes great pictures.

Follow Imaging Resource: