Olympus E-10A 4 megapixel sensor and unique SLR optics make for a major coup for Olympus! (Final review, based on full-production model.)<<Optics :(Previous) | (Next): Shutter Lag & Cycle Time Tests>> Page 6:Exposure & FlashReview First Posted: 1/26/2001 |
Exposure
The E-10 offers excellent exposure
control, with a range of manual and automatic exposure modes available. Through
the mode dial on top of the camera, you can set the exposure mode to Program,
Aperture Priority, Shutter Priority, or Manual. In Program exposure mode, the
camera selects both the aperture and shutter speed settings, while you can
adjust the exposure compensation, metering mode, ISO, flash, and white balance.
Aperture Priority mode allows you to set the lens aperture (from f/2.0-2.4 to
f/11.0, depending on the zoom setting) while the camera selects the best
corresponding shutter speed. Shutter Priority modes works in the exact opposite,
allowing you to set the shutter speed (from two to 1/640 seconds) while the
camera selects the appropriate lens aperture. In both Aperture and Shutter
Priority modes, you have control over the same exposure variables as in Program
mode. Shooting in Manual exposure mode gives you control over both the shutter
speed and aperture setting, increasing the shutter speed range to eight to 1/640
seconds, with a Bulb setting for exposure times all the way out to 30 seconds.
Manual exposure mode also allows you to change all other exposure variables,
with the exception of exposure compensation and metering mode. In both Aperture
and Shutter Priority modes, the designated variable is changed by simply turning
the command dial on top of the camera. In Manual mode, aperture is set by
turning the small sub-dial on the back panel, and shutter speed is changed by
turning the main command dial on the top panel. The camera doesn't offer a range
of preset shooting modes, for shooting in special situations such as night
scenes or sunsets. However, the camera's instruction manual provides detailed
information and tips for shooting portraits, backlit subjects, action subjects,
etc.
We have to admit being a little disappointed that the fastest
shutter speed is only 1/640 of a second, when we're accustomed to speeds as high
as 1/1,000 or 1/2,000 of a second. This limits your exposure in bright, daylight
shooting situations, in that you're practically forced to use a smaller aperture
setting. (Or pack along a neutral-density filter or two.) Still, the
availability of a Bulb setting is a nice bonus for low light shooting, and the
E-10's low light capability is nothing short of phenomenal.
Three
metering modes are available on the E-10, in all exposure modes other than
Manual. ESP Metering reads multiple locations across the the entire image area
to determine the correct exposure value. Center Metering reads light in a
relatively large area at the center of the subject to determine exposure (the
metering area takes up about 11 percent of the total frame area). The third
mode, Spot Metering, takes a light reading from the very center of the subject
(about 1.6 percent of the viewfinder image). The metering mode is selected by
holding down the Metering button and turning the command dial (or sub-dial)
until the desired icon is displayed in the viewfinder. Like metering, exposure
compensation is adjustable in all exposure modes except Manual. By pressing the
Exposure Compensation button and turning the command dial (or sub-dial), the
exposure can be adjusted from -3 to +3 EV in 1/3 EV increments.
An
exposure lock function is controlled by the AE Lock button on the back panel of
the camera. To use AE Lock, simply point the center of the viewfinder at the
part of the subject you want the exposure based on, press and hold the AE Lock
button, reframe the subject, and trigger the shutter. The separate AE Lock
button is a nice feature, because it lets you completely recompose your shot
(including zoom and focus adjustments) without losing the desired exposure
setting.
We at first thought there was no focus-lock feature per se on the E-10, but a reader note on our discussion forums set us to rights. (Thanks to George Pence for the correction!) As it turns out, you can use the AEL and shutter buttons to effect a focus-lock function. Here's how: Start by half-pressing the shutter button to lock both exposure and focus. Then center on your exposure target, and press the AEL button. This *re-locks* the exposure, while not affecting the focus. Finally, while still holding down the AEL button (and still half-pressing the shutter button), reframe your picture and fully press the shutter button. Not the most straightforward implementation we've seen, but the function is nonetheless there and usable.
White balance on the E-10 offers three operating modes, Auto, Quick Reference, and Preset. The Auto setting selects the whitest portion of the subject and adjusts the color balance to achieve the best white value. The Quick Reference setting is equivalent to a manual white balance mode, in that it allows you to set the white balance by placing a white card in front of the subject to balance the color. You then press the Quick Reference white balance button on the front of the camera to save the setting as a preset value. This saved white value will automatically be used the next time the white balance is set to Quick Reference, unless the value is changed again through the same method. We were very pleased to see the addition of a manually adjustable white balance setting, since most Olympus digicams only offer a range of preset values. In our testing, the manual white balance setting worked very well to remove color casts under difficult lighting conditions. Under the Preset white balance mode, the camera offers a selection of Kelvin temperatures, from 3,000 to 7,500 degrees, to match a variety of light sources. The instruction manual provides a detailed chart reporting the temperature setting and the lighting situation it's intended for.
Image sharpness can be adjusted to Hard, Soft, or Normal on the E-10, through
the record menu. The Hard setting sharpens the borders and outlines in the subject,
probably by increasing the contrast, and also clarifies the noise pattern (making
it more prevalent). On the other end of the spectrum, the Soft setting blurs
borders and decreases contrast slightly. Image contrast can also be adjusted
through the record menu, with options for High, Normal, and Low. The High setting
creates a stark contrast, which may wash out highlight areas and turn shadows
to black. Alternatively, the Low setting subtly blends the highlight and shadow
areas, making them less pronounced.
We mentioned earlier that the E-10 offers a histogram function that allows you
to check the exposure before capturing the image. We couldn't actually get the
histogram to appear on the LCD monitor in Capture mode (our beta evaluation
model still had a few quirks), although we did successfully utilize the the
feature in Playback mode. According to Olympus, you will be able display the
histogram over the bottom of your subject and adjust the exposure compensation
or exposure variables (shutter speed or aperture) to tweak the exposure without
leaving capture mode.
Flash
 The E-10 features a built-in,
pop-up flash with five operating modes, including Automatic, Slow Synchro, Redeye
Reduction, Redeye Reduction with Slow Synchro, and Fill-In. Flash mode is controlled
by pressing the Flash button and turning either the main command dial or the
sub-dial. The Automatic flash mode places the camera in charge of when to fire
the flash, based on the existing light level and exposure. The Slow Synchro
setting selects a slower shutter speed to allow more ambient light into a dark
image, such as a night scene. The Slow Synchro flash can be timed to fire at
the beginning or end of the exposure, depending on the desired effect. In Redeye
Reduction mode, the flash fires a rapid burst of 10 short flashes to contract
the pupils of the subject's eyes before the main flash fires. The Redeye Reduction
with Slow Synchro mode simply combines the two flash modes, for night portraits.
The Fill-in flash mode fires the flash with every exposure, regardless of the
light level. Finally, the flash can be completely disabled by returning it to
its compartment. The built-in flash intensity level can be adjusted through
the record menu, from -2 to +2 in 1/3 EV increments.
The E-10 features a built-in,
pop-up flash with five operating modes, including Automatic, Slow Synchro, Redeye
Reduction, Redeye Reduction with Slow Synchro, and Fill-In. Flash mode is controlled
by pressing the Flash button and turning either the main command dial or the
sub-dial. The Automatic flash mode places the camera in charge of when to fire
the flash, based on the existing light level and exposure. The Slow Synchro
setting selects a slower shutter speed to allow more ambient light into a dark
image, such as a night scene. The Slow Synchro flash can be timed to fire at
the beginning or end of the exposure, depending on the desired effect. In Redeye
Reduction mode, the flash fires a rapid burst of 10 short flashes to contract
the pupils of the subject's eyes before the main flash fires. The Redeye Reduction
with Slow Synchro mode simply combines the two flash modes, for night portraits.
The Fill-in flash mode fires the flash with every exposure, regardless of the
light level. Finally, the flash can be completely disabled by returning it to
its compartment. The built-in flash intensity level can be adjusted through
the record menu, from -2 to +2 in 1/3 EV increments.
Olympus estimates the built-in flash as effective from 0.6 to 18.3 feet (0.2
to 5.6m), at the normal intensity and ISO 100 settings. This seemed consistent
with our own test results, with two caveats: First, the flash seemed rather
dim at all test distances in our studio tests, although it appeared to work
fine under less staged conditions. (The +/- 2 EV flash exposure adjustment could
easily adjust for the underexposure we encountered, but we wanted to present
the unadjusted results for the sake of consistency.) Secondly, our studio only
lets us test flash range to about 14 feet, so we couldn't adequately test the
performance at the maximum rated distance.
A hot shoe on top of the camera accommodates an external flash, as does the
PC sync terminal on the side of the camera. You can use the internal flash and
an external flash together, as the camera automatically sets the internal flash
to Automatic if popped up when the external flash is connected. Flash intensity
level can also be controlled through the camera for a dedicated external flash,
via the same method as for the internal unit. Olympus offers the FL-40 external
flash as an accessory, and the instruction manual contains detailed instructions
for connecting the flash and setting it up. (Note that the flash exposure adjustment
option likely will not be available with third-party accessory flash units,
as it requires extra connections on the flash shoe to implement this function.)
Auto Bracketing
In all exposure modes except for Manual, an auto bracketing feature takes three
exposures of the same image at different exposure values (one at the set exposure
value, one overexposed, and one underexposed). Through the record settings menu,
you can set the EV increment you want each image to differ by, with options
of 1/3, 2/3 or one EV step in either direction. The camera's internal flash
must be closed for auto bracketing to work, and the self-timer is unavailable
when this feature is enabled.
Sequence Mode
The Drive button on the side of the camera accesses the Sequence shooting mode,
which allows you to capture up to four successive shots at roughly three frames
per second with one press of the shutter button. Very rare among digicams we've
tested, the E-10's sequence-mode operation can capture even uncompressed TIFF
images at the full three frames per second. (!)
Self-Timer and Remote Control Photography
Also through the Drive button, the E-10 offers the Self-Timer and Remote Control
shooting modes. The Self-Timer features a 12 second countdown before the shutter
is fired, allowing you to get into the image after pressing the shutter button.
As with normal exposures, the camera sets focus with the half-press of the shutter
button, meaning that you shouldn't stand in front of the camera to start the
countdown and press the shutter button.
The E-10 works with an included infrared remote control as well as an accessory
wired remote control unit. The Remote Control shooting mode, accessed through
the Drive button, sets the camera to receive signals from the infrared remote
control unit, which works as far as 16.6 feet (5m) from the camera's front.
We like Olympus' RM-1 remote trigger a lot, and use it extensively in our studio
for product photography with our (now aging) C-2020 Zoom. On the E-10, the manual
nature of its controls reduce the functionality of the remote somewhat: Since
the zoom is actuated by a lens collar, with no electronic actuation possible,
the zoom controls on the RM-1 aren't effective when used with the E-10. Likewise,
the dual-control (button plus thumbwheel) operation of the exposure compensation
function on the E-10 prevents the remote from controlling that function as well.
The RM-1 is thus reduced to only operating as a shutter release, but we find
it very useful nonetheless.
The wired remote control unit can be used in any capture mode and doesn't require
you to set the Drive setting to Remote Control mode. Instead, when the remote
control wire is connected to the camera via the side terminal, the remote functions
are instantly available. With the wired remote, you can halfway press the shutter
button to set focus, a function that the infrared remote doesn't allow. The
wired remote is perfect for shooting with the Bulb shutter setting or any slow
shutter speed, to reduce any camera movement caused by pressing the shutter
button.
Time-lapse Photography
Through the record menu, the E-10 offers a Time-lapse Photography mode. You
can set the shutter intervals from 30 seconds up to 24 hours, and the camera
will continue to take pictures at the set interval until the batteries die,
the memory card fills up, or the camera is turned off.
Low Light Photography
We don't normally have a separate section in our reviews on a camera's low light
capability, but the E-10 was so exceptional in this respect that we thought
it warranted separate coverage.
Earlier in this review, we described the design of the E-10s body and CCD mount,
and the way the combination acted to conduct heat away from the CCD imager chip.
The net result should be lower operating temperatures for the CCD, and thus
lower image noise levels as well. Given a foreknowledge of this design detail,
we expected pretty good low-light performance from the E-10, but also expected
the smaller pixel dimensions needed to cram 4 million pixels onto the sensor
chip to counteract this somewhat. We therefore began our testing thinking that
the E-10 would have fairly typical low light capabilities overall. What a surprise!
In our studio tests, the E-10 produced beautiful exposures down to the lower
limits that we normally test at (1/16 of a foot-candle, about 0.7 lux). Then
we "discovered" the bulb-exposure mode. (Manuals are for wimps...) Messing about
in the studio that night, we happened to take a 30 second exposure with the
camera pointing out a window to the moonlit ground outside. - There was detail
there! A quick trip to the backyard (the front was too "bright" due to the streetlights)
with our heaviest tripod and a steady hand (we didn't get to keep the wired
remote for our testing) was called for, to see just what the E-10 could see.
|
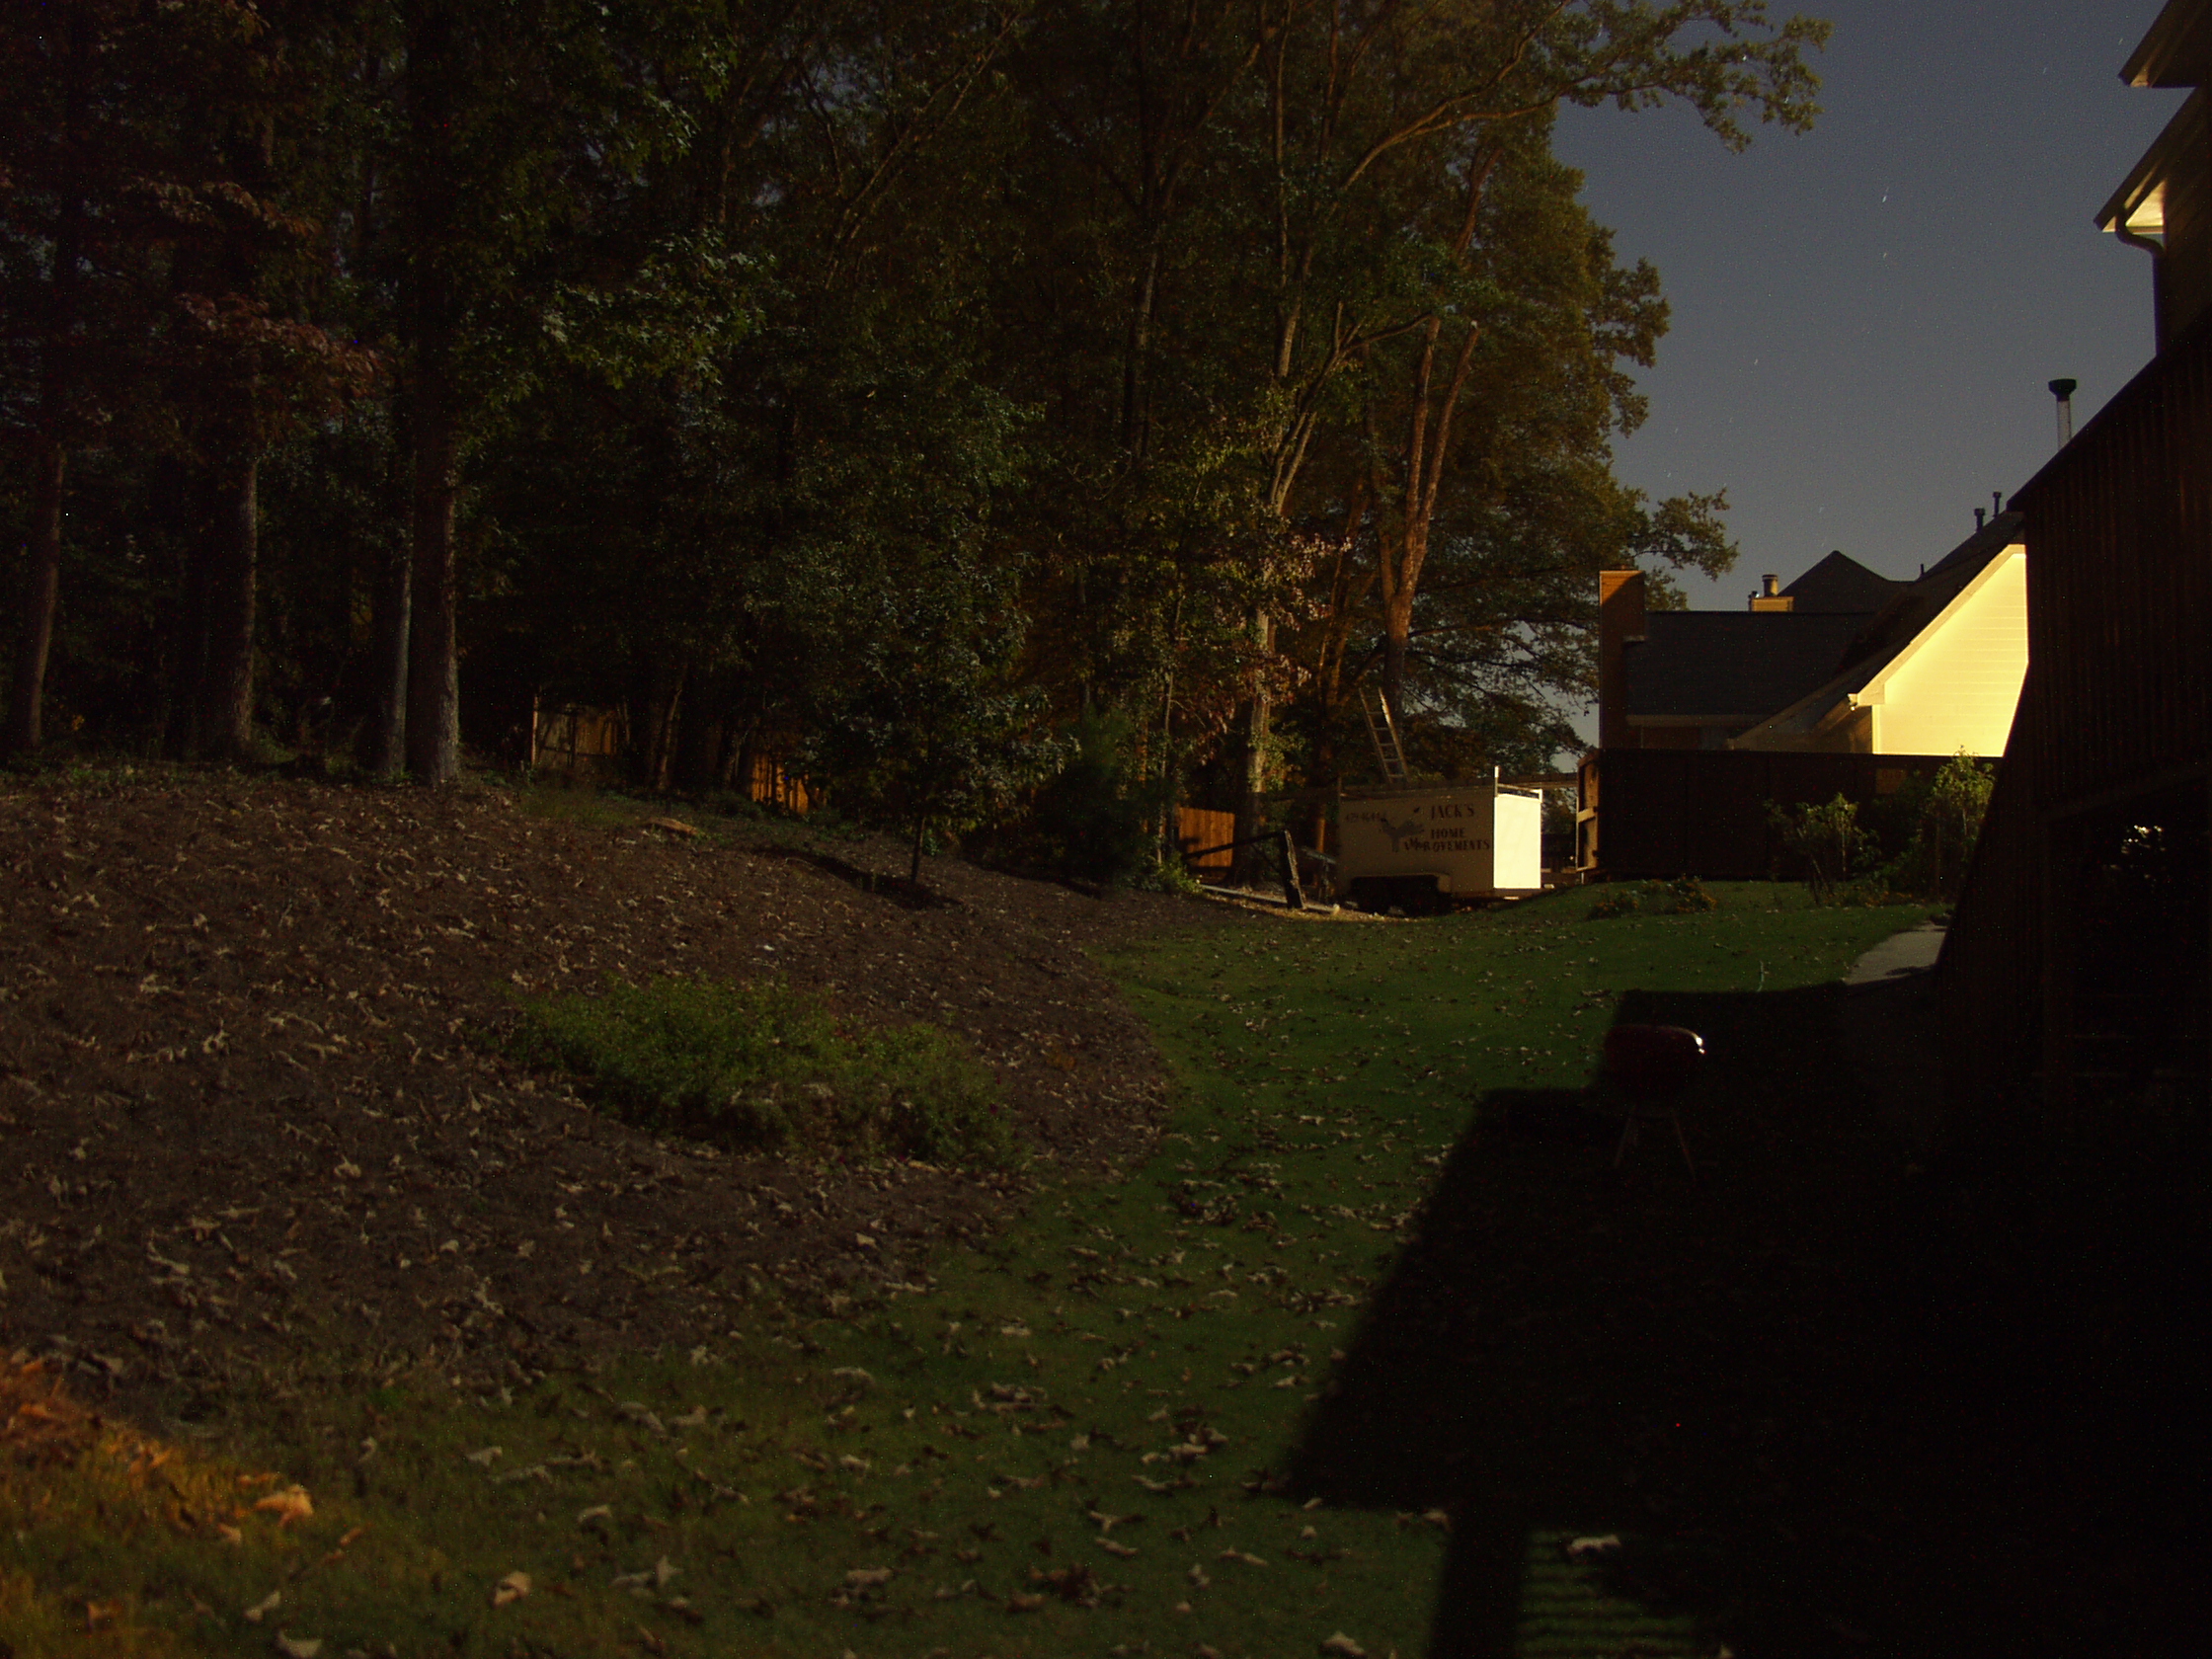
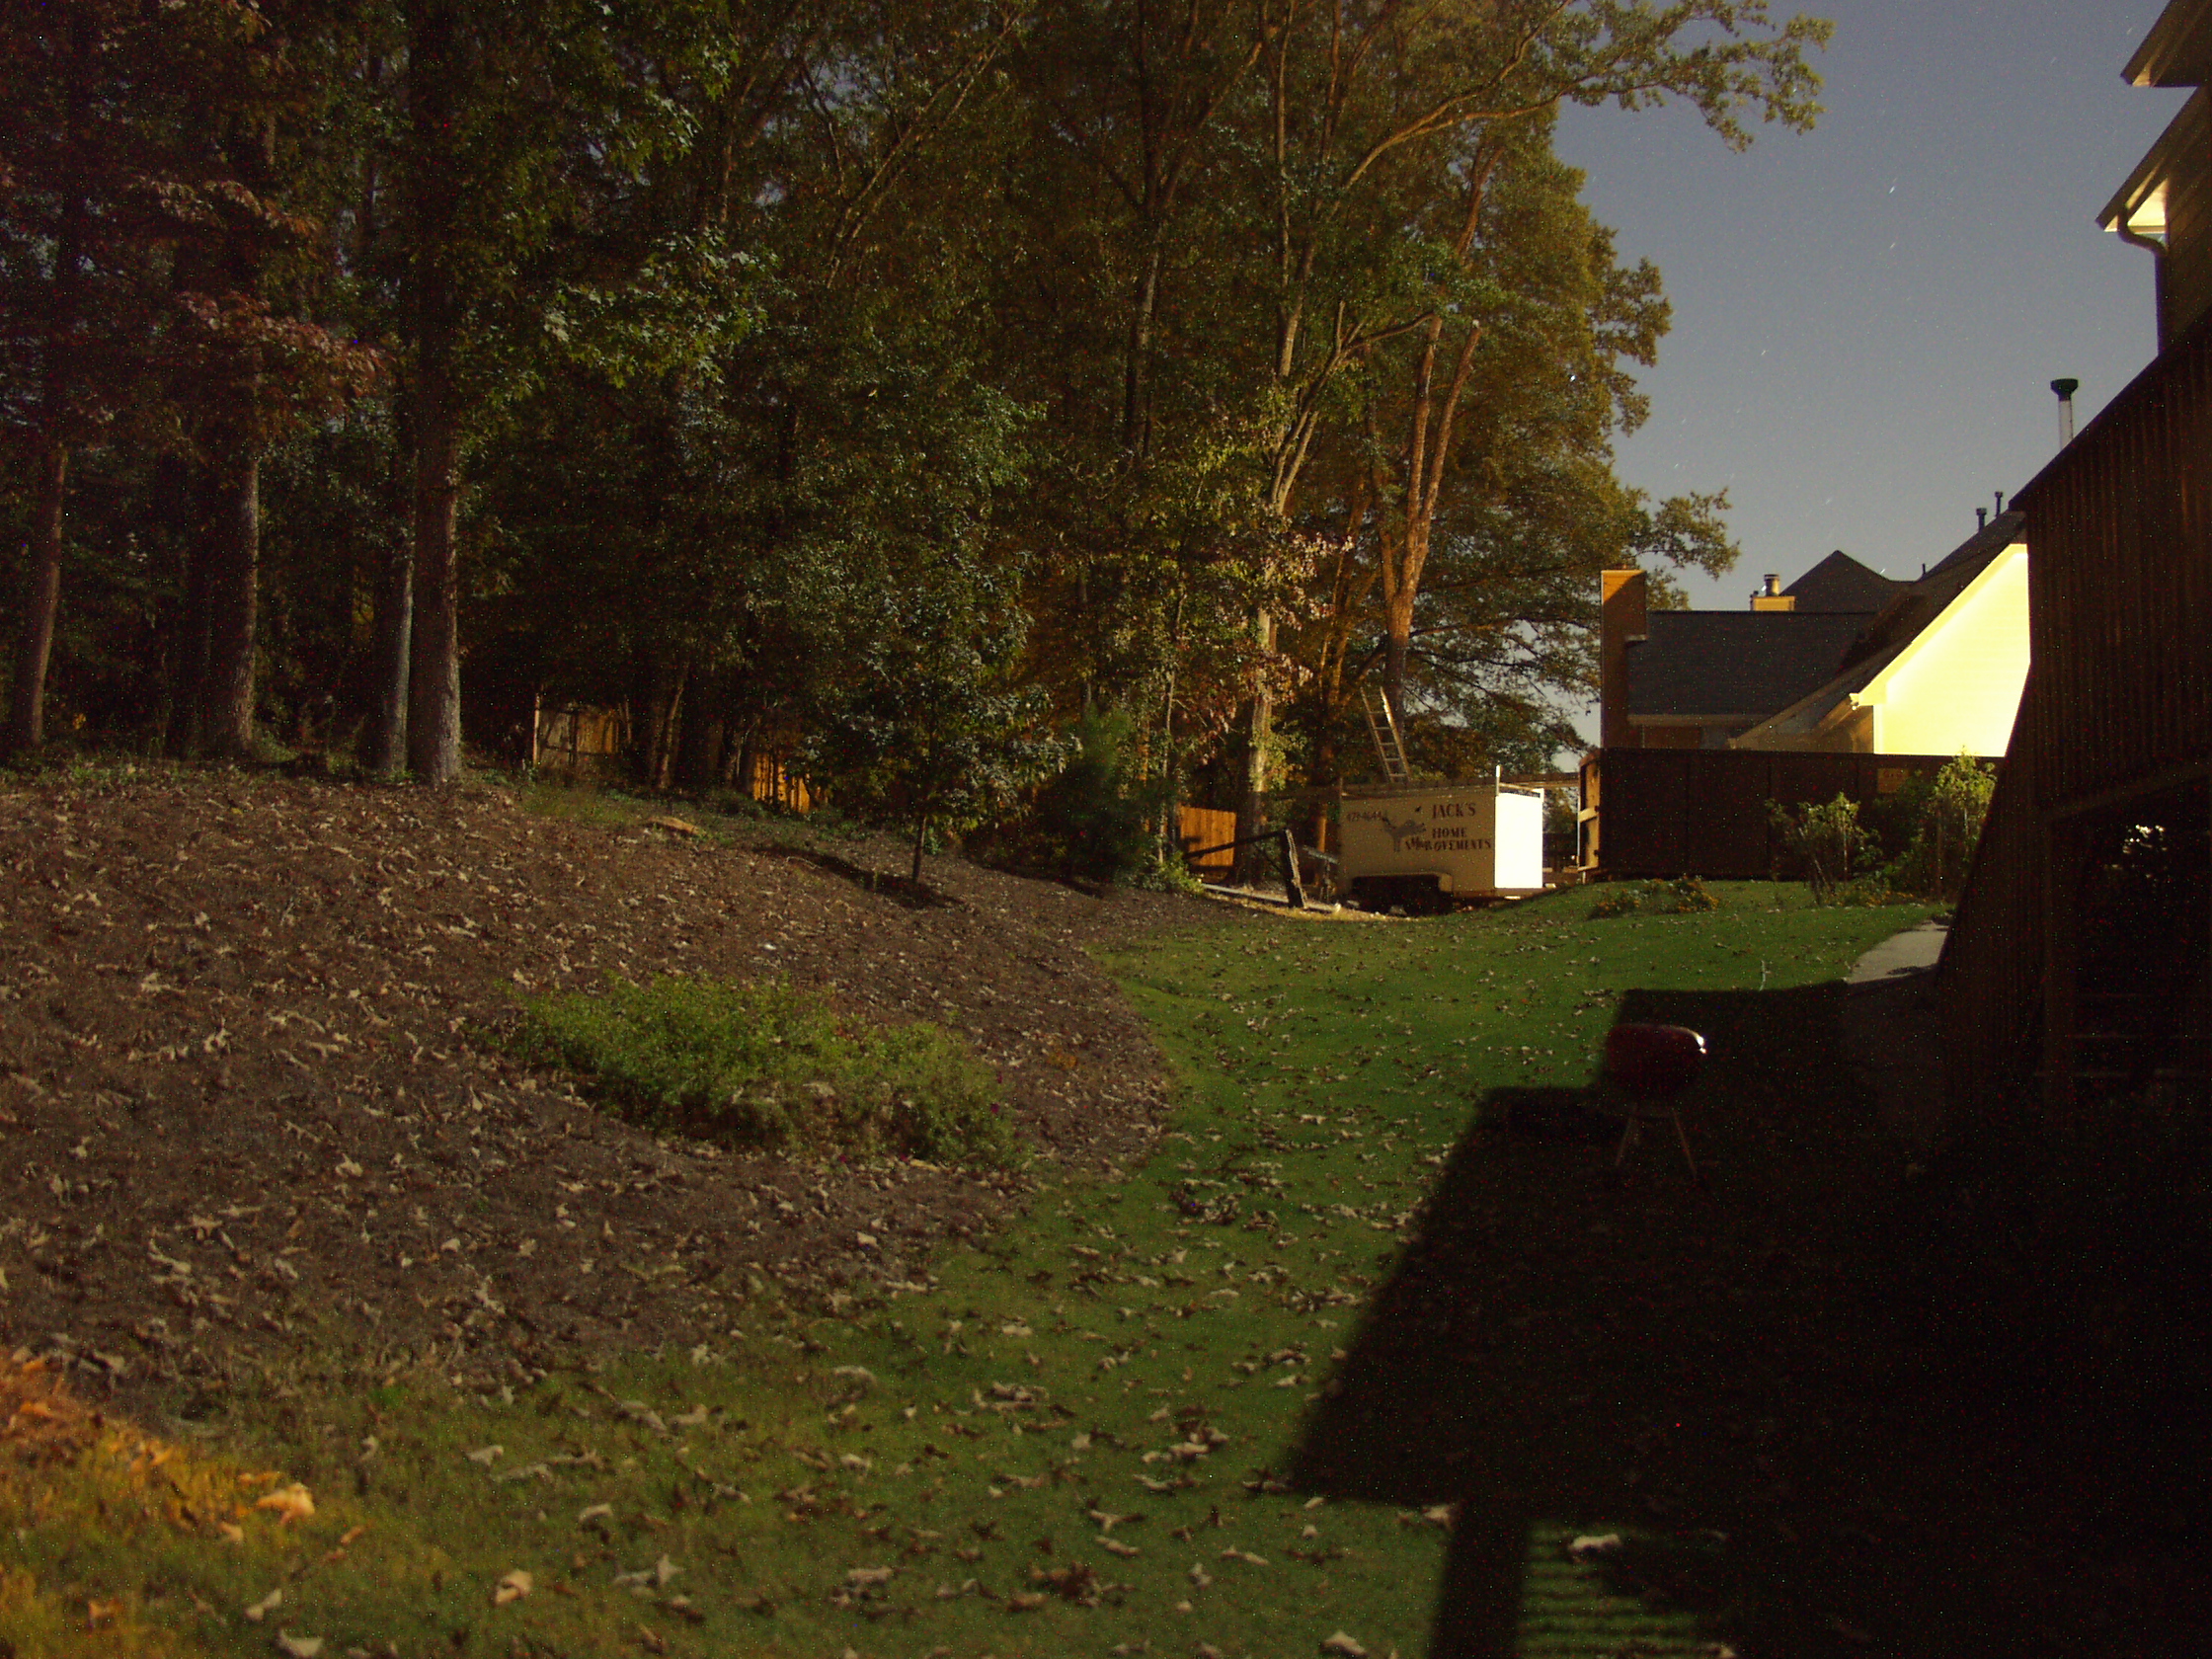
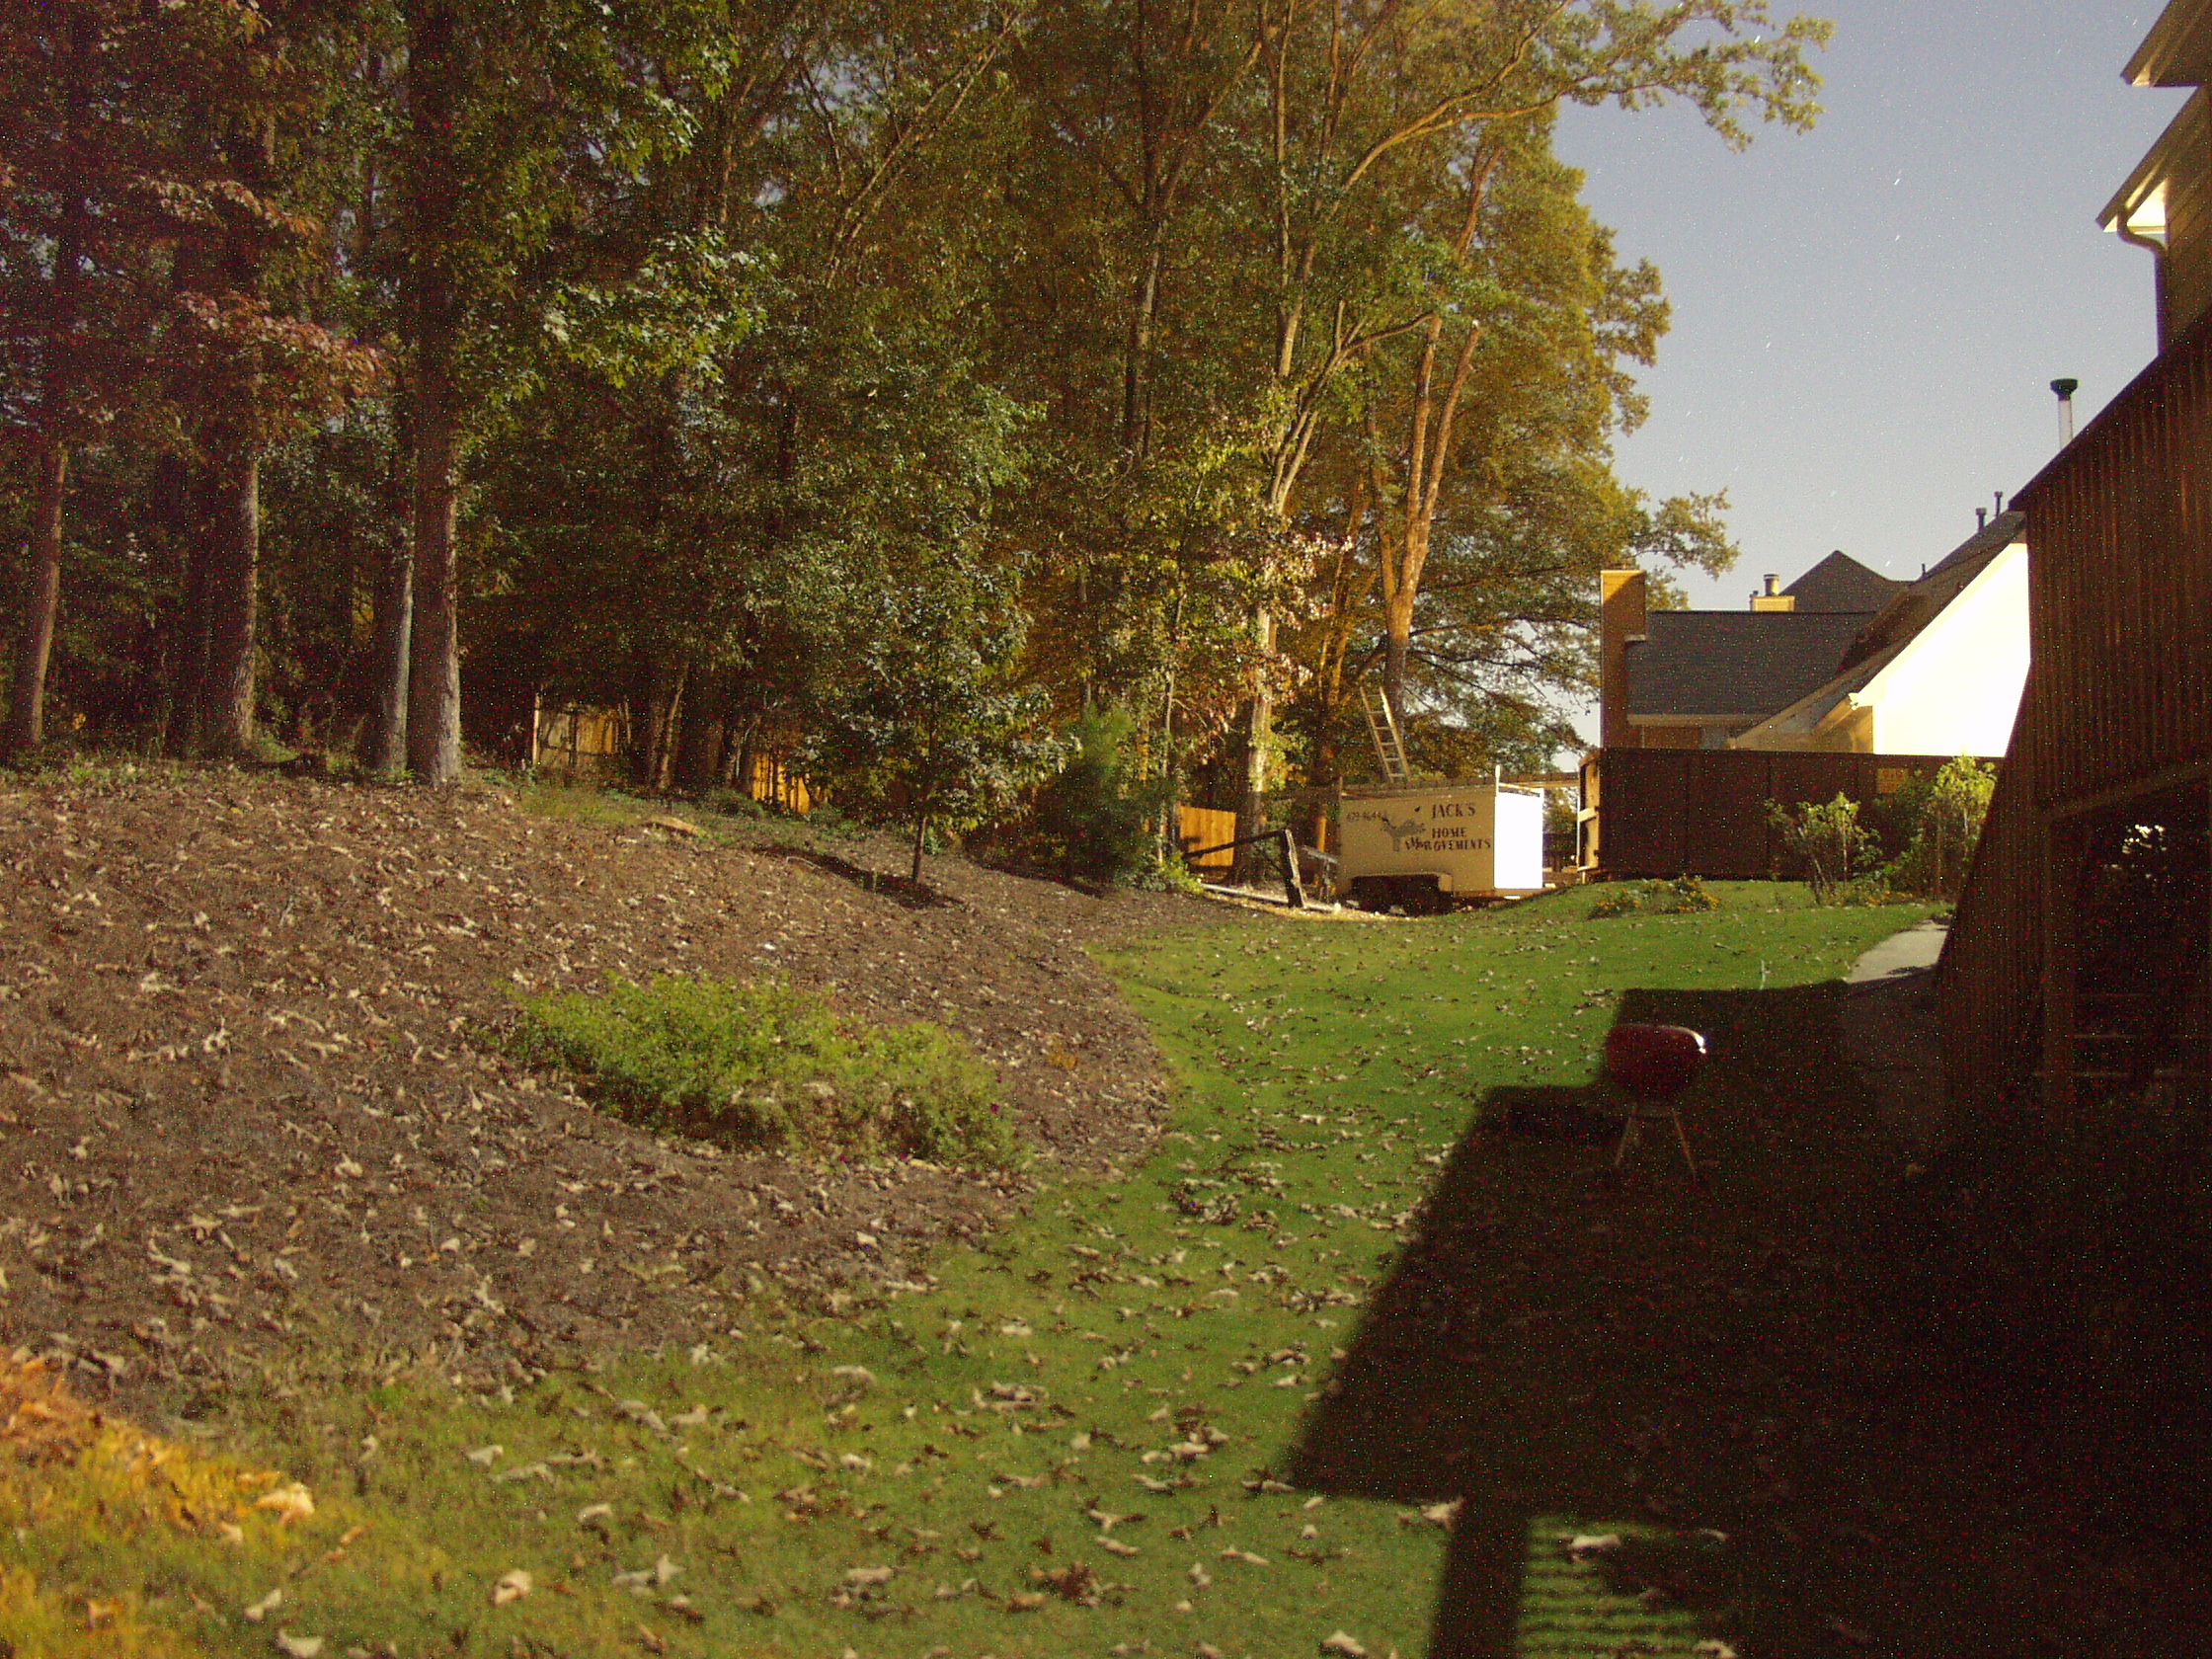
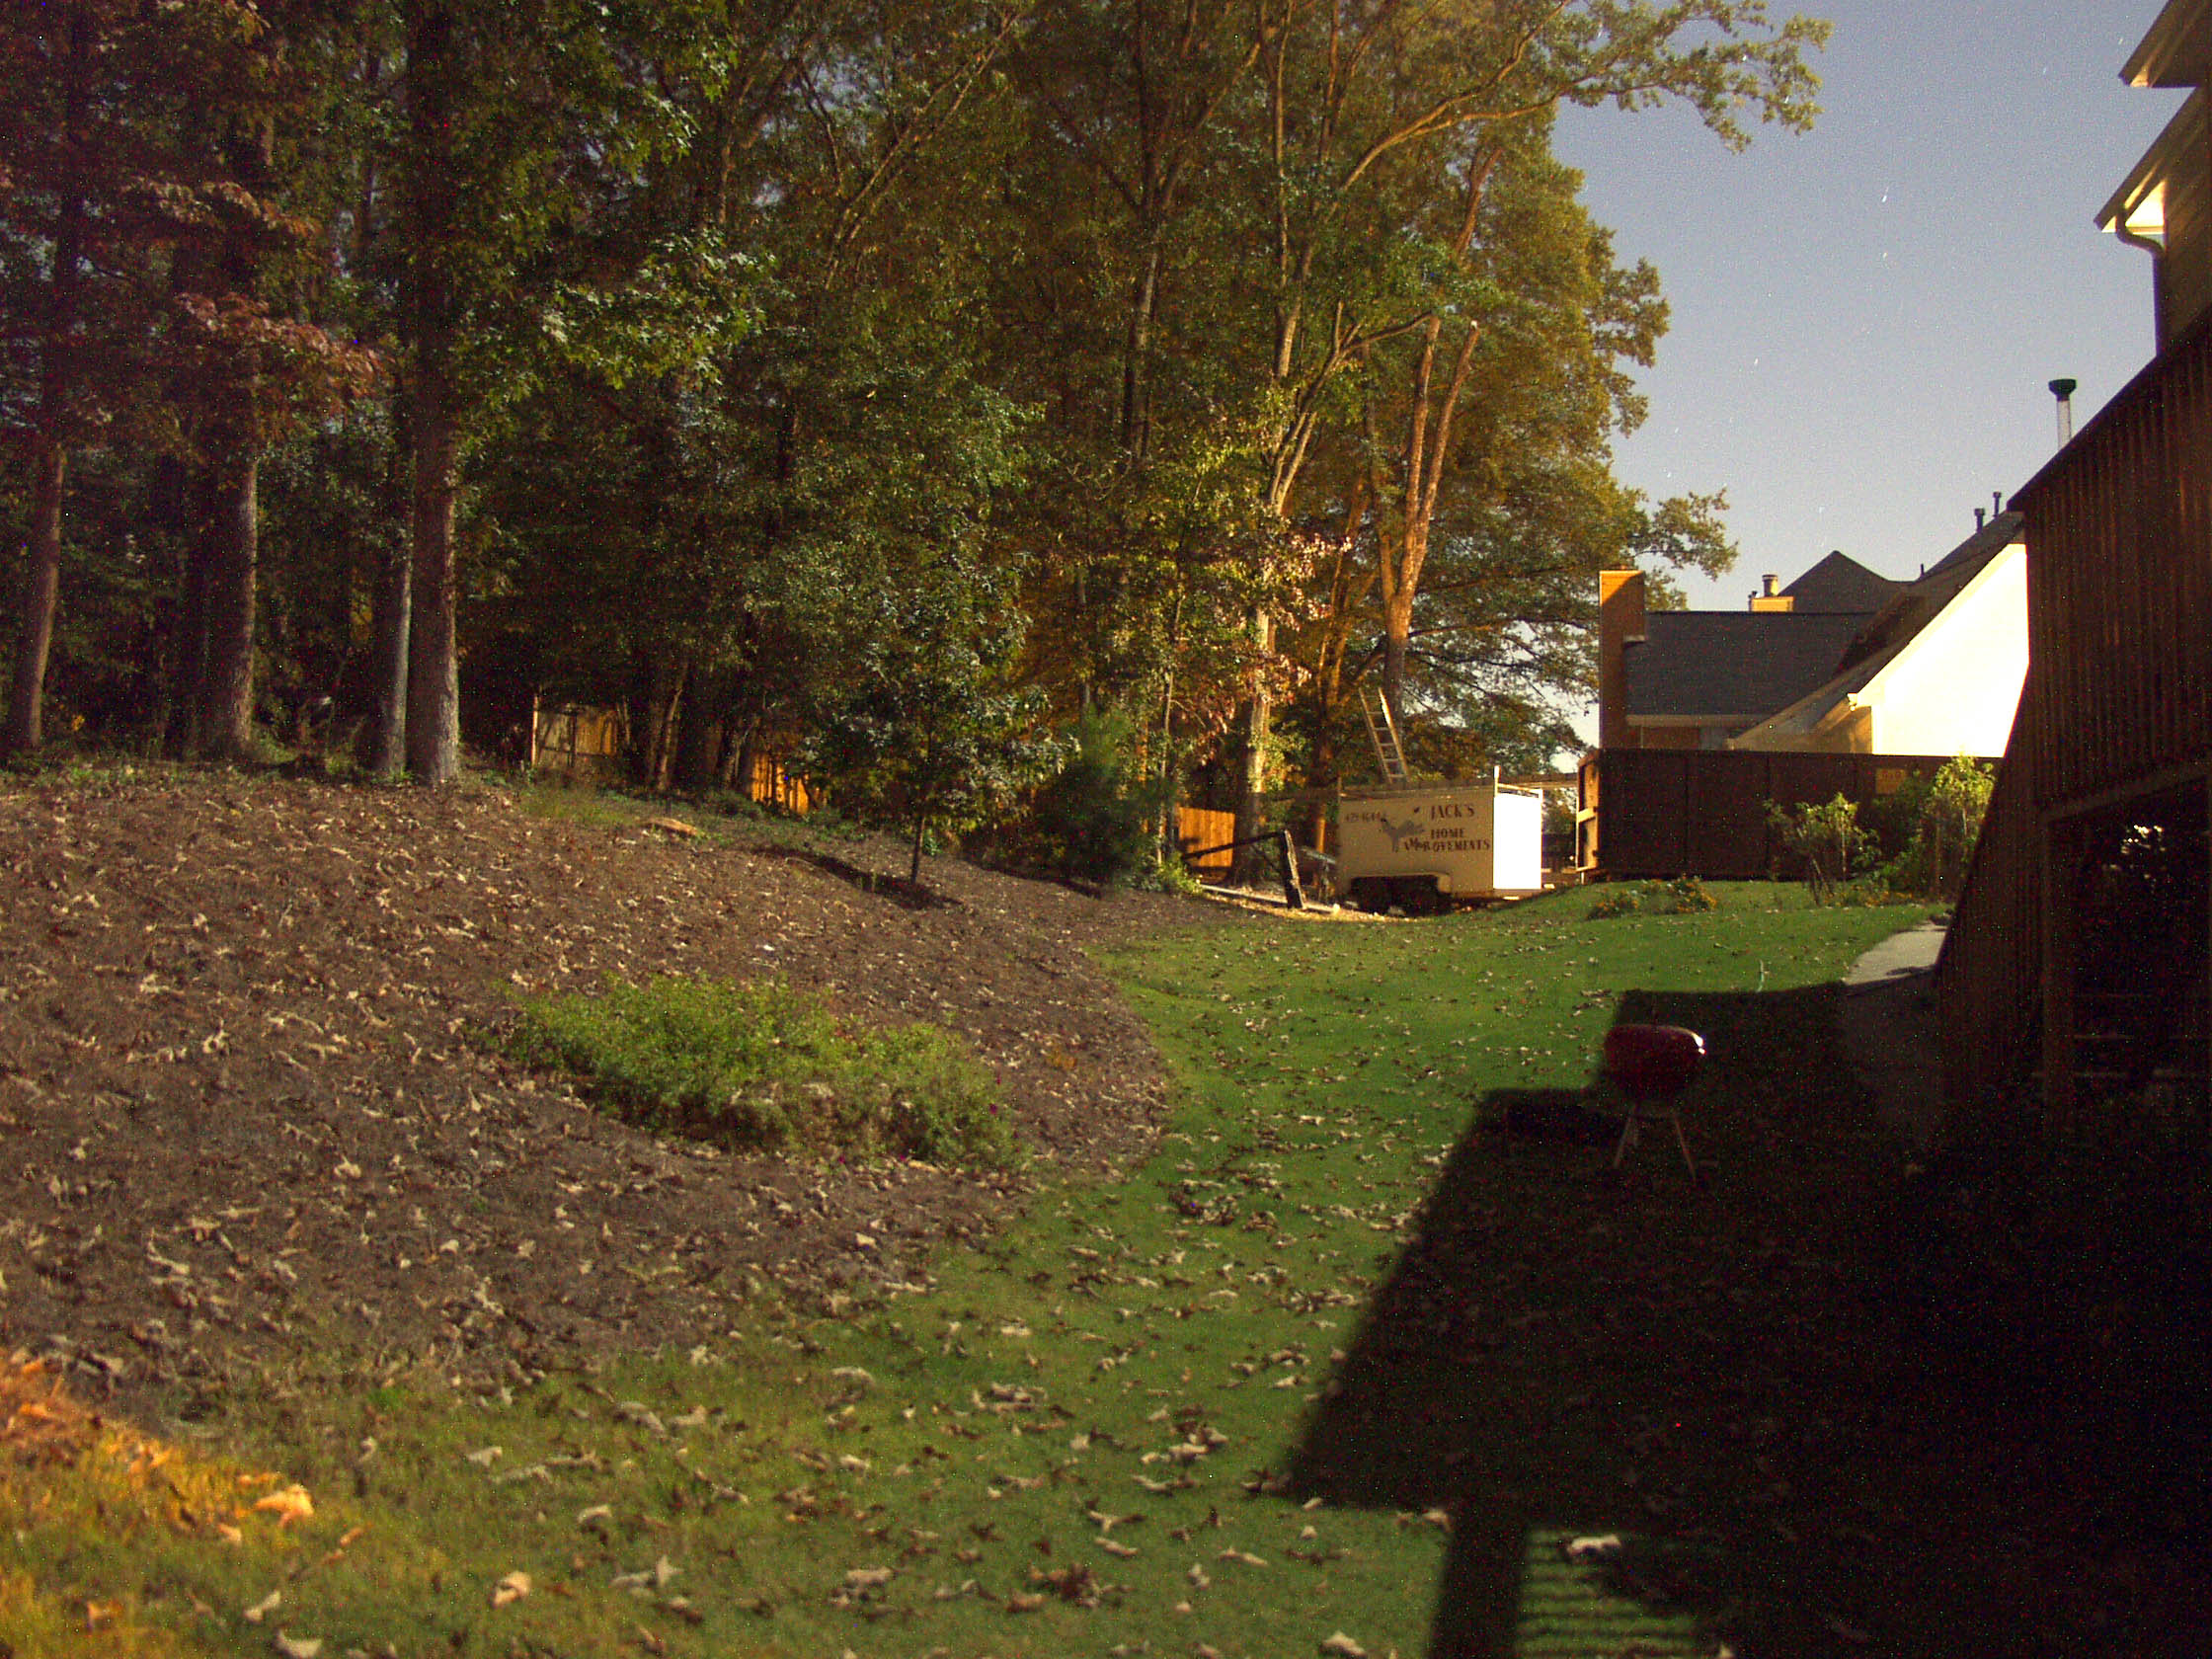
~Full Moon over Georgia, October 14, 2000, a bit after midnight. All exposures 30 second bulb exposures, click on any photo to see full-size image. NOTE though, images average 2.5 MB each! | |||
 |
 |
 |
 |
|
|
|
|
|
30 seconds F/2.2 |
30 seconds F/2.2 |
30 seconds F/2.2 |
Photoshop Levels adjustment, then "Dust & Scratches" Filter, threshold 20, radius 1 |
The shots shown above are all the result of 30 second exposures, with the lens
wide open. (About f/2.2 at the focal length we were shooting with.) We shot
the scene at ISO 80, 160, and 320: The fourth image above is one that was processed
with Photoshop, from the ISO 80 image. We did a fairly extensive tone balance
using the "Levels" function, then hit it with the "Dust & Scratches" filter,
radius 1, threshold 20. The results were literally astonishing, particularly
the incredibly clean image processed from the ISO 80 shot. We normally recommend
Mike Chaney's excellent Qimage
Pro program for processing digicam images with high ISO noise, but in the
case of the E-10, the Photoshop Dust and Scratches filter seemed to do a better
job when used with a relatively high threshold setting. The only light in the
backyard was from a full moon (October, Atlanta area): The totally washed-out
side of the house and small trailer are where light from a streetlight a half-block
away was hitting. - Is that amazing, or what? It was moderately cold outside
when we shot these (probably about 50 degrees F), but we didn't wait for the
camera to cool down to ambient temperature, wanting to see results more typical
of ordinary shooting conditions. Bottom line, we have to say that the E-10 has
the best low light performance of any digicam we've tested to date! (October,
2000. And yes, the Kodak DC620x would almost certainly surpass the E-10, but
that digicam costs roughly 5 times as much, and has half the pixel resolution
of the E-10.) An absolutely outstanding performance!
Reader Comments! --> Visit our discussion forum for the Olympus E-10!

Follow Imaging Resource: