Sony MVC-FD87Sony announces an affordable 1.3-megapixel digicam with basic features, good quality pictures, and a dual-media storage drive!<<Shutter Lag & Cycle Time Tests :(Previous) | (Next): Camera Modes & Menus>> Page 8:Operation & User InterfaceReview First Posted: 5/4/2001 |
Operation and User Interface
The MVC-FD87's user interface is very similar to that of the MVC-FD92 and many other Sony digicams, with very straightforward operation and an uncomplicated menu system. There are few control buttons to decipher, therefore the FD87 relies heavily on the LCD menu system. The camera operates under automatic control, with a handful of exposure options available to make minor adjustments. The LCD menu system is short and sweet. Subject tabs at the bottom of the LCD screen are activated and closed by pressing the up and down arrow keys. We appreciated that you can still see a large part of the view when the menu is displayed so you can observe the effects of your menu selections.
Control Enumeration
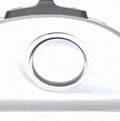
Shutter Button: Located on a sloped panel on the front of the camera, this large silver button sets exposure and focus when pressed halfway. When fully depressed, it triggers the shutter.
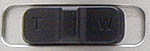
Zoom Lever: Just below the Shutter button, the Zoom lever controls the optical and digital zoom (when enabled). In Playback mode, it controls the digital enlargement of a captured still image, as large as 5x.

LCD Backlight On / Off Switch: Located on the left side of the LCD monitor, this sliding switch turns the LCD backlight on or off.
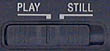
Mode Switch: Situated just below the lower left corner of the LCD monitor, this switch controls the camera's operating mode, placing it in Play or Still modes.
Power On / Off Switch: Directly to the right of the Mode switch, this sliding switch turns the camera on and off. The small green push button in the center of the power switch is a safety lock that ensures that the switch will only move with your finger pressing down on it.

Flash Button: The first in a series of buttons along the bottom of the camera's back panel, the Flash button controls the operating mode of the built-in flash, cycling through each setting:
- Auto: Puts the camera in control of the flash mode.
- Red-Eye Reduction: Fires a small pre-flash before firing the full flash to reduce the red-eye effect.
- Forced: The flash always fires, regardless of light levels.
- Suppressed: The flash never fires, regardless of light levels.

Focus Button: To the right of the Flash button, the Focus button controls the camera's focus mode. Pressing the button sequentially cycles between Autofocus, Macro, and several fixed focus settings: 0.5m, 1.0m, 3.0m, 7.0m, and Infinity.

Program Button: The next button to the right of the Focus button, this button controls the exposure mode, cycling through the following:
- Automatic: (No icon.) Places the camera in standard automatic exposure mode, for normal shooting conditions.

- Twilight: Adjusts the aperture and shutter speed for dark lighting conditions with bright lights, such as neon signs, sunsets, and fireworks.
- Twilight Plus: Performs similar functions to Twilight mode, but increases the camera's light sensitivity.
- Landscape: Sets focus at infinity for faraway subjects.
- Panfocus: Sets the lens aperture and focal distance for quick focusing of faraway or close-up subjects.
- Spot Metering: Bases the exposure on a reading from the very center of the frame, as opposed to the default metering system, which averages readings from multiple points.

Display Button: Directly to the right of the Program button, the Display button controls the information display on the LCD screen, in both Record and Playback modes, alternating between limited and full display.
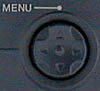
Menu / Arrow Rocker Button: The final button in the series, the Arrow rocker pad serves multiple functions. The pad features four arrows, one pointing in each direction. In all camera modes, the up arrow brings up the LCD menu tabs at the bottom of the screen, while the down arrow turns them off. Once a menu is displayed, all four arrow keys navigate through settings and options. Pressing the center of the button serves as the "OK" button, confirming menu selections. In Playback mode, the right and left arrows scroll through captured images on the floppy disk or Memory Stick.
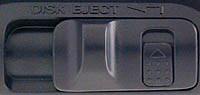
Disk Eject Lever: Located on the right edge of the back panel, this lever slides downward to eject the floppy diskette. Like the Power On/Off switch, the Disk Eject lever features a safety feature -- in this case, a small lever that must slide to the left before the eject lever will slide down.

Follow Imaging Resource: