Sony MVC-FD95Sony takes the Mavica line to 2.1 megapixels, and 12-bit digitization!<<Optics :(Previous) | (Next): Shutter Lag & Cycle Time Tests>> Page 6:Exposure & FlashReview First Posted: 7/13/2000 |
Exposure
With its variety of Program AE modes, the MVC-FD95 gives you a fair amount of exposure control, although it doesn't offer the full manual control that we'd like to see on a high end camera of this sort. In addition to the standard Automatic exposure mode which controls both aperture and shutter speed, the MVC-FD95 offers Aperture Priority, Shutter Priority, Twilight, Twilight Plus, Landscape and Panfocus exposure modes. Both Aperture and Shutter Priority modes give you control over the corresponding setting while the camera controls the other. As we mentioned earlier, aperture can be manually set from f/2.8 to f/11 and shutter speed spans from eight to 1/500 seconds. Manually selected aperture values are in 1/2 f-stop increments, while the shutter speed step size varies as a function of the speed range you're working in. At very long shutter times, the steps are in full-stop (2x) increments, while at very high speeds, they're in half-stop increments. In the critical mid-range, speeds of 1/60, 1/90, 1/100, 1/125, and 1/180 are offered, giving approximately third-stop increments. The Twilight modes simply adjust the aperture and shutter speed for dark settings like night skylines and fireworks. Normal Twilight mode sets the exposure system to somewhat underexpose the image, so bright lights, the sunset, neon signs, etc won't wash out, but retain their full color. Twilight Plus makes less exposure adjustment, but boosts light sensitivity for taking pictures under darker conditions. As mentioned above, Landscape and Panfocus modes apparently only affect the lens focus, although Panfocus apparently also chooses a smaller lens aperture for greater depth of field.
When shooting in Program AE, you do have control over the exposure compensation through the display menu. You can adjust the exposure from -2.0 to +2.0 EV in 1/3 EV increments. (Each full EV unit corresponds to a doubling of halving of the exposure.) White balance is also easily controlled, by a button on the side of the camera, with options for Automatic, One-Push, Outdoor and Indoor. One-Push lets you manually adjust the white balance by placing a white card in front of the lens and pressing the manual adjustment button until the white value is set. We liked the inclusion of the spot metering mode, which takes the exposure values from the very center of the composition as opposed to averaging values from the entire image. Spot metering is useful for high contrast subjects, where you'd rather have the exposure set for a specific highlight or dark area. A self-timer (accessible through the on-screen menu) gives you a 10 second countdown on the LCD monitor, complete with an audible beep, after the shutter button is fully pressed. There's also a sharpness setting through the capture menu, which allows you to adjust the image sharpness from -2 to +2 levels, although we found differences between sharpness settings to be very subtle.
The FD-95's low-light performance is one of the areas of most dramatic improvement relative to previous Mavica models. In our testing, the camera's Automatic and Twilight exposure modes didn't do extremely well in low light situations (we got barely useable images at 0.5 foot candles, or roughly 5.5 lux), but this was still a drastic improvement over earlier models. We saw the best results when using the Shutter Priority mode, which gave us useable images as low as 1/16 foot candles, or only 0.13 lux (although the image was relatively dark, there's still a good amount of detail). This is really extraordinarily dark, and the FD-95 does as well or better in this category than the vast majority of digicams currently on the market. (June, 2000)
We suspect the exceptional low light performance of the FD95 has much to do with its 12-bit digitization (most digicams use only 8 or 10-bit digitization). The 12-bit A/D (analog/digital) conversion of the FD95 also shows up at the other extreme of the tonal range as well: We found that the FD95 did an unusually good job of preserving detail in strong highlights, as seen in our outdoor portrait test shot, taken under direct sun, and in the strong highlight on the front of the house in our far-field test. The FD-95 showed really exceptional tonal range across the board.
 Flash
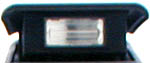
FlashThe MVC-FD95 is equipped with a handy pop-up flash that Sony rates as effective from 2.7 to 8.3 feet (0.6 to 2.5 m). We actually found it to be quite effective as far out as 15 feet, without much loss of brightness. A flash button on the back panel of the camera cycles through Automatic, Red-Eye Reduction, Forced and Suppressed flash modes. You can adjust the flash intensity through the capture menu, with options for High, Normal and Low. We like this flexibility, especially when combined with the Aperture and Shutter Priority modes. By playing with the flash intensity and other exposure settings, we found we could achieve a fair bit of control over the final images, using the flash for "fill" illumination in otherwise brightly lit situations. An external flash sync connection and an accessory shoe mount on top of the camera (without flash contacts) give you even more control over flash exposures - a benefit we greatly appreciate.
When we tested the FD95, we fortunately still had a Sony HVL-F1000 dedicated external flash unit on hand from our testing of other Sony cameras. We used this flash with the FD95, both in our standard "indoor flash" test setting, as well as for some casual testing under a variety of circumstances. We found it to be a surprisingly capable flash system, albeit one with a few quirks.
In our standard indoor portrait testing, we found that the F1000 tended to underexpose consistently, such that we had to set the camera's flash level control to the High setting. (The camera's flash level setting does control the F1000's light output, in the same fashion as it does the built-in strobe.) Some experimentation revealed that this tendency toward underexposure was because the flash meters its output based on the signal from an area sensor that apparently has a very broad angle of coverage. The white walls of the room we were shooting in reflected so much light back to the flash that it tended to quench early, resulting in the tendency toward underexposure. The available High/Normal/Low settings on the camera produce a fairly limited range of adjustment, but it turns out there is an easy workaround, at least in situations where you want to boost the F1000's light output: Simply tape a small piece of neutral-density gel across the red sensor on the front of the flash unit, and you'll trick it into boosting its output proportionately. (In other words, a 1-stop ND gel will boost the light about by about 1 f-stop or EV level.)
We were pleased to see that the camera and flash worked together in all exposure modes, with the flash adjusting its output to match the camera's aperture setting or light sensitivity quite nicely: In aperture-priority mode, the flash responded properly to apertures across the full range from f/2.8 to f/11, while in Twilight Plus mode, the flash handled the camera's increased light sensitivity exactly right. (We were interested to note that with long shutter times, the flash uses a "rear curtain" sync, triggering at the end of the exposure, rather than at the beginning. This is nice because it means moving objects will have any available-light blurs trailing the sharp flash-exposed image, rather than preceding it.) In Macro mode, the flash defaults to off, but you can still use the forced-flash option to make it fire. Another nice touch is that the flash turns on or off along with the camera, meaning that the camera's auto power-down for battery savings also powers down the flash, preserving its batteries as well. Overall, a very nicely implemented flash system, more so than we had realized in our use of it with other Sony cameras. A lot of capability from a very simply designed unit.
Movie Mode
Sony once again included the popular movie mode on the FD95, which allows you to record both images and sound. You can record up to 60 seconds at the 160 x 112 size and up to 15 seconds at 320 x 240. Within these time frames, the camera records both image and sound as long as you hold down the shutter button. If you just press the shutter button momentarily, the camera records for 5, 10, or 15 seconds, as determined by the Record Time setting on the File menu. Movies are recorded as MPEG files and you have the same amount of exposure control as with still images. Another nice feature is that you can operate the zoom control while recording movies, for more cinematic effects.
Special Recording Modes
The MVC-FD95 also features some additional recording modes for still images. The E-Mail option records a still image at the 320 x 240 JPEG size for easy e-mail transmission, in addition to a full-resolution one, at whatever image size you've selected in the menu system. This lets you capture full-resolution images to keep, while at the same time getting smaller versions that you can just drop into an email to share with others. The Voice option lets you record a sound byte to accompany a still image (up to 40 seconds). Finally, the Text mode records a black and white GIF-formatted image file, perfect for recording meeting notes or whiteboards. The GIF format records a high-resolution black/white image with a great deal of compression (that is, the resulting images take up very little memory space), but the penalty paid is the very long processing time required to reduce the full-color image captured by the CCD to the GIF format. (25 seconds or more for a full-resolution image.)
Picture Effects
A playful feature carried over from some of Sony's other digicams, the Picture Effect option in the capture menu lets you get a little creative when composing images. Negative Art reverses the color and brightness of the image. Sepia and Black & White change the image into monochromatic tones. Solarize divides colors and tones in the image into discrete levels, making it look more like an illustration. Note that these options are "live" in record mode, so you get a preview of the effect on the LCD monitor before you snap the image and they add a little fun to your shooting.
Reader Comments! --> Visit our discussion forum for the Sony MVC-FD95!

Follow Imaging Resource: