Canon PowerShot G2Canon updates their very popular G1 with a 4 megapixel CCD and improved color management.<<Optics :(Previous) | (Next): Shutter Lag & Cycle Time Tests>> Page 6:Exposure & FlashReview First Posted: 08/16/2001 |
Exposure
|
Shutter Priority mode puts you in control of the shutter speed setting (from 1/1,000 to 15 seconds), while the camera chooses a corresponding lens aperture. As with the Program AE mode, you maintain control over all other exposure options. Aperture Priority works along similar lines, except that you control the aperture (f/2 to f/8) and the camera chooses the best shutter speed. Both the shutter speed and aperture values are displayed on the LCD monitor. If the camera doesn't agree with the exposure settings you've selected, the LCD indicators will turn red (when you half press the Shutter button), letting you know that either the aperture or shutter speed needs to be corrected.
The shutter speed range on the G2 is expanded over that of the G1 in several respects. First, the maximum exposure time has been nearly doubled, from 8 to 15 seconds. Second, the high shutter speed/aperture combinations have been considerably extended. The G1 could only use the shutter speeds between 1/640 and 1/1000 at an aperture of f/8. With the G2, the 1/640 speed can be used with apertures ranging from f/2.8-f/3.5 through f/8, the 1/800 speed with apertures ranging from f/3.5-f/5.0 to f/8, and the 1/1000 speed with f/8 only.
Several preset exposure modes are also available for shooting under special conditions. Pan Focus mode sets the camera lens at maximum wide-angle, so your subjects will be in focus close-up and faraway (25.6 inches or 65cm to infinity). Portrait mode uses a large aperture setting to reduce the depth of field, resulting in blurred backgrounds and strong focal emphasis on the primary subject. Landscape mode uses a small aperture to keep both the foreground and background in sharp focus. A slow shutter speed is also common in Landscape mode, so it's recommended that you use a tripod.
Night Scene mode uses a slow shutter speed to capture the color and detail of an evening setting, along with a flash exposure to illuminate the primary subject in the foreground. When slow shutter speed and flash are used together, the overall scene is more evenly exposed. This mode can also be combined with the Red-Eye Reduction flash for portraits. A tripod is also recommended when working in Night Scene mode, and portrait subjects should be warned to stay still after the flash, until the shutter is closed. Color mode offers a range of color saturation settings for capturing images, either Vivid, Neutral, Black and White, or Sepia. (This last is a new feature on the G2, not present on the G1.)
A quick-review mode allows you to confirm the recorded image immediately after exposure. To access the Review mode, you simply continue to hold down the Shutter button after the exposure. Or, you can turn on the Review function through the Record menu, which displays the image for either 2 or 10 seconds. You can immediately erase the image by pressing the "*" button, which pulls up a small erase menu on the bottom of the monitor. Press the Right arrow button to highlight "OK" and press the Set button to complete the erasure.
Exposure compensation can be adjusted from –2 to +2 exposure values (EV) in one-third-step increments. The camera's metering system offers two operating modes: Center-Weighted Averaging and Spot Metering. Center-weighted averaging is based on an averaged reading of the overall scene, plus a reading from the center of the viewfinder or LCD monitor. Spot metering reads only the center of the image—that area that falls within the crosshairs of the viewfinder or within the small square that pops up on the LCD monitor when you press the Spot Meter button. Spot metering is useful when you're shooting under backlit conditions. In these situations, you can use the spot meter to obtain a reading of the area you want properly exposed, then lock the exposure with the AE Lock function, (activated by pressing the "*" button on the back panel), and recompose your shot for the final exposure. (Note: depressing any other button on the camera will disengage the Spot Metering function.)
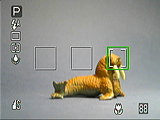 Through the Record menu (Spot AE Point submenu), you can also link the Spot Metering area to one of three adjustable focus points, selectable by pressing the Set button in Program, Tv, Av, or Manual Shooting modes (with the Record Menu turned off). The focus points are displayed as outlined boxes lined up horizontally across the screen. The Right and Left Arrow keys allow you to select one of the three boxes, which when highlighted, turns from a white outline to green.The green box then becomes the primary metering area. Press the Set button again to eliminate the two boxes that are not highlighted, and the square turns white again, until you depress the Shutter button halfway. When the exposure and focus are set, the outline turns green. If there is a problem with setting the exposure or focus, the outline turns yellow. When the Spot AE Point option of "AF Point" is selected, and the spot metering option is activated, the AF box acquires a set of inner brackets indicating that spot metering is active, and that the AF box is where the metering is being done. If the Spot AE Point is set to "Center", the white brackets will appear in the center of the LCD screen, indicating that this is where the Spot AE metering is being done.
The G2 offers eight White Balance modes, including Auto, Daylight, Cloudy, Tungsten, Fluorescent, Fluorescent H (for daylight-balanced fluorescents), Flash, and Custom. The Custom mode allows you to manually set the white balance by holding a white card in front of the camera and pressing the "*" button to set the value. ISO film speed equivalents are set in the Record menu, with a choice of Auto, 50, 100, 200, or 400 ISO values. The higher the ISO setting, the more you can extend the camera's exposure range in low-light situations. Just keep in mind that higher ISO values have slightly lower quality levels. Other manual exposure adjustments in the Record menu include Sharpness, Contrast, and Saturation controls.
 Flash
FlashThe G2's built-in flash operates in one of five modes: Auto, Red-Eye Reduction (Auto), Red-Eye Reduction (Flash On), Flash On, and Flash Off. The Auto mode enables the camera to determine when flash is necessary, based on existing lighting conditions. Flash On means that the flash fires with every exposure, regardless of lighting conditions, and Flash Off completely disables the flash. The two Red-Eye Reduction modes fire a small pre-flash before the full flash, to reduce the red-eye effect in portraits. All flash modes are accessed by pressing the Flash / Index button to the left of the optical viewfinder.
The amount of flash power can be adjusted from -2 to +2 EV in one-third-step increments by the using the four-function Exposure Compensation button on the camera's back panel. (Depressing the button four times cycles to the Flash Exposure Compensation adjustment.) You can also lock the Flash Exposure Setting (FE Lock) for a specific area of your subject, just as you would with a normal exposure. Simply center the portion of the subject you want to have metered and press the "*" button to lock the flash exposure. The flash will fire a pre-flash to lock the exposure reading, then you can recompose your image and make the exposure with the FE Lock in place. (Note: Pressing any other button after the "*" button will cancel the flash exposure lock.) Canon rates the G2's flash effectiveness from 2.3 to 14.8 feet (70cm to 4.5m). (We didn't test the flash power on our prototype unit, as this sometimes changes in production models. We'll perform our own tests once we receive an initial production unit.)
 In addition to its built-in flash, the G2 features a hot shoe for mounting more powerful external flash units. Canon recommends using its own Speedlight 220EX, 380EX, 420EX, or 550EX models, but other manufacturers' models should work as well. The instruction manual notes that when using another manufacturer's flash unit with the G2, the maximum shutter speed for flash synchronization is 1/125 second. (The onboard flash syncs to a maximum shutter speed of 1/250 second.) New with the G2 is automatic Speedlight EX recognition in Aperture-Priority mode. When the camera senses that a Canon external flash is mounted and in ready mode, it automatically sets the shutter speed at 1/60 second. Note though, that the G2 must be in full manual mode to use with other brands of flash units. (Since the Aperture Priority mode will normally select a very slow shutter speed when an "unrecognized" flash unit is attached.)
Another new enhancement in the G2 is that (thanks to the aforementioned aperture-priority behavior) it is now compatible with Canon's Macro Ring Lite, model number MR-14EX. Ring lights are great for evenly illuminating close-in macro subjects, and the availability of one for the G2 is a decided plus for many potential industrial and medical applications.
Auto Exposure Bracketing
The Auto Exposure Bracketing (AEB) mode is the third function controlled by the Exposure Compensation button on the G2's back panel. It automatically captures a series of three images, each at a different exposure setting. You can manually set the exposure step size in one-third-step increments, covering a range from -2 to +2 EV, by depressing the Exposure Compensation button three times to activate the mode and using the arrow buttons to choose the amount of variation between exposures. Depress the Set button, then fully depress the Shutter button to start the series. The camera makes all three exposures with just one press of the Shutter button. This function cannot be used with flash photography. If the flash fires, only one image will be recorded.
Continuous Shooting
Controlled by the Continuous / Self-Timer / Wireless Remote button on top of the camera, the G2's Continuous Shooting mode captures multiple consecutive pictures at up to 1.35 frames per second (fps). (Canon rates this option's speed at 1.5 frames/second, but 1.35 fps was the fastest we measured in our own tests.) This frame-capture rate may vary, depending on image quality, functions in use, and the amount of internal memory available (1.35 fps is based on a "Small" image quality setting, "Economy" JPEG compression, and the LCD monitor and flash turned off. This rate decreases to 1.03 frames/second for "Large/Fine" settings.). The G2 will continue to capture images as long as the Shutter button is depressed, or until the camera's internal memory fills up. We noticed one slightly odd behavior with the G2's continuous shooting mode however: The interval between the first and second shot of the series is always about 0.1 - 0.15 seconds longer than subsequent ones, regardless of the size or quality setting being used.
Through the Record menu, you can also select a High Speed Continuous Shooting mode. In this mode, the capture rate is much faster than normal Continuous Shooting (approximately 2.7 fps in our measurements, rated at 2.5 fps by Canon).
We were puzzled by the difference between the two Continuous Shooting modes, and so asked Canon what the difference was. It apparently has to do with how the camera manages its buffer memory and CPU activity. Both continuous modes capture data directly to the buffer memory, but the "standard" continuous mode does some amount of the signal processing on the fly. The result is that cycle times in normal mode are slower, but the camera can record longer bursts before having to pause to empty its buffer. High Speed continuous mode captures more quickly, but doesn't do the processing on the fly, with the result that fewer shots can fit in the buffer memory before having to empty it.
Movie Mode
The G2 also offers a Movie mode, which is accessed by turning the Mode dial on top of the camera to the miniature movie camera symbol (a camera will appear in the upper left corner of the LCD display). The AVI / Motion JPEG files are recorded at either 320 x 240 or 160 x 120 pixels, at approximately 15 frames per second. (This is an enhancement over the G1, which had only the 320x240 size available.) Recordings can last as long as two minutes, depending on the amount of memory available on the CompactFlash card and the resolution setting. (Max record time in 320x240 mode is 30 seconds, the two minute recording time is possible only in 160x120 mode.) To begin recording, you simply press the Shutter button all the way down and hold it there until the red circle in the upper right corner of the LCD disappears. The flashing green LED light next to the eye-level viewfinder indicates that the camera is storing the movie. When finished, you can view the recording by switching the camera's Main dial to the blue Replay symbol, scrolling to the last frame of the movie with the arrow buttons, and depressing the Set button. The camera will play back both moving images and sound. (Note that the recording options are largely preset in Movie mode: JPEG encoding, Resolution, Exposure Compensation, White Balance, and Manual Focus are the only adjustable functions.)
Stitch-Assist Mode
The Stitch-Assist mode records a series of overlapping images that can be stitched together to create horizontal or vertical panoramas or stacked, 2 x 2-frame rectangular composites. A framing guideline for each format appears in the LCD monitor to help line up successive shots. For the horizontal and vertical panoramas, you can take as many images in a series as you want, enabling you to record a full 360-degree circle of the surrounding scenery. The 2 x 2 mode uses a series of only four images, starting from the top left corner and moving in a clockwise direction, to create a complete composite. Once the images are downloaded, you can use Canon's PhotoStitch program to seamlessly combine the images in your computer.
Self-Timer Mode
The Self-Timer button on top of the camera also controls the Continuous Shooting and Remote operating modes. When set to the Self-Timer / Wireless mode, the camera displays the standard self-timer icon (a clock counting down) in the LCD display, and the self-timer icon with a remote (radar) symbol in the LED panel on top of the camera. When in Self-Timer mode, depressing the Shutter button activates a 12-second countdown, during which a bright blue lamp on the camera's front panel blinks, gaining speed in the last two seconds. If the camera's Beep function is turned on in the Setup menu, you will also hear the beep counting down. While in Self-Timer mode, you can also trigger a two-second countdown by pressing the Shutter button on the remote control.
Remote Sensor/Transmitter
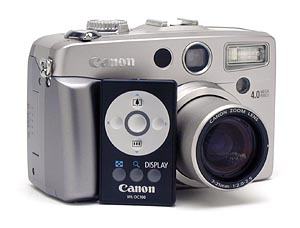
The G2's Wireless Remote Control allows you to trigger a two-second self-timer countdown from as far away as 16.4 feet (5 meters) in front of the camera. It can also be used to adjust the optical zoom lens with its two Zoom buttons, and activate the LCD monitor with its Display button. By rotating the LCD monitor so that it faces you (or the subject), you can use the Zoom buttons to compose the image and the Display button to scroll through the G2's LCD information screen to check exposure settings. In Replay mode, the remote control can be used to scroll through stored images, scroll around areas within a magnified image, view an index of up to nine captures, and replay movies.
Reader Comments! --> Visit our discussion forum for the Canon PowerShot G2!

Follow Imaging Resource: