The Imaging Resource
Quick Review
Polaroid PhotoMAX PDC 2300Z Digital Camera Creative Kit
|
|||||||||||||||||
Introduction
|
|||||||||
Long a household word in film-based photography, Polaroid started out as a strong contender in the digital marketplace, introducing one of the first high-quality digicams -- the PDC-2000 -- in 1996. At a retail price of $2,500, it fell squarely between the low-end digital point-and-shoots and the expensive high-end portable digital cameras, making it a popular choice for studio-based photographers. Since then, Polaroid has introduced a number of digital imaging products, including the PDC-3000 (another professional quality camera), several high-quality desktop film scanners, a line of complete digital studio systems, and the PhotoMAX series of low-end consumer digicams. The PhotoMAX 2300Z is the first in that series to offer 2-megapixel resolution with a robust imaging software package. As we'll see though, the 2300Z really doesn't live up to the Polaroid tradition of imaging excellence.
Overview
The PhotoMAX 2300Z is marketed as a complete Digital Camera Creative Kit, providing all the tools you need to capture and download your images to a Windows-based computer (including e-mail capabilities). The camera design and operation are very basic, with only one Record mode and a handful of controls to adjust image resolution, flash setting, exposure compensation (brightness), and white balance (color). It's targeted at the novice or amateur photographer who doesn't want to make a lot of exposure decisions -- just point the camera and shoot. The 2.3x optical zoom lens has a focal range equivalent to a 38-90mm on a 35mm camera, providing just enough flexibility to shoot indoors in cramped interiors or outdoors where your subject can be distant or close-up. (Note: a 90mm zoom is adequate for location portraiture but not great for capturing sports action from a distance.) Image resolution is 2.3 megapixels, high enough to make 8 x 10-inch prints or very sharp 5 x 7's.
The 2300Z comes equipped with a built-in flash, 8MB CompactFlash memory card, AC adapter, video cable (for hooking up to a TV), two computer connection cables (Serial port and USB), camera case, wrist strap, and Arcsoft's PhotoMAX Pro Software. The software supports Windows computers only, with image acquisition, photo manipulation (by ArcSoft), special effects, printing setups, optional frames and titles, e-mail, and Internet access to the PolaroidDigital website, where you have 50MB of free storage space provided with the purchase of a camera. While we appreciated the nice complement of supplied accessories (including the all-important AC adapter, which is usually sold as an option), we were disappointed with the difficulty we had in performing simple operations, such as turning the Mode dial or removing the CompactFlash card or AA batteries from their compartments. Latches tended to stick and the Mode dial was very difficult to turn -- with only small plastic nubs around the edges to provide a grip for your fingers.
The 2300Z's Mode dial sets the camera's main operation modes, including Record, Play, Setup, Erase, and PC connection. Each mode has a very short on-screen menu, activated by the Menu button and navigated with the Zoom lever on top of the camera (see Camera Operation). Selections are made with the OK button, which is located directly underneath the Menu button on the back panel. The LCD monitor is activated by the LCD button (also on the back panel) or by engaging the Macro and Digital Zoom modes. (Unfortunately, once you turn the LCD monitor on, you can't turn it off again without switching off the camera.) To our eye, the LCD image display is very poor, with dark muted colors that are difficult to see (impossible in sunlight). In fact, we found it necessary to adjust the monitor to its brightest setting (+5) just to lighten it up enough so we could see what we were shooting indoors.
On the positive side, the optical viewfinder is very clear, and it zooms along with the 2.3x lens, so you have a pretty accurate view of your scene without having to turn on the LCD menu at all. (Framing was also pretty good as far as optical viewfinders go.) In general, the control buttons were well placed, with the four non-menu adjustments lined up along the Status Display panel on top of the camera (Quality / Resolution, Macro, Self-Timer, and Flash). Adjustments for these buttons are reported as black icons in the Status display window, making it very easy to follow along as you make changes. The shutter button was relatively slow, with a long delay between the time you press down all the way to the moment it actually fires the shutter.
Basic Features
- 2.3-megapixel CCD with six image quality modes

- Optical viewfinder
- 1.8-inch color LCD display
- 1.3-inch black-and-white Status display
- All glass 2.3x zoom lens (equivalent to 38-90mm)
- 2x Digital zoom
- Built-in flash
- CompactFlash removable storage, 8MB CF card included
- USB or Serial computer connection
- Four Alkaline, Li-Ion, NiMH, or NiCd AA batteries (4 Alkaline batteries included)
- AC adapter included
- Polaroid PhotoMAX Pro Software CDs (Windows only)
Special Features
- Macro (close-up) lens adjustment
- White balance (color) adjustment
- Exposure compensation (lighten / darken) control
- Self-timer option for delayed shutter release
- Slide show playback feature
- NTSC video cable for viewing images on a TV
Recommendation
The PhotoMAX 2300Z is simple to operate and provides a fairly robust hardware and software package (if you're a Windows user!). However, we'd like to see some design improvements before we put it on our recommended buyers list. At $399, we would expect better quality parts and smoother operation, especially with functions like the Mode dial, CF card eject, and camera battery installation. The camera is pretty bulky, which appeals to some users, but for our tastes we prefer a more streamlined model. We also felt that image quality could be better, particularly in the current market: At $299 with a zoom lens, this would be a marginally OK deal, but at $399, you can do a lot better these days. If you want a complete digital imaging package, and don't mind the minor inadequacies, this just may fulfill your needs. However, we recommend trying it out in the store before you take it home.
Camera Design
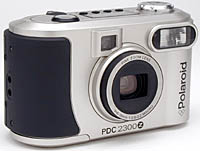
The Polaroid PhotoMAX 2300Z is a relatively large point-and-shoot digicam that measures approximately 4.7 x 2.5 x 2.75 inches (120 x 64 x 70mm) and weighs about 14 ounces with batteries installed. The heavy duty polycarbonate shell has a brushed metallic appearance, with a goldtone body color and black and silver highlights. Overall, it's a bit bulky compared to other digicams with similar features, but it should fit comfortably in a large pocket or purse, or you can carry it in the supplied camera case with a belt loop on the back.
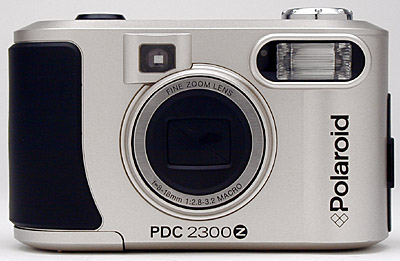
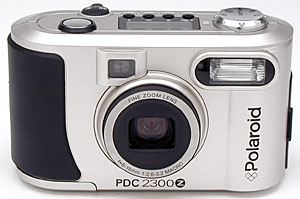
The front of the camera houses the viewfinder window, built-in flash, and a telescoping 2.3x optical zoom lens (equivalent to a 38-90mm on a 35mm camera). A sliding lens cover opens when the camera is powered on in Record mode. Just to the left of the flash reflector is a hidden LED lamp that glows red during the Self-Timer countdown (blinking for the last two seconds before exposure).
The right side of the camera is completely covered by a black rubber hand grip that wraps around the front and back sides of the camera about an inch in each direction. In the very center of the right seam is a set of two 1/8-inch holes through which you must thread the thin cord of the nylon wrist strap. To the left of these holes is the CompactFlash card compartment, covered by a black plastic door that virtually blends into the hand grip. The eject button at the top of the CompactFlash slot is somewhat difficult to access, pushing the card out only a fraction of an inch -- just barely enough to grab the corner and pull it out completely.
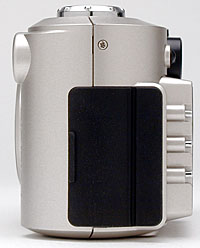
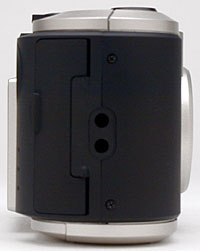
The camera's left side is relatively plain, with only a flexible rubber door covering the DC In, Video Out, and Digital connectors. The door is built to be securely pushed back into the compartment, with small rubber plugs that fit into each connector when the cover is on.
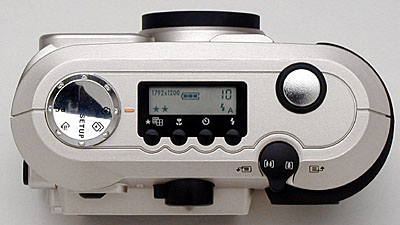
The top of the camera houses the Mode dial on the left and the Shutter button and Zoom lever on the right. Small nubs surround the outer edge of the Mode dial, positioned at each Mode setting (See Functions below), to help rotate the dial. (We found this Mode dial to be much harder to turn than other cameras we've tested, probably due to its plastic construction and smooth surface.) The Zoom lever is on the back edge of the top panel, just above the camera's thumb rest for easy access. It doubles as a navigational tool for scrolling through the camera's on-screen menus and image playback. In the center of the top panel is a small LED status display for indicating battery status, image resolution, remaining pictures, flash, and the image compression factor (indicated by one, two, or three stars). Four small black buttons along the bottom of the Status display control (left to right) include: Image Quality / Resolution, Macro, Self-Timer, and Flash modes.
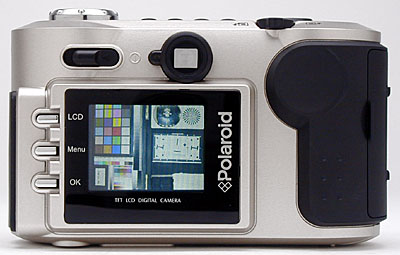
The camera's back panel houses the power switch (top left), optical viewfinder (top right), and 1.8-inch LCD monitor -- all centered on the left side of the panel. The LCD monitor sits on a raised platform (approximately 3/8-inch above the camera surface), with three control buttons along the left edge. The three rectangular silver buttons include (top to bottom): LCD, Menu, and OK. The LCD button turns the monitor on and off, the Menu button activates on-screen menu options, and the OK button selects menus and verifies menu option selections. A red LED lamp next to the optical viewfinder indicates camera status -- glowing steadily when the camera is powered on or when it processes captured images. We found the LCD image to be very low quality and difficult to see -- almost unusable in bright sunlight. (We had to adjust the monitor to its brightest setting to view an on-screen image even in normal room light.)
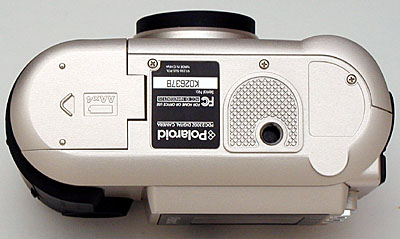
The bottom surface of the camera has a plastic tripod screw hole on the left side and a battery compartment door on the right, far enough apart to allow access to the batteries when the camera is mounted on a tripod. The battery compartment door slides to the right and opens downward, and like many of the other camera's controls, it is a little difficult to maneuver.
Camera Operation
The PDC 2300Z is a fully automatic point-and-shoot digital camera with a minimum of menu options and a few clearly marked external controls. Overall, these controls are well positioned and fairly easy to follow, however our biggest complaint is with the Mode dial, which is constructed of an inexpensive plastic base coated with silver metallic plating. The small plastic nubs around the dial's edges are positioned to mark the different mode settings and to provide a grip for turning the dial, but we found it very stiff and difficult to operate. Each mode has its own settings menu, activated by the Menu button on the left side of the LCD monitor. Once in the menu, you scroll through selections with the Zoom lever on top of the camera and press the OK button whenever you want to access or confirm a highlighted selection. Four small buttons on top of the camera adjust the image Resolution and Quality, close-up (Macro) focus, 10-second Self-Timer, and Flash settings. These are located conveniently close to the camera Status LCD, so you can see the adjustments on-screen as you make them, without having to power up the large LCD monitor. Camera operation is definitely a two-handed affair, due in part to its large size and the way the controls are spread out over both sides of the top and back panels. The camera controls are as follows:
External Controls
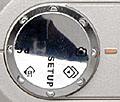
Mode Dial: The largest control on the camera body, the Mode Dial is positioned on the far left side of the top panel. Operating modes include: Record, Play, Erase, Setup, and PC connection. (See descriptions and menus below.)
Shutter Release: Located on the opposite side of the camera's top panel, this button fires the shutter to record an image or triggers the countdown in Self-Timer mode.
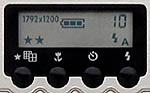
Status Display: In the center of the camera's top panel, the Status display panel indicates remaining battery power, images available, and the external camera settings.

Resolution / Quality Button: The first in a row of four small buttons along the edge of the Status display panel, the Resolution / Quality adjustment changes image resolution and compression quality levels. There are six possible combinations: 1,792 x 1,200 pixels at Low, Medium, and High compression ratios, and 896 x 600 pixels at Low, Medium, and High ratios. Low is the best compression setting, indicated by three stars on the Status display; Medium is two stars; and High is one star.

Macro Mode Button: The second in a row of four small buttons along the edge of the Status display panel, this button adjusts the camera lens to focus on close-up subjects. The Macro shooting range is approximately 1.5 to 18 inches (3.8 to 46cm). When engaged, the Macro flower icon is displayed on the small Status display panel and the large LCD display automatically turns on.

Self-Timer Button: The third in a row of four small buttons along the edge of the Status display panel, this button is used to activate the 10-second countdown. Once activated, the red Self-Timer lamp on the camera's front panel glows steadily for eight seconds and blinks for the last two seconds before firing the shutter. When engaged, the Self-Timer clock icon is displayed on the small Status display panel.

Flash Mode Button: The fourth in a row of four small buttons along the edge of the Status display panel, this button is used to control Flash settings. Options include: Auto Flash, Fill Flash, No Flash, and Red-Eye Reduction. Settings are displayed on the small Status display panel.
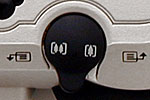
Zoom Lever: On the right side of the camera's top panel, the Zoom lever controls the 2.3x optical zoom lens and 2x Digital Zoom. Pushing the lever to the left zooms out to the wide-angle setting, while pushing it to the right zooms in to the telephoto setting. Digital Zoom is activated by pressing the OK button when the LCD screen is turned on in Record mode, displaying a "2x D Zoom" message in the lower left corner of the monitor. (Note: The 2x Digital Zoom automatically reduces the resolution to 896 x 600 pixels, which is indicated in the Status display panel.) The Zoom lever is also used to scroll through menu settings on the LCD monitor.
![]()
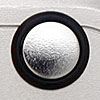
Power Switch: Located at the top left of the back panel, next to the optical viewfinder, this sliding black switch turns the camera on and off.
![]()
LCD Button: Located on the left side of the LCD monitor, this top button is used to turn the LCD monitor on or off.
![]()
Menu Button: Located on the left side of the LCD monitor, this middle button is used to activate the settings menu in each camera mode.
![]()
OK Button: Located on the left side of the LCD monitor, this bottom button is used to select and confirm menu options
Mode Menu Options
Record Mode: This setting records still digital images. The menu options are limited to four adjustments:
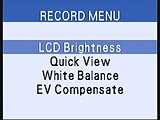 LCD Brightness: -5 to +5
- Quick View: On or Off (Displays image immediately after capture)
- White Balance: Auto, Daylight, Incandescent, Fluorescent 1, Fluorescent 2
- Exposure Compensation: -1.5 to +1.5 EV in one-third-step increments
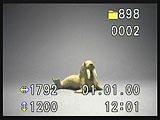
Play Mode: The Play mode displays captured images on the LCD monitor. Pressing the LCD button in Play mode brings up the file size, folder number, image number, and the date and time the image was recorded. Pressing the LCD button a second time brings up a nine-image index display of all images recorded on the card. Play menu options include the following adjustments:
 LCD Brightness: -5 to +5
- Video Mode: NTSC or PAL
- Slide Show: Sets delay to 1, 2, or 3 seconds
- Folder: Allows you to select a folder to display
- Protect Files: Write Protect Current or All files; or Unprotect All files
Setup Mode: The Setup mode instantly brings up the Setup menu with the following options:
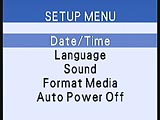 Date / Time: Set date and time
- Language: Set language to English, French, German, Spanish, Japanese, and Portuguese
- Sound: Turns beep sound on or off
- Format Media: Reformats CompactFlash card, erasing all images on the card, including protected ones
- Auto Power Off: Sets Power Off function to 1, 2, or 3 seconds
 Erase Mode: Switching to this mode brings up the captured images on the LCD monitor with the image information displayed (see Play mode above). Pressing the LCD menu button once eliminates the information. The Menu provides only one option:
 Erase Menu: Erase Current or Erase All images
PC Mode: This setting is used to transfer images directly from the camera to your computer, with either the serial or USB cables supplied. The camera must be turned off before inserting both cables, but the computer can remain on when inserting the USB cable (or turned off when connecting the serial cable). Polaroid suggests using the supplied AC adapter when downloading images to save battery power.
Sample Pictures
See our sample pictures and test analyisis here.
Specifications
See the specifications sheet here.
Recommended Accessories
- Larger memory card (at least 16MB)
- Rechargeable NiCd batteries w / charger
- CompactFlash Card reader
Conclusion
The PDC-2300 offers a fairly competent all-in-one imaging solution, with a relatively easy to use camera and good software package. We didn't feel that it offered good value, at least at the current (June, 2001) price point. At $399, there are some genuinely excellent products on the market that will offer much better image quality, smoother operation, and just a better overall picture-taking experience. If Polaroid were to drop the price to $299, it would start to be interesting, at $199, it'd be a good deal. Unless or until Polaroid makes such pricing moves though, you can do better elsewhere.

Follow Imaging Resource: