Back
to Full Canon PowerShot Pro1 Review
Back
to Full Canon PowerShot Pro1 ReviewGo to Canon PowerShot Pro1 Data Sheet
Go to Canon PowerShot Pro1 Pictures Page
Up to Imaging Resource Cameras Page
Use your browser's "Back" button to return to the previous page, or the links at the top and bottom of this page to navigate to related information. If you have difficulty fitting the text on this page onto your printer output, simply resize your browser window to a narrower width and print again.
Remember us when it's time to buy!
Dave here: Have our reviews been helpful to you? (Is this article you're reading right now useful?) Preparing this level of information on as many products as we do is incredibly hard work, not to mention expensive. Things on the Internet may look like they're free, but they're not. (As a lot of big dot.com companies are finding out these days.) Somewhere, somebody has to pay to produce worthwhile content. YOU can help us though, by remembering us when it comes time to make your purchase. Would you consider coming back to our site and clicking-through to one of our advertisers to make your purchase? Every dollar you spend with one of our advertisers helps us directly (in affiliate fees) or indirectly (the advertiser will keep renewing their ad contract with us). To make it easy for you to support us, here's a URL you can visit, to see all our current advertisers, with links to click on that will register your visit to them as having come from our site. It's up to you where you buy, but Mike, Mike, Kim, Yazmin, Marti and I would be really grateful if you'd help us out by choosing one of our advertisers to purchase from.
Thank you for your support!
Dave Etchells, Founder & Publisher
Visit our "Buy Now" Page:
https://www.imaging-resource.com/buynow.htm
Back
to Full Canon PowerShot Pro1 Review
Go to Canon PowerShot Pro1
Data Sheet
Go to Canon PowerShot Pro1
Pictures Page
Up to Imaging Resource Cameras
Page
Canon PowerShot Pro1New level of sophistication takes over the top spot in the PowerShot line. Review First Posted: 05/14/2004 |
|
 |
|
8.0-megapixel CCD for 3,264 x 2,448 pixel images |
| |
7x optical zoom lens, 28-200mm equiv., f/2.4-3.5 (First L-series lens in a PowerShot!) | |
| |
Auto, Scene Program, Program, and Manual exposure modes | |
| |
Unique tilt/swivel LCD panel | |
| |
EVF/LCD works down to very low light levels |
Manufacturer Overview
The PowerShot Pro1 is the latest in a long and highly popular line of Canon
digicams. Canon U.S.A. has long been a dominant player in the film and digital
camera markets, well-known for their high-quality optics, technical innovations,
and aggressive product development. Over the last few years, they've developed
a powerful lineup of digital cameras, ranging from surprisingly feature-rich
entry-level models, all the way to the extreme high end of professional digital
SLRs. At the high end of their consumer line, the PowerShot G2, G3, and G5 have
been perennial favorites on the Imaging Resource website, while at the lower
end, last year's PowerShot A70 was the most popular camera on the entire site.
In the SLR realm, they revolutionized the industry in 2003 with the introduction
of the Digital Rebel, the first d-SLR to sell for under $1000. With the introduction
of the 8 megapixel Pro1, the PowerShot line has a new flagship model, with a
unique 7x zoom lens, ultrasonic focus motor, and an EVF/LCD viewfinder combination.
Read on for all the details!
High Points
Executive Overview - Reviewer Impressions
In the past, this section of my reviews has been a condensed description of each camera's features and functions. This time though, I decided to try something a little different, collecting together some of my impressions of the camera that would normally be scattered throughout the review, and relating a bit more of a sense of what the camera "feels like" to use. I'll see how people respond to this different approach, you'll probably find me switching back and forth between the two approaches for the next little while, until I finally decide which style to settle on. Meanwhile, here are some impressions of the Canon PowerShot Pro1:
With the identically priced Canon Digital Rebel already on the market, it's a little curious that Canon would also produce a high end PowerShot that competes directly with the Rebel for what would seem to be the same type of user -- the person searching for a little more from a digital camera, and one who is willing to pay $999 get it. In many ways the Pro1 actually surpasses the capabilities of the Rebel. Its high performance lens--the first PowerShot to offer Fluorite and UD glass--earns the distinctive red ring of Canon's professional L-series lenses, although to be frank, I still found very noticeable chromatic aberration and loss of sharpness in the corners of the Pro1's images. Its 8 megapixel sensor can capture higher resolution images than the Rebel's 6.3 megapixels (although the Rebel's larger image size does offer lower noise, which we'll get into later). The swing-out LCD display makes the Pro1 more versatile still, offering easy capture over crowds, down low, or in tight spaces where the Rebel owner would just have to point and pray. Then there's movie capability and intervalometer (time lapse) capability. Though the Rebel could do the latter with a little programming, the Pro1's movie mode is completely out of reach of the digital SLR for a number of reasons.
Other advanced features are also present on the Pro1 that the Rebel could have but doesn't. Items like flash exposure compensation, and first and second curtain flash sync, both of which appear to have been left out of the Digital Rebel to keep it from competing too well with its big brother the EOS 10D. To understand this apparent incongruity, it's important to consider that the Pro1 is the top of the PowerShot line, and the Rebel is the bottom of the EOS line, so some overlap is to be expected. The Pro1 was built to exceed the capabilities of the G5, and it does that with ease. The Rebel was built for quick, high quality still image capture with EOS lenses in a small, inexpensive package. Both have different purposes and are likely to attract different users with that same $1,000 to spend.
There will be many fence sitters nonetheless. For the occasional shooter who wants high quality, and the semi-pro who wants the benefits of digital he's become used to in the G-series digicams, the Pro1 offers a lot for the money. Because the beauty of the Pro1 is in its usability, I want to spend some time describing how it feels to use this unique camera.
Wrap your fingers around the well-formed grip and the Pro1 almost whispers, "Let's go." Representing years of PowerShot development, the control arrangement on the Pro1 is excellent. The three fingers of your right hand, middle to pinkie, are given a great hold, comfortably opposed by the sizeable thumb grip, perhaps the deepest we've seen. Your index finger rests on the chrome shutter release naturally, with the Main dial just a few millimeters away. To the immediate right of your thumb is the power control, Manual focus and AE/FE lock buttons, and to the left is the Mode dial. Just down to the left are the all important Function/Jump and Four-way navigator. These four main control groups are right within easy reach for natural and quick operation. Because there's no bulge on the left of the camera, the left hand naturally cradles the underside of the camera with the thumb and index finger free to control the zoom ring surrounding the lens. Whether using the LCD or EVF to compose, this arrangement is just right for handheld photography. To shoot low for a unique vantage, swing out the LCD and tilt it about 40 to 50 degrees and you can easily maintain this comfortable and stable grip.
When it's time to change the battery or CF card, just shift the balance of the camera to your left hand and use the right to pull the battery/CF door open. Its spring loaded mechanism takes over just beyond 60 degrees and opens the cavity wide. A press on the battery release or CF card button brings each out for easy replacement. No fumbling with different doors or turning the camera upside down as we saw in the G-series, and there's room for both thumb and forefinger to grab the CF card, unlike many of Canon's smaller cameras.
A light press on the back of the power toggle releases the lock to ease swinging the toggle left or right. A quick swing to the right puts you in Record mode, and the lens comes out quickly. If you accidentally go left into Playback mode, you can just press the shutter release and go directly to Record mode, an important feature to help prevent missing that great shot. Turn the Zoom ring and the lens gradually comes out over three inches at full length. The lens has focal length markings that appear as it moves out of the camera barrel, a nice touch for those of us accustomed to thinking of focal length in terms of millimeters, referenced to a 35mm frame. A press on the flash button doesn't immediately pop up the flash, but the mode icon does change on both LCDs. When you next press the shutter release halfway, the flash will pop up in time to get your shot.
The only significant drawback to the Pro1 becomes apparent at this point, which is a rather lengthy screen freeze as the camera focuses. It becomes more noticeable as you zoom in, since the camera's shutter lag becomes longer at telephoto focal lengths. (As is the case with most digicams.) Photographing pets and kids becomes more difficult, because the little creatures can sometimes get up and move out of your zoomed frame while you wait for the camera to do its focus calculations. Panning to track a moving subject is also almost impossible because of this delay. Normally this could be overcome with an optical viewfinder, but the Pro1 uses an Electronic Viewfinder (EVF), necessary to accommodate the unusually long zoom.
The zoom on the camera is indeed quiet and relatively fast. It is controlled by an Ultrasonic motor which makes it quiet, but its resolution isn't as high as I'd like. Turning the ring slowly moves the lens assembly in clear steps (I counted a total of 38 steps from wide to tele); because the zoom control actuates an electronic switch, it doesn't always respond as you turn it, if the camera is not ready. The zoom is nonetheless very fast and focus is quiet.
The AF point is the last aspect we should touch on. With a press on the Set button, it can be moved around 60 percent of the screen using the Four-way navigator, excellent for concentrating on the eyes in portraits. Spot metering can also be locked to this point via a menu setting.
With other extras like a built-in neutral density filter (to permit longer exposures under bright lighting), two macro modes (standard and Super), an extended capacity battery, and features you can only get with a non-SLR digital camera, like movie mode and stitch assist mode, it's clear that the Pro1 has a place in the photo enthusiast's bag. The ability to capture RAW images, the option to use the Adobe RGB color space, and the high resolution imager round out the picture. The Pro1 seems to be an excellent choice when detail and precision are important, because its images are excellent. The photographer wanting to capture action would be better served with a digital SLR in his bag though, because the electronic viewfinder and viewfinder freeze during the autofocus delay make these types of photography difficult.
Design
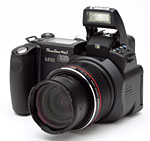
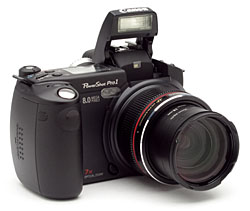
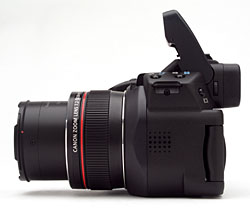
Following design cues from previous EVF-style cameras from a variety of manufacturers, the PowerShot Pro1 is nonetheless unique in both look and function. Dispensing with the G-series' boxy look, the Pro1 is built for efficiency. Whereas the G-series looked as though it was designed to hold a roll of film on the left side, EVF-style cameras put the lens as far left as they can. This allows easier access to the lens, which in the case of the Pro1 is helpful because it allows easier access to the manually-actuated zoom ring. Weighing in at 22.4 ounces (635 grams) without battery or memory card, the Pro1 has a bit of heft to it. However, the hand grip is substantial enough to balance out the weight of the body and lens and provide a secure hold, and its more compact size moves the center of gravity closer to the grip. The Pro1 is pocketable only in a large jacket pocket, and would be none too stealthy while there, but is still a more compact handful than you might expect if you've seen it only in pictures. While they're small, EVF-based cameras like the Pro1 warrant their own case, both for their shape and relative dollar value.
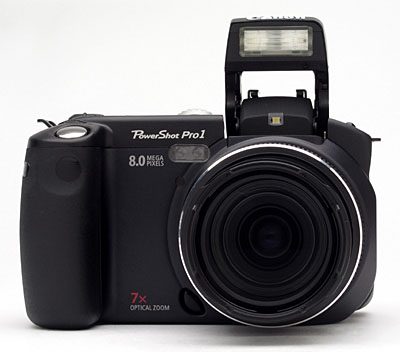
The Pro1's front panel houses the lens, built-in pop-up flash, autofocus sensor, self-timer lamp, accessory lens release, microphone, and one of two remote control sensors (on the front and right-front of the hand grip). The 7x zoom lens telescopes out about 2 1/4 inches from the camera body when the G5 is powered on, and retracts again when the camera is powered off. Zoomed all the way out to its maximum telephoto position, it extends a full 3 5/8 inches. The lens is protected by a small plastic lens cap. Unlike the lens caps of the G-series, the cap cannot be tethered to the camera body. The camera kit comes with a lens hood that mounts bayonet-style on the front of the lens. A deep hand grip on the right side of the camera provides a secure grip and good traction on the camera body for your fingers. Also visible on the front panel is a small button below and to the right of the lens. This is a latch for the bayonet-mount for accessory lenses. Pressing this latch lets you twist and remove the cosmetic lens barrel shroud, revealing a set of mounting flanges to which a lens adapter barrel attaches.
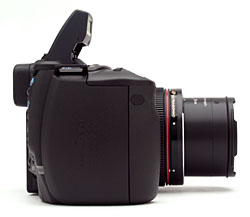
On the right side of the camera is a large sliding door that conceals the battery and CompactFlash slot. The door feels solid, and is mounted with a steel hinge. The camera accommodates both Type I and II CompactFlash cards, and unlike many current Canon cameras, there is more than enough room to remove the card after its released with the button. The battery is of the BP-511 style used on many Canon cameras, but the included BP-511A has more power, offering 1390 mAh vs the 1100 mAh of the original BP-511. At the top of the right side is an eyelet for attaching one end of the neck strap. (A nice, if subtle feature of the Pro1 is that its neckstrap eyelets are positioned close to the center of gravity, so the camera hangs fairly level from the neckstrap when it's powered down with its lens stored.) The secondary remote control sensor is also on this side of the camera, included in the design because both the optional Macro Ring Lite MR-14EX and Macro Twin Light MT-24EX block the front sensor. The CF card access lamp is also visible from this angle.
The left side of the camera has a speaker for playing back recorded sound, and the top left has the other neck strap attachment eyelet. From here you can also see the knurled zoom/focus ring around the lens and the diopter correction wheel on the side of the EVF.
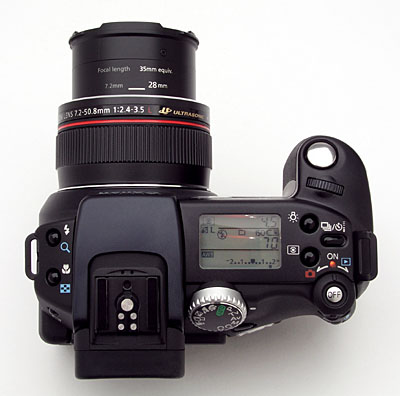
The Pro1's top panel features from left to right: Flash/zoom button and Macro/index button. Centered over the lens is a pop-up flash and hot shoe. Right in front of the hot shoe, two tiny holds constitute a minimalist grille for the built-in microphone. The Mode dial is angled down the back so that it's viewable from both front and back. In front of this is the status LCD display. Pressing the backlight button illuminates it with an amber glow. I always appreciate status display panels like the one on the Pro1, as they report camera settings and other miscellaneous information without the need for powering up the LCD monitor. (Although, on an EVF-style camera like the Pro1, either the LCD or EVF is of necessity powered up all the time anyway. Below this is the light metering selection button, and to the right is the capture mode button, which selects between continuous, single, and self-timer/remote control modes. The Power mode selector is toggled left or right to switch between capture and playback modes. A lock button on the back of the rocker must be pressed in first to release the switch. (In practice, the lock button is naturally pressed in whenever you press your thumb against the power switch to actuate it. An effective design, because it works well as an interlock, but never actually interferes with your normal use of the control.) To turn the unit off, press on the silver off button on the top of this arrangement. The Shutter button on the Pro1 is out on the top front of the camera grip, more like the company's SLR line, with the Main Dial nearby for quick access to shutter speed and aperture. In manual mode, a downward press on the Main Dial switches between aperture and shutter speed.
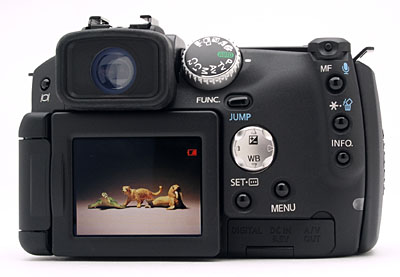
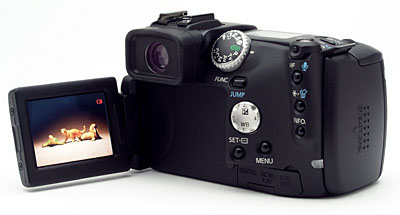
The majority of the exposure controls are located on the camera's back panel, along with the EVF (electronic viewfinder) and LCD monitor. The Pro1's eye-level viewfinder features a diopter adjustment dial on the left. The swiveling LCD monitor pops out of the camera back and rotates 270 degrees when fully extended. You can fold it back into its storage compartment with the monitor facing outward or leave it extended and turn the screen to accommodate a variety of shooting angles ranging from directly in front of the camera (good for self-portraits) to above the camera (good for ground level macro shots), to directly below the camera (great for over-the-head shots in crowds). Finally, the monitor can be turned around and popped back into the panel face-down, protecting it from accidental scratches and fingerprints. All in all, a very handy design. Left of the EVF is the Monitor selector button, which is pressed to switch between the LCD panel and EVF. A four-way arrow pad is mounted at an angle, which makes for surprisingly comfortable activation. In addition to serving as a navigational tool through settings menus, the Four-Way Arrow pad also controls White Balance and Exposure Compensation settings. Just above the four-way is the Function/Jump button, and below are the Set and Menu buttons. A contoured indent runs between this cluster and the three buttons on the right, making for a substantial thumb grip. The MF/Audio button is on the top of this ridge right under the Power switch, and the AE Lock/Erase, and Info buttons are below that. Down and to the right from there is the CF access indicator light. And below all of this is a plastic hinged door that conceals the USB, AC adapter, and AV out ports.
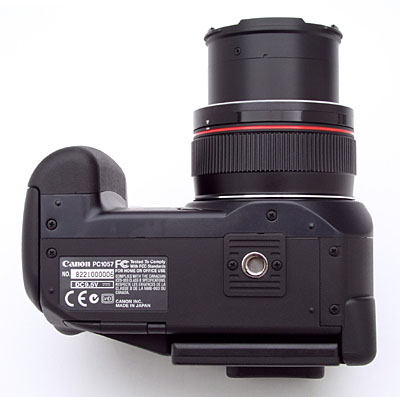
The Pro1's bottom panel is flat, with a slightly raised platform around the threaded metal tripod mount. The tripod mount is positioned just slightly off-center to the right of the lens. Because the battery door is on the right, there is no longer a problem changing batteries while the camera is on a tripod, as we saw with the G-series.
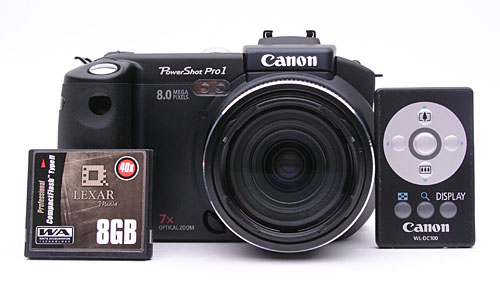
Accompanying the camera is a small infrared remote control, with a rated working range of up to 16.4 feet (5 meters) from the front sensor, and to about 9.83 feet (3 meters) from the side sensor. The shot above shows both the remote and a CompactFlash card posed in front of the camera, so you can get a sense of the size of both the camera and the remote, by comparing it to the CF card. By activating the Continuous / Self-Timer / Wireless Controller button in Shooting mode, you can use the Remote to fire the shutter, adjust the optical zoom, or scroll through the LCD display screens without coming in contact with the camera body. This works well with the rotating LCD monitor, because you can mount the camera on a tripod and compose the shot while standing in front of the camera. The remote also offers several playback functions, which are useful when viewing images on a television screen. The Index display and Replay zoom buttons on the bottom of the remote control enable you to view up to nine thumbnail images at a time, or enlarge one captured image on the LCD monitor. The four arrow buttons on the Remote give you the same capabilities as the Four-Way Arrow pad on the back of the camera, permitting you to scroll through stored images or maneuver within a larger one. Depressing the Remote's Shutter button while in Replay mode lets you play movie files on the camera's monitor or a television. As with the G2, G3, and G5 models, I was glad to see the inclusion of this simple gadget as standard equipment for the Pro1, especially given its video capabilities, which allow the camera to be used as a presentation tool.
Viewfinder
 The
Pro1 features both an eye-level electronic viewfinder (EVF) and a tilt/swivel
LCD monitor on the back of the camera for image composition. The extreme zoom
on the Pro1 makes it very difficult to make an optical viewfinder that will
track the action of the zoom lens accurately, so most makers of long-zoom, non-SLR
cameras have switched to an EVF. It's a necessary evil that is nonetheless vexing.
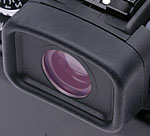
A diopter adjustment control on the left of the eyepiece adjusts the viewfinder
focus for eyeglass wearers. The viewfinder seems particularly well-suited for
eyeglass wearers. The objective has a high enough "eyepoint" to accommodate
even fairly thick eyeglass lenses, and the diopter adjustment seems to cover
a very broad range. (Accommodating even my own 20/180 vision with ease.)
The
Pro1 features both an eye-level electronic viewfinder (EVF) and a tilt/swivel
LCD monitor on the back of the camera for image composition. The extreme zoom
on the Pro1 makes it very difficult to make an optical viewfinder that will
track the action of the zoom lens accurately, so most makers of long-zoom, non-SLR
cameras have switched to an EVF. It's a necessary evil that is nonetheless vexing.
A diopter adjustment control on the left of the eyepiece adjusts the viewfinder
focus for eyeglass wearers. The viewfinder seems particularly well-suited for
eyeglass wearers. The objective has a high enough "eyepoint" to accommodate
even fairly thick eyeglass lenses, and the diopter adjustment seems to cover
a very broad range. (Accommodating even my own 20/180 vision with ease.)
Measuring 2.0 inches diagonally, Canon's low-temperature, polycrystalline silicon, TFT color LCD monitor features the same smart, swiveling design we first saw years ago on the PowerShot Pro 70, and later on the original G1. The monitor's plastic casing actually pops out of the back of the camera and swings around to face forward (the same direction as the lens). From that position, the monitor can be rotated forward 180 degrees or backward 90 degrees, allowing you to hold the camera in practically any position and still see what's going on in the viewfinder. The best part of the LCD's swiveling monitor design is that it can be flipped around to face the back panel and then closed, keeping the screen safe from scratches and smudgy fingerprints.
The Pro1 preserves the enhanced manual focus utility we first saw on the G2's LCD display. Not only does the LCD show numbers on its distance scale (a feature I consider almost mandatory), it also enlarges the center of the image, making it easier for you to focus accurately based on what you're seeing in the LCD. The Pro1's LCD is also used when selecting exposure compensation, white balance, flash exposure compensation, and autoexposure bracketing options. Pressing the Function button next to the LCD on the camera's rear panel calls up a series of tabbed sub-menus that let you control ISO, picture effects, exposure and focus bracketing, flash exposure compensation, and image size and quality.
 In Record mode, the LCD monitor normally displays a range of information about
the camera's settings, including flash mode, exposure mode, drive (single vs
continuous), macro setting, ISO, exposure compensation, image effects, image
size and JPEG quality setting, and number of shots remaining on the memory card
at the current size/quality settings, as well as a white box showing the currently
active focus area.. Pressing the Info button dismisses all of the status overlays
with the exception of the focus box. Pressing the Info button a second time
restores the status information.
In Record mode, the LCD monitor normally displays a range of information about
the camera's settings, including flash mode, exposure mode, drive (single vs
continuous), macro setting, ISO, exposure compensation, image effects, image
size and JPEG quality setting, and number of shots remaining on the memory card
at the current size/quality settings, as well as a white box showing the currently
active focus area.. Pressing the Info button dismisses all of the status overlays
with the exception of the focus box. Pressing the Info button a second time
restores the status information.
 In
Replay (Playback) mode, the LCD monitor provides a full-frame display of captured
images, which you can view individually by scrolling left or right with the
arrow buttons on the Four-Way Arrow pad. Depressing the Flash/Zoom button on
the top left panel zooms in a little at a time, up to 10x its normal size, and
pressing the Macro/Index button zooms out to thumbnail and Jump modes, which
can scroll through nine images at a time; both of these features are duplicated,
with a Jump button integrated into the Function button, and the zoom ring that
normally controls the lens can zoom in or out. The arrow keys permit you to
move around the image and check the fine details. Unlike the implementation
of this feature on some cameras, zoomed playback on the Pro1 lets you see all
the way to the extreme edges of the image, important for checking critical framing.
The 10x magnification is also quite sufficient for critical focus evaluation.
In
Replay (Playback) mode, the LCD monitor provides a full-frame display of captured
images, which you can view individually by scrolling left or right with the
arrow buttons on the Four-Way Arrow pad. Depressing the Flash/Zoom button on
the top left panel zooms in a little at a time, up to 10x its normal size, and
pressing the Macro/Index button zooms out to thumbnail and Jump modes, which
can scroll through nine images at a time; both of these features are duplicated,
with a Jump button integrated into the Function button, and the zoom ring that
normally controls the lens can zoom in or out. The arrow keys permit you to
move around the image and check the fine details. Unlike the implementation
of this feature on some cameras, zoomed playback on the Pro1 lets you see all
the way to the extreme edges of the image, important for checking critical framing.
The 10x magnification is also quite sufficient for critical focus evaluation.
 In
Playback mode, one press of the Info button pulls up detailed information about
the captured image, including the file name, date, and time it was recorded, compression,
resolution, and what number it is in the sequence of captured images. Depressing
the Info button twice adds exposure information such as the Image Zone (portrait,
landscape, etc.), Shutter Speed, Aperture, Exposure Compensation, and White Balance.
Included in this extended information display is a small histogram, which plots
the tonal distribution of the image in a graph. Histograms are useful tools for
checking exposure, as they report the distribution of highlights, shadows, and
midtones, but they don't do a good job of informing you when small highlight areas
are blown out. The Pro1 deals with this by flashing any overexposed portions of
the image black and white in the image accompanying the histogram display, indicating
that you need to adjust the exposure. A third press of the Display button turns
off the information display, returning the LCD to the main image display mode.
A nice feature is that the expanded information display seen in histogram mode
remains on the screen if you use the zoom toggle to magnify the playback image
from that mode; the histogram disappears, but you keep the rest of the information.
In
Playback mode, one press of the Info button pulls up detailed information about
the captured image, including the file name, date, and time it was recorded, compression,
resolution, and what number it is in the sequence of captured images. Depressing
the Info button twice adds exposure information such as the Image Zone (portrait,
landscape, etc.), Shutter Speed, Aperture, Exposure Compensation, and White Balance.
Included in this extended information display is a small histogram, which plots
the tonal distribution of the image in a graph. Histograms are useful tools for
checking exposure, as they report the distribution of highlights, shadows, and
midtones, but they don't do a good job of informing you when small highlight areas
are blown out. The Pro1 deals with this by flashing any overexposed portions of
the image black and white in the image accompanying the histogram display, indicating
that you need to adjust the exposure. A third press of the Display button turns
off the information display, returning the LCD to the main image display mode.
A nice feature is that the expanded information display seen in histogram mode
remains on the screen if you use the zoom toggle to magnify the playback image
from that mode; the histogram disappears, but you keep the rest of the information.
I'm generally no fan of EVFs on cameras, because they usually stop working at light levels quite a bit higher than the camera's low-light exposure limit. This is true of the EVF on the Pro1 too, but I found that it actually offered a dim but very usable image at the lower limit of my low-light test. (1/16 foot-candle, about four(!) f-stops darker than typical city street lighting at night.) This is really an excellent performance for an EVF-equipped camera. Combined with the Pro1's excellent low-light focusing ability (see the following review section on the camera's optics), this makes the Pro1 an unusually capable low-light shooter.
Optics
| Free Photo Lessons | |
|
 The
Pro1 features a built-in, 7x, 7.2-50.8mm zoom lens, equivalent to a 28-200mm lens
on a 35mm camera. This amounts to a range from good wide-angle to very good telephoto
coverage. This is no ordinary PowerShot lens, however, as the surrounding red
ring attests. This ring is seen only on Canon's L-series professional lenses,
most of which include a low-chromatic aberration Fluorite element. This lens also
includes a UD (Ultra-low Dispersion) element and an Aspherical lens, all of which
work to reduce chromatic aberration, spherical aberration, and produce sharper
images while keeping the lens compact.
The
Pro1 features a built-in, 7x, 7.2-50.8mm zoom lens, equivalent to a 28-200mm lens
on a 35mm camera. This amounts to a range from good wide-angle to very good telephoto
coverage. This is no ordinary PowerShot lens, however, as the surrounding red
ring attests. This ring is seen only on Canon's L-series professional lenses,
most of which include a low-chromatic aberration Fluorite element. This lens also
includes a UD (Ultra-low Dispersion) element and an Aspherical lens, all of which
work to reduce chromatic aberration, spherical aberration, and produce sharper
images while keeping the lens compact.
When the camera is powered on, the lens telescopes out from the camera body into its operating position (extending just under an inch from its stowed position), then retracts again when the camera is shut off. Measuring from the body, it comes out about 2 1/4 inches. Zoomed out fully, it moves out about 2 1/4 inches from its stowed position, or 3 5/8 inches from the body. The motor is relatively quiet, and the action is smooth. A plastic lens cap protects the lens when not in use. No tether is included, nor is there a lashing point on the lens cap, something that I personally sorely miss. (I'm notorious for losing lens caps.) Focus can be automatically or manually controlled, with a range of 1.6 feet (50 centimeters) to infinity in Normal Focus mode. Macro mode features a focus range of 3.9 inches to 1.6 feet (10 to 50 centimeters). A new Super Macro mode, entered via a menu setting, enables closer focusing, ranging from 1.2 inches to 1.0 foot (3 to 30 centimeters). The aperture adjusts automatically or manually, with an f/2.4-3.5 to f/8 range, depending on the zoom setting. An internal neutral density filter can be deployed via a menu option to cut the light transmission by a factor of 8 (3 f-stops), permitting the use of wider apertures or slower shutter speeds in bright conditions. (A very handy feature, should you ever be in a position to need it.)
Manual focus is activated by depressing the Manual Focus (MF) button on the back of the camera. Once pressed, a distance indicator appears on the LCD monitor, providing a reference scale for focusing. Turning the zoom control on the lens controls the focusing distance, which is displayed via a vertical bar graph on the LCD monitor. The distance marks on the focusing scale are shown in metric or English units, as selected in the Setup menu. The readout shows meters or feet, centimeters or inches, depending on the range. I found the roughly 2x viewfinder enlargement that accompanies Manual Focus mode very helpful in setting focus, although even more magnification would be welcome. As soon as you turn the zoom ring to adjust focus (while in MF mode), an enlarged portion of the subject appears in the center of the LCD display, making it easier to determine exact focus. While the manual focus system works quite well, I'd really like to see more numeric distance markings on the scale: In low light conditions, I've often found it necessary to set focus by estimating the distance, but the very limited number of specific distance markings on the Pro1's manual focusing scale make it difficult to do this.
The Pro1 also features a Hybrid AF system, which is designed to offer quicker autofocus by employing two methods. Two passive sensors on the front are Canon's Phase Detection Autofocus, seen on earlier 35mm point-and-shoot cameras. This mechanism helps the iSAPS system determine where to put the lens for quicker contrast-detection autofocus. With such a long lens, some systems we've seen will seek across the entire focus range before deciding on the right focus area; using both passive and contrast detection methods, Canon has largely eliminated this problem, but the hybrid AF system didn't result in full-autofocus shutter lag numbers as low as I've seen with other top 8-megapixel models.
Although I didn't see shutter lag times as fast as I'd expected from the Pro1's hybrid AF system, I was very pleasantly surprised by its performance under low light conditions. While the autofocus time could stretch rather long as the light got dimmer, the camera was able to focus under incredibly dim conditions, actually below the 1/16 foot-candle lower limit of my standard low-light test. This is a good thing though, because the Pro1's autofocus-assist illuminator (a bright white LED hidden beneath its flash head) is only available when its flash is enabled. This is the same behavior as found on the Digital Rebel SLR, which I also objected to there. Fortunately, in the case of the Pro1, the camera can focus surprisingly well under dark conditions with no help from the AF assist light.
When shooting in Autofocus mode, the Pro1 offers both Continuous and Single Autofocus functions. In Continuous mode, the camera is constantly adjusting focus, even when the Shutter button is not depressed. In Single mode, the camera focuses only when the Shutter button is depressed halfway, which helps to conserve battery power. Given that the camera is continuously adjusting the focus in Continuous AF mode, you'd expect the shutter delay to be less. (Since the lens ought to be close to optimum focus most of the time.) Like most cameras with continuous autofocus modes though, the Pro1's shutter lag was actually slightly longer in Continuous AF mode in my tests. It might thus be useful for tracking moving subjects (which I have no quantitative way of testing), but don't look to it as a means to improve shutter response. Another issue with the Pro1 is that the screen freezes while the camera is focusing, an effect that also gets longer when in continuous mode. While the display is frozen, it's easy to lose track of your subject, an unfortunate aspect of this otherwise impressive camera. (This viewfinder freeze was quite annoying in my shooting with the camera, to my mind the single biggest drawback of the Pro1.)
Like the G3 and G5 before it, the Pro1 features Canon's "FlexiZone Autofocus" system, which lets you change the focus area by scrolling the focus-area box smoothly up or down, right or left on the LCD or EVF. The AF area can be positioned anywhere within a central area covering roughly 60 percent of the frame. To move the AF area, press the SET button while in Record mode. The central box that marks the AF area will turn green, indicating that it is selected. Using the up/down, left/right arrows on the Four-Way Arrow pad, you can then move the AF box smoothly around the frame. When you have it positioned where you want, press the SET button again to deselect it. Once the focus point is set and the picture is framed, pressing the Shutter button halfway will turn the box green if the selected area is in focus or yellow if it's not. Through the Record menu, you can choose to have the Spot Metering function use this same area for its exposure determination, using the Spot AE Point submenu. As you zoom in toward telephoto, the AF point increases in size. This is in response to the change in the relative size of the area covered by the Hybrid AF's Phase detection sensors, whose detection area increases in size as you zoom in just like everything else in the frame.
Canon's G3 model was the first camera I had seen with an Auto Focus Bracketing feature on it, and I'm pleased to see it continued on the Pro1. Auto Focus Bracketing (AFB) snaps three exposures in rapid succession, shifting the focus slightly after each. This function is accessed through the FUNC button's sub-menus, and must be done in the Manual Focus (MF) mode. You can set the focus step size from one to three in arbitrary units, by depressing the FUNC button, scrolling to the AFB option with the Omni Controller, and then using the Omni Controller again to choose the amount of variation between shots. Depress the Set button, then fully depress the Shutter button to start the series. The camera makes all three exposures with just one press of the Shutter button.
Digital Zoom is activated through the camera's Record menu and is operated with zoom ring. The amount of total zoom (optical plus digital) is reported in the top right corner of the LCD monitor whenever digital zoom is engaged, and can go as high as 22x. (The 22x total zoom corresponds to 7x optical plus 3.2x digital.) Digital Zoom is not available when shooting with the Pro1's Movie mode, Super Macro mode, or when using the RAW file format. (It's important to note that digital zoom simply enlarges the center of the CCD image, resulting in some loss of image quality in the form of reduced image sharpness that's directly proportional to the amount of digital zoom used.)
Like the G-series, the Pro1 accommodates several optional conversion lenses via a lens adapter kit, so you can extend your camera's wide angle or telephoto capabilities with high-quality optics. The adapters attach via a bayonet mount on the lens barrel, and a small button below the lens on the front of the camera releases a catch, letting you remove the cosmetic collar surrounding the lens barrel and reveal the flanges of the bayonet mount.
Exposure
| Free Photo Lessons | |
|
Shutter Priority mode puts you in control of the shutter speed setting (with a range from 1/4,000 to 15 seconds), while the camera chooses a corresponding lens aperture. As with the Program AE mode, you maintain control over all other exposure options. Aperture Priority works along similar lines, except that you control the aperture (f/2.4-3.5 to f/8) and the camera chooses the best shutter speed. Both the shutter speed and aperture values are displayed on the LCD monitor. If the camera doesn't agree with the exposure settings you've selected, the numerals indicating the automatically-determined exposure variable (aperture, when in shutter-priority mode, or shutter speed, when in aperture-priority mode) on the LCD will turn red when you half press the Shutter button, letting you know that either the aperture or shutter speed needs to be corrected. In both Aperture and Shutter Priority modes, you can quickly adjust the designated exposure variable by simply turning the control dial.
In Manual mode, the control dial adjusts both settings, you just press down to alternate between aperture and shutter speed. A nice touch in manual mode is that the camera acts as a light meter, indicating via numerals in the upper left-hand corner of the screen how much over- or under-exposure (in EV units) it thinks will result from your chosen aperture and shutter speed. If the exposure error exceeds 2 EV, the number remains at plus or minus 2, and turns red.
Several preset exposure modes are also available for shooting under special conditions. Portrait mode uses a large lens aperture setting to reduce the depth of field, resulting in blurred backgrounds and strong focal emphasis on the primary subject. Landscape mode uses a small aperture to keep both the foreground and background in sharp focus. A slow shutter speed is also common in Landscape mode, so it's recommended that you use a tripod. Night Scene mode uses a slow shutter speed to capture the color and detail of an evening setting, along with a flash exposure to illuminate the primary subject in the foreground. When slow shutter speed and flash are used together, the overall scene is more evenly exposed. This mode can also be combined with the Red-Eye Reduction flash for portraits, or you can cancel the flash altogether. A tripod is also recommended when working in Night Scene mode, and portrait subjects should be warned to remain still after the flash, until the shutter is closed.
A quick-review mode allows you to confirm the recorded image immediately after exposure. To access the Review mode, you can simply continue to hold down the Shutter button after the exposure. The just-captured image will remain displayed on the LCD until you release the Shutter button. (I really like the convenience of this feature, as it's easy to access when you want it, without tying you down with long review times when you don't need them.) Or, you can turn on the Review function through the Record menu, which displays the image for anywhere from two to 10 seconds, in one-second increments. You can immediately erase the image by pressing the trash can button, which pulls up a small erase menu on the bottom of the monitor. Press the Set button to complete the erasure (this is faster than the G-series, which used to require a press on the right arrow button before pressing Set).
Just as on the G3 and G5, the Pro1 offers the ability to decide after you've shot a photo whether you want to save it to JPEG or RAW file format. If the camera is set to record normally in JPEG format, you can elect to save the just-captured image to a RAW file by pressing the FUNC button at any time during the image-review period. (Whether you're reviewing the image by continuing to hold down the Shutter button, or via a preset review period programmed through the setup menu.) This seems like a handy option, as you could elect to save any images with problematic exposure as RAW files to maximize the data you'll have to work with on the computer after the fact.
Exposure compensation can be adjusted from –2 to +2 exposure values (EV) in one-third-step increments. The camera's metering system offers three operating modes: Evaluative, Center-Weighted Averaging, and Spot Metering. Evaluative metering looks at a number of points throughout the frame, and evaluates the brightness range and distribution between them to come up with the best exposure setting. Center-weighted averaging is based on an averaged reading of the overall scene, plus a reading from the center of the viewfinder or LCD monitor. Spot metering reads only the center of the image, the area that falls within the crosshairs of the viewfinder or within the small square that pops up on the LCD monitor when you press the Spot Meter button. Spot metering is useful when you're shooting under backlit conditions. In these situations, you can use the spot meter to obtain a reading of the area you want properly exposed, then lock the exposure with the AE Lock function, (activated by pressing the "*" button on the back panel in record mode), and recompose your shot for the final exposure. (Note: depressing any other button on the camera will disengage the Spot Metering function.)
Through the Record menu (Spot AE Point submenu), you can also link the Spot Metering area to the FlexiZone AF point described earlier. When the Spot AE Point option of "AF Point" is selected, and the spot metering option is activated, the AF box acquires a set of inner brackets indicating that spot metering is active, and that the AF box is where the metering is being done. If the Spot AE Point is set to "Center," the white brackets will appear in the center of the LCD screen, indicating that this is where the Spot AE metering is being done, regardless of the position of the AF point. This is great for portraits, where both metering and focusing on the face will usually get better results.
The Pro1 offers nine White Balance modes, including Auto, Daylight, Cloudy, Tungsten, Fluorescent, Fluorescent H (for daylight-balanced fluorescents), Flash, and two separate Custom modes, accessed by pressing the WB button on the four-way navigator. The Custom mode lets you manually set the white balance by holding a white card in front of the camera and pressing the "*" button to set the value. Having two Custom settings makes it easy to move back and forth between scenes with radically different lighting. (An example might be a shooting assignment that had you moving between indoor and outdoor spaces at night, with different types of artificial lighting used in the two settings. You could set one Custom white balance for the indoor shots, and the second for the outdoor ones.)
ISO film speed equivalents are set in a submenu of the FUNC button, with choices of Auto, 50, 100, 200, or 400 ISO values. The higher the ISO setting, the more you can extend the camera's exposure range in low-light situations, but keep in mind that image noise increases in more or less direct proportion to the ISO value. Other manual exposure adjustments in the Record menu include Sharpness, Contrast, and Saturation controls.
When comparing the Pro1 to digital SLRs like the Rebel, 10D and higher, it's important to note that though you'll get higher overall resolution in number of pixels captured with the Pro1's 8 megapixel sensor, you get far greater exposure latitude in terms of ISO, with less noise, on the physically larger 6.3 megapixel sensors. The Pro1's ISO range is 50 to 400, whereas the Rebel's is 100 to 1600 and the 10D's is 100 to 3200. These latter two have larger sensor areas, which means bigger pixels. Bigger pixels (7.4 microns on the Rebel, compared to 2.7 microns on the Pro1) can gather more photons. More photons gathered means less signal amplification is necessary, and thus less noise in the resulting image (noise can be thought of as error introduced by signal amplification). More photons also means that the signal (charge in the CCD pixels produced by light from the subject) will be that much greater than noise (charge in the CCD pixels resulting from leakage currents within the sensor itself).
Many may be concerned that the Pro1's higher-resolution sensor means that it has smaller pixels and thus more noise than the G5 sensor, but Canon assures us that the pixel size actually has not changed between the two cameras. To increase the resolution to 8 megapixel, they merely increased the chip size, changing it from a 5 x 7mm chip (.55 inch) to something closer in size to a 8 x 10mm (.66 inch) chip. My own noise measurements seem to bear this out.
Flash
 The
Pro1's built-in flash is of the pop-up variety, and operates in any one of nine
available modes. You can leave it turned off, have it fire all the time, or
only fire automatically, as the camera sees fit. In any of its active modes,
you can turn on red-eye reduction (which illuminates the bright AF assist light
on the front of the camera before the flash fires, to make your subjects' pupils
contract), or enable Slow Sync mode, which combines the flash with a slower
shutter speed to allow more light from the scene to enter the lens. The combination
of off plus two active modes (forced or auto) with four variations each (normal,
red-eye w/o slow sync, red-eye w/slow sync, and slow sync w/o red-eye) adds
up to nine modes total. The main flash modes of off, forced on, and auto are
selected via the Flash/Zoom button on the Pro1's top front panel. Slow Sync
and Red-Eye Reduction modes are controlled via the Record menu. Through the
same menu, you can also specify whether the flash syncs with the first or second
curtain. (That is, on shots with slower exposure times, the flash can fire either
as the shutter opens, or as it's closing.)
The
Pro1's built-in flash is of the pop-up variety, and operates in any one of nine
available modes. You can leave it turned off, have it fire all the time, or
only fire automatically, as the camera sees fit. In any of its active modes,
you can turn on red-eye reduction (which illuminates the bright AF assist light
on the front of the camera before the flash fires, to make your subjects' pupils
contract), or enable Slow Sync mode, which combines the flash with a slower
shutter speed to allow more light from the scene to enter the lens. The combination
of off plus two active modes (forced or auto) with four variations each (normal,
red-eye w/o slow sync, red-eye w/slow sync, and slow sync w/o red-eye) adds
up to nine modes total. The main flash modes of off, forced on, and auto are
selected via the Flash/Zoom button on the Pro1's top front panel. Slow Sync
and Red-Eye Reduction modes are controlled via the Record menu. Through the
same menu, you can also specify whether the flash syncs with the first or second
curtain. (That is, on shots with slower exposure times, the flash can fire either
as the shutter opens, or as it's closing.)
The flash exposure can be adjusted from -2 to +2 EV in one-third-step increments by using the FUNC button on the camera's back panel together with the Four-Way Arrow pad to access the Flash Exposure Compensation adjustment menu. You can also lock the Flash Exposure Setting (FE Lock) for a specific area of your subject, just as you would with a normal exposure. Simply center the portion of the subject you want to have metered and press the "*" button to lock the flash exposure. The flash will fire single pulse to lock the exposure reading, then you can recompose your image and make the exposure with the FE Lock in place. (Note that pressing any other button after the "*" button will cancel the flash exposure lock.) Canon rates the Pro1's flash effectiveness from 1.6 to 16 feet (50 centimeters to 5 meters), a figure that agreed quite well with my own test results. (This is a more powerful flash than found on most consumer-level digicams.)
In addition to its built-in flash, the Pro1 features a hot shoe for mounting more powerful external flash units. Canon recommends using its own Speedlight 220EX, 380EX, 420EX, 550EX, MT-24EX Macro Twin Light, or MR-14EX Macro Ring models, but other manufacturers' models should work as well, albeit with less-complete integration with the camera's own controls. The Pro1's flash sync speed is a maximum of 1/250.
Canon's handling of the sync-speed limitation on the Pro1 bothers me a little though, as it did on the G3 and G5 before it. If you're in Auto or Program AE exposure mode, all is well, the camera simply won't select a shutter speed greater than 1/250 when the flash is enabled. In Tv (shutter speed priority) or Manual mode though, you can select shutter speeds as fast as you want (all the way up to 1/4,000), but if you have the flash turned on (forced flash is the only mode available, the Auto option is only offered in Programmed exposure mode), the actual shutter speed will be restricted to 1/250! I disagree with this design choice. When a camera is in a mode that gives the user control over some parameter or other (such as shutter speed), the camera shouldn't arbitrarily override the user's settings. While the Pro1 does show you that the shutter speed has changed to 1/250 when you half-press the Shutter button, it's easy to miss seeing the changed shutter speed unless you're on the lookout for it. I guess it's good that the camera tries its best to deliver you a well-exposed shot, but I'd really like to see some way of optionally preventing an override like this. Once the shutter button is released, it resumes displaying the shutter speed you've set, further confusing matters.
Carried over from the G-series is automatic Speedlight EX recognition in Aperture-Priority mode. When the camera senses that a Canon EX-model external flash is mounted and in ready mode, it automatically sets the shutter speed to 1/60 second, overriding the normal tendency of Aperture-Priority metering to set the shutter speed based on available lighting. This is very handy, as you can attach an EX-model flash unit, set the camera to Aperture-Priority metering, and then just turn the flash on or off as you wish, without worrying about what the shutter speed is doing. Note though, that the Pro1 must be in full manual mode to use with non-Canon flash units. (Since the Aperture Priority mode will normally select a very slow shutter speed when an "unrecognized" flash unit is attached and the scene is dimly lit.)
Auto Exposure Bracketing
The Auto Exposure Bracketing (AEB) mode is another function controlled by the FUNC button's sub-menus. It automatically captures a series of three images, each at a different exposure setting. You can manually set the exposure step size in one-third-step increments, covering a range from -2 to +2 EV, by depressing the FUNC button, scrolling to the AEB option with the Four-Way Arrow pad, and then using the Main dial or left and right arrows to choose the amount of variation between exposures. Depress the Set button to make your selection, then fully depress the Shutter button to start the series. The camera makes all three exposures with just one press of the Shutter button. In AEB mode, the exposures are chosen to bracket whatever exposure setting you've dialed in using the Exposure Compensation adjustment. Thus, the bracketing always occurs around whatever exposure you've chosen based on your evaluation of the scene and the camera's metering.
Note that Auto Exposure Bracketing cannot be used with flash photography. If the flash fires, only one image will be recorded.
Continuous Shooting
Controlled by the Continuous / Self-Timer / Wireless Remote button on top of the camera, the Pro1's Continuous Shooting mode captures multiple consecutive images at up to 2.5 frames per second (fps) in High Speed mode (only 1 frame per second in Standard Continuous mode). This frame-capture rate may vary slightly, depending on image quality, and functions in use. (In my own testing, the Pro1 consistently delivered 2.59-2.61 frames/second, in a variety of JPEG size/quality modes, but only for the first four frames in a burst. After that, it dropped to about 1.5 frames/second for anywhere from two to 19 frames, depending on the image quality setting.) The Pro1 will continue to capture images as long as the Shutter button is depressed, or until the camera's internal memory fills up. When recording RAW files, the camera can record four shots in high speed continuous mode, at a rate of about 0.73 frames/second.
Both continuous modes capture data directly to the buffer memory, but the "standard" continuous mode does some amount of the signal processing on the fly. The result is that cycle times in normal mode are slower, but the camera can generally record much longer bursts before having to pause to empty its buffer, particularly when working with smaller image sizes and lower quality settings. High Speed continuous mode captures more quickly, but doesn't do the processing on the fly, with the result that fewer shots can fit in the buffer memory before having to empty it.
As alluded to above, the Pro1's buffer memory seems to operate in a two-stage fashion, buffering up to four large/fine JPEG images quite quickly in continuous mode, then dropping to slightly lower shooting speeds for the next two, before finally being forced to wait for the data to transfer to the memory card for each shot taken. In single shot mode, with a reasonably fast memory card (I happened to test with a 24x Lexar unit), you can grab a large/fine JPEG shot about every 1.61 seconds, for up to 17 shots or so. Beyond that point, the camera slows pretty immediately to a pace of 3.9 seconds or so between shots, depending on card speed. This is overall pretty good performance for an 8-megapixel camera. (Some reviewers have apparently measured the continuous-mode cycle time for JPEG files across all six shots that the camera can capture before slowing to card-speed levels, with the result that they report much slower times than the camera is actually capable of in four-shot bursts.)
Movie Mode
The Pro1 also offers a Movie mode, which is accessed by turning the Mode dial on top of the camera to the miniature movie camera symbol (a camera will appear in the upper left corner of the LCD display). The AVI / Motion JPEG files are recorded at either 320 x 240 or 160 x 120 pixels, at approximately 15 frames per second. Recordings can last as long as three minutes at either resolution setting, depending on the amount of memory available on the CompactFlash card. To begin recording, you simply press the Shutter button once. A red dot icon appears in the upper right-hand corner of the LCD screen, indicating that recording is in progress, and a counter in the lower right-hand corner begins counting up to show the length of the current clip in seconds. To stop recording, simply press the Shutter button again. (Note that the recording options are largely preset in Movie mode: Macro mode, Resolution, Exposure Compensation, White Balance, Manual Focus, Picture Effects, self-timer, wireless delay, and AF assist beam are the only adjustable functions.)
When finished, you can view the recording by toggling the power switch to the playback position. Pressing the Set button brings up a little VCR-style playback control panel, with buttons for play, fast forward and fast reverse, go to end and go to beginning. A scissors icon lets you trim the movie to select just the part you're most interested in, and save it to the memory card as a separate file. When the movie is playing back, the control panel disappears, but you can stop playback by hitting the Set button again.
Quicktime(tm) is required to view the AVI/Motion JPEG files recorded by the Pro1 in Movie mode. Quicktime is included with current versions of the Mac OS (any version later than 8.5), and a QuickTime player for the Windows platform is included on the Solutions Disk bundled with the camera.
Stitch-Assist Mode
The Stitch-Assist mode records a series of overlapping images that can be stitched together to create horizontal or vertical panoramas or stacked, 2 x 2-frame rectangular composites. A framing guideline for each format appears in the LCD monitor to help line up successive shots. After each shot, a portion of the image remains on-screen, as an aid to lining up the next image in the series. For the horizontal and vertical panoramas, you can take up to 26 images in a series, enabling you to record a full 360-degree circle of the surrounding scenery. For horizontal or vertical panoramas, you can set the camera to record the series of images either right to left or left to right, top to bottom, or bottom to top. The 2 x 2 mode uses a series of only four images, starting from the top left corner and moving in a clockwise direction, to create a complete composite. Once the images are downloaded, you can use Canon's PhotoStitch program to seamlessly combine them in your computer. This is of the more complete stitch solutions we've seen.
Self-Timer Mode
The Self-Timer button on top of the camera also controls the Continuous Shooting and Remote operating modes. When set to the Self-Timer / Wireless mode, the camera displays the standard self-timer icon (a clock face with one hand) in the LCD display, and the self-timer icon with a remote symbol in the LED panel on top of the camera. When in Self-Timer mode, depressing the Shutter button activates either a 2- or 12-second countdown, as selected via the Record menu. During the countdown time, the red Self Timer light on the camera's front panel blinks, gaining speed in the last two seconds. If the camera's Beep function is turned on in the Setup menu, the camera will also beep during the countdown. While in Self-Timer mode, you can also trigger a zero-, two-, or 10-second countdown by pressing the Shutter button on the remote control, regardless of the self-timer delay chosen in the Record menu. This delay is set in the Record menu under Wireless delay.
Interval Shooting
The Pro1 also features a built-in intervalometer, that lets you program the camera for extended time-lapse exposure sequences. You can choose intervals between successive photos ranging from one to 60 minutes, and anywhere from two to 100 photos in the series. This opens lots of opportunities for interesting time-lapse shots, but be sure to use the optional AC adapter for any long sequences to avoid any interruption of power.
Remote Sensor/Transmitter
The Pro1's Wireless Remote Control allows you to trigger the camera from as far away as 16.4 feet (5 meters) from the front sensor, and as far as 3.3 feet (1 meters) from the right side sensor. The range of the remote control will depend somewhat on ambient lighting and the angle you're at relative to the front of the camera. Range in bright sunlight will be much less than in a darkened room, and you'll get more range when you're directly in front of the camera than when you're to one side. The Pro1 lets you set the shutter delay when using the remote to zero, two, or ten seconds. (The no-delay option is particularly welcome, as most digicams with IR remotes have a minimum delay of two or three seconds.) Besides simply triggering the shutter, you can also use the IR remote to adjust the optical zoom lens with its two Zoom buttons, and activate the LCD monitor with its Display button. With the LCD monitor rotated so that it faces you, you can use the Zoom buttons on the remote control to compose the image and the Display button to scroll through the LCD information screens to check exposure settings. In Replay mode, the remote control can be used to scroll through stored images, scroll around areas within a magnified image, view an index of up to nine captures, and replay movies, very handy for presentations using the built-in video output.
Shutter Lag/Cycle Times
When you press the shutter release on a digital camera, there's usually a delay or lag time before the shutter actually fires. This time allows the autofocus and autoexposure mechanisms to do their work and can amount to a significant delay in some situations. Since this number is rarely reported by manufacturers or reviewers, and can significantly affect the picture-taking experience, I now measure shutter lag and cycle times using an electronic test setup I built for this purpose. It has crystal-controlled timing, with resolution to 0.001 second.
NOTE: My qualitative characterizations of camera performance below (that is, "reasonably fast," "about average," etc.) are meant to be relative to other cameras of similar price and general capabilities. Thus, the same shutter lag that's "very fast" for a low-end consumer camera might be characterized as "quite slow" if I encountered it on a professional model. The comments are also intended as only a quick reference: If performance specs are critical for you, rely on the absolute numbers to compare cameras, rather than my purely qualitative comments.
| |
||
| |
|
|
|
Power On -> First shot |
|
Time from
power-up to first shot. About average. |
|
Shutdown |
|
Time for
lens to retract. On the fast side of average. |
|
Play to Record, first shot |
|
Time until
first shot is captured. Fairly slow. |
|
Record to play (max/min res) |
1.3/0.8 |
Top times
are for max res JPEGs, bottom times for min res. First number is for
immediate switch after capturing an image, second is for camera at rest,
after having finished processing. Reasonably fast for an 8-megapixel
camera. |
|
Shutter lag, full autofocus |
|
Longer
time is for telephoto, shorter for wide angle. On the fast side of average,
but not as quick as I was expecting from the Pro1's hybrid autofocus
system. ("Average" runs from 0.8 to 1.0 seconds, but most
of the current crop of high-end 8-megapixel models is faster.) |
| Shutter lag, continuous autofocus | 0.71 | Continuous AF may help for moving subjects, but is slower than single AF for stationary ones. Quite slow. |
|
Shutter lag, manual focus |
|
About
average for this class of camera. |
|
Shutter lag, prefocus |
|
Very
fast. |
|
Cycle Time, max/min resolution |
|
First number
is for large/fine files, second for small/economy. Last time is for
full res CCD RAW files. Buffer holds minimum of 17 shots at max JPEG
size/quality, essentially unlimited shots at lowest size/quality, and
four shots in RAW mode. Buffer takes about 42 seconds to clear for large/fine
JPEGs, about 31 seconds for RAW files. (Times measured with 24x Lexar
CF card.) |
| Cycle time, normal continuous mode | 1.04 / 1.80 |
First number is large/fine files, second is RAW files. Buffer holds minimum of nine large/fine files in this mode, four RAW files. Buffer clears in 26/31seconds, again, with a 24x card. |
|
Cycle time, high-speed continuous mode |
|
First number
is for large/fine files, second for small/economy, and third time is
for full res CCD RAW files. Buffer holds minimum of six large/fine files,
23 small/basic files, four RAW files, but slows after the first four
large/fine or small/basic files. Buffer clears in 26/17/30 seconds respectively,
again with 24x card. |
The Pro1 is pretty fast from shot to shot and it has a fairly generous buffer
memory, but its shutter lag is longer than the most of its 8-megapixel competition.
Not bad, just not as fast as I was expecting from its hybrid AF system. Specifically,
the Pro1's range of 0.63-0.74 seconds (depending on the zoom setting of the
lens) compared with the equivalent lag times of 0.55-0.58 for the Olympus
C-8080 and 0.46-0.55 seconds for the Nikon Coolpix 8700, and within the slower
end of the 0.25-0.69 second range of the Sony DSC-F828, but slower overall
than the blazing 0.39-0.45 seconds of the Minolta DiMAGE A2. The good news
though, is that its prefocus lag is very short, so you can get quick
response when you need it, as long as you can live with prefocusing by half-pressing
and holding the shutter button ahead of time. Cycle time in continuous mode
is pretty good, about 1.0 frames/second in normal mode, and 2.6 frames/second
in high speed mode. In single shot mode, its cycle times are also at the top
of the field, faster than all but the Sony DSC-F828 and Minolta A2. Shooting
in RAW mode, it beats all the others, thanks to its ability to buffer its
RAW-mode shots. Overall, a very good performance, but I'd like to see a faster
autofocus system, and no viewfinder "freezing."
As I remarked upon earlier, the single biggest annoyance I found with the
Pro1 though, was something that doesn't show up in its lag time numbers: Its
viewfinder display freezes whenever the lens is focusing. This can make it
very difficult to track a moving subject, to "pan" with the action.
Not an issue if you mainly shoot landscapes and still lifes, but for action
shooting, it's a real impediment.
Like its predecessors in the G-series, the Canon Pro1's combination of control buttons and dials may seem a little complicated at first glance. However, once I became familiar with the features, I actually found the user interface to be very intuitive. I generally prefer to change as many exposure settings as possible through external controls, without resorting to the LCD menu, and the Pro1 does pretty well in this regard. Better yet, the Pro1's organization of multiple functions under the FUNC button's menus and the multiple functions of the Main dial make for very fluid camera control. The camera controls are far better placed than in the past, so it's easier to operate the camera one-handed and still access the majority of the buttons.
I appreciate the small status display panel on top of the camera, which allows you to check current camera settings without having to activate the LCD monitor. (This would be a nice battery conservation feature, but based on my experience with other cameras, I suspect that the Pro1's EVF doesn't consume much less power than the rear-panel LCD.) I also enjoyed shooting with the rotating LCD screen, which makes composing shots from odd angles a lot easier to manage. The ability to flip the monitor all the way around to face the back panel was great for keeping fingerprints and smudges off of the screen when handling the camera. Also, if you've chosen to use the EVF for outdoor shooting, having the LCD folded over is a good reminder.
Control Enumeration
![]()
Shutter Button: Mounted out on the edge of the grip, this button sets focus
and exposure when halfway pressed, and fires the shutter when fully pressed.

Zoom Ring: Surrounding the lens, this ring controls the optical and digital
zoom in any record mode, bringing a more traditional feel to the motor-driven
mechanical lens. In Playback mode, this ring also controls the digital enlargement
of recorded images.
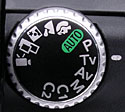
Mode Dial: Mounted on the incline between the top and back panels and nestled
next to the electronic viewfinder, this notched dial controls the camera's exposure
mode. The following options are available:
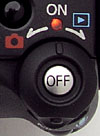
Power Switch and Button: This lever and button combination controls both
the camera's power and mode. Located to the right of the Mode dial, the lever
portion features a small button on the back, which allows it to turn when pressed.
Turning the lever to the left activates Record mode and powers on the camera,
while turning it to the right enables Playback mode. In the center of the lever
is the Off button, which turns the camera off.

Drive Mode Button: In front of the Power Switch and Off button, this button
cycles through the camera's available drive settings. Choices are Single, Continuous,
High Speed Continuous, and Self-Timer/Remote Control modes.

Main Dial: Directly behind the Shutter button, on the top of the handgrip,
this dial controls a variety of camera settings. It adjusts aperture or shutter
speed depending on the exposure mode, sets any menu setting in the Function
menu, sets White Balance and Exposure Compensation options, and controls the
manual focus setting. In Playback mode, this dial scrolls back and forth through
captured images.
Lens Ring Release Button: Hidden beneath the lens in the lower right corner of the front panel, this button releases the lens ring so that it can be removed. Removing the ring allows you to connect accessory lens adapters to the Pro1.
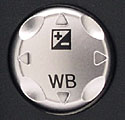
Four-Way Arrow Pad (Omni Selector): Just right of the big LCD panel, this
silver rocker button features an arrow in each direction. In any settings menu,
these arrows navigate through menu options. In most Record modes, the up arrow
activates the Exposure Compensation menu, at the bottom of the LCD display.
Pressing the down arrow enables the White Balance menu. In Playback mode, the
right and left arrow keys scroll through captured images.

Menu Button: Below right of the Four-Way Arrow pad, this button displays
the settings menu in any camera mode. It also dismisses the menu display.

Set Button: To the left of the Menu button, this button confirms menu selections.
In still-picture Record mode, this button lets you change the AF area. After
pressing the button, the AF indicator frame turns green, and can be moved throughout
the frame with the arrow keys. Additionally, this button accesses secondary
settings in the Resolution, Effects, and Bracketing menus.

MF / Sound Button: On the right side of the camera, where the thumb-hold
rises prominently, this button switches the camera between auto and manual focus
control. In Playback mode, this button enables sound recording, for short sound
clips to accompany images.

AE / FE Lock (*) / Erase Button: Right below the Manual Focus button on
the same ridge, this button locks the normal exposure, or the flash exposure
(if the flash is enabled) in any Record mode. In Playback mode (and Quick Review
mode), this button calls up the single-item erase menu.

Info Button: Below the * button on the thumb ridge, the Info button displays
a good deal of information about captured images in Playback mode--including
a histogram--and toggles the onscreen settings display on and off in Record
mode.

Function Button: Above the Four-way arrow pad, this button displays a set
of menus on the LCD monitor. Icons for each submenu line the left side of the
display, and item choices appear along the bottom of the LCD display. The following
menu options are available:
 ISO:
Sets the camera's sensitivity to Auto, 50, 100, 200, or 400 ISO equivalents.
ISO:
Sets the camera's sensitivity to Auto, 50, 100, 200, or 400 ISO equivalents.
In addition to its other functions, pressing the FUNC button during the review interval after a shot has been taken offers you the option of saving the just-captured image in the RAW file format, rather than the usual JPEG.
In Playback mode this button also functions as the Jump button, allowing users to jump by nine images at a time in either single frame playback or index playback views.

Display Button: To the left of the electronic viewfinder, this button switches
between the EVF and LCD panel.

Macro / Index Button: The first button in a series on the left side of the
viewfinder, this button accesses the Macro function when the camera is in Record
mode. In Playback mode, this button displays up to nine images at a time, in
a thumbnail index format, on the LCD screen.

Flash / Zoom Button: Positioned in the very top left corner of the back
panel, this button cycles through the three primary flash modes of off, on (forced
or fill-flash) and automatic. (The sub-options for the flash of red-eye reduction
and sync are controlled via the Record menu.) In Replay mode, zooms in by 2.5x,
5x, and 10x.
![]()
Metering Button: Right of the LCD status button, this control selects between
Evaluative, Center-Weighted Averaging, or Spot metering modes when the camera
is in Record mode.
![]()
Diopter Adjustment Dial: On the left side of the EVF, this notched wheel adjusts the electronic viewfinder's focus to accommodate eyeglass wearers.
The Pro1 has a single Mode dial on the bevel between the back and top panel, which controls the exposure mode. A second Power lever controls whether the camera is in Record or Playback mode. Within Record mode, the Mode dial sets the exposure mode to either Movie, Stitch-Assist, Night Scene, Landscape, Portrait, Auto, Program AE, Shutter Priority, Aperture Priority, Manual, or Custom (C1 & C2).
Record Menu (Red): With the exception of the Auto exposure mode and most of the Image Zone exposure functions, the Record menu provides virtually identical options for all exposure modes. These menus are accessed by depressing the Menu button once while in a Shooting mode. Following are the available settings:
 Flash
Sync: Syncs the flash with the first or second curtain. (That is, just
after the shutter first opens, or just before it closes. Second-curtain sync
is needed when shooting flash photos of moving objects in conjunction with
long shutter speeds, in order to make the "motion trails" of the
subjects follow the subjects, rather than appearing to stretch in front of
them.)
Flash
Sync: Syncs the flash with the first or second curtain. (That is, just
after the shutter first opens, or just before it closes. Second-curtain sync
is needed when shooting flash photos of moving objects in conjunction with
long shutter speeds, in order to make the "motion trails" of the
subjects follow the subjects, rather than appearing to stretch in front of
them.)
Setup Menu (Orange): The Setup menu provides universal camera control options that remain the same in both Shooting and Replay modes. This menu is accessed by depressing the Menu button once and then scrolling to the right with the Four-Way Arrow pad. Following are the available settings:
 Mute:
Turns the camera's sound On or Off.
Mute:
Turns the camera's sound On or Off.
My Camera Menu (Purple): The third menu available in any Record mode, this
lets you customize the camera's start-up screen, sounds, etc. Each setting offers
three choices already programmed into the camera (Canon screen, scenic view,
or bird image), but you can also load your own images and sounds. I guess some
folks may find this amusing, but I really don't understand Canon's expending
the engineering resources to put this sort of thing in a camera for the serious
amateur. I mean, do any of the Pro1's prospective buyers really care about having
their cameras play a different startup sound or tune?
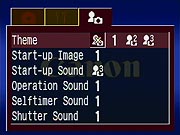 Theme:
Selects the theme for each My Camera setting item, adjusting all of the following.
Theme:
Selects the theme for each My Camera setting item, adjusting all of the following.
Play Menu (Blue): This menu is only available in the Replay mode. It allows you to scroll through captured images; erase, protect, and rotate them; or set them up in a slide show or for printing on a DPOF compatible device. The Play menu offers the following selections:
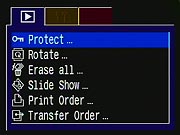 Protect:
Write protects the currently displayed image from accidental deletion, except
by card formatting.
Protect:
Write protects the currently displayed image from accidental deletion, except
by card formatting.
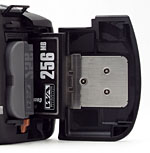 The
Pro1 uses CompactFlash memory cards for image storage, accommodating both Type
I and II card sizes. This means that the camera is also able to store images
to an IBM MicroDrive for increased storage capacity. It also supports FAT32
cards for handling cards above 2GB in size. A 64MB CompactFlash Type I memory
card is supplied with the camera. Entire CompactFlash cards cannot be write-protected;
however, the Pro1's Play menu allows you to write-protect individual image files,
protecting them from accidental erasure, unless the card is formatted.
The
Pro1 uses CompactFlash memory cards for image storage, accommodating both Type
I and II card sizes. This means that the camera is also able to store images
to an IBM MicroDrive for increased storage capacity. It also supports FAT32
cards for handling cards above 2GB in size. A 64MB CompactFlash Type I memory
card is supplied with the camera. Entire CompactFlash cards cannot be write-protected;
however, the Pro1's Play menu allows you to write-protect individual image files,
protecting them from accidental erasure, unless the card is formatted.
Still images can be saved at one of five resolutions (3,264 x 2448, 2,272 x 1,704; 1,600 x 1,200; 1,024 x 768; or 640 x 480 pixels), while movies are recorded at either 320 x 240 or 160 x 120 pixels. Still images also have three JPEG compression levels available: Superfine, Fine, and Normal, plus a RAW setting that records the image straight from the CCD, without any processing. The benefit of the RAW data file format is that it compresses the image file without any loss in image quality (that is, the compression can be completely reversed) and the color isn't adjusted to match any particular file format, such as RGB TIFF. All of the image color parameters are kept in their original state. (RAW images require the Canon Zoom Browser software for processing on a computer.)
Following are the approximate resolution / quality and compression ratios for a 64MB card (compression numbers are based on our own computations):
| Resolution/Quality |
|
Standard | |
Format |
|
| High
Resolution 3264 x 2448 |
Images (Size) |
18 3.6 MB |
30 2.1 MB |
1MB |
9.5 MB |
| Approx. Compression |
7:1 | 11:1 | |
(lossless) |
|
| Medium
1 Resolution 2272 x 1704 |
Images (Size) |
2.0 MB |
55 1.2 MB |
582 KB |
|
| Approx. Compression |
|
10:1 | |
|
|
| 1200 x 600 |
Images (Size) |
1.0 MB |
109 582 KB |
295 KB |
|
| Approx. Compression |
|
10:1 | |
|
|
| Resolution 1024 x 768 |
Images (Size) |
270 KB |
190 164 KB |
98 KB |
|
| Approx. Compression |
|
7.0:1 | |
|
|
| VGA Resolution 640 x 480 |
Images (Size) |
270 KB |
390 164 KB |
98 KB |
|
| Approx. Compression |
|
5.6:1 | |
|
|
A full complement of interface software comes with the Pro1, as does a USB cable for speedy connection to a PC or Macintosh computer. The Pro1 supports "PTP" image transfer mode, which means you can connect it to a computer running Windows XP or Mac OS X without the need for additional driver software. (Drivers are included for other flavors of Windows and Mac OS though, so no worries if your computer is running an older OS.) I measured the Pro1's transfer rate on my Sony Vaio desktop computer (2.4 GHz Pentium, Windows XP), and clocked it at 530 KB/second using the Windows XP photo download wizard. While not bad, this isn't an especially impressive number, particularly now that many new digicams are coming with high-speed USB 2.0 interfaces, which can transfer data at rates of a couple of megabytes/second.
Direct Print
Besides the USB computer connection, the Pro1 also supports direct printing
(no computer needed) to a number of Canon printers. The Pro1 supports both the
new PictBridge protocol for printing to non-Canon printers, as well as Canon's
own Direct Print standard. Direct Print-compatible printers from Canon range
from tiny, dye-sub units that print only 4x6 photos, up to large, sophisticated
(and fast) high-end inkjet models capable of 8x10 and larger output sizes.
Canon was an early leader in offering Direct Print functionality with their
cameras, and continues to strongly support the technology.
Lost Images? - Download this image-recovery program so you'll have it when
you need it...
Since we're talking about memory and image storage, this would be a good time
to mention the following: I get a ton of email from readers who've lost photos
due to a corrupted memory card. It's tragic when it happens, there are few things
more precious than photo memories. Corrupted memory cards can happen with any
card type and any camera manufacturer, nobody's immune. "Stuff happens,"
as they say. A surprising number of "lost" images can be recovered
with an inexpensive, easy to use piece of software though. Given the amount
of email I've gotten on the topic, I now include this paragraph in all my digicam
reviews. The program you need is called PhotoRescue, by DataRescue SA. Read
our review
of it if you'd like, but download the program now, so you'll have it.
It doesn't cost a penny until you need it, and even then it's only $29, with
a money back guarantee. So download PhotoRescue
for Windows or PhotoRescue
for Mac while you're thinking of it. (While you're at it, download the
PDF manual and quickstart guide as well.) Stash the file in a safe place and
it'll be there when you need it. Trust me, needing this is not a matter of if,
but when... PhotoRescue is about the best and easiest tool for recovering
digital photos I've seen. (Disclosure: IR gets a small commission from sales
of the product, but I'd highly recommend the program even if we didn't.)
OK, now back to our regularly scheduled review...
Video Out
 The
Pro1 has a video-out port with a choice of NTSC timing format, for US and Japanese
model televisions, or PAL timing format for European televisions, which are
selectable through the Play menu. The video output can be used for reviewing
previously recorded images or running slide shows from the camera. It also shows
all three LCD menu screens in both playback and capture modes, as well as the
preview display from the LCD viewfinder. Combined with the very flexible controls
of the wireless remote transmitter, the live video output display opens up interesting
possibilities for portrait photography, such as using a video monitor as a remote
viewfinder.
The
Pro1 has a video-out port with a choice of NTSC timing format, for US and Japanese
model televisions, or PAL timing format for European televisions, which are
selectable through the Play menu. The video output can be used for reviewing
previously recorded images or running slide shows from the camera. It also shows
all three LCD menu screens in both playback and capture modes, as well as the
preview display from the LCD viewfinder. Combined with the very flexible controls
of the wireless remote transmitter, the live video output display opens up interesting
possibilities for portrait photography, such as using a video monitor as a remote
viewfinder.
The output cable is a true A/V cable, as it fans out into two RCA jacks, one for video, and one for audio. Plugged into any video monitor (or TV with direct video and audio inputs), the audio capabilities of the Pro1, combined with the wireless remote control, should make it an effective portable presentation device.
Power
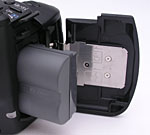 The
Pro1 is powered by an internal BP-511A rechargeable lithium-ion battery pack,
a LiIon design that packs quite a bit more power than its predecessor, a full
1390 mAh compared to the BP-511's 1100 mAh. The camera ships with one battery
pack, as well as a charger module with flip out prongs to plug directly into
a wall or strip socket. Unlike the G-series, the Pro1 does not include an AC
adapter. This is sold separately, as is a car AC adapter that plugs into any
automobile cigarette lighter. A CR2016 lithium battery keeps the Pro1's internal
clock going, and fits into a small compartment within the battery chamber.
The
Pro1 is powered by an internal BP-511A rechargeable lithium-ion battery pack,
a LiIon design that packs quite a bit more power than its predecessor, a full
1390 mAh compared to the BP-511's 1100 mAh. The camera ships with one battery
pack, as well as a charger module with flip out prongs to plug directly into
a wall or strip socket. Unlike the G-series, the Pro1 does not include an AC
adapter. This is sold separately, as is a car AC adapter that plugs into any
automobile cigarette lighter. A CR2016 lithium battery keeps the Pro1's internal
clock going, and fits into a small compartment within the battery chamber.
Because the Pro1 relies on its LCD display for viewing and selecting some of its settings, it can be somewhat of a drain on the power supply. Fortunately, the camera has an automatic three-minute shutdown mode to help conserve battery power, and you can further reduce power consumption by setting a shorter timeout on the LCD monitor, as well as by keeping the autofocus mechanism in Single rather than Continuous mode.
That said, the Pro1 offers really excellent battery life. I wasn't able to test its power drain explicitly, because I didn't have an adapter to fit its proprietary power connector. I did time how long it took the camera to run down in its worst-case power drain mode (capture mode, with the rear-panel LCD turned on, and the camera kept fully "awake" by half-pressing the shutter button periodically), and the result was a very impressive 191 minutes. (3 hours, 11 minutes.) This is almost exactly the same run time as the Sony DSC-F828, and easily beats the rest of the 8-megapixel competition.
I really like Canon's BP-511 batteries. While I generally prefer nonproprietary batteries (allowing many third-party solutions), the BP-511s hold a lot of charge, and the new BP-511A holds even more, turning in some impressive run times, both in testing and in use.
Still, as always, I strongly recommend buying a second battery to have as a spare. (Murphy's law dictates that the battery in your camera will always run out just as the most interesting photos present themselves. Carry a spare and don't miss out!) Fortunately, there are now some third-party battery packs available to fit the Pro1, so it should be easier to find spare batteries in the marketplace.
Included Software
The Canon PowerShot Pro1 comes with a software CD containing the latest versions of Canon's digital software, which provides a wealth of utilities. Compatible with Windows and Macintosh operating systems, the software package allows you to download images from the camera, process RAW data files, stitch together images shot in Stitch-Assist mode, set up images for printing, and operate the camera remotely from the computer. Also included is a second software CD loaded with ArcSoft Camera Suite 2.1, also for both PC and Macintosh formats. The suite includes PhotoStudio, for editing images, and VideoImpression, for editing movie files.
Not Included: "Brainware"
Every manufacturer includes some level of needed software with their cameras,
but what's missing is the knowledge and experience to know what to do with it.
For lack of a better term, I've called this "Brainware." There's a
lot involved between snapping the shutter, and watching a beautiful, professional-quality
print spool off your printer, and there's sadly very little guidance as to how
to get from point A to point B.
Fortunately, Uwe Steinmueller of OutbackPhoto.com has come up with an excellent series of e-books that detail every step of the process, show actual examples of files moving through the workflow, and the final results. If you want to get the absolute best prints possible from your digital files, you owe it to yourself to purchase one of the Outback Photo Digital Workflow books.
In the Box
Included in the box with the PowerShot Pro1 are the following items:
Test Results
In keeping with my standard test policy, the comments given here summarize only my key findings. For a full commentary on each of the test images, see the PowerShot Pro1's "pictures" page.
Not sure which camera to buy? Let your eyes be the ultimate judge! Visit our Comparometer(tm) to compare images from the PowerShot Pro1 with those from other cameras you may be considering. The proof is in the pictures, so let your own eyes decide which you like best!
As with all Imaging Resource product tests, I encourage you to let your own eyes be the judge of how well the camera performed. Explore the images on the pictures page, to see how Pro1's images compare to other cameras you may be considering.
Conclusion
|
Canon has produced a consistently excellent line of digicams for some years
now, and there are never less than two or three different Canon models on the
top-10 list of models most favored by Imaging Resource readers. The new PowerShot
Pro1 kicks things up another notch, with its 8-megapixel CCD and long-ratio
L-series zoom lens, with its very useful 28mm minimum equivalent focal length.
The camera scores big points for its beautiful images (with typically excellent
"Canon color"), powerful exposure and focus controls, great build
quality, and excellent cycle times (including its times in continuous mode,
contrary to some reports), particularly when shooting in RAW mode. In fact,
if you're a raw-mode shooter, the Pro1 is really the only 8-megapixel model
out there that I'd consider acceptably fast to use. It's also great at low-light
photography, its EVF/LCD viewfinder system surprisingly able to show usable
subject detail under very low-light conditions. For closeup work, its
super-macro mode gets incredibly close, able to satisfy the most fanatic bug-hunter.
It feels great in the hand too, and ties with the Sony DSC-F828 for having the
best battery life of any of the current crop of 8-megapixel cameras. On the
downside, I was surprised to find as much chromatic aberration and softness
in the corners of its images as I did, given the L-series lens it's equipped
with. Not horrible, but certainly not what I expected to see from L-series glass.
Its single most annoying trait though, was the way its viewfinder displays "freeze"
when the lens is focusing. This might be more of an individual like/dislike,
but I personally found it very distracting. Like the rest of the 8-megapixel
models on the market, the Pro1 has both strengths and weaknesses, but I'd have
to say that there are happily quite a lot more of the former than the latter.
Bottom line, I don't think that any of the 8-megapixel digicams amount to a
slam-dunk relative to the others, a lot will depend on your particular shooting
needs and preferences. The Pro1 will be an easy choice for anyone interested
in RAW-mode shooting though, is faster shot to shot than most of its competition,
and has a viewfinder that does quite a bit better than most under dim lighting.
If any of those factors are important to you, the Pro1 will probably make you
(very) happy. All in all, a strong contender in the 8-megapixel derby, and one
that should be on your short list of candidates if you're shopping in that market.
<<Pro1 Sample Images | Additional Resources and Other Links>>
Reader Comments!
Questions, comments or controversy on this product? Click
this link to see what other Imaging Resource readers have had to say about
the Canon PowerShot Pro1, or add comments of your own!