 Casio, QV-770 Digital Camera Casio's "Digital Time Machine" goes to the Movies! |
 |
|
640X480 w/flash, macro modes |
|
|
Expanded internal memory (4MB) | |
|
|
Multiple time-recording modes | |
|
|
"Movie" recording mode (3.2 second sequence) | |
|
|
In-camera image combination/editing | |
|
|
In-camera panorama stitching & viewing(!) |
At the Spring '98 PMA in New Orleans (February 12-15), Casio announced an upgraded version of their QV-700 "digital time machine" (our term, not theirs). At long last, we're pleased to present our review of their new device:
Consumer electronics giant Casio has long been an innovator in the world of digital cameras: Their original QV-10 was the first digital camera to incorporate an LCD screen, a feature that has by now become nearly universal. With their QV-700 and QV-770 models, we suspect we are once again seeing Casio pioneer features that will become popular across the market.
In their earlier QV-700, Casio found a truly useful space to inhabit, between the static world of still images and the flowing world of multimedia. Among its many innovations, the QV-700 included the ability to capture sequences of images across time, with the interval between successive images ranging from 0.05 seconds to as much as an hour. While the time-exposure capabilities will be great for school science experiments, or just general playing around, the real usefulness comes with the "past" and "future" exposure modes. Perhaps most interesting is the "past" mode, in which the camera continuously scans the scene, capturing an image every 0.05 seconds. Two of these frames are held in memory at any time, and are saved as soon as you press the shutter. You end up with a total of four images, corresponding to the two "past" images, the one immediately after you pressed the shutter, and one more 0.05 seconds later. Think of how many shots you've blown with your film camera because somebody blinked, or the fleeting expression disappeared just before you could press the shutter release! With the QV-700 and now the '770, we suspect the vast majority of these situations could be salvaged!
In the QV-770, Casio has taken this concept farther, now allowing you to capture entire "movies" of as many as 32 frames, taken at 0.1 second intervals! They've also tweaked the "past" and "future" modes a bit, shifting the sequence of 4 frames slightly back or forward, so that the shutter release either ends or begins the sequence, instead of the 1-frame "overhang" the previous model provided.
The QV-770 is a basically a scaled-back version of the earlier QV-700, but with some important new features of its own: By dropping support for removable memory, using a smaller LCD panel, and removing a few features, Casio has produced a significantly less expensive unit, yet actually improved some characteristics, including color rendition. The QV-770 breaks new ground in two areas, with a "movie" mode and in-camera panorama stitching and display.
Overview
As with the QV-700, the LCD panel on the QV-770 was one of the first things
we noticed, albeit for a different reason. At 1.8 inches, the QV-770's LCD panel
is smaller than that of the QV-700, and more typical of the panels on most digital
cameras. What distinguishes the display on the QV-770 though, is its exceptional
clarity: Advertised as a "low-temperature TFT" unit, the LCD panel
on the QV-770 offers much higher resolution and greater sharpness than we've
become accustomed to in most digital point & shoots. As a result, even though
the LCD on the QV-770 is smaller than that on the QV-700, we felt that the '770
offered a better image.
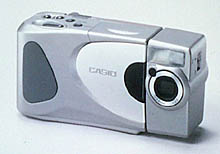
With its smaller LCD panel, and not needing room for a removable-memory card slot, the QV-770 is a fair bit smaller than the QV-700. This means the QV-770 fits comfortably (if a little heavily) into an average shirt pocket. No slight intended to the QV-700 here though: Your ham-handed reviewer actually found the larger '700 a bit easier to hold. The QV-770 continues the Casio tradition of the left-mounted, swiveling lens. The lens rotates through a range of 270 degrees, to capture shots below, in front of, above, or even directly behind the camera. Casio specifies the CCD as a 1/4-inch (6mm) unit, with 350,000 pixels, although they add that it has 330,000 "effective" pixels. (We confess we don't know the distinction between regular pixels and "effective" ones in this context.) The basic image size captured is 640x480.
Like its "big brother," the QV-770 camera is unique in offering a wide range of unusual features, many of which we found highly useful. Foremost among these are the various timed-exposure modes, which we'll explore further in the "Exposure" section of this review. Of the timed-exposure modes though two deserve special mention: "Past" and "Future" shooting. Each of these modes allow you to capture a total of 4 frames in the space of two tenths of a second (0.2 seconds). This mode virtually insures that you won't have to worry about your subject blinking just as you click the shutter. Even better, the "Past" mode scans the subject continuously, and saves the two frames just before you pressed the shutter, helping to compensate for lagging reflexes that normally result in pictures snapped just after the critical moment has passed.
While the QV-770 lacks the time-lapse capability of the QV-700, it adds two new and interesting modes: Movies and in-camera panorama stitching! We'll talk about these more later, but they do a great deal to enhance the unit's "fun potential" in group situations.
Overall, the QV-770 offers a tremendous package of features, full VGA resolution, a rich software bundle, and a very attractive price for the whole package.
Design
The QV-770 is shaped much like a conventional film-based point & shoot camera,
but the plethora of buttons, knobs, and switches give away the fact that this
is definitely an electronic-age device. At 5.0x2.6x1.5 inches (129x66x38mm),
it will fit into a shirt pocket fairly comfortably. At 7 ounces (200g) without
batteries, it's toward the lighter end of the range for cameras in its class.
Designed to be held primarily by your right hand, the most often-used controls
are readily available under either your thumb or forefinger, and a row of buttons
along the bottom of the rear-mounted LCD screen control less common functions.
If you haven't used a camera with a swiveling lens before, it may take a little
getting used to: Conditioned by years of using less flexible devices, we at
first found ourselves tilting the whole camera body up or down to get the shot
we needed. Once we became accustomed to the freedom offered by the swiveling
lens, we loved the convenience, and the opportunities it provided for candid
shots.
Viewfinder
Casio originated the concept of an LCD panel as the camera viewfinder, and continues
that tradition in the QV-770. The advantage of a direct LCD viewfinder is that
it avoids the parallax problems of optical viewfinders at close quarters, letting
you see exactly what the lens is looking at, a particularly useful feature when
doing macro photography. Another advantage works particularly well with the
QV-770's swivel lens: The combination lets you unglue your eye from the viewfinder,
and hold the camera wherever makes most sense for the shot you're taking. In
a crowd, you can hold the camera over your head and still see what you're shooting.
Alternatively, ground-level close-ups don't require you to be a contortionist
to compose the shot.
Of course, there are downsides to LCD viewfinders too: Direct sunlight can swamp the illumination of the backlight, making them hard to read. (Although we found the TFT display in the QV-770 slightly less prone to this problem than earlier models.) LCDs are also famous for their power consumption, meaning that near-continuous usage as a viewfinder can lead to short battery life.
Optics
We've already talked quite a bit about the swiveling lens mount on the QV-770,
so won't spend more time on it here. The lens itself is a very fast f2.0 design,
with a focal length equivalent to 38 mm on a 35mm film camera. The lens is a
fixed-focus design, with two modes; normal and macro. In the "normal"
setting, everything from 2.3 feet (0.7m) to infinity is in focus, while at the
"macro" setting, the focal range is reduced to 5.5 to 6.3 inches (14
to 16cm), although you can get a little closer with the lens set to the f8 aperture.
In our tests, the macro mode captured an area of 4.8 x 3.6 inches (12 x 9 cm)
at a 5.5 inch subject distance.
The lens uses a switchable iris, with two fixed aperture settings. The wider setting corresponds to a very fast f2.0, while the smaller opening stops the lens down to f8. When moving from a brightly-lit scene to a dimmer one, there's a delay of a four or five seconds while the smaller aperture is switched in or out. Accordingly, if there's a sudden, drastic change in illumination, allow a few seconds for the camera to get things sorted out before attempting to take a picture. If you know your shooting conditions, you can use the camera's "manual" mode to permanently choose one aperture or the other.
One consequence of the QV-770's switchable aperture is that images shot with lots of light are noticeably sharper than those shot under dimmer conditions. In our test shots, this undoubtedly contributes to the slightly softer focus of the indoor portrait, as compared to the outdoor one shot in full sun.
Exposure
Casio doesn't give the QV-770 an explicit equivalent ISO speed in their literature,
but does claim a usable exposure range of EV 5 to EV 18. This is a very wide
range, and extends quite a bit lower than most other digital cameras. Exposure
time is controlled electronically at the CCD, and "shutter" speeds
range from 1/8th to 1/4000th of a second. Working backward from the 1/8th second
maximum exposure time and the f2.0 lens aperture, you arrive at an equivalent
ISO speed of 3200! (Exceptional low-light performance has long been a hallmark
of Casio digital cameras.) This is pretty remarkable, and one might ask why
Casio doesn't tout it more in their marketing literature.
The answer probably lies in the fact that the methodology for calculating "equivalent ISO speed" hasn't been defined yet for digital cameras, and Casio doesn't want to run afoul of any future direction taken by the international standards committees. (And be blamed for falsely "hyping" their products.) What Casio has done in the QV-770 (and in most of their other QV-series cameras) is to use greater amplification on the CCD signal when shooting in low light than is common among other manufacturers. This lets you capture pictures that you otherwise couldn't, but at the cost of increased "noise" in the image.
When the "ISO equivalent" standard is defined, it will most likely take image noise levels into account, meaning that the Casio devices will probably have ISO ratings lower than the value of 3200 we calculated above. Perhaps the best way to understand what the QV-770 offers is to liken it to "push processing" of film, in which changes are made during development to increase the film's sensitivity, at the expense of larger grain and less resolution. Bottom line, however you interpret it, the QV-770 lets you capture usable images in very low light conditions, albeit with a somewhat higher level of image noise than you would see under brighter conditions.
Many third or fourth-generation digital cameras such as the QV-700 are allowing much longer exposure times than were possible with earlier devices. This has proved to be somewhat of a mixed blessing for the manufacturers though, in that they are wrongly blamed for fuzzy images that often are the fault of the photographer. The QV-770 has a fixed-focus lens, so blurry pictures can't be blamed on poor autofocus performance, but we're concerned that novice photographers adequately understand the steadiness required by a 1/8 second shutter speed: The general rule of thumb for amateur photographers is to use a tripod whenever the shutter speed drops below 1 over the lens focal length in millimeters. With the QV-700's 38mm-equivalent lens, this guideline would suggest a tripod for any shutter speed slower than 1/38th of a second. When you realize that the longest exposure time the camera is capable of is over four times slower, you can appreciate the need to brace or otherwise support the camera in some fashion when shooting under dim conditions. Don't blame blurry pictures on the camera when you're blithely hand-holding shots even a pro would shy away from!
Like any other auto-exposure system, that of the QV-770 is prone to being "fooled" by unusual lighting conditions, such as a bright subject against a dark background, or strong backlighting. To allow for this, Casio has provided an exposure compensation capability, permitting a +/- 2EV adjustment in the base exposure, in nominal 0.5 EV steps. (There are four compensation steps available in each direction.) We liked how easy it was to change the exposure compensation during shooting, simply by pressing the "+" or "-" buttons prior to each shot. In practice though, we found the steps between compensation levels weren't uniform, sometimes making it difficult to achieve exactly the exposure we were trying for. Also, the camera would sometimes take a few seconds to respond to an exposure compensation change, which could result in losing a critical shot.
The built-in automatic flash has a specified working range of 2.3-9.8 ft (0.7-3.0m), and has three operating modes: On ("forced on" or "fill"), Off, and Automatic. The QV-700 was the first Casio digital camera to include an on-board flash, where we found it a welcome addition that we're pleased to see continued in the QV-770. A note about flash on the QV-770 though: We found that it was somewhat prone to produce oddly-colored images when shooting under moderate levels of incandescent lighting. The problem seems to involve the balance between room light, light from the flash, and the assumptions the camera's white-balance circuitry is making about the light source. In situations where there was almost enough light to take the picture unaided, the flash would fire and properly provide only a subtle "fill" illumination. The white-balance circuitry would see that the flash was being used though, and adjust the color balance as if the scene was lit only by the flash. The end result was a strong yellow cast. We found we could avoid this using any of three methods: 1) By using relatively strong incandescent lighting, which caused the aperture to stop-down to the smaller opening. 2) By selecting an incandescent white-balance setting in "manual" mode. 3) By turning the lights either way down or off, so the scene would be mainly lit by the flash. Bottom line, the flash was quite usable under all conditions, it just required a little manual fiddling under moderate incandescent lighting.
Although we list "cycle time" (the minimum time between successive exposures) in our camera data sheets, we don't normally cover it explicitly in the camera reviews themselves. In the case of the QV-770 though, we feel it deserves special mention, since it is so fast compared to other popular cameras. We found that we could take picture after picture very rapidly, with as little as 1 second between successive frames(!) This addresses a frequent user complaint with digital cameras, as most take a minimum of 10-15 seconds to process each image.
White Balance
The QV-770 normally operates with a fairly effective automatic white balance
control enabled (although we found the white balance adjustment on the '770
to be a little less aggressive than that of the '700). Alternatively, you can
manually select a fixed white balance to compensate for incandescent, fluorescent,
or daylight lighting. While the automatic white balance setting works well in
most circumstances, the incandescent setting provides a much more neutral color
cast under incandescent lighting. In the QV-770, Casio fixed one of our minor
interface gripes: In addition to the cryptic notations "WB-1", "WB-2",
etc, the user interface now displays informative icons (the sun, an incandescent
bulb, fluorescent tubes) to indicate what white balance setting is selected.
Timed Exposure Modes
We've mentioned the QV-770's timed exposure modes several times already, but
feel they're so important that we're giving them their own section here.
The most interesting exposure modes on the QV-770 take advantage of the sensor's ability to continuously capture images every 0.05 seconds (!), and the availability of high-speed "buffer" memory capable of storing four full-frame images temporarily, until the camera can save them permanently.
The neatest trick is the QV-770's "Past" mode, in which the camera captures three frames of data before you press the shutter button! How can this be? Does the camera read your mind and know when you're about to press the button? Of course, the answer is no -- the camera can't read your mind. What happens instead is that, when operating in "past" mode, the sensor and camera electronics run all the time, constantly grabbing frame after frame, one new image every 0.05 seconds. At any moment, the three previous frames are held in memory, until the next one arrives and pushes the oldest one out. When the shutter button is finally pressed, all that happens is that the camera stops overwriting the oldest image each time, saving it to permanent memory instead. The net result is you capture a total of four images, ending shortly after the moment you pressed the shutter button.
The "Past" mode can be a real boon, if you're trying to catch a fleeting event or expression, and don't have the reflexes of Superman: If you can manage to push the shutter button within as much as a tenth of a second or so of the event itself, it will be safely recorded.
The QV-770's "Future" mode is the same trick in reverse: Instead of stopping its continuous recording with the button-press, it starts it instead. The end result here is a sequence of four images taken about 0.05 seconds apart, beginning at the moment you pressed the shutter trigger.
The final "rapid exposure" mode is "Continuous" recording, in which pictures are taken about every second, as long as the shutter button is held down, and there's space available in memory.
Sadly, none of the short-interval timed-exposure modes can be used with the flash, as it can't cycle nearly fast enough to keep up with such rapid-fire exposures.
In addition to the short-interval timed-exposure modes, the QV-770 also includes a familiar self-timer, in which the camera counts down for either 10 or 2 seconds before taking the picture. Even here though, Casio goes the conventional approach one or two better, with three different options: First, in single-shot mode you have 10 seconds before a single picture is taken. The second, multi-shot mode counts down a 10 second delay, and then takes four pictures in rapid succession (the "future" mode). (How many times have you set the camera up for a self-timer shot, and then discovered that someone blinked when the shutter went off?) Finally, in movie mode (see below), the camera will capture a low-resolution movie up to 3.2 seconds long after the 10-second delay is over. Finally, thanks to the swiveling lens, you can turn the camera so the LCD faces the subjects, so everyone can see the big, bright numbers counting down the time until the exposure.
Movie Mode
In the QV-770, Casio dropped the long-term time-lapse exposure mode of the QV-700,
but in its place added a unique "movie" mode. In this mode, the tricky
clocking of the CCD sensor let it capture long sequences of 160x120 images.
Up to 32 such images can be captured at 0.1 second intervals. What's more, the
resulting movie can be played back directly on the camera. When they're downloaded,
you'll need to use software to assemble them back into a movie on your computer,
but the ability to take and play movies directly from the camera itself is great
fun at parties and other gatherings. Each movie takes only 2 frames of image
storage, so you'll still have plenty of room for ordinary pictures in the on-board
memory, too.
Panorama Shooting
With recent software innovations, "panorama" shooting has become increasingly
popular, and Casio provides unique features in the QV-770 to support this. In
fact, they've once again gone one better than anyone else, allowing you to actually
view panoramas you've shot directly within the camera! To create a panorama,
a series of up to 9 images are taken in sequence, panning the camera between
each shot. In playback mode, panorama images are identified by an icon at the
top of the image. Pressing the shutter begins playback after a slight delay,
and the image slowly scrolls back and forth across the captured image. When
playing back a panorama, the height of the image is shrunk to about half of
the LCD height, and control instructions appear at the bottom of the LCD. The
"+" and "-" buttons control the direction of the scrolling,
the "menu" button pauses or jumps between frames, and the shutter
button exits the playback.
Unfortunately, the in-camera image-assembly is only of sufficient quality for display on the small LCD screen: In your computer, you'll want to use software such as Spin Panorama (included in the box with the QV-770) to "stitch" the separate images together into a single, super-wide picture.
The big challenge in creating panoramas is to have all the initial images line up properly, and include enough overlap between them to allow the software to smoothly blend from one image to the next. Normally, this requires either a special tripod head, or a lot of guesswork. In the QV-770 though, a clever panorama mode saves a slice of the image from the right-hand side of the previous frame and moves it over to the left-hand side as an aid to alignment. Even better, the reference image is translucent, meaning you can "see through" it to the current scene coming from the sensor. This lets you achieve almost perfect alignment effortlessly. The ability to achieve such good alignment between shots makes the final stitching process much easier, and reduces the likelihood you'll have visible seams in your final panorama.
Operation and User Interface
Given all its operating modes and features, you might expect the QV-770 to be
complex to operate. While it's true that there are a lot of buttons, Casio's
extensive use of the LCD panel makes accessing the different functions pretty
straightforward: The key is to become comfortable with the interaction between
the back-panel "mode" button and the "menu" button on the
top panel. The "mode" button takes the place of the top-panel rotary
switch on the QV-700, cycling through available image-recording modes when the
camera is in record mode. (The "mode" switch has no function when
the camera is playing back images.) When in record mode, each press of the "mode"
button advances you to the next capture mode, as indicated by the icon at the
top of the LCD panel. Available modes include normal/manual, movie, timed-recording,
self-timer, panorama, and title acquisition.
Once a mode is selected, you can specify detailed options by pressing the "menu" button to go to the function menu specific to that recording mode. Given the vast array of functions on the QV-770, we can't possibly step through each one here, but we'll describe several of the major functions to provide a general flavor of what it's like to operate the camera.
Normal picture-taking
Most of your picture-taking will be done in the "normal recording"
mode, designated by a horizontal page icon at the top of the display. With the
back-panel switch set to "Rec," you're ready to take a picture. In
this mode, the LCD panel acts as a viewfinder, but also gives you some information
on camera settings: Indicators in the upper left-hand corner show the flash
mode (no icon means auto-flash), and whether or not the lens is set to macro
mode. Other information displays on the LCD are controlled by the "Disp"
push-button on the top panel. You can turn on or off the mode indicator itself,
a storage indicator showing resolution setting, and frames remaining in memory,
and a battery-condition indicator.
While previewing the scene, the viewfinder display gives a fairly good representation of what the final image will look like. Assuming you don't have direct sunlight falling on the LCD panel, you can get a pretty good idea of what the exposure will look like on the final image. If the image seems too light or too dark, you can adjust the exposure by up to 2EV units in either direction, simply by pressing the "+" or "-" buttons on the top panel. (As mentioned earlier though, you may need to wait a few seconds after making a change, as there seems to be a slight time lag built into the camera's autoexposure circuitry.)
You can change the image resolution setting (fine, normal, or economy) at any time while in recording mode, simply by pressing the "F>N>E" button on the camera's rear panel. If the camera isn't set to display resolution and remaining image capacity, that indicator will briefly illuminate in the LCD when you change the resolution setting.
In normal recording mode, the "Menu" button brings up a screen allowing you to select "manual" mode, by forcing the aperture to either f2 or f8, or by explicitly selecting one of the fixed white balance settings.
Movie Mode
In "Movie" mode, the frames-remaining indicator switches to indicate
the number of movies that may be recorded in available memory, and the flash
indicator blinks, indicating that flash isn't available in this mode. The "menu"
button has no function in this mode.
Serial-Recording Mode
(This could also be called "timed exposure mode.") In "Serial-Recording"
mode, the menu button brings up choices for Continuous, Past, or Future recording
modes. You select a mode by pressing the +/- buttons until the desired mode
is highlighted, then the shutter button to select it. When in any of the continuous
modes, the flash is disabled, and the flash icon blinks on the LCD screen.
Self-Timer Mode
Self-Timer mode is indicated by a stopwatch icon. In this mode, the menu button
brings up choices for Single, Movie, or Future recording modes. As before, you
select a mode by pressing the +/- buttons until the desired mode is highlighted,
then the shutter button to select it. If you choose one of the continuous modes,
the flash is disabled, and the flash icon blinks on the LCD screen.
Panorama Mode
We discussed panorama mode at some length earlier. On the QV-770, panoramas
may only be taken with the camera in a horizontal ("landscape") orientation,
so the menu button has no function. (The QV-700 allows panoramas to be captured
with the camera oriented either vertically or horizontally.)
Image Review
Once you've taken one or more pictures, you can view them on the LCD panel by
flipping the back-panel switch to "Play." In this mode, the last picture
taken is displayed first, and you can page back and forth between shots by pressing
the "+" and "-" buttons. To review your images more quickly,
you can switch to a 4-up or 9-up index display via the "menu" button.
In these modes, the +/- buttons step you through the camera's memory 4 or 9
images at a time.
In Play mode, you also have the option of zooming in on the image, using the LCD screen as a "window" into the full picture. Zoomed in, the full image is about twice as large as the LCD screen, and you can pan around to inspect the full detail of the picture. Panning is controlled by the ubiquitous +/- buttons, and a small icon in the upper right-hand corner of the LCD shows you what part of the image you're looking at.
In-Camera Image Manipulation
As digital cameras become increasingly "smarter," it becomes practical
to do more and more image manipulation within the camera itself. Casio has taken
this capability to new heights with the QV-770, allowing you to cut-out one
image (in any of several different shapes) and overlay it on another; change
the color of an image; rotate an image in the display, filling the sides of
the horizontal frame with any of a choice of colors; or add titles to your images.
Titles are created by capturing a high-contrast image using a special recording
mode, selecting one of several standard banner formats, choosing title and banner
colors, and finally picking an image to drop the title onto. Title backgrounds
can even have varying degrees of transparency!
The image manipulation and titling capability is clearly directed at those who would use the camera's video-out capability (see below) for presentations driven directly from the camera. Some may question the benefit of assembling presentations in the camera, rather than on a computer and simply uploading the results back to the camera for display. While the camera's standalone capabilities are obviously less than those of a software package running on a host PC, we found the in-camera capabilities both more useful and more fun than we had anticipated: You might not want to rely on the QV-770's presentation capabilities to sell a multi million-dollar business deal, but they'd be absolutely great for family "slide shows," or school projects.
Image Storage and Interface
Memory
The QV-770 stores images on 4 megabytes of internal (non-removable) memory.
This will hold 30 images in "fine" mode, 60 in "normal"
mode, and 120 in "economy" mode. Movie files occupy the same space
as 2 "fine" quality images.
Computer Interface
Images are read from the camera by using the included QV-Link or TWAIN driver
software to download images via the built-in serial port. The QV-Link software
is quite straightforward in its operation, and versions for both Mac and PC
platforms ship with the camera. In the most normal mode of operation for QV-Link,
you would most likely begin by opening the camera's memory as an index of thumbnail
images. From there, it's easy to select multiple images for download, and then
pull down all the selected shots in a single download. Alternatively, the camera's
entire memory image can be downloaded for later sorting and culling in a single
operation. Images from the host can also be uploaded back to the camera, increasing
the QV-770's usefulness as a presentation device.
On the Windows platform, the maximum data-transfer rate is 57,600 baud. This translates into an image-transfer time of roughly 7 seconds, with another 3 seconds per image required for processing and screen display on our 133 MHz Pentium. On the Mac platform, the maximum transfer speed doubles to 115,200 baud, which would proportionately reduce the transfer times.
IR-TranP
We didn't have the opportunity to test it, as our computer didn't have the necessary
infrared (IR) communications port, but the QV-770 also supports data transfer
using the IR-TranP protocol. This protocol was developed specifically to transfer
picture files between digital imaging devices. We don't know much about the
details of the QV-770's implementation, but in many devices, IR-TranP is faster
than serial port transfers, and requires no troublesome cabling.
Camera-Camera Connections
Shoot them, collect them, trade them with your friends! - Inherent in all of
Casio's digital camera models is the ability to transfer images directly from
one camera to another. We're not sure just what application this would serve,
other than in a high school full of gadget-happy kids. (Its not hard to imagine
kids swapping pictures of each other during study hall.) Other than this though,
we confess we're hard-pressed to understand how one would effectively use this
capability...
Video Output
Casio was one of the first companies to include video output capability on their
cameras, a function that is now commonplace. We've mentioned this ability earlier,
and the concept of using the camera as a presentation tool. We vacillate somewhat
though, as to how frequently the typical user will take advantage of this capability.
For casual one-on-one sharing, the built-in LCD screen is often sufficient.
For a better viewing experience, whether in home or office, there's frequently
a computer handy, and computer CRTs always look better than televisions. On
the other hand, regardless of where you are, you can probably find a television
handy that will either have a jack for direct video input, or have a VCR attached
that does. Overall, video-out is a handy feature, and one that we'd rather have
than do without. (QV-770 models sold in the US only support the NTSC signal
standard: Presumably those sold in other countries would support some flavor
of PAL.)
Power
The QV-770 is powered by four standard 1.5v AA batteries, or the included AC
power adapter. Casio recommends either alkaline or lithium primary cells, but
we also had good luck with Rayovac Renewal rechargeable alkalines, NiCd, and
NiMH batteries. (A word of caution though: We've heard from earlier QV-camera
users that the lower operating voltage of most rechargeable batteries can cause
the camera to fatally "hang" as the batteries approach the end of
their usable charge. We can't verify this, but suggest you be very careful not
to push your batteries too far: Recharge them fully at the first sign of a low-battery
warning! Casio themselves recommends against NiCd or NiMH batteries.)
As with most similarly-equipped cameras, the LCD panel on the QV-770 consumes large amounts of power. Extended viewing of images will drastically shorten your battery life. That said, although we didn't conduct any formal tests, our general impression was that batteries lasted somewhat longer in the QV-770 than in other LCD-equipped cameras. Nonetheless, our standard recommendation that you use high-capacity NiMH rechargeable batteries for all your digital cameras holds here as well. (Moderated in this case by Casio's recommendation against that battery type.)
Included Software
The QV-770 has one of the richest assortments of included software we've seen
to date in any digital camera. The software package includes Casio's own driver
software, Adobe's PhotoDeluxe, ISR's Ixlaphoto, ColorDesk Photo, Spin Panorama
and Spin PhotoObject, and a trial offer from PictureMall, an internet-based
photo novelty supplier.
Basic camera operation and connectivity is provided by Casio's own QV-Link application for both Mac and Windows platforms. Also included from Casio are a Photoshop plug-in driver for Macintosh computers, and a TWAIN driver for Windows ones. All of these basic applications allow full control over uploading and downloading to or from the camera, and are all you really need to get images into or out of the QV-770.
Several of the included software packages provide for image manipulation, and the creation of various creative items such as calendars, cards, etc. Adobe's PhotoDeluxe program supports both Mac and Windows environments, while IxlaPhoto and ColorDesk Photo work only on Windows 95 machines. All of these provide for basic image manipulation and project creation. PhotoDeluxe includes the greatest number of "guided activities," and the most fonts and project templates, while Ixlaphoto includes "album" organization capabilities, tools for business presentations, and the ability to create simple web pages. ColorDesk's claim to fame is more extensive image manipulation, and a special color-matching system to insure good-looking printouts.
Spin Panorama is a panorama "stitching" program, that lets you combine multiple shots into wide panoramic views. Used in conjunction with the special panorama mode of the QV-700, it is particularly easy to assemble panoramic images. (The panorama shooting mode helps you line up successive shots, making the final stitching process easier, and the seams between images less evident.) Conversely, Spin PhotoObject lets you take pictures of an object from all sides, and then combine them into a QuickTime "object" that you can turn and look at different sides of on your computer.
Test Results
As with all Imaging Resource camera tests, we encourage you to let your own
eyes be the judge of how well the devices performed: Explore the links at the
bottom of this page, to see how well the QV-700 performed, and how its images
compare to other cameras you may be considering buying.
Overall, we found the image quality of the QV-770 to be a bit better than average for VGA-resolution cameras, with improved color saturation relative to the QV-700. Its resolution measured-out at about 400-425 line pairs per picture height in both horizontal and vertical directions. This is slightly lower than some other VGA-level cameras we tested, and may be due to Casio's use of a 1/4 inch CCD, rather than the larger 1/3 inch one some higher-performing devices used. On a positive note though, the QV-770's images were almost entirely free of the color artifacts that plague most digital cameras when taking pictures of high-contrast objects with fine detail.
We found the "live" LCD viewfinder was both quite accurate, and very predictable: In common with most point & shoot camera viewfinders, it displays slightly less of the image than is actually captured. (The captured image is about 5% larger than what you see on the LCD panel.) To its credit though, the displayed area is very accurately centered in the final image, avoiding the problems off-center viewfinder framing we've seen on several digital point & shoots.
Color accuracy on the QV-770 was quite good, with good saturation relative to other units we've tested. The increased color saturation was one of the few noticeable differences between its images and those of the earlier QV-700. Overall, the improved color saturation produced brighter, more colorful and more appealing images, although skin tones sometimes came out a little ruddy.
While it didn't prove to be much of a problem under normal shooting conditions, the tonal range of the QV-770 is also somewhat compressed: In scenes with contrasty lighting, you're likely to lose detail in both the shadows and the highlights. This tendency was more evident in strong highlights, but we found we could generally compensate fairly well by using the manual exposure compensation to bring down the overall exposure level one notch.
The QV-770's macro lens setting performed well: At closest approach, it captured an area as small as 4.8 x 3.6 inches (12 x 9 cm) at a 5.5 inch subject distance.
We found that flash exposure behaved differently on the QV-770: As noted earlier, under fairly bright incandescent lighting, using the flash resulted in fairly yellowish images. As it turns out, this problem is easily corrected by manually setting the white balance to "incandescent", but it will require a little closer attention in this regard than does the QV-700.
See for Yourself!
Take a look at the test images from the QV-770,
or jump to the Comparometer(tm)
page to compare its reference images to those from other digital cameras.
Conclusion
Overall, the QV-770 is a very nice package: It offers a number of features and
capabilities that simply aren't available anywhere else in the market (the unique
timed exposure modes, and its slick support for panorama images), and its image
quality is quite respectable as well. (In fact, we found ourselves preferring
images from the QV-770 over those of the QV-700 due to the increased color saturation.)
Match this with an excellent software bundle, and the result is a very compelling
combination: Excepting only its "big brother" the QV-700, you probably
get more capability in one box (in terms of ways you can capture images, and
things you can do with them) than with any other product on the market, and
at an excellent price point to boot.
Reader Sample Images!
Do you have a QV-770 camera? If you'll post an album of your samples
on one of the photo-sharing services and email us at [email protected],
we'll list the album here for others to see!
For More Info:
View the data sheet for the QV-770![]()
View the test images from the QV-770![]()

Follow Imaging Resource: