Canon PowerShot S110Canon updates their Digital ELPH with improved color, movie capture, and direct print capabilities!<<Shutter Lag & Cycle Time Tests :(Previous) | (Next): Camera Modes & Menus>> Page 8:Operation & User InterfaceReview First Posted: 5/24/2001 |
Operation and User Interface
The S110 features a straightforward user interface similar to that of other Canon PowerShot digicams, but without the large Mode dial for selecting a Shooting mode. Though it is somewhat reliant on its LCD display for confirming mode changes and menu settings, the LCD works very efficiently to minimize power drain. Even when the image display is turned off, simply pressing a control button activates the information display, allowing you to change the setting without turning on the image display. Once you've made the change, the information display automatically disappears and shuts off the LCD monitor after a few seconds.
The Menu system is set up in two different formats. The first section accommodates those functions that are external controls on some other PowerShot models: Shooting mode, Exposure Compensation, and White Balance. These three menu screens are accessed by pressing the Menu button and their options are selected by scrolling with the Arrow keys. Pressing the Set button locks in the desired option. To advance to the next menu in this section, you must press the Menu button after setting your selection. However, after the White Balance menu, subsequent menus are navigated with only the Arrow keys and Set button. Pressing the Menu button while in these sections will turn off the Menu. While this menu system is somewhat quirky to navigate, the user interface overall is fairly intuitive and quick to learn.
Control Enumeration

Main Switch (On / Off): Located on top of the camera, to the left of the Shutter button, the Main Switch is used to power the camera on or off in Shooting or Playback modes. When turning on the camera, the button must be held down until it beeps to successfully power up the camera.
Shutter Button: To the right of the Main Switch, surrounded by the Zoom adjustment lever, this large silver button sets focus and exposure when halfway depressed, and releases the shutter when fully depressed. When the camera is in Self-Timer mode, pressing the Shutter button activates the Self-Timer countdown.
Zoom Lever / Ring: Positioned on top of the camera, encircling the Shutter button, the Zoom lever controls the Optical Zoom in any Shooting (Record) mode. When the LCD monitor is active in either Automatic or Manual mode, this lever also controls the 2.5x digital telephoto. Pushing the lever to the left zooms out to the wide-angle setting and pulling it to the right zooms in to maximum telephoto. A dimpled marker, set at a 90-degree angle to the Zoom lever, indicates which direction the lens is zooming when you push or pull on the lever.
In Playback mode, the wide-angle end of the Zoom lever activates the nine-image index display mode, allowing you to select single images for review. A second press in the wide-angle direction allows you to scroll page by page through the index display. Pulling the lever back toward the telephoto end returns you to the normal nine-image index display page. A second pull enables the Playback zoom function, which enlarges the captured image by 2x.
Mode Switch: In the top right corner of the back panel, this small, rectangular sliding button controls the camera's operating mode, placing it in Playback (left) or Shooting mode (right).

Set / Flash Button: Directly under the bottom left corner of the LCD monitor, this button controls the Flash mode in Automatic, Manual, and Stitch-Assist modes. Pressing the Flash button cycles through five modes: Auto, Red-Eye Reduction, (Forced) On, (Forced) Off, and Slow Synchro modes (except in Stitch-Assist mode, where it cycles through On, Off, and Slow Synchro only). When a settings menu is displayed, this button is used to access and confirm menu selections.
In Playback mode, when Playback Zoom is enabled, holding down the Set / Flash button, while simultaneously pressing the right or left arrow keys, allows you to move up and down within an enlarged image.

Drive / Left Arrow Button: To the right of the Flash / Set button, the left arrow button controls the camera's Drive mode when in Automatic or Manual modes. In Automatic mode, the default setting is Single Capture and pressing the button once activates the Self-Timer mode. In Manual mode, the settings go from Single Capture, to Continuous Shooting, to Self-Timer. Also marked with a left-pointing arrow, this button allows the user to scroll through menu options.
In Playback mode, the left arrow button allows you to scroll backward through captured images. When the Playback Zoom is enabled, this button scrolls to the left within an enlarged image. Also in Playback Zoom, pressing this button while holding down the Set button allows you to scroll up within the enlarged image.
Focus / Right Arrow Button: To the right of the Focus button, the right arrow button controls the Focus mode while the camera is in any Shooting mode. Pressed once in Auto mode, it changes the focus to Macro (close-up). In Manual, Stitch-Assist, and Movie modes, a second press of the button changes the focus to Infinity mode, while a third press returns it to the Normal focus mode. This button is also marked with a right-pointing arrow, which allows the user to navigate through menu options.
In Playback mode, the right arrow button allows you to scroll forward through captured images. When the Playback Zoom is enabled, this button scrolls right within an enlarged image. Also in Playback Zoom, pressing this button while holding down the Set button allows you to scroll down within the enlarged image.
Menu Button: To the right of the Focus button, pressing Menu turns on the settings menu in each camera mode, and turns it off again when you've completed your menu selections. In the first three menu options only (Shooting mode, Exposure Compensation, and White Balance), the Menu button also scrolls from one menu to the next.
In Playback mode, pressing the Menu button allows you to delete the currently selected image (using the Set button), with an option to cancel.
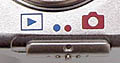
Display Button: The far right button along the bottom of the LCD monitor, the Display button controls the image display in any Shooting mode, turning it on or off.
In Playback mode, the Display button cycles through three image information display screens: 1) no information; 2) basic image information, including the file name, image number, Resolution and Compression setting, and the date and time it was recorded, and 3) the full information display, including Shooting mode, Macro or Infinity Focus, Drive, Self-Timer, Flash, Exposure Compensation, and White Balance (in addition to the information in #2).

Follow Imaging Resource: