Fuji FinePix S2 ProFuji updates their digital SLR with a 6 megapixel CCD, with the same excellent color...<<Reference: Datasheet :(Previous) | (Next): Print-Friendly Review Version>> FinePix S2 Pro Sample ImagesReview First Posted: 7/24/2002 |
Digital Cameras - Fuji S2 Pro SLR Test Images
(Original test posting: 07/24/02)
| I've begun including links in our reviews to a Thumber-generated index page for our test shots. The Thumber data includes a host of information on the images, including shutter speed, ISO setting, compression setting, etc. Rather than clutter the page below with *all* that detail, I'm posting the Thumber index so only those interested in the information need wade through it! |
Read our shootout article, comparing this camera to 3 other digital SLRs!
Outdoor
Portrait:
Excellent color (apart from a slight greenish tint from the white balance), great detail, low noise. The extreme tonal range of this image makes it a tough shot for many digicams, which is precisely why I set it up this way. (And why I shoot it without any fill flash or reflector to open the shadows.) The object is to hold both highlight and shadow detail without producing a "flat" picture with muddy colors. The S2's default settings produced excellent results here. Surprisingly, the camera got the exposure nearly perfect with no exposure compensation adjustment. (This is quite unusual. - This high-key subject almost always tricks exposure meters into underexposing. The default exposure was technically just right, but I'd have preferred a slightly brighter image. The minimum boost I could give it with the S2 was +0.5 EV though, which was really too much. (I'd have liked to try +1/3 EV.) I ended up shooting this with the Daylight white balance setting, which resulted in a slightly greenish tinge. The shot with Auto white balance was slightly more greenish, and the Manual option produced a rather warm result. (I found the warm cast from the Manual option more pleasing, but it was technically less accurate, so I went with Daylight.) Apart from the slight greenish cast, color is very accurate and pleasing. I really like the S2's handling of Caucasian skin tones, an area in which it's predecessor the S1 also excelled. Besides the skin tones, the S2 got the blue flowers almost exactly right, a color that seems to give most digicams I test fits. Resolution is excellent, with lots of crisp detail, and noise is quite low, even in the shadows. Overall, an excellent job with a difficult (way contrasty) subject.
|
|||||||||||||||||||||||||||||||||||||||||
|
Closer Portrait:
Once again, excellent skin tones. This shot required one notch of negative exposure compensation though. Once again, the S2 did a beautiful job with Marti's skin tones. Detail is exceptional, with the individual strands of her hair very delicately and crisply rendered. (And this is in the S2's 6 megapixel, uninterpolated mode: The SuperCCD interpolation does indeed bring out slightly more detail, due to the diagonal orientation of the sensor pixels.) Exposure details here are similar to the shot above, except this time I dialed in -0.5EV of negative exposure compensation, as the default exposure left the highlights in Marti's hair just a bit too "hot." The extreme contrast of these outdoor/full sun shots are intended to really test a camera's ability to handle high contrast, wide dynamic range subjects. Judging by how poorly most cameras do with this subject, I guess it's a pretty tough test. Accordingly, I was quite impressed with how well the S2 Pro did with it. It managed to hold onto highlight details without producing overly dark midtones, and while simultaneously holding good detail in the shadows. Also, there's no question that the S2 Pro is a great camera for portraits - Even in this horrible lighting, it manages to do an excellent job with Marti's skin tones. Very impressive!
|
|||||||||||||||||||||||||||||||||||||||||
|
Good illumination from the internal flash, nice integration with Nikon external speedlights. The S2's flash illuminates the subject well, with good color and brightness.
I found that I needed to use a little negative exposure compensation with
the internal flash operating in its normal mode (top photo at right),
but a little positive compensation when I combined the flash with a longer
shutter speed, working in shutter priority mode (middle photo). Finally,
I attached a Nikon SB-80DX speedlight to the S2, and set it to bounce
from the ceiling, but with the little reflector card popped up to throw
a little direct light on the subject. In this mode, I found I need to
add a full f-stop of positive flash exposure compensation, but the result
was beautifully even lighting. (As always, I strongly recommend external
flash units for any digicams that can work with them - the results you
can achieve are so dramatically better than anything the onboard flash
can do.) |
|||||||||||||||||||||||||||||||||||||||||
|
Indoor Portrait, No Flash:
Good color with custom white balance, although still a slight greenish tinge. This shot is always a very tough test of a camera's white balance capability, given the strong, yellowish color cast of the household incandescent bulbs used for the lighting. The S2's white balance system did a pretty good job with it, but I'd have liked to see the Auto setting produce a slightly (not much, but a little bit) more neutral image, and the Custom white balance option resulted in a slightly warm-toned image. (Overall though, I prefer a slightly warmer look to this image, to preserve some of the mood of the original lighting. It should be no surprise that the Incandescent white balance preset produced a very warm-toned image here: The S2's incandescent white balance is doubtless balanced for professional tungsten studio lighting, which has a color temperature of 3200K. The household incandescent lighting used in this test has a color temperature of only 2440K. As in several of the studio shots below, I found that the white balance setting affected exposure significantly, with the Auto white balance setting producing brighter exposures than the others. In this case, the Custom white balance option need a full f-stop more positive exposure compensation than did Auto. It looks like the S2 balances its color by reducing the gain of the "hot" color channels, rather than by boosting the gain of the ones with lower signal levels. Thus, the more the camera corrects the color balance, the more the effective exposure is reduced. This can lead to a good deal of uncertainty in exposure determination, a highly undesirable camera behavior. ISO Series:
|
|||||||||||||||||||||||||||||||||||||||||
|
Manual white balance is dead on, excellent color, fantastic resolution. The Auto and Daylight white balance settings were just a bit off, but the Manual white balance was spot-on, producing almost an almost perfectly neutral tone on the white paint of the bay window. Resolution is really exceptional here, clearly approaching the limits of the test target itself. (Which is pretty amazing, considering that the original was shot on 4x5 film with a very sharp lens and scanned to a file size of 500 MB.) In evaluating these test images for the S2, I've been comparing them to the matching ones shot with the Canon D60 and Nikon D100. As I work my way through the library of images, it's becoming increasingly clear to me that the S2 has a slight but definite edge in resolution and sharpness over both competing cameras. In this image, the S2 seemed to do a better job of resolving the fine details of the branches against the sky, above the central gable of the house. I was particularly intrigued by the S2's interpolated resolution mode. Fuji has made much of the unusual diagonally structured array of photosites in their SuperCCD sensors. The process of optimally converting this diagonal array of original pixels into the rectilinear arrangement of pixels in the final file results in a 2x increase in the number of pixels, a factor of about 1.4 in both horizontal and vertical directions. Interpolation has a lot of negative connotations in the digicam market, because it has been used by a number of companies to artificially inflate the pixel counts of their cameras. In the case of the SuperCCD though, it appears that there is indeed some validity to the interpolation that occurs as a natural consequence of the diagonal pixel structure. It's difficult to directly compare sharpness and detail in images of different sizes, so I took the interpolated image of the house here, and resampled it down to the same size as the "uninterpolated" 6 megapixel file. I then applied unsharp masking in Photoshop to both images, in the amount that seemed to produce the best rendering of the fine detail in the tree limbs. The result was very interesting, as shown below. - There's no question that the downsampled and sharpened interpolated image is crisper and shows more detail than the original 6 megapixel file from the camera. (And the resulting image is likewise noticeably sharper than anything I could extract from the 6 megapixel files from the Nikon D100 or Canon D60.) Here's a comparison of images from the three cameras. (The S2 Pro and D100 used the same lens at the same focal length, the D100 at f/10, the S2 Pro at f/8. (A difference in aperture, but I think not enough to be responsible for the sharpness difference seen here.) The D60 image was shot with Canon's much-acclaimed 100mm f/2.8 macro lens at an aperture of f/6.3. Unsharp masking for each image was set to produce the maximum apparent sharpness, without introducing artifacts visible in other parts of the image.):
|
|||||||||||||||||||||||||||||||||||||||||
|
This image is shot at infinity to test far-field lens performance. NOTE that this image cannot be directly compared to the other "house" shot, which is a poster, shot in the studio. The rendering of detail in the poster will be very different than in this shot, and color values (and even the presence or absence of leaves on the trees!) will vary in this subject as the seasons progress. In general though, you can evaluate detail in the bricks, shingles and window detail, and in the tree branches against the sky. Compression artifacts are most likely to show in the trim along the edge of the roof, in the bricks, or in the relatively "flat" areas in the windows. This is my ultimate "resolution shot," given the infinite range of detail in a natural scene like this. The S2 really excelled here, capturing an extraordinary level of fine detail throughout the frame. The fine details in the tree limbs and foliage above the roof are rendered with exceptional delicacy. Shadow detail is excellent as well, and the strong highlights on the bay window on the front of the house stop just short of blowing out. (This shot was taken under slightly hazy conditions though, so the test is less severe than as if it were shot on a crisp fall day, when the lighting would be even more contrasty.) On this photo, I again found that the "secret" of downsampling and applying unsharp masking in Photoshop that I tumbled across on the House poster test yielded even more exemplary results here. Below are shots comparing the raw 6 megapixel image as it came from the camera, the interpolated 12 megapixel image, and a sample of the 12 megapixel that has been downsampled to 6 MP in Photoshop and then had careful unsharp masking applied to it (200%, 0.2 pixel radius). (Click here to see the full image that received the downsampling/unsharp masking treatment.)
Resolution Series:
ISO Series:
Color Series
Tone Series
Sharpness series:
|
|||||||||||||||||||||||||||||||||||||||||
|
Lens Zoom Range I routinely shoot this series of images to show the field of view for each camera, with the lens at full wide angle, at maximum telephoto, and at full telephoto with the digital zoom enabled. Since the S2 accommodates a wide range of Nikkor lenses, this test is somewhat meaningless for it. Still, since I had the lens on the camera from the far field shots above anyway, I shot the following with the 24-85mm f/3.5-45. G AF-S zoom that I used for a lot of my test photos. (This lens seems like a very nice match for the S2, IMHO, corresponding to a range of 36 - 127.5mm on a 35mm film camera.) Following are the results with this lens at its maximum wide angle and telephoto settings.
|
|||||||||||||||||||||||||||||||||||||||||
|
Great color and resolution. This shot is often difficult for digicams, as the abundance of blue in
the image can trick white balance systems into producing a overly-warm
color balance. The S2 Pro did a very good job here, producing only very
slight casts with the Auto and Daylight
white balances. I once again chose the Manual
setting as the most accurate, but none of them were too far off. The strangest
thing here though, is that the Auto white balance image is noticeably
much brighter than the other two, even though the exposure settings were
the same for all three. Skin tones and the blue robe are pretty much spot
on. Resolution is very high, but frankly, the resolving power of the S2
is greater than the level of detail in the poster used as the target for
this shot.
|
|||||||||||||||||||||||||||||||||||||||||
|
Macro Shot
Not purely a function of the camera, but the Nikkor 100mm f/2.8 macro lens gives some incredible shots! This is another test I don't normally bother with for Digital SLRs, since you can put whatever lens you'd like on them. I couldn't resist slapping my 100mm f/2.8 Micro Nikkor on the S2 though. - This is really excellent lens, the full capability of which isn't really revealed by the lighting on this subject. Give it a serious look if you plan on much macro work! (If you've looked at many of my test shots snapped with consumer and prosumer-level digicams, you'll immediately be impressed by how sharp and distortion-free the image from the Micro Nikkor is, corner to corner.) Besides the 6 megapixel shots linked at right, I also shot and uploaded
some interpolated images, both with and without
flash.
|
|||||||||||||||||||||||||||||||||||||||||
|
Accurate color and saturation, excellent shadow detail. Once again, the Auto white balance setting resulted in an oddly brighter exposure, even though the aperture and shutter speed were identical for all three shots. I chose the Manual White balance shot as the most accurate, although it was still just slightly warm. Detail in the shadows is excellent, and image noise is quite low. There's a lot of highlight detail as well, but that's no surprise, given the overall slight underexposure of all but the Auto white balance shot. Color is very good, but I was a little surprised to see that the subtractive primary colors (cyan, magenta, and yellow) were a little dull, particularly the large yellow block of the MacBeth chart. Still, a very nice result. ISO Series
Color Series
Tone Series
|
|||||||||||||||||||||||||||||||||||||||||
|
Low-Light Tests Absolutely amazing low-light capability, with very low noise. With shutter speeds out to 30 seconds (plus Bulb exposures) and ISOs as high as 1600, the S2 has no trouble capturing bright images under very dim lighting. More surprising though, is how incredibly clean the images are. The shots in the table below were snapped at the lowest light level I commonly test to - 1/16 foot-candle, or 0.67 lux. At ISO 100 and 200, the noise levels are as low as many cameras manage to achieve in broad daylight. There's also no sign of "hot pixel" noise, despite the fact that the S2 doesn't appear to use any form of dark-frame subtraction. (I suspect this is yet another consequence of Fuji's SuperCCD technology.) Noise at ISO 1600 was much more pronounced, but still nothing near what I would normally expect from that ISO and this low a light level. (Comparing the S2 in this respect to competing 6 megapixel SLRs, it handily beats the Nikon D100 in noise performance, but is itself trounced by the Canon D60.) The table below shows the best exposure I was able to obtain at 1/16 foot-candle (0.67 lux), the darkest I normally test at (since that's as low as my light meter goes). Images in this table (like all of our sample photos) are untouched, exactly as they came from the camera.
|
|||||||||||||||||||||||||||||||||||||||||
|
Flash Range Test Good intensity to 11-12 feet with the lens used. (f/4.5 aperture) The S2's flash showed good intensity out to about 11-12 feet with the lens used for this test. (The Nikkor 24-85mm f/3.4-4.5 G) This is actually a bit better than Fuji's assigned guide number of 39 feet at ISO 100 - Divide by the f/4.5 aperture used here, and that should equate to only about 8.7 feet. I tested the flash at the default brightness level, with no flash exposure adjustments. Below is the flash range series, with distances from eight to 14 feet from the target.
|
|||||||||||||||||||||||||||||||||||||||||
|
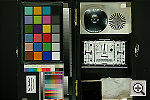
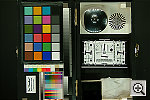
ISO-12233 (WG-18) Resolution Test
The S2 performed spectacularly on the "laboratory" resolution test chart, although I have to hasten to point out that SuperCCD sensors are optimized to produce their maximum resolution along the vertical and horizontal axes, while more conventional CCDs with rectangular pixels actually produce their highest resolution along axes tilted 45 degrees from vertical. Even allowing for the fact that the detail in this test target is oriented favorably for the SuperCCD sensor, the resolution results are quite remarkable. It's also interesting to note that the SuperCCD interpolation really comes into its own with this target, with the 12 megapixel files resolving much more detail than the 6 megapixel ones. It must be noted that there are some artifacts that creep in, with some regular patterns that look a little like stitching appearing on the diagonal lines at the 1000 l/ph level. There are also artifacts in the vertical and horizontal hyperbolic resolution wedges that appear as patches of ghostly-looking blotchiness. Still, while there are artifacts present, there's clearly what I'd call "strong detail" out to about 1650 lines/picture height in the horizontal direction, and 1600 l/ph in the vertical one. "Extinction" of the target elements doesn't occur until 1850-1900 l/ph. This is by far the highest resolution I've seen to date (late July, 2002) on any digicam I've tested. On consumer cameras, I normally comment here on the optical distortion and artifacts. Since these are functions of the lens, not the imager, it doesn't make sense to report on them for removable-lens SLRs. It is worth noting though, the difference a really good lens can make: I shot these photos with the Micro Nikkor 100mm f/2.8 Micro Nikkor, one of the sharpest lenses Nikon makes, and one that also has about the least distortion. As a result, chromatic aberration is exceptionally low, and the image is sharp corner to corner. (I also shot with the lens stopped down to f/8 for this shot, so I'd come as close as possible to testing the sensor and image processing algorithms, not the lens itself.) Resolution Series, 100mm f/2.8 Micro Nikkor
|
|||||||||||||||||||||||||||||||||||||||||
|
Viewfinder Accuracy/Flash Uniformity An accurate optical viewfinder. The S2's SLR optical viewfinder tested out at approximately 96 percent frame accuracy (vertically), slightly better than Fuji's claimed 93% vertical/95% horizontal figures. I generally prefer viewfinders to be as accurate as possible, so the S2 does pretty well here. Flash illumination is even throughout the frame. (No surprise, this was shot at a little distance, not wide angle at all.)
|
|||||||||||||||||||||||||||||||||||||||||


Follow Imaging Resource: