The Imaging Resource
Quick Review
Kyocera Finecam S4 Digital Camera
 |
Camera QuickLook | |
|
Review Date
|
|
|
|
User Level
|
|
|
|
Product Uses
|
|
|
|
Digicam Design
|
|
|
|
Picture Quality
|
High, 4.0-megapixel CCD | |
|
Print Sizes
|
up to 8x10 inches | |
|
Availability
|
|
|
|
Suggested Retail Price
|
|
|
Introduction
|
||||||||||
Though the Kyocera name is not a household word for most consumers (it's actually best known for its semiconductor development), both serious amateur and professional photographers will immediately recognize the names Contax, Yashica, and Carl Zeiss -- all camera / optics manufacturers marketed by 45-year-old Kyocera Optics Inc. -- and all highly regarded in the field of fine photographic systems and lenses. Though these camera lines are best known in the field of conventional film imaging, Kyocera has been making inroads in the digital realm as well, with digicam models reaching as far back as 1999, and last year's ultra-minature S3 model finding a good many homes with style-conscious consumers.
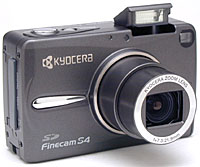
This year (2002), Kyocera has updated their line with the FineCam S4, a four megapixel update to the 3 megapixel S3 mentioned above. Billed as the "world's smallest four megapixel camera with 3x zoom," it is indeed that: It's about 14% smaller than the Pentax Optio 430, its nearest competitor in the four megapixel category. Read on for all the details on this tiny camera.
Camera Overview
Touted by Kyocera as the "world's smallest 4.0-megapixel camera with 3x zoom," the new Finecam S4 is definitely tiny (rivaling the Canon ELPH series in size). For comparison, the overall volume of the S4 is about 14% less than that of the Optio 430, it's nearest four megapixel competitor, and only about 22% larger than Canon's ultra-tiny two megapixel S200 digital ELPH. The S4's diminutive dimensions make it an easy fit for most shirt pockets and small purses, and its relatively smooth front lets you quickly slip it into a pocket and go. The camera fits easily into one hand, and comes with a wrist strap to keep it securely connected to your wrist. The dark, charcoal-grey body is mostly metal, making for a rugged-looking package. It feels solid to the touch, but isn't overly heavy. Exposure control is mainly automatic, though a handful of manual settings are available, with a fair number of external controls as well. The S4's 4.0-megapixel CCD delivers moderately high quality images, printable to 8x10 inches with good detail. (A consequence of the tiny size seems to have been some compromise in image sharpness: The S4's images are a good bit softer than those from most four megapixel cameras I've tested.) A lower resolution setting creates images better suited for email distribution to family and friends.
Equipped with a 7.3-21.9mm lens, equivalent to a 35-105mm lens on a 35mm camera, the S4 provides a true, 3x optical zoom. Maximum aperture ranges from f/2.8 to f/4.8, depending on the zoom setting, and remains under automatic control most of the time. However, through the Manual exposure menu, you can manually set the aperture to fixed apertures of f/2.8 or f/9.6. Focus ranges from 1.96 feet (60 centimeters) to infinity in normal AF mode, and from 6.69 to 23.6 inches (17 to 60 centimeters) in Macro mode. A manual focus option is available, though the S4's distance readout on the LCD monitor makes it a little tough to accurately gauge focus, and the camera offers a total of only 7 focus settings to cover the range from 60 cm to infinity. The image in the LCD monitor also doesn't enlarge in manual focus mode, so it's hard to know whether or not you have the focus properly set. While I always like to see manual focus options on cameras as an assist when shooting under low-light conditions, the S4's implementation is so hampered by its lack of distance readout or focus feedback that it doesn't seem particularly useful. A Landscape mode sets focus at Infinity, for shots of scenery though, and this could be handy for night shots at a distance. In addition to the 3x optical zoom, the S4 also features as much as 2x digital zoom. Remember though, that digital zoom decreases the overall image quality in direct proportion to the magnification achieved because it simply enlarges the center pixels of the CCD's image. For composing shots, the S4 has both a real-image optical viewfinder and 1.5-inch polysilicon, TFT, color LCD monitor. The LCD monitor's information display includes basic camera information, such as the shooting mode and image quality setting, as well as the current image capacity of the memory card. A set of focus/exposure brackets is in the center of the display, for lining up shots.
The S4 offers automatic exposure control, as well as a handful of manual adjustments. Through the LCD menu, the Manual menu option pulls up a sub-menu of exposure options. An AE Mode setting lets you choose between Program or two fixed aperture settings, and a Long Exposure mode offers two-, four-, and eight-second exposure times. In all other cases though, shutter speed and aperture remain under automatic control. The S4's full shutter speed range extends from 1/2,000 to eight seconds, though the two-second and longer times are only available in the Long Exposure mode. The S4 employs a Multi-Area Evaluation metering system by default, which looks at a number of areas of the image to determine the best overall exposure. Through the LCD menu, Spot and Center-Weighted options are also available. You can adjust the overall exposure from -2 to +2 exposure equivalents (EV) in one-third-step increments, also through the LCD menu. ISO sensitivity options include Standard (100 equivalent), as well as 2x and 4x settings (ISO 200 and 400, respectively) to improve low-light shooting performance and/or increase shutter speeds in brighter surroundings. White balance options include Auto, Daylight, Tungsten, Cloudy, Fluorescent, and Preset (manual setting). There's also a Color option that lets you capture images in black-and-white or sepia tones. The camera's built-in, pop-up flash automatically pops up when the camera is powered on, and operates in either Auto, Red-Eye Reduction Auto, Fill-In, Flash-Off, or Red-Eye Reduction Forced modes. The Flash button cycles through each mode, and an icon appears on the LCD display indicating the selection.
The S4 also features a Movie mode, accessed through the Quality setting of the LCD menu, which records as much as 15 seconds of moving images (without sound) per clip. Movies are recorded at a resolution of 320 x 240 pixels, and the actual amount of recording time will also depend on the available memory card space. For self-portraits or timed shots, the S4's Self-Timer counts down from either two or 10 seconds between the time the Shutter button is fully pressed and when the shutter fires. The Self-Timer setting in the LCD menu cycles between the two countdown times, and the normal exposure mode. (The shorter two second setting is handy for those times when you want to prop the camera on something to take a shot with a very slow shutter speed, but don't need time to get into the photo yourself.)
The S4 stores images on SD-type memory cards, and comes with a 16MB card. I highly recommend picking up a larger memory card, given the S4's 2,272 x 1,704-pixel maximum resolution, and the large files that it produces. SD cards currently are available in capacities as large as 128MB, with larger cards anticipated before the end of 2002. The camera uses either a lithium-ion battery pack or the AC adapter for power, both of which come with the camera, the included AC adapter acting as an in-camera battery charger as well. Since the S4 doesn't have the option of AA batteries as a backup power source, I strongly advise getting an additional battery pack, and keeping it freshly charged and on hand. (Like most subcompact digicams, the S4's battery life is rather short.) The S4 will automatically shut itself down after a small period of inactivity, which can be set through the Set-up menu to one, two, or six minutes. (You can also disable the power save function if you want to.) The S4 features a USB jack for downloading images to a computer, and comes with the appropriate cable, as well as drivers and Pixela ImageMixer software on CD (compatible with both Windows and Macintosh operating systems). For connecting to a television set, the S4 has a Video Out jack and US versions come with an NTSC video cable (I assume the European counterpart ships with the appropriate PAL cable, given the PAL setting in the camera menu). The S4 is DPOF (Digital Print Order Format) compatible, with a handful of print settings available in Playback mode.
Basic Features
- 4.0-megapixel CCD.
- 1.5-inch color LCD monitor.
- Real-image optical viewfinder.
- Glass, 3x 35-105mm lens, with apertures from f/2.8 to f/9.6.
- 2x digital zoom.
- Automatic exposure control, with Long Exposure mode for exposures as long as eight seconds.
- Full shutter speed range from 1/2,000 to eight seconds.
- Multi-Area Evaluation, Spot, and Center-Weighted metering modes.
- ISO rating of 100, with 2x and 4x adjustable settings.
- Built-in flash with five operating modes.
- Adjustable white balance with six modes, including a manual setting.
- SD-type memory card storage.
- Power supplied by rechargeable lithium-ion battery pack or AC adapter, both included.
Special Features
- Movie (without sound) recording mode.
- Adjustable Color mode, with black-and-white and sepia settings.
- Two- and 10-second Self-Timer.
- Manual focus option.
- Landscape (infinity) and Macro focus modes.
- DPOF (Digital Print Order Format) compatibility.
- USB cable for connection to a computer.
- Software CD with interface software and USB drivers.
- Video Out jack for connection to a television set.
Recommendation
With the S4's mostly automatic exposure control, the camera is a good option for novices who prefer to let the camera do all the work. However, the availability of two fixed aperture settings, as well as three longer shutter times for low light photography provides some options for those who want just a little extra control. The ability to manually adjust white balance, as well as increase the ISO sensitivity, also makes the camera flexible for more difficult shooting situations. The 4.0 megapixel CCD provides enough resolution to print images as large as 8x10 inches, although it is softer than other four megapixel cameras I've tested. (I'd rate most four megapixel models as being appropriate for print sizes as large as 11x14 inches.) The S4's super-compact design is excellent for travel and inconspicuous shooting, as it can be slipped into a pocket quickly when on the go. The user interface is fairly uncomplicated, and so shouldn't require long for most users to learn. Do pack along an extra battery or two though, as run times are rather short.
Design
Tiny and lightweight, the Finecam S4 definitely ranks among the smaller digicams I've seen. Measuring 3.68 x 2.24 x 1.24 inches (91 x 57 x 31.5 millimeters), the S4 will easily fit into shirt pockets and small purses. Additionally, the telescoping lens retracts almost flush with the camera front, keeping the front profile fairly smooth. The camera's wrist strap is great when holding the camera in-hand, but I'd recommend a small camera bag for better protection when traveling. Despite the metal jacketing on the body, the S4 very light weight, at just 6.2 ounces (175 grams), without the battery or memory card.
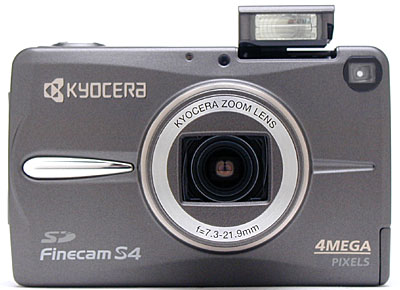
The S4's front panel is reasonably smooth with the lens retracted, leaving just a small protrusion around the outside ring of the lens barrel. A protective shutter automatically opens when the camera is powered on, as the lens telescopes outward (thus eliminating the need for a lens cap). The camera's pop-up flash also automatically opens when the camera is powered on, making the flash visible from the front. (The flash closes itself as well, whenever the camera is shut off.) Below the flash compartment and to the right is the front of the optical viewfinder window. On the opposite side of the flash compartment are the camera's light sensor and the Self-Timer LED lamp.
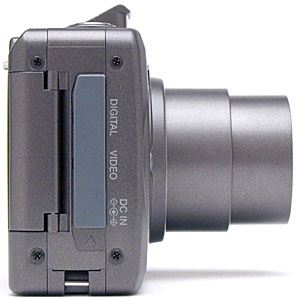
The right side of the S4 (as viewed from the back) holds the connector compartment, protected by a flexible, rubbery flap that remains tethered to the camera at the top. Beneath this covering are the Digital, Video, and DC In connector jacks. Directly below the connector compartment is an eyelet for attaching the wrist strap. Also on this side of the camera is the SD memory card slot. The hinged door over the card slot is released by a latch on the back panel before swinging open to reveal the card.
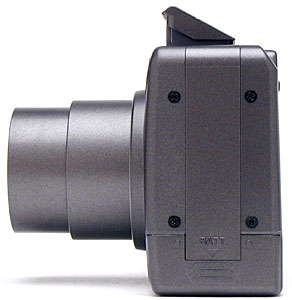
The only feature on the S4's left side is the battery compartment, covered by a locking plastic door. The door slides downward before opening, and snaps back into place securely (the pressure from the door holds the battery in position).
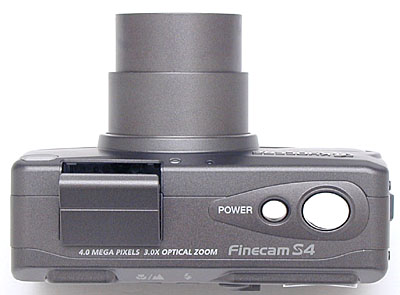
The Shutter and Power buttons share the S4's top panel with the pop-up flash.
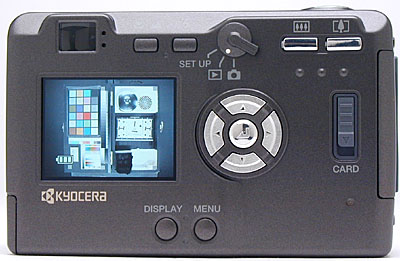
The majority of the S4's controls are on its rear panel, along with the LCD monitor and optical viewfinder. A set of LED lamps next to the optical viewfinder eyepiece report camera status, such as when focus and exposure are set, the battery is charging, or the flash is charging. The viewfinder eyepiece is very small, and thus rather sensitive to the lateral position of your eye. The viewfinders eyepoint is high enough that it's quite usable with eyeglasses, but I found I needed to have my eyeball lined up pretty exactly with the eyepiece to be able to see well through it. Lining the top of the back panel are the Macro/Landscape, Flash, and Zoom buttons, as well as a Mode switch that controls the camera's main operating mode. (Record, playback, or setup.) A Four Way Arrow pad in the center of the back panel controls a variety of functions, with an OK button in the center to confirm camera settings. Also on the back panel are the SD compartment cover latch, and Menu and Display buttons.
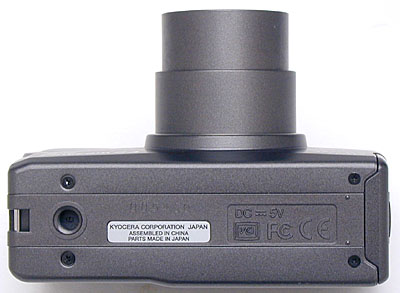
Finally, the S4 has a fairly flat bottom panel, with just the plastic-threaded tripod mount on the far left side. The position of the tripod mount at the far end of the camera body could make for a slightly tilted connection on some tripod heads, although that could easily be fixed by adjusting the angle of the tripod slightly.
Camera Operation
The S4 is a largely automatic camera, but an on-screen LCD menu system offers a handful of exposure options. A few camera settings feature external controls, such as flash, Macro mode, zoom, and the main camera mode, but the remaining settings rely on the LCD menu system. The LCD menu system itself is fairly simple to navigate however, with a set of menu options appearing along the bottom edge of the display, the arrow keys moving the cursor. Although not uncommon among digicams I've tested, it did seem a little odd to have to leave the arrow keys and press the OK button to change and cycle through settings. However, once I got the hang of the camera's operation, changing settings was a breeze. The only two-page menu is under the Manual settings option, but is fairly straightforward as well. With the instruction manual in hand, I'd estimate that the average user could become familiar with the camera after a half-hour or so of study.
External Controls

Shutter Button: This large, silver button on the front panel sets focus and exposure when pressed halfway, and fires the shutter when fully pressed.
![]()
Power Button: To the left of the Shutter button, this smaller silver button turns the camera on or off (triggering the pop-up flash to open and the lens to telescope forward when the camera is powered on).

Macro / Landscape Button: Directly to the right of the optical viewfinder eyepiece on the camera's back panel, this button alternates between the normal AF mode, Macro mode, and Landscape mode (which sets focus to infinity).
Flash Button: Adjacent to the Macro / Landscape button on the right, this button cycles through the available flash modes:
- Auto: Lets the camera control when to fire the flash, based on lighting conditions and whether or not the subject is backlit.
- Red-Eye Reduction Auto: The camera remains in control of the flash, but now fires a small pre-flash before firing the flash at full power, to reduce the Red-Eye effect in pictures of people or pets.
- Fill-In Flash: Fires the flash with every exposure, regardless of lighting conditions.
- Forced Off: Completely disables the flash.
- Red-Eye Reduction Forced: Fires the flash with every exposure, including the Red-Eye Reduction pre-flash.

Mode Switch: Next in line to the right of the Flash button, this switch controls the camera's main operating mode:
- Setup: Displays the camera's Setup menu on the LCD, which adjusts basic camera settings.
- Playback: Lets the user review captured images and movies on the SD card.
- Record: Sets up the camera to record still images and movies, with a handful of exposure options available.
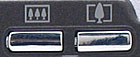
Zoom Controls: These two buttons are in the top right corner of the back panel, and control the optical and digital zoom while the camera is in Record mode.
In Playback mode, these buttons control the digital enlargement of captured images, as much as 2x.
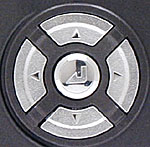
Four Way Arrow Pad: Located in the center of the back panel, these four buttons are arranged in a circle, with an arrow pointing in each cardinal direction. (up, down, left, right) In all mode menus, the arrow keys navigate through menu selections.
In Record mode, when manual focus is enabled, the right and left arrows control the focus setting. The down arrow dismisses the information display on the LCD monitor and recalls it again.
In Playback mode, the left and right arrows scroll through captured images on the card. When an image has been digitally enlarged, the arrow keys move your view around within the enlarged image. The up arrow displays or dismisses a screen showing information about the currently-displayed image.
OK Button: Positioned in the center of the Four Way Arrow pad, this button confirms menu selections. It also scrolls through the available options for each menu setting, when pressed repeatedly.
In Record and Playback modes, pressing this button outside of the menu system displays the LCD brightness adjustment screen.
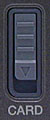
SD Card Release: All the way on the far right of the back panel, this sliding lever releases the memory card compartment door.

Menu Button: At the bottom of the back panel, this button displays the settings menu in both Playback and Record modes. It also dismisses the menu display.

Display Button: To the left of the Menu button, this button cancels and recalls the LCD display entirely in Record mode.
Camera Modes and Menus
 Record Mode: Designated on the Mode switch by a small camera symbol, this mode sets up the camera for capturing still or moving images. Pressing the Menu button pulls up the following settings menu:
- Self-Timer: Offers two- and 10-second self-timer modes, or returns to the normal capture mode.
- Quality / Movie: Cycles between the available resolution settings and Movie mode. Still image resolution choices are: Super Fine (2,272 x 1,704 pixels), Fine (2,272 x 1,704 pixels, but more JPEG compression), Normal (1,280 x 960 pixels), and Movie mode. Movie resolution is 320 x 240 pixels.
- Exposure Compensation: Increases or decreases the overall exposure from -2 to +2 EV in one-third-step increments.
- White Balance: Offers Auto, Daylight, Tungsten, Cloudy, Fluorescent, and Preset (manual) white balance settings.
 Manual Details: Displays the following sub-menu:
 - Color Mode: Records images in Color, Black-and-White, or Sepia tones.
- WB Preset: Adjusts the manual white balance setting, based on a white card held in front of the camera.
- AE Mode: Sets the exposure control to Program, and offers f/2.8 or f/9.6 aperture settings.
- Focusing: Places focus control under Automatic or Manual modes.
- Long Exposure: Offers two-, four-, and eight-second shutter times, or deactivates the mode.
- Sensitivity: Sets the camera's ISO sensitivity to Standard (ISO 100), or to 2x or 4x settings.
- Metering: Controls the camera's exposure metering mode. Options are Evaluation, Spot, and Center-Weighted.
- Record Review: Turns the instant image review function on or off.
- Digital Zoom: Activates or deactivates the 2x digital zoom.
 Playback Mode: This mode lets you review captured images on the memory card, as well as erase them, write-protect them, or set them up for printing on a DPOF-compatible output device. Menu options in this mode include:
- Multi: Displays an index of all the images on the SD memory card, six images at a time. Also switches back to Single display mode.
- Protect: Write-protects the currently displayed image, preventing it from being erased or manipulated (except via card formatting). This option can also remove protection.
- Erase: Deletes the current image from the memory card.
- Erase All: Erases all images from the memory card, except for write-protected images.
- Rotate: Rotates the displayed image in 90-degree increments clockwise.
- Auto Play: Enables an automatic slide show playback of all images on the memory card. You can adjust the interval and starting frame.
- Print: Displays the DPOF settings options, which let you set the number of prints to be made, designate an index print, or reset all print settings.
- Resize: Resizes the current image to a smaller resolution.
 Setup Mode: This mode automatically displays the following camera settings:
- Date: Sets the camera's internal calendar and clock, as well as the time display format.
- Format: Formats the SD memory card, erasing all files, even write-protected ones.
- Beep: Turns the camera's beep sounds on or off.
- Power Save: Turns off the Power Save function, or sets the time period before the camera goes to sleep to one, two, or six minutes.
- Mode Lock: Activates the Mode Lock function, which saves the current exposure settings whenever the camera is powered off, so that they are instantly recalled when the camera is switched back on.
- Language: Sets the camera's menu language to Japanese, English, French, German, or Spanish.
- Video Out: Sets the Video Out signal timing to NTSC or PAL.
- File Number: Resets the file numbering whenever a new SD card is inserted.
- Mode Reset: Returns all camera settings to their defaults.
- Color Select: Lets you choose the display color for selected menu items. Options are Purple, Red, Yellow, or Blue.
Sample Pictures
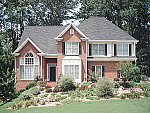
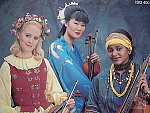
See our sample pictures and detailed analysis here. The thumbnails below show a subset of our test images. Click on a thumbnail to see the full-size photo.
 |  |  |
| | | |
|
|
|
|
| | | |
|
|
|
|
| | | |

Specifications
See the specifications sheet here.
Picky Details
Information on shooting speed, battery life, etc. can be found here.
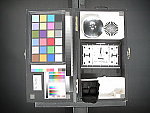
- Color: The S4 produced pretty good color throughout most of the testing, both outdoors and under the studio lighting. It tended to be a little less saturated than a lot of consumer cameras, although it was actually more faithful to the original subjects as a result. I most often chose the Manual and Auto white balance settings, as the Daylight setting typically resulted in a warm color cast. Both the Incandescent and Auto white balance settings had trouble with standard room lighting, though Manual white balance produced nearly dead-on color. The S4 also produced good color on the test targets under the studio lighting, though the camera's tendency to overexpose the studio shots tended to wash out the color and weakened overall saturation. The blue flowers of the Outdoor and Indoor portraits were nearly accurate, though slightly purplish. Skin tones looked about right both indoors and out.
- Exposure: The S4's external light sensor gave it some trouble with exposure, especially in the studio shots. Because the camera doesn't meter through the lens, it is easily fooled by scenes with large light or dark areas surrounding the subject (but outside the frame.) The black background behind the studio targets threw off the camera's exposure metering, most noticeably in the Davebox shot, which was heavily overexposed. Because the camera is metering a much larger area than what's viewed through the lens, the abundance of black background around the relatively small Davebox target made it difficult to determine the most accurate exposure. However, the camera captured great midtones in the harsh lighting of the Outdoor portrait, and did a good job with the Indoor Portrait (without flash) as well.
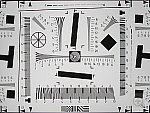
- Sharpness: Image sharpness was rather low in most cases, though the S4's 4.0-megapixel CCD captured fairly good detail. Details such as the fine foliage in the House and Far-Field Test were very soft, as were the rounded details in the Macro and Musicians targets. Optical distortion was also a bit high at both the wide-angle and telephoto lens settings, though chromatic aberration in the corners of the image was very faint. The most evident distortion was in the form of corner softness, with the most visible instance in the Macro test shot and House poster.
- Closeups: The S4 performed about average here, capturing a slightly large macro area of 4.89 x 3.67 inches (124 x 93 millimeters). Corner softness was present in all four corners, and details were soft throughout the frame. Color and exposure were both good, however.
- Night Shots: The S4's maximum shutter speed of eight seconds gives the camera good low-light shooting capabilities. At 100, 200, and 400 ISO settings, the S4 captured bright (albeit noisy) images at light levels as low as 1/16 foot-candle (0.067 lux). Color was good in most instances, though slightly warm with the 100 ISO setting. Since the S4 doesn't have a dark-frame noise reduction system, "hot pixel" noise was fairly pronounced in longer exposures at all ISO settings. The S4 should easily handle dark shooting situations, well below average city street lighting at night, but really dark conditions and the long exposure times they require will result in rather noisy images.
In the Box
The S4 arrives with the following items:
- Hand strap.
- AC adapter.
- Lithium-ion battery pack.
- Video cable (NTSC for Japanese and US, PAL for European models).
- USB cable.
- 16MB SD memory card.
- Software CD.
- Instruction manual and registration kit.
Recommended Accessories
- Large capacity SD memory card.
- Additional lithium-ion battery pack.
- Soft case for travel.
| Free Photo Lessons | |
|


Follow Imaging Resource: