Quick Review
Casio Exilim EX-Z3 Digital Camera
 |
Camera QuickLook | |
|
Review Date |
|
|
|
User Level |
|
|
|
Product Uses |
|
|
|
Digicam Design |
|
|
|
Picture Quality |
High, 3.2-megapixel CCD | |
|
Print Sizes |
4x6, 5x7, 8x10 | |
|
Availability |
|
|
| Suggested Retail
Price (At introduction) |
|
|
Introduction
|
||||||||||
Consumer electronics giant Casio has been one of the true innovators in the world of digital photography, although their role is seldom recognized as such by industry commentators and pundits. Their original QV-10 camera was the first to include an LCD display panel, a feature that has become nearly ubiquitous across the entire digital point and shoot camera marketplace. The swiveling lens first seen in the QV-10 also became more common among other manufacturers.
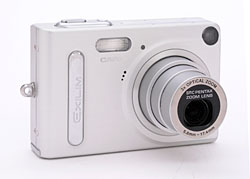
With the new Exilim series of ultra-thin, very compact digital cameras, Casio continues to innovate. The latest in the series is the EX-Z3, which boasts a 3.2-megapixel CCD and a true, 3x optical zoom lens in its tiny dimensions. (The lens being the same clever design developed by Pentax for their own Optio S model.) The Z3 also has no less than 21 preset shooting modes, making it a versatile choice for just about any situation. It's tiny, quick on the draw, and very flexible. - Read on for all the details.
Rivaling some of the smallest digicams currently on the market, Casio's new Exilim EX-Z3 is unabashedly tiny. Measuring 3.4 x 2.2 x 0.9 inches (87 x 57 x 23 millimeters) and weighing just 4.8 ounces (135 grams) with the battery and SD memory card, the EX-Z3 is a perfect match for small shirt pockets and purses. Clearly meant to tag along to just about any destination, the EX-Z3 is well-suited for travel, as it's not much bigger than a (thick) stack of credit cards. The built-in lens cover automatically opens whenever the camera is powered on, and the lens telescopes outward in a matter of seconds, making it quick on the draw. With its 3.2-megapixel CCD, you can capture high resolution images, good for printing as large as 8x10 inches. (A lower resolution setting is perfect for email attachments.)
The EX-Z3 features a 3x, 5.8-17.4mm SMC Pentax lens, equivalent to a 35-105mm lens on a 35mm camera. Maximum aperture ranges from f/2.6 to f/4.8, depending on the zoom position, and remains under automatic control. Focus covers a range from 1.3 feet (40 centimeters) to infinity in normal shooting mode, with a Macro range from 2.4 to 19.7 inches (6 to 50 centimeters). This is the same lens as we saw on the Pentax Optio S, and it shares the same capabilities and limitations. (Very compact, good sharpness in the center, but rather soft in the corners of the frame.) The EX-Z3 offers both manual and automatic focus control, and features a fixed Infinity setting as well. In manual focus mode, the central portion of the image is enlarged 2x as an aid to focusing. A maximum of 4x digital zoom is available in addition to the optical zoom, but keep in mind that digital zoom always decreases the overall image quality because it simply enlarges the center pixels of the CCD image.
For composing your shots, the EX-Z3 features a tiny, real-image optical viewfinder as well as a generous 2.0-inch, TFT color LCD monitor (which takes up most of the back panel). The LCD monitor reports basic camera settings information, including camera mode, the number of available images, focus mode, date and time, and battery power, among various other mode information. Additionally, it reports the selected aperture and shutter speed, whenever the Shutter button is halfway pressed. (So, though you can't control the actual exposure, you can at least get a good idea of what it will be, and whether any exposure compensation is needed.) The Display button not only controls the amount of information on the LCD display, but also enables a small histogram for checking exposure.
While tiny, the Z3's optical viewfinder is reasonably eyeglass-friendly, as its eyepoint is high enough that you can actually see all of it without mashing your glasses against the back of the camera. Unfortunately, the Z3's optical viewfinder is very "tight," showing only 73-77% of the frame, so you'll find yourself relying on the LCD for any critical framing. The good news is that the LCD shows essentially 100% of the final image area.
The EX-Z3 offers automatic exposure control, which keeps things simple for novice users, but allows for little control by more sophisticated photographers. Shutter speeds range from 1/2,000 to one second, which means you'll need to use the flash for shooting in low-light conditions. An On/Off button on top of the camera powers the camera on, and a sliding switch selects either Playback or Record mode. To determine exposure, the camera uses a multi-pattern metering system, which takes exposure readings from areas throughout the frame and then determines the best overall exposure. In keeping with its basic point & shoot design, there are no options for center-weighted or spot metering. You can increase or decrease the exposure from -2 to +2 exposure equivalents (EV) in one-third-step increments, either by pressing the right and left arrow keys in Record mode, or through an option in the LCD menu. An ISO adjustment offers an Auto setting, as well as 50, 100, and 200 equivalent settings. White Balance options include Auto, Daylight, Shade, Incandescent, Fluorescent, and Manual settings, which handle most average lighting conditions.
Although you can't control exposure directly, the EX-Z3 does offer 21 preset "scenes" for specific shooting situations, through the Best Shot mode option of the Record menu. Scene modes include Portrait, Scenery, Portrait with Scenery, Coupling Shot, Pre-Shot, Children, Candlelight Portrait, Party, Pet, Flower, Natural Green, Sundown, Night Scene, Night Scene Portrait, Fireworks, Food, Text, Collection, Monochrome, Retro (sepia), Twilight, and Register Favorites (which lets you register favorite images and save them as presets).
Most of the scene modes are self-explanatory, but a couple call for further explanation. In Coupling mode, the camera lets you combine two separate images of people into one. For example, you could take one image of a friend in front of some scenery, and then have your friend take another image of yourself (on opposite sides of the frame). When shooting in this mode, the camera splits the screen in half, with the active half brighter than the inactive one. After you've shot the first image, a translucent copy of that image remains, making it fairly easy to line things up so the background will be in the same orientation for both shots. After the second image is shot, the camera combines the two images into one so that both subjects are in the shot. Playing with this feature, I was surprised to find that it worked better than I expected. There's always a very slight seam down the middle of the image, but if you're careful lining things up, it's hardly visible. Pre-Shot mode is a bit of a variation on the Coupling mode, and a good choice for those instances when you need someone else to take a picture of you. (Think vacation pictures.) This mode lets you set up the framing and then hand off the camera to another person to capture the shot. First, you frame the background you'd like to have, and then press the Shutter button. A ghost-like image of the background remains on the monitor, helping the other person to line you up in the shot and capture the background you had in mind.
The EX-Z3 also features a Movie mode, which records moving images with sound for a maximum of 30 seconds per movie. Movies are recorded at the 320 x 240-pixel resolution setting, and the actual length of recording time will vary depending on the amount of available memory space. A Self-Timer mode provides either a two- or 10-second delay between the time the Shutter button is pressed and when the camera actually takes the picture, allowing you to get into your own shots. An X3 Self-Timer setting takes three consecutive self-timer images in rapid succession, with a 10-second shutter delay before the first. The camera's flash operates in either Auto, Off, On, or Red-Eye Reduction modes, and is rated as effective to approximately 7.5 feet (2.3 meters), a figure that matched my own test results fairly well.
The EX-Z3 stores images on SD / MMC memory cards, and also features 10 megabytes of internal memory. Since the camera does not come with a memory card, I strongly recommend picking up at least a 32- or 64-megabyte card at purchase, so you won't miss any shots due to lack of memory space. A USB cradle also comes with the camera, and provides quick connection to a computer for downloading images. The cradle also provides in-camera battery charging for the NP-20 lithium-ion battery pack. An AC adapter is included for the USB cradle, but the camera itself does not have a DC-In terminal. Since the EX-Z3 does not accommodate AA batteries in any form, I also highly recommend picking up an additional battery pack and keeping it freshly charged. A software CD loaded with multi-language Casio Digital Camera Software and a detailed instruction manual comes with the camera, and provides minor editing tools and image organization utilities. (I applaud the inclusion of an electronic version of the manual, but really think that not including a full printed instruction manual with cameras is a disservice to consumers.)
Basic Features
- 3.2-megapixel CCD.
- Real-image optical viewfinder.
- Large, 2.0-inch color TFT LCD monitor.
- Glass, 3x, 5.8-17.4mm SMC Pentax lens, equivalent to a 35-105mm lens on a 35mm camera.
- 4x digital zoom.
- Automatic exposure control, plus 21 preset Scene modes.
- Shutter speeds from 1/2,000 to one second.
- Maximum aperture of f/2.6 to f/4.8, depending on lens zoom position.
- Built-in flash with four modes.
- SD/MMC memory card storage, though card not included.
- 10 megabytes of internal memory.
- Power supplied by one NP-20 rechargeable lithium-ion battery pack.
- Software CD loaded with Casio Digital Camera Software and instruction manual for Macintosh or PC.
- USB cradle for quick connection to a computer and charging of the camera's battery.
Special Features
- Movie with sound mode.
- Two- or 10-second Self-Timer for delayed shutter release.
- Macro lens setting.
- Manual focus option and Infinity fixed-focus setting.
- White balance (color) adjustment with six modes, including a manual (custom) option.
- Sensitivity adjustment with three ISO equivalents and an Auto setting.
- DPOF (Digital Print Order Format) compatibility.
- Photo Album utility with USB cradle.
Recommendation
The EX-Z3's tiny dimensions and user-friendly interface should make it a popular option for anyone frequently on the go. The camera's point-and-shoot style should appeal to novices, while the 21 preset shooting modes give the camera more exposure versatility than most standard point-and-shoot designs. A 3.2-megapixel CCD delivers high quality images, good for printing or distributing via email. When it comes to downloading images, the EX-Z3's USB cradle makes it easy, and provides a few unique image management tools as well. An excellent choice for novice photographers, the EX-Z3's small size and well-rounded feature set should also appeal to more experienced photographers looking for a fun "take anywhere" camera for snapshots.
Thin, compact, and always ready to shoot, Casio's new EX-Z3 digital camera is fun, user-friendly, and a sure bet for consumers with active lifestyles. Its sleek, smooth styling is free from any extreme protrusions except for the lens, which telescopes outward when powered on. Measuring 3.4 x 2.2 x 0.9 inches (87 x 57 x 23 millimeters), the EX-Z3 fits well into small shirt pockets, hip pockets, and evening bags. With the battery and memory card, the EX-Z3 weighs just 4.8 ounces (135 grams). Because the small size might be a little difficult for larger hands to hold onto, a thin wrist strap is included for some security if the camera slips through your fingers. The camera's built-in, shutter-like lens cover means you can stash the camera in a pocket and go, without worrying about scratching the lens. (Or losing a lens cap.)
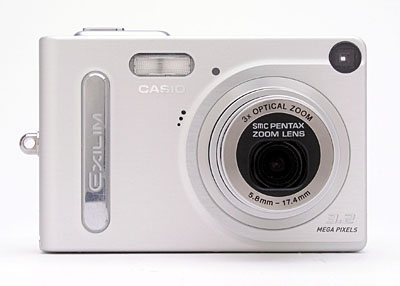
The front of the camera features the lens, flash, optical viewfinder window, self-timer lamp, and tiny microphone. A shutter-like, retractable lens cover protects the lens whenever the camera is powered off, sliding quickly out of the way when the camera is turned on. The lens then telescopes out from the camera body a bit less than an inch into its operating position. When powered off, the front of the camera is flat with only a thin raised finger grip, so be sure to keep the wrist strap securely around your wrist when holding the camera.

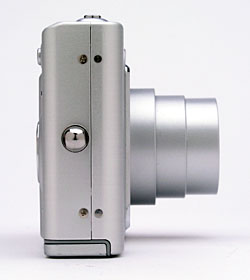
The left side of the camera is smooth, with only a shiny silver strip running down the center of the panel. The right side of the EX-Z3 features only the eyelet for attaching the wrist strap.
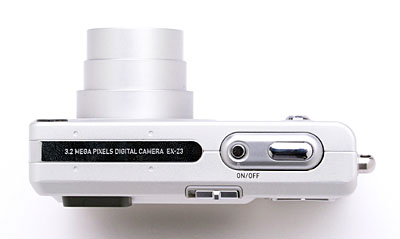
The EX-Z3's top panel is mostly flat, although a small ridge protrudes from the surface on the right side. The Shutter and Power buttons are located on this ridge, the power button recessed flush with the surface to help prevent accidental actuation when the camera is carried in a pocket.
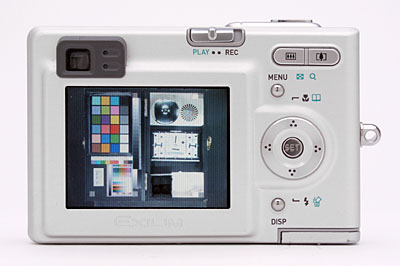
All of the EX-Z3's controls are on the rear panel, along with the optical viewfinder eyepiece and large LCD monitor. At the top of the panel is the Mode switch, which selects between Playback and Record modes. Lining the right side of the rear panel are the Zoom, Menu, Set, and Display buttons, along with a Multi-Controller in the center. In addition to navigating menu screens, the Multi-Controller access a number of camera functions, depending on which arrow keys are pressed. The EX-Z3's optical viewfinder is quite small, with a moderately high eyepoint for eyeglass wearers. Two LED lamps on the right side of the eyepiece report camera status, such as when focus is set, the flash is charging, the camera is writing to the memory card, etc. (A full listing of the light patterns and their meanings is in the instruction manual.)

The EX-Z3's bottom panel is flat and smooth, featuring a metal-threaded tripod mount, the Cradle connector jack, and the memory card and battery compartment. (Kudos to Casio for using metal for the tripod socket, rather than the more common plastic.) A sliding door protects the memory card and battery compartment, and slides out before opening. Inside, the battery and SD/MMC card slots line up side by side. Though the battery compartment is too close to the tripod mount to allow quick battery changes while shooting with the camera on a tripod, I doubt this will be much of an issue with the camera's users, given the camera's highly portable design.
The accompanying USB cradle provides quick connection to a computer, in-camera battery charging, and limited file management options. The AC adapter and USB cables plug in to the designated jacks on the back of the cradle. Across the cradle's front are the Photo and USB buttons, as well as two battery charge status LEDs. When the camera is in the cradle, pressing the Photo button starts an automated slide show of the images on the memory card. (You can adjust the slideshow parameters via the Playback menu, including which images to display, the interval between successive frames, and how long to leave the show running.) The USB button connects the cradle to the computer, launching Casio's software if you have it installed, so you can download images.
The EX-Z3's user interface is very straightforward, with only a few external controls and an easily navigable LCD menu system. For standard point-and-shoot operation, the most basic features such as flash, focus mode, and zoom are all accessible via external controls. An external switch controls the main operating mode, and the camera's LCD menu system is simple to navigate when you do have to enter it. Three menus are available in Record mode, two in Playback, delineated by subject tabs at the top of the screen. The arrow keys of the Multi-Controller scroll through each selection, and the Set button in the center of the pad confirms any changes. It shouldn't take much more then half an hour to become familiar with the camera setup, even without the manual, as it's fairly intuitive Novice users may require an hour or so to become comfortable though.
External Controls

Power Button: This tiny button, located on the top panel next to the Shutter
button, turns the camera on or off.
![]()
Shutter Button: To the right of the Power button on top of the camera, this
button sets focus and exposure when halfway pressed, and fires the shutter when
fully pressed.

Mode Switch: Crowning the camera's rear panel, just above the top
right corner of the LCD monitor, this sliding switch selects Record or Playback
modes.
![]()
Zoom Toggle Button: Located in the top right corner of the back panel, this
button controls the optical and digital zoom in any record mode.
In Playback mode, this button lets you zoom in on captured images, or select the index display mode to quickly scan the images stored in the camera's memory, nine at a time.

Menu Button: Just below the Zoom button, this button activates
the LCD menu display in Record and Playback modes. Pressing this button also
cancels the menu display.
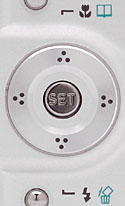
Multi-Controller and Set Button: Centered vertically on the camera's rear
panel, this four-way rocker button features arrows pointing up, down, left and
right. In the center is the Set button, which confirms menu settings. In any
settings menu, the four arrow keys navigate through menu options, highlighting
selections.
In Record mode, the up arrow key accesses the Macro, Infinity, and Manual focus modes. The down arrow cycles through the available flash modes, including Auto, Off, On, and Red-Eye Reduction. The right and left arrow keys adjust the Exposure Compensation, unless specified otherwise through the settings menu.When the camera is in manual focus mode, the right and left arrows adjust the focus setting, and exposure compensation can only be set via the Record menu.
In Playback mode, the right and left keys scroll through captured images. When an image has been enlarged, all four keys pan around within the view. When viewing images normally, the down arrow displays the delete menu, with options for deleting the current file or all files. During normal playback display, the up arrow activates the Album setting menu, for creating photo albums of captured images. You can choose a layout option, background color, text style, usage (Web, Print, or View), or let the camera automatically set up the album. (This option is also included in the accompanying software, and can be setup on a computer.) This is a pretty nifty camera feature, one that I've not seen anyone but Casio market. (Some of their earlier cameras had Album options as well.) The ability to turn a camera full of pictures into a web-ready photo album with no computer intervention at all is pretty impressive!

Display Button: Directly below the Multi-Controller, this button cycles
through the available LCD displays in each mode. In Record mode, pressing the
button once displays the image with a full information display, while a second
press adds the histogram to the display. A third press displays the image area
only, and a fourth press disables the LCD altogether.
In Playback mode, the first press displays limited image information, while a second press increases the information displayed and includes a histogram. A third press disables the information overlay and the histogram.
Record-Mode Display:
 The
EX-Z3 has three Record mode displays, shown at right. The first displays the
image area and a fairly comprehensive information overlay, including resolution
and quality settings, flash mode, camera mode, etc., and the aperture and shutter
speed whenever the Shutter button is halfway pressed. The second mode adds a
small histogram, for double-checking exposure. The third mode shows the image
area only, with just the focus/exposure brackets displayed in the center of
the screen.
The
EX-Z3 has three Record mode displays, shown at right. The first displays the
image area and a fairly comprehensive information overlay, including resolution
and quality settings, flash mode, camera mode, etc., and the aperture and shutter
speed whenever the Shutter button is halfway pressed. The second mode adds a
small histogram, for double-checking exposure. The third mode shows the image
area only, with just the focus/exposure brackets displayed in the center of
the screen.
Playback-Mode Display
 In
Playback mode, you can use the EX-Z3's zoom control to zoom in or out on an
image, or show an index display of the captured images on the memory card. Pressing
the "W" side of the zoom level when you're already viewing a thumbnail
display takes you to a calendar view, which groups images in the camera's memory
according to the date they were captured on. The Display button controls the
level of information displayed over the image, and accesses a histogram display
as well.
In
Playback mode, you can use the EX-Z3's zoom control to zoom in or out on an
image, or show an index display of the captured images on the memory card. Pressing
the "W" side of the zoom level when you're already viewing a thumbnail
display takes you to a calendar view, which groups images in the camera's memory
according to the date they were captured on. The Display button controls the
level of information displayed over the image, and accesses a histogram display
as well.
Camera Modes and Menus
Record Mode: In Record mode, the camera can capture still images or movie files. Exposure remains under automatic control, but the Best Shot option of the LCD menu system offers 21 preset shooting modes for more difficult situations. Pressing the Menu button displays the following three submenus and options:
 Record
Menu
Record
Menu
- Record Mode: Sets the record mode to Snapshot, Best Shot, or Movie. Within Best Shot mode, 21 preset scene modes are available, including Portrait, Scenery, Portrait with Scenery, Coupling Shot, Pre-Shot, Children, Candlelight Portrait, Party, Pet, Flower, Natural Green, Sundown, Night Scene, Night Scene Portrait, Fireworks, Food, Text, Collection, Monochrome, Retro (sepia), Twilight, and Register Favorites (which lets you register favorite images and save them as presets).
- Self-Timer: Activates the Self-Timer shooting mode, with shutter delays of two or 10 seconds. An "X3" setting records three self-timer images in rapid succession, after a 10-second shutter delay. (Great for avoiding problems with eye-blinks, etc.)
- Size: Sets the image resolution to 2,048 x 1,536; 1,600 x 1,200; 1,280 x 960; or 640 x 480 pixels.
- Quality: Sets the JPEG compression level to Fine, Normal, or Economy.
- EV Shift: Increases or decreases overall exposure from -2 to +2 exposure equivalents (EV) in one-third-step increments.
- White Balance: Adjusts the overall color balance of the scene. Options include Auto, Daylight, Shade, Incandescent, Fluorescent, and Manual.
- ISO: Adjusts the camera's light sensitivity, options are Auto, or 50, 100, or 200 ISO equivalents.
- Digital Zoom: Turns the 4x digital zoom on and off.
- Review: Turns the instant image review function off. If on, the image is displayed post-capture on the LCD screen for a few seconds.
- L/R Key: Sets the left and right arrow keys to control either
Record Mode, Exposure Compensation, White Balance, ISO, or the Self-Timer.
An Off setting renders the keys without function.
 Memory
Menu: This menu lets you specify a handful of camera settings to
be remembered whenever the camera is powered off. Options are Record Mode,
Flash, Focus, White Balance, ISO, Digital Zoom, and MF Position.
Memory
Menu: This menu lets you specify a handful of camera settings to
be remembered whenever the camera is powered off. Options are Record Mode,
Flash, Focus, White Balance, ISO, Digital Zoom, and MF Position.
 Set-Up
Menu
Set-Up
Menu
- Beep: Turns the camera's beep sounds on or off.
- Startup: Sets which image appears on the LCD monitor when the camera starts up. If turned off, no image appears.
- File Numbering: Designates whether the camera continues numbering files from card to card, or resets file numbering with each new memory card.
- World Time: Allows you to set the time for another city, so that you can display the time in London, for example, on the LCD monitor. A full list of cities is in the manual.
- Date Style: Cycles through available date formats.
- Adjust: Sets the camera's internal date and time.
- Language: Changes the menu language to one of 10 options. (English, French, German, Spanish, Italian, Portuguese, Japanese, and three other Asian-looking languages I don't recognize.)
- Sleep: Turns the Sleep function off, or sets the camera to go to sleep after 30 seconds, or one or two minutes.
- Auto Power Off: Turns this feature off, or sets the camera to shut off after two or five minutes of inactivity.
- Format: Formats the SD or MMC card, erasing all files (even protected ones). Also can format the camera's internal memory.
- Reset: Resets all camera settings to their defaults.
Playback Mode: This mode allows you to review captured images on the memory card, erase them, protect them, set them up for printing, play them back in a slideshow, or set up photo albums. Pressing the Menu button displays the following options:
 Play
Menu
Play
Menu
- Slideshow: Activates an automatic slideshow of images on the card. You can set the image interval time, select images to appear in the slideshow, or designate how long the slideshow plays.
- Calendar: An interesting function on the EX-Z3, the calendar option displays images on the memory card in a calendar format composed of thumbnails. Each day block shows the first image taken on that date.
- Favorites: Lets you select images to be saved as favorites, as well as edit the favorite list. Images selected as favorites are not shown in the normal playback display, and are copied to the camera's internal memory.
- DPOF: Selects images for printing, or removes the print mark designation.
- Protect: Write-protects individual images or all images on the memory card, also removes protection.
- Rotation: Rotates the currently displayed image in 90-degree increments.
- Resize: Changes the size of captured images to 1,280 x 960 or 640 x 480 pixels.
- Trimming: Allows you to crop captured images and save a new copy.
- Alarm: Allows you to set up the camera as an alarm clock.
- Copy: Copies files between the built-in memory and the SD/MMC
card.
- Set-Up Menu: Displays the same Set-Up menu as in Record
mode.
In the Box
Packaged with the EX-Z3 are the following items:
- NP-20 rechargeable lithium-ion battery pack.
- USB cradle.
- Cradle AC adapter
- USB cable.
- Wrist strap.
- Software CD.
- Basic manual and registration information.
- Large capacity SD or MMC memory card.
- Additional NP-20 lithium-ion battery pack.
- Small camera case.
Recommended Software: Rescue your images!
Just as important as an extra memory card is a tool to rescue your images when
one of your cards fails at some point in the future. I get a lot of email from
readers who've lost photos due to a corrupted memory card. Memory card corruption
can happen with any card type and any camera manufacturer, nobody's immune.
A surprising number of "lost" images can be recovered with an inexpensive,
easy to use piece of software though. Given the amount of email I've gotten
on the topic, I now include this paragraph in all my digicam reviews. The program
you need is called PhotoRescue, by DataRescue SA. Read our review
of it if you'd like, but download the program now, so you'll have it.
It doesn't cost a penny until you need it, and even then it's only $29, with
a money back guarantee. So download PhotoRescue
for Windows or PhotoRescue
for Mac while you're thinking of it. (While you're at it, download the
PDF manual and quickstart
guide as well.) Stash the file in a safe place and it'll be there when you need
it. Trust me, needing this is not a matter of if, but when... PhotoRescue
is about the best and easiest tool for recovering digital photos I've seen.
(Disclosure: IR gets a small commission from sales of the product, but I'd highly
recommend the program even if we didn't.) OK, now back to our regularly
scheduled review...
See camera specifications here.
Cycle times, shutter lag, battery life, etc. can be found here.
- Casio Exilim EX-Z3 user reviews on PriceGrabber.com
- Casio Exilim EX-Z3 user reviews on PC PhotoREVIEW
See my sample pictures and detailed analysis here. The thumbnails below show a subset of our test images. Click on a thumbnail to see the full-size photo.

|

|

|
| |
|
|
|
|
|
|
| |
|
|
|
|
|
|
| |
|
|


Test Results
In keeping with my standard test policy, the comments given here summarize only my key findings. For a full commentary on each of the test images, see the EX-Z3's "pictures" page.
As with all Imaging Resource product tests, I encourage you to let your own eyes be the judge of how well the camera performed. Explore the images on the pictures page, to see how EX-Z3's images compare to other cameras you may be considering.
- Color: Overall, I felt that the Z3 missed the mark just
slightly in the color department, largely due to its tendency to produce moderate
color casts under most light sources. The manual white balance setting was
closest to accurate under artificial lighting, and the auto and daylight options
typically did best outdoors, but still produced somewhat warm color balances
most of the time. Under household incandescent lighting, the auto white balance
setting was unusable, the incandescent option resulted in a rather warm image,
but the manual setting resulted in an image with better than average color.
At the end of the day, not a bad performance, just not one of the best either.
- Exposure: The Z3 had a tendency to overexpose its shots
slightly, even in the studio. Outdoors , under harsh sunlight, the camera
captured good-looking midtones, but at the expense of highlight detail, showing
a somewhat limited dynamic range. On the Indoor Portrait (without flash),
exposure was good, requiring only the normal +1.0 EV of exposure compensation
that that shot typically requires. On my "Davebox" test, the Z3
had some trouble distinguishing the subtle pastel tones on the Q60 target,
only distinguishing tones up to the"C" range.
- Resolution/Sharpness: It started showing artifacts in the
test patterns at resolutions as low as 600 lines per picture height, in both
horizontal and vertical directions. I found "strong detail" out
to at least 1,050 lines vertically and 1,100 horizontally. (This is one area
where the Z3 seemed to do better than its close rival, the Pentax Optio S:
Casio's image processing seems to be better at preserving fine detail and
avoiding artifacts than does Pentax's. Both cameras show significant softness
in the corners of the frame though, a product of the lens design they share.)
- Closeups: The Z3 performed well in the macro category,
and captured a tiny minimum area of only 1.53 x 1.15 inches (39 x 29 millimeters).
Resolution was high, with pretty good detail in the dollar bill. The coins
and brooch were soft due to the shallow depth of field at the very short shooting
distance. There was quite a lot of softness in the corners of this shot, extending
down the entire left side of the frame. (This is generally the rule, rather
than the exception in super-macro shots with digicams, due to curvature of
field in their lens systems at close focusing distances.) Additionally, exposure
was slightly dim, but overall color was good. The Z3's flash had trouble throttling
down for the macro area, and overexposed the shot, so plan on using external
lighting for any real closeup shots.
- Night Shots: The Z3's full automatic exposure control and
maximum exposure time of 1 second somewhat limit its low-light shooting capabilities.
(Note that the 1 second exposure time is only available in night shooting
mode, the normal limit on shutter time is only 1/8 second.) Images were usable
at the 1 foot-candle (11 lux) light level, with the ISO 100 and 200 settings.
Since that's the equivalent of average city street lighting at night, the
camera should work OK for city night scenes, but expect to use flash for close-up
subjects that might move during the exposure.
- Viewfinder Accuracy: The Z3's optical viewfinder was very
tight, showing approximately 73 percent frame accuracy at wide angle, and
about 77 percent at telephoto. The LCD monitor proved much more accurate,
showing about 100 percent at wide angle and about 99 percent at telephoto.
Given that I like LCD monitors to be as close to 100 percent accuracy as possible,
the Z3's LCD monitor is essentially perfect in that regard.
- Optical Distortion: Optical distortion on the Z3 is rather
high at the wide-angle end, where I measured approximately 1.2 percent barrel
distortion. (Average is about 0.8%, still much too high, IMHO.) The telephoto
end fared much better, as I measured a 0.1 percent barrel distortion. Chromatic
aberration surprisingly low, as there's relatively little color around the
target elements. (This distortion is visible as a very slight colored fringe
around the objects at the edges of the field of view on the resolution target.)
There's a good bit of softness in the two left-hand corners of the frame,
although it didn't seem to be nearly as severe as with the House poster shot
above.
- Battery Life: Because it didn't have an external power terminal that would work in all operating modes (the camera will only operate in playback mode when connected to external power via its cradle), I couldn't conduct my normal explicit power measurements. I did find that it runs for a bit over an hour and a half in both playback and record modes with a fully charged battery. This is shorter than most full-sized cameras, but surprisingly good for a subcompact model. (As always though, I highly recommend purchasing a second battery at the same time as the camera, and keeping it charged as a spare for longer outings.)
| Free Photo Lessons | |
|

The obvious competition for the Exilim Z3 is the Pentax Optio S, which I reviewed
previously. I felt that the two cameras are likely to appeal to slightly different
markets. The Z3 is more oriented to pure point & shoot novice users, with
more scene modes, including some truly clever innovations like the "Coupling"
mode that lets you and a friend snap photos of each other in front of the same
scene, yet end up in the same photo together. While the Optio S is also very
easy to use in full-auto mode, it does offer more exposure control options than
does the Z3. I also felt that the Optio had a slight edge in color rendition
and image quality, while the Z3's image processing seemed to preserve fine detail
somewhat better. (Ultimately, the two cameras have similar strengths and weaknesses
optically, since they both use the same lens.) Overall, I'd give the nod to
the Z3 for novice-oriented features, and to the Optio for color quality. Both
are nice products though, good choices for anyone looking for a very compact,
take-anywhere camera.

Follow Imaging Resource: