M1 DIARY
Scanning Film on the M1
 By MIKE PASINI
Editor
The Imaging Resource Digital Photography Newsletter
Review Date: January 2008
SAN FRANCISCO -- When you look at a flatbed scanner, you can't help but think of scanning prints. But the Microtek ArtixScan M1 is different from your ordinary flatbed scanner. It was designed to scan film.
|
Microtek ArtixScan M1 -- Installation |
There are certainly many flatbeds that pretend to be able to scan film. With a lamp built into the cover, they offer resolutions that exceed reflective requirements. But they generally suffer two problems: 1) an insufficient density range to capture detail in the shadows and highlights of film and 2) that plate of glass on the scanning bed that sits right in the middle of the optical path.
Beyond those two common pitfalls, none of them can autofocus. And with film -- which does not always lay down flat in the holder and is usually enlarged substantially -- fighting for focus is a real productivity killer. It usually means making miniscule and time-consuming adjustments to the height of the film holder on the glass bed.
THE MICROTEK DIFFERENCE | Back to Contents
The M1, however, is different. Designed to do the heavy lifting film requires, it has an optical resolution of 4800 dpi, the equivalent in pixels to an image from a 30 megapixel dSLR.
Resolution. Scanning continuous tone (rather than line art) originals requires, at most, 300 dpi resolution at final size. A 2400 dpi scan resolution provides 800 percent enlargement at 300 dpi, quite enough for reflective art. It even provides at least a 200 percent enlargement of line art.
Where higher scan resolution matters, then, is with film, particularly 35mm film. The 1x1.5 inch film frame has to be enlarged substantially even to provide 300 dpi for a 4x6 print. That 400 percent enlargement with 300 dpi requires scanning the 35mm film frame at 1200 dpi. To make an 8x10, the 800 percent enlargement requires 2400 dpi. The M1's 4800 provides enough headroom to turn that 35mm frame into a 16x24 poster at 300 dpi.
Ektachrome. This image is about 30 years old.
Autofocus. Autofocus is clearly an advantage in a camera where the subject could be anywhere. But in a scanner, you'd think the distances between the sensor and the original would be fixed values. And that is, for the most part, true. Which is why flatbeds have not had autofocus.
But film scanners do provide autofocus. The focus plane for film varies with each format. Slide holders accommodate mounted slides whose cardboard mounts suspend the film in the mount. And larger formats like the 120 film format often have a curl that must be tensioned but still can be problematic.
On a flatbed film scanner like the Epson V700/V750, the holder itself provides feet that can be positioned in three different ways to provide three different elevations from the glass bed. Third-party holders (http://www.betterscanning.com) offer feet with screw mechanisms that, when turned evenly, accomplish the same thing with more flexibility.
But the problem cries out for autofocus technology. And the M1 offers it. It's supported both by the company's ScanWizard pro technology and the included SilverFast Ai products. You can turn it off (saving about a minute and a half per scan once you've established focus), set it to auto focus from the center of the scan or set a manual point to look for focus.

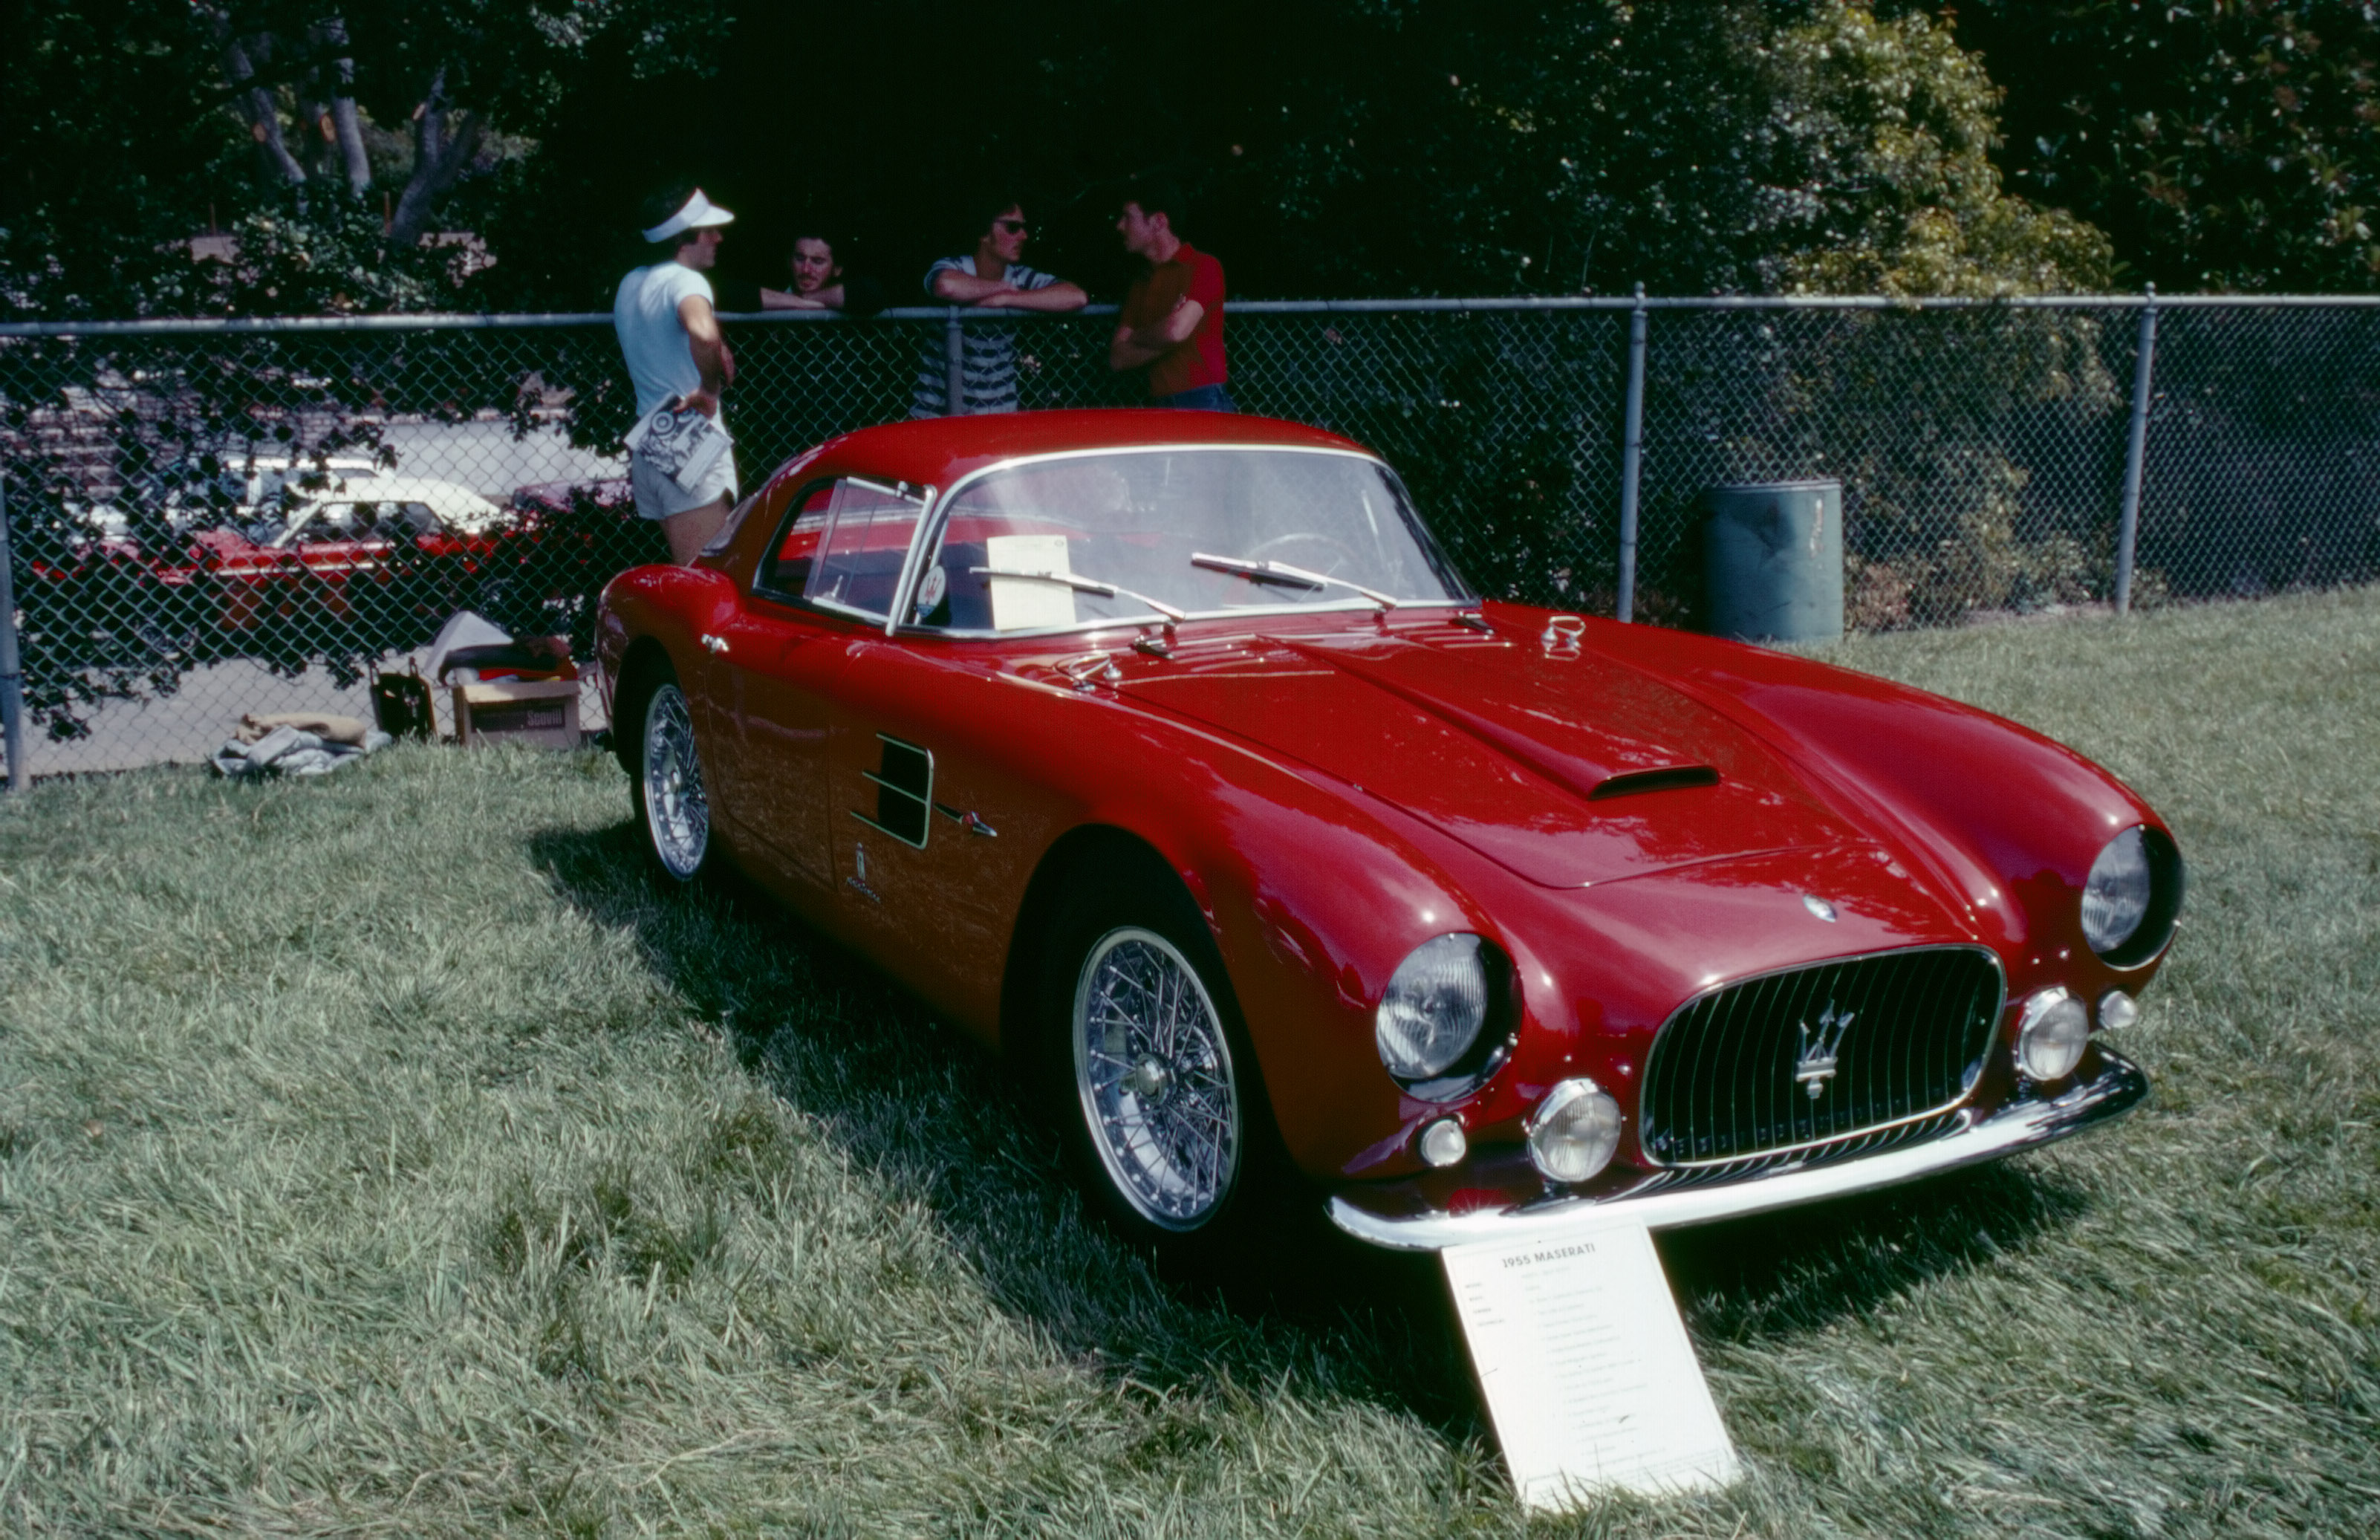
Manual Focus. We selected the chrome rim on the headlight near the dark grill on this Kodachrome slide.
So, in short, the software provides complete control of the feature.
Dual Bed Design. Microtek calls their dual bed design Emulsion Direct Imaging Technology. Other flatbeds scan through their glass bed when scanning film. But the M1 (like the i900 before it) has a drawer under the optics to load film holders. The sensor scans the film directly, avoiding the glass plate completely, much like a dedicated film scanner.
This has always been a big deal to us because it not only eliminates the optical interference of the glass (and the expense of coated glass to minimize reflections) but also two more surfaces that can fog and attract dust. The promise of emulsion-direct scanning is that if you clean the film, you'll get a clean scan.
ONE PROBLEM | Back to Contents
That's important because the M1 does not do infrared scanning. Infrared scanning is essential for tools like Kodak's Digital ICE and SilverFast's iSDR (infrared Software Removal of Defects). The infrared scan provides a picture of the physical imperfections on the emulsion, which is then used to create a mask.
In other words, an infrared scan can find irregularities in the surface an emulsion. That, in fact, is why you can't use Digital ICE or iSDR with black and white film, whose emulsion does not have a uniform surface. So if you're concerned about defect removal on black and white film, the M1's lack of infrared scanning is moot. Infrared scanning doesn't work with black and white film.
Interestingly enough, the Microtek ArtixScan F1, which is not sold in North America, does include infrared scanning and Digital ICE. Licensing issues prevented the inclusion of the technology on the M1, sold in North America.
IN PRACTICE | Back to Contents
To see how well the M1 scans film, we loaded a few of our favorite high-contrast Ektachrome and Kodachrome slides in the 35mm film holder.
The 35mmm holder is essentially the same design as the i900 holder with some small refinements. The shelf that each slide sits on is narrower and the tension finger is thinner. Just slip the slide onto the shelf and push it against the finger. Then drop it fully onto the shelf and let the finger push it back against the back stops. It holds the mounted slide securely.
The holder has a silk-screened icon to show you how to orient the emulsion and top side of the 35mm slide. There's also an icon to show you which corner of the holder to put in which corner of the drawer's holder slot. Very simple and clear.
As we pointed out in our first diary entry, we decided to work with the SilverFast software rather than ScanWizard. So we launched SilverFast and got to work.
TROUBLE IN PARADISE | Back to Contents
One of the advantages of this diary format is getting you the story quickly. But the disadvantage is that the details can be messy. If we have trouble, you hear about it.
And we did have trouble.
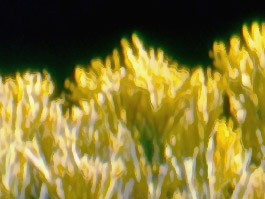
SilverFast Multi-Exposure. Slight misregistration can be seen on this full-size crop.
We couldn't achieve a sharp scan. That surprised us since we had autofocus enabled and were just scanning a single slide. In this case, it was some bright yellow wildflowers on blue stems (something like Daisy Miller) against a dark background. Viewed with a loupe the image was very sharp but the scans appeared soft at best. On closer examination, there actually appeared to be some misregistration of the scan channels.
Fearing a hardware failure, we sent a crop of the scan to Parker Plaisted, the M1 product manager.
He diagnosed the problem right away. "It looks like you are using the SilverFast multi-exposure feature."
Indeed we were. That feature takes two scans of the image, one calibrated to capture shadow detail and the other to capture highlight detail. The two scans are then merged into one image, yielding the highest possible dynamic range from the scanner. It's a neat trick SilverFast alone can do.
Parker told us he had seen this on some multi-exposure scans but not on others. "We will work with LaserSoft Imaging to investigate this further," he promised.
Meanwhile, he suggested as a workaround (other than use ScanWizard), we use SilverFast's multi-sampling. You don't get the same extension of dynamic range as multi-exposure but by taking multiple samples as the scan head moves across the image, you reduce noise in the shadows.
"Some film falls within the dynamic range of the scanner and I see no benefits from the multi-exposure feature," Parker observed. "The film image has to be really dark for you to see the benefits of the multi-exposure feature."
We tried that and the misregistration disappeared. We also set autofocus manually on the yellow flowers and got a much sharper image, if still not quite as sharp as we'd hoped from looking at the image under the loupe. That was improved quite a bit, however, by sharpening the image.
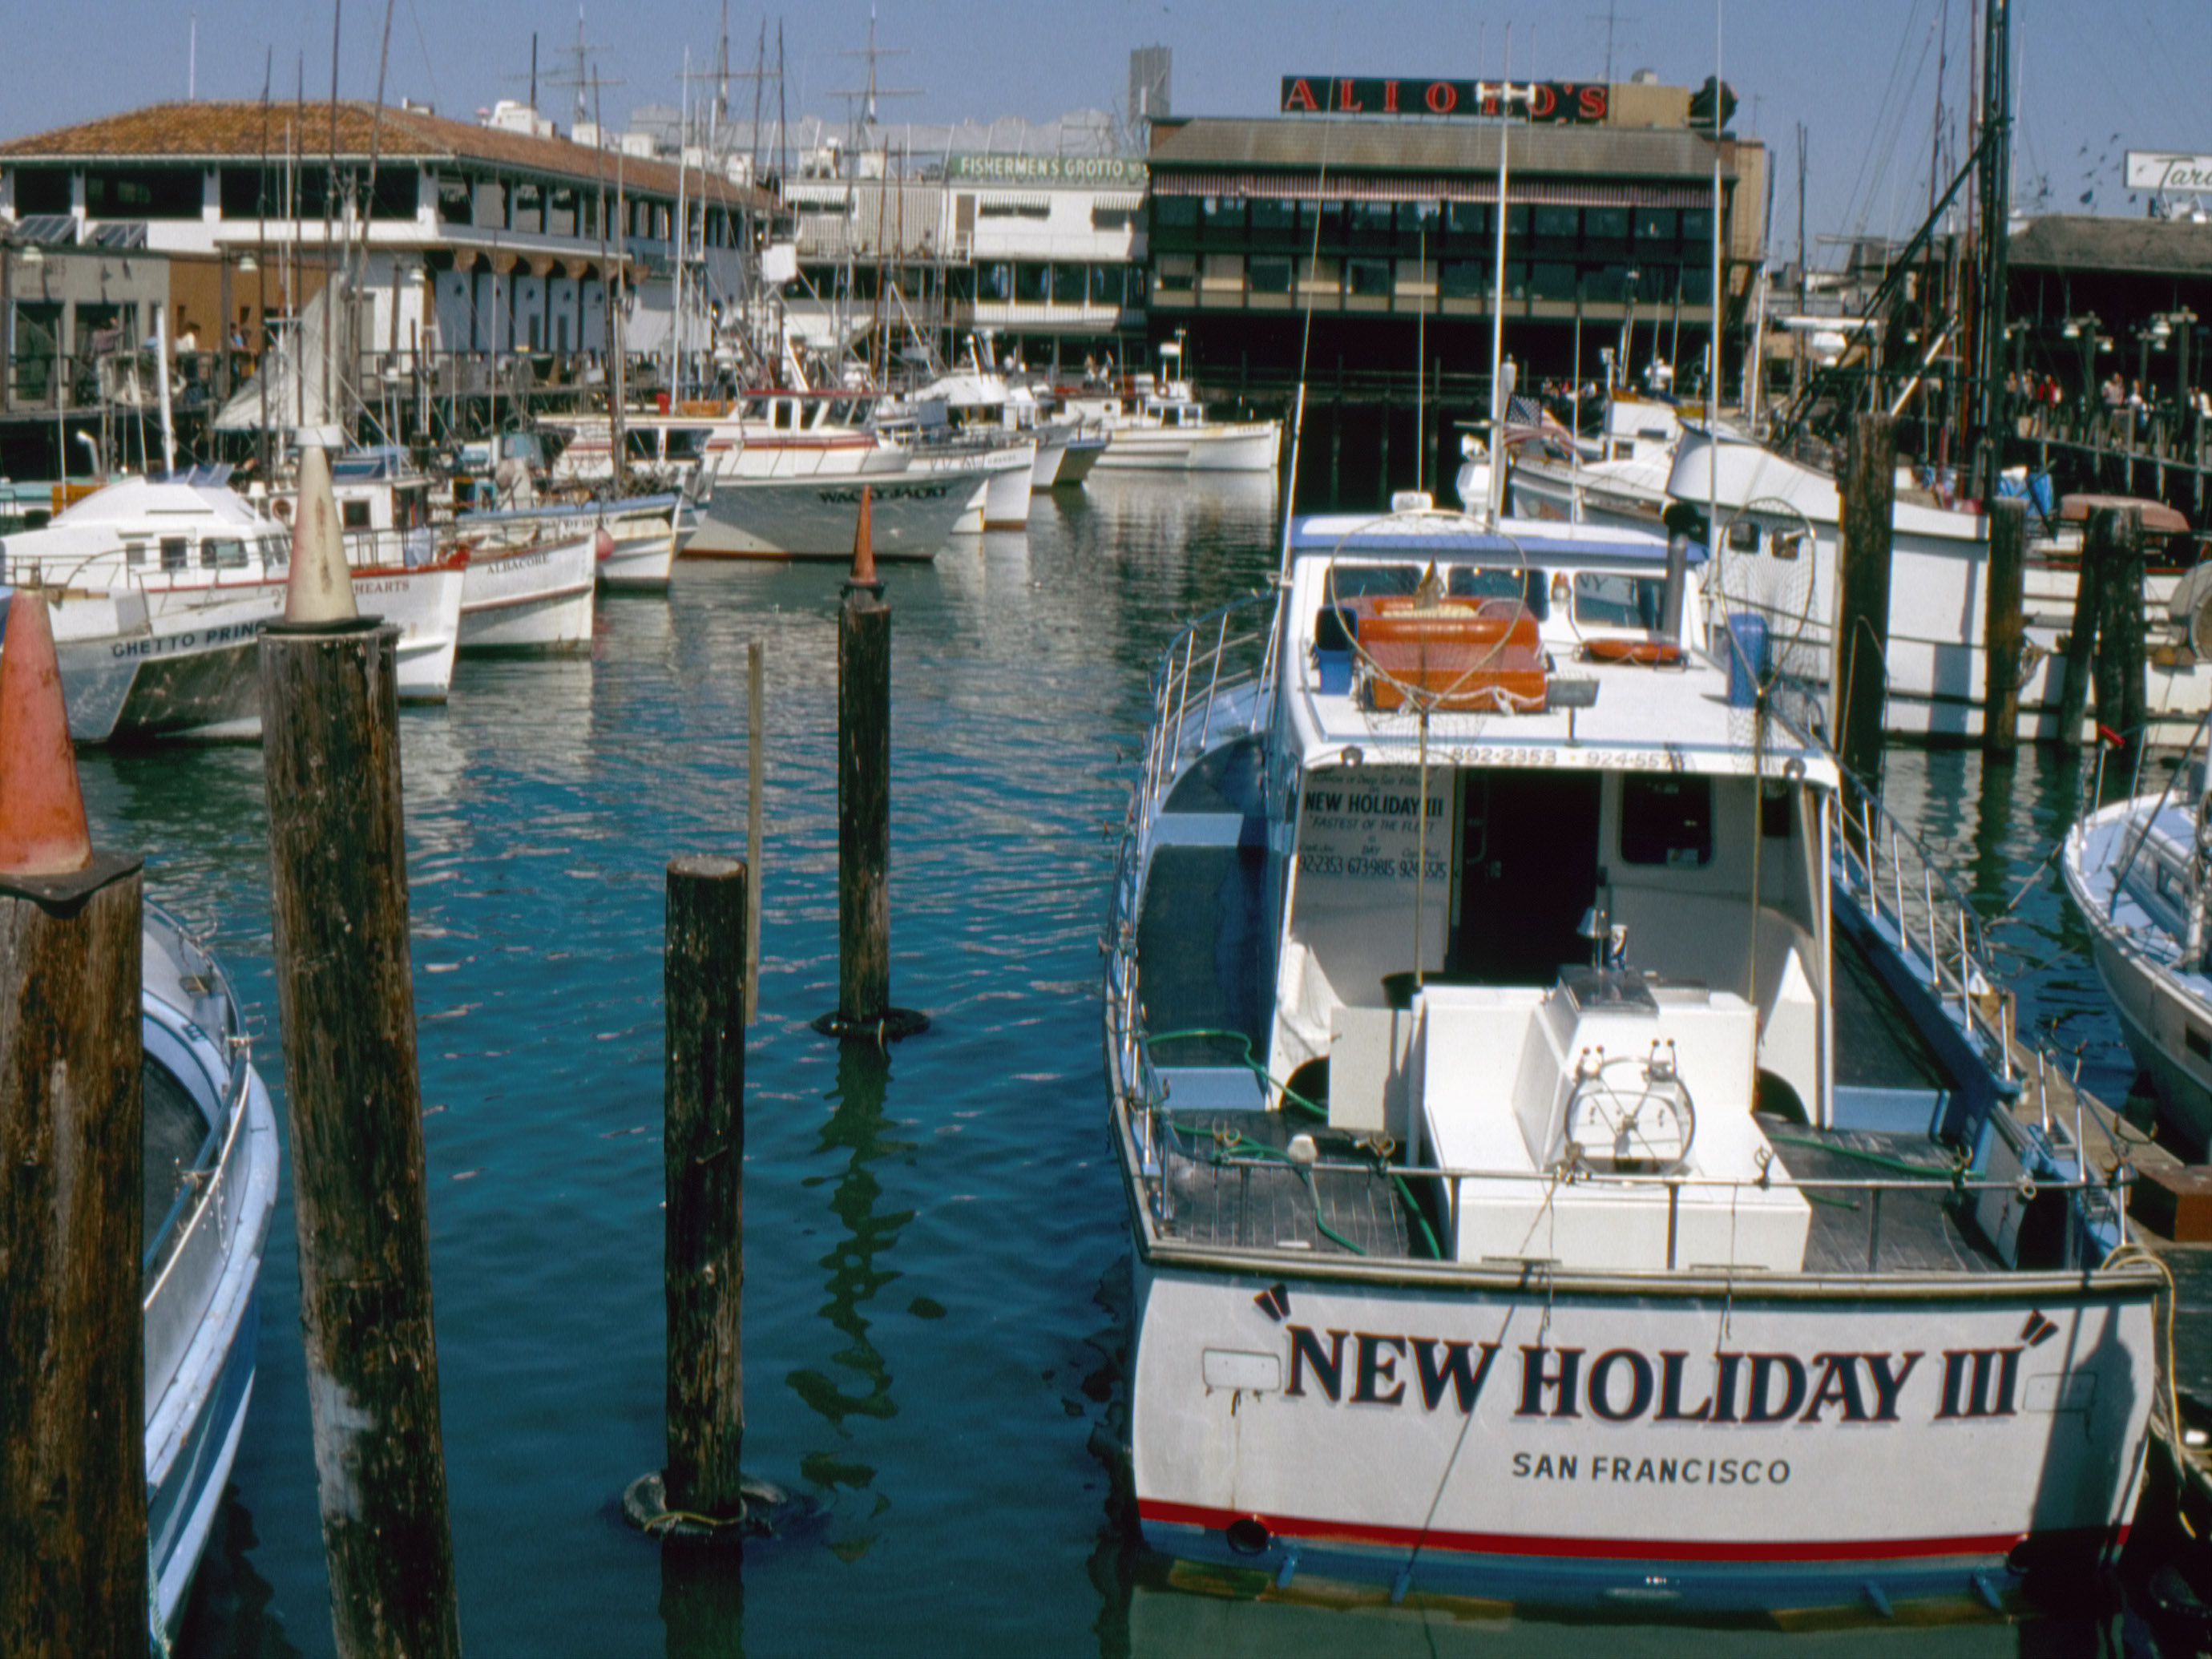
We had another issue that baffled us when we tried to scan a 1955 Maserati. Again, under the loupe, we had a good exposure, plenty of detail in the shadows and highlights.
48-Bit Color. Scanning 48-bit color and manipulating that in Photoshop saved the shadow detail.
But our 48->24 bit color scan wasn't doing the image justice. There was no detail in the shadows and the highlights, too, were disappointing.
The trick was to switch scanning modes to 48-bit color, period. Rather than let the scanner decide which 24 bits we wanted to see, we told it to give us everything the M1 could capture and we'd fool around in Photoshop to get the best tonal curve. Essentially, we were working with raw scanner data as you might work with a Raw image file format from your digital camera rather than a JPEG.
That did the trick.
Color was more accurate to begin with. The red matched the Maserati paint. And we had detail in the dark side panels and the white placard that had been lost in the 24-bit scan.
Both the wildflowers and the Maserati were 3204x2073 pixel images, a 19-MB 8-bit channel, RGB file when uncompressed. We weren't really tapping into the full resolution of the M1 yet. But sufficient for a 6.9x10.6 image at 300 dpi.
One of the more misunderstood aspects of scanning is sharpness. A raw scan will always look softer than the original. It's no fault of the scanner. As Taz Tally explains the phenomenon in his excellent SilverFast: the Official Guide (0782141978), "Because a scanner does not capture all of the available image data but rather samples an image and averages the values, it tends to slightly lower contrast along high-contrast edges and smooth out the image."

Ektachrome. This image is about 30 years old.
The solution to this has always been to apply some sharpening to the scan. You can specify the amount of brightness to add to the edge pixels, the brightness difference to define an edge and how wide a border to be affected. In most Unsharp Masking dialogs those are Amount/Intensity, Threshold and Radius settings.
But in sharpening a scan (rather than a digital photograph), you'll want to affect higher contrast edges more than lower contrast edges. To avoid adding grain or noise to the low contrast areas of your scan, you'll want to increase the Threshold dramatically.
SilverFast offers an Expert mode with even more settings to control sharpening. We tapped into them for our rhododendron scan. Sharpen Up To using tonal values to mask out the effect. By setting this to 90 percent, we prohibited sharpening in the darkest 10 percent of the image. Light Contour and Dark Contour can emphasize one side or the other of an edge. At 50 percent each, they're balanced, but we set them slighting in favor of the light contour because our subject (the flowers) are light. The Shadows Soft checkbox tells SilverFast to try to prevent noise in the shadows.
It's important to put this in perspective. There are three kinds of sharpening you can subject an image to. We usually talk about output sharpening, the last step in image editing, which is tailored to the output device, print size and viewing distance. But with a Raw image capture or a scan, you want to indulge in a little input sharpening as well. Between the two is the third form, which Bruce Fraser in his excellent Image Sharpening with Adobe Photoshop CS2 called creative sharpening.
But input sharpening is essential to scanning. Your scans will look disappointingly soft without it.
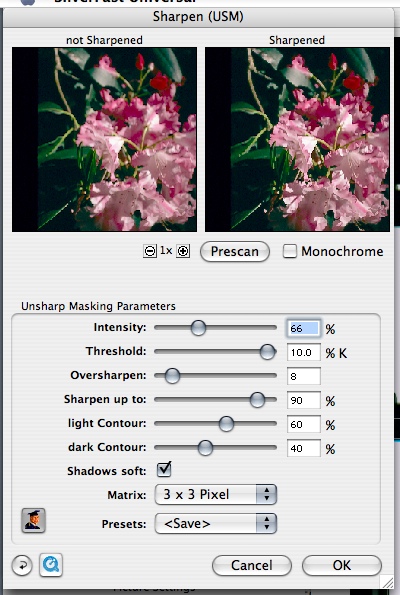
USM. Our SilverFast sharpness settings for the rhododendrum.
Our sample images here, consequently, are all manipulated. They've been sharpened. Color and tone have been adjusted and reduced from 48-bit to a displayable 24 bits. And they've been JPEGed (at a high quality level of 9 on a scale of 1 to 12. But they also represent real world results.
Judge for yourself by clicking on the thumbnail.