WITH TIGER & QUICKTIME 7
Phanfare Photo Roars on the Mac
 By MIKE PASINI
Editor
The Imaging Resource Digital Photography Newsletter
For the last week, we've been playing with a sneak preview of Phanfare's first non-beta release of Phanfare Photo for OS X, the software that organizes your images for display on the Phanfare site.
Phanfare (http://www.phanfare.com) is the subscription-based sharing site that stands out from the crowd with its "zero-click" Web publishing, uploading your captioned images and video to attractively designed Web albums in the background while you work on world peace, global warming and raising your heirs. It also distinguishes itself by giving you access to your collection from any computer with the organizer installed.
We think that alone is worth the price of admission. Which is $6.95 a month, $54.95 a year or $299.95 for a lifetime membership.
In fact, it's one reason Imaging Resource was able to produce over 760 photos (some of them panoramas) and over a dozen videos for our PMA 2006 coverage earlier this year. The team used Phanfare Photo to upload almost all of them while the Phanfare server kept up with the demands of thousands of readers downloading gigabytes of data.
We reviewed the Windows version of Phanfare Photo in March of last year (http://www.imaging-resource.com/SOFT/PHF/PHF.HTM). Then we started playing with the alpha Mac version in August and the beta in September. The Mac beta kept pace with new features introduced in the Windows version, but as Phanfare CEO Andrew Erlichson put it, this Universal Binary release "is definitely 1.0."
NEW FEATURES | Back to Contents
This release also turns out to be not only a sneak preview of the Mac version but a sneak peek of some new features coming to the Windows version in a few days. Highlights include:
Version 1.0. Very attractive interface (but would you expect any less on a Mac?)
- Album sections. You can now have sections in any online album. So if you happened to be Landon Donovan, you might have an album called World Cup 2006 with sections for Czech Mate, Italian Generosity and Ghana Gone. Visitors to your site see the Album and its section table of contents.
- New AJAX-powered menus to navigate online albums. Just hover over a link and a transparent box drops down with links to all your stuff. They call this form of navigation "breadcrumbs" because you can backtrack without getting lost, but it's a pretty tasty way of getting around.
- Improved performance and stability for the Mac client. That's what makes this version 1.0. But the Phanfare target has been moving all this time, too. Not long after our review, the company added an RSS feature to keep your visitors up to date, video support (AVI, MOV and MPEG), camphone support, auto-captioning from Exif data, larger file size limits (which keep expanding), Phriends and Family link swapping without a password, image straightening, Flash conversion of video, auto extraction of Picasa captions, hidden Exif data, international character support, album search engines, improved Web slide show with Ken Burns effect (pan and zoom), new styles, music for slide shows, videos in slide shows and hidden individual photos. Busy guys.
- Auto rotation of images based on Exif orientation information. Drag a photo into Phanfare Photo and, presto, it turns itself right-side up. Thunderous ovation. Even iView MediaPro can't do this. Lossless rotation joins a rewrite of the Exif orientation field, height and width, the industry standard for auto-rotate on acquire.
- Support for iPhoto import at the roll and album level.
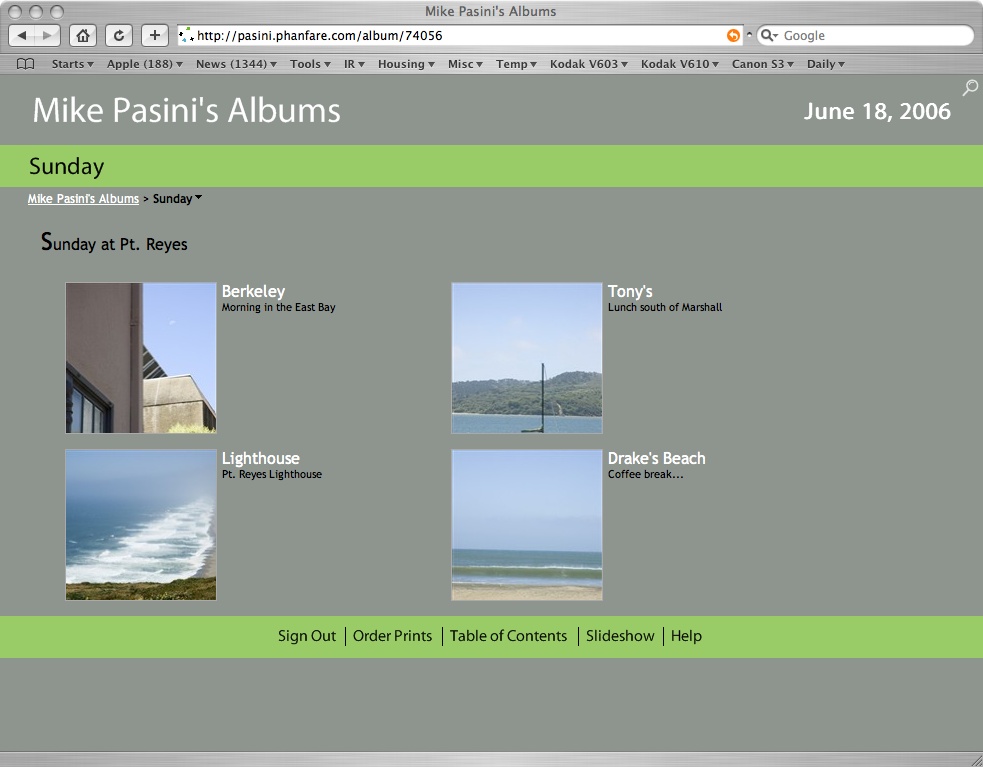
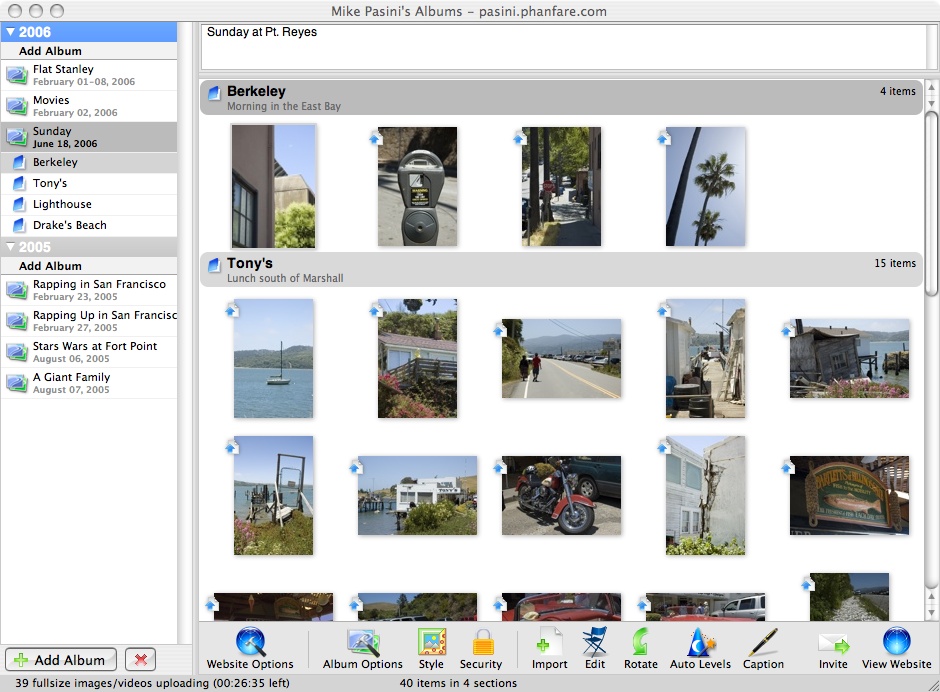
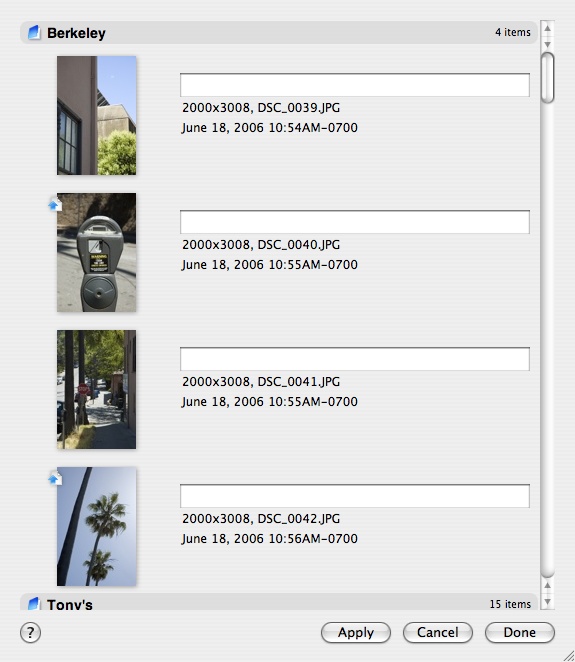
Album Sections. Talk about getting organized. Here's what they look like when your friends visit your online album. We have four for our Sunday album: Berkeley, Tony's, Lighthouse and Drake's Beach.
UNDER THE HOOD | Back to Contents
If one thing is clear from that list, it's that these guys have been working under the hood, tweaking the engine that spins the wheels. And that sort of thing isn't always obvious to users. But it does leave some interesting tracks. Including:
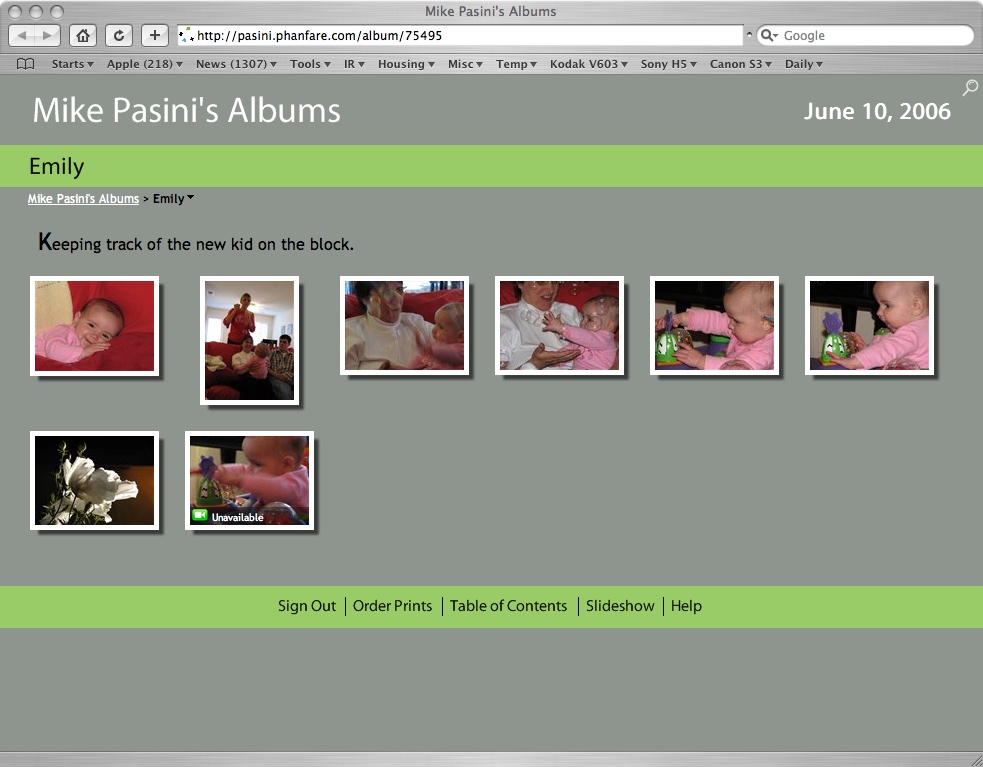
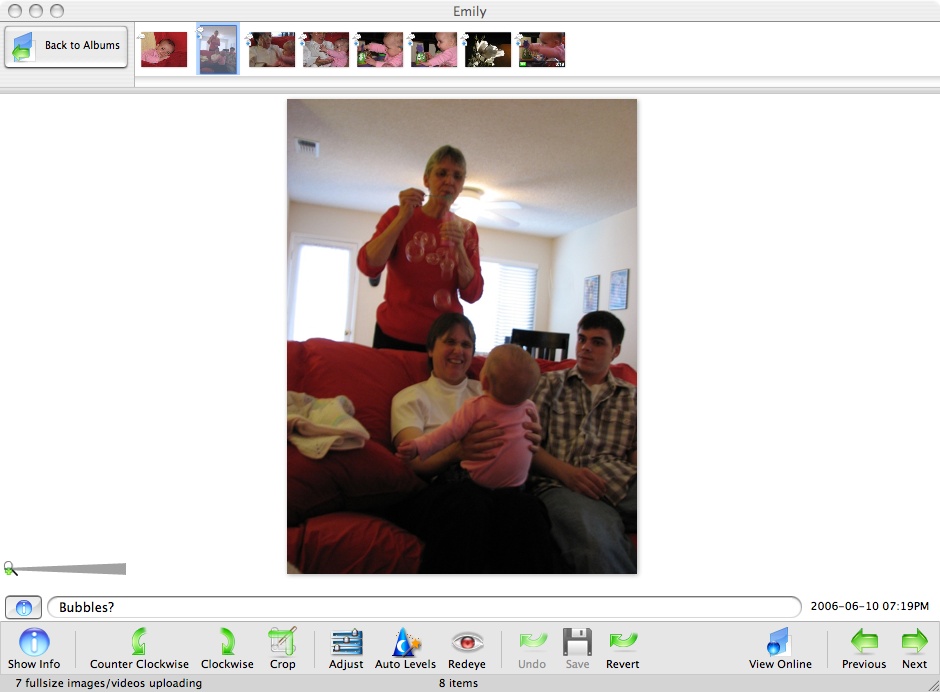
Sample Album. Note the portrait orientation of the second image (done automatically by the Mac client). Not to mention the movie clip in the second row, which plays in the slide show, too, automatically dropping the volume of the music track so you can hear the movie's audio.
- Image versioning. Your edits are made to copies of the originals, which remain available so you can revert to them at any time. Image editing tools are available to fix skew, red-eye, levels and more.
- Install Phanfare Photo on a new computer, log in and see your albums just as they appeared on your old computer. Yes, even if you switch from a PC to a Mac, you'll see all the albums you built on the PC from your new Mac. We've done it ourselves, setting up some albums on Windows, others on the Mac.
- DVD-quality video archive in addition to the streaming version, "so when the Internet gets faster, we can upgrade the viewer experience." The Flash 8 streaming video is exceptionally high quality.
- Unlimited storage with rather generous individual file size limits (20-MB for a still and video clips up to five minutes and under 1-GB with a monthly bandwidth limit of 8-GB), no advertising on your album pages, your visitors don't have to join anything, you get a personal URL at Phanfare, image/video hosting for other sites like eBay, integration with Shutterfly, Kodak EasyShare Gallery and Snapfish print and product ordering and more.
SYSTEM REQUIREMENTS | Back to Contents
You can view the online albums from any computer browser. Firefox, Explorer 6 and Safari are all supported.
Phanfare Photo works over a dialup connection and since it works in the background, it's probably the best way to upload if you use a modem. Of course, it shines with a broadband connection.
The Universal Binary Mac version requires OS X version 10.4 and QuickTime 7. The Windows version needs Windows 98/ME/2000/XP, Microsoft .NET (automatically installed) and a 300-MHz Pentium II or faster with at least 128-MB RAM and 512-MB free disk space.
HOW IT WORKS | Back to Contents
When you create an album in Phanfare Photo and drag some images and video into it, Phanfare Photo copies the full-sized files to a temporary cache on your system. It then resizes them and uploads the Web-sized versions to your online album so your albums appear pretty quickly. The full-sized versions are sent after that and then deleted from your local cache. The Web-sized versions, about 10 percent the size of the full-size versions, stay in the cache.
If you log in from another computer, the Web-sized versions are downloaded to that computer's Phanfare Photo cache so you can edit and arrange them normally.
We had a busy Sunday. Drove over to Berkeley to pick up The Nephew and then we shot over the Richmond Bridge to Pt. Reyes for lunch just south of Marshall on the eastern shore of Tomales Bay. After a few oysters and some calamari at Tony's, we drove to the Pt. Reyes Lighthouse (http://www.ptreyeslight.com/lthouse.html), whose fresnel lens casts its beam all the way to the horizon. We finished off with a cup of coffee at Drake's Beach before going back to Berkeley for dinner.
If ever an album needed sections, this was it.
Interface. When you launch Phanfare Photo you can see right away why Phanfare calls it an "organizer." In the left-hand pane of the window are your albums arranged chronologically (newest on top). A "+" and "x" at the bottom of the pane let you quickly add or delete albums.
The last edited album is displayed by default, but clicking on any other brings up the images (organized in sections) in the main pane of the window. Albums with sections have a plus sign in their icon. Click the icon to see the sections. Captions are indicated by small cloud balloons.
Along the bottom of the window below the main pane is the tool bar. Tools include: Web site options; Album Options, Style, Security; Image editing tools Import, Edit, Rotate, Auto Levels, Caption; Invite and View Web site.
You can do your work in that window and never visit the Menu bar, but there are few extras there. The File menu has an export command with options for full-size or Web-size versions. The View menu also lets you sort your images by caption, date, filename or in reverse order. You can also just drag and drop images in the main pane to change their order. And the Share command offers an Address Book, Invite Friends, Phanfare Friends and Web site and Invitation Reports.
We use Image Capture to copy what's on our memory card to our hard disk and, after rotating the images, copy the new folder of images to an external drive so we have two copies of everything before we reuse the card.
Sections. When we launched Phanfare Photo, we simply clicked on the "+" button to create a new album, added a little description and dragged our images the main frame. To create a new section, we used the command on the Menu Bar's File option. You rename each section just as easily as renaming the album and use the "x" button to delete any you don't want after all. Pretty simple.
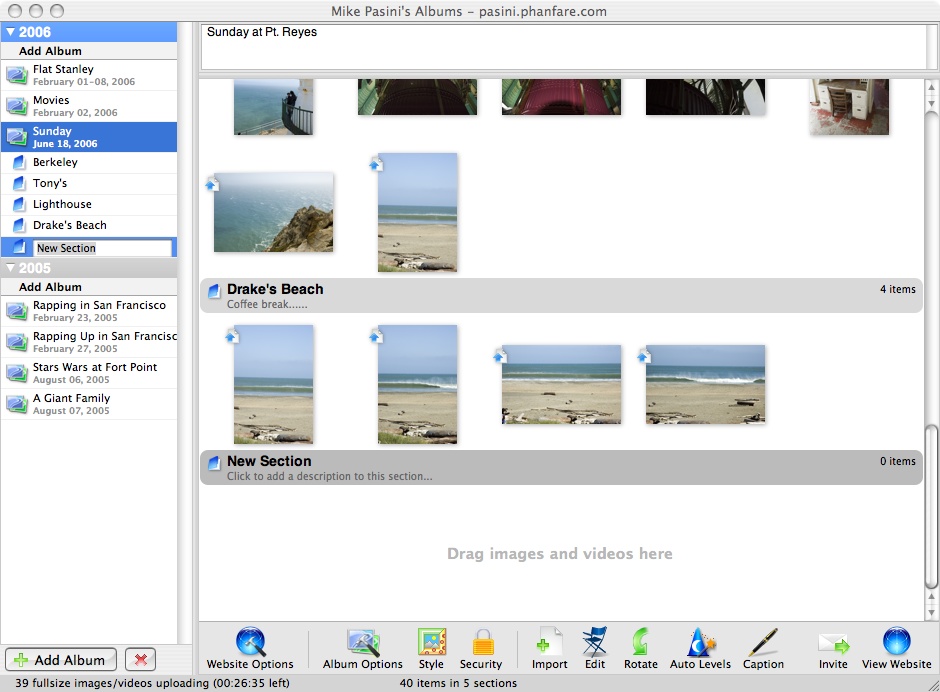
Getting Organized. Create an Album and make sections within it as you need them.
Our Sunday images were rotated and didn't have any video (well, it is our day of rest). So we created a new album for some shots that were not rotated (no matter what we did) and did have a nice big fat 640x480, 30-fps, stereo AVI. Nineteen seconds of broadcast quality.
Rotation. We were just delighted (delirious, really) to see our stubborn images rotated immediately to the correct orientation. Image rotation is not as simple as it seems. There is the data itself and the header tags, which include orientation and height and width. There's no guarantee any of these things agree with each other, of course, and many modern digicams just fiddle with the orientation tag, leaving it to other software to correctly render the databased solely on that. Which usually does not happen, we've found to our dismay.
Video. We were even more delighted to see the quick preview of our video, but we did have to wait a while to see it play from our online album. But it's a 37.3M file. That's larger than most software updates.
When it did get to the site, though, it played marvelously well. The streaming was a bit behind playback, but once downloaded, it played flawlessly. A nice large image in stereo on our second monitor.
Slide Show. We had even more fun viewing a slide show of our images, though. The state of the art has, thankfully, moved away from the mind numbing flashing with transitions inspired by Kodak Carousels to the Ken Burns-effect of a slight pan and zoom with music. A little movement keeps you on your toes and a little music makes them tap.
The default music selection includes: Air On a G String, Brighter Days, Children Go Where I Send Thee, Flight of the Bumblebee, Greensleaves, Heart of the Country, Jesu Joy of Man's Desire, Memories of You, Midnight Rider, Mozart's Rondo, My Dog Skippy, O Holy Night, Pachelbel's Canon in D, Paula Jane, Playful Spirits, Pop Pop Radio, Quirky Bounce, Spring, Toccata and Fugue in D Minor, Twinkle Twinkle, Under a Painted Sky, Welsh Piano with Female Vocals and Wicked Rock Taxi. You can preview these from the Album Options button that lets you select one for your show.
Album Styles. There are quite a few album styles to choose from, all listed with a thumbnail to make it easy to select one you like. You can change the album style or the style of your whole site.
Image Editing. If you click the Edit button or double-click on an image, you get a new tool bar at the bottom of the editing window, which displays a thumbnail of each image in the album in a scrolling bar along the top and the caption below the image.
Editing Tools. Quick fixes for common problems but not a comprehensive set of tools.
These are not world-class tools and certainly not in the same league as iPhoto's image adjustment palette, but they're available. Of them all, we liked the Unsharp masking tool the best. Red-eye is, we understand, being worked on as we write. Auto Levels is always handy. The Crop tool worked as expected. And you can enlarge the image easily with a little slider in the lower left-hand corner of the image. You can't work on selections. All the changes are global.
We didn't see the Straighten tool and, in fact, the option was grayed out in the Menu bar.
Uploading? Attentive readers will note we haven't said anything about uploading. There's no Upload button because, as we've pointed out, Phanfare uploads automatically in the background as you work.
Captions. And you do work. One thing you do is title your albums and write descriptions for them. But the big task is captioning the images. You can have Phanfare Photo do this automatically for you, cribbing some data from the Exif header or the filename, but it's more fun if you write your own doozies.
Turbo Captioning. Just tab through the list to add captions while your full-res images are uploading in the background.
There's more than one way to caption an image in Phanfare Photo. You can do it when you're editing the image itself, but that's the slow way.
Phanfare Photo offers a turbo captioning command under the Menu Bar's Album option that displays all your images with a caption slot, so you just have to tab through them to enter captions. We just loved that.
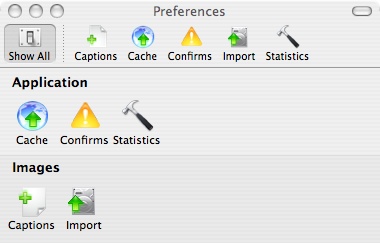
Tabbed Preferences
Options. There are a lot of options but they are nicely hidden away so you can get to them when you need them without tripping over them when you don't. The familiar interface niceties of tabs organizes them intelligently under the main buttons or menu items where you'd expect to find them. It's a nicely thought out architecture.
We could go on, but the beauty of Phanfare Photo is that it's a quick hit. You're in and out in a couple of heart beats, your album published without clicking a button. You can add captions any time and all at a gulp, including titles and descriptions for albums and sections of albums.
Not only do we highly recommend it (as a gift, too), but we use it and have relied on it for our own convention coverage. Rather high praise.