Four Tips For Improving Your Summer Travel, Landscape and Vacation Photos
posted Thursday, June 28, 2012 at 8:21 AM EDT
![]() With summer upon us, it's time to head out and photograph the world. With blue skies and plenty of sunshine, millions of us will go out and start taking scenic, travel photographs while on vacation.
With summer upon us, it's time to head out and photograph the world. With blue skies and plenty of sunshine, millions of us will go out and start taking scenic, travel photographs while on vacation.
Yet, despite the immobility of the subject, taking really good landscape shots can be a challenge. In part, the difficulty is that we are overwhelmed by the scene’s beauty and in our rush to capture it, miss it.
Raising our cameras (or iPhones) to our eyes, we fire away as though a mountain is about to go off and take a meeting. With luck, we capture the scene’s colors but beyond that, the photos are generally nothing like the experience we had.
However, to get better scenic landscapes there is no need to study rocket science or geography, just slow down long enough and apply some of these simple tips.
1) The horizon points to the subject
The horizon is the boundary line between earth, sky, and water. Its placement in a photograph is crucial, as it indicates to the viewer what the photograph’s subject is. When the horizon sits at the top of the frame — anywhere from a third of the way to the top, to the top — it directs the viewer’s eyes down towards the earth or sea. To the contrary, a low horizon line lifts the viewer’s eyes towards the sky.
The photo of the silt-filled river Orb (below) illustrates how a high horizon focuses the eye down.

Taken at the mouth of the river, at Valras-Plage, France, the photo shows how tons of silt washed down from the mountains had turned the river into what looks like a sandy desert. By placing the horizon line (with the thin blue line of the Mediterranean barely visible beyond it) high in the frame, I focused the viewer on the river.
2) Show scale by including people
This image also illustrates another tip to improve landscape photos and that is providing scale with the inclusion of people in the photo.
It is a trick the great landscape photographers (and painters) of the 19th century knew. To show the vastness of a scene, they often posed themselves sitting on some impossible rock outcropping, overlooking an endless canyon.
3) A centered horizon is static
Some twenty miles up the Orb River, at the entrance to the magnificent Languedoc Regional Park, is the charming winemaking village of Roquebrun. A picture postcard pretty village, it clings to the hillside over the river.
Here the Orb is wide and lazy, which gives the area a placid and calm ambiance. This is the feeling I wanted to convey in my photo (below).
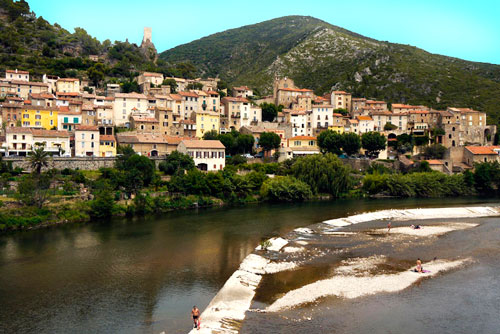
To do this, I divided the frame in half with the boundary between river and village as the “horizon” rather than the line between sky and land. A divided frame is “balanced,” almost to the point being static.
While a static frame is generally to be avoided, it is what I wanted in this photo. Removing the dynamic energy from the photo made the image very quiet.
However, look closely, and again you will see that I have included people swimming in the river and one man walking out of the frame at its bottom. This adds both scale and human activity to what might have otherwise been a frozen postcard image.
4) Use a low horizon
Finally, there is the use of the low horizon, which forces the viewer eyes up. The photo below is of one of the huge stone outcroppings in the “Cirque de Moureze” wilderness area, near the city of Clermont l’Herault.
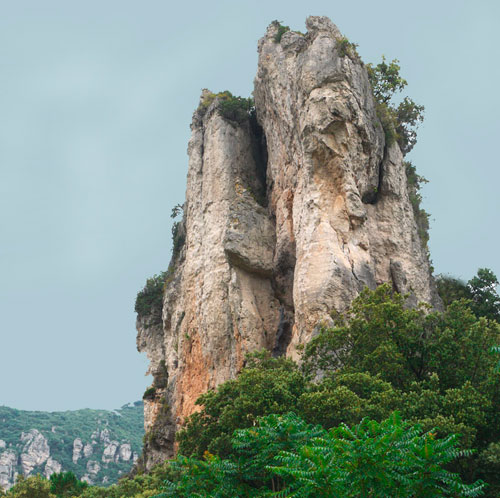
Framed by the sky, the outcropping looms large, seeming to grow out of the treetops. It towers over the viewer the same way it towered over me when I stood next to it.
Knowing the effect of horizon placement in a photo, framing a landscape in a viewfinder or on a monitor accordingly, your scenic shots will improve. As you raise and lower the horizon line, you will see how the image’s feeling changes. When the image you see in the camera matches the feeling you have, you have found the right place for the horizon.
Now, hit the shutter button.
(To see more photography tips, click here for our story on "Five Keywords for Better Photography.")