STILL PULLING THE PLOW
Epson Stylus Photo 2200
-- The Old Gray Mare
 By MIKE PASINI
Editor
The Imaging Resource Digital Photography Newsletter
Review Date: January 2004
Rewrite those lyrics. The old gray mare is still what she used to be. Which may explain her longevity. Introduced in 2002 as the successor to the 2000, the 2200 still makes an impressive print. There are faster printers and newer ink sets, but the old gray mare can still pull a plow.
Our review may be the last to be written on this classic, but we'd be remiss not to look at it. Over the past two years, it has been put in harness by numerous commercial and fine arts photographers attracted by its ability to produce pigment-based prints with 100-year longevity.
The $699 Epson Stylus Photo 2200 made its mark on the printing landscape with a set of unusual features:
- Seven-color archival UltraChrome pigment inks in individual $15 ink cartridges
- 2880x14400-dpi resolution with 4-picoliter ink droplets
- Roll paper holder and automatic cutter
- Paper sizes to 13x19 inches
- Interchangeable Photo and Matte Black inks
- PRINT Image Matching technology
- USB, FireWire/IEEE-1394 and parallel connectivity
 |
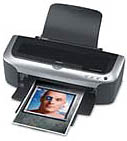
| The Epson Stylus Photo 2200 Fully expanded |
 |
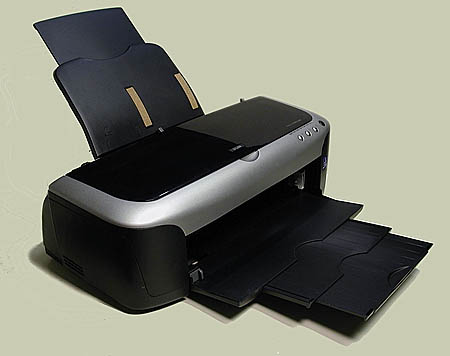
| The 2200 & Canon i9900 About the same size, even opened up |
Its 4.0-picoliter droplet may seem large compared to the R800's industry-leading 1.5 and the Canon's impressive 2.0, but at normal handheld viewing distances, we could not detect the difference in the highlights of the same image printed on all three. It took a 10x loupe to appreciate the smaller droplets.
So while those two specs may not be state of the art any more, they were no handicap.
SPECIFICATIONS | Back to Contents
Let's take a closer look at the 2200's specifications:
- Micro piezo printing heads, optimized for photo printing at 4 picoliter droplet size with 96 nozzles for each ink providing 2880x14400-dpi resolution
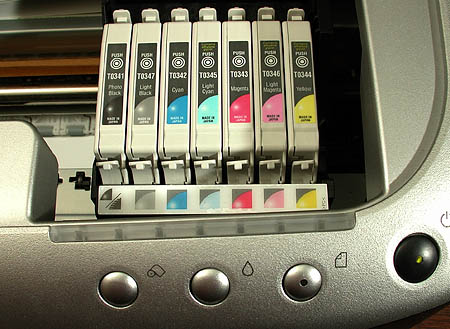
- Seven individual UltraChrome pigment inks: Photo Black or Matte Black, Light Black, Cyan, Light Cyan, Magenta, Light Magenta, Yellow. Black ink yield for text is 628 pages a cartridge or 440 prints (five percent coverage). Color ink yield is 440 prints (five percent coverage). Shelf life is two years from production date and six months from first use.
- Print speeds of 2:06 for 8x10 prints on matte or 3:51 on semi-gloss.
- Maximum printable area is 13x44 inches.
- Paper sizes: 3.5x5, 4x6, 5x7, 8x10, Letter, A4, legal, 11x14, 11x17 (B), A3 (11.7x16.5), 13x19 (Super B), statement, executive, user definable sizes and panoramic up to 13x44
- Borderless photo sizes: 4x6, 5x7, 8x10, letter, 11x14 and 13x19 (on glossy media only)
- Paper types: Epson Premium Glossy Photo Paper, Premium Semigloss Photo Paper, Premium Luster Photo Paper, Enhanced Matte Paper, Velvet Fine Art Paper, Watercolor Paper - Radiant White, PremierArt Water Resistant Canvas for Epson, PremierArt Matte Scrapbook Photo Paper for Epson, Premium Bright White Paper and Plain paper
- Envelope sizes: No. 10, DL, C6
- Support for roll paper (4, 8.3 and 13 inch rolls), straight paper path for media up to 1.3mm thick
- Paper capacity is 100 sheets of plain paper in the input tray or 10 envelopes
- Light resistance: Up to 108 years Premier Art Matte Scrapbook Photo Paper, 92 years on Epson Watercolor Paper Radiant White, 85 years on Epson Premium Glossy Photo Paper, 77 years on Epson Premium Semigloss Photo Paper, 76 years on Epson Enhanced Matte Paper, 71 years on Epson Premium Luster Photo Paper and 61 years on Epson Velvet Fine Art Paper
- Dimensions and weight: closed 24.3x13x8.2, printing 24.3 x 34.1 x 15.4, 25.7 lbs.
- Interface: USB, FireWire/IEEE-1394 and Parallel
- Sound level: 42dB(A)
- Printer Duty: 25,000 black or 10,000 color pages at A4 or Letter
- Power: 0.8 amps maximum and 19 watts in self-test mode
- Buffer: 112KB
- Warranty: Standard one-year limited warranty in the U.S. and Canada including EPSON Exchange program (U.S. and Canada only)
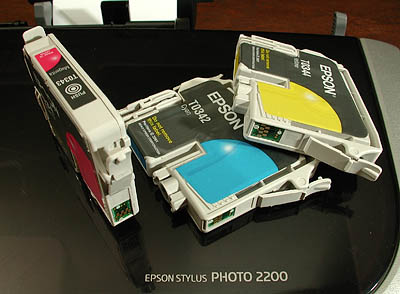 |
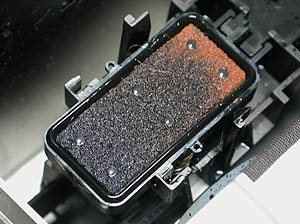
| The Ink Cartridges Note the circuit board for tracking usage |
BUTTONS & LIGHTS & LEVER | Back to Contents
For all those details, the box itself is pretty straightforward. It has just a few buttons, a series of lights for feedback and one paper thickness level.
 |
| Installed Cartridges & Buttons Above the Roll, Ink, Paper and Power buttons, LEDs monitor each ink cartridge |
The printer's four buttons are all on the front left.
- The Power button turns the printer on and off. When on, a small green LED in the center of the button is illuminated.
- The Paper button loads or ejects paper and resumes printing after a misfeed or paper out condition.
- The Ink button moves the print head into the cartridge replacement position and returns it to the service bay. If you hold it down for three seconds, it also cleans the print head.
- The Roll Paper button cuts, feeds and returns paper to the printing position when the automatic cutter is used. When held down for three seconds, it reverses the roll paper out of the printer.
- The Power light on the Power button is green when the printer is on and flashes when the printer is busy.
- The Paper Out button on the Paper button lights when the printer is out of paper or multiple sheets have been fed and flashes on a paper jam.
- The seven Ink lights flash when a cartridge is low and stay on when it's empty. They also flash when the printer is performing an ink-related operation.
 |
| The Lever & Roll Feed |
- The top Paper position is used for standard thickness sheets and roll paper.
- The middle Envelop position is for printing up to 10 envelopes at a time.
- The lower Manual Feed position is for thick paper up to 0.05-inch thick. Single sheets can be fed in the manual feed slot under the sheet feeder.
INSTALLING HARDWARE OPTIONS | Back to Contents
If there's one place the 2200 shows its age, it's in what it expects of you to install the hardware options like the sheet feeder support or the automatic paper cutter. You can't figure it out by looking at the pieces. You have to read the manual.
 |
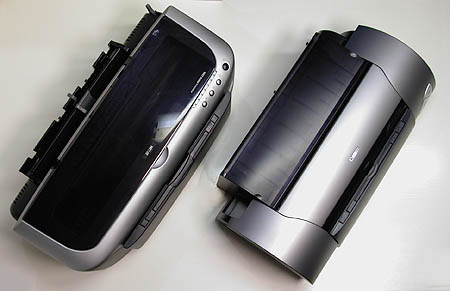
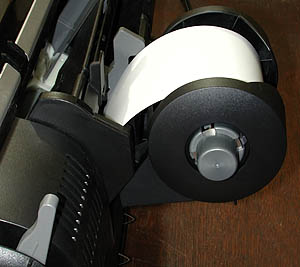
| Automatic Paper Cutter For roll paper. Basket folds up for storage. |
Even then, it's hard to quite see what lines up with what. But persist. Thousands before you have done it.
PIEZO PRINTHEADS | Back to Contents
Epson uses piezo print heads rather than thermal printheads (as in the HP 7960 and Canon i9900). Piezo heads fire ink by using an electrical charge to distort the print head elements. Thermal heads fire ink by heating it until it bursts.
The debate over the relative merits of each technology is intriguing (see our coverage in http://www.imaging-resource.com/NEWS/1063266040.html), but we've found only one important caveat to pass along. Epson's piezo print heads are built into the printer, not the cartridge (as in HP's printers).
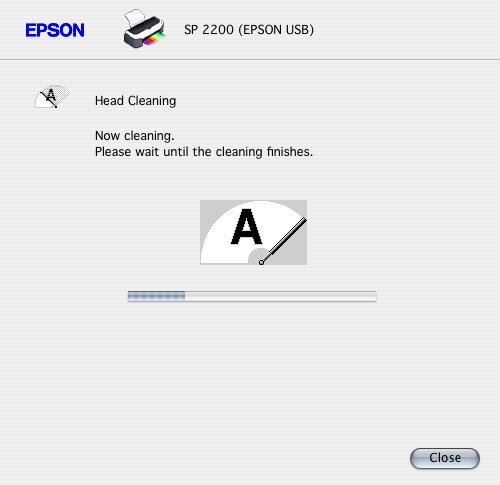
Inkjets that do not get regular use will clog as pigment dries in the head. Epson provides nozzle check and cleaning functions in its drivers to maintain the print heads and there are more drastic measures available to clean them, too. But failure of a piezo print head usually means replacing the printer. Repairs are possible but expensive. So if you print photos once a month, piezo heads might disappoint you.
This particular 2200, however, sat idle for quite a while before getting shipped across country. The first prints we made from it were terrible. We wondered if we could actually revive the printer.
 |
| Utility: Nozzle Check The first step in reviving the 2200 |
 |
| Utility: Cleaning We had to do so many cleanings, we ran out of ink |
 |
| Utility: Aligning Always a good idea but not much help this time |
Over the course of two days we escalated our efforts only mildly before achieving success. We first used the Cleaning function in the Utilities software. Several times. There is, it turns out, a right way and a wrong way to do this. If, after the first attempt, you aren't getting a good ink pattern, you don't repeat the process but continue it. By continuing, you ramp up how aggressive the cleaning process is in three different stages.
Finally, several ink cartridges simply ran out of ink from the cleaning process. When we replaced them, we had good ink flow and our prints looked like prints again.
We're happy to report we didn't have to ask Epson to replace the print head. Our caveat about infrequent use might be amended to say it's expensive to use infrequently. So fire it up every week and prosper.
 |
| The Ink Station Head cleaning dumps ink here |
Most inkjets use dye-based inks that are encapsulated in the surface of the media. Dyes provide a brighter and wider range of color but tend to be less permanent than pigments, particularly in media not designed for them. So the HP 7960 requires HP papers to deliver extended lightfastness whereas the 2200 can print on nearly anything. Pigments are fade resistant. As the outer layer deteriorates, it is replaced by a fresher layer, much like an onion.
But dyes and pigments are only colorants. To get them from the cartridge to the paper, an ink vehicle is deployed. A dye is dissolved in this vehicle, which evaporates when it gets to the paper. But pigment has to be wrapped in the vehicle, which is a trickier business. Pigments tend to have a hard time on glossy surfaces, where uniformity is difficult to achieve, working best on satin paper finishes. Unlike the R800, the 2200 does not have a special Gloss Optimizer cartridge to address this weakness.
Viewed obliquely, it's easy to see a flat gloss on the shadow areas of prints on both glossy and lustre finishes. The shadow areas, of course, are where all the ink is. On matte papers, the ink is absorbed into the paper, so there is no shine.
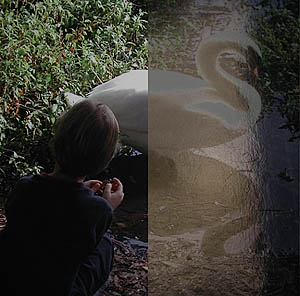 |
| The Gloss Problem Right side shows effect of glare on shadows |
The Red and Blue cartridges of the R800 complement the usual Cyan, Magenta and Yellow cartridges to provide a one percent larger color gamut than the 2200, which uses Light Cyan and Light Magenta rather than Red and Blue. We found ourselves going through the Light Magenta most with Light Cyan right behind.
The 2200 uses two black ink cartridges, letting you swap one of them to match either glossy or matte paper. But on the Macintosh when you change blacks, you have to delete the printer and add it again. And there's no cartridge cap to preserve the black cartridge you aren't using.
Pigmented inks aren't fussy about what paper they move into. And Epson sells a number of different papers to accommodate them:
- Premium Glossy is a photo-weight resin coated paper with a glossy finish that provides the widest density range.
- Premium Luster is a photo-weight resin coated 'E' type paper with a light sheen and the same textured surface found in photo lab prints. The surface scatters light to avoid glare, so it's ideal for harshly lit rooms.
- Premium Semigloss is a photo-weight resin coated paper with a semigloss finish.
- Enhanced Matte is a thick, bright white, flat matte paper.
- Matte Heavyweight is a bright white, ultra-smooth coated sheet with a matte finish.
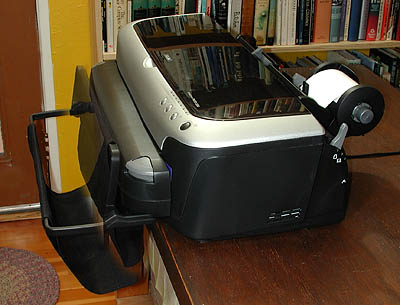
The 2200 can also handle roll paper in three sizes (4, 8.3 and 13 inch widths) using the included roll paper holders. It also includes an automatic paper cutter with a fabric basket for images shorter than 11.7 inches. About 40 seven-inch long photos fit in the basket at a time, so you can do a roll of 4x6s easily.
The cutter can make either one cut precisely between images, two cuts with a margin between images or no cuts. The driver lets you select which method you prefer. The Utility program has an alignment option for the cutter that you should use whenever you reinstall the cutter.
It is possible to decurl roll paper. For long panoramas, roll the paper in the opposite direction and slip a rubber band over the roll to hold it in that position a few hours. For cut sheets as small as 4x6, lay them face up, pick up each corner and roll them toward the center of the sheet with the flat of your hand, back and forth until they relax. They won't spring back.
The 2200 ships with Epson's Web-To-Page Utility [W] and a PIM II plug-in [W]. It also includes Epson's EasyPrint software [MW], which lets savvy applications like Elements 3.0 configure the printer driver for you automatically.
But to wring everything out of this device, you'll want to tap into a set of profiles available on the Epson site and print using the Epson-supplied driver from your image editing application.
Mac users should not be fooled by the CUPS driver for the 2200. Download and install Epson's more elaborate driver. It alone provides access to the Epson Utilities to maintain the printer.
ICC PROFILES | Back to Contents
One of the advantages of the 2200's longevity is the number of profiles available for it. Both printer and ink manufacturers commonly offer profiles for the 2200. As well as Epson itself.
Hidden on the Epson site is a set of ICC profiles [MW] for the 2200. "In most cases, these custom ICC profiles will provide more accurate color and black and white reproduction than with the standard profiles already shipping with every printer," Epson notes. Epson offers profiles for:
- Premium Lustre photo paper
- Premium Semigloss photo paper
- Premium Glossy photo paper
- Enhanced Matte
- Watercolor paper (radiant white)
- Velvet Fine Art paper
- PremierArt Water-Resistant Canvas
Unfortunately, you don't just install the profiles. You have to know how to actually use them. It isn't hard, but it isn't straightforward either.
First, there are a couple of general settings to confirm. As always, make sure you've calibrated your monitor. If your monitor lies to you, your printer can't tell the truth. Second, in Photoshop's Color Settings, choose a working color space (Adobe RGB works well with the 2200 but we used Matchprint successfully, too).
We'll detail the Photoshop OS X settings here, but the principle applies to Windows as well. To print, use Print with Preview and Show More Options to see the Color Management popup. Confirm your Source Space is your working color space. Then set the Profile in the Print Space to the appropriate ICC profile, depending on both the paper you're using and the ink set. The MK suffix indicates you're using the matte black cartridge, while the PK suffix stands for photo black. These settings define what Photoshop does to control printing.
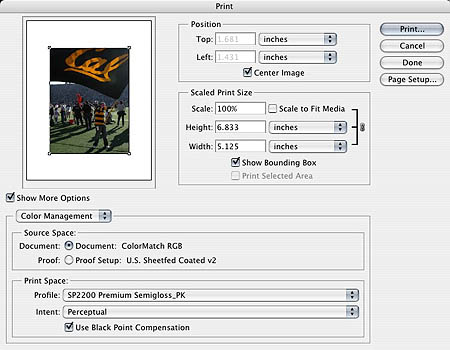 |
| ICC Profile in Action Note the Color Management settings |
In Page Setup, make sure you've set the printer to the 2200 with the right page size. When you Print, Epson's driver is in control. Confirm the 2200 is selected as the printer. In Print Settings select the paper you've loaded and in Advanced settings set your dpi (1440 is recommended). The High Speed option prints in both directions rather than in just one, which the printer can do on most surfaces with no problem. Now move to Color Management and turn it off by selecting No Color Adjustment. This prevents the Epson driver from handling color management, leaving it all up to your Color Management settings in Photoshop. You're ready to print.
MAKING PRINTS | Back to Contents
We used the 2200 over several weeks to print on all sorts of paper from four-inch rolls to matte scrapbook paper. That included Epson's best photo glossy and semi-glossy sheets. We printed color and black and white, primarily with the Photo Black cartridge.
With so many variables, it would have been impossible to print every image perfectly. In fact, making mistakes (using a mismatched profile or ink set, say) can be quite an adventure. Some prints really surprised us. But a little investigation always yielded a plausible explanation. And from that, we learned a little bit more about what would and would not fly.
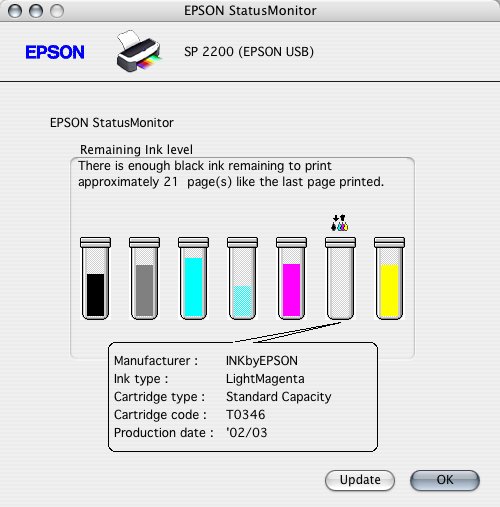 |
| Utility: Monitoring Ink Levels Light Magenta goes fast |
When we had our ink percolating and our paper primed and our image optimized, we got stunning prints. Our best prints were done on Premium Luster and Premium Semigloss although we like our black and whites on matte sheets. The problem with Premium Glossy was the flat gloss of the shadow areas. Seen straight on it wasn't an issue, but if you only print glossy prints, we wouldn't recommend the 2200.
We had only one real problem with the printer once we had revived it from its long hibernation. On very cold mornings and evenings, the ink would bleed in non-printing areas and we'd see horizontal white lines in printing areas. As soon as the studio warmed up, the problems disappeared. We didn't see any official caveat about operating temperature, but clearly the 2200 prefers a warm room. As do we.
Reviewing the 2200 so far from its introduction date gives us a different perspective from our other printer reviews. It isn't the innovations that excite us but its lasting capabilities. Those include print quality on various oversized media with long-lasting pigments which is still among the best you can get on any inkjet, a roll feed option with an automatic cutter, high-speed interfaces and a well-developed set of ICC profiles.
The 2200 has set the standard for archival inkjet prints. The R800 surpasses it in droplet size and speed (and perhaps with its gloss-optimizer) but not print size or roll production convenience. Canon's i9900 also beats it in droplet size and speed, offering the same size prints but not on as many different papers or in rolls and without the benefits of pigmented inks.
In short, the old gray mare is just as good as she ever was. And while its newer competition may have an edge over her here or there, she's still very much in the race. Even pulling a plow.