INTELLIGENT TOUCH, LIGHT GUIDANCE
Canon Pixma MG8120 --
New Interface, Same High Quality
By MIKE PASINI
Editor
The Imaging Resource Digital Photography Newsletter
Review Date: November 2010
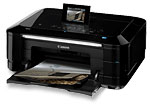
The Pixma MG8120 is the flagship of Canon's recently revamped lineup of multifunction devices. Like the previously reviewed MG5220, it's dressed in a shiny piano black finish with a single silver accent on the front lid.
But where the MG5220 kept things pretty simple on the control panel, the MG8120 introduces the company's Intelligent Touch System of back-lit touch-sensitive buttons and Light Guidance, which illuminates only the active buttons. It's quite a step up from what we saw on the MG5220.
Like the MG5220, the MG8120 includes Canon's new Movie frame printing function built into Easy-PhotoPrint. The new tool makes it easy to find a Canon-captured movie frame to print, automatically enhancing the image for printing as a still.
The MG8120 also features a transparency unit for scanning strips of 35mm negatives and slides. Which can immediately be printed as photos in as little as 20 seconds for a 4x6 print.
The six-color ink system with individual cartridges for each color includes five dye-based inks including a dedicated gray ink tank for black and white photos. The pigment black is used for text.
The WiFi MG8120 can also print iPhone and Android images wirelessly using a free Canon app. Other connections include built-in Ethernet, a memory card reader, Hi-Speed USB port and a PictBridge port that can, with an optional adapter, communicate via Bluetooth.
And, of course, you get Canon's built-in duplex printing (except with borderless pages), auto-document fix and auto scan mode.
The duplex feature is just one of the several ways the MG8120 represents Canon's Generation Green program. Other ways the MG8120 goes green include being able to print as many as four pages on one side, individual ink tanks (and cartridge recycling), the white LED that requires no warm-up time, the energy efficient Quick Start feature, the restricted use of hazardous materials, Canon's hardware recycling program plus its own refurbishing program.
SPECIFICATIONS | Back to Contents
Printer Specifications
Print Speed: Approx. 20 seconds for a 4x6 borderless photo; approx. 12.5 impressions per minute for black; 9.3 ipm for color
Number of Nozzles: 5,632 color, 512 black, 6,144 total
Picoliter Size: 1, 2 and 5
Print Resolution: Up to 9600 x 2400 dpi in color and up to 600 x 600 dpi in black
Paper Sizes: 4x6, 5x7, 8x10, Letter, Legal, U.S. #10 Envelopes
Paper Compatibility: Plain: Plain Paper, Canon High Resolution Paper; Super High Gloss: Photo Paper Pro Platinum; Glossy: Photo Paper Plus Glossy II, Photo Paper Glossy; Semi-Gloss: Photo Paper Plus Semi-Gloss; Matte: Canon Matte Photo Paper; Fine Art: Canon Fine Art Paper "Photo Rag"; Envelope: U.S.# 10 Envelope
Printer Features: Auto Duplex Print, Auto Photo Fix II, Borderless Printing, Calendar Print, Document Printing, Full HD Movie Print, Grayscale Printing, ID Photo Print, smartphone Photo Printing, Photo Index Sheet, Photo Direct Print (Memory Card/Camera/USB Flash Memory), Photo Printing, Template Print, Wireless Printing
Output Tray Capacity: Both the auto sheet feeder and the cassette hold 150 sheets
Copier Specifications
Copy Speed:Approx. 15 seconds for color
Reduction/Enlargement: 25 to 400 percent
Copy Features: 4 in 1, 2 in 1, Auto Duplex Copy, Auto Exposure/Intensity Copy, Face Brightener/Fading Correction, Film Copy, Fit-to-Page, Gutter Shadow Correction Copy, Image Repeat, Intensity, Manual Color Adjustment, Masking Copy, Multiple Copy: 1-99 Pages, Photo Reprint, Preset Copy Ratios, Trimming Copy, Zoom

Film Carrier. Tucked behind the white background in the lid, the film carrier holds a strip of six negatives or four 35mm slides.
Scanner Specifications
Scanner Type: Flatbed
Scanning Element: Charged-Coupled Device
Max. Resolution: 4800 x 9600 dpi for film and 4800 x 4800 dpi reflective; 19,200 x 19,200 dpi interpolated
Scanner Features: Auto Document Fix, Auto Scan Mode11, Film Scan, Gutter Shadow Correction, Network Scan, Push Scan, Scan to Memory, White LED, Wireless Scanning
Color Depth: 48-bit internal/24-bit external
Max. Document Size: 8.5x11.7 inches
Connections
Media Card Support: SD Memory Card, SDHC, MultiMediaCard, MultiMediaCard Plus, miniSD Card, miniSDHC, microSD Card, microSDHC, RS-MMC, USB flash memory, CompactFlash Card, Microdrive, Memory Stick, Memory Stick PRO, Memory Stick Duo, Memory Stick PRO Duo, Memory Stick Micro, xD-Picture Card, xD-Picture Card (Type M), xD-Picture Card (Type H)
General Specifications
Other Features: Intelligent Touch System, Wi-Fi status LED, 2-Way Paper Feeding, 3.5" LCD, Auto Sheet Feeder, DCGPT, FAU, Scroll Wheel, Ethernet, Self-Opening Paper Output Tray, Quick Access UI, Quick Start
OS Compatibility: Windows 7, Windows Vista , Windows XP, Mac OS X v10.4.11 to v10.6.x
Standard Interfaces: Wireless LAN (IEEE 802.11b/g/n, although it seems to be a Wireless G device), Ethernet, USB 2.0 Hi-Speed, Card Slots, PictBridge, Bluetooth v2.010 (optional), IrDA
Software Included: Setup Software & User's Guide CD-ROM, PIXMA MG8120 Printer Driver, Easy-PhotoPrint EX, Easy-PhotoPrint Pro, Easy-WebPrint EX (Windows only), Full HD Movie Print, MP Navigator EX, Solution Menu
Dimensions: 18.5 x 15.5 x 7.9 inches (W x D x H)
Weight: 23.6 lbs.
Warranty: One-year limited warranty with InstantExchange program. One-year toll-free technical phone support
SYSTEM REQUIREMENTS | Back to Contents
Canon claims compatibility with Windows systems including XP, Vista and 7. It also claims compatibility with Mac OS X Tiger through Snow Leopard.

The Box. The box was battered but the MG82120 came through fine.
The retail box includes:
- PIXMA MG8120 multifunction device
- Document Kit with Cross Sell Sheet, Getting Started, Important Information Sheet, Networking Troubleshooting Guide, Safety Environment Information, Setup Software & User's Guide CD-ROM, Warranty Card
- Ink Tanks for PGI-225 Pigment Black, CLI-226 (Cyan/Magenta/Yellow/Black/Gray)
- Power Cord
- Print Head
- Sample Media (three sheets of 4x6 PP-201 photo paper)
We did receive and expect the shipping units to include:
- MP-101 print head alignment paper (two sheets)
An optional Bluetooth adapter turns the unit into a Bluetooth printer using the USB port, as we describe below.
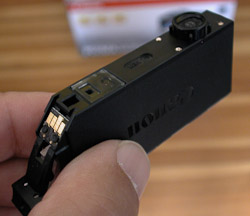
Cartridge. A snap to install.
CONSUMABLES | Back to Contents
The five ChromaLife100 CLI-226 color ink and gray cartridges are $13.99 each. The larger PGI-225 black pigment cartridge for text is $15.99. Canon sells combo packs of the color inks for $55.99 and double packs of the pigment black for $29.99 or a four pack for $51.99.

Six Inks. A grey dye-based ink for black and white printing complements the usual four dyes and pigment black.
All of Canon's photo papers are available for the MG5220 with the exception of the heavy-weight art papers. Fifty sheets of 4x6 glossy Photo Paper Plus costs $12.99. Twenty sheets of 8x10 in the same surface costs $13.99. We found 100 sheets of 4x6 Photo Paper Plus Glossy II at Office Depot for $19.49.
These consumables are dye inks intended for printing on swellable papers. You should not use these inks on instant-dry porous papers because you will compromise their longevity (quite severely). Prints on swellable paper take a while to dry. Canon warns against stacking the prints without letting them set for 15 minutes and the company suggests letting them dry for 24 hours.
HARDWARE TOUR | Back to Contents
The top of the unit features the transparency unit and scanner lid with a silver trimmed edge on the front. The lid hosts the Control Panel along the front edge with a pop-up 3.5-inch LCD behind it that can be raised to a comfortable viewing angle. The Power button is on the top to the left of the control panel.

Card Reader. A slot for almost anything.
At the center of the front edge is an LED to indicate power status. To the right is another for warnings and erros and just right of that is an indicator LED for WiFi connectivity. Just below that is the card reader. Further down is the PictBridge USB connection, just to the right of the 150-sheet paper tray. Above the tray is the output tray cover with a flip-out finger to support page-sized sheets.

Rear Feed. Just lift up to exposure the rear, photo paper feed.
On the back, the auto duplexing unit is surprisingly compact. The photo paper tray sits right on top of it, lifting out and angling back to reveal the paper path. This is Canon's traditional paper handling strategy, eschewing the two-trays-in-one approach of Kodak and HP. The only drawback is that it can be inconvenient to use the back tray if space is cramped in the rear. But otherwise, it's one of the better approaches to loading specialty paper like photo paper.
Also on the back is a Hi-Speed USB port and an Ethernet port to the left and the Power connection to the right. The MG8120 happily does not require a power brick, just the long power cable that Canon includes.

Glass Platen. The top expands to accommodate thick materials.
Under the scanner lid, which does lift up a bit to accommodate thicker materials, is the glass platen, which is not large enough for legal-size originals. The lid stays up when you raise it 45 degrees.
The scanner bed itself lifts up for access to the print head and cartridges. It stays up without requiring anything to prop it up.
INSTALLATION | Back to Contents
Good engineering extends to packaging and Canon's packaging is among the very best. The power cord, inks and documentation are easily removed from the box before you lift out the two Styrofoam bumpers. That makes the printer itself easily accessible. Just grab the bag by its built-in handles and pull up.

Handles. A nice touch: the plastic wrap has handles.
The installation guide is a booklet not a poster but it was easy to follow. And when we got far enough to power on the printer, the LCD gave us helpful line illustrations of each procedure.

Guide. Not as hard as it looks.
Once you've got everything out of the box, it's just a matter of removing the clear plastic protecting the black plastic piano finish and all the orange tapes holding the moving parts in place. Some of those tapes are hidden, so be thorough.

Lock. Prominently marked.
Note also that the MG8120 has a scanner lock. So be sure to unlock it after you've placed the device where you'll leave it. Whenever you move the MG8120, be sure to lock it first.
The general process is to install the print head (without touching any of the contacts, install the six ink cartridges, align the print head and load it with paper.
On the MG8120, the print head sits in a carriage that has a locking frame on top. You open the spring-loaded frame, slip the print head into position and lock it into position with the frame. It took no special effort and we were never confused about what went where or how hard to push.

LCD Guide. Animated line illustrations play over until you get it.
Canon cartridges are indeed a snap to install. Rip the wrap off, twist off the orange cap and slide them into their bay in the print head, snapping them down into position. A red LED on the cartridge lights up to confirm you did it right.
There's enough clearance to work under the scanner but just enough. Canon advises you work in a well-lit area and we second that. One problem is that all the plastic is black, so it can be hard to see what you're doing, particularly for older eyes. Shine a light in there, though, and no problem.

Alignment. Very simple.
Canon supplies two sheets of alignment paper with one corner notched so you can orient it correctly in the rear paper feed. It took about five minutes to print and scan the sheet, aligning the print heads. Apparently only the cyan and black cartridges are required.
Wireless Setup. We set the MG8120 to connect wirelessly to our network so any computer in the house could print to it with the correct driver installed. You can also plug a USB cable into it to marry it to just one machine.

WiFi Setup. Also very simple.
To enable WiFi, we first had to scroll to the Setup menu on the MG8120 itself and find the LAN settings option. Canon touts WiFi setup as very easy, and that describes our experience.
It found our Wireless network but preferred the Wireless G connection to the Wireless N connection. That's not a big deal in terms of performance. And it's probably not a bad idea to have something like a printer on the slower connection, leaving the faster connection free for video streaming.
As soon as we confirmed the access point, it connected to it and the blue WiFi LED lit up. So we just had to tell the computers to look for it on the network.
Alternately, you can plug an Ethernet cable into the back of the MG8120 to connect it to a hub for sharing. If the hub is connected to a wireless router, you'll also be able to share it wirelessly.
You can also, of course, just plug a USB cable from your computer to the back of the printer if you prefer not to share it.
Software. With the hardware installed and connected to the network, we moved on to the software installation. We found a more current driver on the Canon site than what shipped with the device on CD.
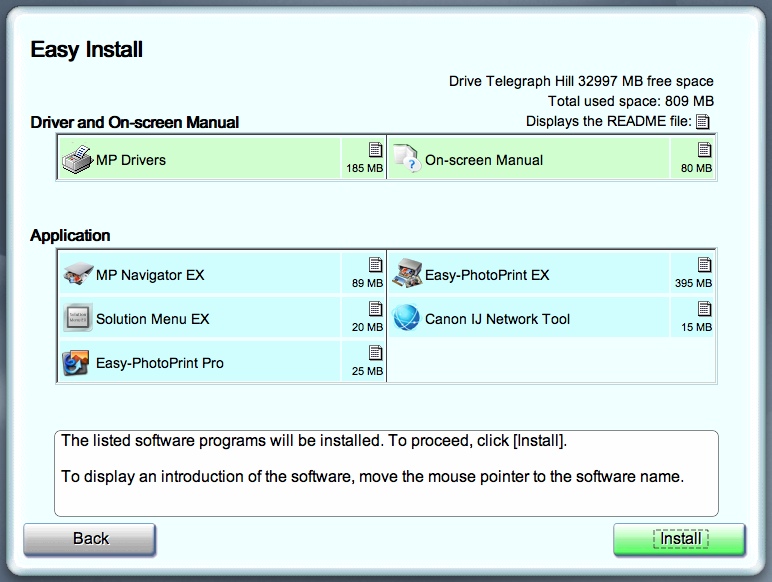
Install Options. This is what the Easy Install installs.
Driver installation was easy. Just pop the CD into your computer and select Easy Install to load the driver, Solution Menu and a few applications. Canon's new movie frame printing feature is part of Easy-PhotoPrint, not a separate application.
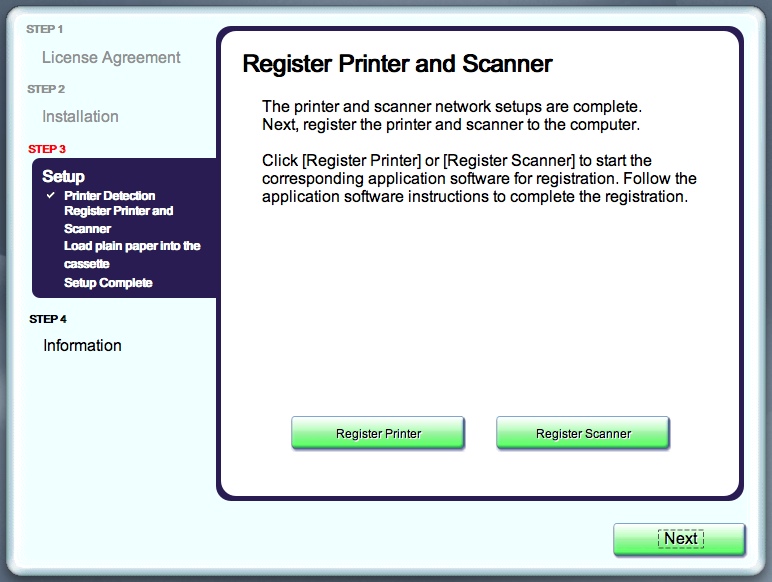
Register. Click them both to set up the printer and scanner on your system.
The one confusion in the software install was the screen that asked us to register our printer and register our scanner. We normally think of registering as something we do for a product on the manufacturer's Web site. But in this case, Canon is talking about registering the new device with your operating system. Do both to make it easier to use either.
OS X users should repair permissions using Disk Utility immediately after installing the Canon software. We found quite a few discrepancies between what Apple thinks permissions should be and how Canon left them.
CONTROL PANEL | Back to Contents
The control panel features Canon's Intelligent Touch System of back-lit touch-sensitive buttons and Light Guidance. Together they make using the MG8120 much easier to use than previous Canon multifunction devices and most competing products, too.

LCD Latch. Another nice engineering touch: just press the bar behind the LCD to release it.
If we were less than impressed by the MG5220's control panel, we were suitably appreciative of the innovations of the MG8120's.
The entire lid functions as the control panel. At the back is the large LCD that is released from its lower, locked position by a simple press of the wide bar behind it. It's an elegant touch.
In front of the LCD are three soft buttons whose functions are labeled at the bottom of the LCD. That beats the two function buttons of older MP all-in-ones, allowing a redesign of the menu system.

Scroll Wheel. Not a moving part, but touch sensitive with Light Guidance to show your options.
Along the front edge of the lid is a row of controls that light up as necessary. When they aren't lit, you can't see them at all, much like the burners on an electric range. You just admire the shiny piano black finish of the lid.
So the layout, while complex, is easily grasped. More easily than the description that follows, at least.
The Power button on the far left is a physical button, cut into the lid. There's no hunting around for it. After you take off the big label surrounding it, anyway.
Options. In this case, everything but the Stop button (which would be off-screen to the right) and OK button is lit up.
In the middle of the row is the Scroll Wheel. It's not a physically separate control and doesn't move. Instead, it's embossed on the lid, so to speak, and touch sensitive. When active, a white ring of light circles it. Inside the ring are the four arrow keys and an OK button, which only illuminate when active. The outside of the ring functions like a scroll wheel when you run your finger along it.
To the immediate left of the Scroll Wheel is the Back button. It's simply a light under the piano finish lid that turns on when it's an option. It's set a little lower on the row than the other buttons so it's position reminds you of its function.
To its left is the Home button, which, again, only lights up when it's an option.
Same with the five buttons to the right of the Scroll Wheel: the Plus/Minus stacked pair, the Black Start button, the Color Start button, and the Stop button.

WiFi Indicator. Indicates an active connection.
So if the buttons aren't physical devices themselves with springs and detents, how do you "press" them?
They actually sense your finger on them. On dry days this can be amusing. You barely have to touch a button to trip it. So we never found them to be insensitive. And on the whole we liked the touch.
You do get some audible feedback, whose volume and repeat rate you can adjust in the Device Settings in the Setup menu.
There are three LEDs along the front edge of the top lid: the Power lamp to remind you the printer is on, the Alarm lamp in case there's a problem like no paper or no ink, and the WiFi lamp to indicate the WiFi connection is up or active (when flashing).
MENU SYSTEM | Back to Contents
There are nine items at the top of the Menu System, which displays three at a time. The soft keys select one of them in the set. To get to the subsequent screen displays you use the Down arrow key and the Up key to go back up, or just twirl the Scroll Wheel.
The Home button takes you to the top of the Menu system.
On the first screen:
- Copy: Options include changing copy scale or erasing dark frame or the shaded binding when copying a book. You can also copy an original in various layouts.
- Photo: Print photos from a memory card or USB flash drive.
- Scan: Save scanned data to your computer, a memory card or USB flash drive.
On the second screen:
- Photo Reprint: Reproduce printed photos on photo paper as easily as copying documents.
- Fun Photo Reprint: Print stickers, calenders and other photo items using photos on a memory card or USB flash drive.
- Slide Show: Sequentially preview photos from a memory card or USB flash drive on the LCD. You can also select and print selected photos.
And on the third screen:
- Document Print: Print PDF files that were scanned and saved by the MG5220.
- Special Print: Print template forms like notebook paper, graph paper, etc. You can also print photos on a mobile phone using a wireless connection with an optional Bluetooth adapter (although you don't have to be at the machine to do it).
- Setup: Maintain the machine or change its settings. You can also configure a wireless LAN connection.
Help screens are plentiful but unobtrusive. You can quickly dismiss them with the OK button or use one of the soft buttons to proceed. But the type is pretty small on the little screen. We had no trouble reading it but Grandmother might.
We didn't get lost in the menu system and easily found some unusual options that turned out to be useful. So we have no complaints about the menu system itself.
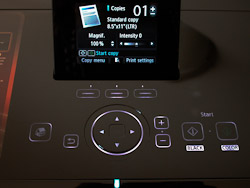
Stand-alone copying is one of the simpler tests but more frequent uses of a multifunction device. The MG8120 passed with flying colors, its new user interface making the experience particularly pleasant. The Light Guidance feature helps keep the task as simple as possible, even when you start navigating extensive options.
Documents. It's almost too simple to copy a document in either color or black and white on the MG8120. Just place the original on the glass, press the Copy function button and then either the Color or Black Start button.

Newsprint. Did a nice job without any fiddling around with the settings. Both of these are the copies -- and they look better than the originals.
We challenged the MG8120 with some newspaper clippings. The brown newsprint and the show-through often make this a tough subject. But the MG8120 did very well, keeping the paper bright without picking up any show-through. There is an optional setting to reduce show-through but we didn't need it for the newspaper clipping.
And the color reproduction from the newspaper was also well done, with accurate color.
The MG8120 has several handy copying options, by the way, including double-sided copying, 2-in-1 copying and 4-in-1 copying. The latter two print multiple originals on one side of the paper by reducing each image. And you can use them with the two-sided option to copy as many eight originals on just one sheet of paper. We found it a little confusing the first time through, but a little time spent with the on-screen manual clarified things.
You don't have to print your copies, of course. In the Scanning section below, we discuss other options.
Photos. Copying photos is one of the thrills of owning a multifunction device. Whether you've got just one copy of an old black and white you want to share or you want to run off a few copies of a fun photo for friends, the MG8120 is up to the task.

Copy Me. The original is on top.
You might think this involves the Copy or Scan command, but you'd be thinking too hard. Canon has a special option for just this sort of thing: Reprint Photo.
We tried both color and black and white photos and both were reproduced very well. We almost preferred the copy of the baby photo to the original, something we've never said before.
Film. Yes, the MG8120 can make a print directly from a color negative with no computer involved. And it's pretty simple, too.
Like reprinting a photo, you tap the Reprint Photo option but select the From Film option. Instructions are provided on the LCD for loading the film carrier but it's easy enough to figure out.

From Color Negatives. Load the film and Reprint. Note the pin in the top left corner and the two big holes for opening the carrier to the right. The print is from 30+ year-old film.
There are a couple of big holes for your fingers to squeeze the top piece, releasing it from the carrier. Observe the R-in-a-box icon to orient the film in the carrier. Then snap the top back down.
The only complaint we have about the carrier is that film curl makes it difficult to position the negative strip in the open carrier. It's a small help to clip one end of the film strip into the fingers in the end of the holder. Then just take your time, aligning as you snap the top back down. And make sure you have the frames aligned to the white marks on the holder so the MG8120 knows where the images are.
Once you've loaded the carrier, you place it on the glass, pinning one end to the slot with a pin in it.
The holder also accommodates four mounted slides when you take out the negative insert.
You then tell the MG8120 what the original is (color negative, slide, etc.) and it scans the strip, showing you each frame. You can crop (resizing with the Plus and Minus keys and using the arrow keys to move your crop around the image) and print (just press the Color button).

Options. You can use Autofix or roll your own fixes.
Results were very pleasing. We didn't have to tell the MG8120 what kind of film we had and we were able to make grain-free enlargements with only a crop of the frame. The images really looked like they were fresh off a camera.
Part of that was thanks to the MG8120's Autofix feature. It can brighten faces, restore faded colors and more. But for difficult images, you can also disable it, activating the individual features separately. The LCD is not a great editing monitor, though, so you're flying blind, but you can make your own adjustments. And you can do that very easily from the menu as you work on each image.
In fact, the workflow for reprinting was remarkably convenient. Canon has really figured out the decision tree for making reprints.
Considering what a bonus it is to be able to easily print images from your shoebox of negatives, it's hard to imagine why you wouldn't want film scanning in your multifunction device.
We're always tempted to refer to multifunction devices as printers because that's what they do mostly: print. The MG8120 prints quickly with great color. It was really a pleasure to see sheets roll out of the printer.
From the Card Reader. Unlike some multifunction devices (well, most actually), the MG8120 includes a card reader that can handle almost any card format.
Those include SD/SDHC, MultiMediaCard, MultiMediaCard Plus, miniSD, miniSDHC, microSD, microSDHC, RS-MMC, USB flash memory, CompactFlash Card, Microdrive, Memory Stick/PRO/Duo,/PRO Duo/Micro, xD-Picture Card and xD-Picture Card (Type M or H).
Of particular note for photographers in that list is CompactFlash, which is rarely supported on multifunction card readers these days.

Bluetooth Adapter. Pretty handy.
Bluetooth. We were able to copy a photo from our vintage Motorola Razr to the MG8120 via Bluetooth, which printed it nicely on a sheet of 4x6 photo paper. No problem.
We did have to attach a Bluetooth adapter to the PictBridge port of the MG8120. As always, we relied on our D-Link DBT-120.
For iPhones and Android devices, Canon has an app to enable WiFi printing to the MG8120, too.
From Easy-PhotoPrint. As with the MG5220, the MG8120 includes Canon's Easy-PhotoPrint. It makes it simple to print more than one image on a sheet of photo paper and also lets you edit the images before printing, optimizing both the image and the use of paper.

Prints. No complaints.
Easy-PhotoPrint is easy. Real easy. It advises you to point it to a folder of photos, select the photos to print (a single command will set one copy for all of them), pick your paper, select your layout (borderless 4x6 prints or something else) and print. All the steps, in the right order, to get the best results.
The results are generally pleasing. We find the images a bit too vivid still (pretty brilliant denim, for example) but the blacks are rich and skin tones natural. Easy-PhotoPrint generates the printer data before sending the data to the printer so all of your images are rendered before the first is printed. That rendering ties up your computer a while but the printing itself goes fast.
Because these are dye inks on swellable paper, don't let them stack up as they print but remove them one at a time to air dry.
We've tested dry prints by running water over them to see how well they would hold up. After a few hours, when they have dried again, there is no noticeable effect.
Templates. Built into the MG8120 are a set of templates for common ruled formats like notebook paper in three line spacing options, graph paper in two options, check list, musical staff paper in two options, handwriting paper, weekly schedule and a monthly schedule. These are all available from the Special Print main menu option.
A number of these options are best printed two-sided and the MG8120 will do that. Unfortunately, the menu display is a little confusing. We thought we had set two-sided printing because the LCD said two-sided, but it meant the option rather than the setting. We had to scroll down to it and change it from one-sided, the default, to two-sided.
Great feature, though, especially for students.
Because we set up the MG8120 as a network printer, connected to our WiFi router, we were able to scan wirelessly to any computer on which we'd installed the Canon software suite. MP Navigator handled the details, receiving the scan and storing it on the hard disk of the computer we targeted from the MG8120.
You can also scan directly to a thumbdrive or memory card, too. And you can email a scan as well.
Documents. While we were glad to see you can scan directly to a thumbdrive or memory card from the glass platen, we were a bit miffed that the PDF scan of a text document is only an image. So things like links to Web sites are not active in the PDF.
MP Navigator does provide OCR capability, however. It's under the One-click option as OCR. But OCR won't create a PDF document with linkable text, just a text version of the document. And the PDF option, though it will create a text-based PDF if you enable the Keyword Search option, won't create links.
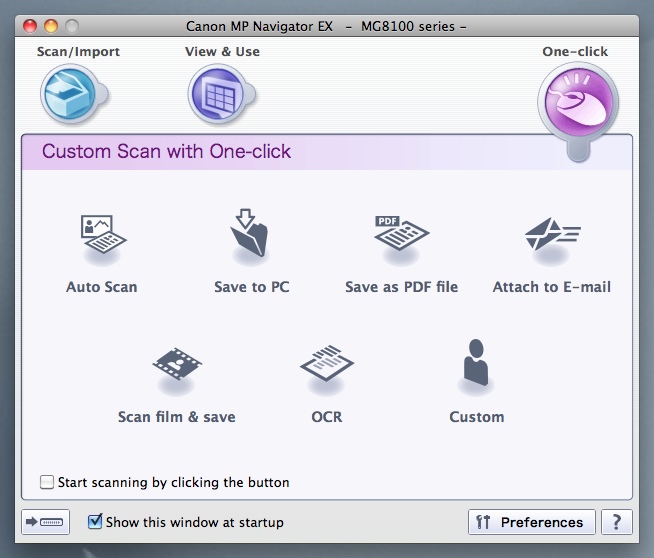
MP Navigator. The One Click menu shows the OCR option.
But it was very convenient to be able to scan directly to a thumb drive or flash card rather than print a copy. Canon gives you great output flexibility.
Images. We scanned our Maserati Kodachrome slide several different ways:
- Directly from the MG8120 at 1250 dpi
- Using Image Capture at 1250 dpi
- Using ScanGear, where we could tap into the full 4800-dpi capability of the scanner, although for this review we limited ourselves to 2400 dpi
In our CanoScan reviews, we've praised ScanGear as our favorite OEM scanning tool. We like it's interface and, if you dig, you can find almost any option you need to turn out a sparkling scan.

ScanGear. Even handled Kodachrome.
Kodachrome is a tough scan, but the MG8120 did very well, holding detail in the highlights and shadows and delivering a credible red.
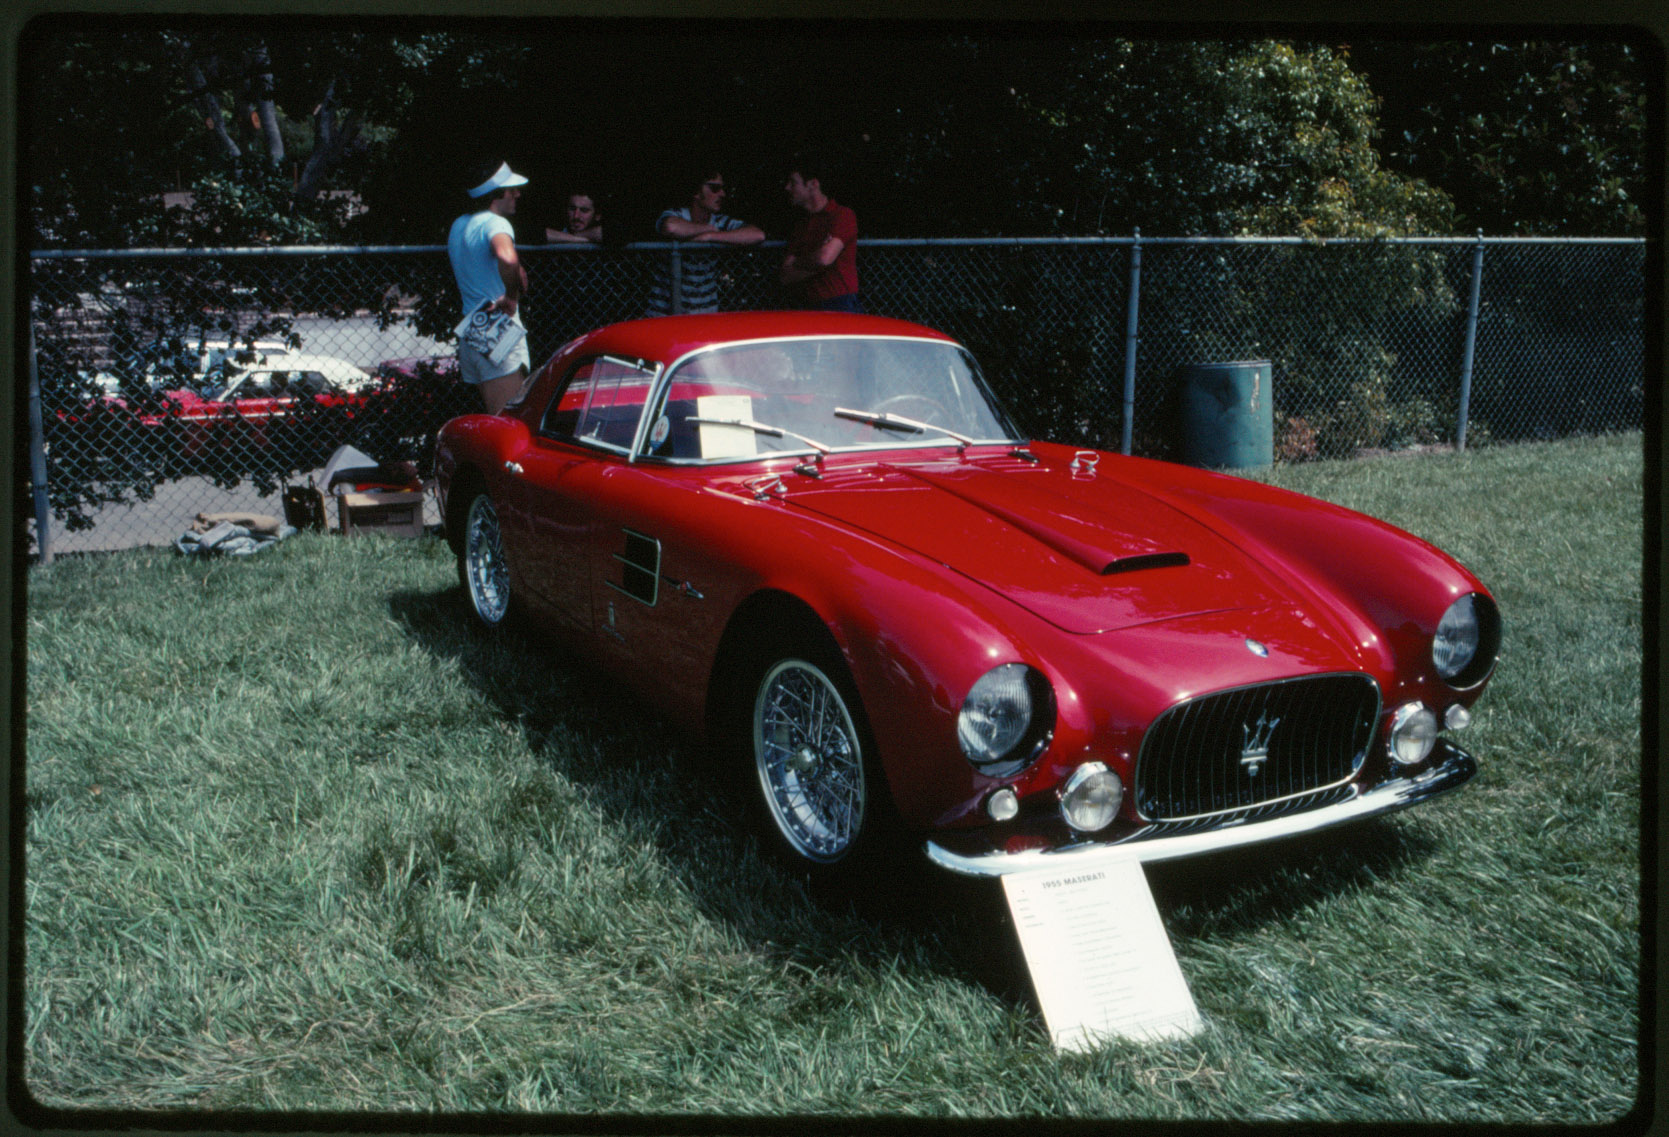
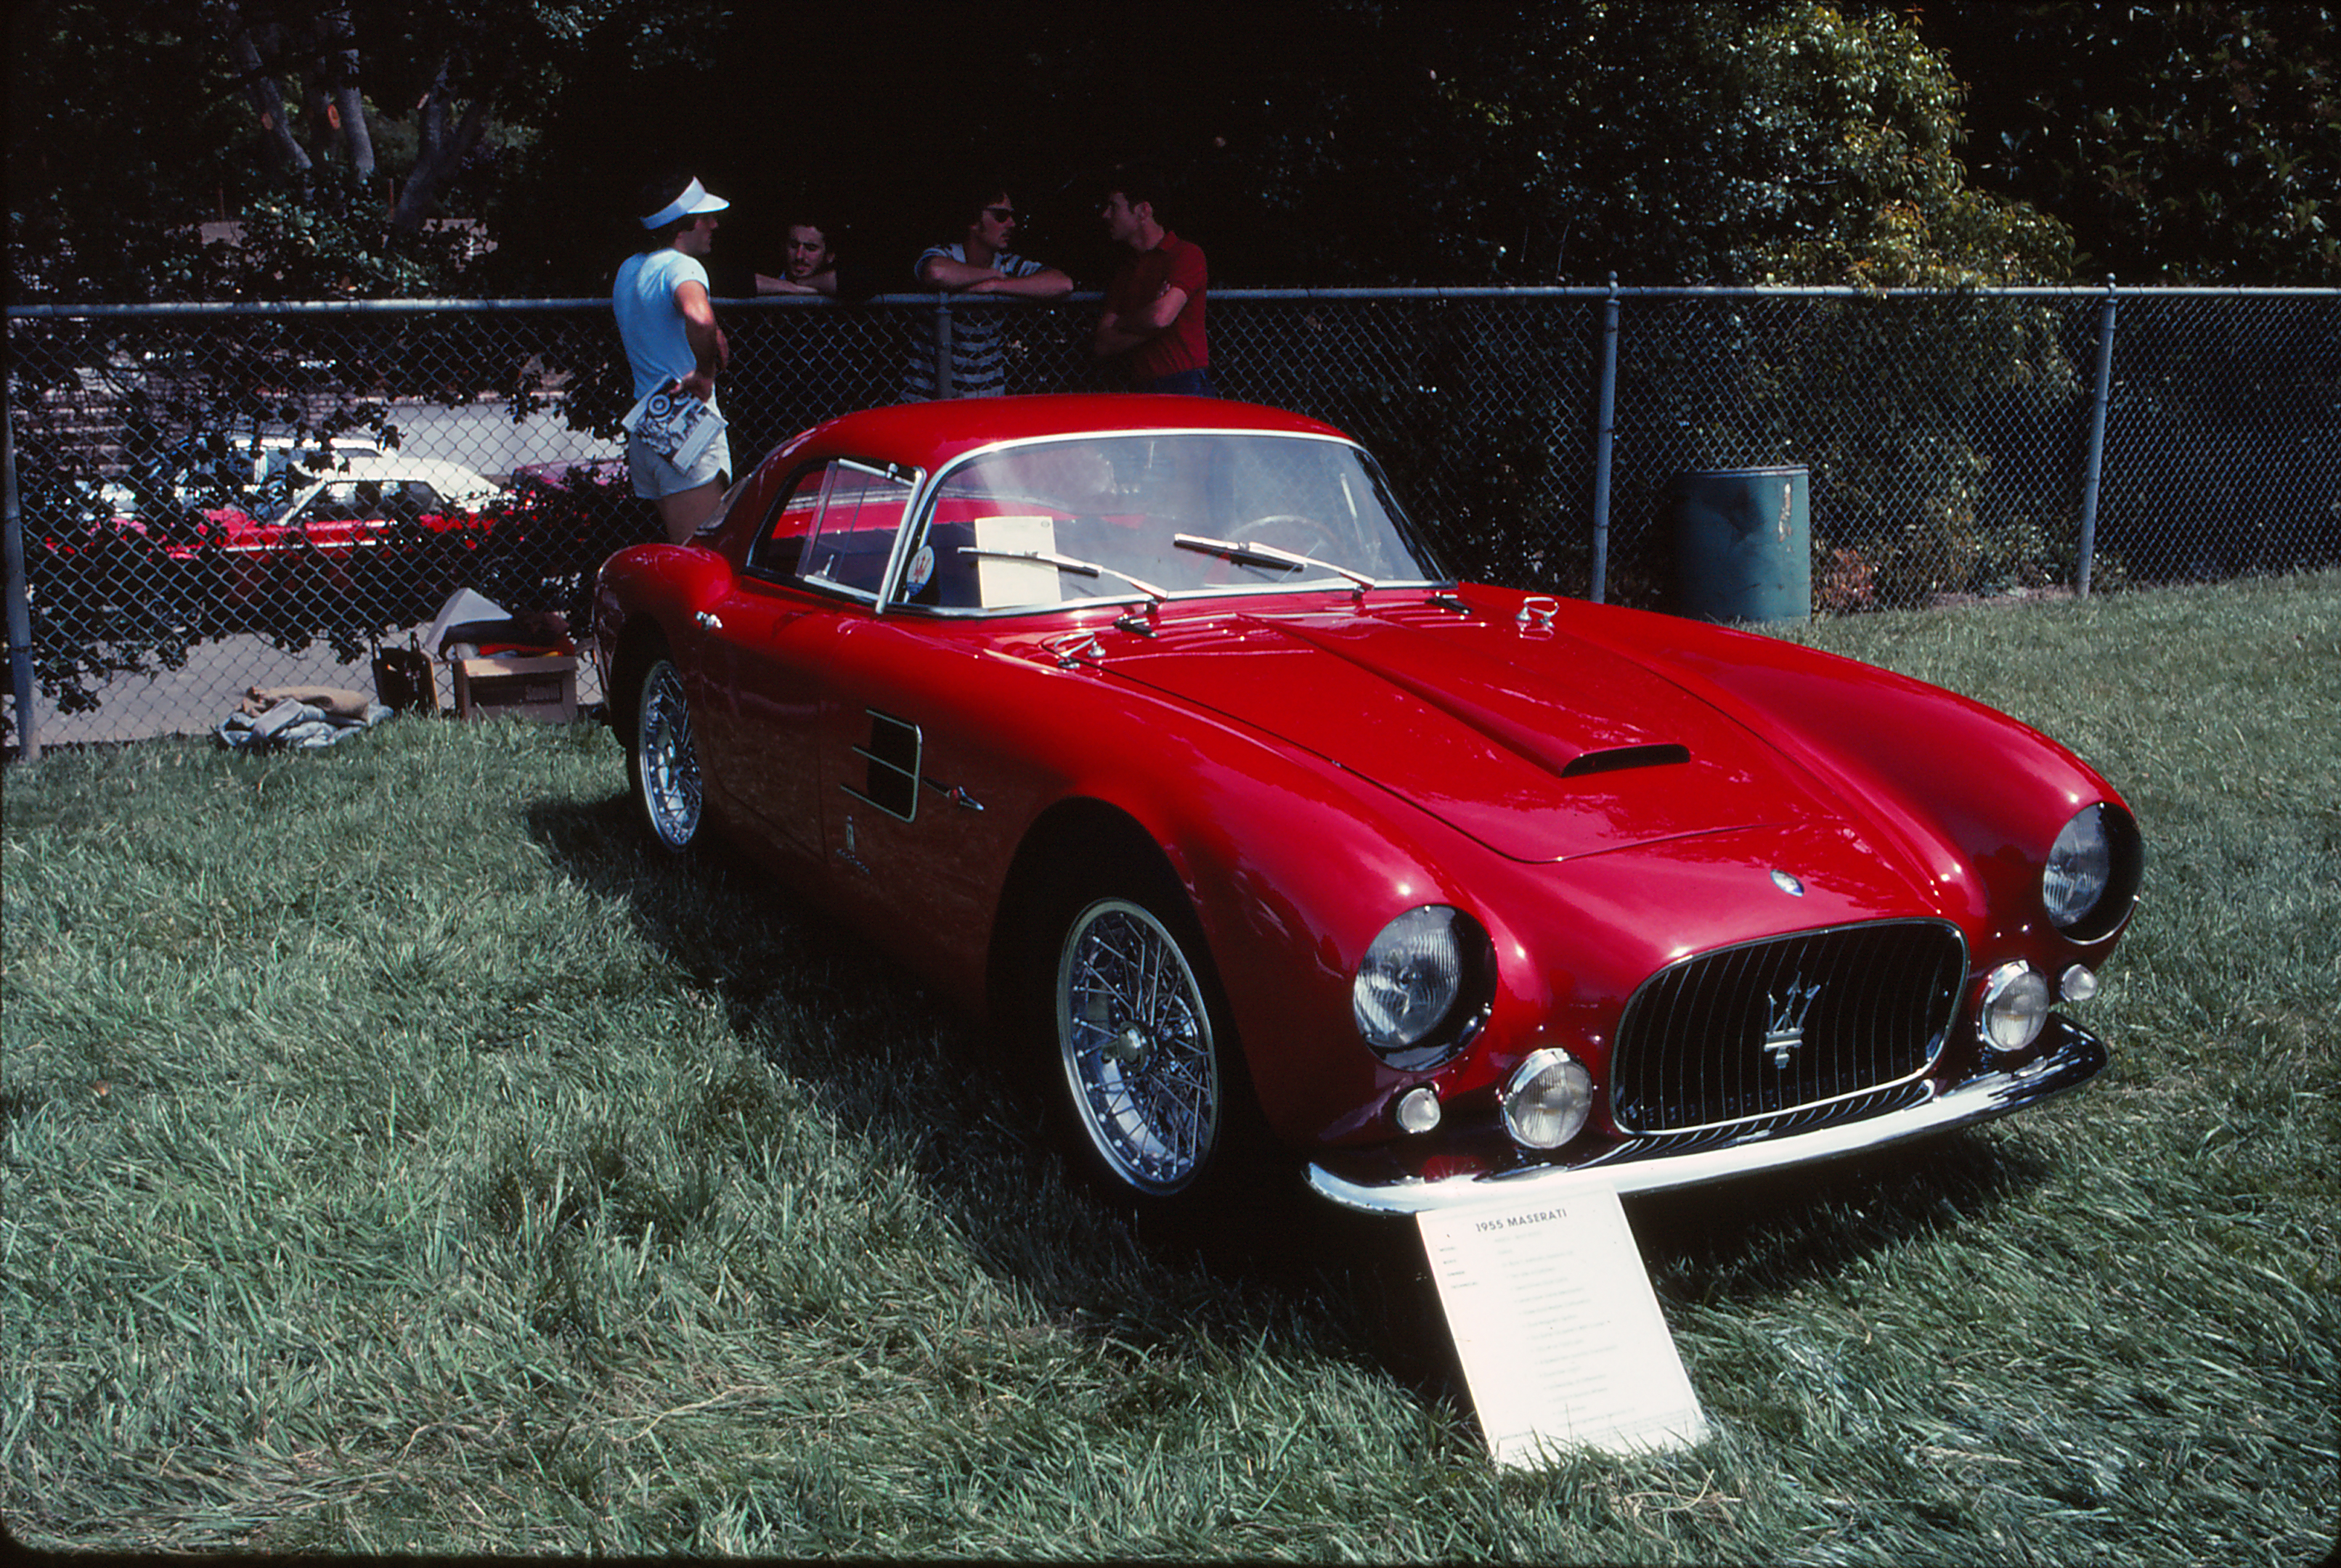
Kodachrome Maserati. Scanned from Image Capture (top) and ScanGear (bottom).
As we observed in our CanoScan 9000F review, LED illumination seems to do very well with a generic profile rather than a custom one. For difficult originals like slides, we still prefer to use VueScan or SilverFast for its multiexposure function (and we were able to run VueScan with the MG8120).
But the results we got from the MG8120 using ScanGear were certainly suitable for 4x6 prints and screen display. And, who knows, we might easily have taken them farther.
Movie Frames. This is a hot new feature but you need an Intel processor to use it.
With more and more digicams and dSLRs capturing HD-quality movies, clever family photographers have figured out that Movie mode beats trying to anticipate the shot. At 30 frames per second, Movie mode has a better chance of capturing the moment than you do in Auto still mode.
The problem with this approach in the past has been the low resolution of movie frames. And with SD video (640x480 pixels) you pretty much had to work at small print sizes to deliver an image that looked like a photo. We did a series of 2x3-inch frames once, in fact, that came out very well.
HD video ups the resolution significantly to either 1280x720 or 1920x1080. At 150 dpi for the printer, that translates to roughly a 7x12-inch print for 1080 HD or a 4x8 print for 720 HD. Plenty of resolution.
The trick becomes finding the frame.
Easy-PhotoPrint is your ticket for this. There are a few caveats, though. Macs must have an Intel processor but OS 10.4.11 is still supported. ImageBrowser 6.5 or later must be installed (it's included with Canon cameras that record MOV format video). And video color tone isn't necessarily matched by the still.
The Movie Print window in Easy-PhotoPrint is accessed by the Movie Print icon. Or you can go directly to it from Solution Menu. Once you've browsed to a folder with compatible MOV files, you'll find a large preview area above a captured frames area, both of which sit to the right of a settings/operations area.
In the Settings area, a Print button does the deed. You can, of course, change media type and page size to match your paper and print settings, too. An Auto Frame Capture Settings option lets you capture multiple stills by time. You tell it when in the video to start and how long to go and it reports how many frames it will capture for printing.
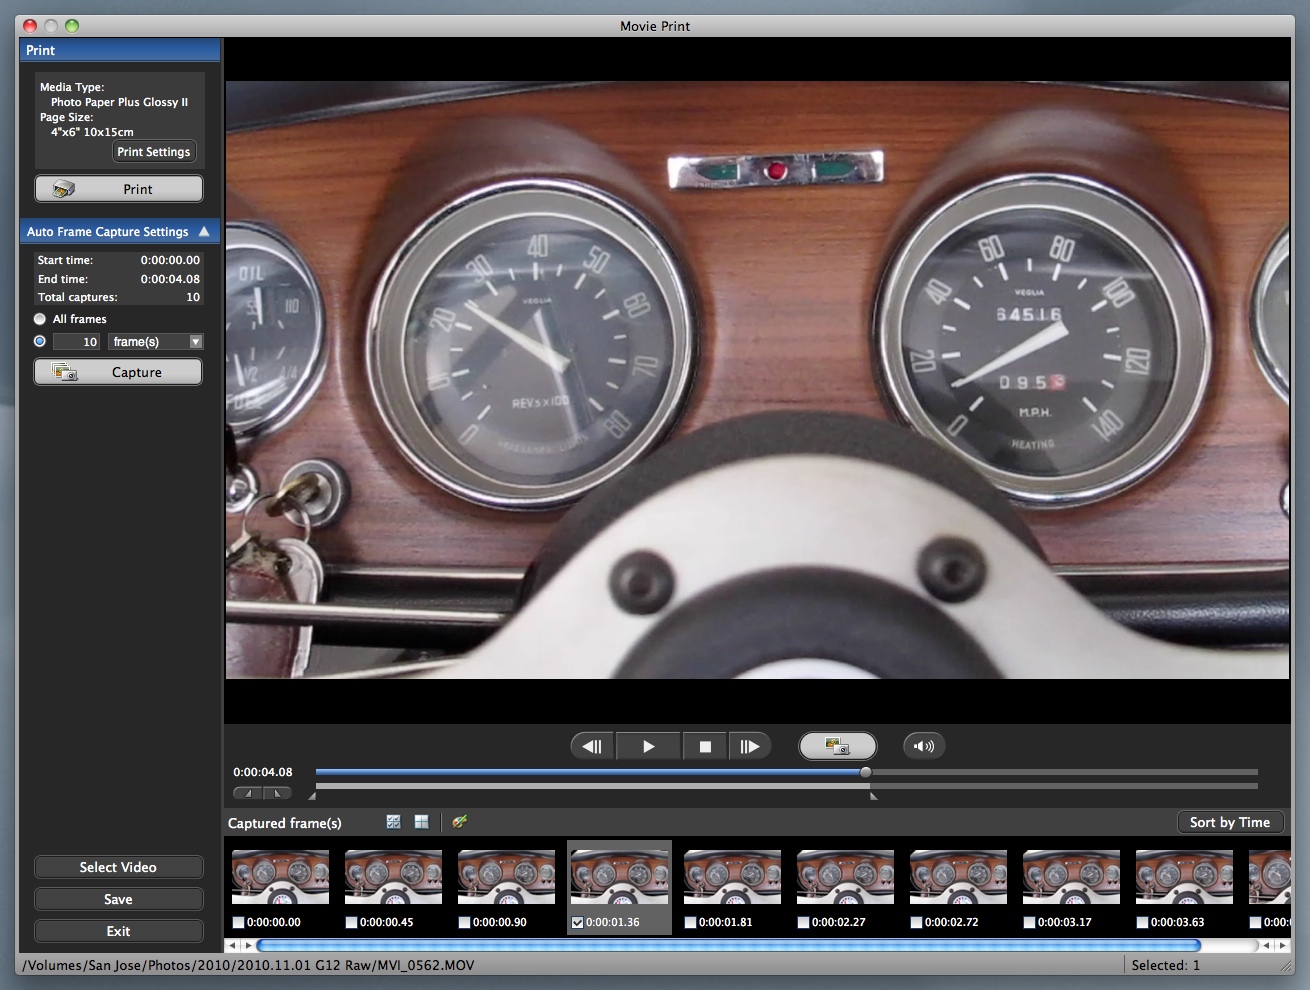
HD Movie Print. We picked one of the 10 frames the software grabbed for us.
You can hunt manually in the Preview window using the Play/Pause, Frame Back/Frame Forward buttons or the Playback Slider.
Selected frames are displayed in the Captured Frames panel where you can click on the Correct Captured Frames icon to color correct them. Corrections, displayed in the Operations panel to the left, include Noise Reduction and Enhance Resolution (to smooth jaggies). You can compare Before and After renderings, too.
Or you could do what we do. Use a Movie editor (like iMovie) to select frames and export them as JPEGs, which you can then doctor in Photoshop.
We didn't mistake the print from our Canon PowerShot G12 movie frame for a print from a still captured by the same digicam. Color was certainly very nice but resolution looked more like a cellphone camera, much softer than a typical digicam 4x6 print.
And then there's the problem of the aspect ratio. A 4x6 print (with its 2:3 aspect ratio) isn't the same shape as a 16:9 HD movie frame. So to get a borderless print, the sides of the image are cropped out. Severely.
But we found the process very simple, even painless, which is saying something. It was easy to find a good frame to print and there was no image editing required to make the movie frame printable.
ONE LITTLE PROBLEM | Back to Contents
We delayed this review for weeks while we tried, with Canon's assistance, to resolve a problem on one of our test systems.
We weren't able to print two files on the MG8120 from OS X.
The first was an iWork '09 Numbers spreadsheet. The second was a four-up notecard created in iWork '09 Pages.
The spreadsheet failed to print with an "Unable to open raster stream -: No such file or directory" error.
The Pages document, a landscape layout, failed to print past the 8.5-inch horizontal mark, as if it were a portrait layout. Actually it did print past it, all the way off the sheet, but only repeating the last few pixels. Garbage, that is.
We tried this under a number of OS X versions. We were able to print from 10.4.11 running on a PowerPC chip and from 10.6.3 on an Intel chip. But we were not able to print from 10.6.4 or 10.6.5 on the Intel chip.
Writing the file as a PDF and printing from Preview resulted in the same errors. But dragging the files into Safari and printing from there worked.
The raster stream error seems to involve an error writing data where the Canon utility Raster2CanonIJ (buried deep within the Library/Printers/Canon install) expects to find it.
But this isn't Canon's problem alone. We duplicated both errors on an Epson Artisan 810 as well. Its raster filter also couldn't find the data file.
In trying to diagnose the problem, which we understood to be a CUPS error, we downloaded and compiled v1.4.4 and v1.4.3 of CUPS. But each compile ended in an error. So something was fishy in Denmark.
Update. When we had the same problem with a Kodak ESP 7250 and we could find nothing on the Web about a raster stream problem, we concluded the problem was unique to our installation.
So we reinstalled the operating system.
We had, as we mentioned above, installed 10.6.3 on an external drive and had been able to print from that. We had never printed from the factory installation of 10.6.3 because we immediately had updates to the OS installed.
With 10.6.3 installed (and CUPS 1.4.3), we were able to print to the Kodak. So we used the Combo updater to get to OS 10.6.5 (and CUPS 1.4.5).
Then we reinstalled the Epson Artisan 810 software and the Canon MP8120 software (for both the printer and the scanner).
And all was well.
The only thing the MG8120 can't do is print on a CD. We can live without that. Although if you aren't in the U.S., your MG8120 will print on a CD.
The ChromaLife100 five-color inking system with a dye-based gray in addition to the cyan, magenta and yellow dyes plus a pigment black delivered very nice photo prints and certainly had no trouble generating color documents. And the scanner had sufficient resolution to faithfully reproduce both prints and ordinary documents.
It did very well scanning color negative film, black and white film and slides (including Kodachrome). The addition of a transparency unit for film scanning is a real treat if you have any shoeboxes stuffed with old photos.
We also found the new and improved user interface to really be new and improved. It was easy to navigate the menu system and we never fumbled around trying to find the function we needed. It was always right in front of us on the function buttons.
Unique functions like HD Movie print only matter if you have Canon movies to print from, but that too was well implemented and easy to use.
All of that adds up to a glowing review for the latest flagship multifunction device from Canon. Very highly recommended.